Maiden flight testing for CL Scale
by Fred Cronenwett
clscale7@gmail.com
When you get ready to fly your new Control Line (CL) Scale model for the first time, there are several things you need to check before the flight. The most important one is the location of the center of gravity (CG).
If the CG is too far aft, the model will be pitch sensitive and possibly dangerous to fly. Follow the CG location shown on the plans or, if you are scratch-building, use 25% of the average wing chord to find the location.
Make sure the engine idles correctly and check the new model’s throttle control system. You want to be able to throttle all the way down to idle and shut the engine down from the handle. If you are flying with 2.4 GHz control, you can use the trim to shut the engine down.
Flying Lines
If the flying lines are new, pull-test the lines, connectors, and the handle. You can attach the lines to a solid object such as a tree and give it a pull test with all of the connectors attached. Look at the rules on the AMA website to verify the required length and the line diameter.
The handle, line connectors, lines, leadouts, and bellcrank all need to be checked before flying with the lines under load. Pull-test the model with the lines attached before the maiden flight.
I have a dedicated set of lines and handle for each model. After the handle is adjusted for neutral elevator, I can hook up the lines, check to make sure I have not picked up the handle upside down, and it’s ready to go. I leave one connector on the model and one connector on the lines so that I don’t hook up the lines backward when I get to the flying field.

Control Throw on the Elevator
You don’t need a lot of elevator movement to fly your models. If you have too much control throw on the elevator, it can lead to a pitch-sensitive model. Put the pushrod on the farthest hole on the elevator horn and the closest hole to the center of the bellcrank to reduce the elevator’s movement.
I have a 39-inch wingspan Spitfire that I fly for practice. It was a handful to trim out. When I first flew it, it was pitch sensitive, but after several flights, I realized that the handle spacing was too wide. The line spacing on the handle and the location of the pushrod at the bellcrank and elevator all had to be changed to get the model to trim out correctly.
Adjustable Line Guide
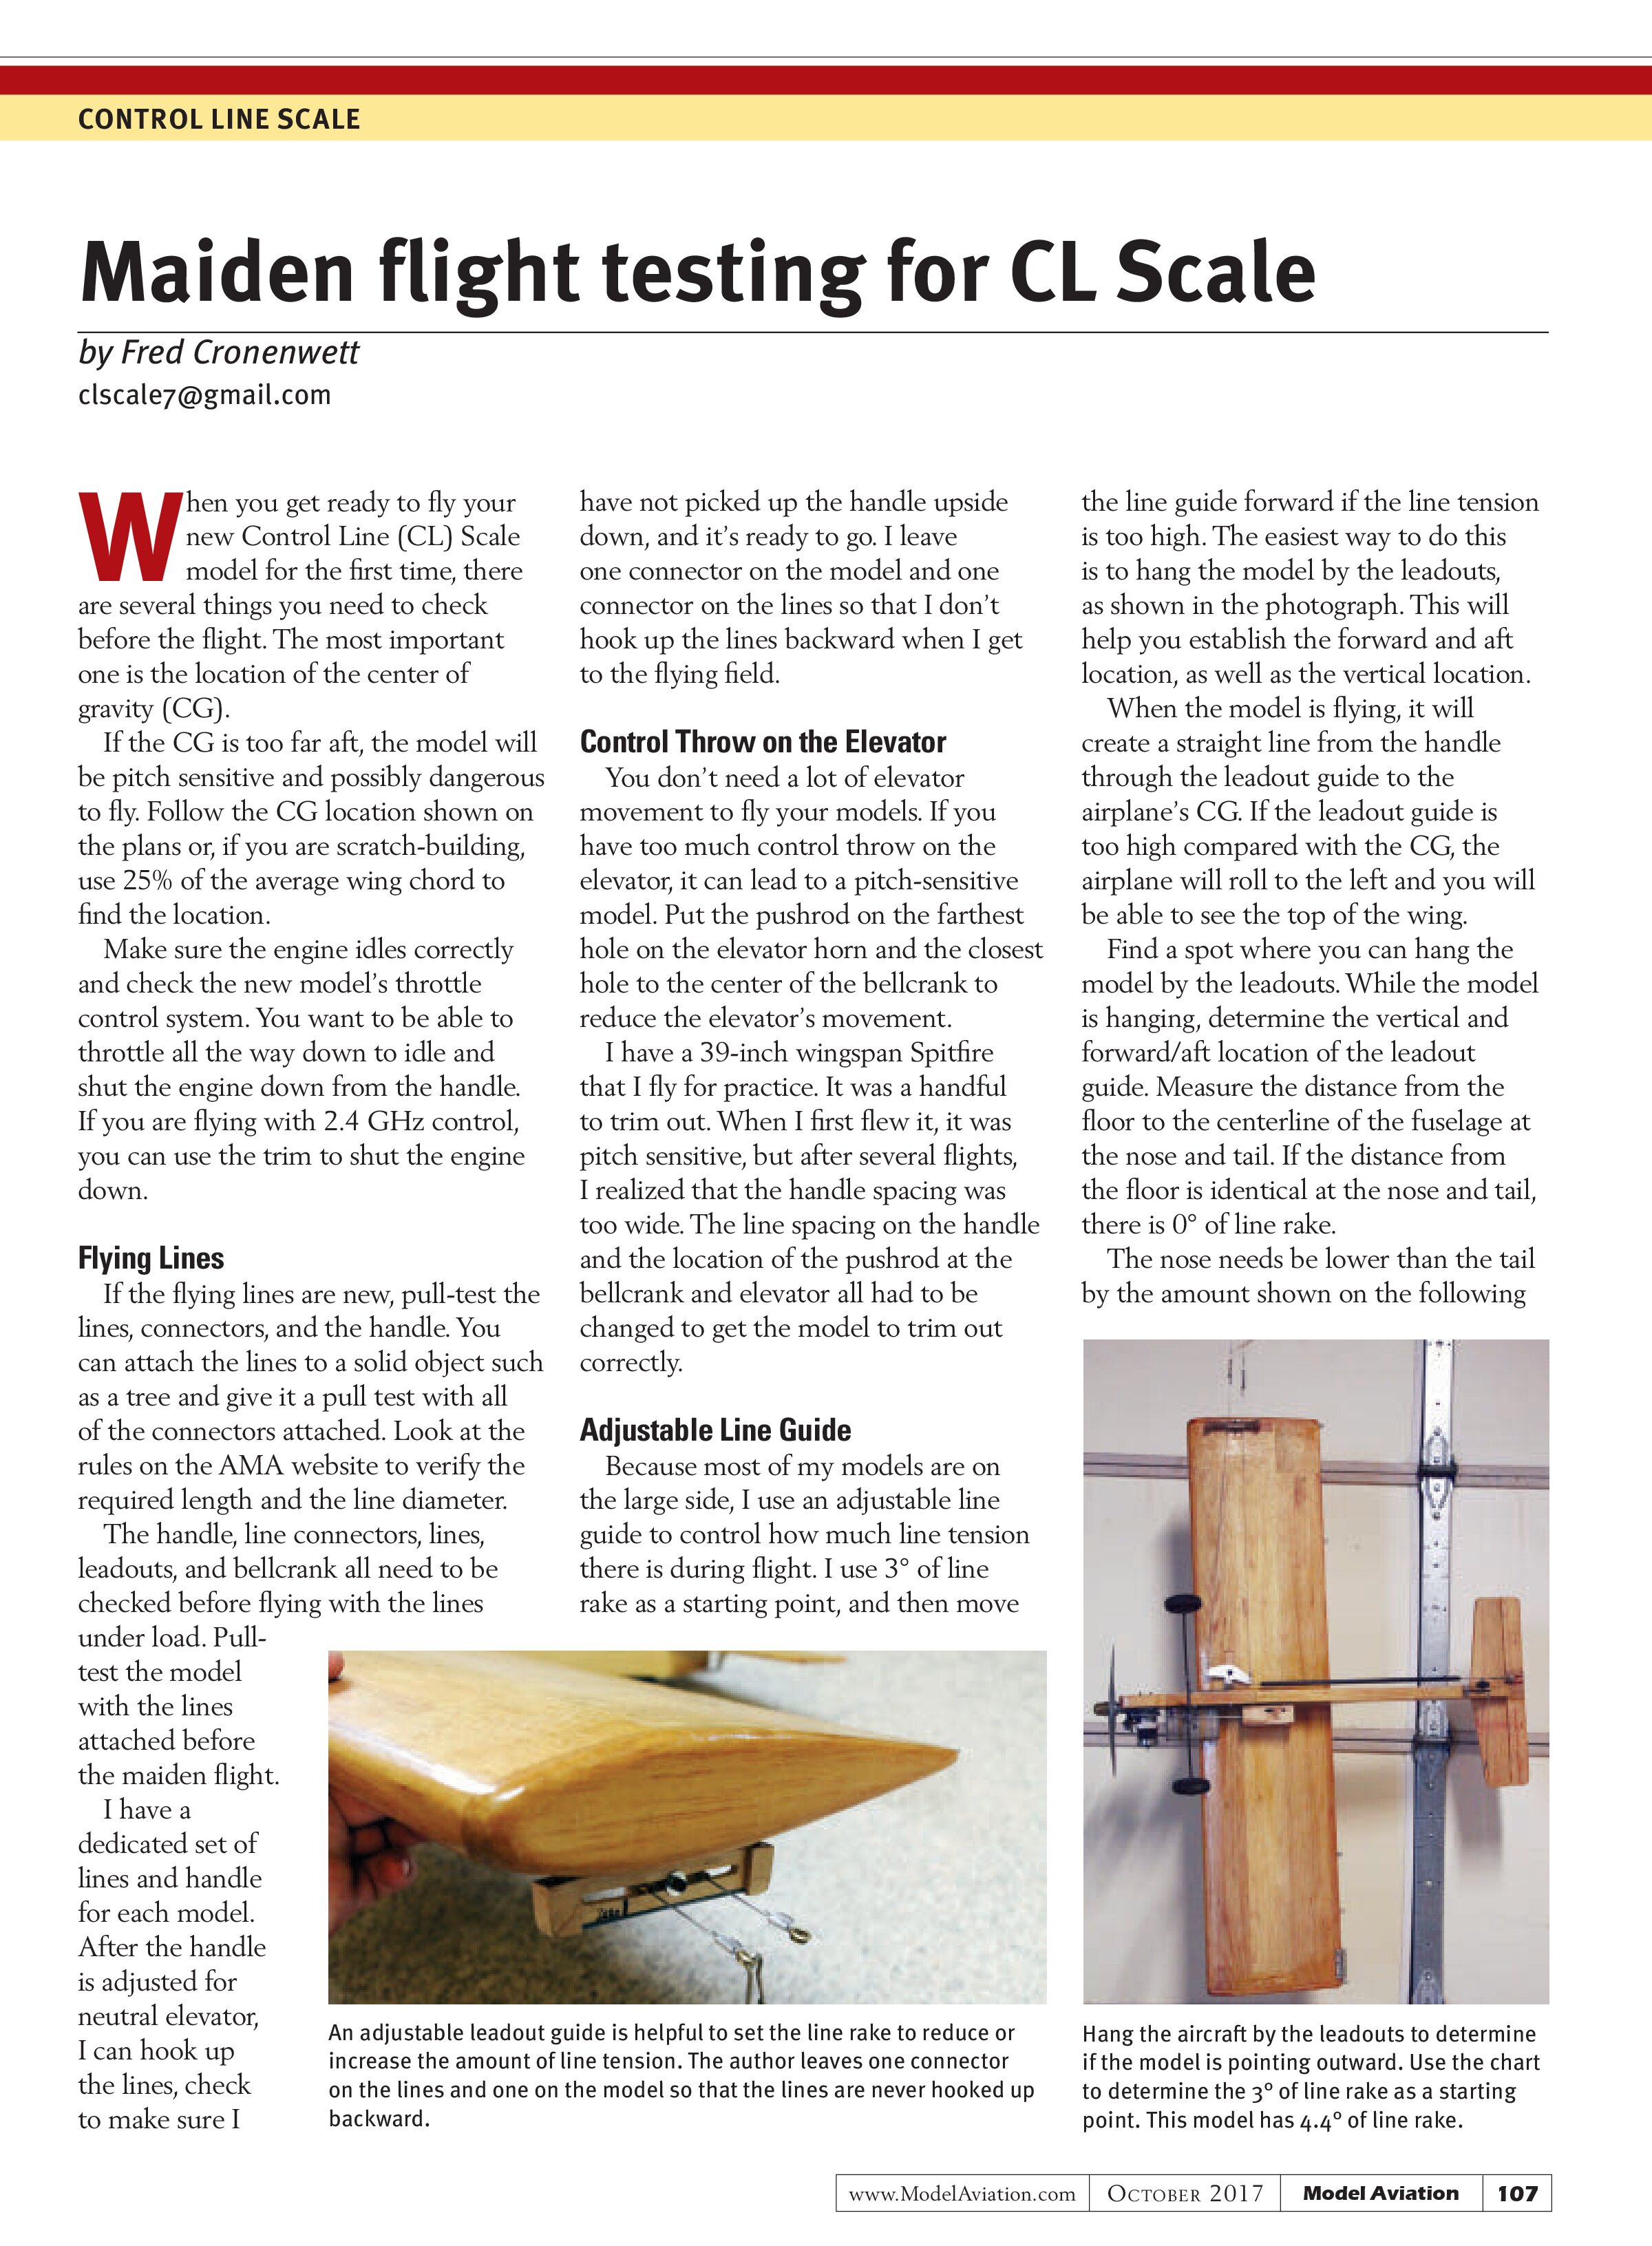
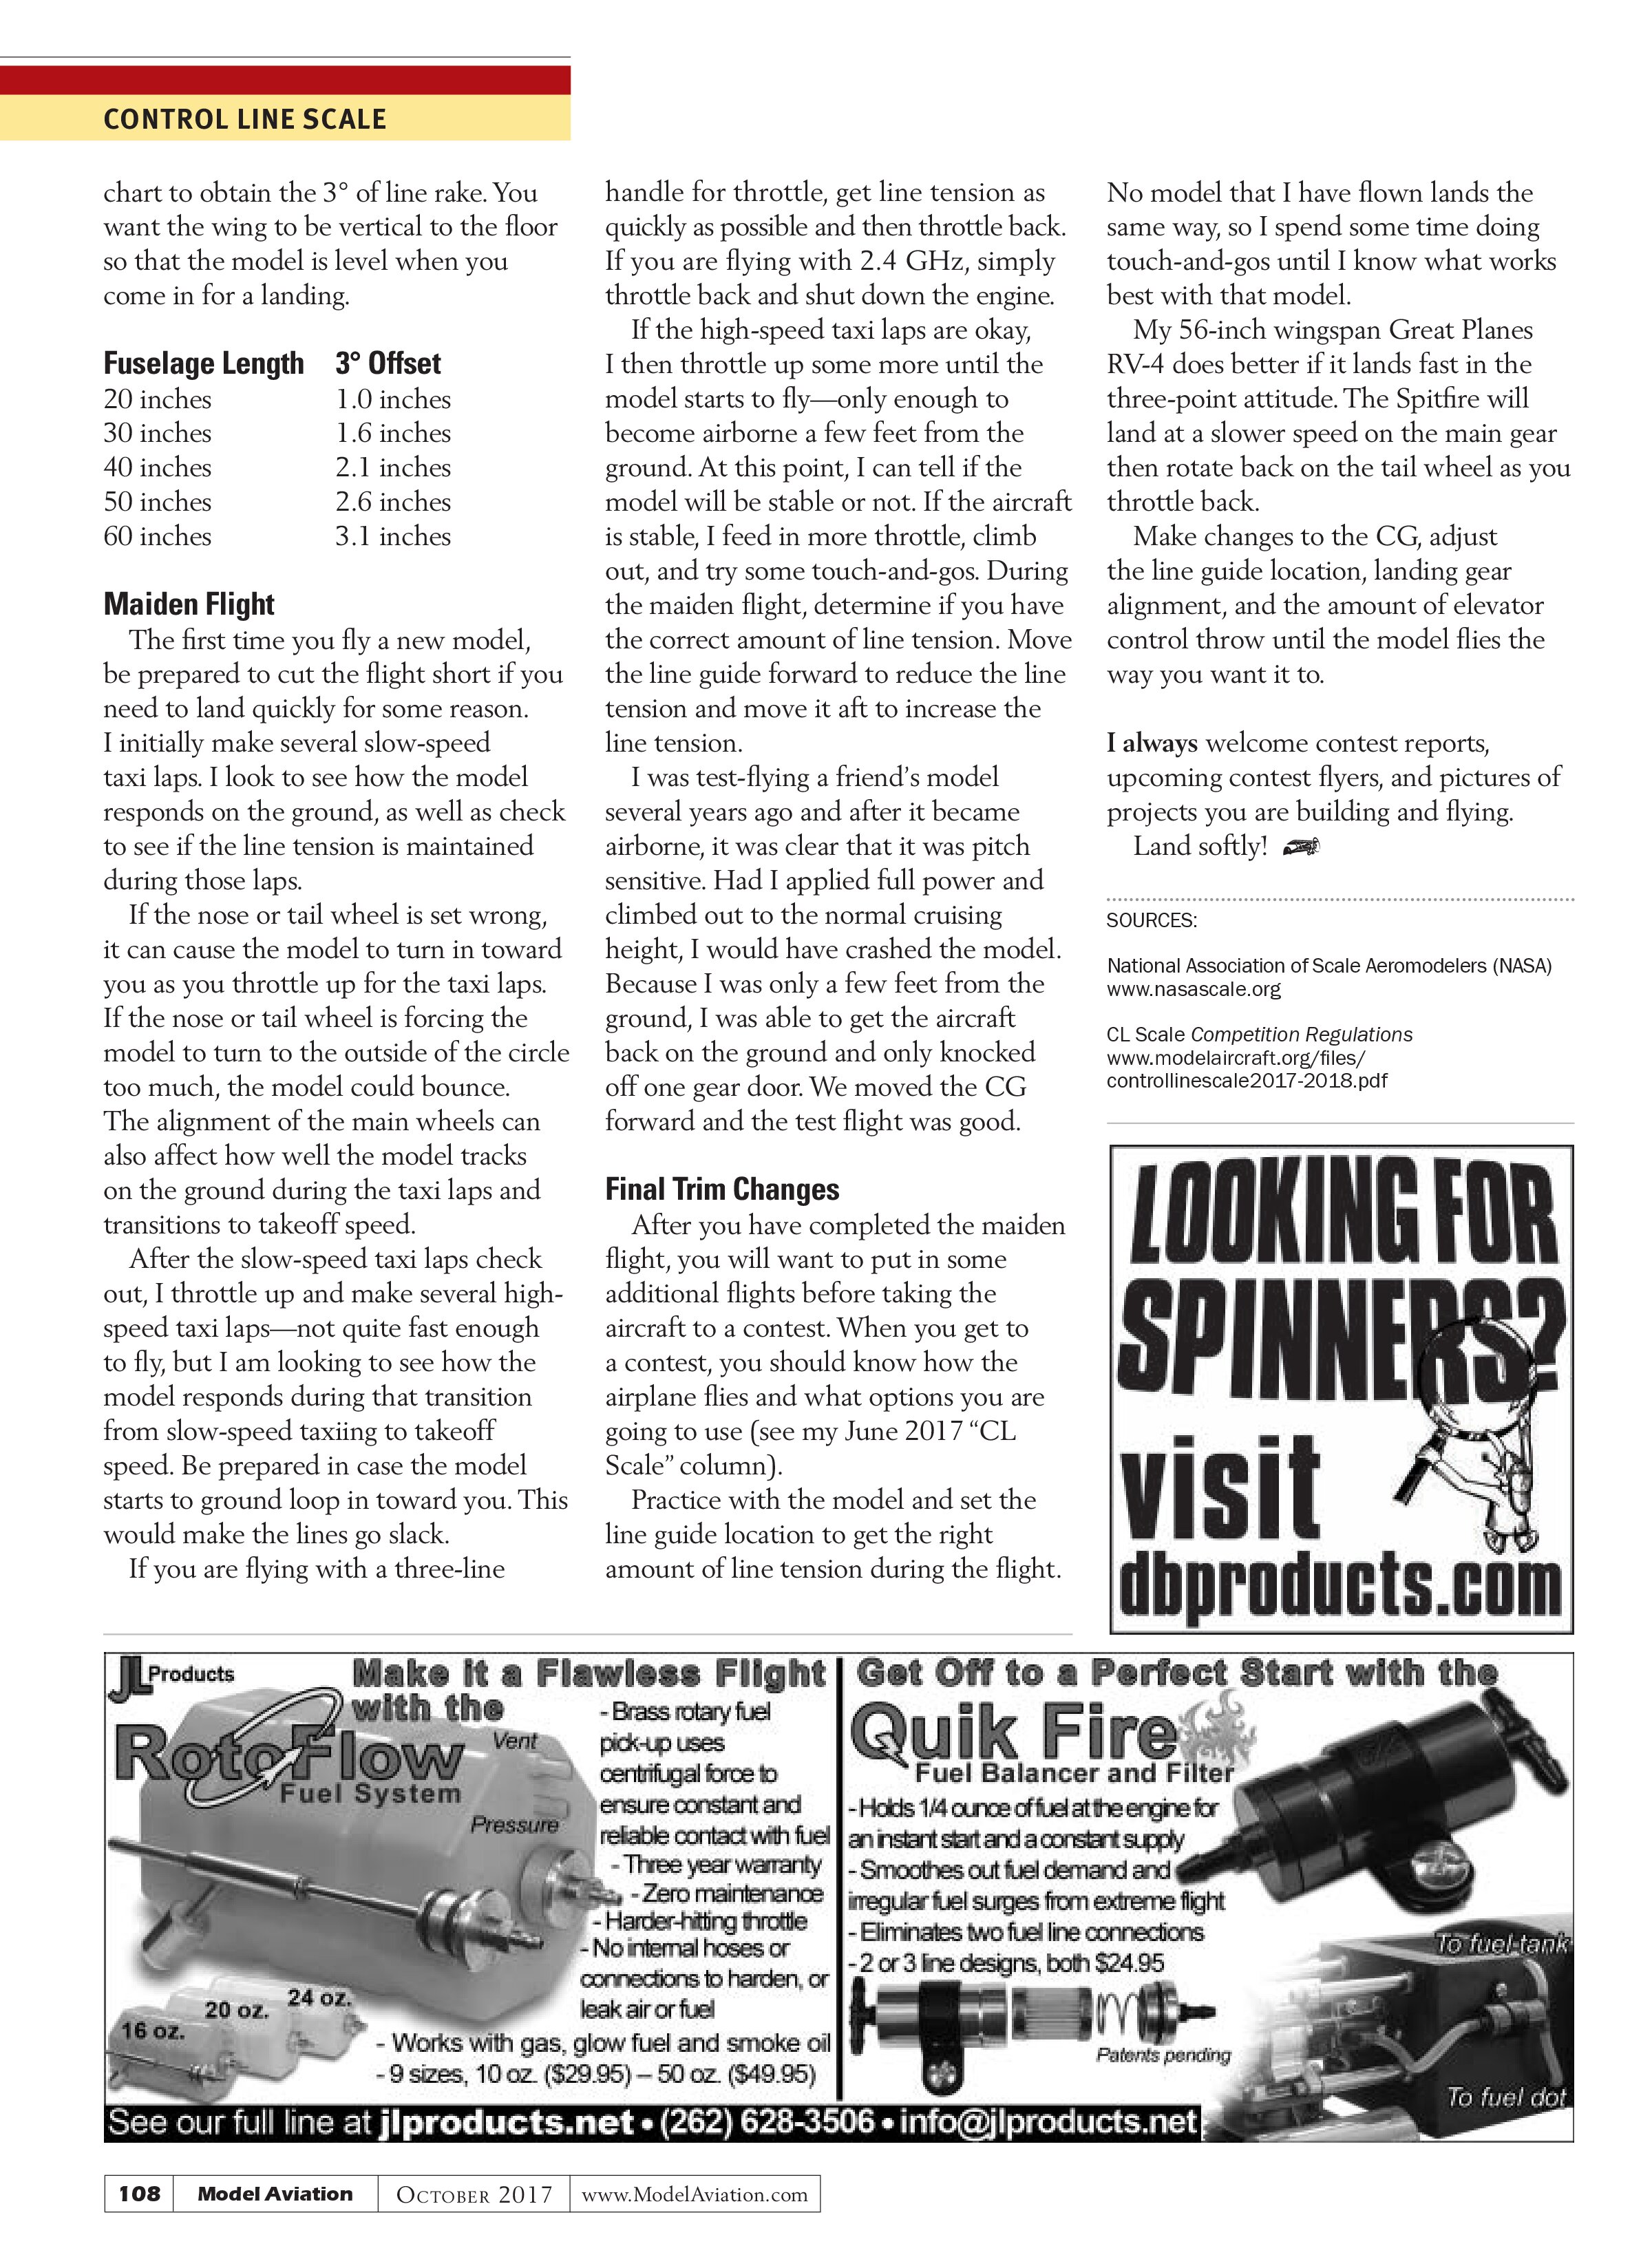
Because most of my models are on the large side, I use an adjustable line guide to control how much line tension there is during flight. I use 3° of line rake as a starting point, and then move the line guide forward if the line tension is too high. The easiest way to do this is to hang the model by the leadouts, as shown in the photograph. This will help you establish the forward and aft location, as well as the vertical location.
When the model is flying, it will create a straight line from the handle through the leadout guide to the airplane’s CG. If the leadout guide is too high compared with the CG, the airplane will roll to the left and you will be able to see the top of the wing.
Find a spot where you can hang the model by the leadouts. While the model is hanging, determine the vertical and forward/aft location of the leadout guide. Measure the distance from the floor to the centerline of the fuselage at the nose and tail. If the distance from the floor is identical at the nose and tail, there is 0° of line rake.
The nose needs be lower than the tail by the amount shown on the following

chart to obtain the 3° of line rake. You want the wing to be vertical to the floor so that the model is level when you come in for a landing.
Fuselage Length 3° Offset
20 inches 1.0 inches
30 inches 1.6 inches
40 inches 2.1 inches
50 inches 2.6 inches
60 inches 3.1 inches
Maiden Flight
The first time you fly a new model, be prepared to cut the flight short if you need to land quickly for some reason. I initially make several slow-speed taxi laps. I look to see how the model responds on the ground, as well as check to see if the line tension is maintained during those laps.
If the nose or tail wheel is set wrong, it can cause the model to turn in toward you as you throttle up for the taxi laps. If the nose or tail wheel is forcing the model to turn to the outside of the circle too much, the model could bounce. The alignment of the main wheels can also affect how well the model tracks on the ground during the taxi laps and transitions to takeoff speed.
After the slow-speed taxi laps check out, I throttle up and make several high-speed taxi laps—not quite fast enough to fly, but I am looking to see how the model responds during that transition from slow-speed taxiing to takeoff speed. Be prepared in case the model starts to ground loop in toward you. This would make the lines go slack.
If you are flying with a three-line handle for throttle, get line tension as quickly as possible and then throttle back. If you are flying with 2.4 GHz, simply throttle back and shut down the engine.
If the high-speed taxi laps are okay, I then throttle up some more until the model starts to fly—only enough to become airborne a few feet from the ground. At this point, I can tell if the model will be stable or not. If the aircraft is stable, I feed in more throttle, climb out, and try some touch-and-gos. During the maiden flight, determine if you have the correct amount of line tension. Move the line guide forward to reduce the line tension and move it aft to increase the line tension.
I was test-flying a friend’s model several years ago and after it became airborne, it was clear that it was pitch sensitive. Had I applied full power and climbed out to the normal cruising height, I would have crashed the model. Because I was only a few feet from the ground, I was able to get the aircraft back on the ground and only knocked off one gear door. We moved the CG forward and the test flight was good.
Final Trim Changes
After you have completed the maiden flight, you will want to put in some additional flights before taking the aircraft to a contest. When you get to a contest, you should know how the airplane flies and what options you are going to use (see my June 2017 “CL Scale” column).
Practice with the model and set the line guide location to get the right amount of line tension during the flight. No model that I have flown lands the same way, so I spend some time doing touch-and-gos until I know what works best with that model.
My 56-inch wingspan Great Planes RV-4 does better if it lands fast in the three-point attitude. The Spitfire will land at a slower speed on the main gear then rotate back on the tail wheel as you throttle back.
Make changes to the CG, adjust the line guide location, landing gear alignment, and the amount of elevator control throw until the model flies the way you want it to.
I always welcome contest reports, upcoming contest flyers, and pictures of projects you are building and flying.
Land softly!
SOURCES:
National Association of Scale Aeromodelers (NASA)
www.nasascale.org
CL Scale Competition Regulations
www.modelaircraft.org/files/
controllinescale2017-2018.pdf