MAXFORD USA E-2C HAWKEYE EP ARF
Andrew Griffith
andy@customcutgraphix.com

A model as enjoyable as it is unique
During my naval career, I was fortunate to be able to qualify as an airplane captain on three aircraft: the P-3 Orion, the SH-60 Seahawk, and the E-2 Hawkeye. With that in mind, walking the aisles of the 2016 AMA Expo in Ontario, California, I stopped in my tracks walking past the Maxford USA booth when I saw a model of an E-2 Hawkeye!
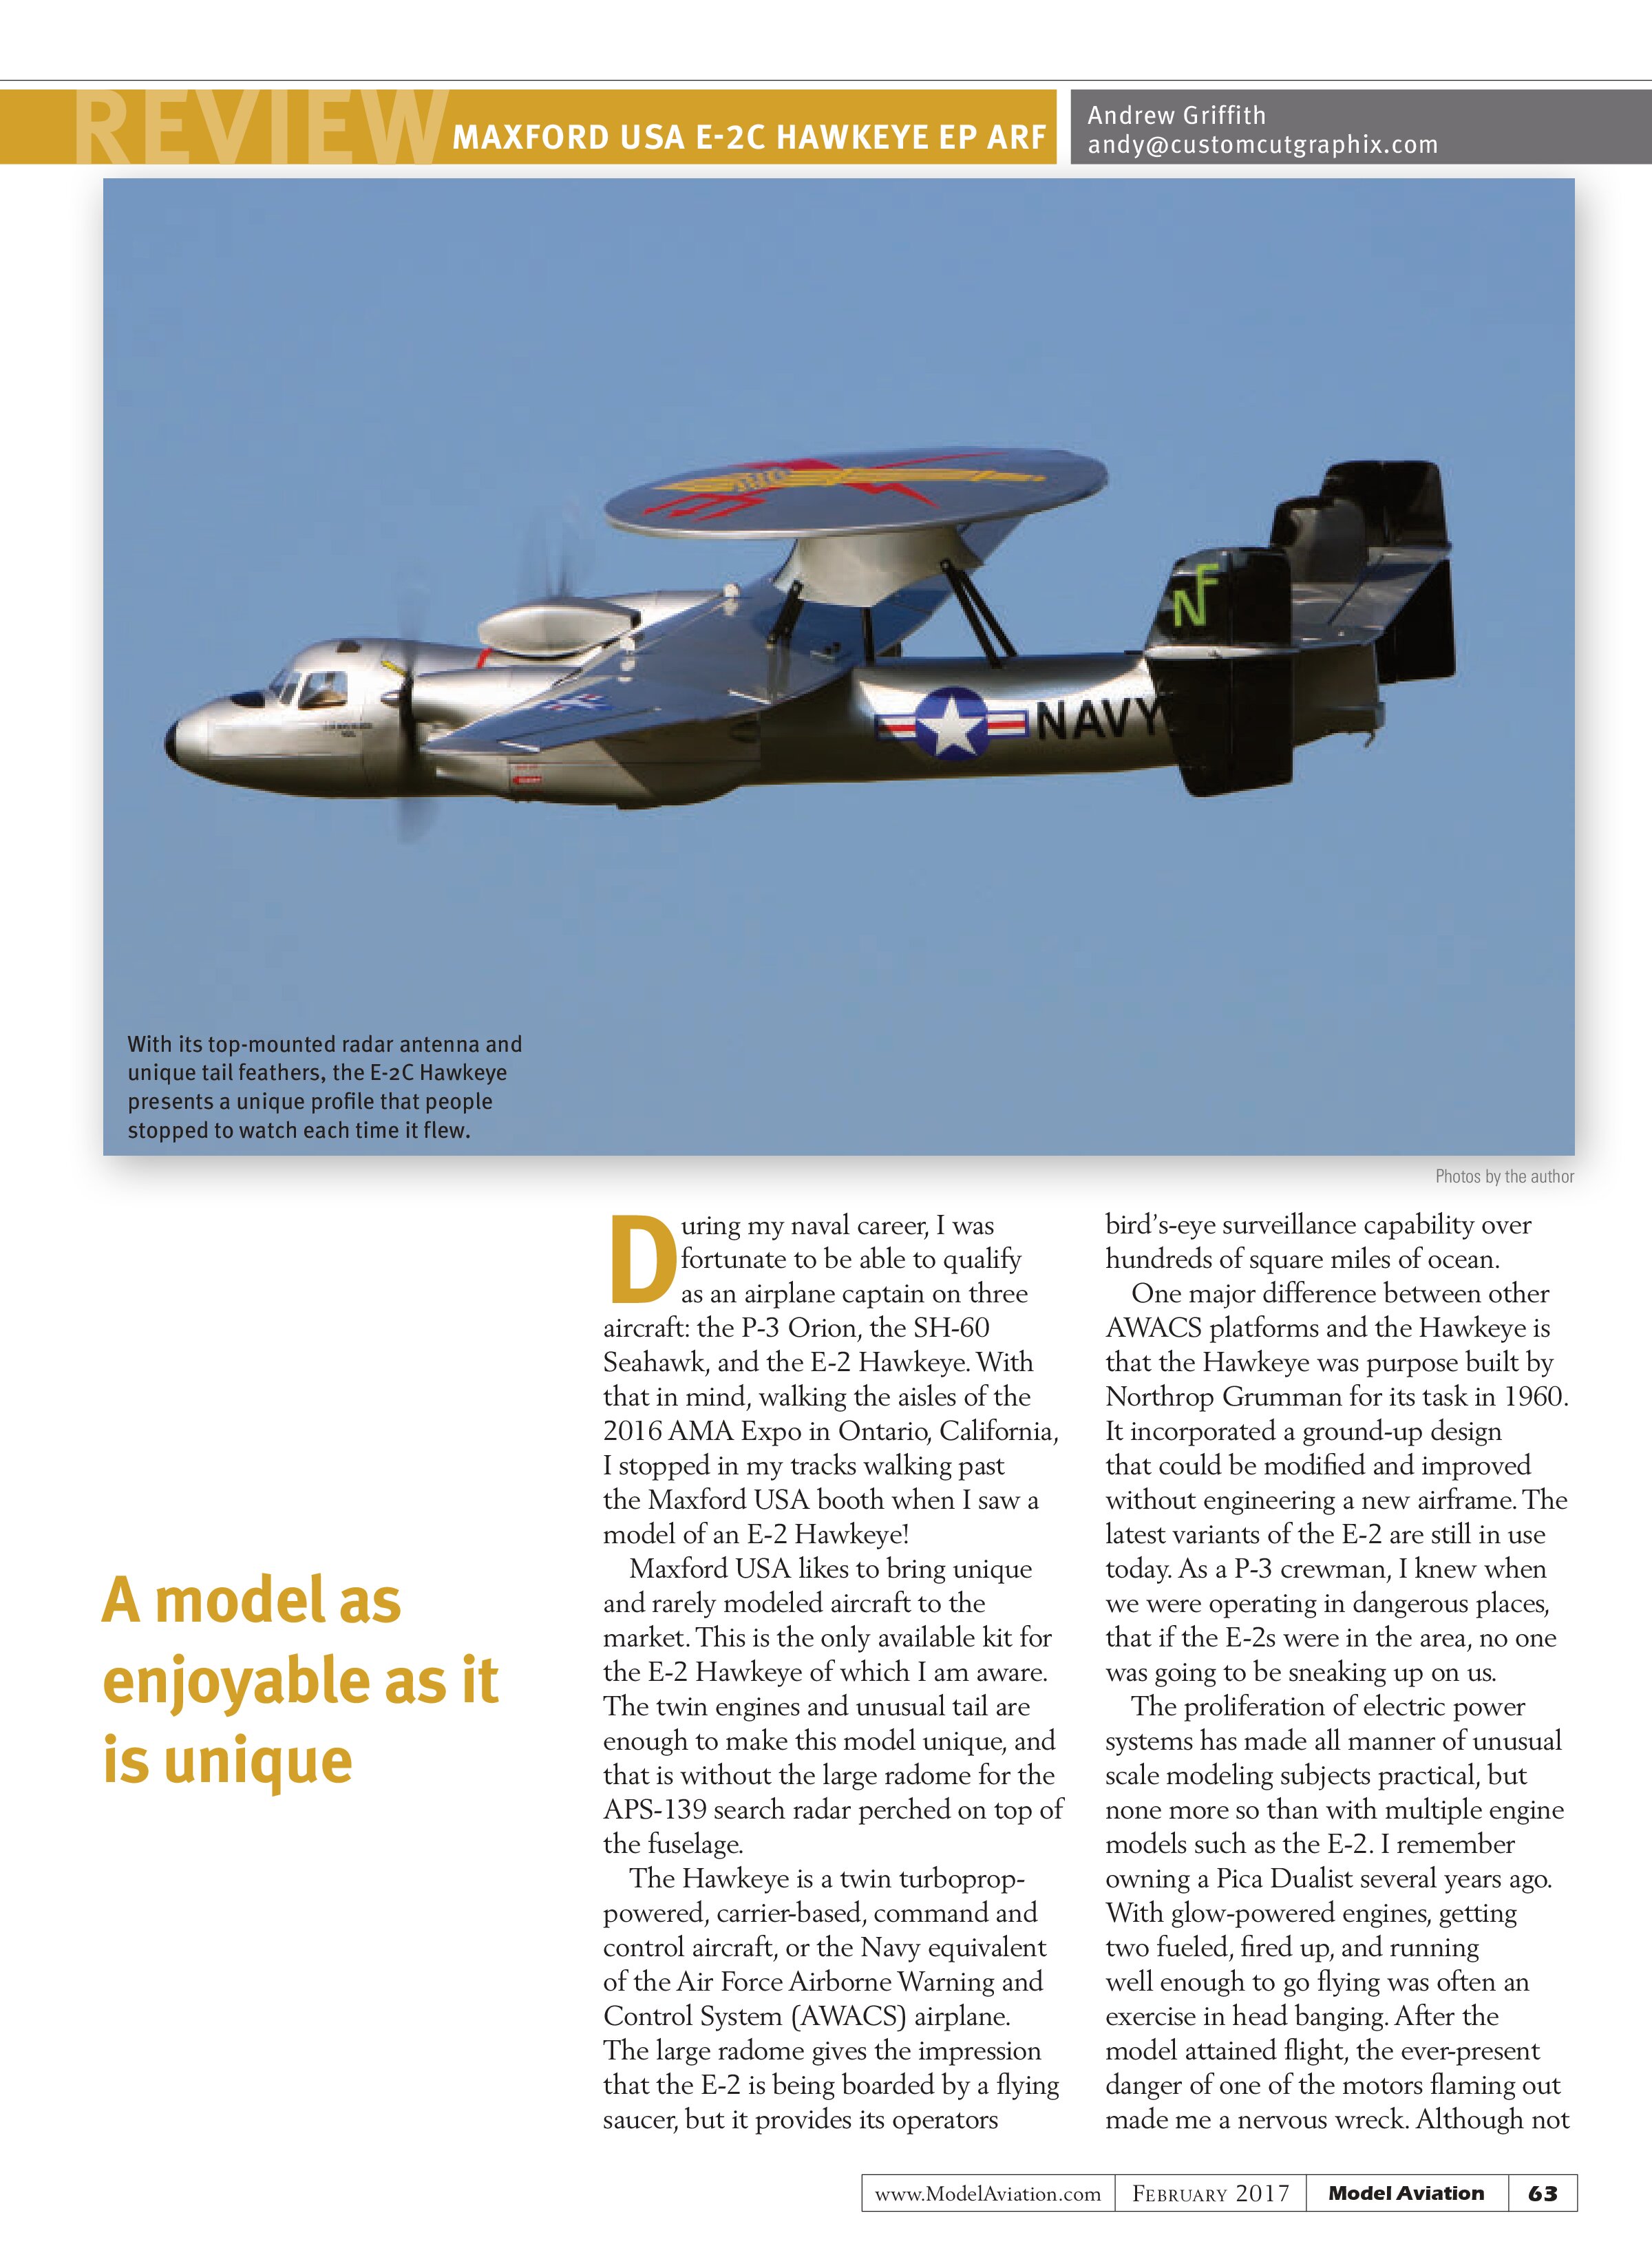
Maxford USA likes to bring unique and rarely modeled aircraft to the market. This is the only available kit for the E-2 Hawkeye of which I am aware. The twin engines and unusual tail are enough to make this model unique, and that is without the large radome for the APS-139 search radar perched on top of the fuselage.
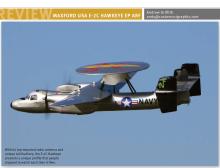
The Hawkeye is a twin turboprop-powered, carrier-based, command and control aircraft, or the Navy equivalent of the Air Force Airborne Warning and Control System (AWACS) airplane. The large radome gives the impression that the E-2 is being boarded by a flying saucer, but it provides its operators bird’s-eye surveillance capability over hundreds of square miles of ocean.
One major difference between other AWACS platforms and the Hawkeye is that the Hawkeye was purpose built by Northrop Grumman for its task in 1960. It incorporated a ground-up design that could be modified and improved without engineering a new airframe. The latest variants of the E-2 are still in use today. As a P-3 crewman, I knew when we were operating in dangerous places, that if the E-2s were in the area, no one was going to be sneaking up on us.
The proliferation of electric power systems has made all manner of unusual scale modeling subjects practical, but none more so than with multiple engine models such as the E-2. I remember owning a Pica Dualist several years ago. With glow-powered engines, getting two fueled, fired up, and running well enough to go flying was often an exercise in head banging. After the model attained flight, the ever-present danger of one of the motors flaming out made me a nervous wreck. Although not
AT A GLANCE ...
SPECIFICATIONS
Model type: Semiscale ARF
Skill level: Intermediate to advanced
Wingspan: 71 inches; 27 inches with the wings folded
Wing area: 755 square inches
Wing loading: 26.3 ounces per square foot
Wing cube loading: 11.5
Airfoil: Semisymmetrical
Length: 50 inches
Weight: 8 pounds, 10 ounces
Power system: Twin electric motors
Radio: Full-range, four-channel minimum; five channels required for optional retracts
Construction: Built-up balsa and light plywood
Covering/finish: UltraCote or similar with painted plastic trim parts
Street price: $309.99
TEST-MODEL DETAILS
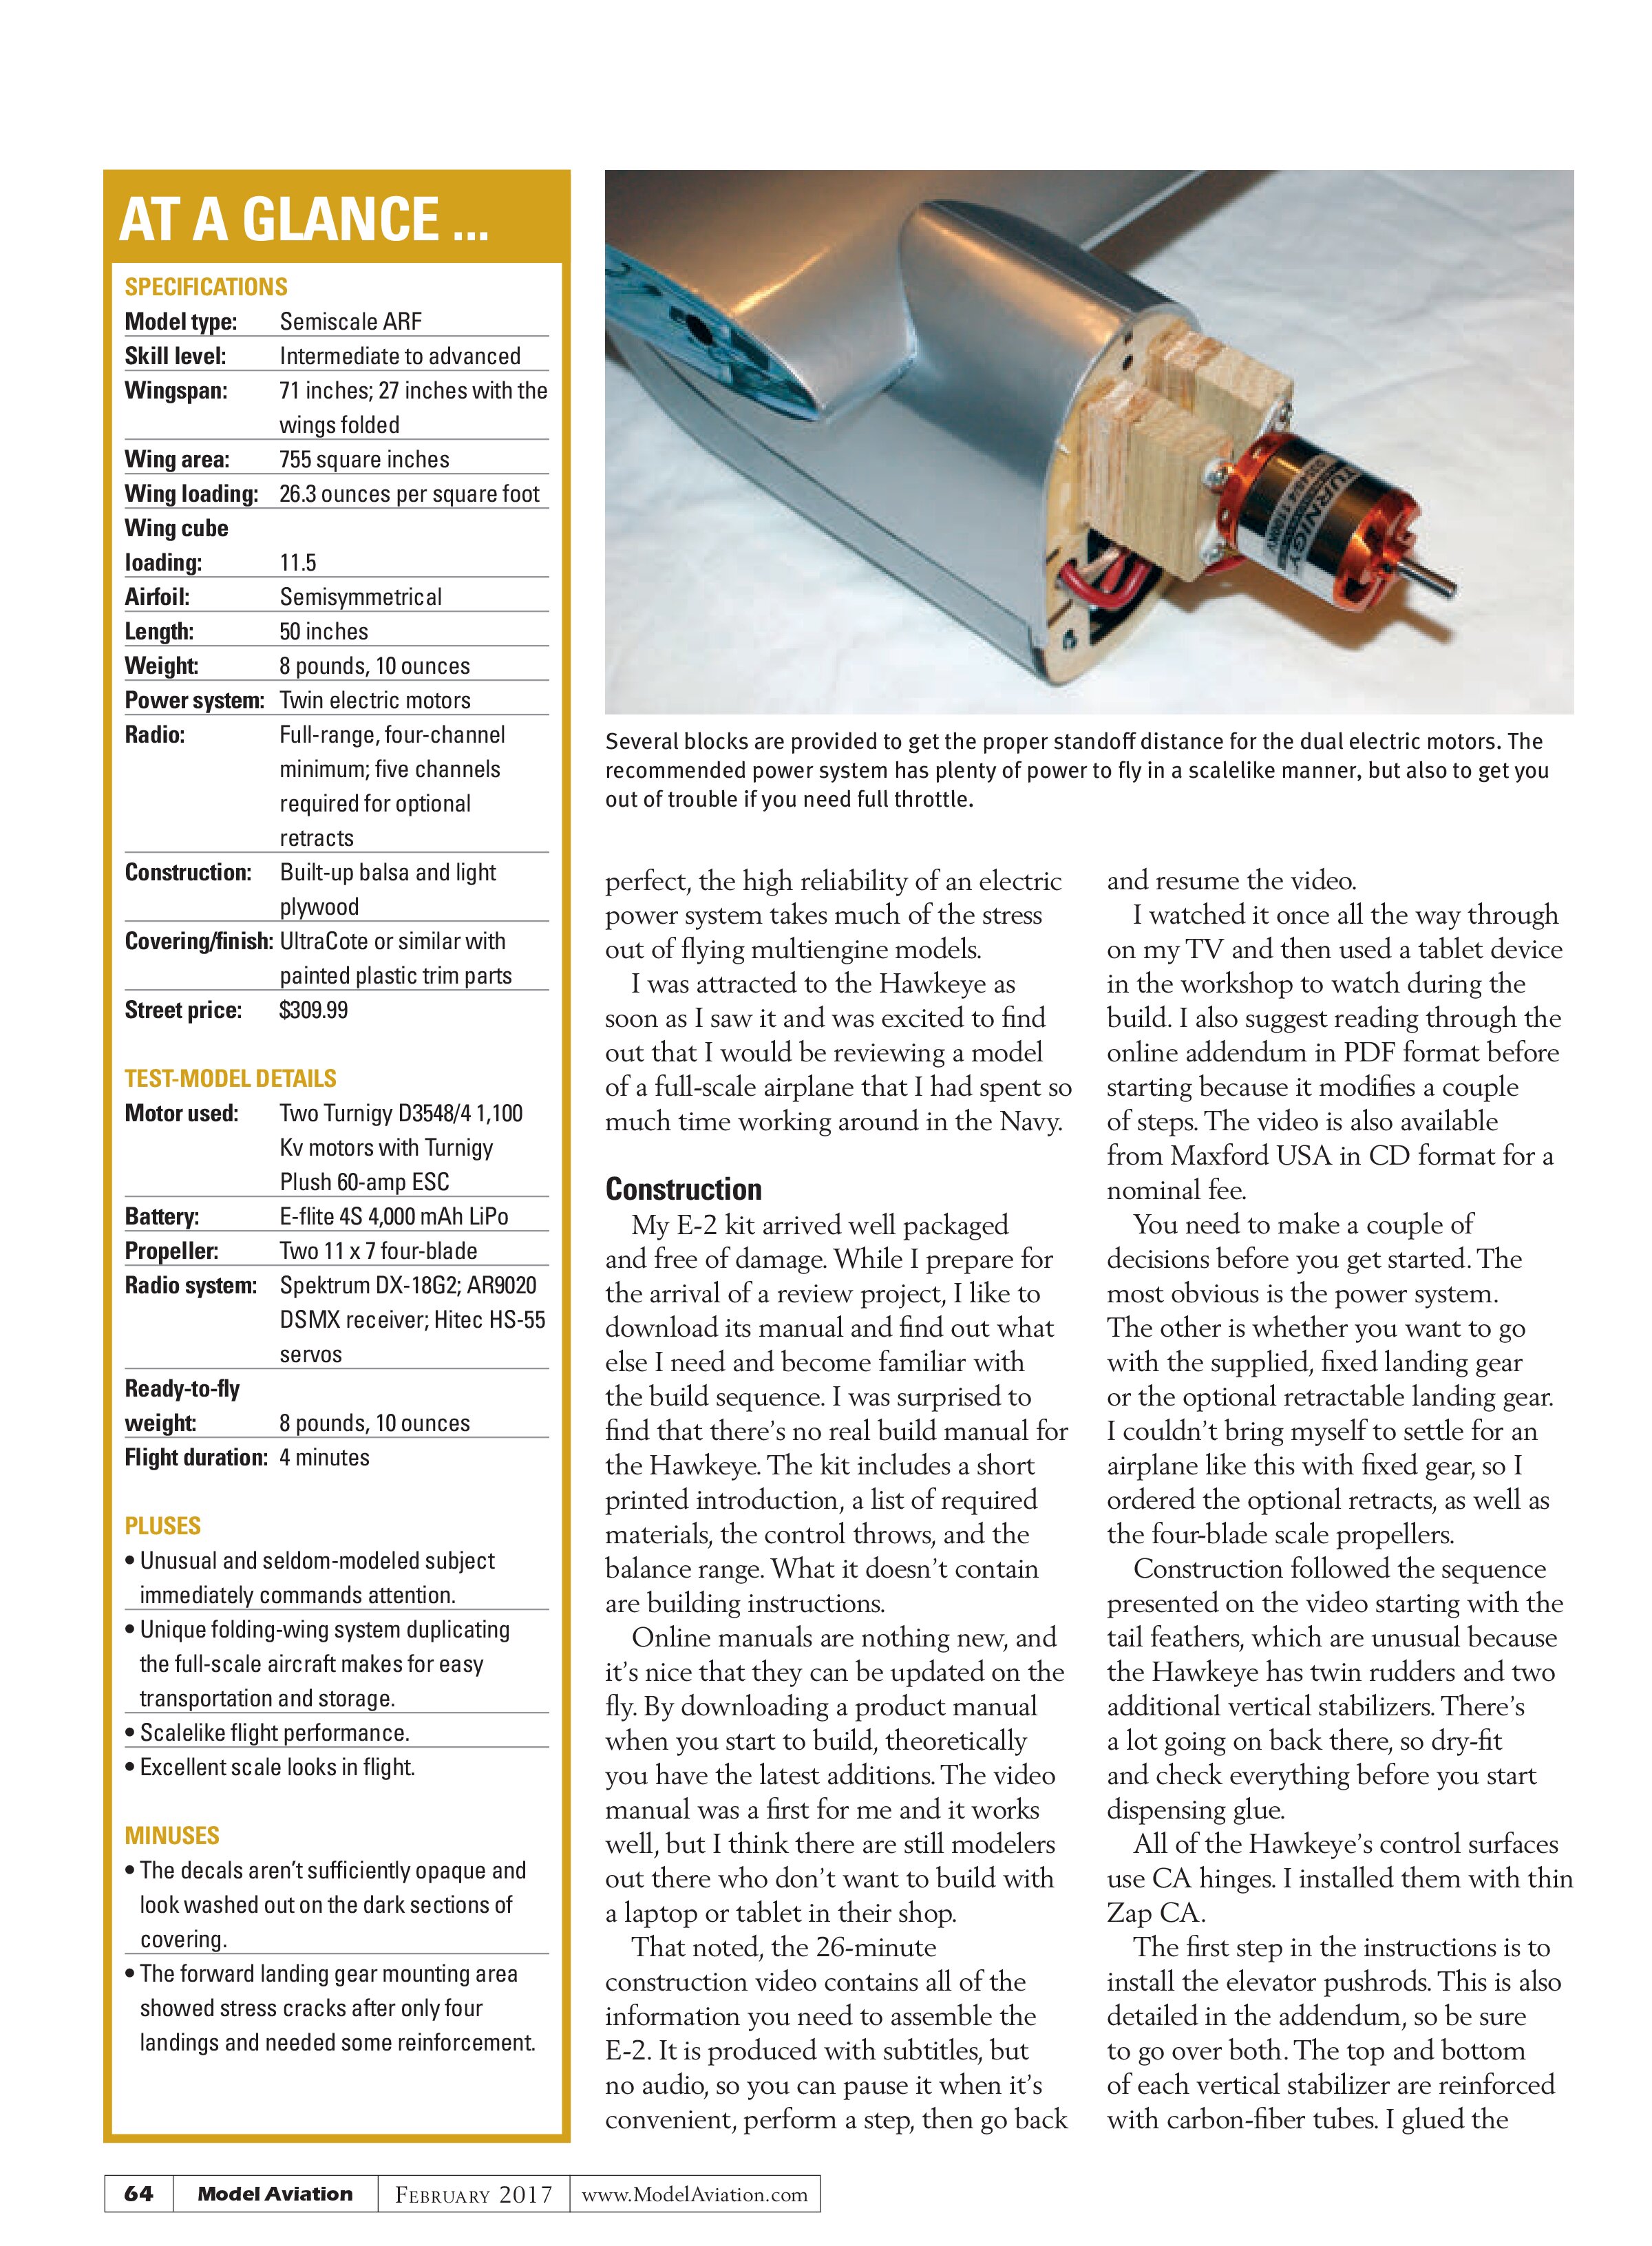
Motor used: Two Turnigy D3548/4 1,100 Kv motors with Turnigy Plush 60-amp ESC
Battery: E-flite 4S 4,000 mAh LiPo
Propeller: Two 11 x 7 four-blade
Radio system: Spektrum DX-18G2; AR9020 DSMX receiver; Hitec HS-55 servos
Ready-to-fly weight: 8 pounds, 10 ounces
Flight duration: 4 minutes
PLUSES
- Unusual and seldom-modeled subject immediately commands attention.
- Unique folding-wing system duplicating the full-scale aircraft makes for easy transportation and storage.
- Scalelike flight performance.
- Excellent scale looks in flight.
MINUSES
- The decals aren’t sufficiently opaque and look washed out on the dark sections of covering.
- The forward landing gear mounting area showed stress cracks after only four landings and needed some reinforcement.

perfect, the high reliability of an electric power system takes much of the stress out of flying multiengine models.
I was attracted to the Hawkeye as soon as I saw it and was excited to find out that I would be reviewing a model of a full-scale airplane that I had spent so much time working around in the Navy.
Construction
My E-2 kit arrived well packaged and free of damage. While I prepare for the arrival of a review project, I like to download its manual and find out what else I need and become familiar with the build sequence. I was surprised to find that there’s no real build manual for the Hawkeye. The kit includes a short printed introduction, a list of required materials, the control throws, and the balance range. What it doesn’t contain are building instructions.
Online manuals are nothing new, and it’s nice that they can be updated on the fly. By downloading a product manual when you start to build, theoretically you have the latest additions. The video manual was a first for me and it works well, but I think there are still modelers out there who don’t want to build with a laptop or tablet in their shop.
That noted, the 26-minute construction video contains all of the information you need to assemble the E-2. It is produced with subtitles, but no audio, so you can pause it when it’s convenient, perform a step, then go back and resume the video.
I watched it once all the way through on my TV and then used a tablet device in the workshop to watch during the build. I also suggest reading through the online addendum in PDF format before starting because it modifies a couple of steps. The video is also available from Maxford USA in CD format for a nominal fee.
You need to make a couple of decisions before you get started. The most obvious is the power system. The other is whether you want to go with the supplied, fixed landing gear or the optional retractable landing gear. I couldn’t bring myself to settle for an airplane like this with fixed gear, so I ordered the optional retracts, as well as the four-blade scale propellers.
Construction followed the sequence presented on the video starting with the tail feathers, which are unusual because the Hawkeye has twin rudders and two additional vertical stabilizers. There’s a lot going on back there, so dry-fit and check everything before you start dispensing glue.
All of the Hawkeye’s control surfaces use CA hinges. I installed them with thin Zap CA.
The first step in the instructions is to install the elevator pushrods. This is also detailed in the addendum, so be sure to go over both. The top and bottom of each vertical stabilizer are reinforced with carbon-fiber tubes. I glued the
stabilizers in place with 15-minute Z-Poxy. The video shows safety clips securing the extensions, and although they work, my preference is to use heat shrink to retain the extensions for permanent installations.
All of the servos are centered with the radio. The provided four-point control horns were installed and rotated until the arm that was closest to 90° was found. After the best mechanical arm was marked, I cut off the remaining ones. All of the flight surfaces use EZ-style connectors for the pushrods, which work well on a model of this size.
The servos are mounted using wood blocks that are glued to the hatch covers. The blocks were prepared by scuffing the gluing surfaces on the blocks and hatches, then installing them with
15-minute Z-Poxy epoxy. The servos were attached by prethreading the mounting holes, hardening the holes with thin Zap CA glue, and screwing the servos down. Likewise, the holes used to mount the servo hatches are prethreaded and were hardened with thin CA.
I secured the tail using two machine screws and Z-42 threadlocker to secure the bolts into the blind nuts. Small zip ties were used to clean up and route all of the wires away from the elevator control arm and linkage.
Assembling the center section is time-consuming and you should be proficient in soldering or enlist someone who is. Another point to remember is that when you have a multiengine model and both speed controllers are equipped with a BEC, you need to ensure that only one ESC is providing power to the receiver.
I used a needle to lift the retainer and removed the center wire from the number two (right wing) speed controller servo plug. That left the ground and signal wire active and I taped back the positive wire. If the ESC is needed for a different project in the future, it’s simply a matter of snapping the power lead back into the servo plug.
Reversing a brushless motor is simply a matter of swapping any two of the three wires, so the best way to keep the motor wires straight is to use one color of wire on each side. If the motor rotates backward, you simply swap two black wires or two red wires. Zip ties or heat-shrink material go a long way to keep the many wires running through the wing under control (especially if you have retracts).
I used motors that are the same size as the recommended ones and everything in the nacelles fit quite well. As with each metal-to-metal fastener, the motors were installed using Z-42 threadlocker.
After the nacelles were installed and the wires routed, I gave considerable thought to joining the front of the fuselage to the midsection. With the weight of the batteries up front and the relatively long moment, I wanted a good joint. I decided to use Epo-Grip Model Matrix. Epo-Grip is a pastelike epoxy and the Model Matrix product has milled fiberglass for extra strength.
All of the gluing surfaces were scuffed and the glue was applied and cleaned up with alcohol. The fuselage was taped in place and left to cure overnight. It takes at least a couple of hours to fully cure, but the strength of the resulting bond is worth the wait.

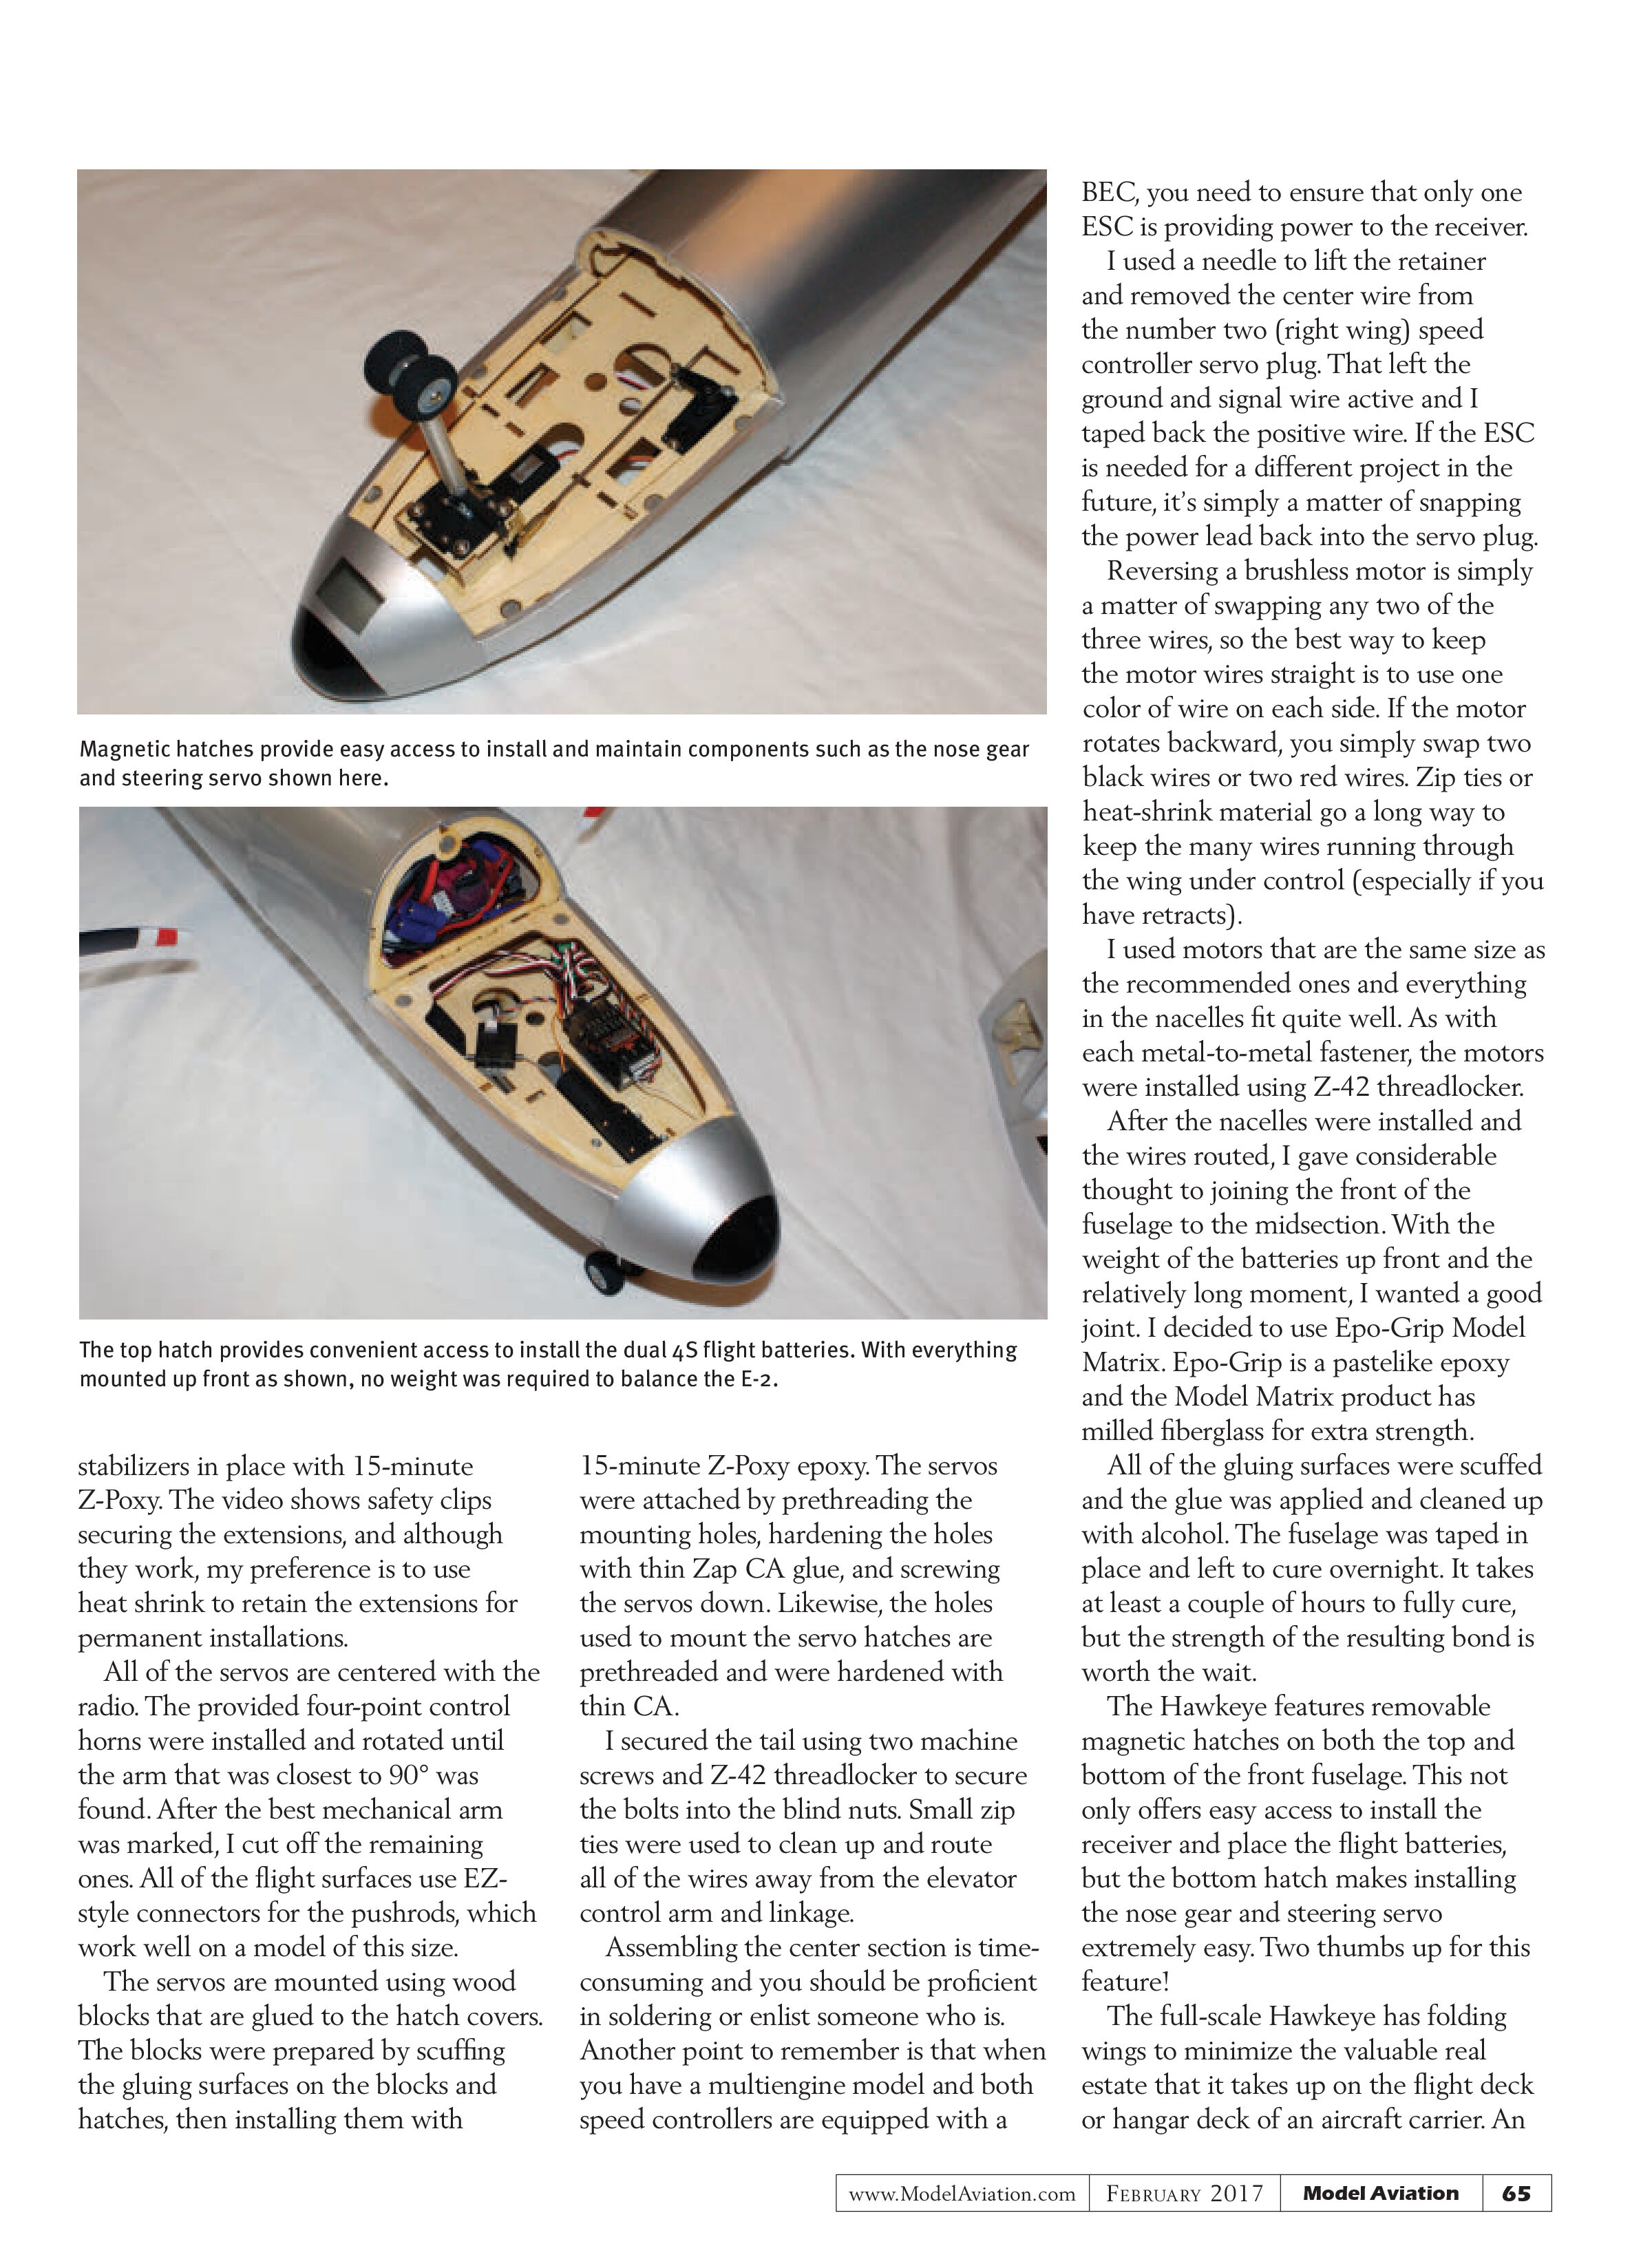
The Hawkeye features removable magnetic hatches on both the top and bottom of the front fuselage. This not only offers easy access to install the receiver and place the flight batteries, but the bottom hatch makes installing the nose gear and steering servo extremely easy. Two thumbs up for this feature!

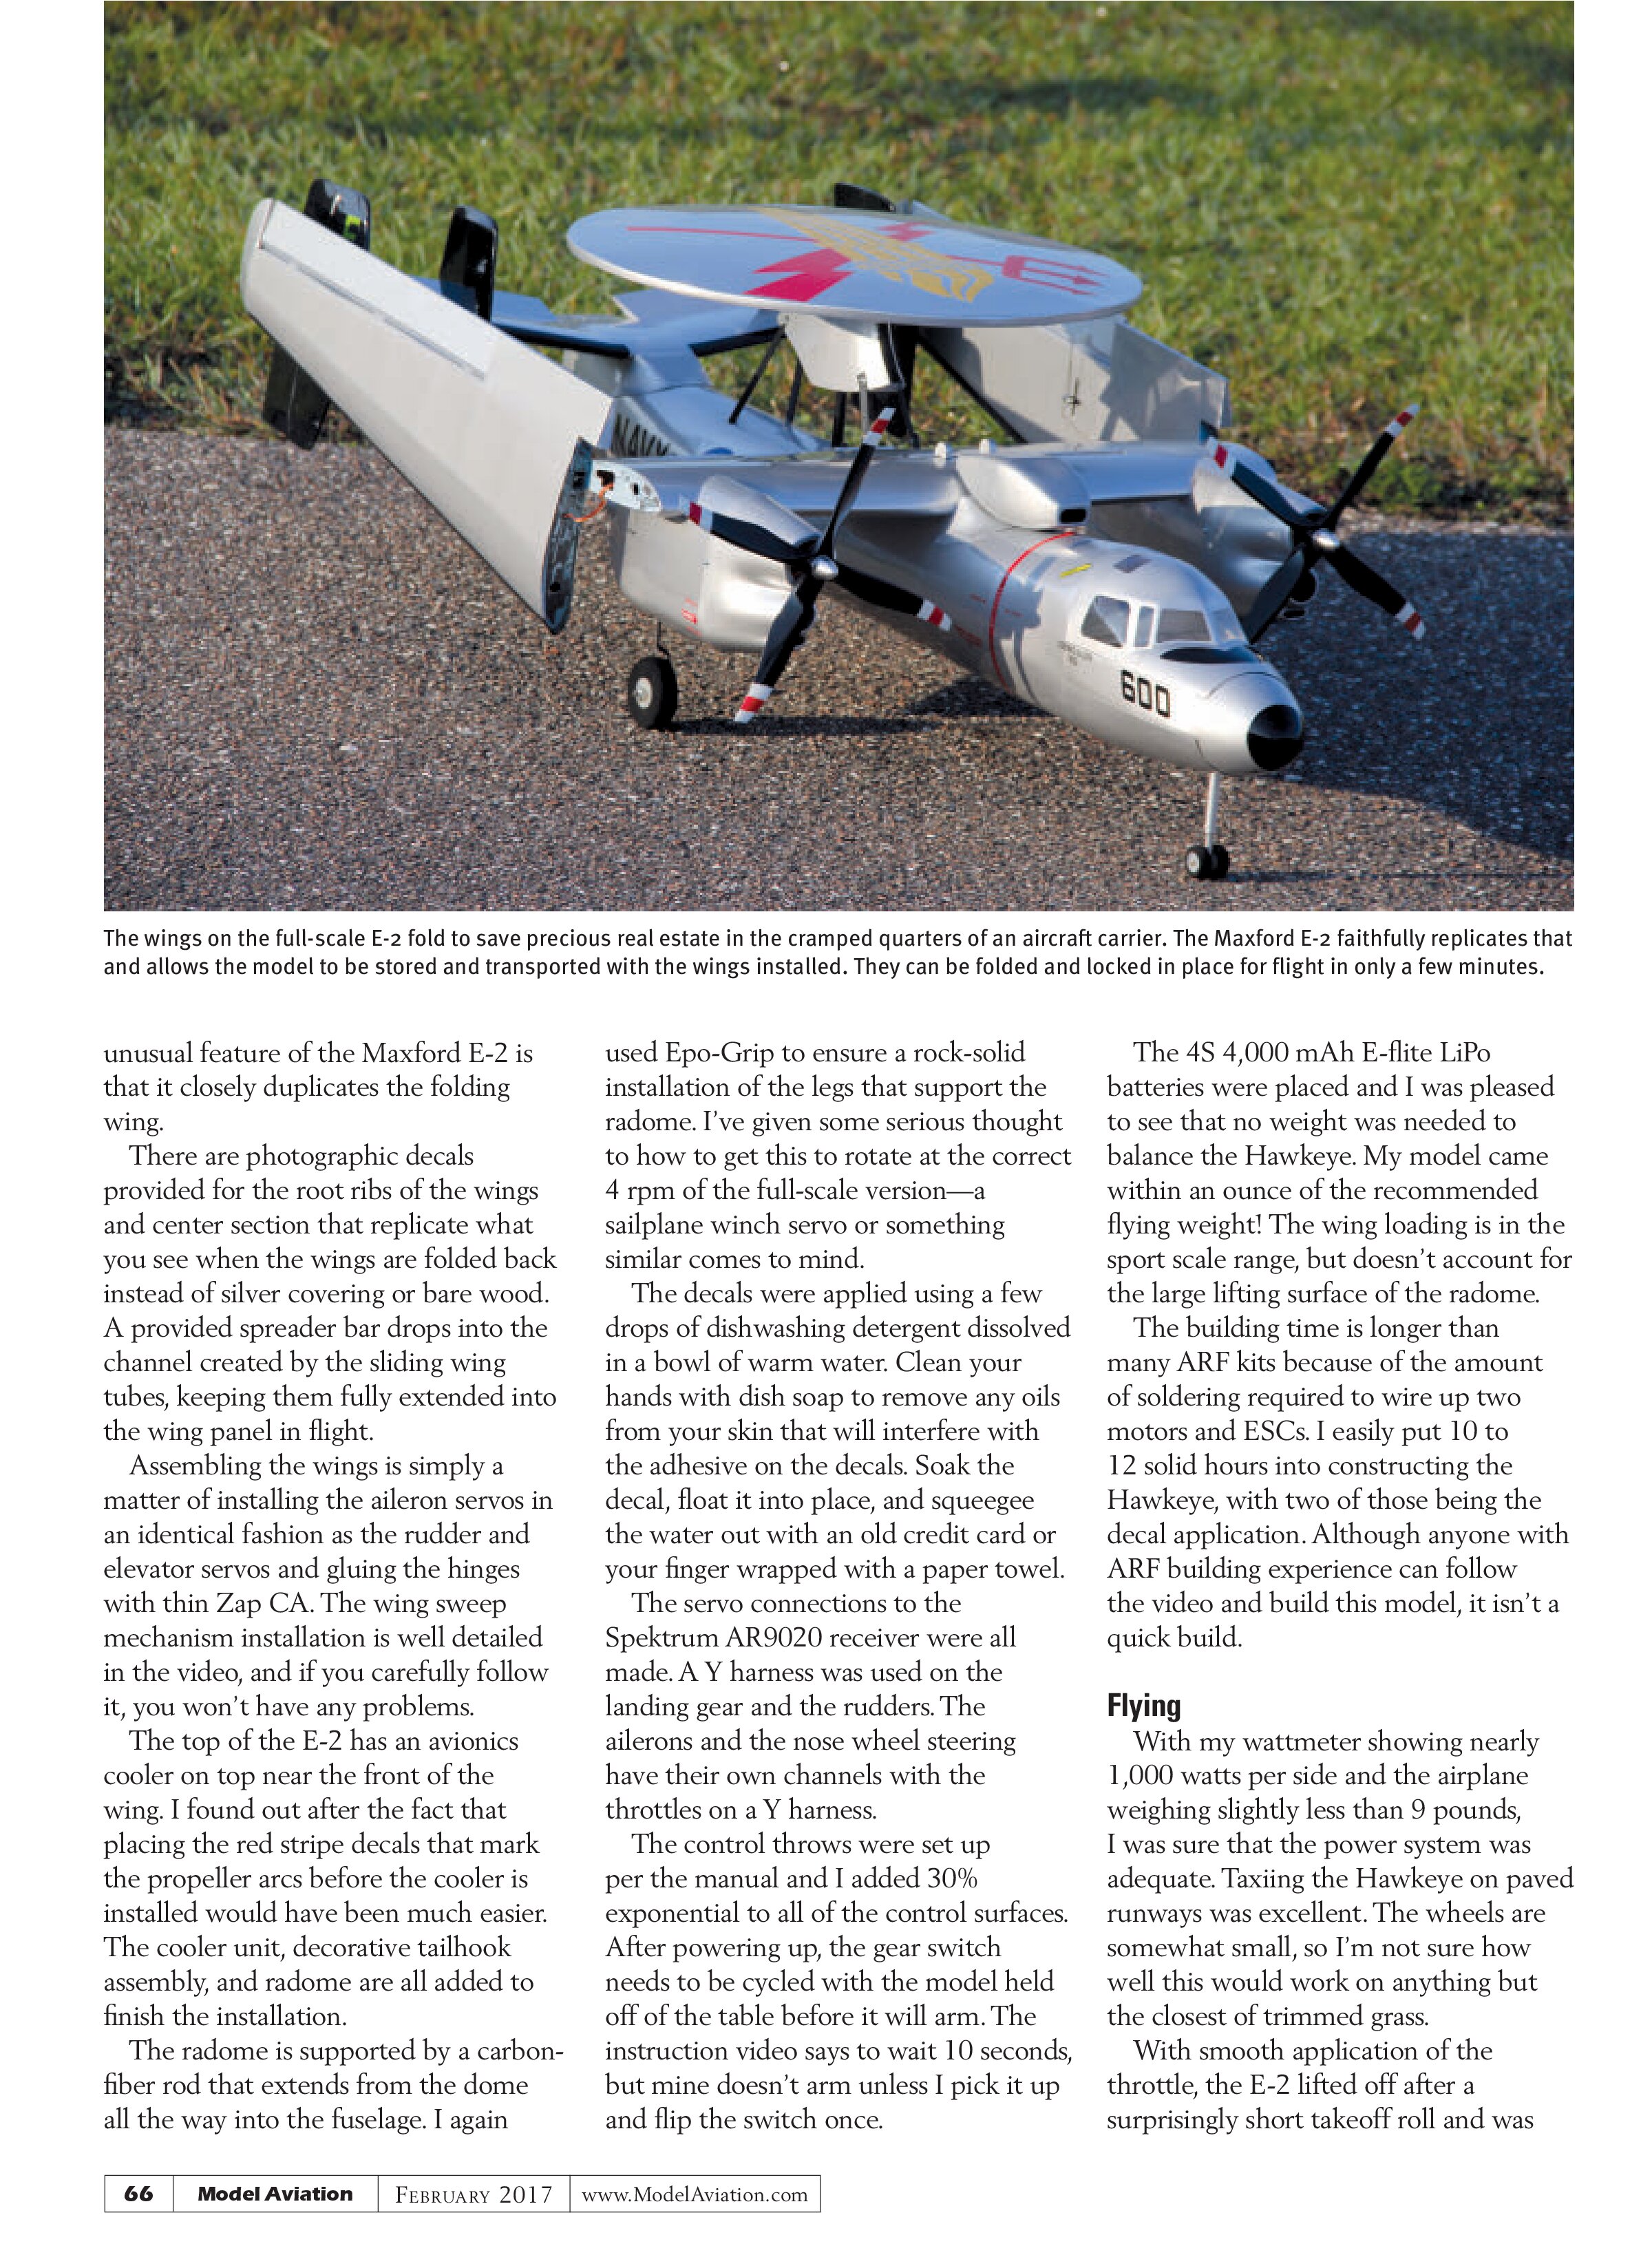
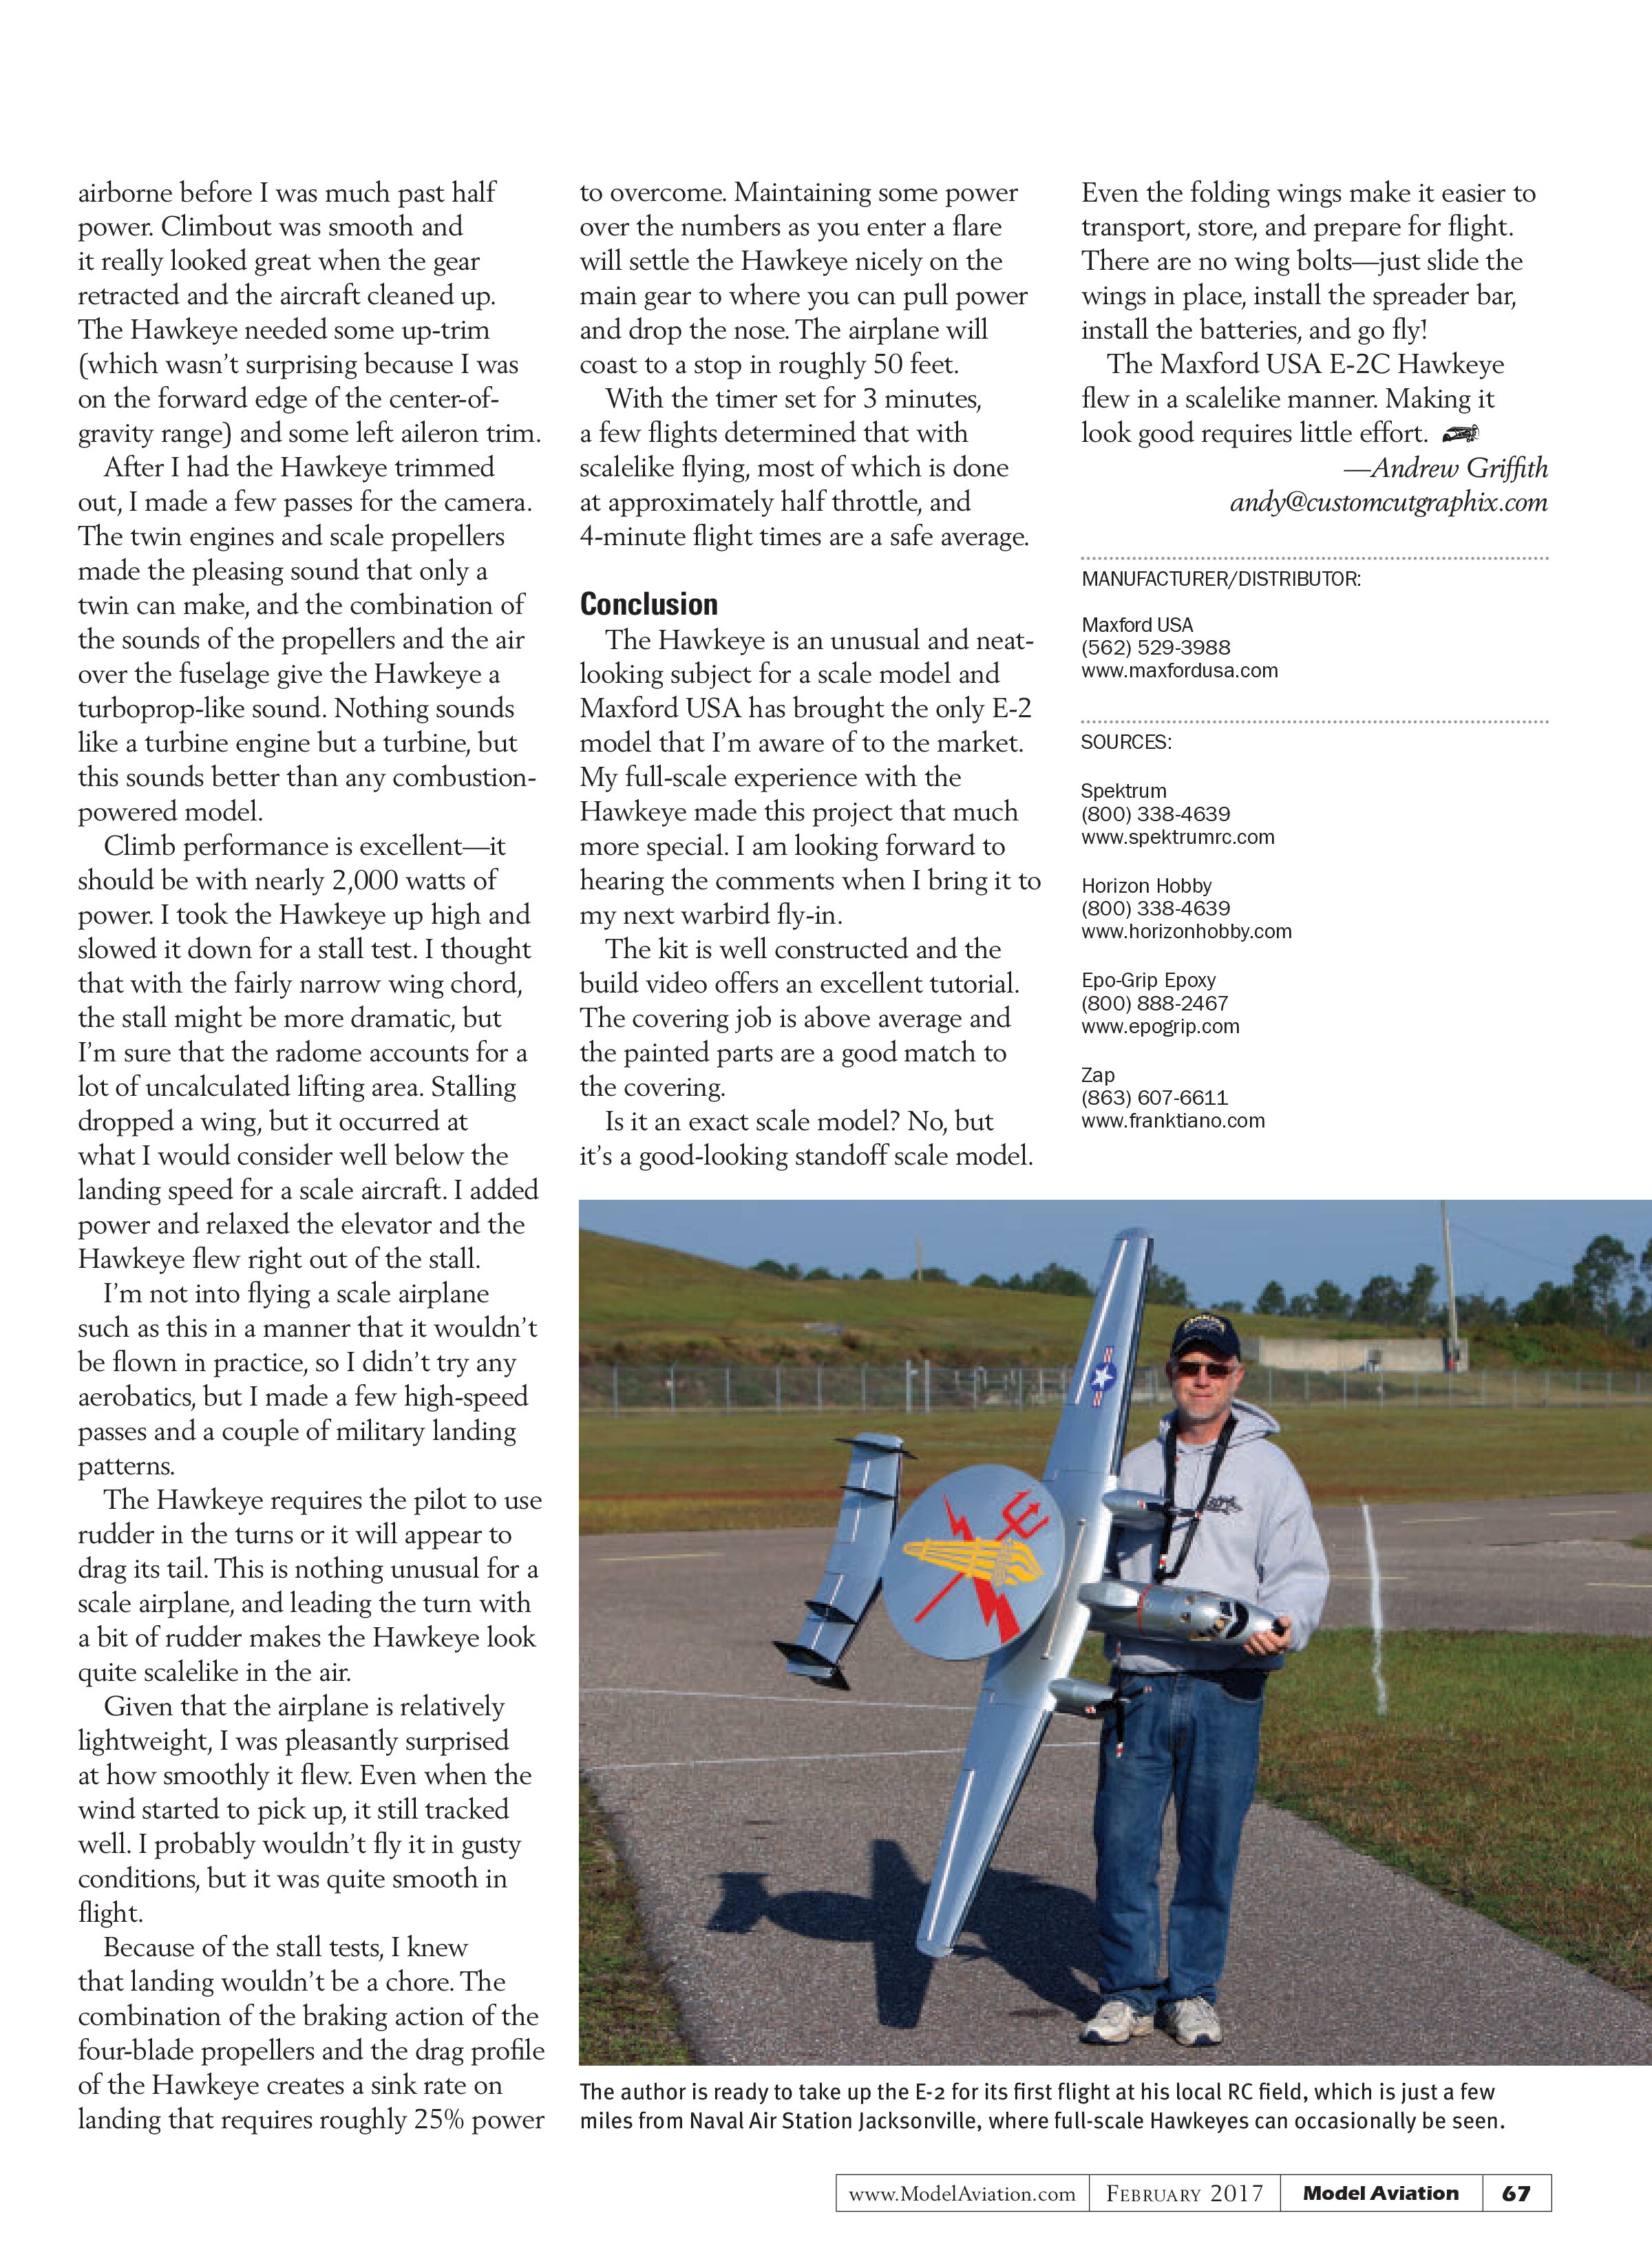
The full-scale Hawkeye has folding wings to minimize the valuable real estate that it takes up on the flight deck or hangar deck of an aircraft carrier. An
An unusual feature of the Maxford E-2 is that it closely duplicates the folding wing.
There are photographic decals provided for the root ribs of the wings and center section that replicate what you see when the wings are folded back instead of silver covering or bare wood. A provided spreader bar drops into the channel created by the sliding wing tubes, keeping them fully extended into the wing panel in flight.
Assembling the wings is simply a matter of installing the aileron servos in an identical fashion as the rudder and elevator servos and gluing the hinges with thin Zap CA. The wing sweep mechanism installation is well detailed in the video, and if you carefully follow it, you won’t have any problems.
The top of the E-2 has an avionics cooler on top near the front of the wing. I found out after the fact that placing the red stripe decals that mark the propeller arcs before the cooler is installed would have been much easier. The cooler unit, decorative tailhook assembly, and radome are all added to finish the installation.
The radome is supported by a carbon-fiber rod that extends from the dome all the way into the fuselage. I again
used Epo-Grip to ensure a rock-solid installation of the legs that support the radome. I’ve given some serious thought to how to get this to rotate at the correct 4 rpm of the full-scale version—a sailplane winch servo or something similar comes to mind.
The decals were applied using a few drops of dishwashing detergent dissolved in a bowl of warm water. Clean your hands with dish soap to remove any oils from your skin that will interfere with the adhesive on the decals. Soak the decal, float it into place, and squeegee the water out with an old credit card or your finger wrapped with a paper towel.
The servo connections to the Spektrum AR9020 receiver were all made. A Y harness was used on the landing gear and the rudders. The ailerons and the nose wheel steering have their own channels with the throttles on a Y harness.
The control throws were set up per the manual and I added 30% exponential to all of the control surfaces. After powering up, the gear switch needs to be cycled with the model held off of the table before it will arm. The instruction video says to wait 10 seconds, but mine doesn’t arm unless I pick it up and flip the switch once.
The 4S 4,000 mAh E-flite LiPo batteries were placed and I was pleased to see that no weight was needed to balance the Hawkeye. My model came within an ounce of the recommended flying weight! The wing loading is in the sport scale range, but doesn’t account for the large lifting surface of the radome.
The building time is longer than many ARF kits because of the amount of soldering required to wire up two motors and ESCs. I easily put 10 to 12 solid hours into constructing the Hawkeye, with two of those being the decal application. Although anyone with ARF building experience can follow the video and build this model, it isn’t a quick build.
Flying
With my wattmeter showing nearly 1,000 watts per side and the airplane weighing slightly less than 9 pounds, I was sure that the power system was adequate. Taxiing the Hawkeye on paved runways was excellent. The wheels are somewhat small, so I’m not sure how well this would work on anything but the closest of trimmed grass.
With smooth application of the throttle, the E-2 lifted off after a surprisingly short takeoff roll and was airborne before I was much past half power. Climbout was smooth and it really looked great when the gear retracted and the aircraft cleaned up. The Hawkeye needed some up-trim (which wasn’t surprising because I was on the forward edge of the center-of-gravity range) and some left aileron trim.
After I had the Hawkeye trimmed out, I made a few passes for the camera. The twin engines and scale propellers made the pleasing sound that only a twin can make, and the combination of the sounds of the propellers and the air over the fuselage give the Hawkeye a turboprop-like sound. Nothing sounds like a turbine engine but a turbine, but this sounds better than any combustion-powered model.
Climb performance is excellent—it should be with nearly 2,000 watts of power. I took the Hawkeye up high and slowed it down for a stall test. I thought that with the fairly narrow wing chord, the stall might be more dramatic, but I’m sure that the radome accounts for a lot of uncalculated lifting area. Stalling dropped a wing, but it occurred at what I would consider well below the landing speed for a scale aircraft. I added power and relaxed the elevator and the Hawkeye flew right out of the stall.
I’m not into flying a scale airplane such as this in a manner that it wouldn’t be flown in practice, so I didn’t try any aerobatics, but I made a few high-speed passes and a couple of military landing patterns.
The Hawkeye requires the pilot to use rudder in the turns or it will appear to drag its tail. This is nothing unusual for a scale airplane, and leading the turn with a bit of rudder makes the Hawkeye look quite scalelike in the air.
Given that the airplane is relatively lightweight, I was pleasantly surprised at how smoothly it flew. Even when the wind started to pick up, it still tracked well. I probably wouldn’t fly it in gusty conditions, but it was quite smooth in flight.
Because of the stall tests, I knew that landing wouldn’t be a chore. The combination of the braking action of the four-blade propellers and the drag profile of the Hawkeye creates a sink rate on landing that requires roughly 25% power to overcome. Maintaining some power over the numbers as you enter a flare will settle the Hawkeye nicely on the main gear to where you can pull power and drop the nose. The airplane will coast to a stop in roughly 50 feet.
With the timer set for 3 minutes, a few flights determined that with scalelike flying, most of which is done at approximately half throttle, 4-minute flight times are a safe average.
Conclusion
The Hawkeye is an unusual and neat-looking subject for a scale model and Maxford USA has brought the only E-2 model that I’m aware of to the market. My full-scale experience with the Hawkeye made this project that much more special. I am looking forward to hearing the comments when I bring it to my next warbird fly-in.
The kit is well constructed and the build video offers an excellent tutorial. The covering job is above average and the painted parts are a good match to the covering.
Is it an exact scale model? No, but it’s a good-looking standoff scale model.
Even the folding wings make it easier to transport, store, and prepare for flight. There are no wing bolts—just slide the wings in place, install the spreader bar, install the batteries, and go fly!
The Maxford USA E-2C Hawkeye flew in a scalelike manner. Making it look good requires little effort.
—Andrew Griffith
andy@customcutgraphix.com
MANUFACTURER/DISTRIBUTOR:
Maxford USA
(562) 529-3988
www.maxfordusa.com
SOURCES:
Spektrum
(800) 338-4639
www.spektrumrc.com
Horizon Hobby
(800) 338-4639
www.horizonhobby.com
Epo-Grip Epoxy
(800) 888-2467
www.epogrip.com
Zap
(863) 607-6611
www.franktiano.com