E-Flite Carbon-Z P2 Prometheus BNF
Andrew Griffith

A Pitts biplane evolved
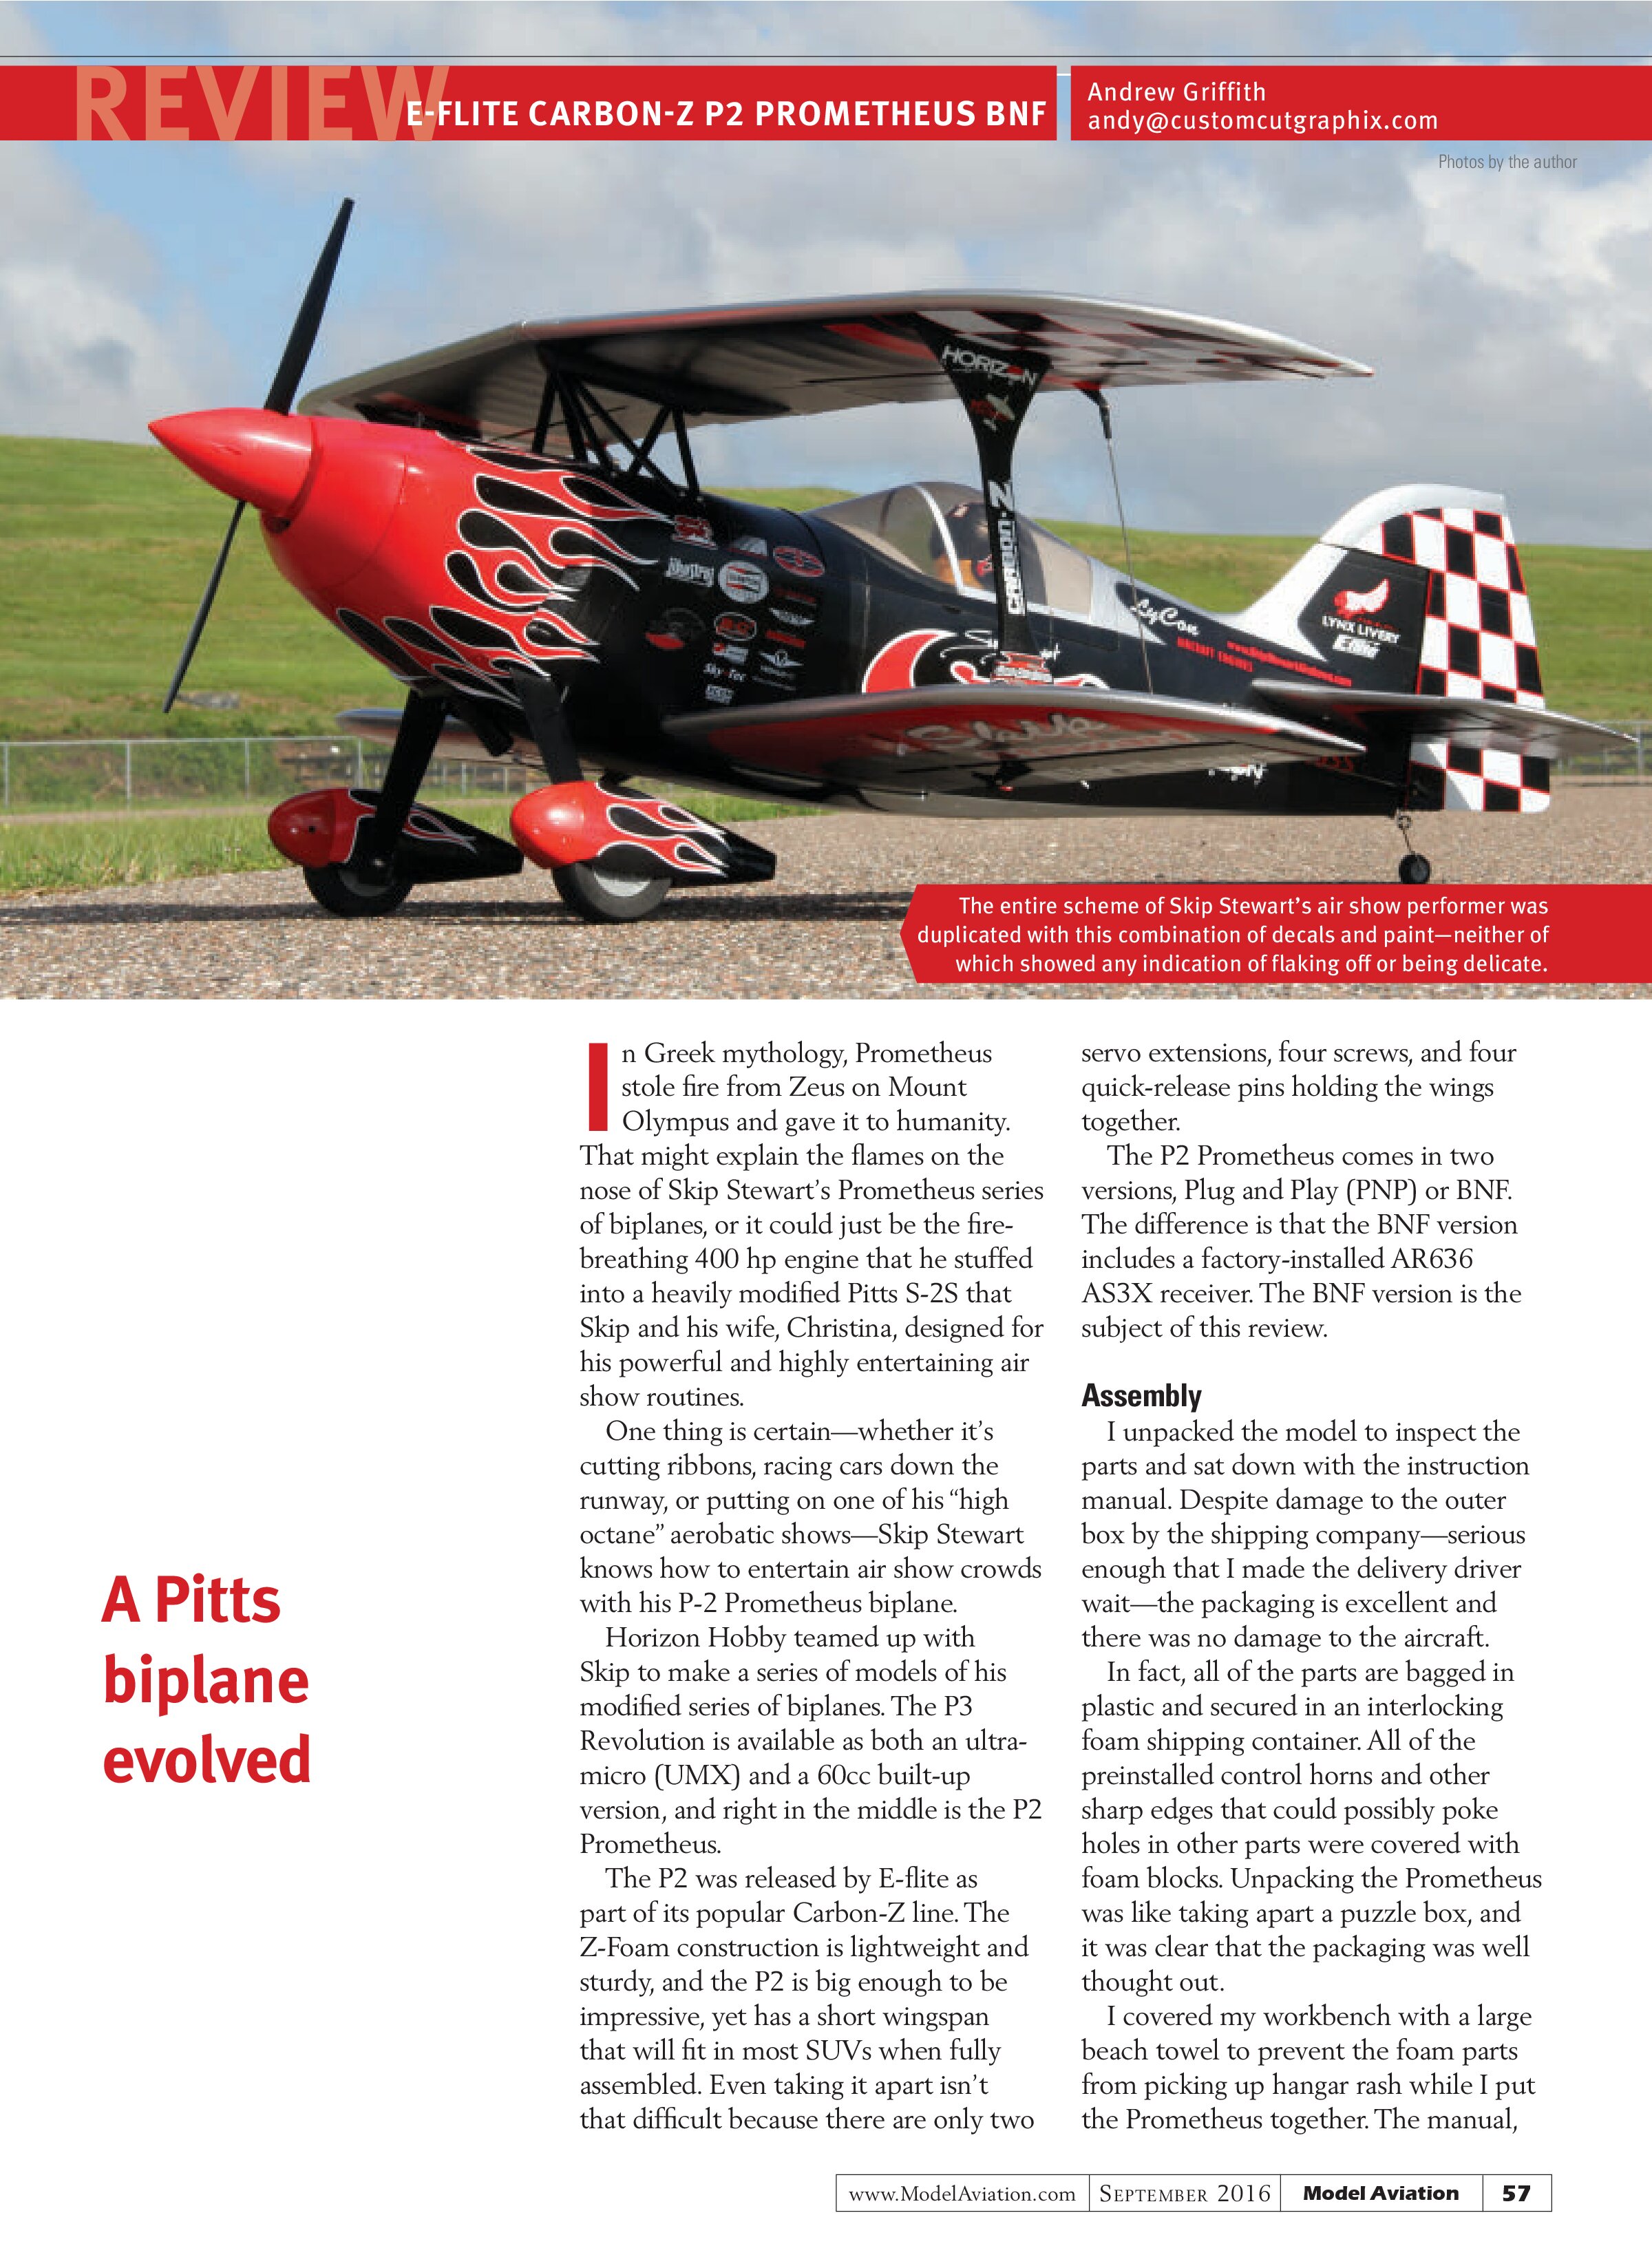
In Greek mythology, Prometheus stole fire from Zeus on Mount Olympus and gave it to humanity. That might explain the flames on the nose of Skip Stewart’s Prometheus series of biplanes, or it could just be the fire-breathing 400 hp engine that he stuffed into a heavily modified Pitts S-2S that Skip and his wife, Christina, designed for his powerful and highly entertaining air show routines.
One thing is certain—whether it’s cutting ribbons, racing cars down the runway, or putting on one of his “high octane” aerobatic shows—Skip Stewart knows how to entertain air show crowds with his P-2 Prometheus biplane.
Horizon Hobby teamed up with Skip to make a series of models of his modified series of biplanes. The P3 Revolution is available as both an ultra-micro (UMX) and a 60cc built-up version, and right in the middle is the P2 Prometheus.
The P2 was released by E-flite as part of its popular Carbon-Z line. The Z-Foam construction is lightweight and sturdy, and the P2 is big enough to be impressive, yet has a short wingspan that will fit in most SUVs when fully assembled. Even taking it apart isn’t that difficult because there are only two servo extensions, four screws, and four quick-release pins holding the wings together.
The P2 Prometheus comes in two versions, Plug and Play (PNP) or BNF. The difference is that the BNF version includes a factory-installed AR636 AS3X receiver. The BNF version is the subject of this review.
Assembly
I unpacked the model to inspect the parts and sat down with the instruction manual. Despite damage to the outer box by the shipping company—serious enough that I made the delivery driver wait—the packaging is excellent and there was no damage to the aircraft.
In fact, all of the parts are bagged in plastic and secured in an interlocking foam shipping container. All of the preinstalled control horns and other sharp edges that could possibly poke holes in other parts were covered with foam blocks. Unpacking the Prometheus was like taking apart a puzzle box, and it was clear that the packaging was well thought out.
I covered my workbench with a large beach towel to prevent the foam parts from picking up hangar rash while I put the Prometheus together. The manual,

like most of those produced by E-flite, is excellent. The paint job on the foam appears to be applied well, and the decals don’t look like they will fall off at the slightest touch, like some foam models do.
There are a couple of areas that require glue and I used Zap brand thin and medium CA. A Phillips-head screwdriver and CA adhesive are all that you need to assemble the Prometheus. A six-cell battery and a six-channel radio are required if you purchased the BNF version.
AT A GLANCE ...
SPECIFICATIONS
Model type: Semiscale aerobat
Skill level: Intermediate to advanced
Wingspan: 48 inches
Wing area: 840 square inches
Wing loading: 17.8 ounces
Wing cube loading: 7.4
Airfoil: Symmetrical
Length: 49.3 inches
Weight: 7 pounds
Power system: 525 Kv 50-size brushless outrunner motor
Radio: Full-range six-channel DSM2/DSMX radio system
Construction: Z-Foam
Covering/finish: Paint and decals over Z-Foam
Street price: $399.99
TEST-MODEL DETAILS
Motor used: E-flite 50-size brushless motor (included)
Battery: E-flite 6S (22.2-volt) 4,400 mAh LiPo
Propeller: 15 x 5.5 two-blade (included)
Radio system: Spektrum DX-18G2
Ready-to-fly weight: 6 pounds, 8 ounces
Flight duration: Five minutes
PLUSES
- Fantastic-looking, detailed color scheme.
- Unique pin system makes wing installation easy.
- Very aerobatic and fun to fly.
- Top hatches for convenient battery and radio system access.
MINUS
- Main landing gear fairing didn’t align with fuselage on my model.
The first assembly step is to install the main landing gear. This is where I ran into my only area of frustration. The main landing gear comes as an assembly from the factory with the wheels, wheel pants, and the fuselage fairing built up for you. With a few drops of medium Zap adhesive, the faux exhaust pipe is glued to the landing gear fairing. I didn’t want to stain anything by spraying kicker, so I held the exhaust in place for a minute until the CA cured.
I aligned the gear assembly in such a way that the fairing was flush with the bottom of the fuselage. The landing gear is bolted in place with four Phillips screws, but I couldn’t get the screws to catch the threads of the blind nuts in the fuselage. I pushed one of the screws through and visually lined up the screw. This time it grabbed, so I installed all four screws, but I realized that the fairing wasn’t properly aligned. I removed the gear and carefully cut the fairing loose, put the gear back in place with the four screws, and reglued the landing gear fairing to the aluminum gear strut with medium Zap so that everything was properly aligned.
The rudder is installed next using CA hinges. I was careful with the thin Zap CA glue to prevent making a mess. After the rudder is hinged, the tail wheel slides into place on the bottom and is held there with a plastic plate that is secured with two small screws.
Because it was time to install the rudder pushrod, I went ahead and bound the AR636 receiver to my DX18G2. The control linkages all use Z-bends on the servo end and ball links on the control surface. With the radio on, I sized the rudder pushrod and snapped the ball link in place.
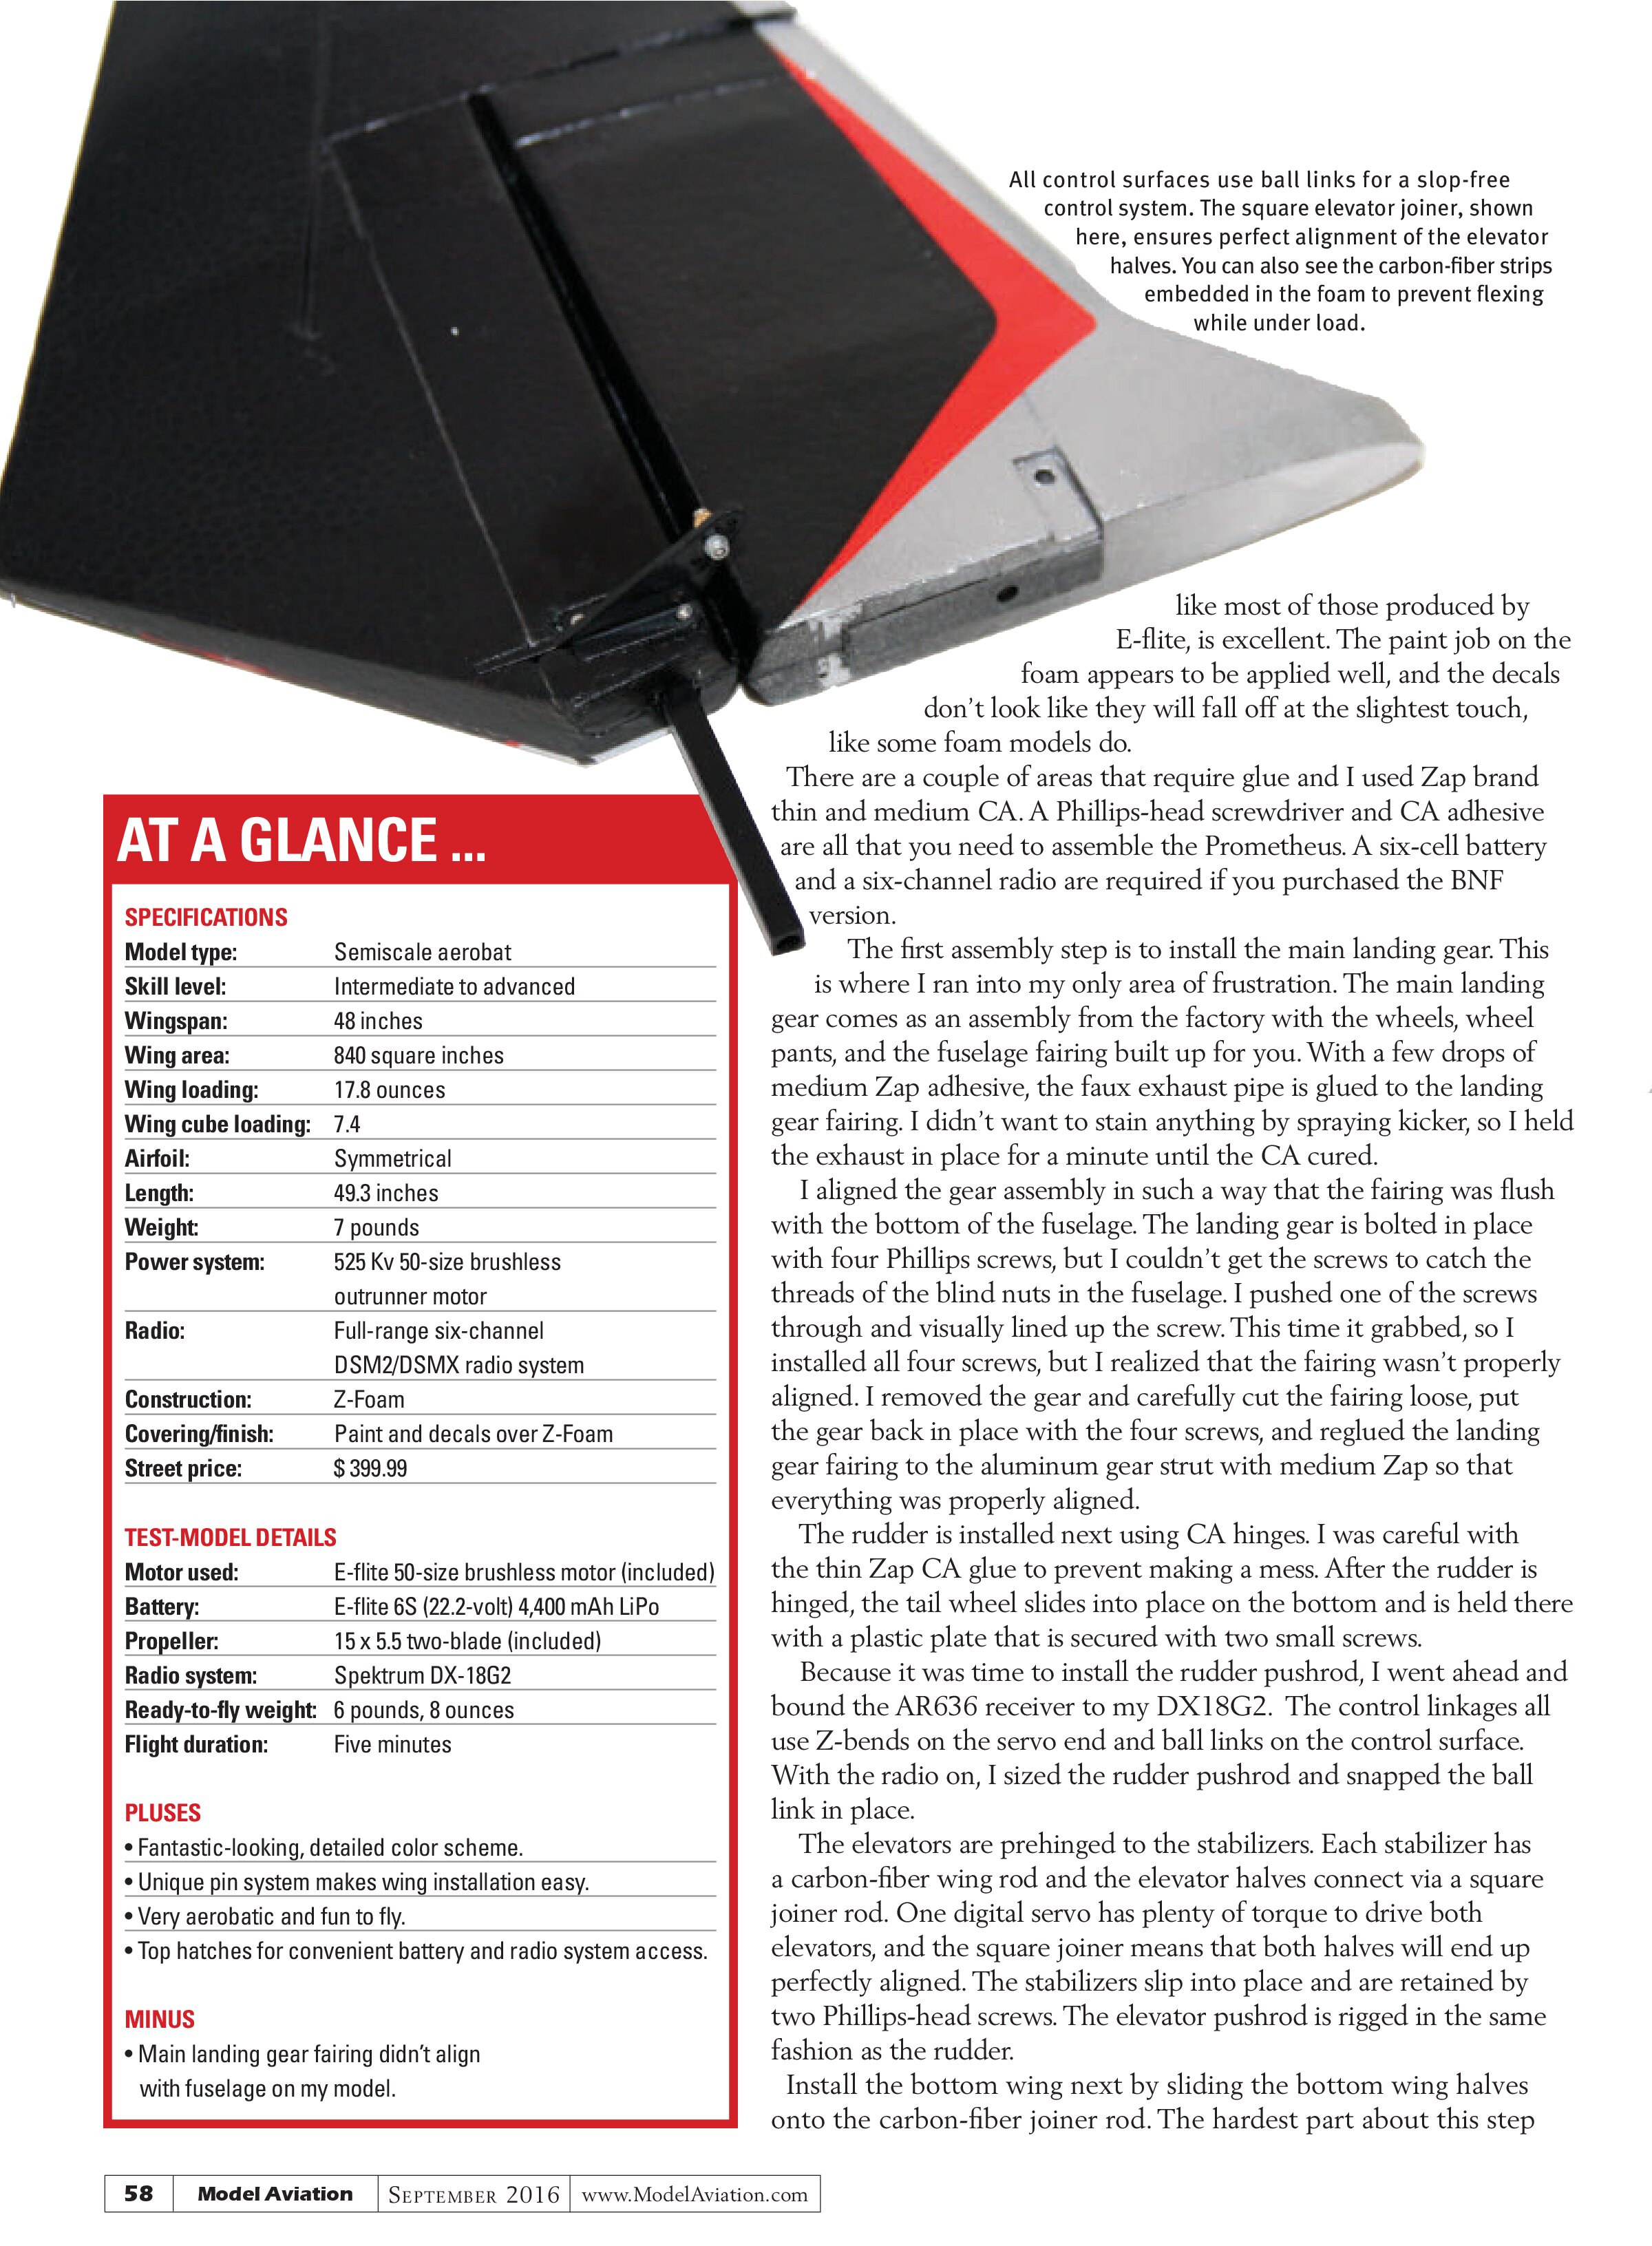
The elevators are prehinged to the stabilizers. Each stabilizer has a carbon-fiber wing rod and the elevator halves connect via a square joiner rod. One digital servo has plenty of torque to drive both elevators, and the square joiner means that both halves will end up perfectly aligned. The stabilizers slip into place and are retained by two Phillips-head screws. The elevator pushrod is rigged in the same fashion as the rudder.
Install the bottom wing next by sliding the bottom wing halves onto the carbon-fiber joiner rod. The hardest part about this step is fishing the servo wires through to the interior. I used a pair of surgical hemostats. It’s important to keep a little tension on these as you slide the wing halves into place to ensure that you don’t trap any wires between the wing halves and the fuselage. Aside from possibly damaging the servo extensions, it will make it impossible to fully seat the wing halves. With the bottom wing halves in place, they are retained by one Phillips-head screw on each side.
With the aileron servos connected, I installed the aileron pushrods in the same sequence as the rudder and elevator. After adjusting them to the proper length, they were snapped into place on the ball links. All of the control surfaces appear to have a positive and slop-free installation.
The top wing halves slip into place and are retained by two more Phillips-head screws.
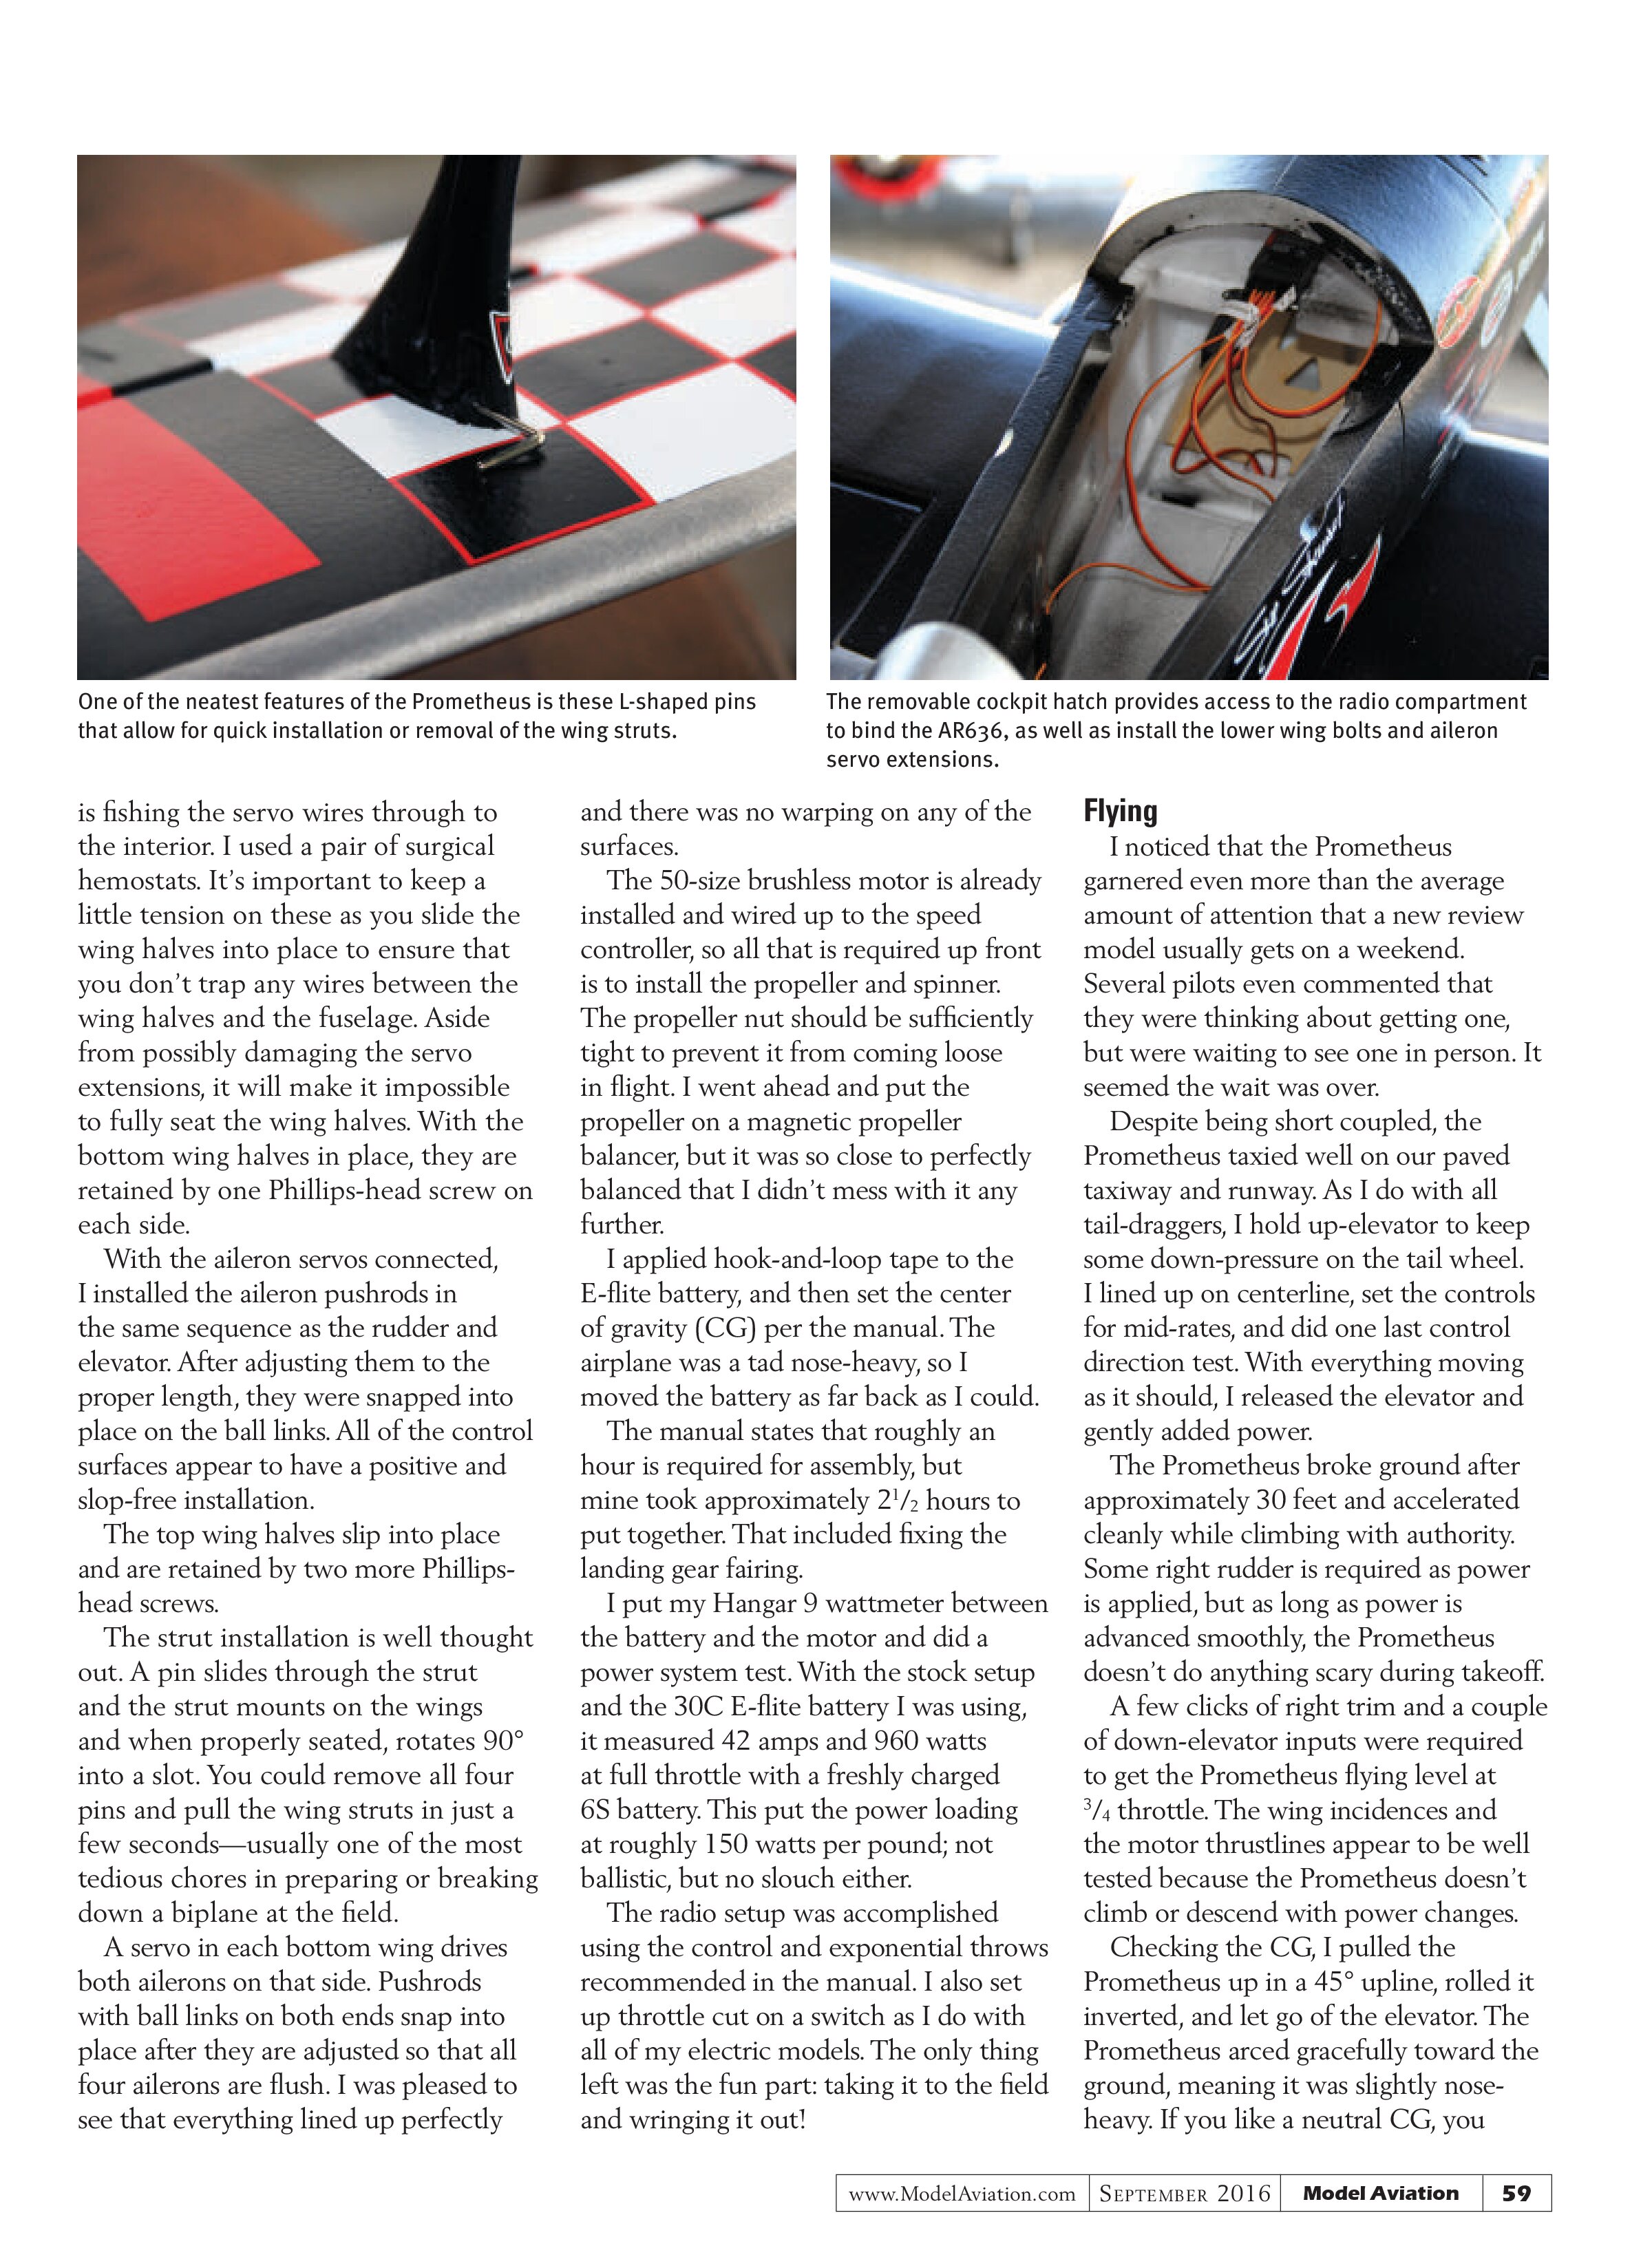
The strut installation is well thought out. A pin slides through the strut and the strut mounts on the wings and when properly seated, rotates 90° into a slot. You could remove all four pins and pull the wing struts in just a few seconds—usually one of the most tedious chores in preparing or breaking down a biplane at the field.
A servo in each bottom wing drives both ailerons on that side. Pushrods with ball links on both ends snap into place after they are adjusted so that all four ailerons are flush. I was pleased to see that everything lined up perfectly and there was no warping on any of the surfaces.
The 50-size brushless motor is already installed and wired up to the speed controller, so all that is required up front is to install the propeller and spinner. The propeller nut should be sufficiently tight to prevent it from coming loose in flight. I went ahead and put the propeller on a magnetic propeller balancer, but it was so close to perfectly balanced that I didn’t mess with it any further.
I applied hook-and-loop tape to the E-flite battery, and then set the center of gravity (CG) per the manual. The airplane was a tad nose-heavy, so I moved the battery as far back as I could.
The manual states that roughly an hour is required for assembly, but mine took approximately 2½ hours to put together. That included fixing the landing gear fairing.
I put my Hangar 9 wattmeter between the battery and the motor and did a power system test. With the stock setup and the 30C E-flite battery I was using, it measured 42 amps and 960 watts at full throttle with a freshly charged 6S battery. This put the power loading at roughly 150 watts per pound; not ballistic, but no slouch either.
The radio setup was accomplished using the control and exponential throws recommended in the manual. I also set up throttle cut on a switch as I do with all of my electric models. The only thing left was the fun part: taking it to the field and wringing it out!


Flying
I noticed that the Prometheus garnered even more than the average amount of attention that a new review model usually gets on a weekend. Several pilots even commented that they were thinking about getting one, but were waiting to see one in person. It seemed the wait was over.
Despite being short coupled, the Prometheus taxied well on our paved taxiway and runway. As I do with all tail-draggers, I hold up-elevator to keep some down-pressure on the tail wheel. I lined up on centerline, set the controls for mid-rates, and did one last control direction test. With everything moving as it should, I released the elevator and gently added power.
The Prometheus broke ground after approximately 30 feet and accelerated cleanly while climbing with authority. Some right rudder is required as power is applied, but as long as power is advanced smoothly, the Prometheus doesn’t do anything scary during takeoff.
A few clicks of right trim and a couple of down-elevator inputs were required to get the Prometheus flying level at ¾ throttle. The wing incidences and the motor thrustlines appear to be well tested because the Prometheus doesn’t climb or descend with power changes.
Checking the CG, I pulled the Prometheus up in a 45° upline, rolled it inverted, and let go of the elevator. The Prometheus arced gracefully toward the ground, meaning it was slightly nose-heavy. If you like a neutral CG, you
either have to run a lighter battery or add a small amount of tail weight. Moving the battery back is possible, but difficult because of the battery strap’s location. The battery would likely end up in the area between the hatches, so it would be difficult to put the strap on even if you moved it back. With all of that stated, it flew well with the CG where it was, so I didn’t mess with it any more.
A stall test was performed from both level flight and with a slightly nose-up attitude. In level flight, I reduced power and added elevator and when the stall broke, the Prometheus fell forward. When the elevator was relaxed and power was added, the Prometheus recovered and resumed flying. With the nose up several degrees and power removed, the Prometheus will drop a wing. Corrective control and power are needed to recover. Keeping this in mind, I will make sure that I don’t flare too early for landing.
Next, I tested the control response at the recommended rates. As I expected, with four ailerons, the Prometheus is nimble in high rate. Rolls are quick, stops are crisp, and snaps are quite snappy. Inverted snaps and tumbles are as impressive as one would expect with such a short Pitts-style fuselage.
Mid- and low-rates made the Prometheus more docile and although it will still perform large aerobatics and knife-edge in mid-rate, it doesn’t snap or tumble as well. Spins are tight and flatten out nicely with some power and

With four of the allotted five minutes elapsed on my timer, I decided it was time to see how the Prometheus landed while I still had plenty of battery remaining. A biplane has quite a bit of frontal area and that makes for a lot of drag, so it came as no surprise that pulling the power below half meant that the Prometheus would start to descend and some throttle is required to keep it on glide slope.
If you haven’t flown a biplane before, be ready for more throttle during final approach and maintain that until the main wheels are on the ground. This is a higher-performance airplane and is intended for experienced pilots. They shouldn’t have any problems landing the Prometheus.
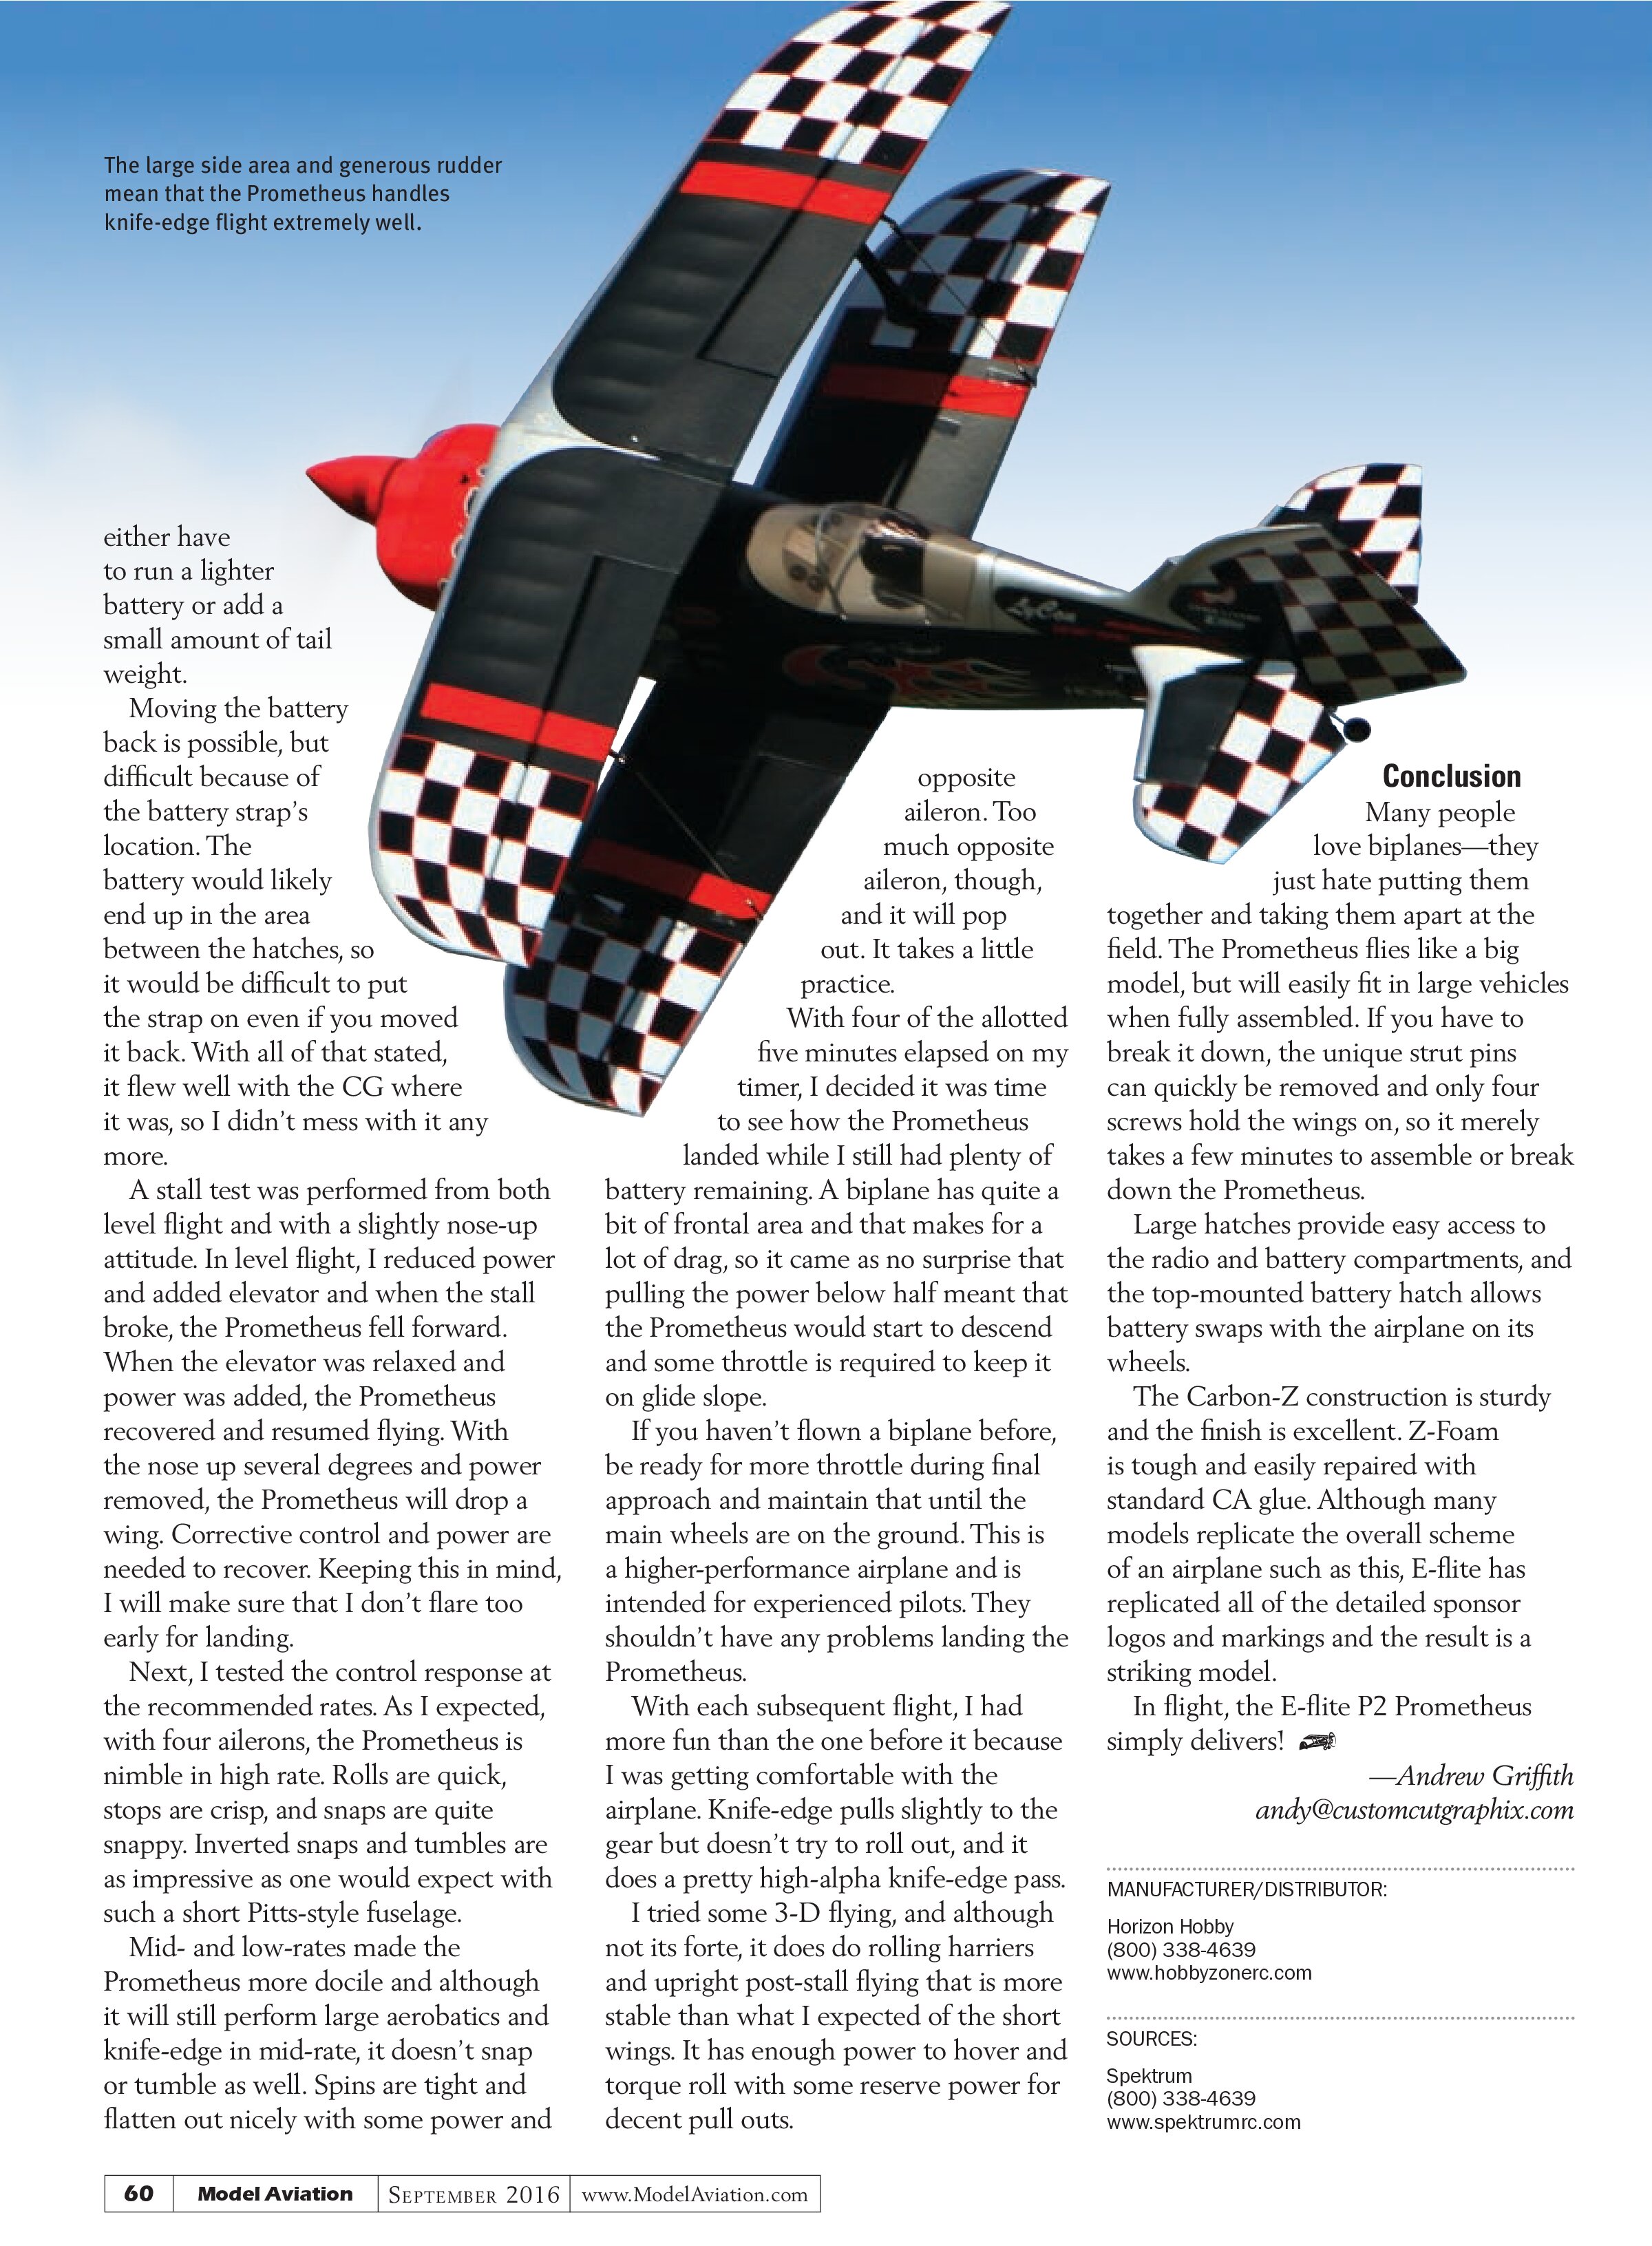
With each subsequent flight, I had more fun than the one before it because I was getting comfortable with the airplane. Knife-edge pulls slightly to the gear but doesn’t try to roll out, and it does a pretty high-alpha knife-edge pass.
I tried some 3-D flying, and although not its forte, it does do rolling harriers and upright post-stall flying that is more stable than what I expected of the short wings. It has enough power to hover and torque roll with some reserve power for decent pull outs.
Conclusion
Many people love biplanes—they just hate putting them together and taking them apart at the field. The Prometheus flies like a big model, but will easily fit in large vehicles when fully assembled. If you have to break it down, the unique strut pins can quickly be removed and only four screws hold the wings on, so it merely takes a few minutes to assemble or break down the Prometheus.
Large hatches provide easy access to the radio and battery compartments, and the top-mounted battery hatch allows battery swaps with the airplane on its wheels.
The Carbon-Z construction is sturdy and the finish is excellent. Z-Foam is tough and easily repaired with standard CA glue. Although many models replicate the overall scheme of an airplane such as this, E-flite has replicated all of the detailed sponsor logos and markings and the result is a striking model.
In flight, the E-flite P2 Prometheus simply delivers!
—Andrew Griffith
andy@customcutgraphix.com
MANUFACTURER/DISTRIBUTOR:
Horizon Hobby
(800) 338-4639
www.hobbyzonerc.com
SOURCES:
Spektrum
(800) 338-4639
www.spektrumrc.com