HORIZON HOBBY HANGAR 9 P-51 MUSTANG S 8cc BNF GAS TRAINER
Andrew Griffith
A gas-powered warbird trainer

Mary has a month gone by without a first-time RC pilot either asking about learning how to fly a P-51 Mustang or actually showing up at my club field with one, or a similar aircraft, asking for lessons. Disappointment sets in when the pilot realizes that he or she will have to start with a boxy-looking high-wing trainer that he or she will quickly outgrow.
My favorites are the full-scale pilots who show up a few times a year, thinking that because they are “real” pilots already, they can start with a scale Mustang or Corsair without the help of an instructor. If you’re reading Model Aviation, you probably know that it doesn’t work that way!
A few years ago, Hangar 9 filled a hole in the market by introducing what was known at the time as Progressive Trainer System (PTS) airplanes. The company added high-lift devices to the wingtips, as well as flaps to models such as the F-22 Raptor and the P-51 Mustang. These aircraft allowed a new modeler to get into the air with something sportier, with the help of an instructor.
These models could fly slowly and land well, and as a pilot progressed in his or her training, the devices could be removed to make them capable of more spirited performance. When combined with a simulator and a good instructor, the PTS models allowed pilots to fly solo with fighter airplanes, which is what many people envision when they get into RC airplanes.
The P-51 seems to be a perennial favorite of the designers at Horizon Hobby and modelers alike, so it was no surprise that they would eventually come out with a new-age trainer based on the venerable Mustang.
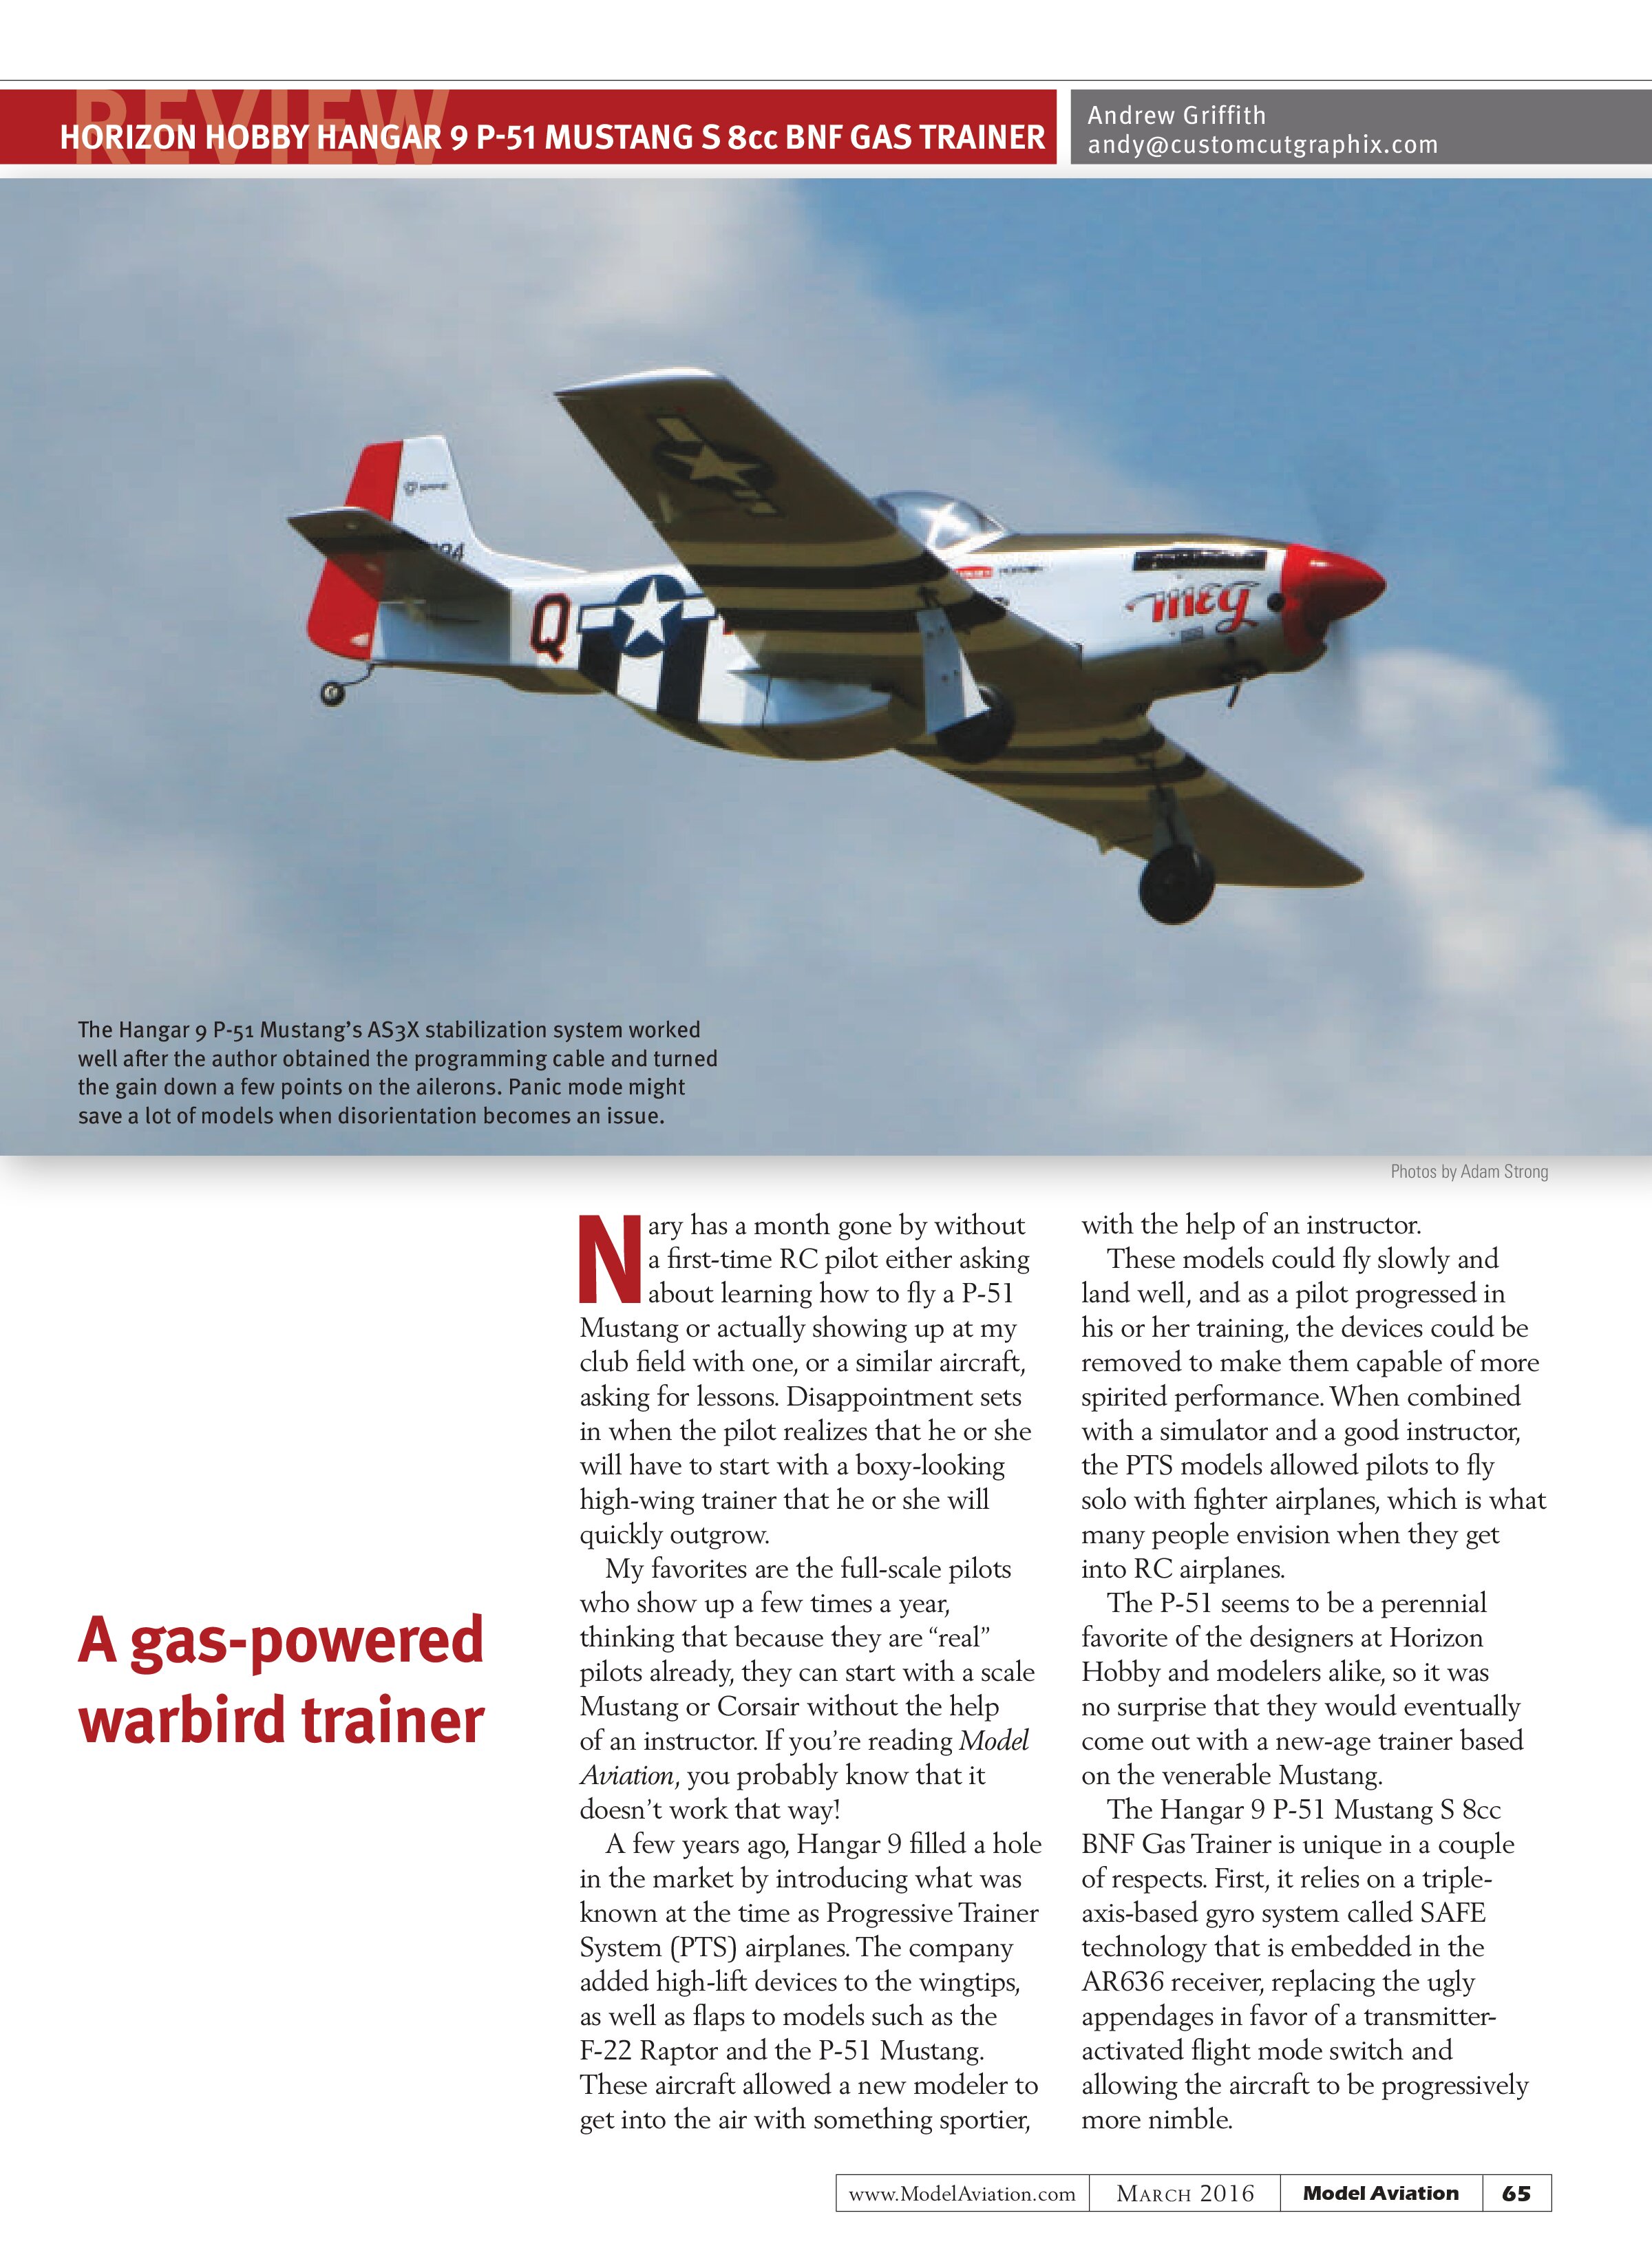
The Hangar 9 P-51 Mustang S 8cc BNF Gas Trainer is unique in a couple of respects. First, it relies on a triple-axis-based gyro system called SAFE technology that is embedded in the AR636 receiver, replacing the ugly appendages in favor of a transmitter-activated flight mode switch and allowing the aircraft to be progressively more nimble.

Second, it’s equipped with a gas engine! A tiny one—only 8cc (roughly the size of a .46 to .50 glow engine)—that is factory installed with all of the ignition wiring and fuel tank plumbing completed. Unlike the PTS airplanes, the Mustang S also has a panic button that when activated, will recover the airplane from whatever attitude it’s in to upright in a gentle climb.
The combination is something often avoided by first-time modelers: a tail-dragger, a fighter airplane, and a gas engine. Much of the work is done for you, and with minimal assembly, you will quickly be at the field with your new Mustang, ready to do some flight training or to escort bombers deep into enemy territory.
Construction
The Mustang S features a high level of prefabrication and a 70-page comprehensive instruction manual that makes it easy to get the Mustang completed and ready to fly. If you use the correct adhesives and take the time to properly prepare everything, assembly will take approximately four hours.
I unboxed the Mustang and sat down with the instruction manual, which includes two pages that shouldn’t be set aside and ignored. One page contains an addendum to correct a few mistakes in the manual. The second page warns you that unless the model is sitting upright on its landing gear, the receiver won’t connect to the transmitter and initialize.
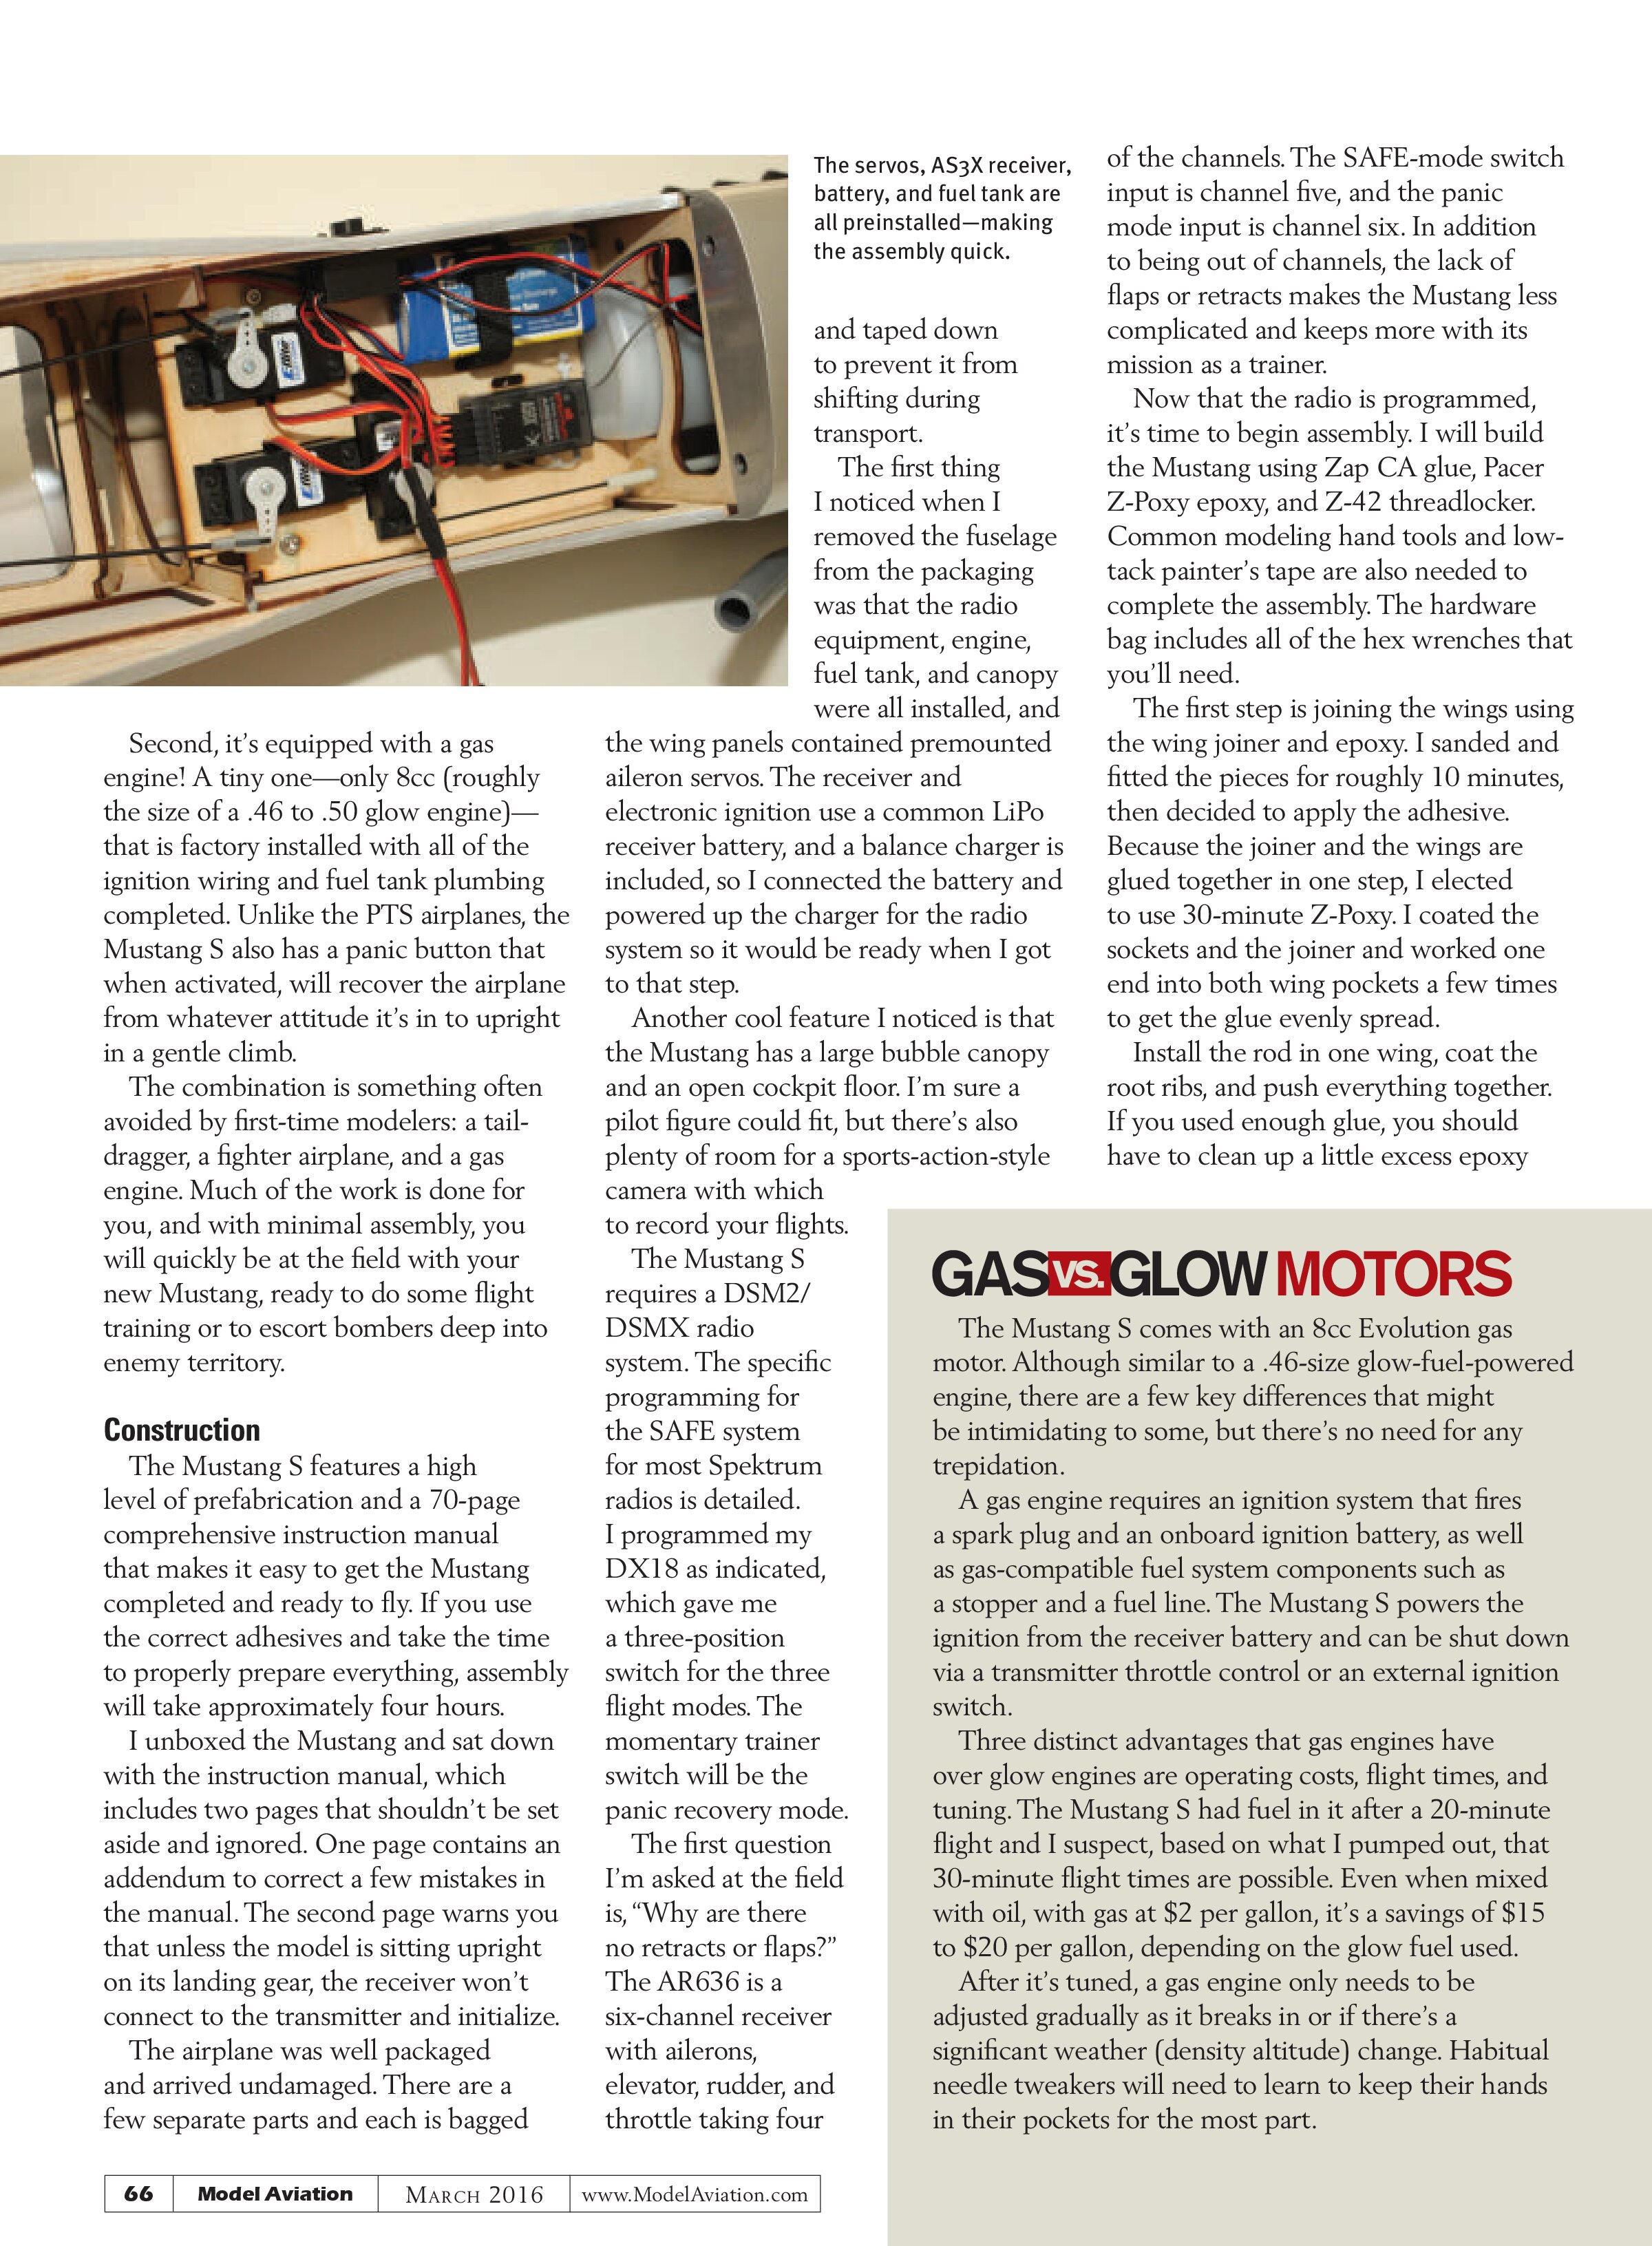
The airplane was well packaged and arrived undamaged. There are a few separate parts and each is bagged and taped down to prevent it from shifting during transport.
The first thing I noticed when I removed the fuselage from the packaging was that the radio equipment, engine, fuel tank, and canopy were all installed, and the wing panels contained premounted aileron servos. The receiver and electronic ignition use a common LiPo receiver battery, and a balance charger is included, so I connected the battery and powered up the charger for the radio system so it would be ready when I got to that step.
Another cool feature I noticed is that the Mustang has a large bubble canopy and an open cockpit floor. I’m sure a pilot figure could fit, but there’s also plenty of room for a sports-action-style camera with which to record your flights.
The Mustang S requires a DSM2/DSMX radio system. The specific programming for the SAFE system for most Spektrum radios is detailed. I programmed my DX18 as indicated, which gave me a three-position switch for the three flight modes. The momentary trainer switch will be the panic recovery mode.
The first question I’m asked at the field is, “Why are there no retracts or flaps?” The AR636 is a six-channel receiver with ailerons, elevator, rudder, and throttle taking four of the channels. The SAFE-mode switch input is channel five, and the panic mode input is channel six. In addition to being out of channels, the lack of flaps or retracts makes the Mustang less complicated and keeps more with its mission as a trainer.
Now that the radio is programmed, it’s time to begin assembly. I will build the Mustang using Zap CA glue, Pacer Z-Poxy epoxy, and Z-42 threadlocker. Common modeling hand tools and low-tack painter’s tape are also needed to complete the assembly. The hardware bag includes all of the hex wrenches that you’ll need.
The first step is joining the wings using the wing joiner and epoxy. I sanded and fitted the pieces for roughly 10 minutes, then decided to apply the adhesive. Because the joiner and the wings are glued together in one step, I elected to use 30-minute Z-Poxy. I coated the sockets and the joiner and worked one end into both wing pockets a few times to get the glue evenly spread.
Install the rod in one wing, coat the root ribs, and push everything together. If you used enough glue, you should have to clean up a little excess epoxy.
Gas vs. Glow Motors
The Mustang S comes with an 8cc Evolution gas motor. Although similar to a .46-size glow-fuel-powered engine, there are a few key differences that might be intimidating to some, but there’s no need for any trepidation.
A gas engine requires an ignition system that fires a spark plug and an onboard ignition battery, as well as gas-compatible fuel system components such as a stopper and a fuel line. The Mustang S powers the ignition from the receiver battery and can be shut down via a transmitter throttle control or an external ignition switch.
Three distinct advantages that gas engines have over glow engines are operating costs, flight times, and tuning. The Mustang S had fuel in it after a 20-minute flight and I suspect, based on what I pumped out, that 30-minute flight times are possible. Even when mixed with oil, with gas at $2 per gallon, it’s a savings of $15 to $20 per gallon, depending on the glow fuel used.
After it’s tuned, a gas engine only needs to be adjusted gradually as it breaks in or if there’s a significant weather (density altitude) change. Habitual needle tweakers will need to learn to keep their hands in their pockets for the most part.
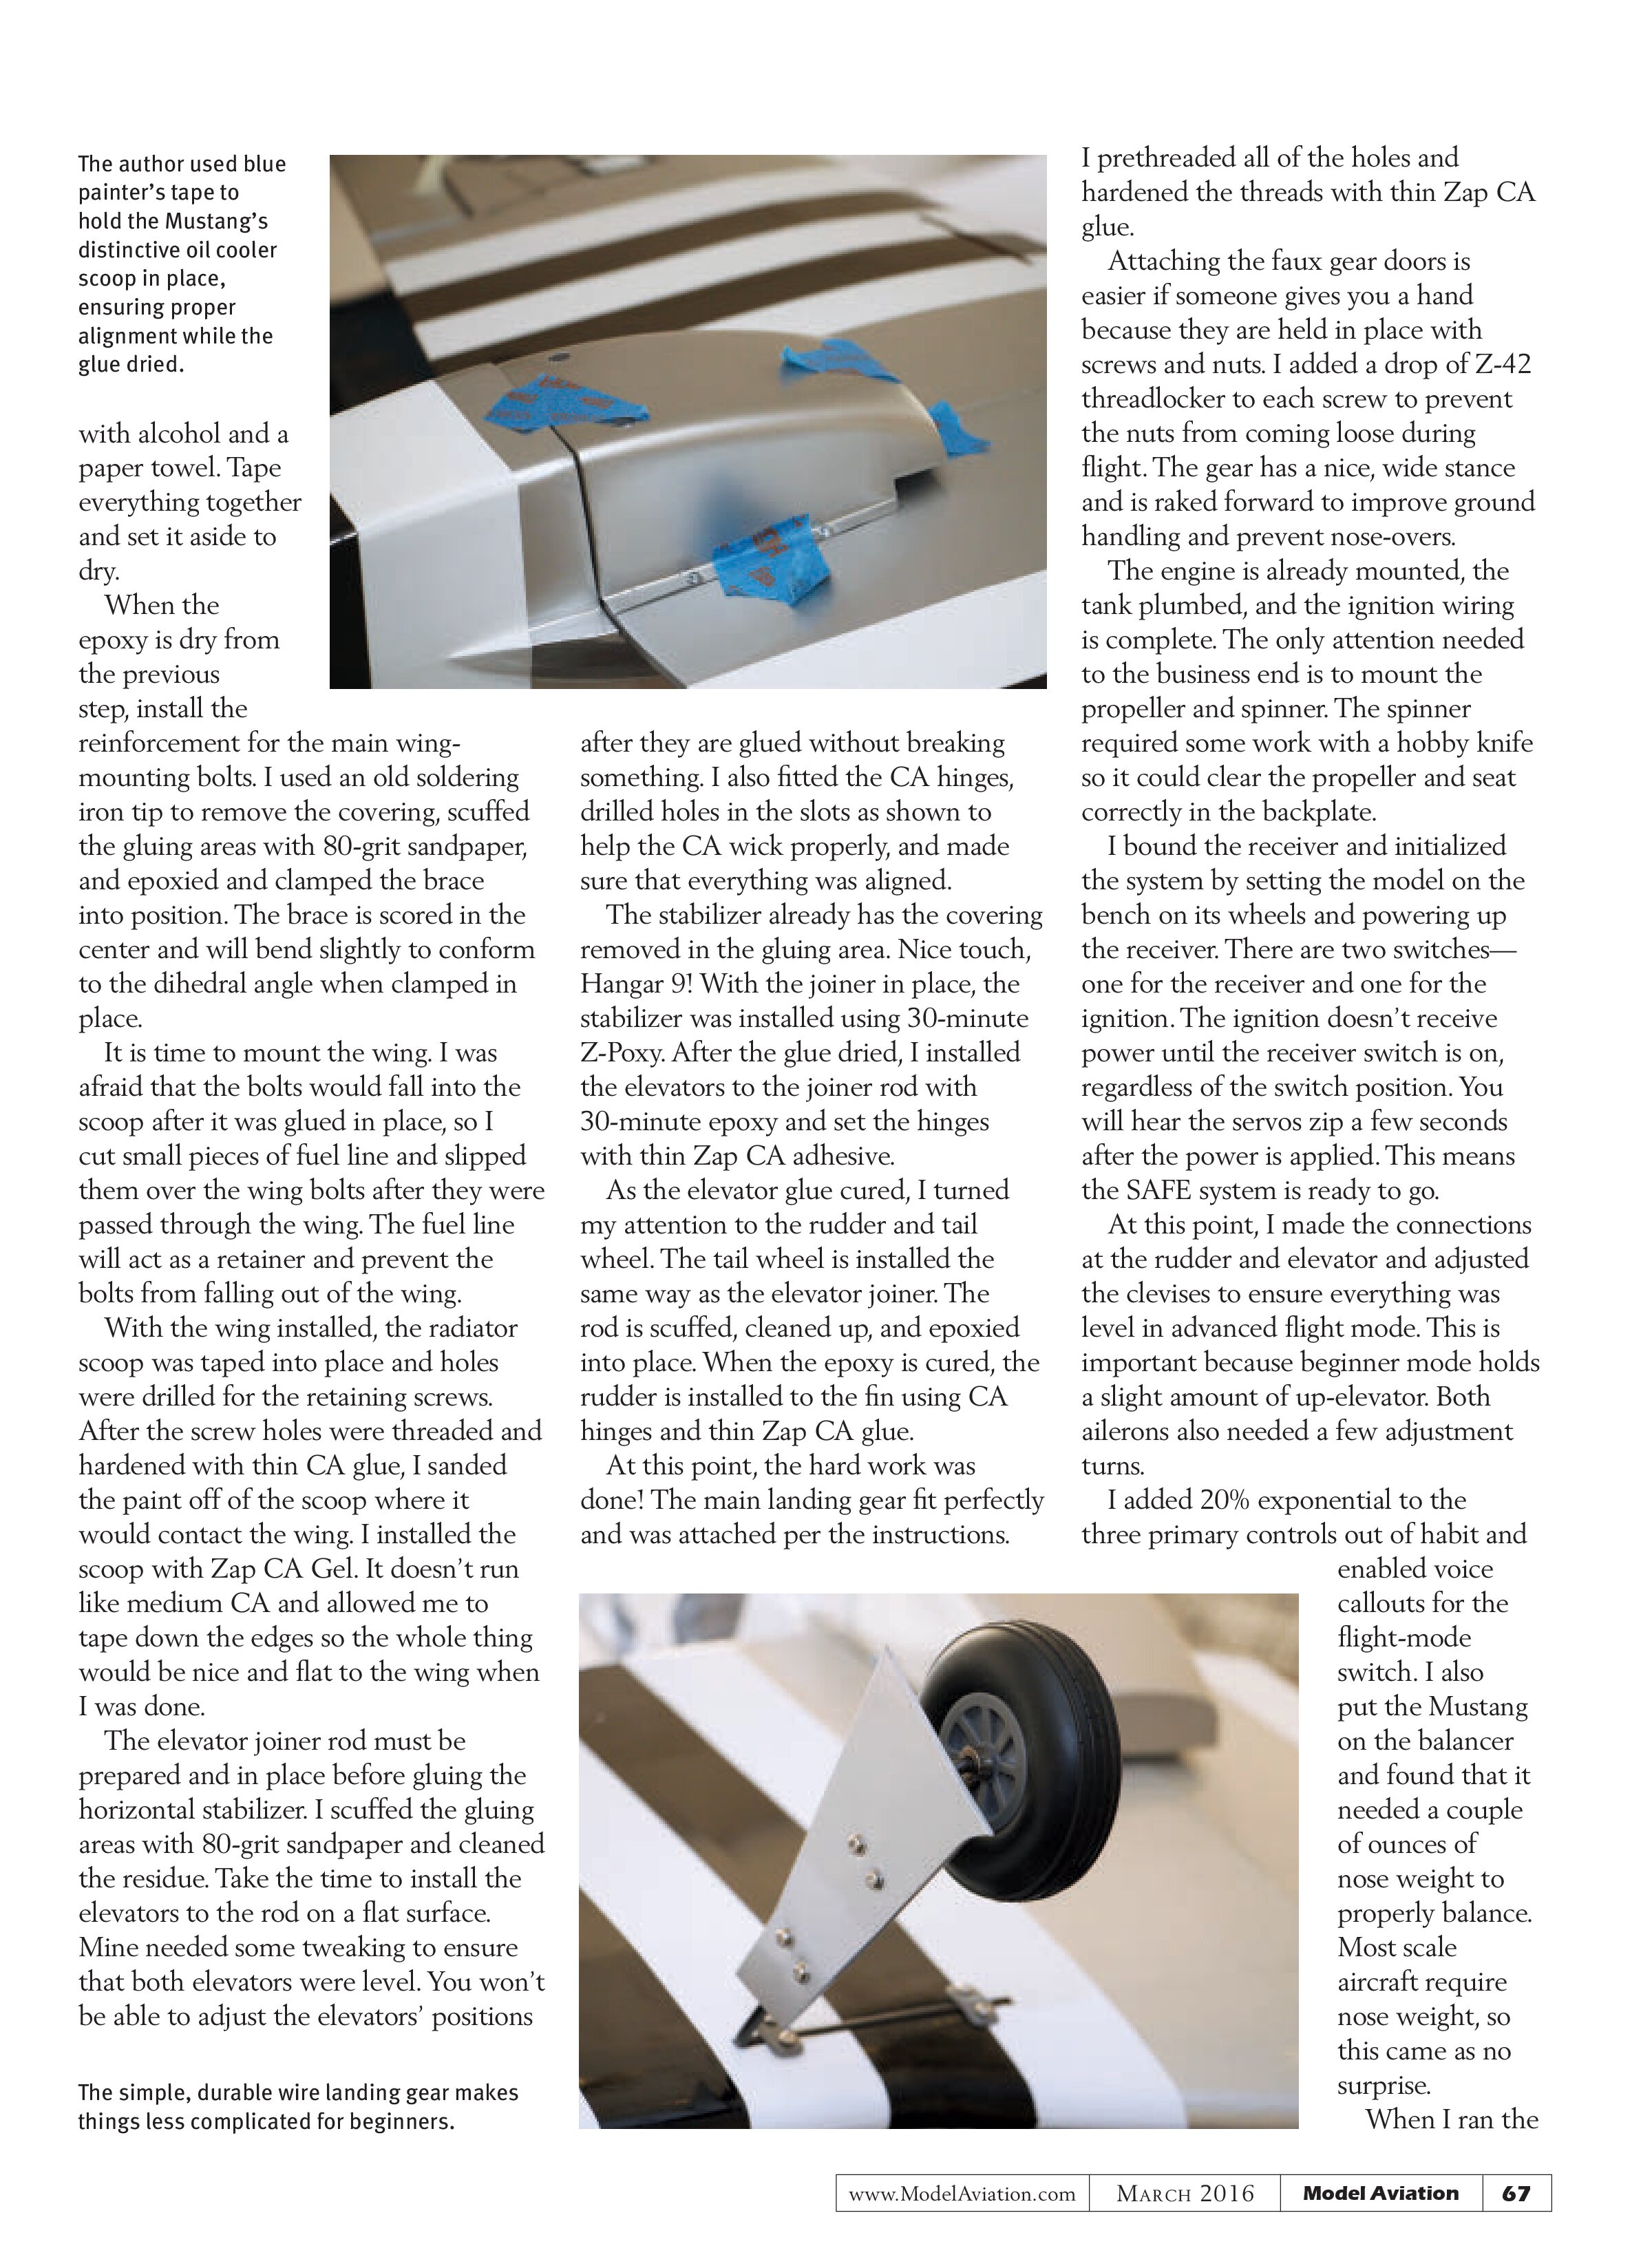
The author used blue painter’s tape to hold the Mustang’s distinctive oil cooler scoop in place, ensuring proper alignment while the glue dried.

with alcohol and a paper towel. Tape everything together and set it aside to dry.
When the epoxy is dry from the previous step, install the reinforcement for the main wing-mounting bolts. I used an old soldering iron tip to remove the covering, scuffed the gluing areas with 80-grit sandpaper, and epoxied and clamped the brace into position. The brace is scored in the center and will bend slightly to conform to the dihedral angle when clamped in place.
It is time to mount the wing. I was afraid that the bolts would fall into the scoop after it was glued in place, so I cut small pieces of fuel line and slipped them over the wing bolts after they were passed through the wing. The fuel line will act as a retainer and prevent the bolts from falling out of the wing.
With the wing installed, the radiator scoop was taped into place and holes were drilled for the retaining screws. After the screw holes were threaded and hardened with thin CA glue, I sanded the paint off of the scoop where it would contact the wing. I installed the scoop with Zap CA Gel. It doesn’t run like medium CA and allowed me to tape down the edges so the whole thing would be nice and flat to the wing when I was done.
The elevator joiner rod must be prepared and in place before gluing the horizontal stabilizer. I scuffed the gluing areas with 80-grit sandpaper and cleaned the residue. Take the time to install the elevators to the rod on a flat surface. Mine needed some tweaking to ensure that both elevators were level. You won’t be able to adjust the elevators’ positions after they are glued without breaking something. I also fitted the CA hinges, drilled holes in the slots as shown to help the CA wick properly, and made sure that everything was aligned.
The stabilizer already has the covering removed in the gluing area. Nice touch, Hangar 9! With the joiner in place, the stabilizer was installed using 30-minute Z-Poxy. After the glue dried, I installed the elevators to the joiner rod with 30-minute epoxy and set the hinges with thin Zap CA adhesive.
As the elevator glue cured, I turned my attention to the rudder and tail wheel. The tail wheel is installed the same way as the elevator joiner. The rod is scuffed, cleaned up, and epoxied into place. When the epoxy is cured, the rudder is installed to the fin using CA hinges and thin Zap CA glue.
At this point, the hard work was done! The main landing gear fit perfectly and was attached per the instructions.

I prethreaded all of the holes and hardened the threads with thin Zap CA glue.
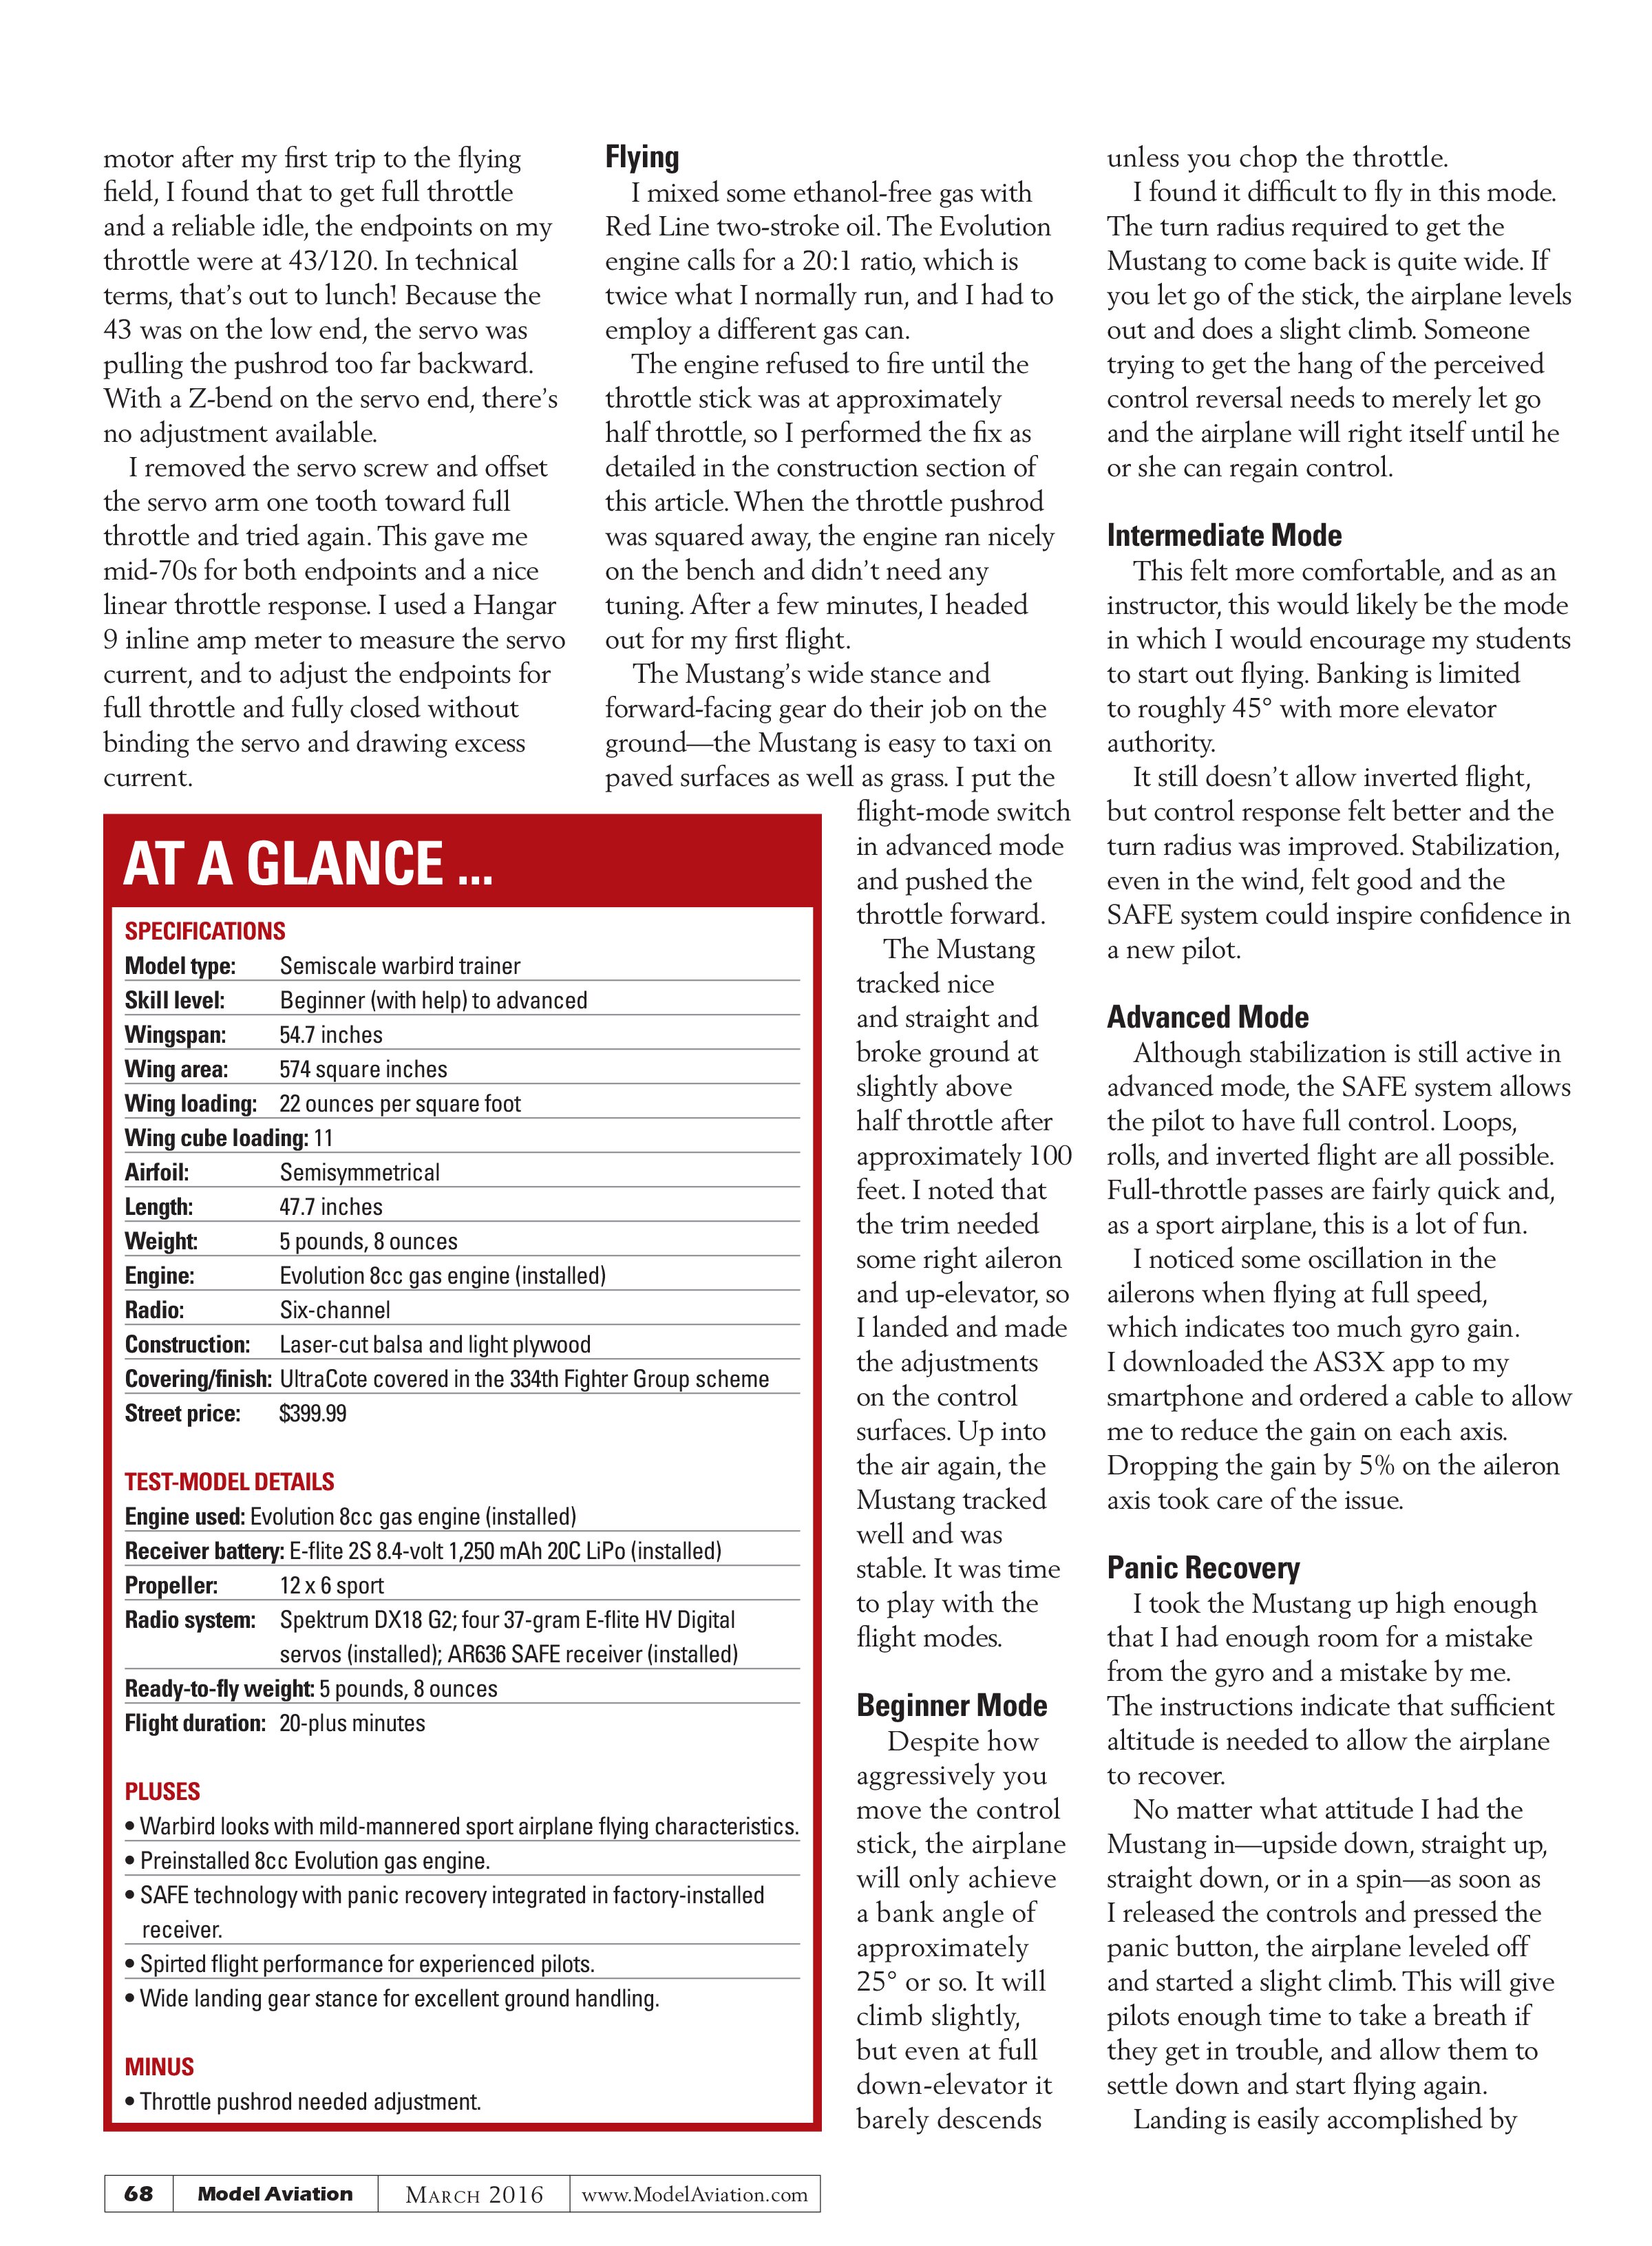
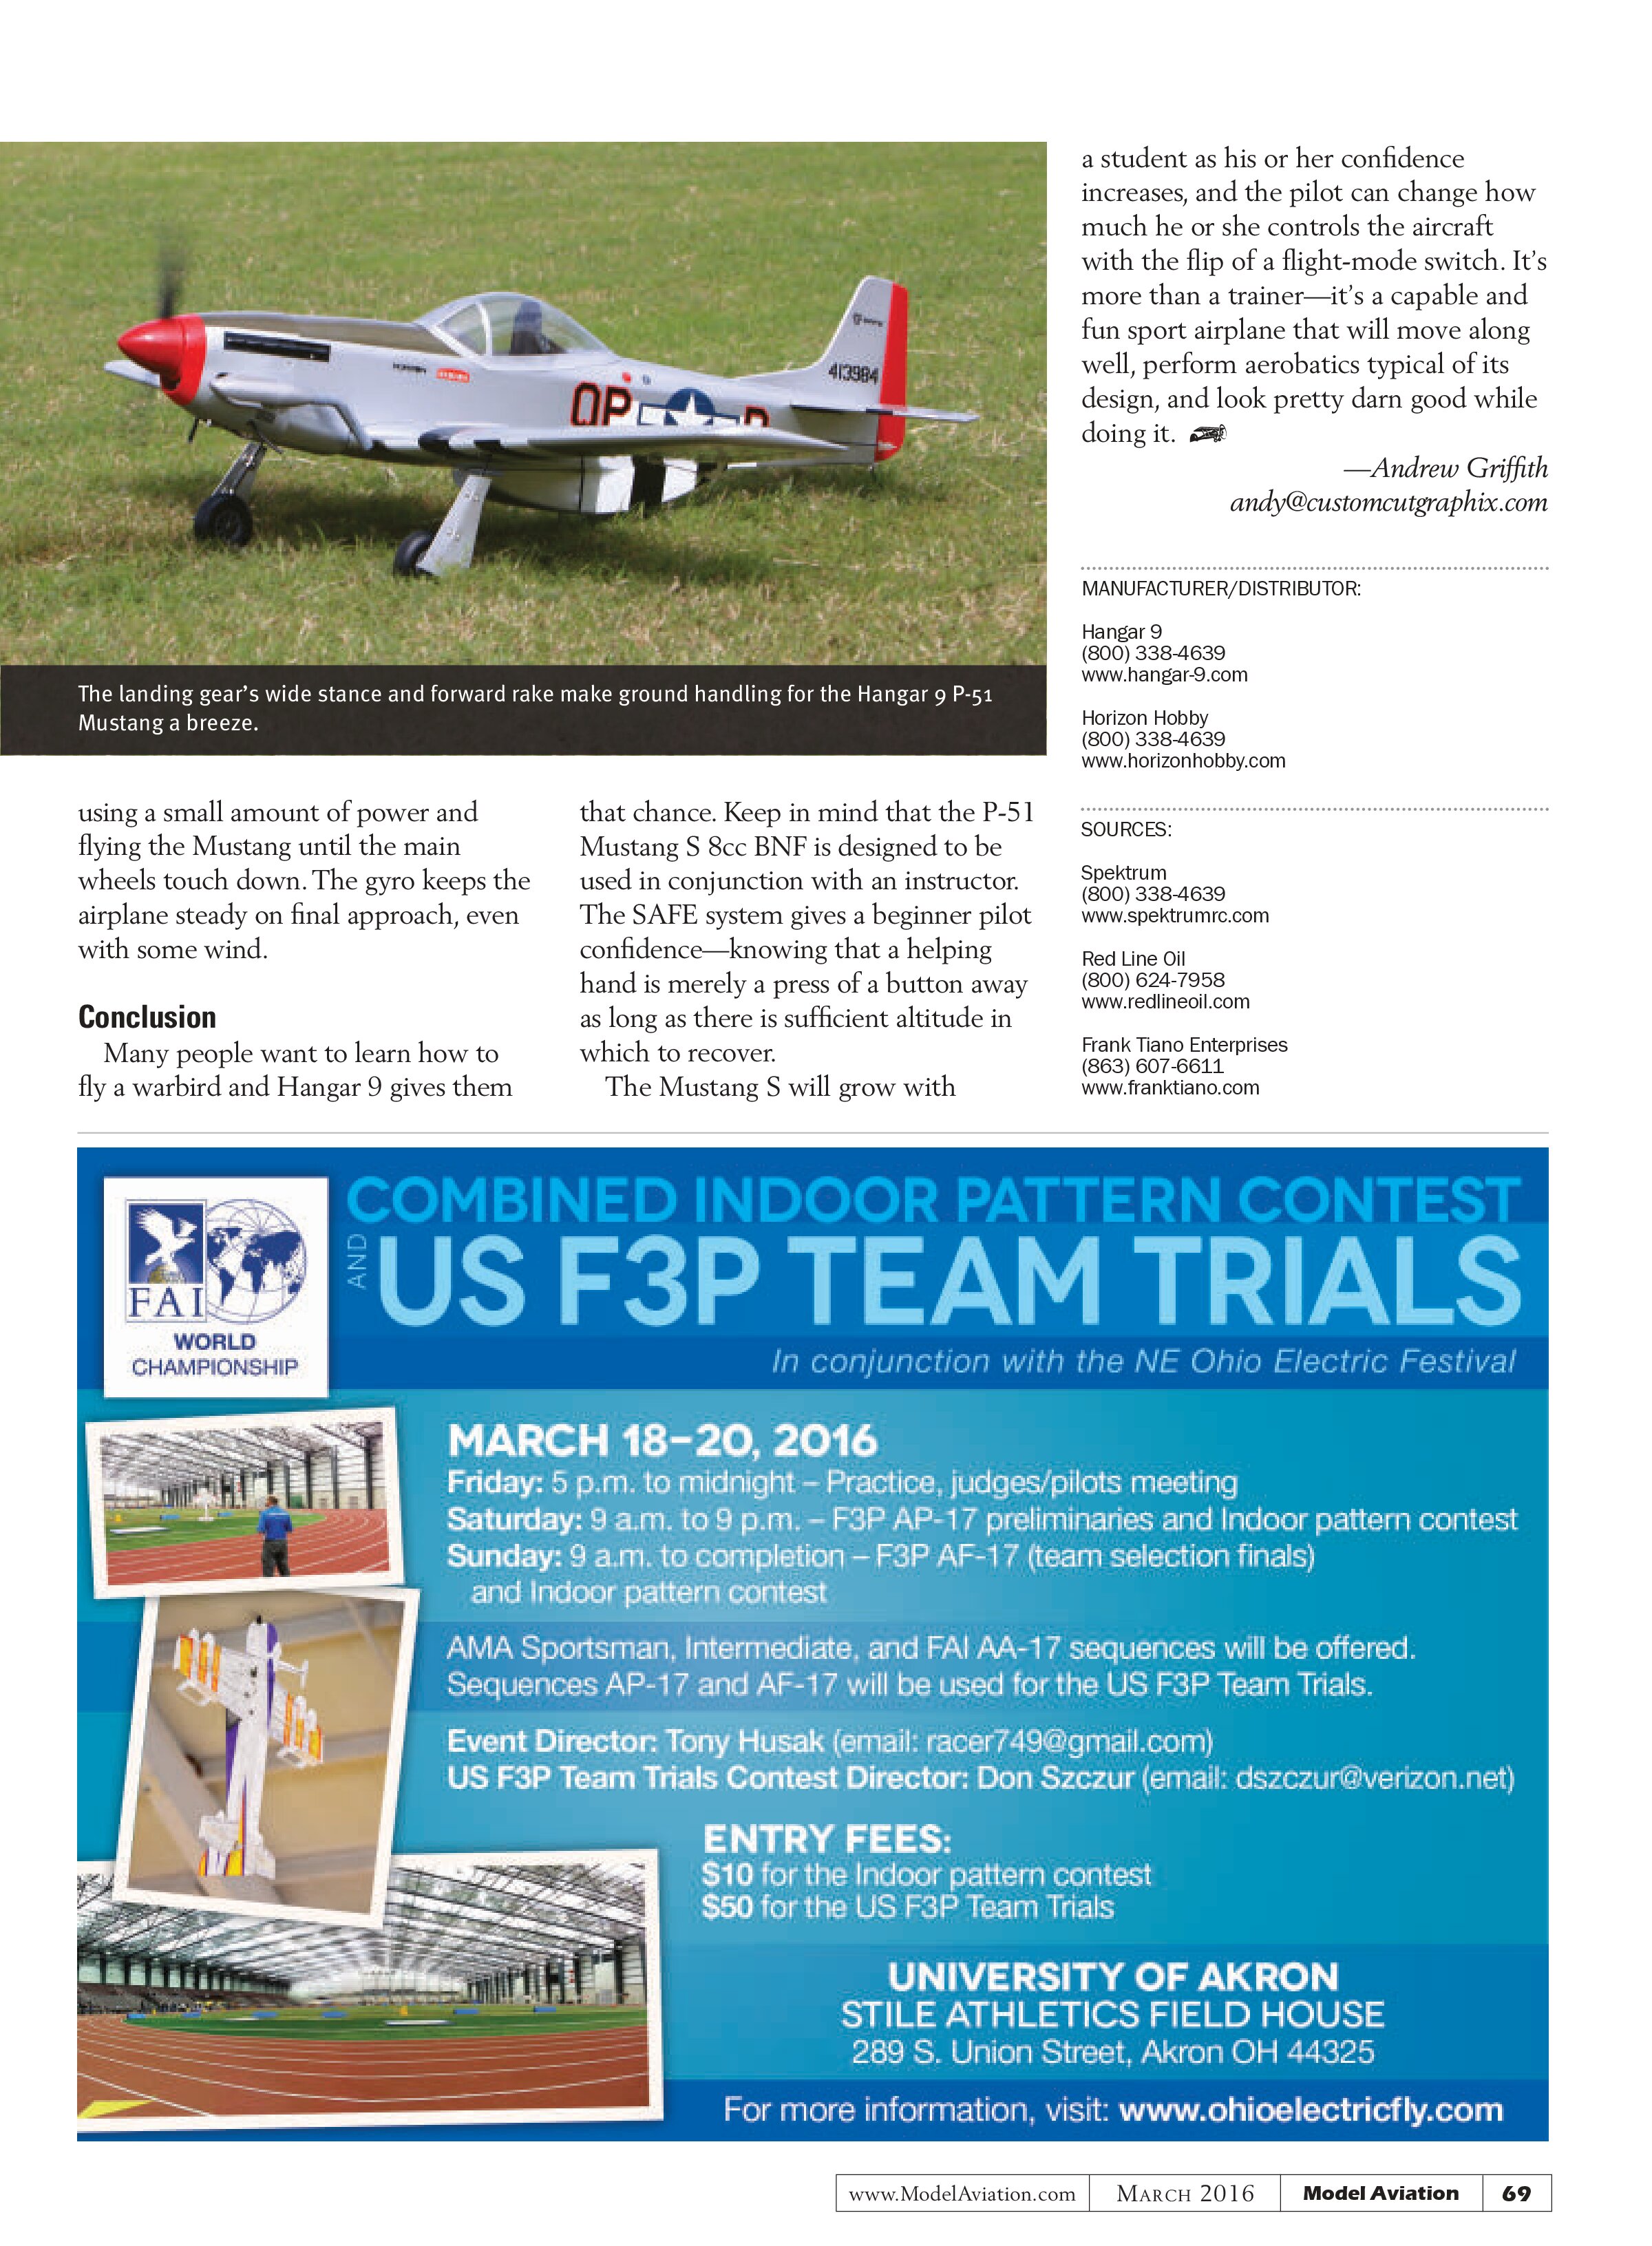
Attaching the faux gear doors is easier if someone gives you a hand because they are held in place with screws and nuts. I added a drop of Z-42 threadlocker to each screw to prevent the nuts from coming loose during flight. The gear has a nice, wide stance and is raked forward to improve ground handling and prevent nose-overs.
The engine is already mounted, the tank plumbed, and the ignition wiring is complete. The only attention needed to the business end is to mount the propeller and spinner. The spinner required some work with a hobby knife so it could clear the propeller and seat correctly in the backplate.
I bound the receiver and initialized the system by setting the model on the bench on its wheels and powering up the receiver. There are two switches—one for the receiver and one for the ignition. The ignition doesn’t receive power until the receiver switch is on, regardless of the switch position. You will hear the servos zip a few seconds after the power is applied. This means the SAFE system is ready to go.
At this point, I made the connections at the rudder and elevator and adjusted the clevises to ensure everything was level in advanced flight mode. This is important because beginner mode holds a slight amount of up-elevator. Both ailerons also needed a few adjustment turns.
I added 20% exponential to the three primary controls out of habit and enabled voice callouts for the flight-mode switch. I also put the Mustang on the balancer and found that it needed a couple of ounces of nose weight to properly balance. Most scale aircraft require nose weight, so this came as no surprise.
When I ran the
motor after my first trip to the flying field, I found that to get full throttle and a reliable idle, the endpoints on my throttle were at 43/120. In technical terms, that’s out to lunch! Because the 43 was on the low end, the servo was pulling the pushrod too far backward. With a Z-bend on the servo end, there’s no adjustment available.
I removed the servo screw and offset the servo arm one tooth toward full throttle and tried again. This gave me mid-70s for both endpoints and a nice linear throttle response. I used a Hangar 9 inline amp meter to measure the servo current, and to adjust the endpoints for full throttle and fully closed without binding the servo and drawing excess current.
AT A GLANCE ...
SPECIFICATIONS
Model type: Semiscale warbird trainer
Skill level: Beginner (with help) to advanced
Wingspan: 54.7 inches
Wing area: 574 square inches
Wing loading: 22 ounces per square foot
Wing cube loading: 11
Airfoil: Semisymmetrical
Length: 47.7 inches
Weight: 5 pounds, 8 ounces
Engine: Evolution 8cc gas engine (installed)
Radio: Six-channel
Construction: Laser-cut balsa and light plywood
Covering/finish: UltraCote covered in the 334th Fighter Group scheme
Street price: $399.99
TEST-MODEL DETAILS
Engine used: Evolution 8cc gas engine (installed)
Receiver battery: E-flite 2S 8.4-volt 1,250 mAh 20C LiPo (installed)
Propeller: 12 x 6 sport
Radio system: Spektrum DX18 G2; four 37-gram E-flite HV Digital servos (installed); AR636 SAFE receiver (installed)
Ready-to-fly weight: 5 pounds, 8 ounces
Flight duration: 20-plus minutes
PLUSES
- Warbird looks with mild-mannered sport airplane flying characteristics.
- Preinstalled 8cc Evolution gas engine.
- SAFE technology with panic recovery integrated in factory-installed receiver.
- Spirited flight performance for experienced pilots.
- Wide landing gear stance for excellent ground handling.
MINUS
- Throttle pushrod needed adjustment.
Flying
I mixed some ethanol-free gas with Red Line two-stroke oil. The Evolution engine calls for a 20:1 ratio, which is twice what I normally run, and I had to employ a different gas can.
The engine refused to fire until the throttle stick was at approximately half throttle, so I performed the fix as detailed in the construction section of this article. When the throttle pushrod was squared away, the engine ran nicely on the bench and didn’t need any tuning. After a few minutes, I headed out for my first flight.
The Mustang’s wide stance and forward-facing gear do their job on the ground—the Mustang is easy to taxi on paved surfaces as well as grass. I put the flight-mode switch in advanced mode and pushed the throttle forward. The Mustang tracked nice and straight and broke ground at slightly above half throttle after approximately 100 feet. I noted that the trim needed some right aileron and up-elevator, so I landed and made the adjustments on the control surfaces. Up into the air again, the Mustang tracked well and was stable. It was time to play with the flight modes.
Beginner Mode
Despite how aggressively you move the control stick, the airplane will only achieve a bank angle of approximately 25° or so. It will climb slightly, but even at full down-elevator it barely descends unless you chop the throttle. I found it difficult to fly in this mode. The turn radius required to get the Mustang to come back is quite wide. If you let go of the stick, the airplane levels out and does a slight climb. Someone trying to get the hang of the perceived control reversal needs to merely let go and the airplane will right itself until he or she can regain control.
Intermediate Mode
This felt more comfortable, and as an instructor, this would likely be the mode in which I would encourage my students to start out flying. Banking is limited to roughly 45° with more elevator authority.
It still doesn’t allow inverted flight, but control response felt better and the turn radius was improved. Stabilization, even in the wind, felt good and the SAFE system could inspire confidence in a new pilot.
Advanced Mode
Although stabilization is still active in advanced mode, the SAFE system allows the pilot to have full control. Loops, rolls, and inverted flight are all possible. Full-throttle passes are fairly quick and, as a sport airplane, this is a lot of fun.
I noticed some oscillation in the ailerons when flying at full speed, which indicates too much gyro gain. I downloaded the AS3X app to my smartphone and ordered a cable to allow me to reduce the gain on each axis. Dropping the gain by 5% on the aileron axis took care of the issue.
Panic Recovery
I took the Mustang up high enough that I had enough room for a mistake from the gyro and a mistake by me. The instructions indicate that sufficient altitude is needed to allow the airplane to recover.
No matter what attitude I had the Mustang in—upside down, straight up, straight down, or in a spin—as soon as I released the controls and pressed the panic button, the airplane leveled off and started a slight climb. This will give pilots enough time to take a breath if they get in trouble, and allow them to settle down and start flying again.
Landing is easily accomplished by

using a small amount of power and flying the Mustang until the main wheels touch down. The gyro keeps the airplane steady on final approach, even with some wind.
Conclusion
Many people want to learn how to fly a warbird and Hangar 9 gives them that chance. Keep in mind that the P-51 Mustang S 8cc BNF is designed to be used in conjunction with an instructor. The SAFE system gives a beginner pilot confidence—knowing that a helping hand is merely a press of a button away as long as there is sufficient altitude in which to recover.
The Mustang S will grow with a student as his or her confidence increases, and the pilot can change how much he or she controls the aircraft with the flip of a flight-mode switch. It’s more than a trainer—it’s a capable and fun sport airplane that will move along well, perform aerobatics typical of its design, and look pretty darn good while doing it.
—Andrew Griffith
andy@customcutgraphix.com
MANUFACTURER/DISTRIBUTOR:
Hangar 9
(800) 338-4639
www.hangar-9.com
Horizon Hobby
(800) 338-4639
www.horizonhobby.com
SOURCES:
Spektrum
(800) 338-4639
www.spektrumrc.com
Red Line Oil
(800) 624-7958
www.redlineoil.com
Frank Tiano Enterprises
(863) 607-6611
www.franktiano.com