How to Get Started in Control Line Sport Scale
by Fred Cronenwett
IF YOU HAVE ever considered flying a Control Line (CL) Scale model, now is a very exciting time with all the kits and electronic controls that are available. Getting into CL Scale requires more than just building a model airplane and flying it; half of your overall score is based on your static score. The static score is where judges compare your model to the full-scale aircraft that you modeled.
People will tell you to read the AMA rule book, Competition Regulations, to learn about an event you have never entered. Although that is good advice for CL Scale, it won't tell you everything you need to know to be successful in Sport Scale competition.
There are two equally important portions of a CL Scale contest: static judging and scoring of how well models fly and display certain options such as retractable landing gear, flaps, and others that competitors choose. You can earn as many as 200 points in CL Sport Scale competition—100 of that being static-judging points. Pilots who are new to CL Scale contests usually have few problems with the flying portion, but they do have difficulty with the static portion.
When building a CL Sport Scale model, remember one very important thing: you are building a smaller duplicate of a full-scale, man-carrying airplane. The judge will compare your model to the full-scale airplane for outline and color-and-markings. Picking your subject and getting all the documentation is critical. A great CL Scale model starts with great documentation.
The documentation folder you give the judges to score your airplane by can help—or in some cases, hurt—your score. You should research and compile documentation before you build any part of the model.
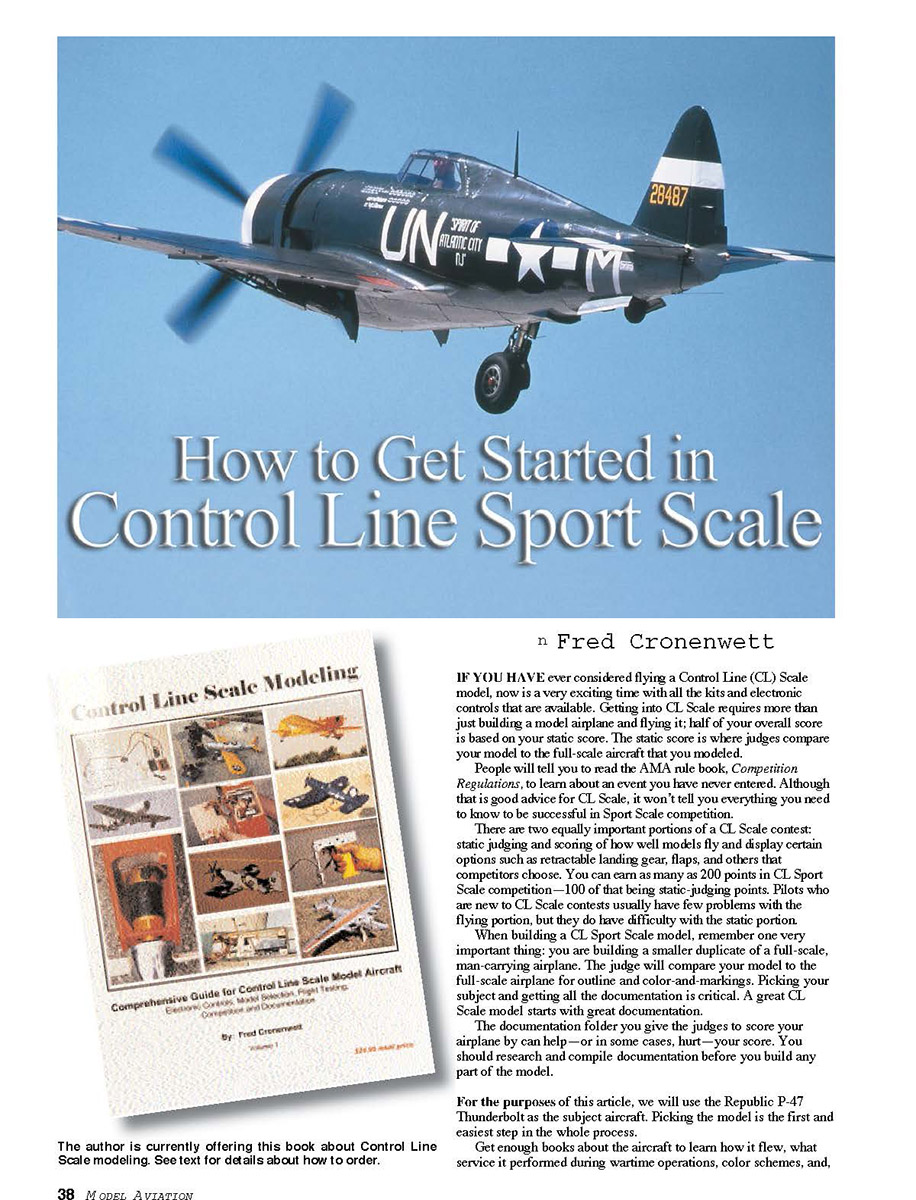
For the purposes of this article, we will use the Republic P-47 Thunderbolt as the subject aircraft. Picking the model is the first and easiest step in the whole process.
Get enough books about the aircraft to learn how it flew, what service it performed during wartime operations, color schemes, and, canopy, demonstrate drop tank release and bomb release (outboard of landing gear), demonstrate opening and closing of cowl vents, and deploy a steerable tail wheel and brakes. This is a large list, and not all of these features will be working on our model.
During CL Scale competition we will be asked to fill out a flight-score sheet. There are four mandatory options: takeoff, 10 level laps, realism in flight, and landing. There are also six options we can pick. We don't have to pick all six, but we are giving away 10 points per flight if our airplane can only demonstrate five options.
There are many items that can be selected for the six options, including touch-and-go, taxi, throttle control, flaps, retractable landing gear, brakes, wing cover, loops, bomb drop, tank drop, and any other feature that the subject aircraft was capable of exhibiting. In Sport and Profile Scale, touch-and-go, taxi, and retractable landing gear count as two options.
What does all of this mean to us? Since we decided to build the P-47 for Sport Scale, we need to put enough movable features on our model to fill out six options for the maximum score during the flight portion.
Some options are difficult and others are easier to accomplish. Operating flaps are easy to set up, and judges hardly give any number of points for this option. The flap work properly or they don't, assuming that you fly the model correctly with the flaps down.
However, a touch-and-go can score 10 on one flight and a three the next because of many factors, such as wind and flying conditions.
For our CL Sport Scale entry we will opt for flaps, retractable landing gear, steerable tail wheel, throttle, drop-tank release, and bomb drops—features that are more dramatic in flight. The retractable landing gear is difficult to set up but worth the effort. The tail wheel must also retract for maximum points. The steerable tail wheel is more for proper ground handling. If we can adjust the tail wheel steering from the center of the circle, we will get better ground handling which will result in higher flight scores.
Flaps, bomb drops, and drop-tank release are easy to set up. If they work as desired, almost a full 10 points per option will be awarded every time. It is still possible to pick six flight options if we choose fixed gear, but the judge might give us a lower realism score for the flight.
Now that we have decided what airplane we are going to build, which paint scheme will be depicted, and which features will move during the flight, we have to build this model and make all of the work as detailed as possible.
The traditional CL Scale model has used a three-line bellcrank for a long time, but it can be replaced in our model. Thanks to the Radio Control (RC) contributions to our hobby, a wide selection of kits, engines, and other products can be used for our CL Sport Scale model.
It is extremely rare to find a kit advertised today for CL Scale; it is usually intended for RC and converted for CL Scale use.
Electronic controls for CL Scale have been growing in popularity since the 1980s, with the availability of custom-made handles from Bill Young and the JR radios that can be used for our CL Scale model without transmitting a radio frequency. If we used the traditional three-line bellcrank for our P-47, we would have eight lines coming out of this model! The most I have seen is five lines. Using electronic controls, we can fly with two flying lines and operate all six features with servos, including the throttle control.
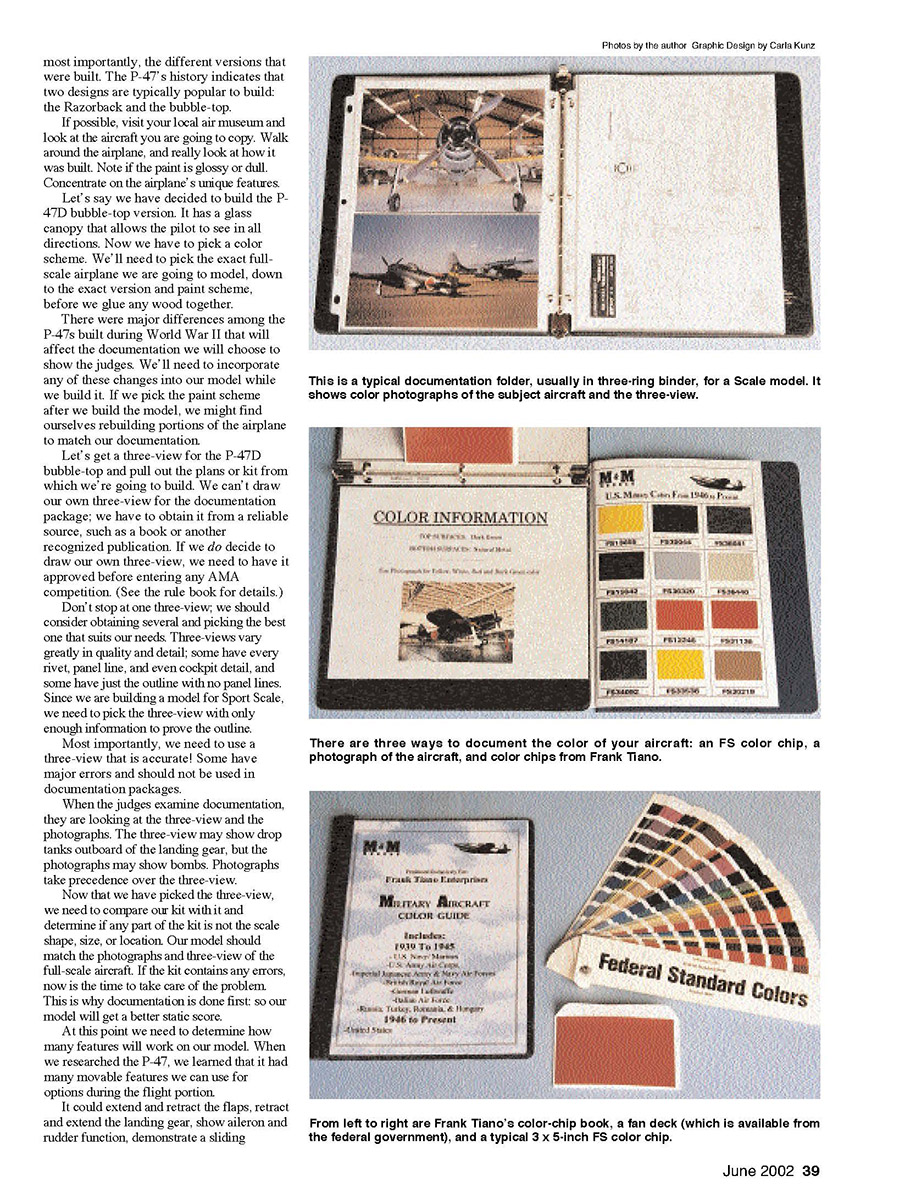
The subject of electronic controls is huge. For a detailed look at this topic, I have a 133-page book about CL Scale and electronic controls. It has all the information about the products available, where to get them, and how to set up an airplane with electronic controls.
Another important thing to consider before we build the model is the incidence of the stabilizer. The fixed portion of the horizontal tail (stabilizer) must be set at 0° incidence for the model to fly correctly.
My Hangar 9 Piper Cub comes with positive incidence in the stabilizer from the factory. The Cub is an Almost Ready to Fly that I use for practice and general fun-flying. A flying buddy and I each picked up a kit and converted it to CL. (It was intended for RC.)
The first airplane converted was my buddy's. We left it stock and did nothing but install the bellcrank, engine, and other CL-related hardware. That model flew okay, but the fuselage was not level with the ground during level flight, and it was difficult to trim.
When it came time to build my model, I changed the incidence of the stabilizer to 0°. I did so by raising the stabilizer's trailing edge. This model flew level without the ill effects seen on the first model.
We will install an adjustable line guide, wingtip weight, and the bellcrank in our P-47 as we would for a normal CL model. The adjustable leadout guide is required to make sure the line tension does not become excessive.
When we finish the model, with all the electronic controls and other systems installed, it will take a minimum of three months to trim it out before we can realistically take it to any contest. With complicated CL Scale models—especially those with retracts and other moving features—it takes time to work out the minor bugs that reveal themselves during the first few months.
If you can get any video of a full-scale P-47 flying, look at how the gear retracts and how the other features operate during flight. When you fly your model, you can duplicate the takeoff and other flight procedures to get a better flight-realism score.
Once we have trimmed our model and it is flying properly, it is time to prepare for our first contest. The first thing to do is make a static propeller that will be used during static judging. If our P-47 is powered with a four-stroke .90 engine, we will probably fly with a 14- to 15-inch-diameter propeller.
The static propeller needs to be a scale replica of the full-scale part; put as much detail into it as possible. Typically, the static propeller is not flown and is much larger in diameter than the flying propeller. We need to make sure that the static spinner (if on the full-scale aircraft) is the same size, color, and shape of the flying spinner.
The P-47 has a radial cowl, so we can’t forget the dummy engine inside it; this will be judged during the static portion. We will need to allow cooling air to pass through the dummy engine to cool our model’s engine.
Once we finish the static propeller, we pull our documentation together and assemble a folder that the judges will review. We won’t put all our information in this package; not every photograph is required since we are only allowed eight pages (one side) of information. If we took 100 pictures of a P-47, we might only want to put 12 in the package. We need to look at each photograph carefully and only include it if all the details visible in it are on our airplane.
We must make the documentation folder clear and concise so we don’t confuse the judges. Remember that our three-views—regardless of the number of copies or number of pages—count only as one page of the eight allowed.
Now we are ready to have an experienced Scale judge look at our documentation and our P-47 in a relaxed setting to see if we are ready for competition. Since we have been looking at each detail of the airplane and documentation since we started the project, we may have overlooked something we will never find.
We need to have an experienced person, who has never seen our model up-close or possibly even flown, static- and flight-judge it. He or she will point out problem areas in our documentation folder, model, and flight program that we can correct before we attend our first event.
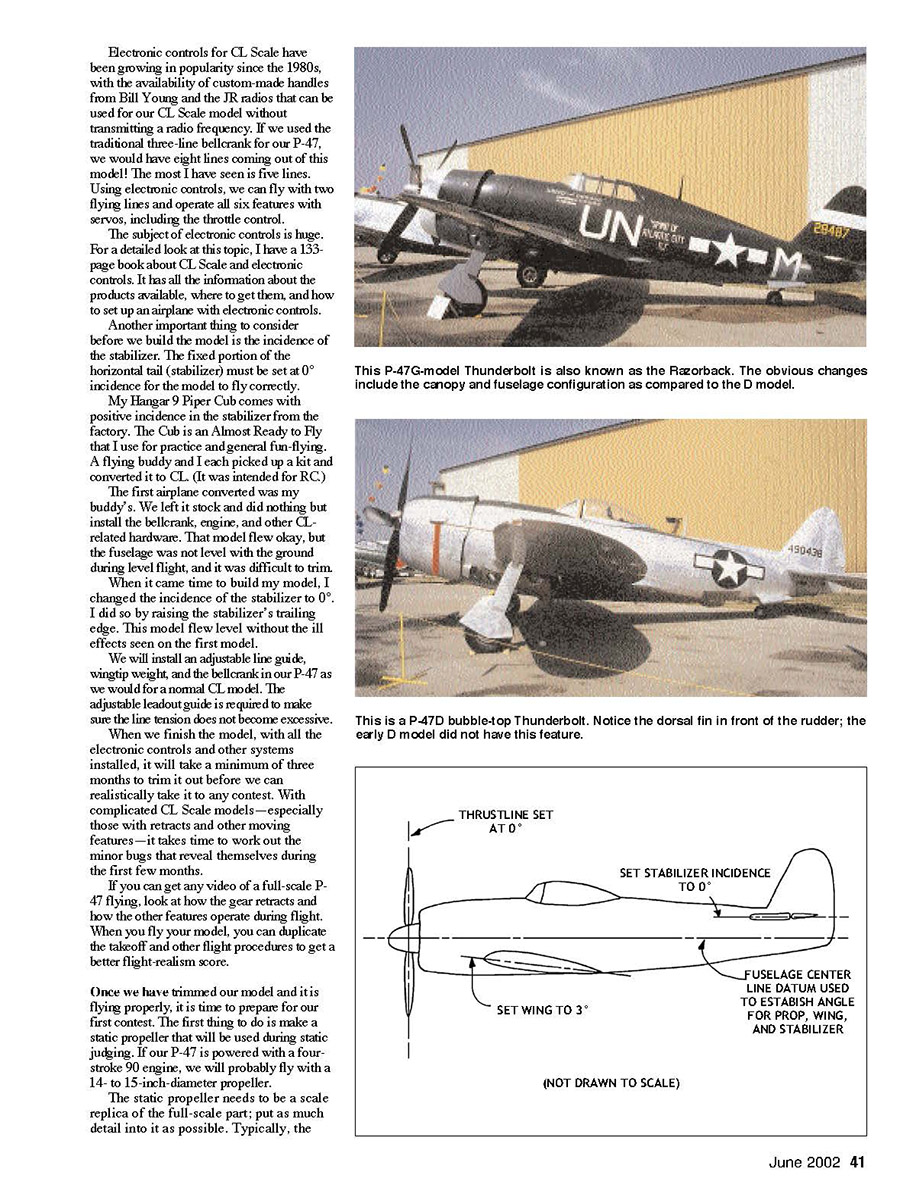
Proof of color is probably the most difficult thing to document. The ideal situation is to have FS (from the Federal Supply Service Bureau; see the address at the end of the article) color chips that match the airplane we are duplicating. If we have access to the restored aircraft at our local air museum, this is possible. If we are building from photographs and can’t personally inspect the airplane we are modeling, we have to use the photographs as color information.
In some cases where color information is limited, such as with World War I aircraft, written documentation that references FS color chips may be used. We have to try to use FS color chips whenever possible; if that does not work, we can use one photograph from our stack of pictures for documentation.
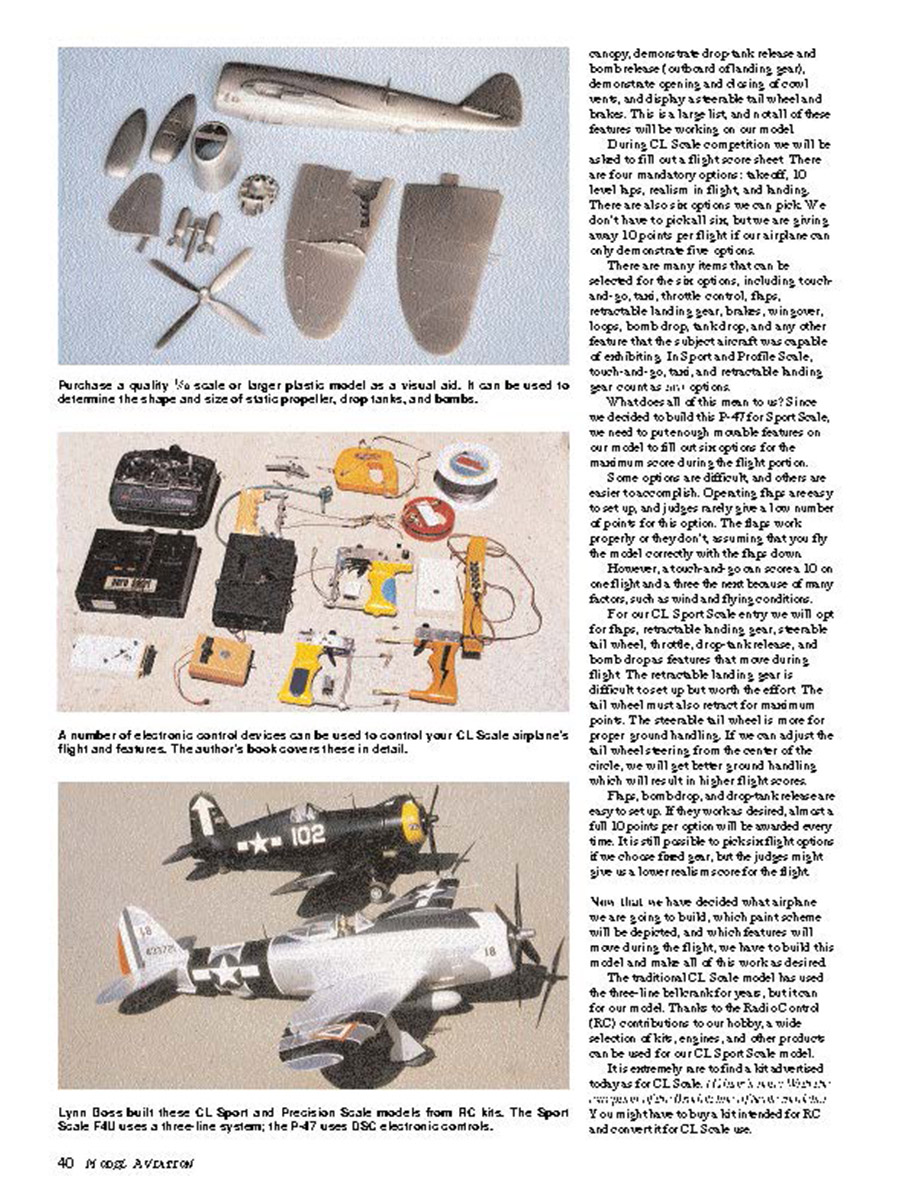
We put all the following information (remember that eight pages is the maximum allowed) in a three-ring binder and type the pages if possible. A concise, clear presentation will go a long way in helping us get a high static score.
- Information about yourself and the model airplane. Include your name and AMA number. Also feature information about the full-scale aircraft; the judges are not looking for in-depth information here.
- Proof of scale. Your three-view goes here. Put three copies of your three-view in this section (one for each judge).
- Proof of color scheme. Show pictures of the full-scale aircraft to document the paint scheme.
- Degree of gloss and color chips. Show your chips and color information in this section.
- Photographs of subject aircraft. Show detail photographs of the full-scale aircraft here.
All CL Scale contests are run differently. The larger, two-day contests generally static-judge the models on the first day then conduct all the flying on the second day. Local contests sometimes have the models flown first then static-judged after all the flying is complete. Regardless of the sequence, we need to prepare our model for static judging by cleaning it and installing the static propeller.
The model’s configuration needs to be the same for static judging and flying, except for the following. We need to remove the leadout guide and the static propeller for flying. We can replace the static bombs (the ones with all the detail) with flying bombs as long as they are the same shape and color as the static bombs. We must have a dummy pilot in the airplane during flight, but it can be removed for static judging.
CL Scale can be a very rewarding and challenging event. Remember that a great CL Scale model starts with great documentation. The pilots who win in this event are the ones who do well in the static and flying portion of the competition.
You will need to practice with your model so that you are familiar with it, but don’t fly it so much that you wear it out. Consider having a general fun-fly airplane that you can use for practice.
Once you finish the model and enter your first contest, don’t be afraid to ask the flight and static judges about their comments. You can improve the model for the next contest and improve your score. Good luck with your CL Scale model, and keep the wings level. MA
Fred Cronenwett 18375 Ventura Blvd. #173 Tarzana CA 91356
Sources:
Control Line Scale Modeling, a book about CL Scale, electric-powered CL and electronic controls, single-channel electronics, flying lines. Direct Servo Connection: Fred Cronenwett 18375 Ventura Blvd. #173 Tarzana CA 91356 This book is $24.95 plus shipping, which is $4 for the continental US, Hawaii, and Alaska; $8 for Mexico and Canada; and $10 for all other countries. California residents pay 8% sales tax ($26.95 plus shipping). Make checks payable to Fred Cronenwett.
Surflon® insulated fishing leader (for flying lines): TackleMania.com 18840 US Hwy. 19 N., Suite 422 Clearwater FL 33764 (727) 445-4629 www.tacklemania.com The Web site shows only what is in stock; if you can’t find what you are looking for, check back later. You can only order via the Internet from this source.
Custom-built CL electronic controls: Bill Young Designs 4403 E. Rustic Knolls Ln. Flagstaff AZ 86004 (520) 522-0155
Three-views and photo documentation: Bob’s Aircraft Documentation (Bob Banka) 3114 Yukon Ave. Costa Mesa CA 92626 (714) 997-8058 www.bobsairdoc.com
Color chips and scale bombs (call for details): Frank Tiano Enterprises 15300 Estancia Ln. West Palm Beach FL 33414 (561) 795-6600
Plastic models and books: Squadron Mail Order 1115 Crowley Dr. Carrollton TX 75011-5010 (972) 242-8663 Subscribe to the monthly newsletter at the Web site: www.squadron.com.
To order Federal standard color chips and fan deck of color chips: General Services Administration Federal Supply Service Bureau Specification Section 470 L’Enfant Plaza S.W., Suite 8100 Washington DC 20407 (202) 755-0325 Make checks payable to "The General Services Administration, Attention: Specifications." Be sure to include a cover letter with your check when you order color chips. Personal checks for more than $20 are not accepted; send a money order or use your credit card. Prices can change quickly, so call to verify that the cost and availability are correct. Also verify that the FS color chip you want is available; some of the color-chip numbers listed in the IPMS color guide are not always available. The best way to do this is to have the fan deck of the color chips so you can verify the FS number availability and see what color you have selected.
A 3 x 5-inch color chip is $2, $2.50 in foreign countries (indicate what FS numbers you want). A fan deck of all the color chips (highly recommended) is $35 and $43.75 in foreign countries.
Transcribed from original scans by AI. Minor OCR errors may remain.