PERFECTING THE PATCH-UP
By Greg Gimlick | maelectrics@gimlick.com

LAST TIME, I talked about how to get your airplane glued back together after a mishap or two. I’ll expand a bit this month and wrap this up so that we can get back to the field.
Wrinkled and Crunched
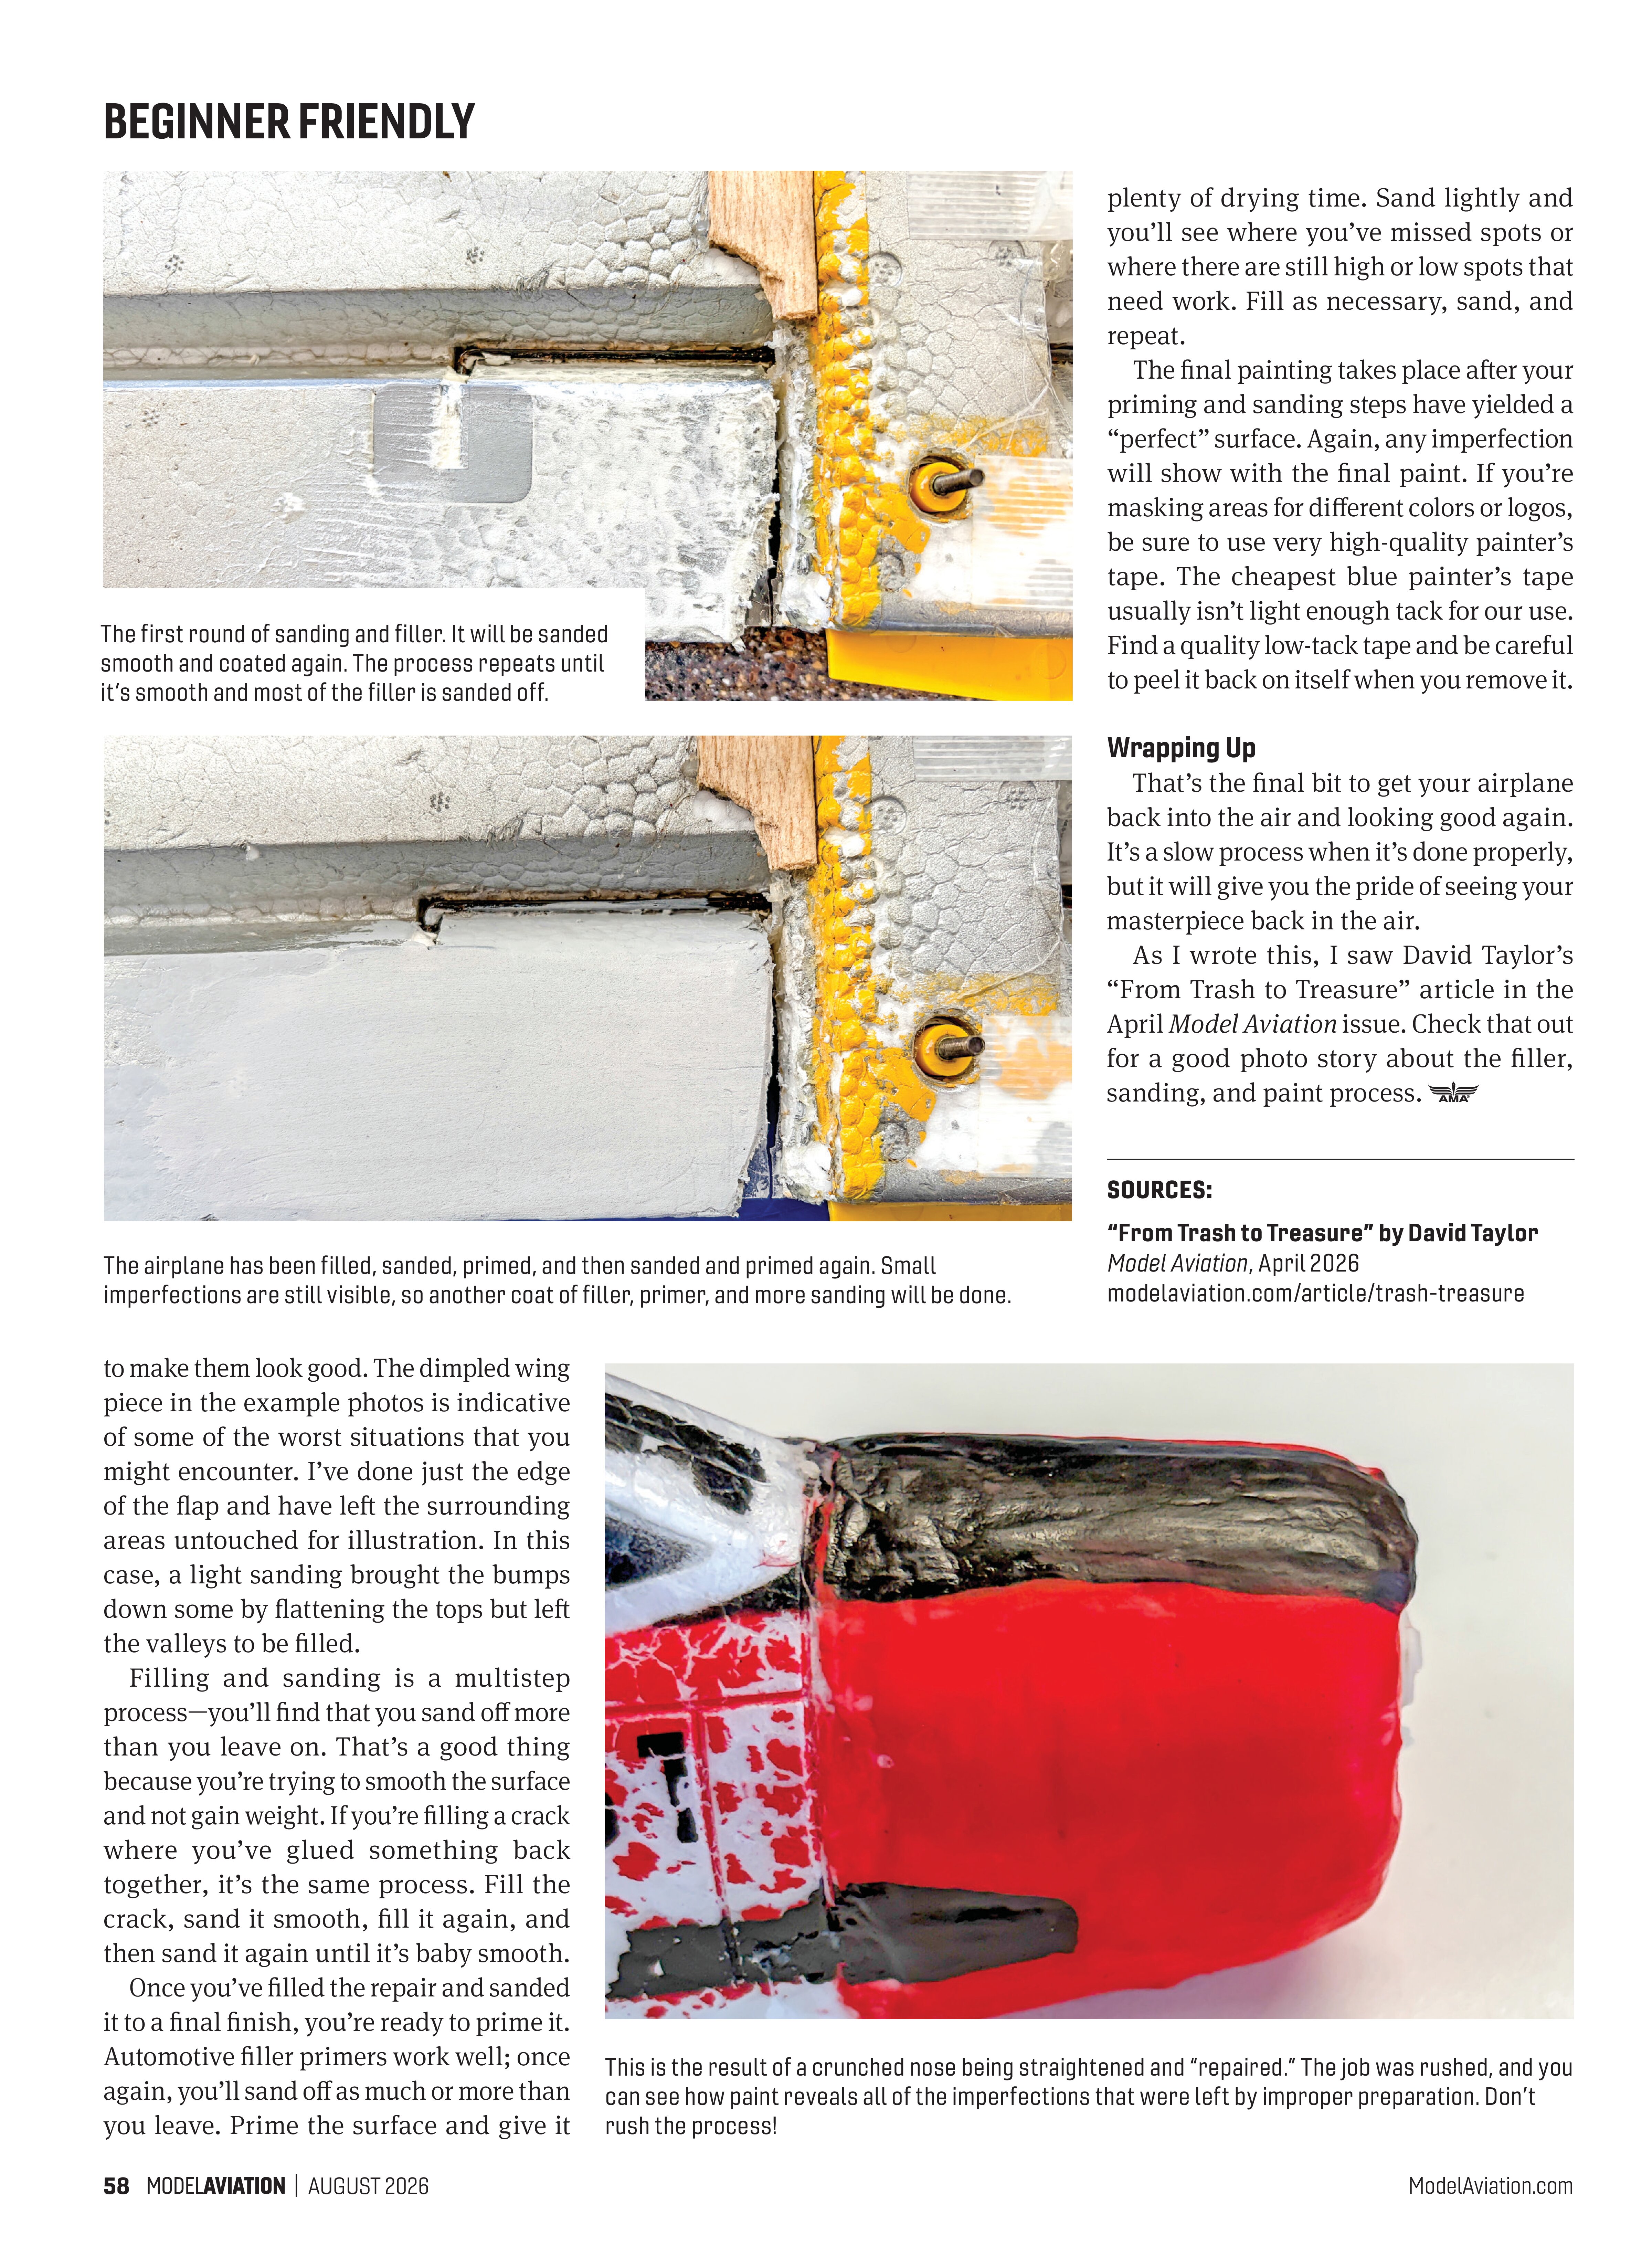
The great thing about foam airplanes is how durable they are. Even if they don’t break, they often crunch, and then you find yourself with a nose that’s no longer straight or with pieces that are bent. Many times, you can use a little steam to help as you try to straighten them. In the photos provided, you’ll see a very rough, knobby-looking surface on a wing; this is the result of too much heat. Be forewarned.
Reinforcing the Break
If you’re gluing a part back together and are afraid that it’s not going to be strong enough, you can reinforce the joint by inserting bamboo skewers or toothpicks, or embedding a thin piece of wood into the foam. Alignment of the parts is critical, so don’t rush.
Materials
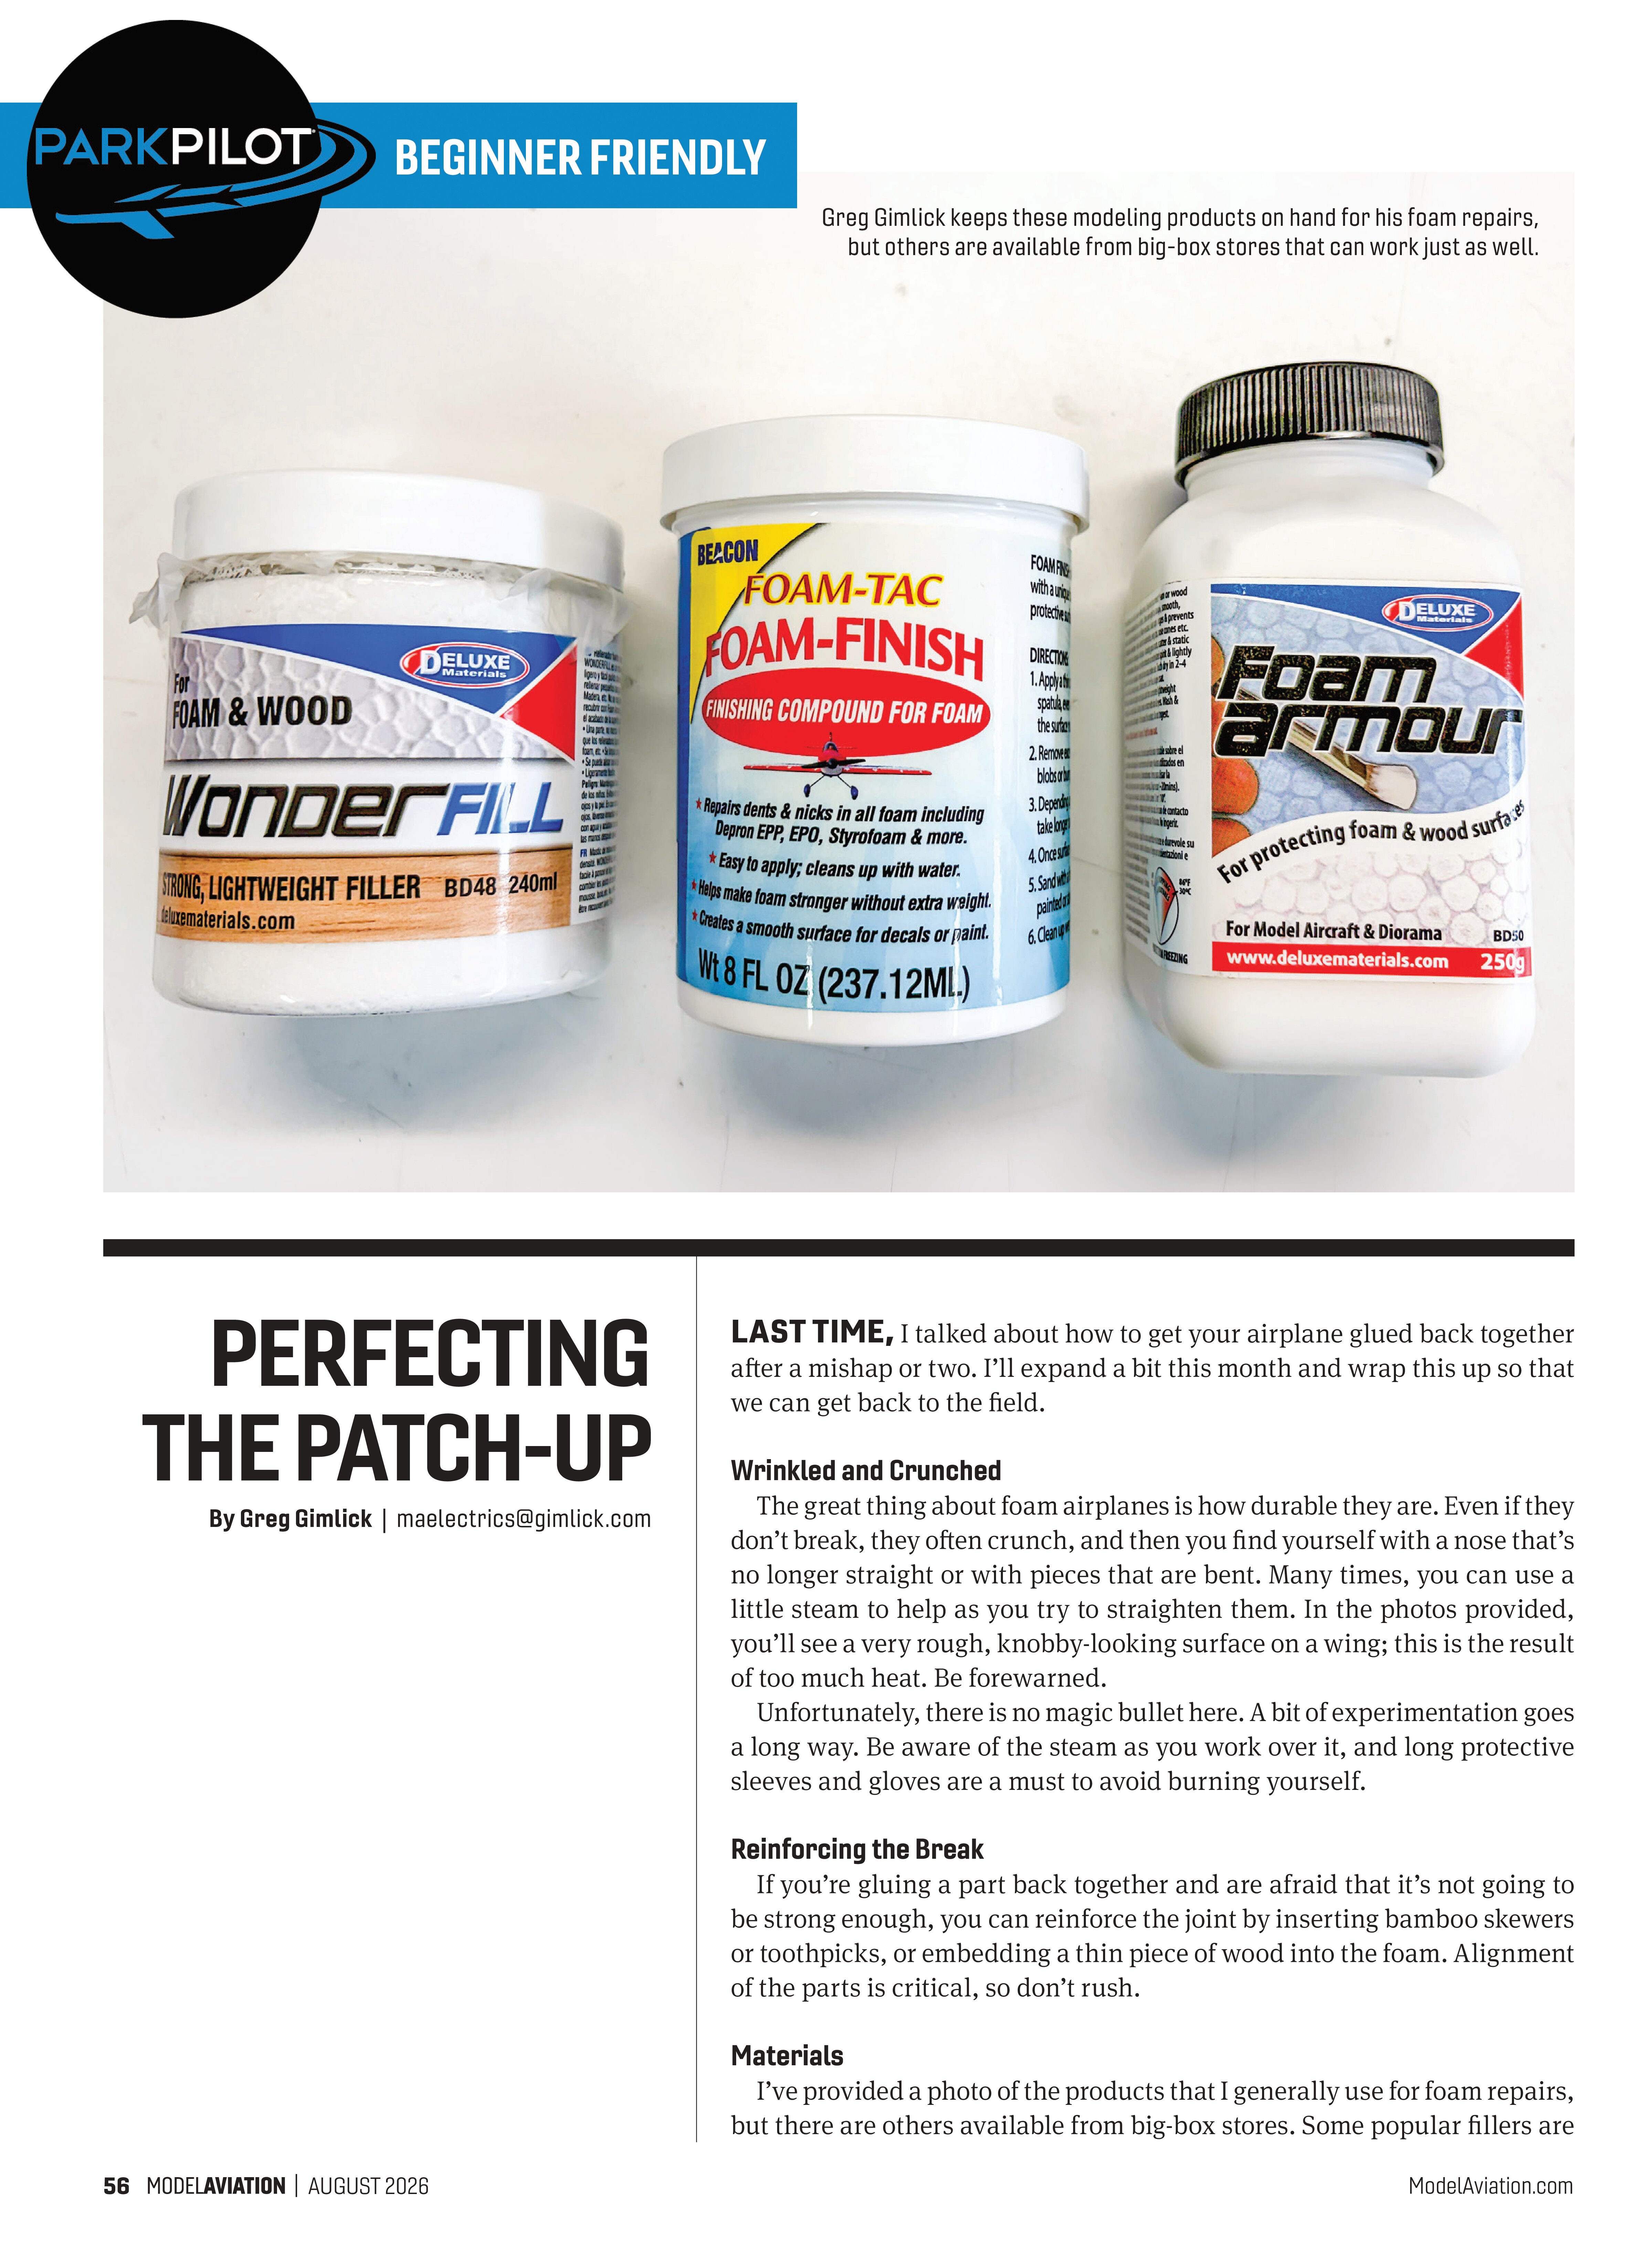
I’ve provided a photo of the products that I generally use for foam repairs, but there are others available from big-box stores. Some popular fillers are light spackle and joint compound. I’ve used both and have found that formulas with elastomeric (flexible) properties work best. One of the beauties of foam is its ability to bend without breaking, so having a filler that isn’t rock hard plays into that ability.

If you use a thick, hard filler, it will crack and flake as the surface flexes.
As with glues, it’s important to use primers and paints that are compatible with the type of foam that you’re repairing. Test them on a scrap or inconspicuous area of the airplane if you’re unsure. Rattle can paint and airbrushes are both easy ways to paint the repaired model. Because all of my airplanes are electric, I lean toward water-based acrylics. They are inexpensive and available in a variety of colors that can easily be mixed.
Patience
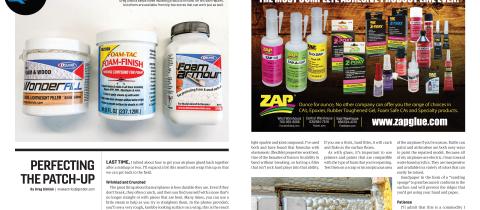
I’ll admit that this is a commodity I sometimes find to be in short supply, but it’s key to a good-looking repair. If you notice the nose on the little T-28, you’ll see the result of impatience, so go slow and be methodical. Paint will show off the smallest imperfections in your repair. If you think it looks “good enough,” you probably need to work on it a bit more. Be sure to give fillers and primers plenty of curing time before you sand or recoat them.
Greg Gimlick


The airplane has been filled, sanded, primed, and then sanded and primed again. Small imperfections are still visible, so another coat of filler, primer, and more sanding will be done.
to make them look good. The dimpled wing piece in the example photos is indicative of some of the worst situations that you might encounter. I’ve done just the edge of the flap and have left the surrounding areas untouched for illustration. In this case, a light sanding brought the bumps down some by flattening the tops but left the valleys to be filled.
Filling and sanding is a multistep process—you’ll find that you sand off more than you leave on. That’s a good thing because you’re trying to smooth the surface and not gain weight. If you’re filling a crack where you’ve glued something back together, it’s the same process. Fill the crack, sand it smooth, fill it again, and then sand it again until it’s baby smooth.
Once you’ve filled the repair and sanded it to a final finish, you’re ready to prime it. Automotive filler primers work well; once again, you’ll sand off as much or more than you leave. Prime the surface and give it plenty of drying time. Sand lightly and you’ll see where you’ve missed spots or where there are still high or low spots that need work. Fill as necessary, sand, and repeat.
The final painting takes place after your priming and sanding steps have yielded a “perfect” surface. Again, any imperfection will show with the final paint. If you’re masking areas for different colors or logos, be sure to use very high-quality painter’s tape. The cheapest blue painter’s tape usually isn’t light enough tack for our use. Find a quality low-tack tape and be careful to peel it back on itself when you remove it.
Wrapping Up
That’s the final bit to get your airplane back into the air and looking good again. It’s a slow process when it’s done properly, but it will give you the pride of seeing your masterpiece back in the air.
As I wrote this, I saw David Taylor’s “From Trash to Treasure” article in the April Model Aviation issue. Check that out for a good photo story about the filler, sanding, and paint process.
SOURCES:
“From Trash to Treasure” by David Taylor
Model Aviation, April 2026
modelaviation.com/article/trash-treasure

This is the result of a crunched nose being straightened and “repaired.” The job was rushed, and you can see how paint reveals all of the imperfections that were left by improper preparation. Don’t rush the process!