Indoor No-Cal Trimming Techniques
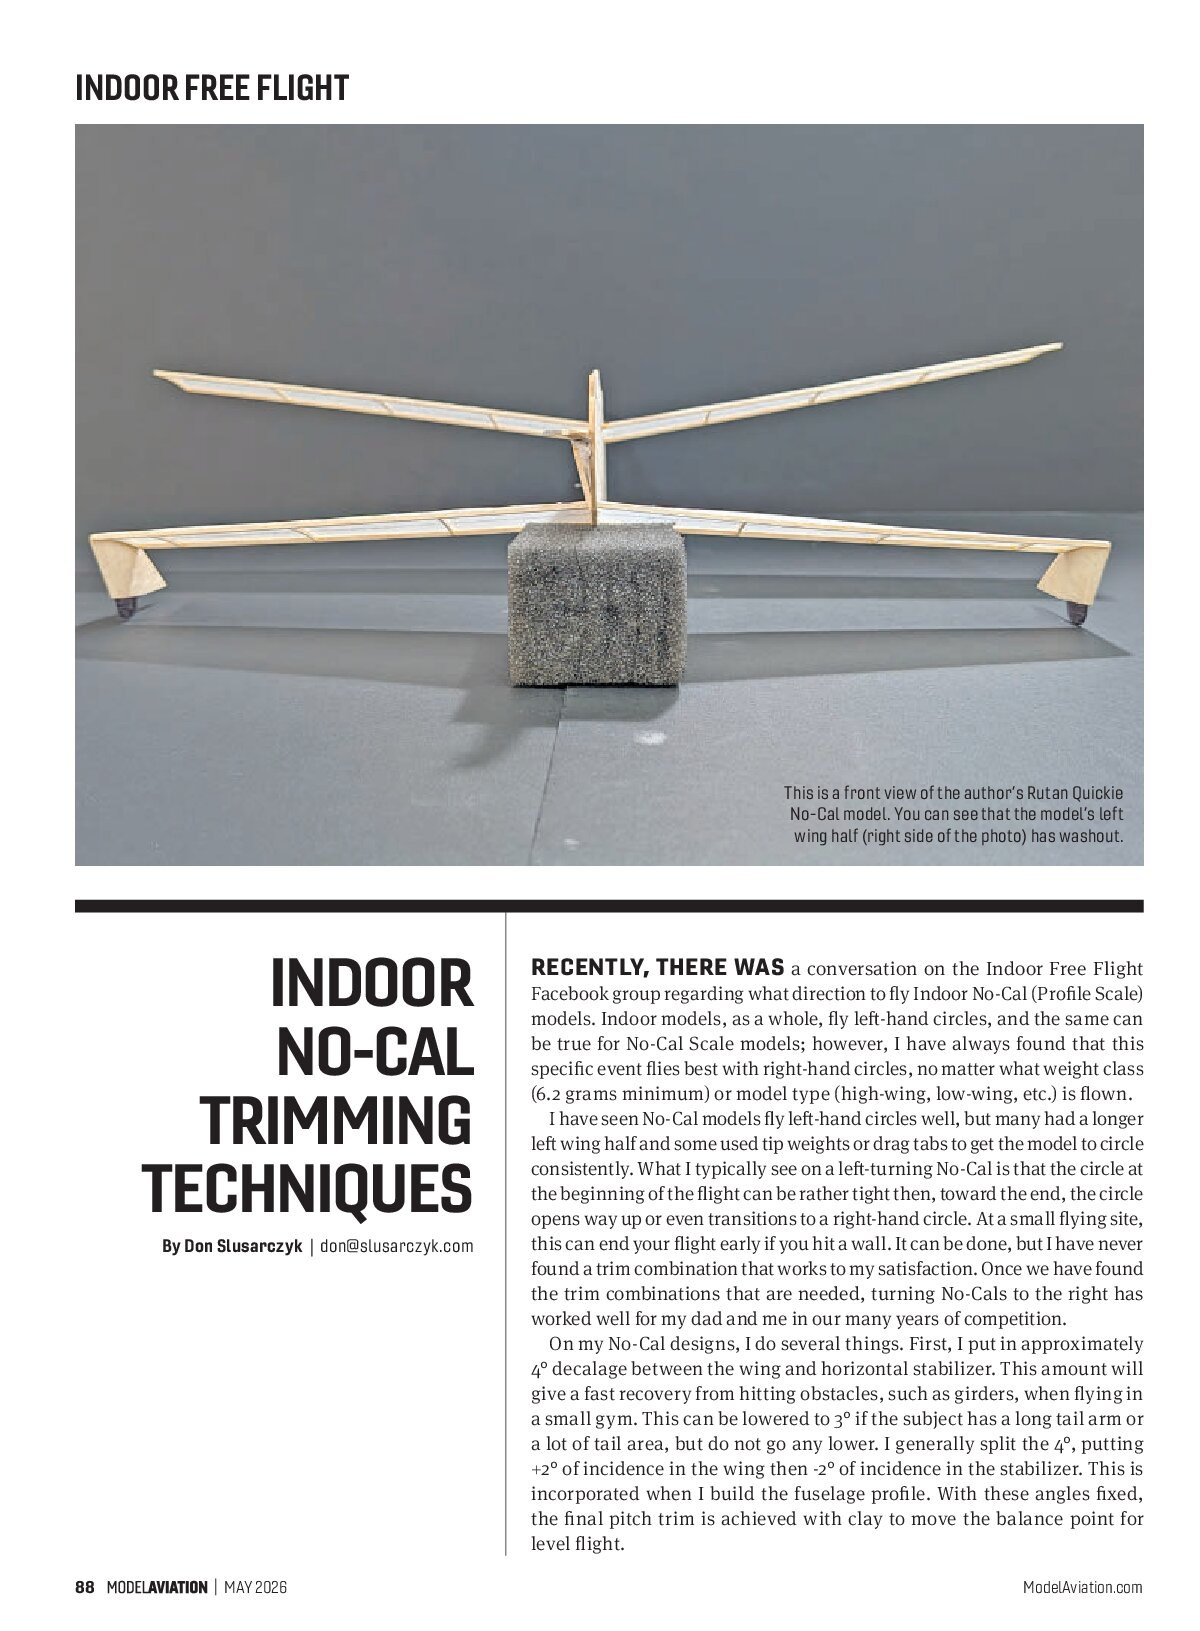
This is a front view of the author’s Rutan Quickie No-Cal model. You can see that the model’s left wing half (right side of the photo) has washout.
Recently, there was a conversation on the Indoor Free Flight Facebook group regarding what direction to fly Indoor No-Cal (Profile Scale) models. Indoor models, as a whole, fly left-hand circles, and the same can be true for No-Cal Scale models; however, I have always found that this specific event flies best with right-hand circles, no matter what weight class (6.2 grams minimum) or model type (high-wing, low-wing, etc.) is flown.
I have seen No-Cal models fly left-hand circles well, but many had a longer left wing half and some used tip weights or drag tabs to get the model to circle consistently. What I typically see on a left-turning No-Cal is that the circle at the beginning of the flight can be rather tight then, toward the end, the circle opens way up or even transitions to a right-hand circle. At a small flying site, this can end your flight early if you hit a wall. It can be done, but I have never found a trim combination that works to my satisfaction. Once we have found the trim combinations that are needed, turning No-Cals to the right has worked well for my dad and me in our many years of competition.
On my No-Cal designs, I do several things. First, I put in approximately 4° decalage between the wing and horizontal stabilizer. This amount will give a fast recovery from hitting obstacles, such as girders, when flying in a small gym. This can be lowered to 3° if the subject has a long tail arm or a lot of tail area, but do not go any lower. I generally split the 4°, putting +2° of incidence in the wing then -2° of incidence in the stabilizer. This is incorporated when I build the fuselage profile. With these angles fixed, the final pitch trim is achieved with clay to move the balance point for level flight.
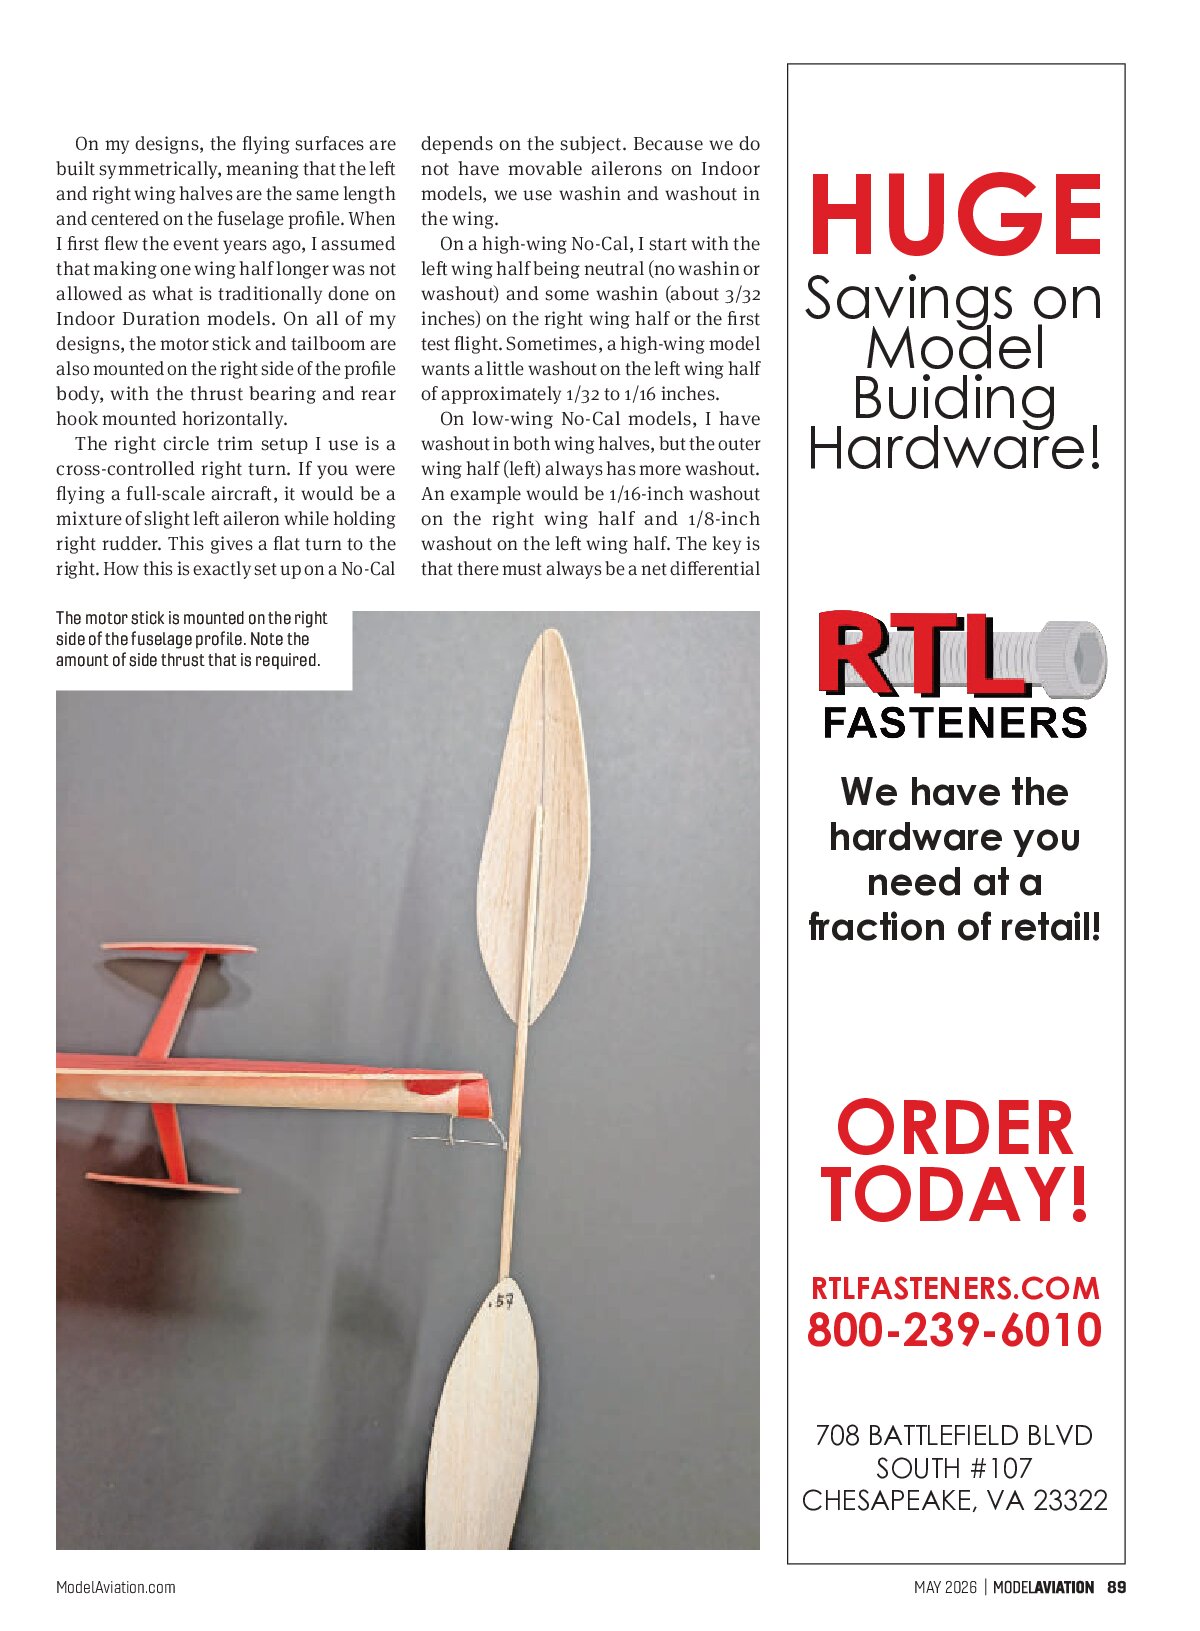
On my designs, the flying surfaces are built symmetrically, meaning that the left and right wing halves are the same length and centered on the fuselage profile. When I first flew the event years ago, I assumed that making one wing half longer was not allowed as what is traditionally done on Indoor Duration models. On all of my designs, the motor stick and tailboom are also mounted on the right side of the profile body, with the thrust bearing and rear hook mounted horizontally.
The right circle trim setup I use is a cross-controlled right turn. If you were flying a full-scale aircraft, it would be a mixture of slight left aileron while holding right rudder. This gives a flat turn to the right. How this is exactly set up on a No-Cal depends on the subject. Because we do not have movable ailerons on Indoor models, we use washin and washout in the wing.
On a high-wing No-Cal, I start with the left wing half being neutral (no washin or washout) and some washin (about 3/32 inches) on the right wing half or the first test flight. Sometimes, a high-wing model wants a little washout on the left wing half of approximately 1/32 to 1/16 inches.
On low-wing No-Cal models, I have washout in both wing halves, but the outer wing half (left) always has more washout. An example would be 1/16-inch washout on the right wing half and 1/8-inch washout on the left wing half. The key is that there must always be a net differential that wants to roll the model to the left along with the torque.
Once the wing is set, the next part of this trim setup is right rudder and right thrust. The amount of right thrust is typically 3° to 5°. This is needed to pull the nose to the right, especially under higher torque. You will also need some downthrust. I start with about 2°.
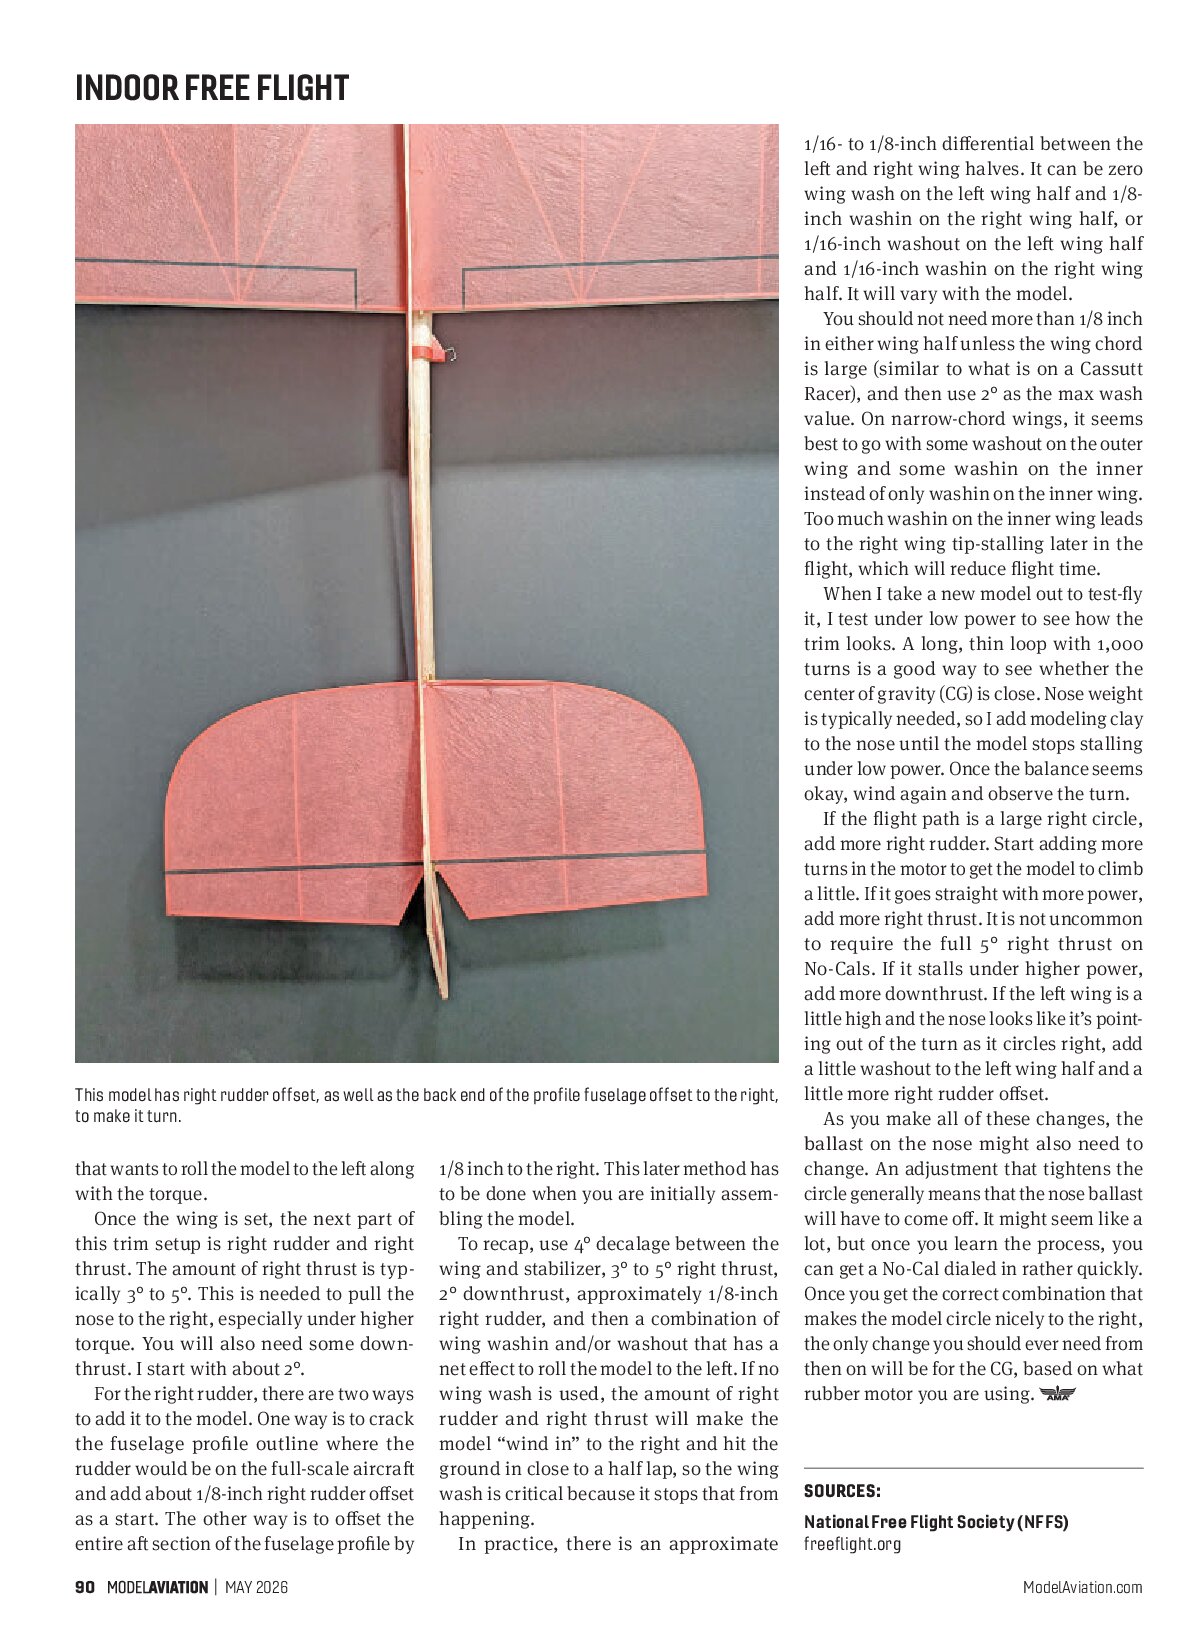
For the right rudder, there are two ways to add it to the model. One way is to crack the fuselage profile outline where the rudder would be on the full-scale aircraft and add about 1/8-inch right rudder offset as a start. The other way is to offset the entire aft section of the fuselage profile by 1/8 inch to the right. This later method has to be done when you are initially assembling the model.
To recap, use 4° decalage between the wing and stabilizer, 3° to 5° right thrust, 2° downthrust, approximately 1/8-inch right rudder, and then a combination of wing washin and/or washout that has a net effect to roll the model to the left. If no wing wash is used, the amount of right rudder and right thrust will make the model “wind in” to the right and hit the ground in close to a half lap, so the wing wash is critical because it stops that from happening.
In practice, there is an approximate 1/16- to 1/8-inch differential between the left and right wing halves. It can be zero wing wash on the left wing half and 1/8-inch washin on the right wing half, or 1/16-inch washout on the left wing half and 1/16-inch washin on the right wing half. It will vary with the model.
You should not need more than 1/8 inch in either wing half unless the wing chord is large (similar to what is on a Cassutt Racer), and then use 2° as the max wash value. On narrow-chord wings, it seems best to go with some washout on the outer wing and some washin on the inner instead of only washin on the inner wing. Too much washin on the inner wing leads to the right wing tip-stalling later in the flight, which will reduce flight time.
When I take a new model out to test-fly it, I test under low power to see how the trim looks. A long, thin loop with 1,000 turns is a good way to see whether the center of gravity (CG) is close. Nose weight is typically needed, so I add modeling clay to the nose until the model stops stalling under low power. Once the balance seems okay, wind again and observe the turn.
If the flight path is a large right circle, add more right rudder. Start adding more turns in the motor to get the model to climb a little. If it goes straight with more power, add more right thrust. It is not uncommon to require the full 5° right thrust on No-Cals. If it stalls under higher power, add more downthrust. If the left wing is a little high and the nose looks like it’s pointing out of the turn as it circles right, add a little washout to the left wing half and a little more right rudder offset.
As you make all of these changes, the ballast on the nose might also need to change. An adjustment that tightens the circle generally means that the nose ballast will have to come off. It might seem like a lot, but once you learn the process, you can get a No-Cal dialed in rather quickly. Once you get the correct combination that makes the model circle nicely to the right, the only change you should ever need from then on will be for the CG, based on what rubber motor you are using.


SOURCES
- National Free Flight Society (NFFS)
- freeflight.org