Ensuring the Best Engine Performance
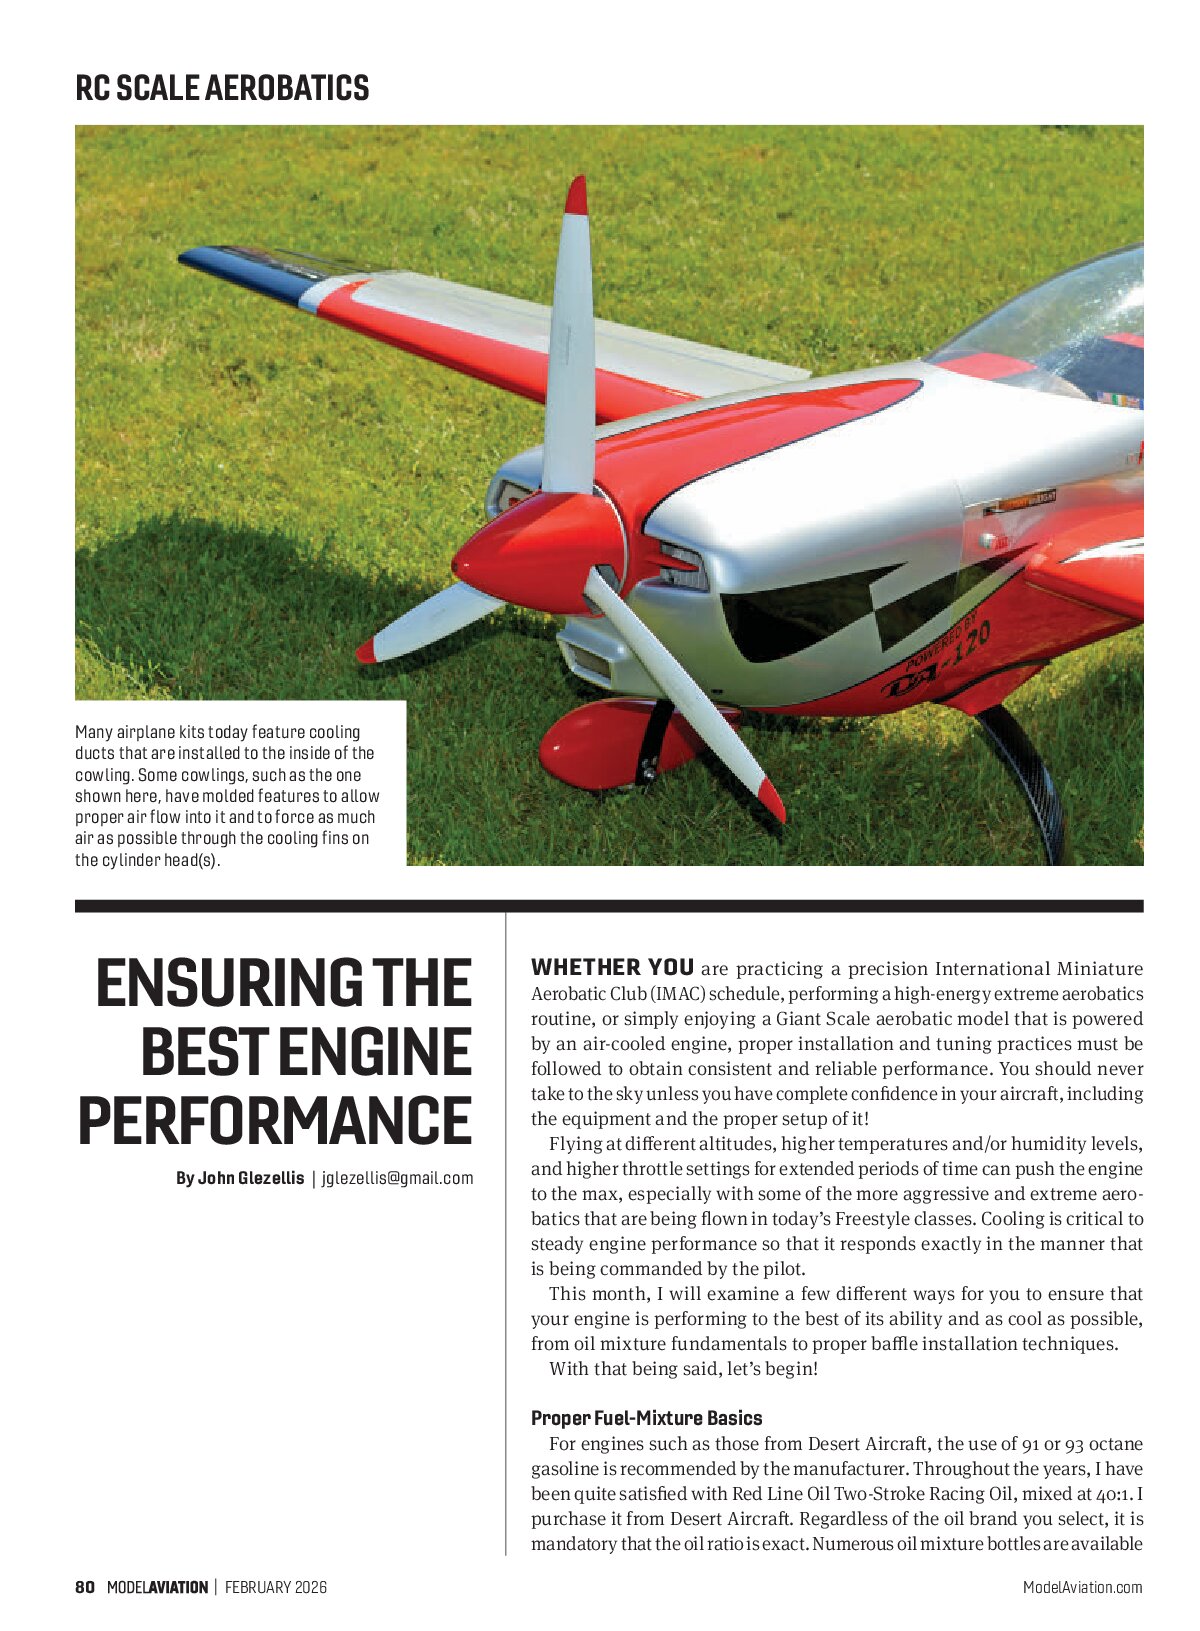
Many airplane kits today feature cooling ducts that are installed to the inside of the cowling. Some cowlings, such as the one shown here, have molded features to allow proper air flow into it and to force as much air as possible through the cooling fins on the cylinder head(s).

Whether you are practicing a precision International Miniature Aerobatic Club (IMAC) schedule, performing a high-energy extreme aerobatics routine, or simply enjoying a Giant Scale aerobatic model that is powered by an air-cooled engine, proper installation and tuning practices must be followed to obtain consistent and reliable performance. You should never take to the sky unless you have complete confidence in your aircraft, including the equipment and the proper setup of it!
Flying at different altitudes, higher temperatures and/or humidity levels, and higher throttle settings for extended periods of time can push the engine to the max, especially with some of the more aggressive and extreme aerobatics that are being flown in today’s Freestyle classes. Cooling is critical to steady engine performance so that it responds exactly in the manner that is being commanded by the pilot.
This month, I will examine a few different ways for you to ensure that your engine is performing to the best of its ability and as cool as possible, from oil mixture fundamentals to proper baffle installation techniques.
With that being said, let’s begin!
Proper Fuel-Mixture Basics
For engines such as those from Desert Aircraft, the use of 91 or 93 octane gasoline is recommended by the manufacturer. Throughout the years, I have been quite satisfied with Red Line Oil Two-Stroke Racing Oil, mixed at 40:1. I purchase it from Desert Aircraft. Regardless of the oil brand you select, it is mandatory that the oil ratio is exact. Numerous oil mixture bottles are available today that take all of the guesswork out of the process of adding oil to the fuel. Remember, an engine that is operating hotter than normal could be because of a lean needle setting or an incorrect oil ratio.

Engine Cooling Fundamentals
On an engine such as Desert Aircraft’s DA-120, the maximum temperature near the spark plug should be 325°F (162°C), with all other locations being cooler. Interestingly, many people feel that an airplane featuring a large radial cowling, like what is found on the Flex Innovations Mamba 120, will be cool enough if they leave the entire front end of the cowling open.
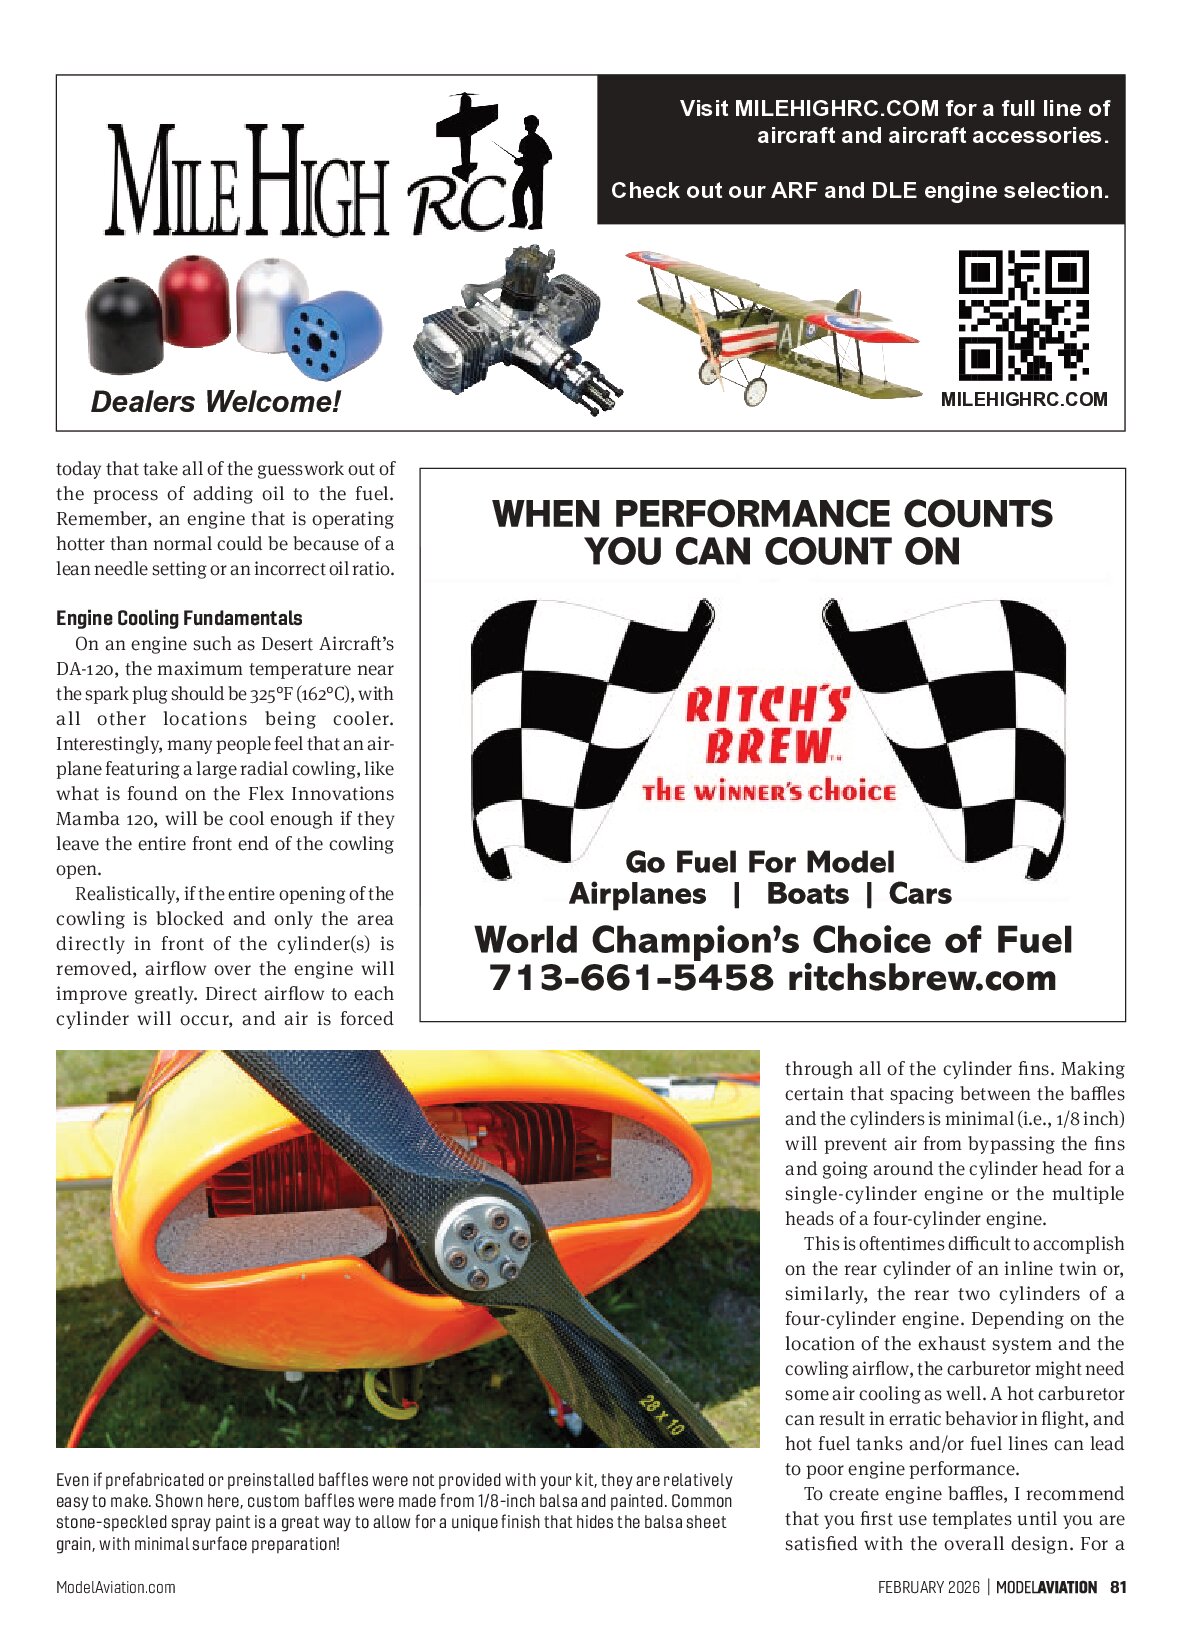
Realistically, if the entire opening of the cowling is blocked and only the area directly in front of the cylinder(s) is removed, airflow over the engine will improve greatly. Direct airflow to each cylinder will occur, and air is forced through all of the cylinder fins. Making certain that spacing between the baffles and the cylinders is minimal (i.e., 1/8 inch) will prevent air from bypassing the fins and going around the cylinder head for a single-cylinder engine or the multiple heads of a four-cylinder engine.
This is oftentimes difficult to accomplish on the rear cylinder of an inline twin or, similarly, the rear two cylinders of a four-cylinder engine. Depending on the location of the exhaust system and the cowling airflow, the carburetor might need some air cooling as well. A hot carburetor can result in erratic behavior in flight, and hot fuel tanks and/or fuel lines can lead to poor engine performance.
To create engine baffles, I recommend that you first use templates until you are satisfied with the overall design. For a two-piece cowling, this is rather simple because you can lay the cowling over posterboard and trace the outline. Should something more rigid be preferred, 3/16-inch (4.8mm) foamboard or corrugated cardboard will also work. Personally, I prefer posterboard because it is relatively thin and easy to work with. However, if an airplane features a one-piece cowling, a contour gauge, which is available at most hardware stores, will be a great time saver.
A contour gauge is a woodworking tool that is used to duplicate and transfer a specific pattern. Carefully position the contour gauge and press it against the cowling. Painter’s tape over this area might be preferred so not to scratch the surface of the cowling, assuming that it has already been painted.
After the shape of the cowling edge has been transferred onto the gauge, trace it on a piece of paper and take a few measurements to figure out the cylinder head with respect to the outer edge of the cowling. You can also use the contour gauge to create the engine cylinder outline for the baffle template.
When all measurements have been transferred, cut out the paper template, make any necessary modifications, and, once you are satisfied, cut the actual baffle out of light plywood or 1/8-inch balsa. Each baffle should continue past the top of the cylinder head and along the side of the cowling, especially if a four-cylinder engine or an inline twin is used. Continue them outward past the tops of the cylinder heads to the sides of the cowling. The vertical location of these plates should be below the centerline of the cylinder but not down to the lower edge of the cooling fins. They can also slope upward from the inlets to the lower edge of the cylinder.
Others prefer baffles that are built using additive manufacturing techniques. For example, AJ Aircraft offers 3D-printed baffles for its larger Raven, which are suitable for a 120cc engine. Fiberglass baffles, such as those on the Flex Innovations 120cc Edge 540 or the printed baffles from AJ Aircraft, might be able to be minimally modified to fit a different aircraft.
Prepare the cowling by scoring the area in which the baffles and ducts will be secured by using 80-grit sandpaper and properly cleaning that area with rubbing alcohol. Tack the components in place using Zap medium CA or a similar adhesive and check the alignment. Once you are satisfied, mix 30-minute Zap epoxy or similar with milled fiberglass and use an acid brush or a syringe to apply the glue to the areas in which the baffles and/or ducting contact the fiberglass cowling. Allow proper curing time and the baffles have been installed! Some prefer Amazing GOOP, which is a flexible, all-purpose adhesive, and have had great success.
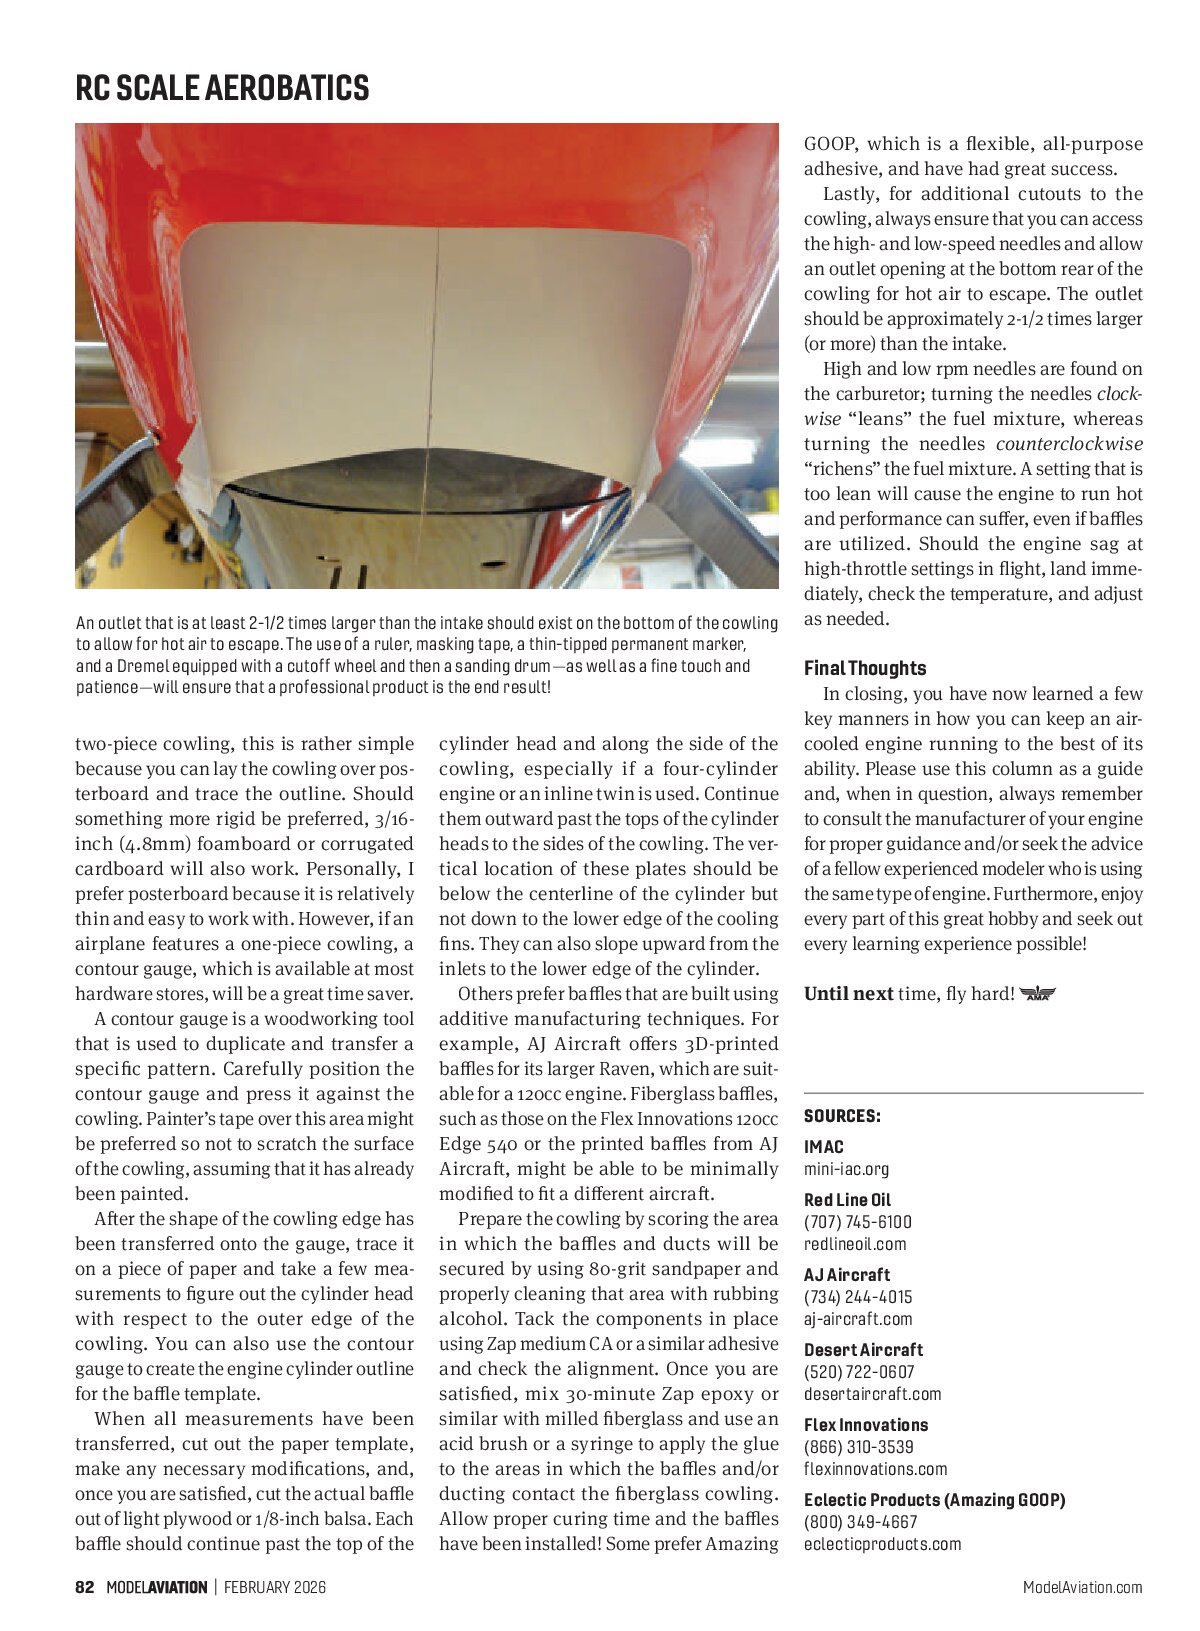
Lastly, for additional cutouts to the cowling, always ensure that you can access the high- and low-speed needles and allow an outlet opening at the bottom rear of the cowling for hot air to escape. The outlet should be approximately 2-1/2 times larger (or more) than the intake.
High and low rpm needles are found on the carburetor; turning the needles clockwise “leans” the fuel mixture, whereas turning the needles counterclockwise “richens” the fuel mixture. A setting that is too lean will cause the engine to run hot and performance can suffer, even if baffles are utilized. Should the engine sag at high-throttle settings in flight, land immediately, check the temperature, and adjust as needed.
Final Thoughts
In closing, you have now learned a few key manners in how you can keep an air-cooled engine running to the best of its ability. Please use this column as a guide and, when in question, always remember to consult the manufacturer of your engine for proper guidance and/or seek the advice of a fellow experienced modeler who is using the same type of engine. Furthermore, enjoy every part of this great hobby and seek out every learning experience possible!
Until next time, fly hard!
SOURCES
- IMAC
- mini-iac.org
- Red Line Oil
(707) 745-6100 - redlineoil.com
- AJ Aircraft
(734) 244-4015 - aj-aircraft.com
- Desert Aircraft
(520) 722-0607 - desertaircraft.com
- Flex Innovations
(866) 310-3539 - flexinnovations.com
- Eclectic Products (Amazing GOOP)
(800) 349-4667 - eclecticproducts.com