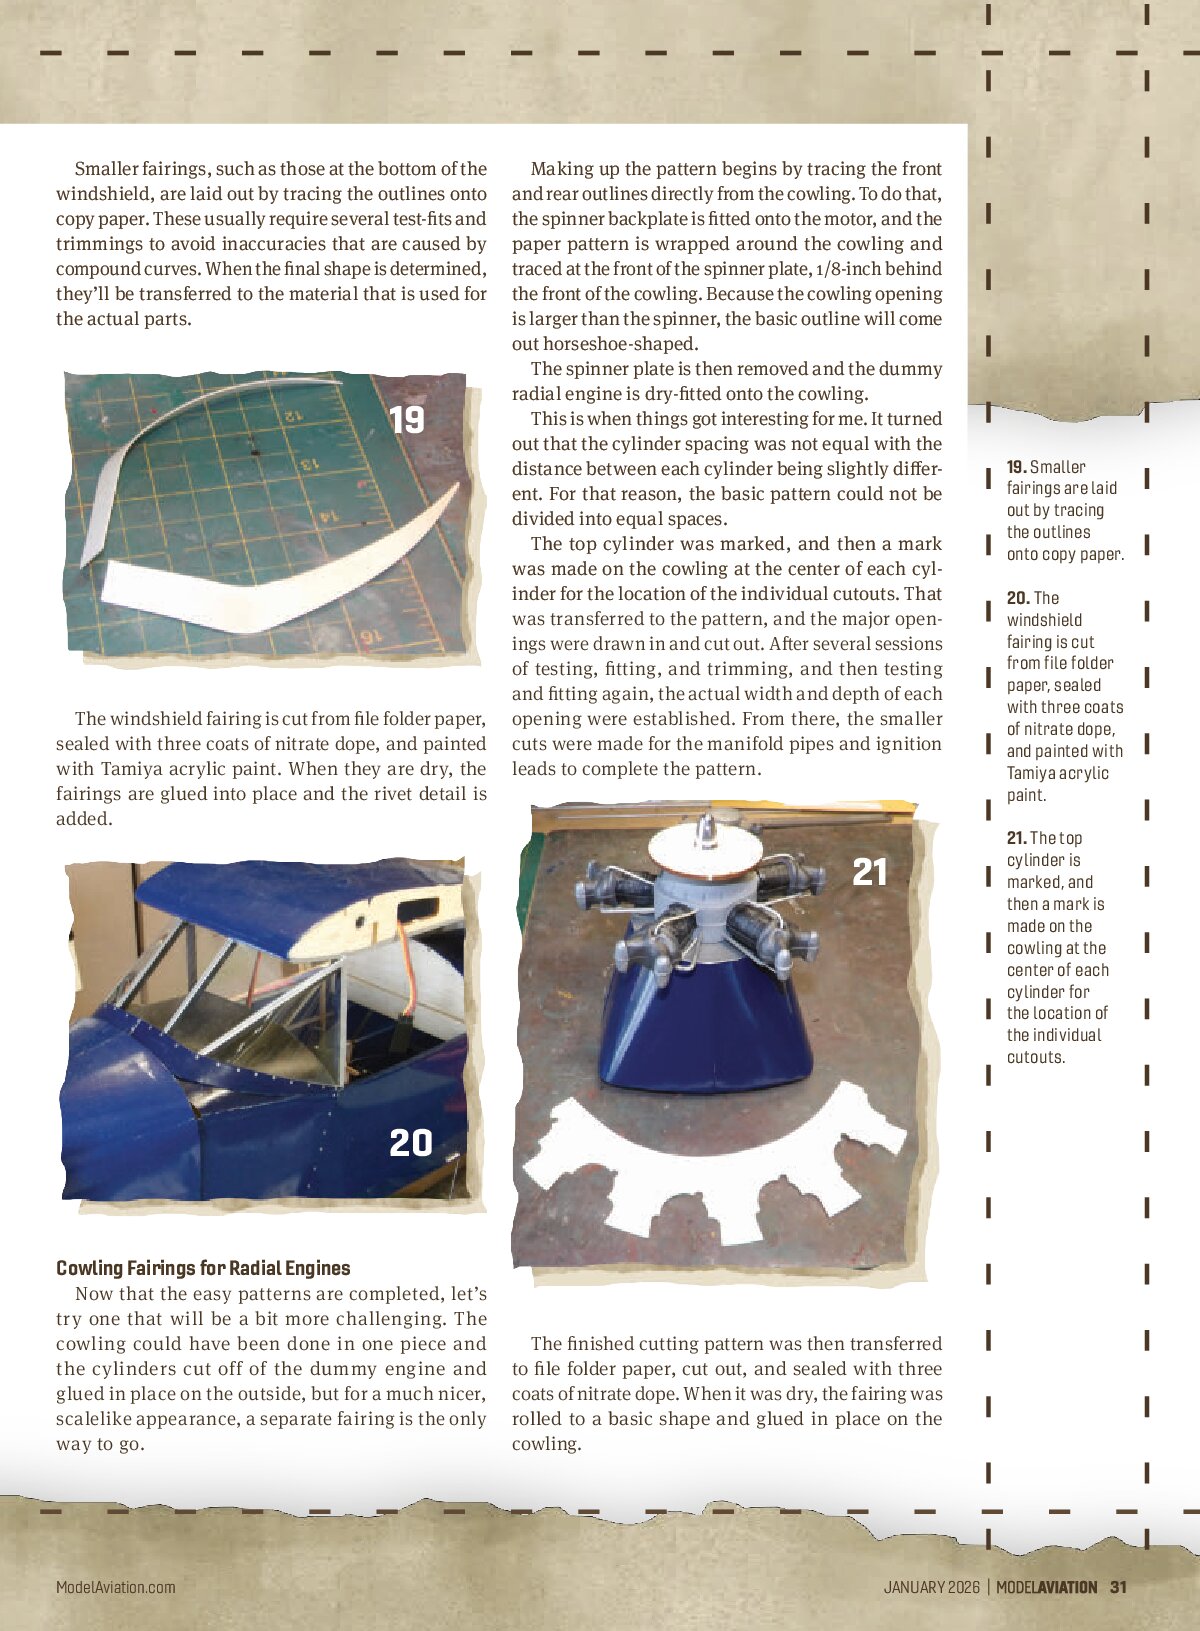
Smaller fairings, such as those at the bottom of the windshield, are laid out by tracing the outlines onto copy paper. These usually require several test-fits and trimmings to avoid inaccuracies that are caused by compound curves. When the final shape is determined, they’ll be transferred to the material that is used for the actual parts.

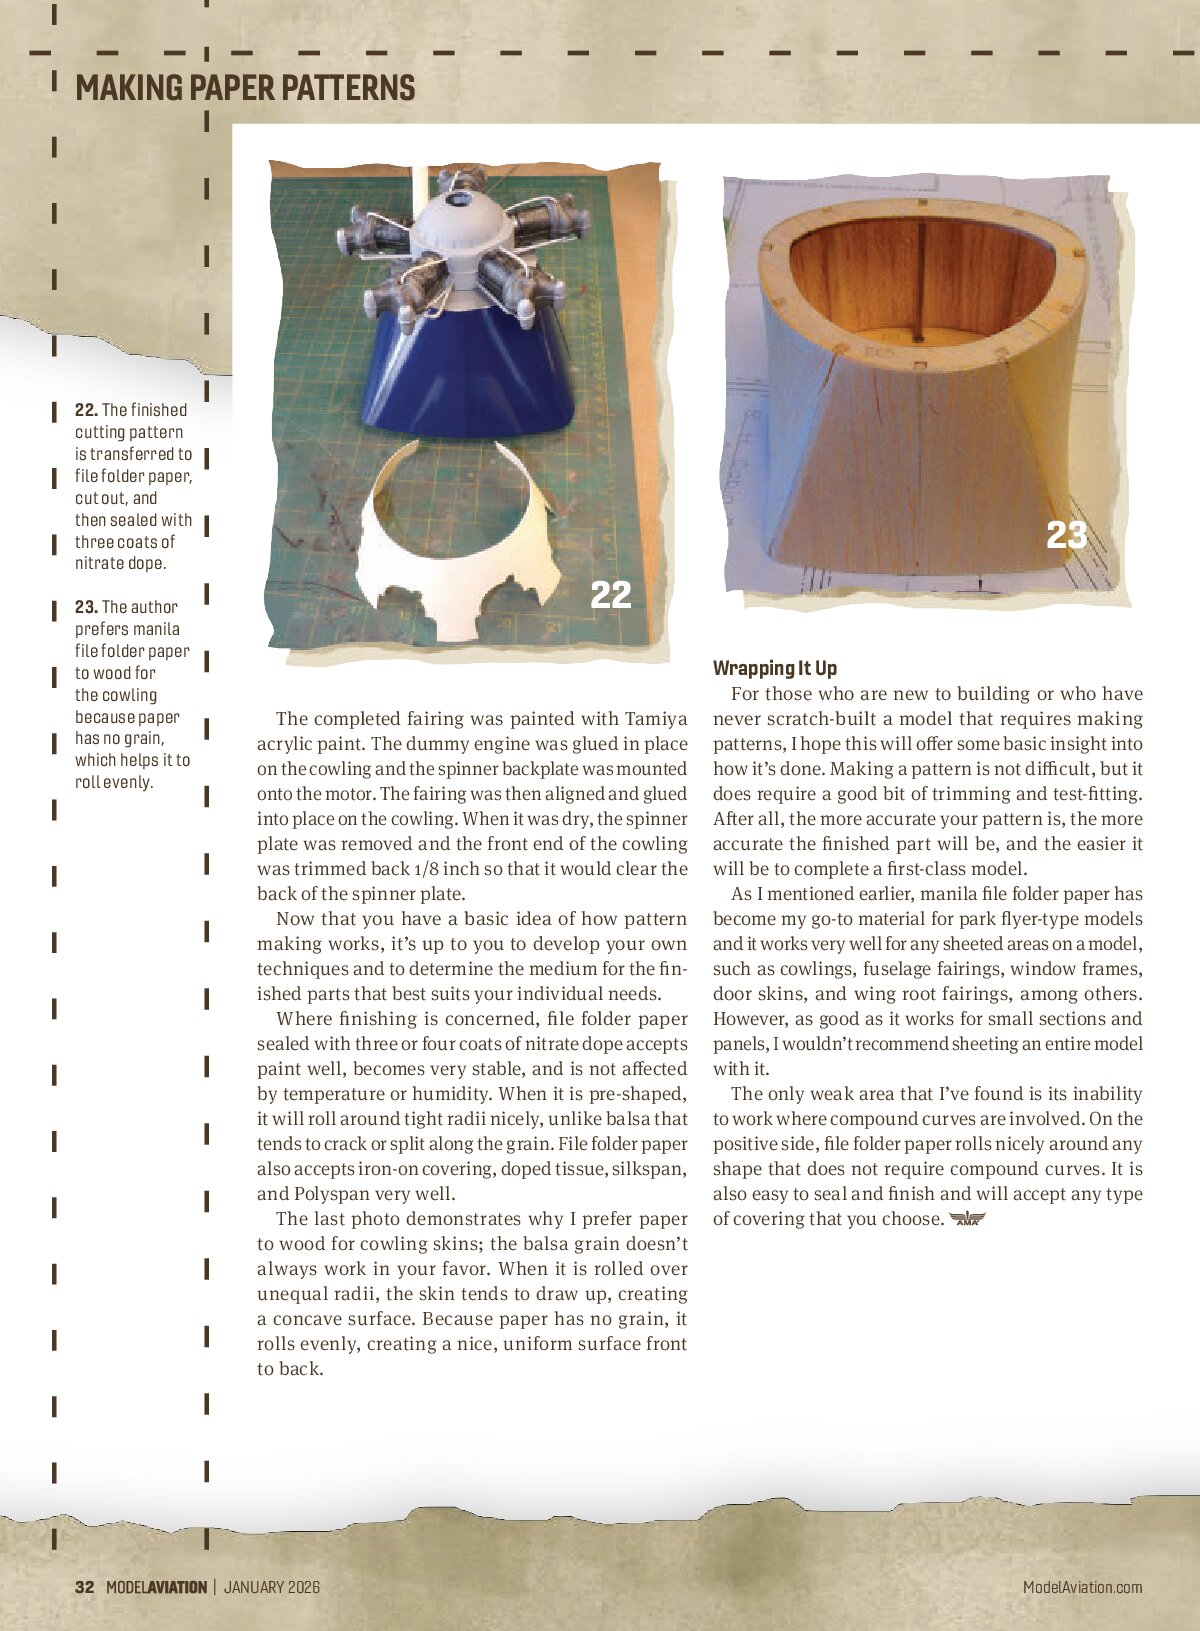
The windshield fairing is cut from file folder paper, sealed with three coats of nitrate dope, and painted with Tamiya acrylic paint. When they are dry, the fairings are glued into place and the rivet detail is added.

Cowling Fairings for Radial Engines
Now that the easy patterns are completed, let’s try one that will be a bit more challenging. The cowling could have been done in one piece and the cylinders cut off of the dummy engine and glued in place on the outside, but for a much nicer, scalelike appearance, a separate fairing is the only way to go.
Making up the pattern begins by tracing the front and rear outlines directly from the cowling. To do that, the spinner backplate is fitted onto the motor, and the paper pattern is wrapped around the cowling and traced at the front of the spinner plate, 1/8-inch behind the front of the cowling. Because the cowling opening is larger than the spinner, the basic outline will come out horseshoe-shaped.
The spinner plate is then removed and the dummy radial engine is dry-fitted onto the cowling.
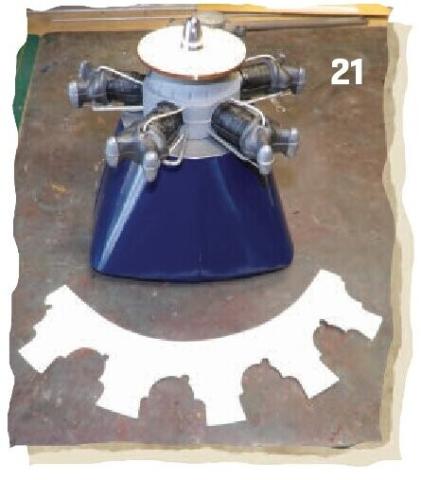
This is when things got interesting for me. It turned out that the cylinder spacing was not equal with the distance between each cylinder being slightly different. For that reason, the basic pattern could not be divided into equal spaces.
The top cylinder was marked, and then a mark was made on the cowling at the center of each cylinder for the location of the individual cutouts. That was transferred to the pattern, and the major openings were drawn in and cut out. After several sessions of testing, fitting, and trimming, and then testing and fitting again, the actual width and depth of each opening were established. From there, the smaller cuts were made for the manifold pipes and ignition leads to complete the pattern.

The finished cutting pattern was then transferred to file folder paper, cut out, and sealed with three coats of nitrate dope. When it was dry, the fairing was rolled to a basic shape and glued in place on the cowling.
MAKING PAPER PATTERNS


The completed fairing was painted with Tamiya acrylic paint. The dummy engine was glued in place on the cowling and the spinner backplate was mounted onto the motor. The fairing was then aligned and glued into place on the cowling. When it was dry, the spinner plate was removed and the front end of the cowling was trimmed back 1/8 inch so that it would clear the back of the spinner plate.
Now that you have a basic idea of how pattern making works, it’s up to you to develop your own techniques and to determine the medium for the finished parts that best suits your individual needs.
Where finishing is concerned, file folder paper sealed with three or four coats of nitrate dope accepts paint well, becomes very stable, and is not affected by temperature or humidity. When it is pre-shaped, it will roll around tight radii nicely, unlike balsa that tends to crack or split along the grain. File folder paper also accepts iron-on covering, doped tissue, silkspan, and Polyspan very well.
The last photo demonstrates why I prefer paper to wood for cowling skins; the balsa grain doesn’t always work in your favor. When it is rolled over unequal radii, the skin tends to draw up, creating a concave surface. Because paper has no grain, it rolls evenly, creating a nice, uniform surface front to back.
Wrapping It Up
For those who are new to building or who have never scratch-built a model that requires making patterns, I hope this will offer some basic insight into how it’s done. Making a pattern is not difficult, but it does require a good bit of trimming and test-fitting. After all, the more accurate your pattern is, the more accurate the finished part will be, and the easier it will be to complete a first-class model.
As I mentioned earlier, manila file folder paper has become my go-to material for park flyer-style models and it works very well for any sheeted areas on a model, such as cowlings, fuselage fairings, window frames, door skins, and wing root fairings, among others. However, as good as it works for small sections and panels, I wouldn’t recommend sheeting an entire model with it.
The only weak area that I’ve found is its inability to work where compound curves are involved. On the positive side, file folder paper rolls nicely around any shape that does not require compound curves. It is also easy to seal and finish and will accept any type of covering that you choose.