RC JETS

MY FIRST
MODEL
AVIATION
COLUMN
By Jim Hiller | jetmodeler@earthlink.net
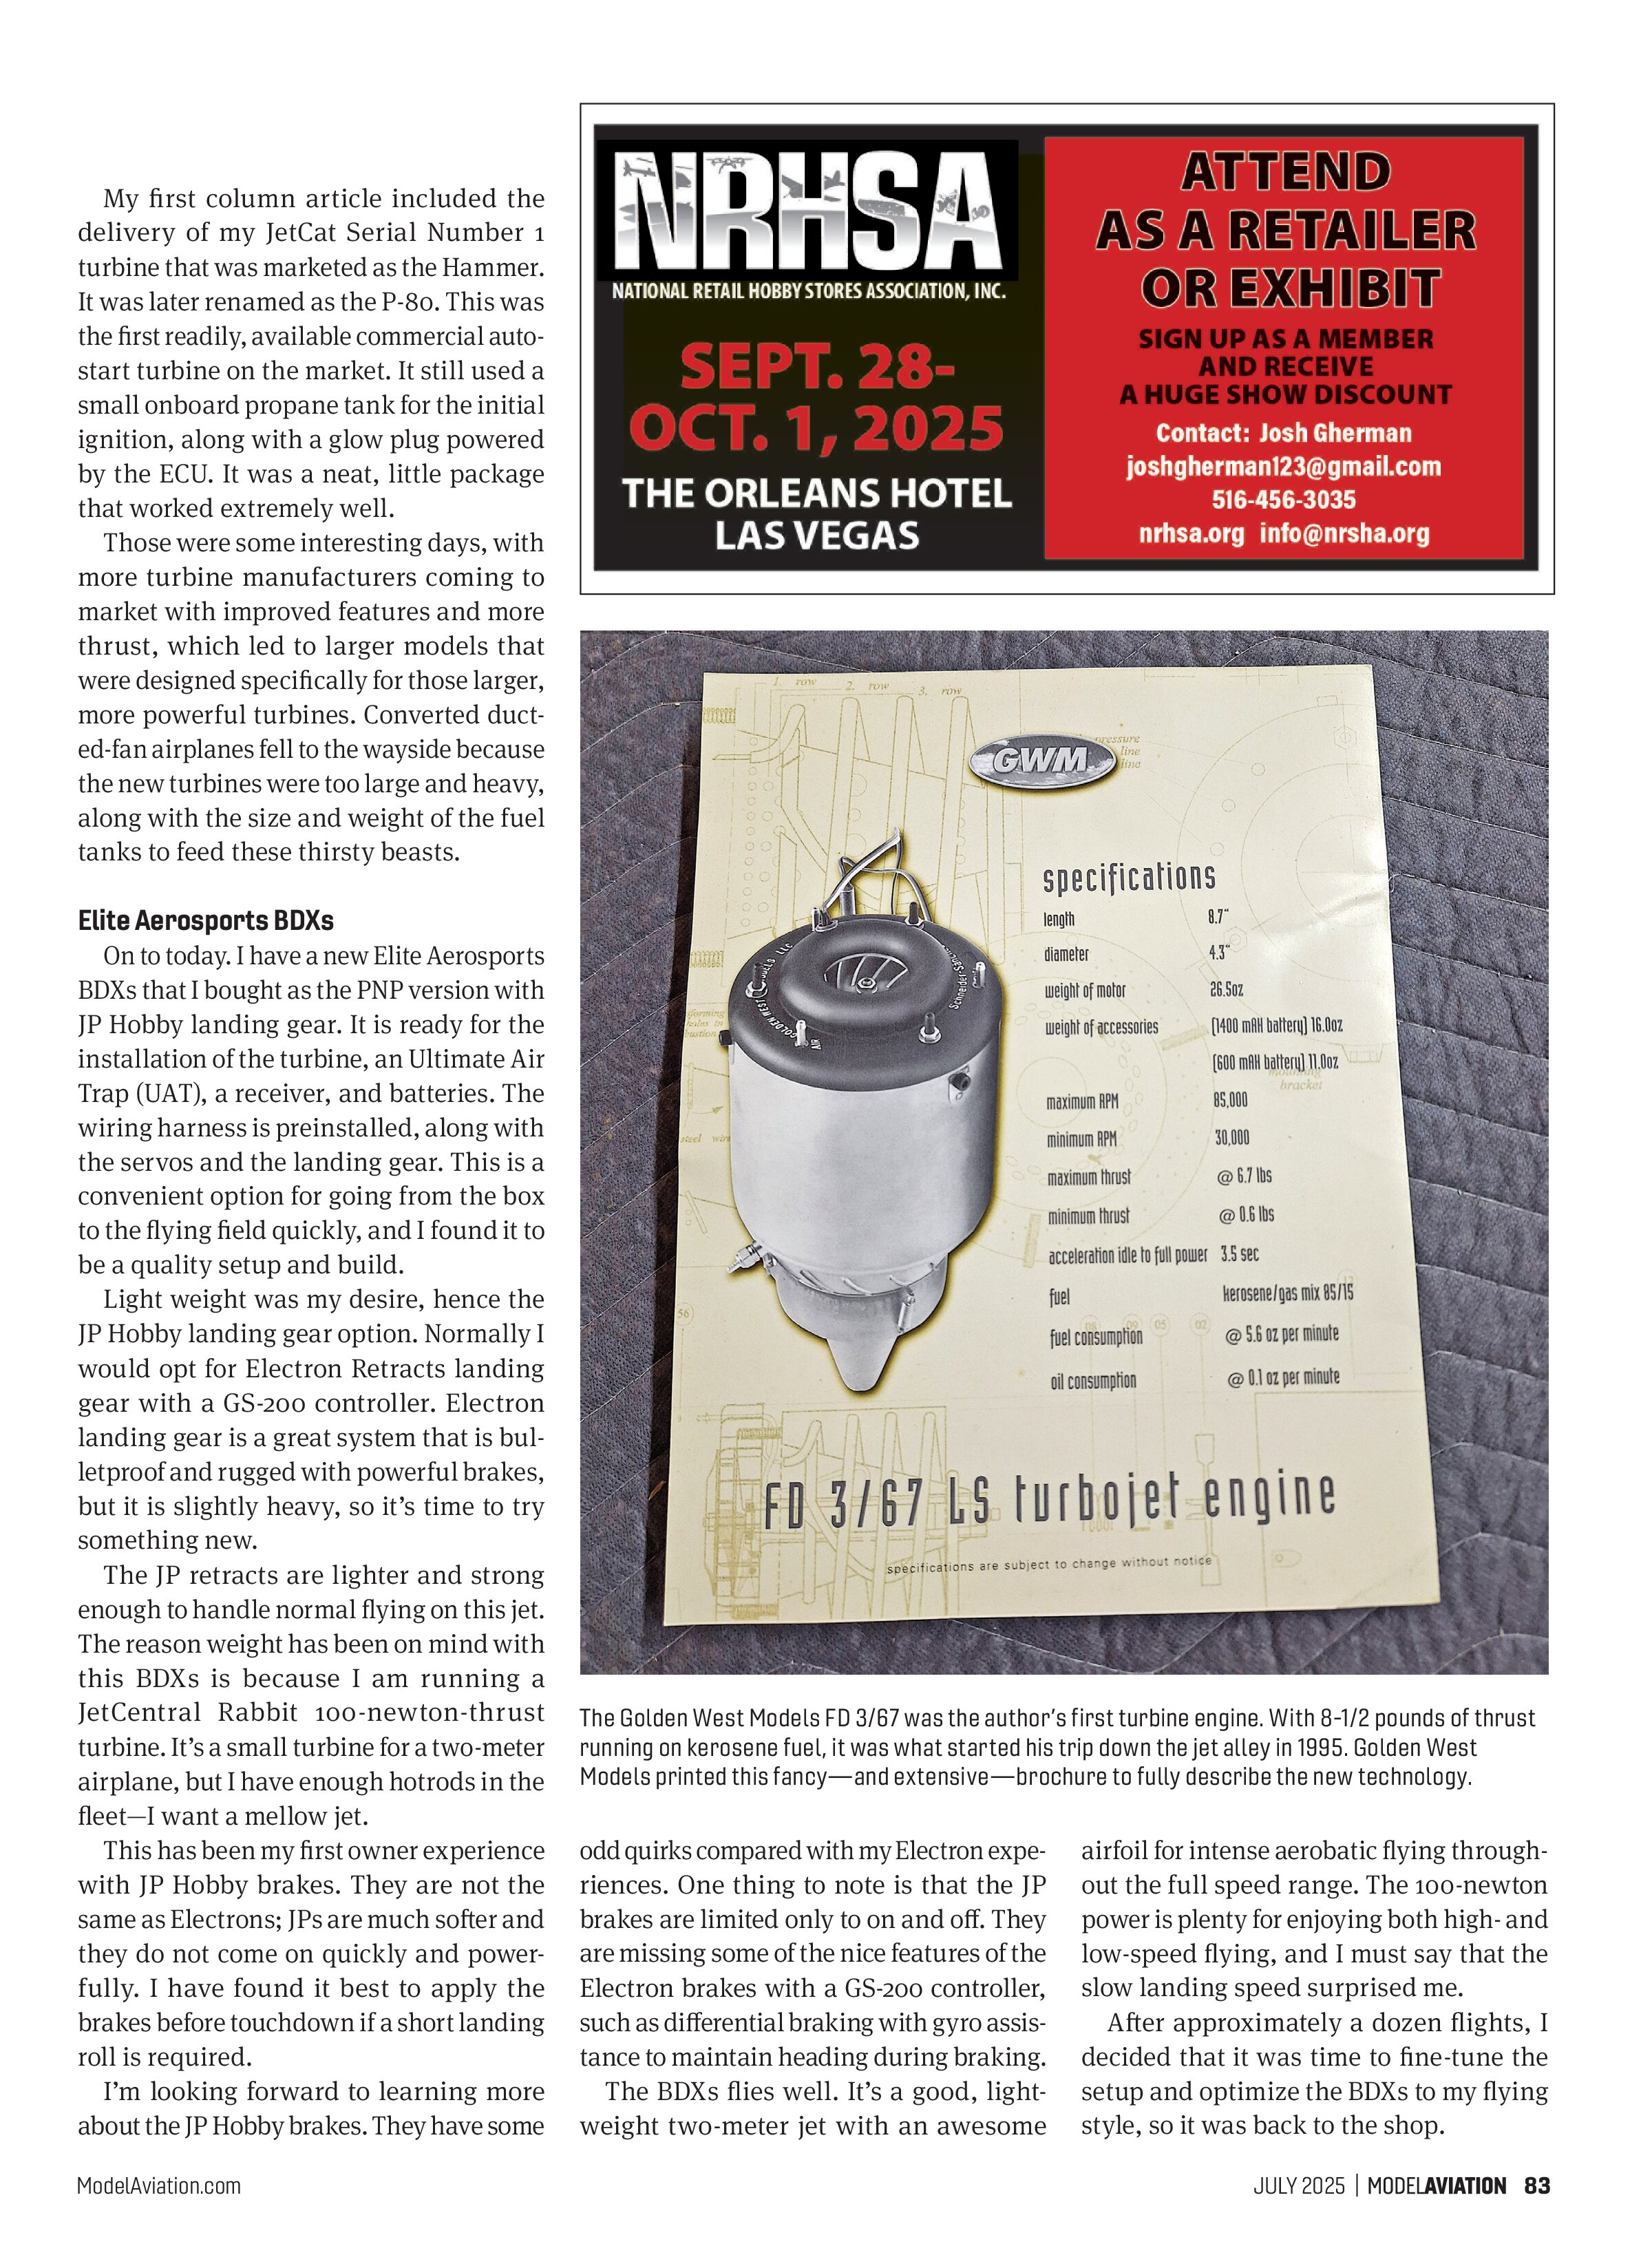
AS MODEL AVIATION magazine looks back at its roots, so shall I. My first jet column dates back to June 1996. Man, I’ve been a writer for a long time. Who would have thought? Back then, jet modeling was in its infancy, and so was my jet flying. I had an X-Terminator designed for an internal-combustion ducted fan that I converted to turbine power using a Golden West Models FD 3/67 engine. It was a great-running, little 8-1/2-pound-thrust turbine made in the US by Tad Krzanowski and Bob Wilcox.
Times were different back then. The FD 3/67 turbine was started using an old-school glow plug as an ignitor. A 12-volt blower was pointed into the turbine intake to spin it up to speed. It was then started by adding in propane, with the flow hand-controlled to ignite it, followed by manually increasing the propane-valve flow to accelerate up to an rpm high enough to start running the fuel pump.
At this point, you would start increasing the throttle until the idle rpm was achieved, then cycle the throttle back to idle, and normal flight throttle travel would become available. When you had the turbine idling, the propane was disconnected and you fully throttled up, adjusting the full-throttle potentiometer on the electronic control unit (ECU). The turbine was then running and ready to fly.
Note: Golden West Models had the first turbine to be available with an ECU. Additionally, all of the other turbines on the market were started using scuba tanks to spin them up to rpm. They were heavy and cumbersome, with a field box required.
My first column article included the delivery of my JetCat Serial Number 1 turbine that was marketed as the Hammer. It was later renamed as the P-80. This was the first readily, available commercial auto-start turbine on the market. It still used a small onboard propane tank for the initial ignition, along with a glow plug powered by the ECU. It was a neat, little package that worked extremely well.
Those were some interesting days, with more turbine manufacturers coming to market with improved features and more thrust, which led to larger models that were designed specifically for those larger, more powerful turbines. Converted ducted-fan airplanes fell to the wayside because the new turbines were too large and heavy, along with the size and weight of the fuel tanks to feed these thirsty beasts.
Elite Aerosports BDXs
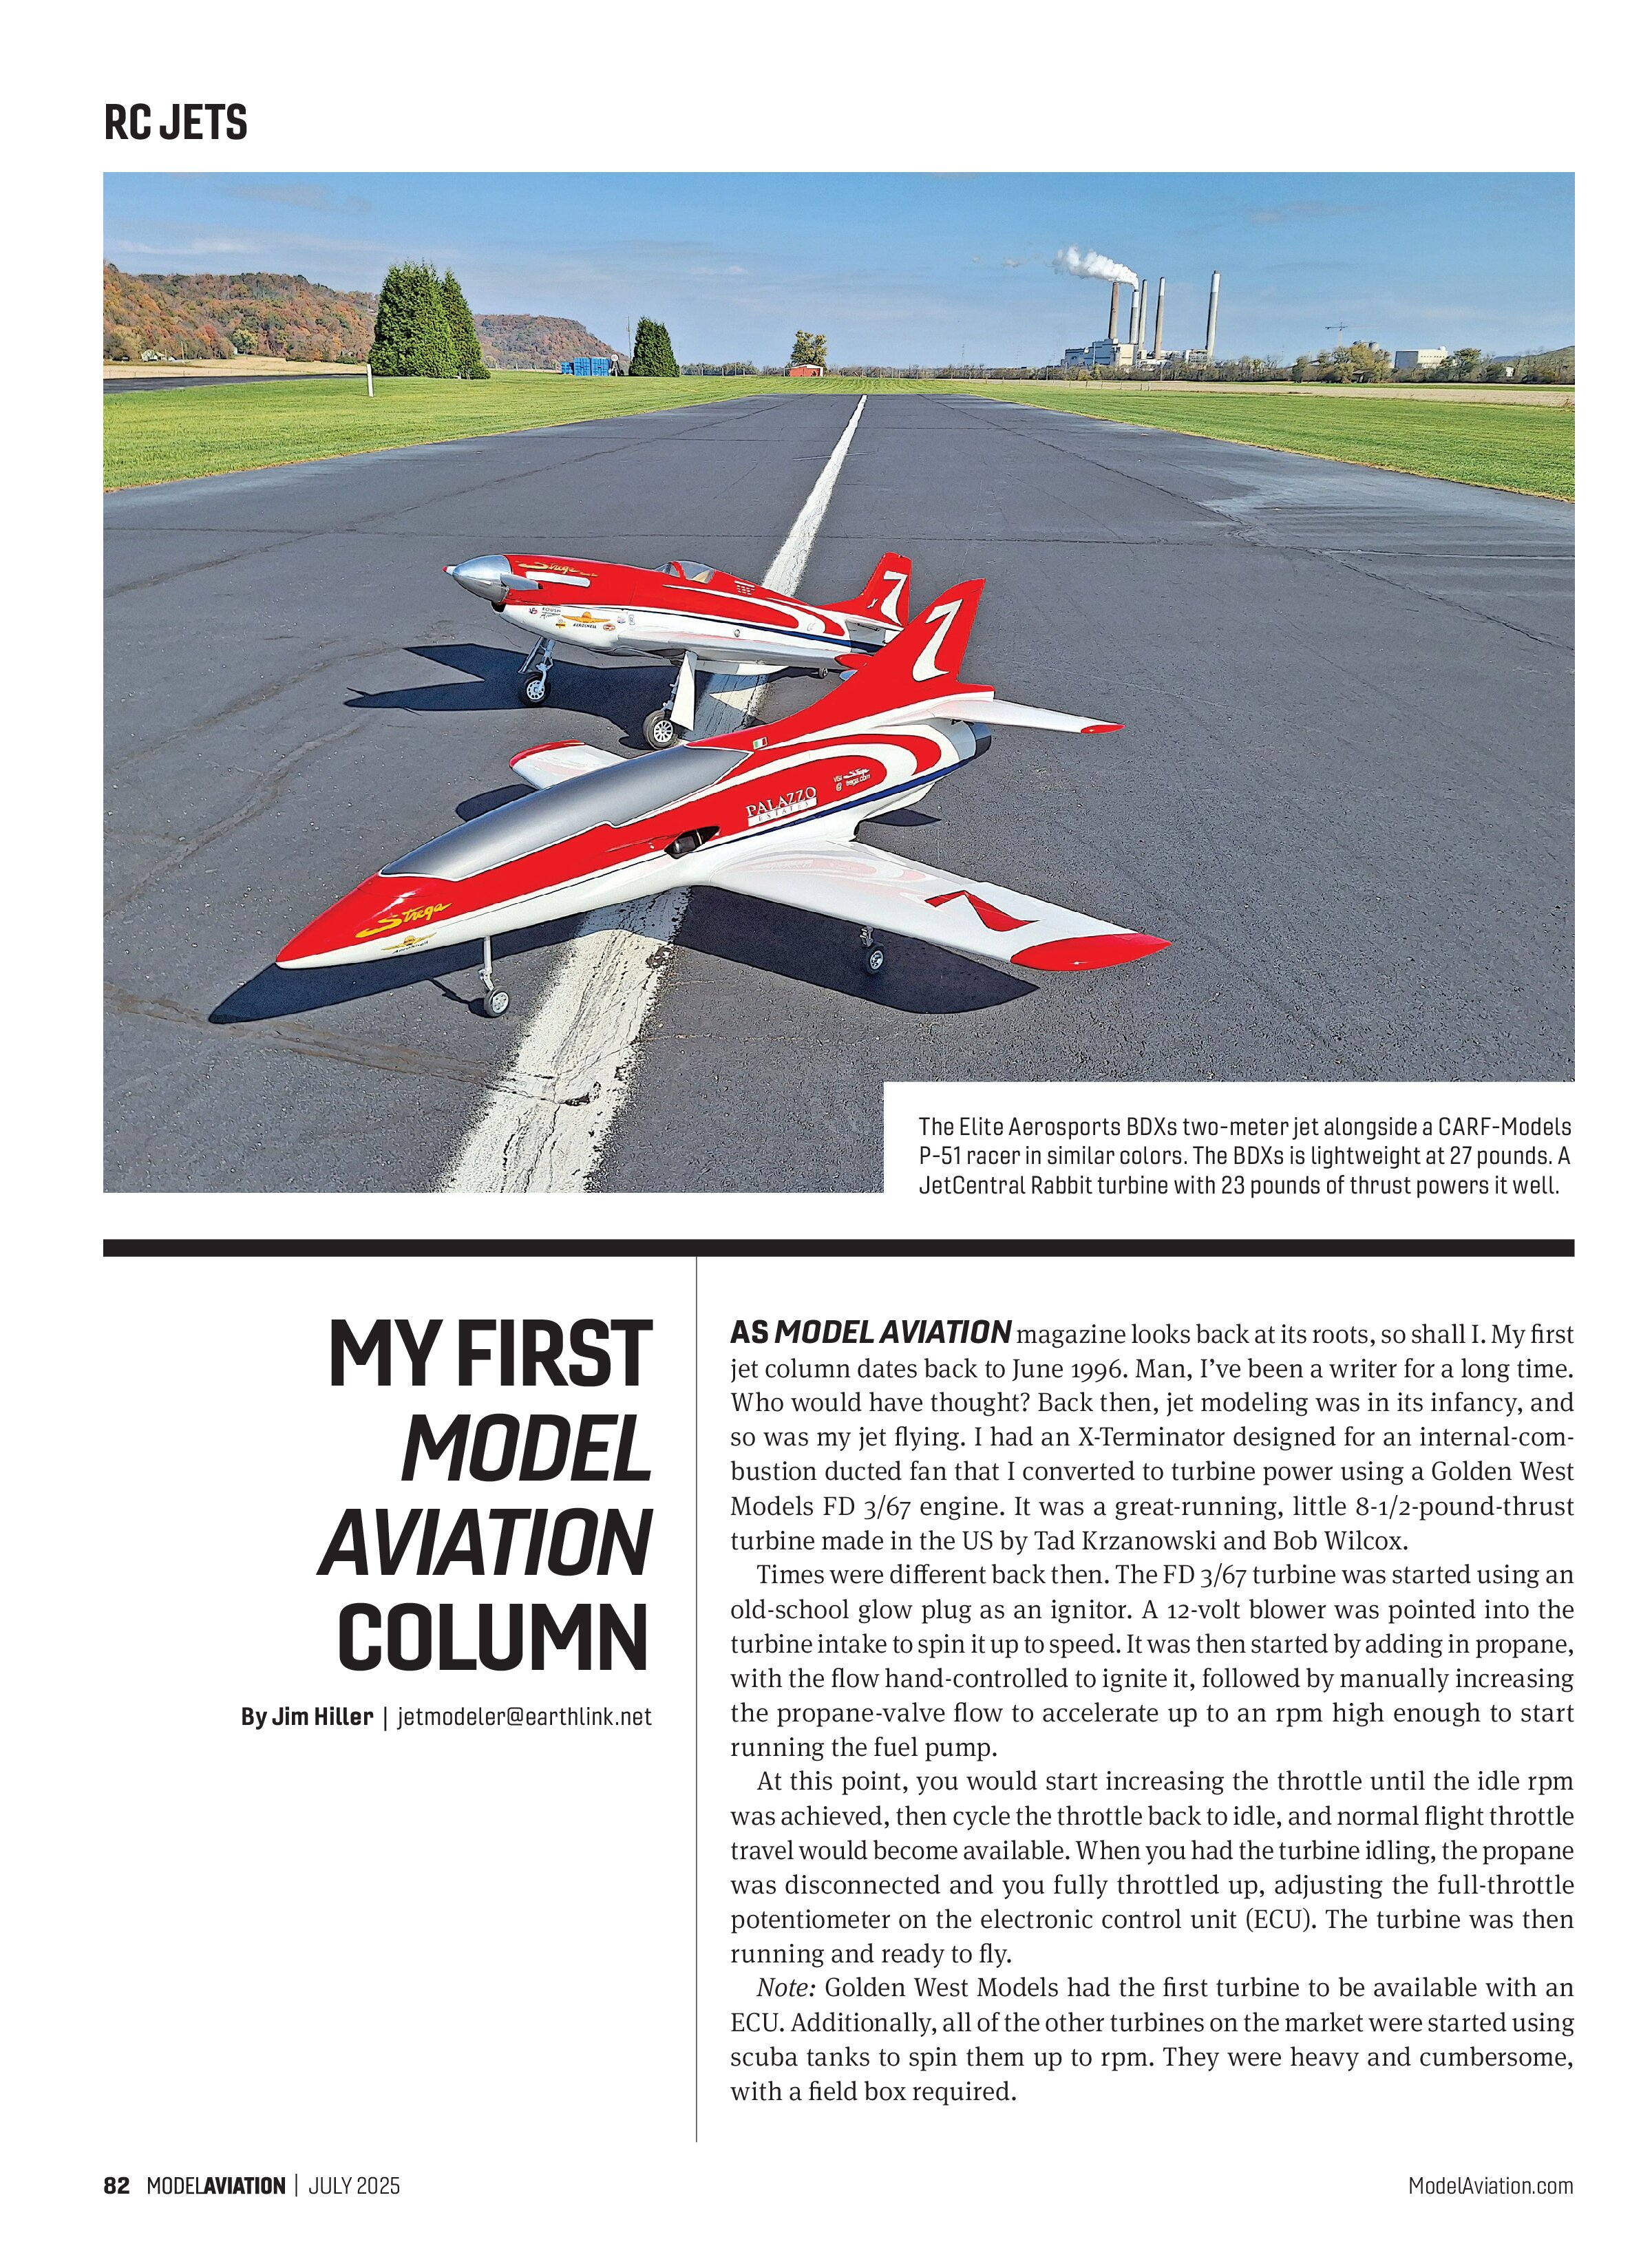
On to today. I have a new Elite Aerosports BDXs that I bought as the PNP version with JP Hobby landing gear. It is ready for the installation of the turbine, an Ultimate Air Trap (UAT), a receiver, and batteries. The wiring harness is preinstalled, along with the servos and the landing gear. This is a convenient option for going from the box to the flying field quickly, and I found it to be a quality setup and build.
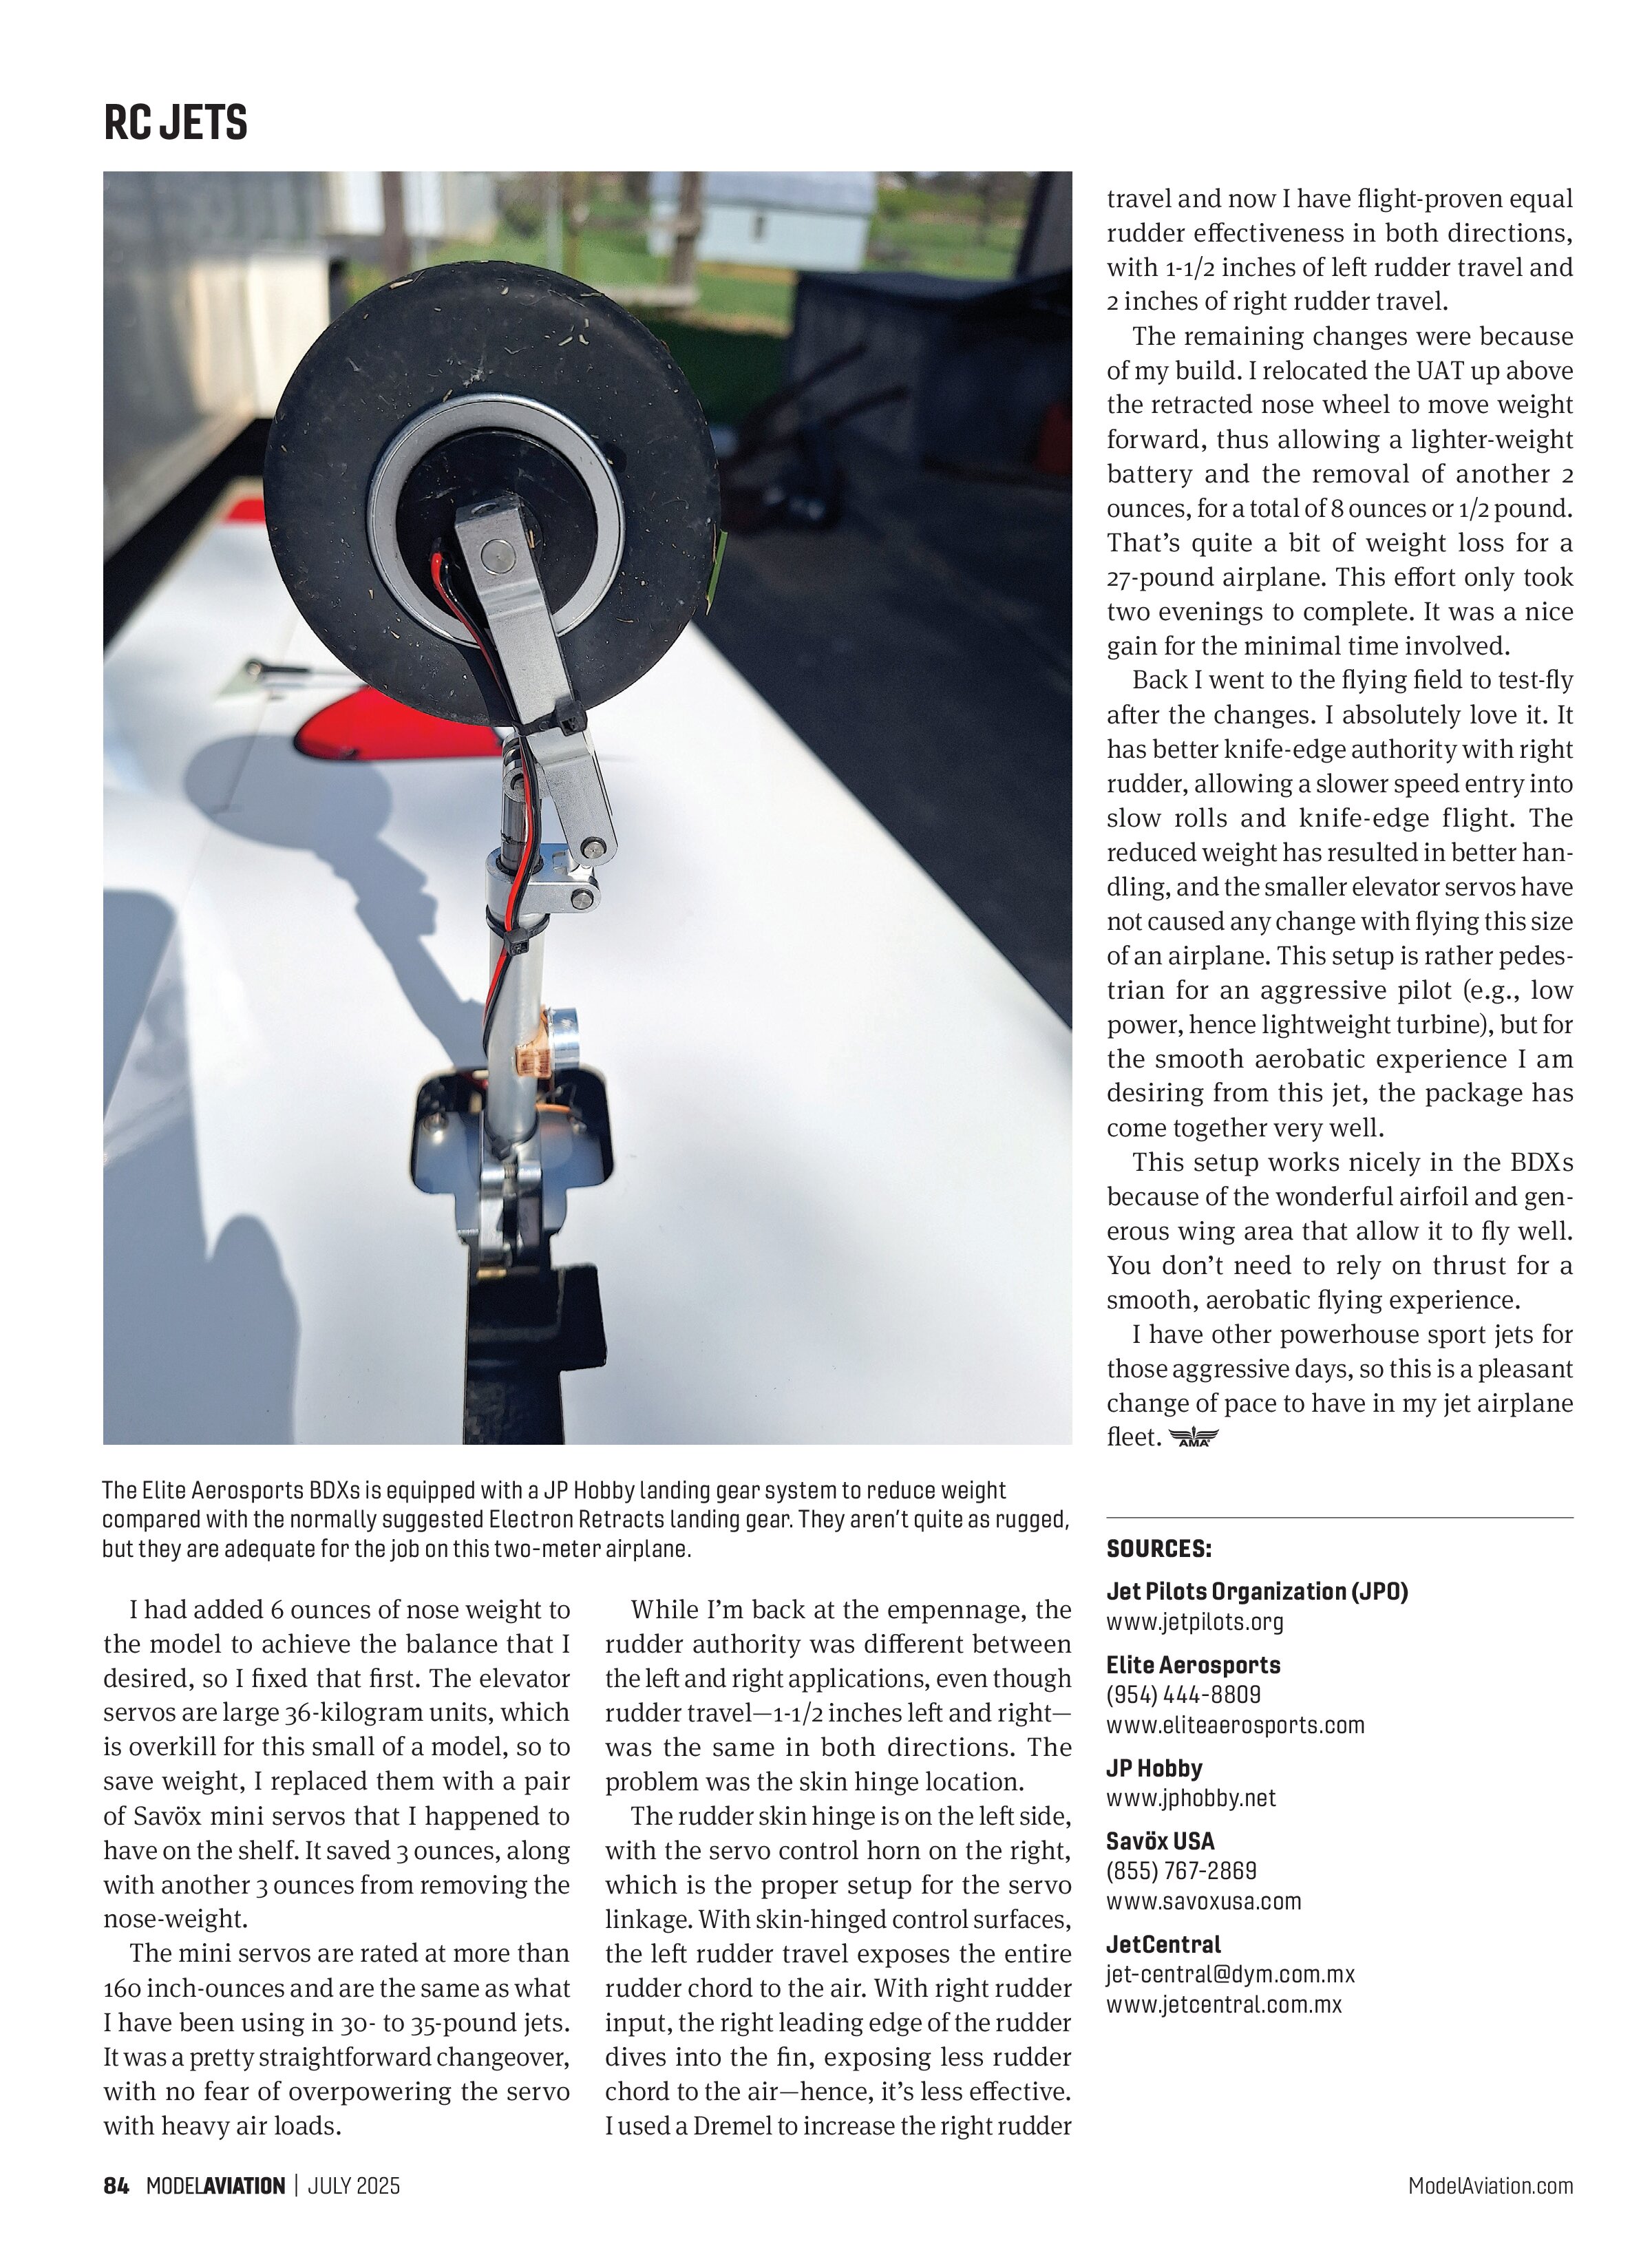
Light weight was my desire, hence the JP Hobby landing gear option. Normally I would opt for Electron Retracts landing gear with a GS-200 controller. Electron landing gear is a great system that is bulletproof and rugged with powerful brakes, but it is slightly heavy, so it’s time to try something new.
The JP retracts are lighter and strong enough to handle normal flying on this jet. The reason weight has been on mind with this BDXs is because I am running a JetCentral Rabbit 100-newton-thrust turbine. It’s a small turbine for a two-meter airplane, but I have enough hotrods in the fleet—I want a mellow jet.
This has been my first owner experience with JP Hobby brakes. They are not the same as Electrons; JPs are much softer and they do not come on quickly and powerfully. I have found it best to apply the brakes before touchdown if a short landing roll is required.
I’m looking forward to learning more about the JP Hobby brakes. They have some odd quirks compared with my Electron experiences. One thing to note is that the JP brakes are limited only to on and off. They are missing some of the nice features of the Electron brakes with a GS-200 controller, such as differential braking with gyro assistance to maintain heading during braking.
The BDXs flies well. It’s a good, lightweight two-meter jet with an awesome airfoil for intense aerobatic flying throughout the full speed range. The 100-newton power is plenty for enjoying both high- and low-speed flying, and I must say that the slow landing speed surprised me.
After approximately a dozen flights, I decided that it was time to fine-tune the setup and optimize the BDXs to my flying style, so it was back to the shop.


travel and now I have flight-proven equal rudder effectiveness in both directions, with 1-1/2 inches of left rudder travel and 2 inches of right rudder travel.
The remaining changes were because of my build. I relocated the UAT up above the retracted nose wheel to move weight forward, thus allowing a lighter-weight battery and the removal of another 2 ounces, for a total of 8 ounces or 1/2 pound. That’s quite a bit of weight loss for a 27-pound airplane. This effort only took two evenings to complete. It was a nice gain for the minimal time involved.
Back I went to the flying field to test-fly after the changes. I absolutely love it. It has better knife-edge authority with right rudder, allowing a slower speed entry into slow rolls and knife-edge flight. The reduced weight has resulted in better handling, and the smaller elevator servos have not caused any change with flying this size of an airplane. This setup is rather pedestrian for an aggressive pilot (e.g., low power, hence lightweight turbine), but for the smooth aerobatic experience I am desiring from this jet, the package has come together very well.
This setup works nicely in the BDXs because of the wonderful airfoil and generous wing area that allow it to fly well. You don’t need to rely on thrust for a smooth, aerobatic flying experience.
I have other powerhouse sport jets for those aggressive days, so this is a pleasant change of pace to have in my jet airplane fleet.
The Elite Aerosports BDXs is equipped with a JP Hobby landing gear system to reduce weight compared with the normally suggested Electron Retracts landing gear. They aren’t quite as rugged, but they are adequate for the job on this two-meter airplane.
I had added 6 ounces of nose weight to the model to achieve the balance that I desired, so I fixed that first. The elevator servos are large 36-kilogram units, which is overkill for this small of a model, so to save weight, I replaced them with a pair of Savöx mini servos that I happened to have on the shelf. It saved 3 ounces, along with another 3 ounces from removing the nose-weight.
The mini servos are rated at more than 160 inch-ounces and are the same as what I have been using in 30- to 35-pound jets. It was a pretty straightforward changeover, with no fear of overpowering the servo with heavy air loads.
While I’m back at the empennage, the rudder authority was different between the left and right applications, even though rudder travel—1-1/2 inches left and right—was the same in both directions. The problem was the skin hinge location.
The rudder skin hinge is on the left side, with the servo control horn on the right, which is the proper setup for the servo linkage. With skin-hinged control surfaces, the left rudder travel exposes the entire rudder chord to the air. With right rudder input, the right leading edge of the rudder dives into the fin, exposing less rudder chord to the air—hence, it’s less effective. I used a Dremel to increase the right rudder travel and now I have flight-proven equal rudder effectiveness in both directions, with 1-1/2 inches of left rudder travel and 2 inches of right rudder travel.
SOURCES:
Jet Pilots Organization (JPO)
www.jetpilots.org
Elite Aerosports
(954) 444-8809
www.eliteaerosports.com
JP Hobby
www.jphobby.net
Savöx USA
(855) 767-2869
www.savoxusa.com