DICK SARPOLUS' LEARJET

Build the “lost” EDF project from 2016
By Dick Sarpolus
rsarpolus2@comcast.net
Photos provided by the author
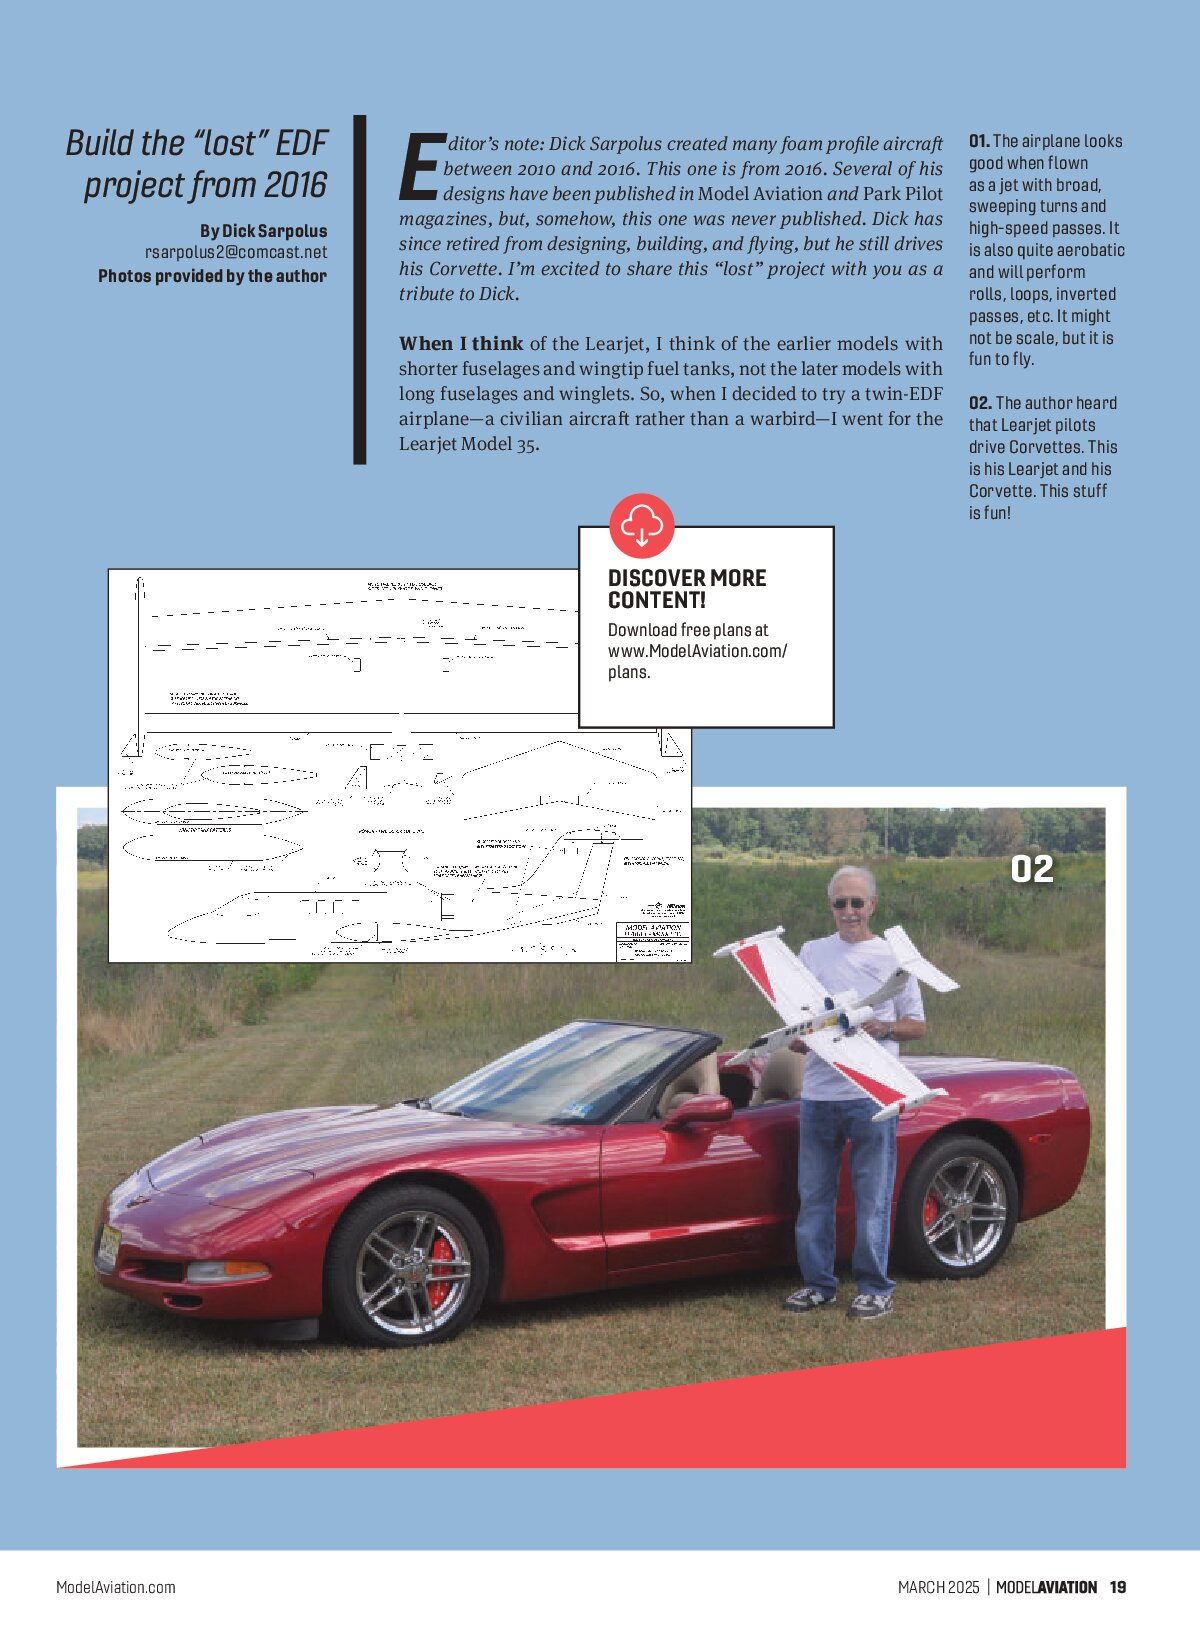
Editor's note: Dick Sarpolus created many foam profile aircraft between 2010 and 2016. This one is from 2016. Several of his designs have been published in Model Aviation and Park Pilot magazines, but, somehow, this one was never published. Dick has since retired from designing, building, and flying, but he still drives his Corvette. I’m excited to share this “lost” project with you as a tribute to Dick.
When I think of the Learjet, I think of the earlier models with shorter fuselages and wingtip fuel tanks, not the later models with long fuselages and winglets. So, when I decided to try a twin-EDF airplane—a civilian aircraft rather than a warbird—I went for the Learjet Model 35.


At a Glance
Specifications
Type: Foam profile, electric, semiccale, twin-engine business jet
Construction: Sheet foam; balsa; cut-foam wing; thin plywood
Wingspan: 42 inches
Length: 36 inches
Wing area: 400 sq. in.
Weight: 31 ounces with battery
Wing loading: 11 ounces per sq. ft.
Power: Two 55mm EDF units
Battery: 3S 2,400 mAh LiPo
Radio: Four-channel micro receiver; four submicro servos
I still remember when the Learjet was new, and it seemed so exciting that this new, private jet could outperform many of the military jet fighters of the time. The Learjet looked hot and it was hot; it was one of those designs that was an instant classic. Warbirds are probably the most popular aircraft to create in model form, but I always liked the Learjet. And, if you liked a warbird Learjet, they made more than 50 C-21A versions of the Model 35 for the U.S. Air Force and the Air National Guard.
This is just a profile model, mostly foam, and electric powered. I’ve used the same basic cut-foam wing as in my Too Windy, which has been on three-dozen “sorta-scale,” electric-powered profile warbirds I’ve greatly enjoyed doing. I was confident that the wing would provide good flying sport/aerobatic performance, and a twin-jet aircraft would be an interesting project.
I’ve had good success with 70mm EDF units and I figured that two 55mm EDFs would be right for a twin-jet layout on the same wing. I used ELE EDF units because I had them, but any good 55mm EDF units should work.
It’s a profile model and the wing is slightly oversized, but it’s obviously a Learjet and it’s scalelike enough for me. At 400 sq. in. of wing area, with a 43-inch wingspan and a 36-inch length, if it looks right, it will probably fly right. These are foam airframes, but the fuselage on this one had to be long and strong enough for the twin EDF mounting and the T-tail, so I figured a piece of 3/8-inch balsa made more sense than a piece of thin foam with a lot of plywood doublers glued on.
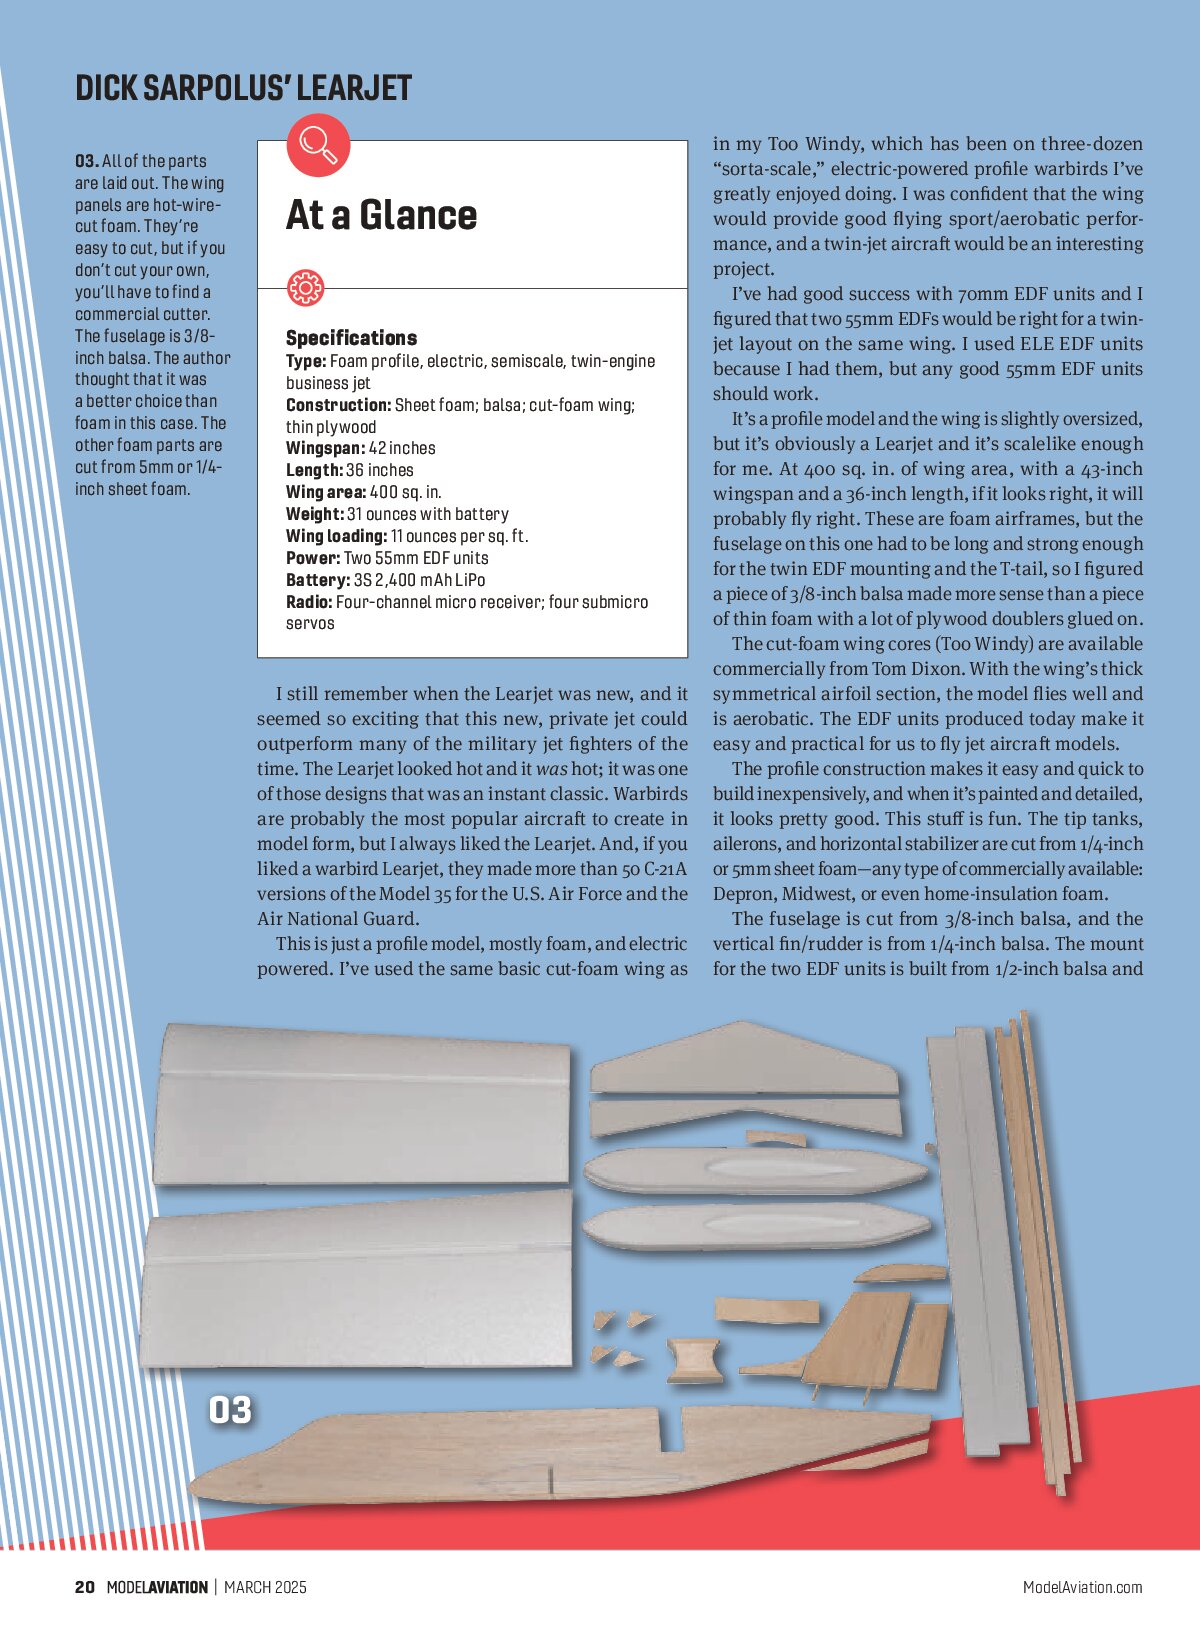
The cut-foam wing cores (Too Windy) are available commercially from Tom Dixon. With the wing’s thick symmetrical airfoil section, the model flies well and is aerobatic. The EDF units produced today make it easy and practical for us to fly jet aircraft models.
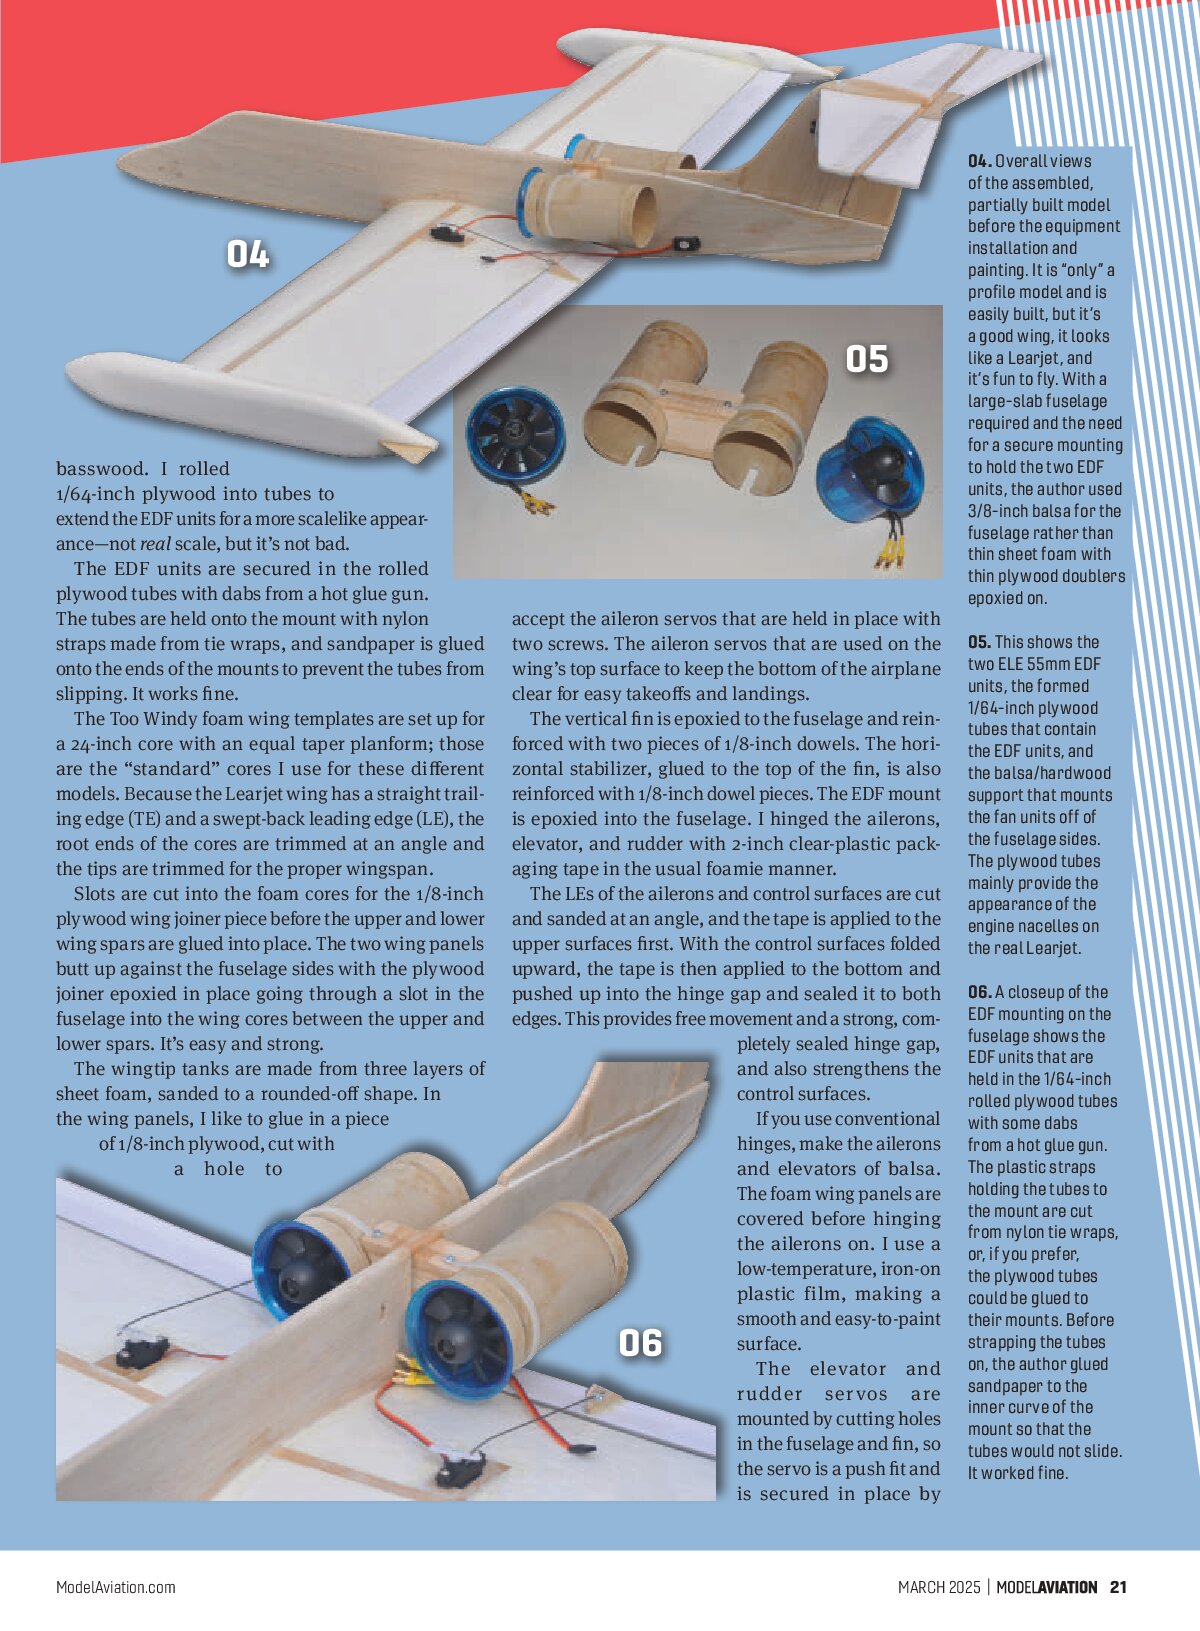
The profile construction makes it easy and quick to build inexpensively, and when it’s painted and detailed, it looks pretty good. This stuff is fun. The tip tanks, ailerons, and horizontal stabilizer are cut from 1/4-inch or 5mm sheet foam—any type of commercially available: Depron, Midwest, or even home-insulation foam. The fuselage is cut from 3/8-inch balsa, and the vertical fin/rudder is from 1/4-inch balsa. The mount for the two EDF units is built from 1/2-inch balsa and

basswood. I rolled 1/64-inch plywood into tubes to extend the EDF units for a more scalelike appearance—not real scale, but it’s not bad.
The EDF units are secured in the rolled plywood tubes with dabs from a hot glue gun. The tubes are held onto the mount with nylon straps made from tie wraps, and sandpaper is glued onto the ends of the mounts to prevent the tubes from slipping. It works fine.
The Too Windy foam wing templates are set up for a 24-inch core with an equal taper planform; those are the “standard” cores I use for these different models. Because the Learjet wing has a straight trailing edge (TE) and a swept-back leading edge (LE), the root ends of the cores are trimmed at an angle and the tips are trimmed for the proper wingspan.
Slots are cut into the foam cores for the 1/8-inch plywood wing joiner piece before the upper and lower wing spars are glued into place. The two wing panels butt up against the fuselage sides with the plywood joiner epoxied in place going through a slot in the fuselage into the wing core between the upper and lower spars. It’s easy and strong.
The wingtip tanks are made from three layers of sheet foam, sanded to a rounded-off shape. In the wing panels, I like to glue in a piece of 1/8-inch plywood, cut with a hole to accept the aileron servos that are held in place with two screws. The aileron servos that are used on the wing’s top surface keep the bottom of the airplane clear for easy takeoffs and landings.

The vertical fin is epoxied to the fuselage and reinforced with two pieces of 1/8-inch dowels. The horizontal stabilizer, glued to the top of the fin, is also reinforced with 1/8-inch-dowel pieces. The EDF mount is epoxied into the fuselage. I hinged the ailerons, elevator, and rudder with 2-inch clear-plastic packaging tape in the usual foamie manner.
The LEs of the ailerons and control surfaces are cut and sanded at an angle, and the tape is applied to the upper surfaces first. With the control surfaces folded upward, the tape is then applied to the bottom and pushed up into the hinge gap and sealed to it to both edges. This provides free movement and a strong, completely sealed hinge gap, and also strengthens the control surfaces.

If you use conventional hinges, make the ailerons and elevators of balsa. The foam wing panels are covered before hinging the ailerons on. I use a low-temperature, iron-on plastic film, making a smooth and easy-to-paint surface.

The elevator and rudder servos are mounted by cutting holes in the fuselage and fin, so the servo is a push fit and is secured in place by

dabs of glue from a hot glue gun. Slots are cut into the control surfaces for the 1/16 plywood control horns and they are epoxied in place. I use .047 wire for the pushrods, with a Z-bend on one end and a Du-Bro Mini E/Z Connector on the other.
I mounted the two ESCs on the sides of the fuselage close to the EDF units and the receiver on the top side of the wing with hook-and-loop tape. The LiPo battery is mounted to the fuselage side toward the nose with hook-and-loop tape, and slots are cut through the fuselage for a hook-and-loop strap around the battery.
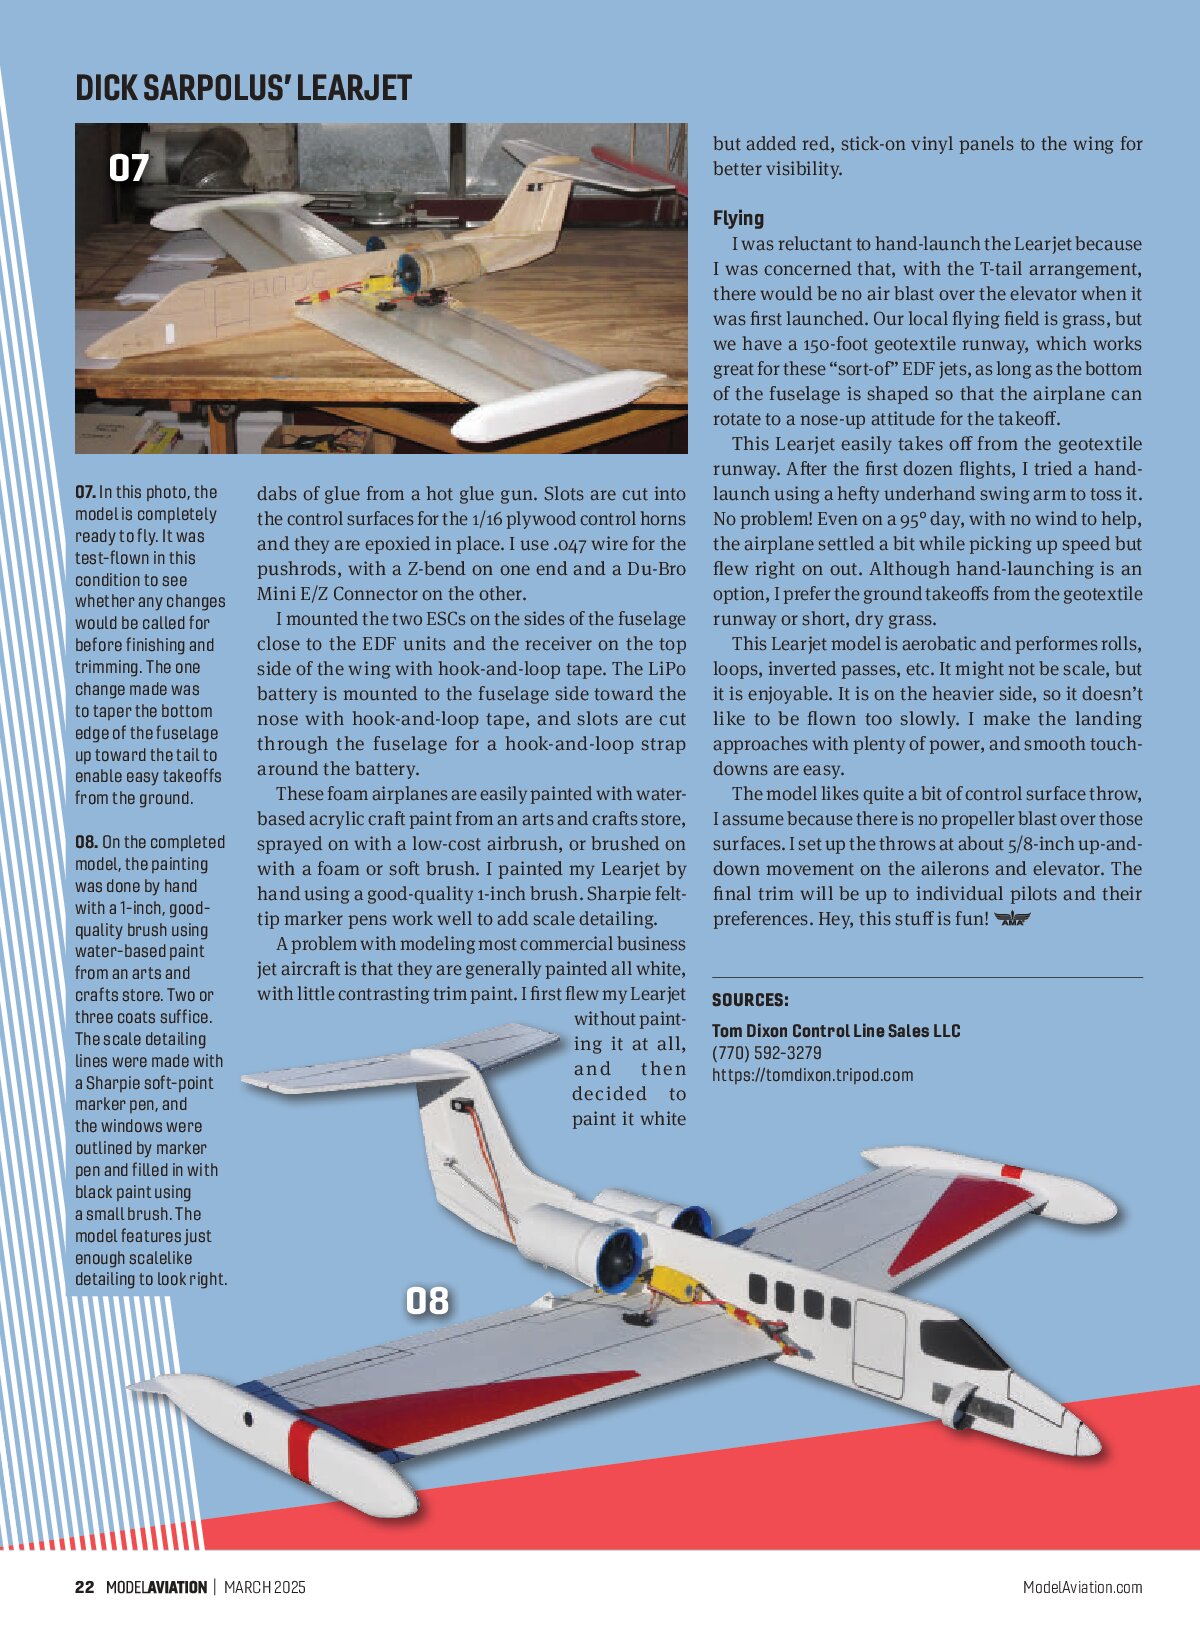
These foam airplanes are easily painted with water-based acrylic craft paint from an arts and crafts store, sprayed on with a low-cost airbrush, or brushed on with a foam or soft brush. I painted my Learjet by hand using a good-quality 1-inch brush. Sharpie felt-tip marker pens work well to add scale detailing.
A problem with modeling most commercial business jet aircraft is that they are generally painted all white, with little contrasting trim paint. I first flew my Learjet without painting it at all, and then decided to paint it white but added red, stick-on vinyl panels to the wing for better visibility.

Flying
I was reluctant to hand-launch the Learjet because I was concerned that, with the T-tail arrangement, there would be no air blast over the elevator when it was first launched. Our local flying field is grass, but we have a 150-foot geotextile runway, which works great for these “sort-of” EDF jets, as long as the bottom of the fuselage is shaped so that the airplane can rotate to a nose-up attitude for the takeoff.
This Learjet easily takes off from the geotextile runway. After the first dozen flights, I tried a hand-launch using a hefty underhand swing arm to toss it. No problem! Even on a 95° day, with no wind to help, the airplane settled a bit while picking up speed but flew right on out. Although hand-launching is an option, I prefer the ground takeoffs from the geotextile runway or short, dry grass.
This Learjet model is aerobatic and performs rolls, loops, inverted passes, etc. It might not be scale, but it is enjoyable. It is on the heavier side, so it doesn’t like to be flown too slowly. I make the landing approaches with plenty of power, and smooth touch-downs are easy.
The model likes quite a bit of control surface throw. I assume because there is no propeller blast over those surfaces. I set up the throws at about 5/8-inch up-and-down movement on the ailerons and elevator. The final trim will be up to individual pilots and their preferences. Hey, this stuff is fun!
SOURCES:
Tom Dixon Control Line Sales LLC
(770) 592-3279
https://tomdixon.tripod.com