DANCING WINGS HOBBY TIGER MOTH LIGHT REDO, PART ONE
By Rob Caso | quack916@aol.com

THIS WILL BE a two-part how-to!
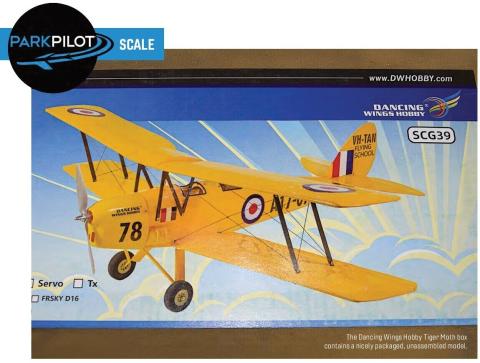
The Tiger Moth is one of my favorite aircraft. It was responsible for training Royal Air Force (RAF) pilots throughout World War II, and many are still around. My 68-inch wingspan model almost flies itself and has no bad habits, so when I happened upon the Dancing Wings Hobby 800mm (31.5-inch) wingspan balsa and plywood model, I couldn’t say no.
At 1/12 scale, it’s available from Amain Hobbies in both ARF and air-frame-only formats. Its outlines are close, it’s a relatively simple model, and I can fly it out in front of my house. I have learned that ARFs aren’t made forever, so I didn’t want to miss this one, even if it didn’t currently fit into my lengthy build list.
While the model is very nice as it is, it nevertheless could use some scale “fluff up.” Doing so makes an ARF more “yours” rather than one you simply bought. There’s a bit of the common “starved horse” effect on the fuselage aft of the cockpit, the rudder and elevator servos reside way back in the tail, and, finally, you can have any color you want, as long as it’s yellow.
The kit includes a well-illustrated instruction booklet, so I will only address my modifications and make other recommendations for a successful model.
The Plan
I bought the airframe-only version, which is packaged in large pieces. While I intend to keep the yellow flying surfaces, I will skin the turtledeck, redo the fuselage covering, repaint the cowling, and, although the model is still open, move the fuselage servos forward. The landing gear could use a
little help, and how about an instrument panel and pilot? Perhaps more accurate RAF markings are needed as well. Okay, it’s not that big of a list. Game on!
Fuselage
All of the action is in the fuselage, so the first thing I did was gather all of the needed equipment. Lucien at Innov8tive Designs, who was recently featured in Model Aviation, is my go-to for propulsion. He fixed me up with a motor, propeller, ESC, and battery after I sent him the model’s specifications, advised him of my “crash-averse” flying style, and gave him an idea of what motor I needed. I have the results listed in the “At a Glance” sidebar. I scrounged some micro servos from my stash, along with a receiver. Roundels are on the way from Callie Graphics. This is just getting easier.
Tear-Off
It was almost a shame to remove the neat and firmly affixed covering—the most tedious part of the redo. I began with the underside’s edges, teasing the sides up and off and saving the remnants of yellow for some striping later. Be careful not to cut into the 1/32-inch balsa skinning; instead, maneuver a sharp #11 blade under an edge and along the seam to release the covering’s bond. Note the carbon-fiber rod that runs lengthwise along the four corners of the fuselage. It’s indicative of a well-thought-out and solidly constructed model.

Fuselage Servos and Pushrods
I installed the rudder and elevator servos aft of the battery compartment using the model’s hatch for access. I pressed the “easy” button and used Du-Bro’s #847 20-inch Micro Pushrods and braced them in a couple of spots out to the tail, which is easy to do while the fuselage is open.
I installed my own control arms on both the rudder and elevator since the kit’s control arms seemed flimsy. My kit had the slots for each control horn on the same side of the airplane—they should be opposite. Test-fit the control surfaces to the fuselage so that the pushrod exits at the tail to ensure an arrow-straight run from the servo to the control horn.
New Bulkheads
Using matboard, I prototyped the five new bulkheads, which were toleranced for the 1/32-inch sheeting. I saved builders who want to do this the tedium of determining the lofts and slots by asking Model Aviation to place a 1:1 PDF of the parts on its website for download.

At a Glance
Specifications
Wingspan: 800mm
Length: 690mm
Flying Weight: 420 grams
Motor: 1908 1,500 to 2,000 Kv brushless
Servos: Four 3.7 grams
ESC: 20 amps
Propeller: 7 inches
Battery: 2S 7.4-volt 1,300 to 1,500 mAh LiPo
Innov8tive Designs Equipment:
Motor: BA-2305-1050
Propeller: 7 x 5E
ESC: 20 amps
Battery: 1,000 mAh 3S
SCALE

flush to accommodate the sheeting. Double check the area along the top of the fuselage framework to make sure that there is enough room for the skin, which should wind up flush with the sides.
Skin the area with opposing pieces of dampened medium 1/32-inch balsa; rubber bands may be used to keep the sheeting in close contact with the new bulkheads. A good idea is to fit one side, tack-glue its base, rubber band it, and then glue in the curved sections and along the stringers via the open underside. Lightly sand the skin flush after both sides have been installed.
As an aside, all of the internal wood joints on the fuselage, as well as the carbon-fiber rods running aft, should be augmented with a swipe of medium CA.

The author notched the balsa/plywood servo rails to make servo installation easier.
In my May column, I will discuss covering, motor installation, markings, the final fit out, and maybe even have some flight shots.

Cut off and sand the old bulkheads flush with the fuselage, leaving a little of their crossing member intact. If you blow one out, it’s no problem; just glue in some hard 1/16-inch strip so that the new bulkhead has something to glue to.
Install the three intermediate bulkheads to the front of their respective crossmembers. The large bulkhead goes on the back of the cockpit and the aftmost one on top at the tail. To make the bulkheads, laminate a pair of 4 x 4-inch pieces of hard 1/32-inch balsa with the grain running crosswise to form a ply. This will be enough material for the set. I used Titebond III and clamped the resulting 1/16-inch lamination flat until it was dry.
Drop in some medium 1/8-inch square balsa for the stringers and sand them in
Free PDF downloads for the bulkheads, cowling mount, and templates are available at www.ModelAviation.com.
SOURCES:
Dancing Wings Hobby
morty@dwhobby.com
www.dwhobby.com
AMain Hobbies
(800) 705-2215
www.amainhobbies.com
Innov8tive Designs
(442) 515-0745
www.innov8tivedesigns.com
Callie Graphics
info@callie-graphics.com
www.callie-graphics.com
Du-Bro
(800) 848-9411
www.dubro.com
Horizon Hobby/UltraCote
www.horizonhobby.com
Tamiya USA
(800) 826-4922
www.tamiyausa.com
Titebond
(800) 669-4583
www.titebond.com
Model Aviation
www.ModelAviation.com