HOW AND WHEN TO WASHOUT A WING WHILE BUILDING

By Thayer Syme | thayer@flying-models.com
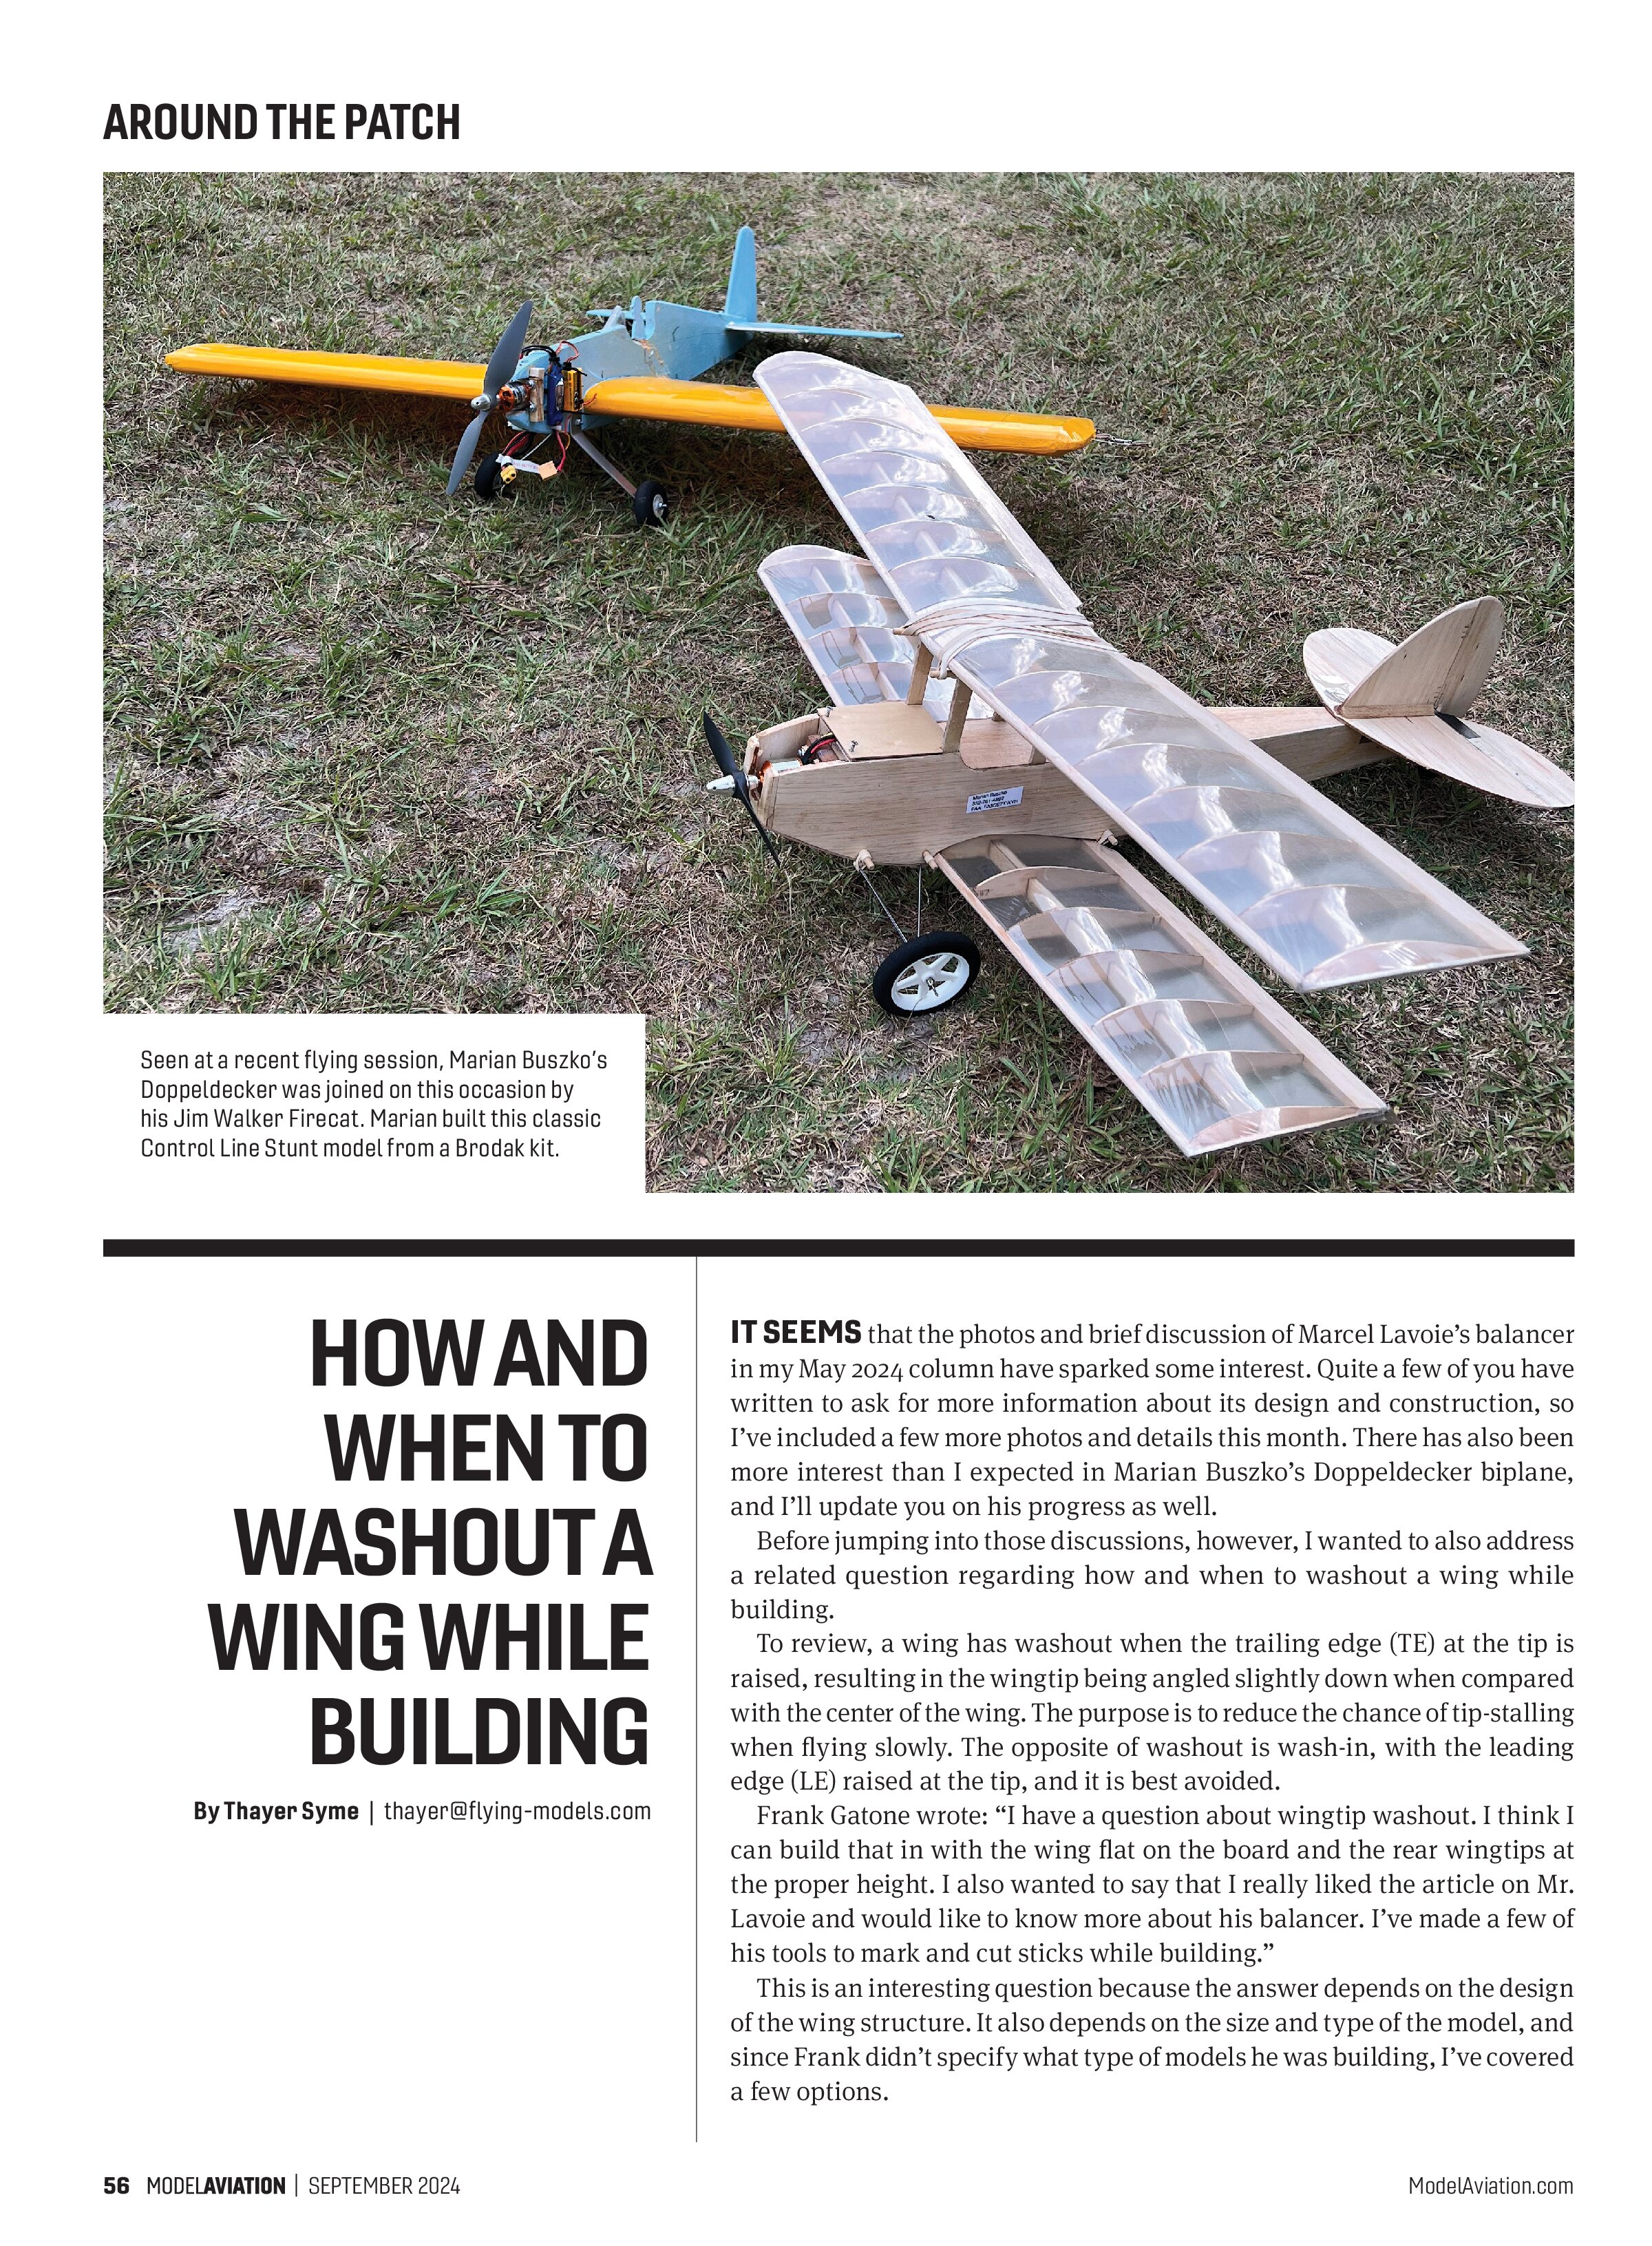
IT SEEMS that the photos and brief discussion of Marcel Lavoie’s balancer in my May 2024 column have sparked some interest. Quite a few of you have written to ask for more information about its design and construction, so I’ve included a few more photos and details this month. There has also been more interest than I expected in Marian Buszko’s Doppeldecker biplane, and I’ll update you on his progress as well.
Before jumping into those discussions, however, I wanted to also address a related question regarding how and when to washout a wing while building.
To review, a wing has washout when the trailing edge (TE) at the tip is raised, resulting in the wingtip being angled slightly down when compared with the center of the wing. The purpose is to reduce the chance of tip-stalling when flying slowly. The opposite of washout is wash-in, with the leading edge (LE) raised at the tip, and it is best avoided.
Frank Gatone wrote: “I have a question about wingtip washout. I think I can build that in with the wing flat on the board and the rear wingtips at the proper height. I also wanted to say that I really liked the article on Mr. Lavoie and would like to know more about his balancer. I’ve made a few of his tools to mark and cut sticks while building.”
This is an interesting question because the answer depends on the design of the wing structure. It also depends on the size and type of the model, and since Frank didn’t specify what type of models he was building, I’ve covered a few options.
twist the wing intentionally after construction will likely not be possible.
I recommend “building in” washout for any wings with diagonal bracing or D-tube construction, where the LE is sheeted top and bottom back to the spar. This is typically done by shimming the TE to the desired washout at the wingtip during construction, with additional support appropriately spaced along the TE as needed.
For lower-power models, though, typically slow RC “cruisers” or many Sport and Scale rubber FF models, the wing will not see such stresses. In such models, the wing structure is often more basic to save weight, thus easier to twist after assembly and covering.
Washout can be added to such tissue-covered wings when shrinking and sealing the tissue. Pin it flat while the wing dries, using shims to lift the wing and set the washout to allow appropriate airflow.
Modelers have added washout to larger wings with iron-on covering for years, simply by holding in a bit of twist and removing the ensuing wrinkles with a heat gun or covering iron. Such techniques are also used to straighten a wing that might have unequal twist between the two panels. It is also not unknown for modelers to use the heat from their car’s exhaust to set the twist while at the field.
Marcel’s Balancer
Moving on, I have included a few photos here to answer some more questions about Marcel’s balancer.
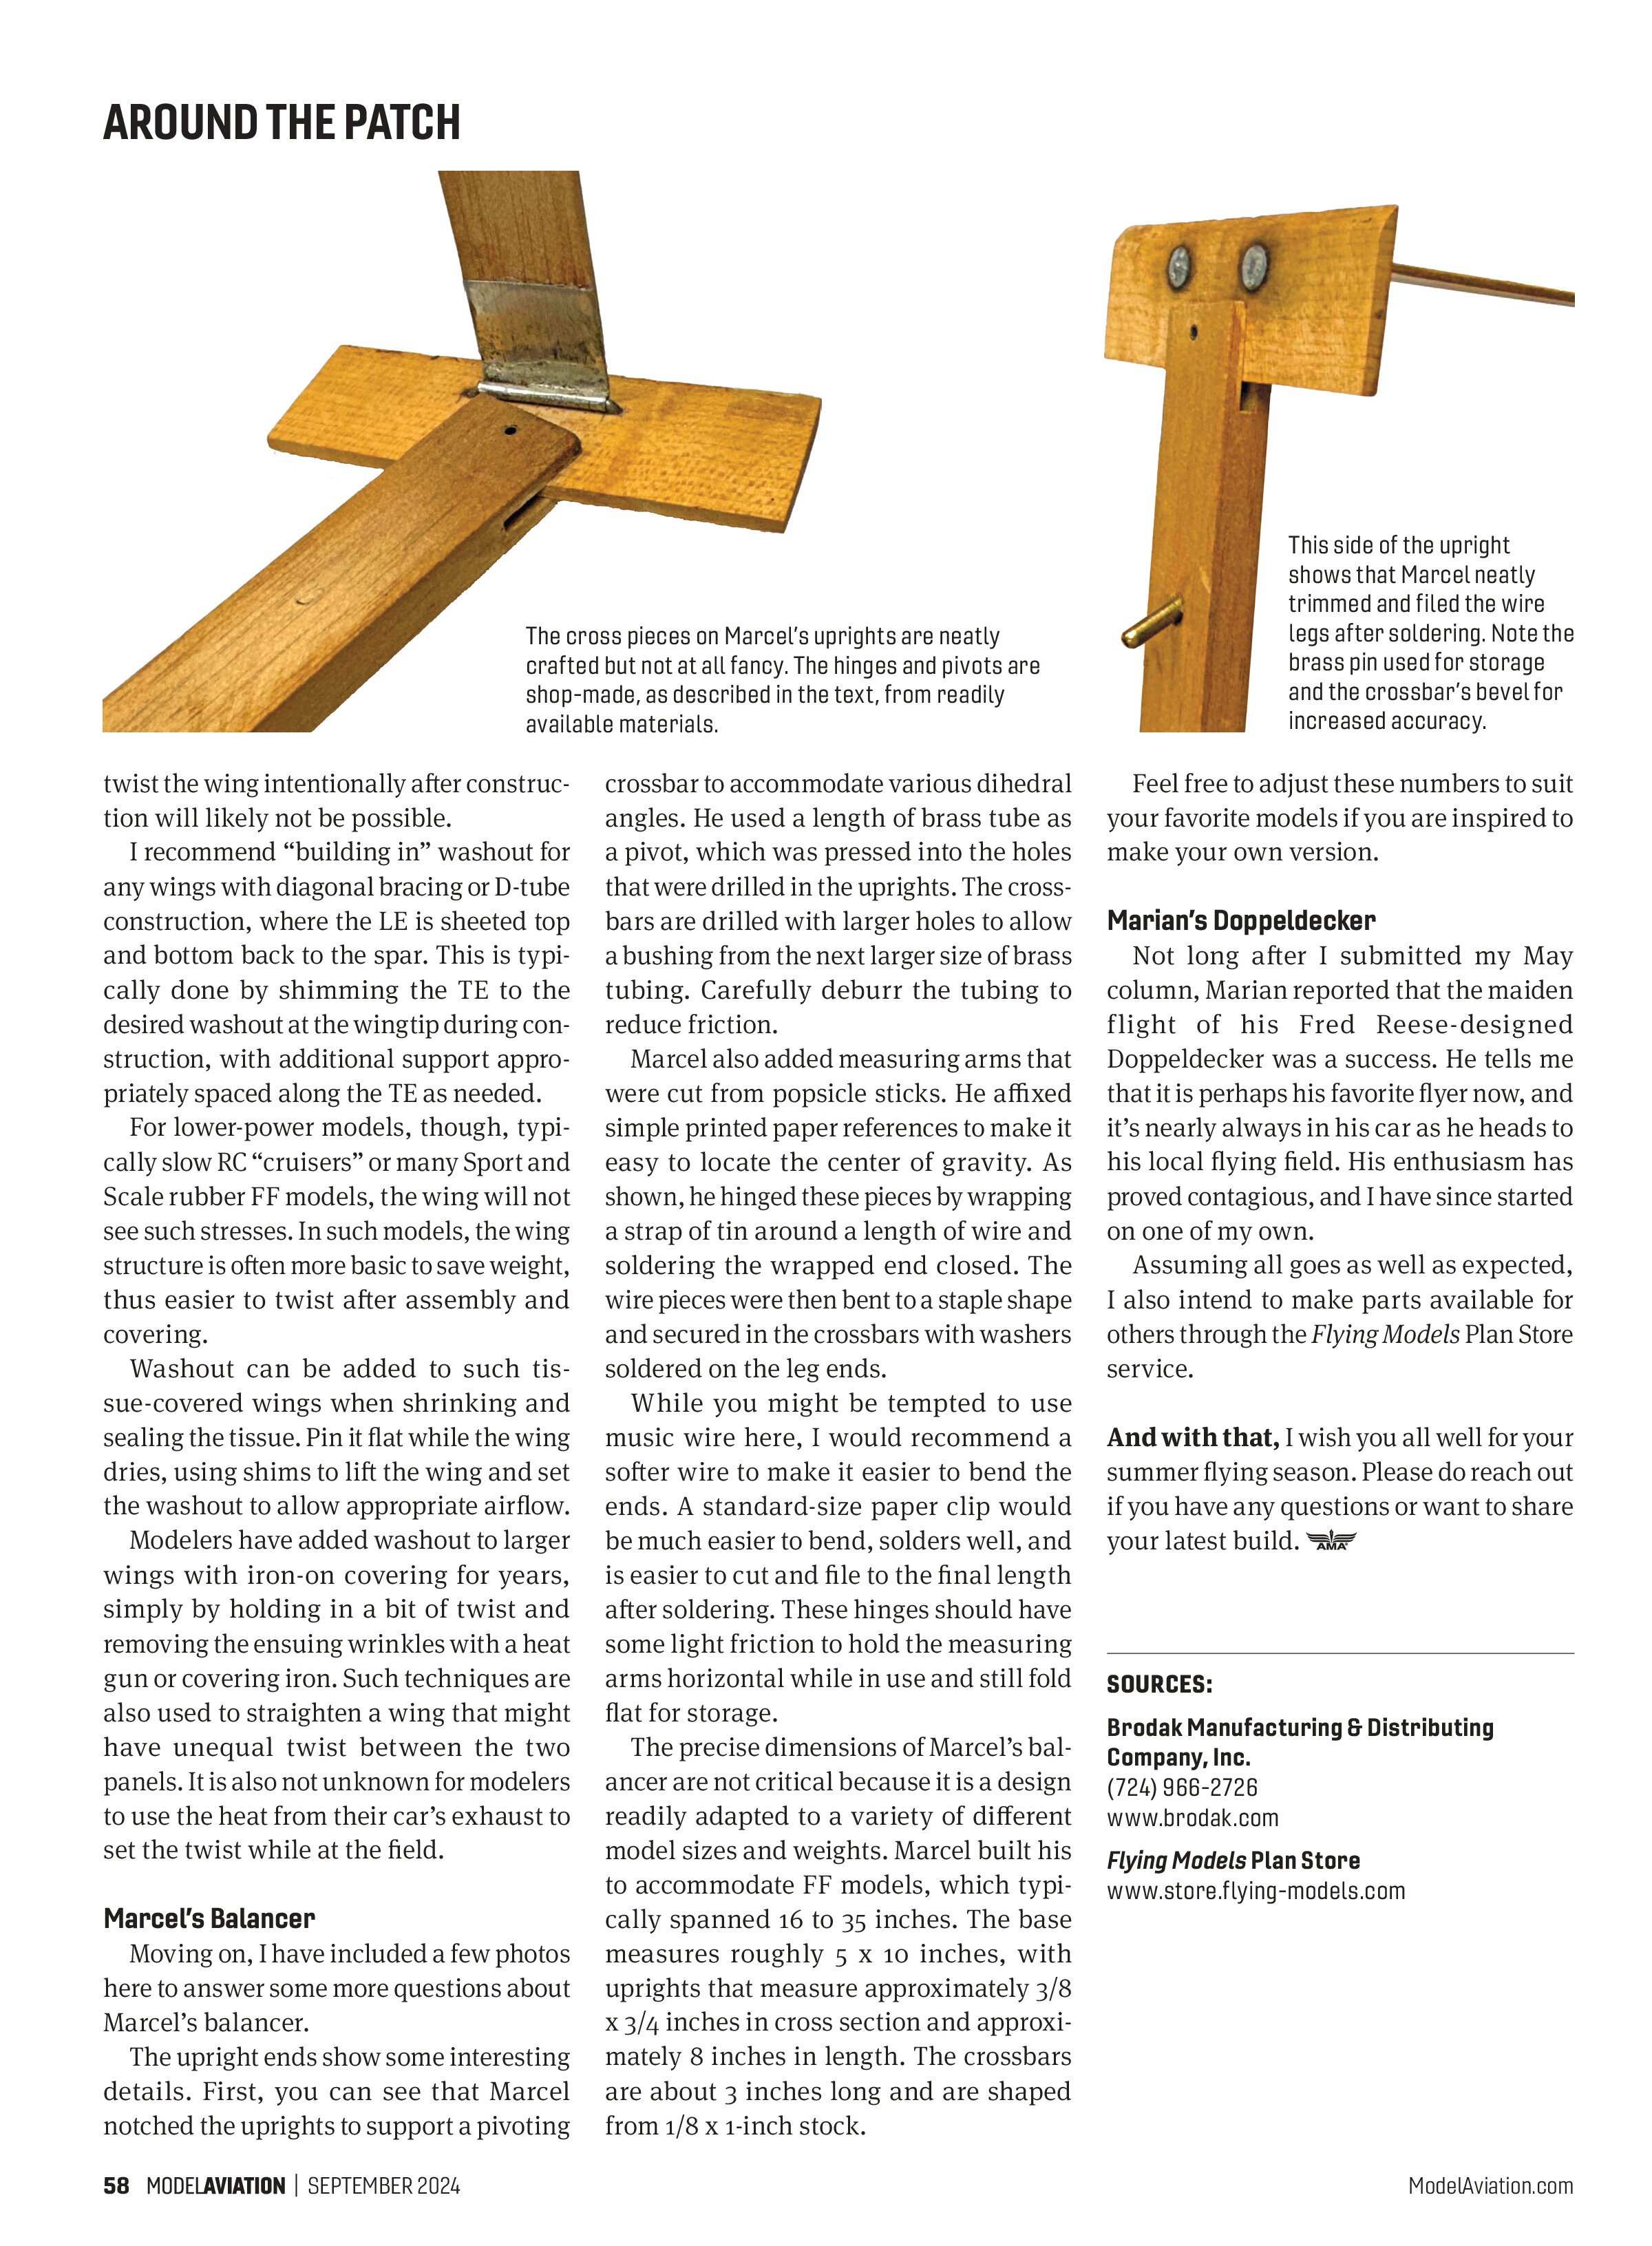
The upright ends show some interesting details. First, you can see that Marcel notched the uprights to support a pivoting


crossbar to accommodate various dihedral angles. He used a length of brass tube as a pivot, which was pressed into the holes that were drilled in the uprights. The crossbars are drilled with larger holes to allow a bushing from the next larger size of brass tubing. Carefully deburr the tubing to reduce friction.
Marcel also added measuring arms that were cut from popsicle sticks. He affixed simple printed paper references to make it easy to locate the center of gravity. As shown, he hinged these pieces by wrapping a strap of tin around a length of wire and soldering the wrapped end closed. The wire pieces were then bent to a staple shape and secured in the crossbars with washers soldered on the leg ends.
While you might be tempted to use music wire here, I would recommend a softer wire to make it easier to bend the ends. A standard-size paper clip would be much easier to bend, solders well, and is easier to cut and file to the final length after soldering. These hinges should have some light friction to hold the measuring arms horizontal while in use and still fold flat for storage.
The precise dimensions of Marcel’s balancer are not critical because it is a design readily adapted to a variety of different model sizes and weights. Marcel built his to accommodate FF models, which typically spanned 16 to 35 inches. The base measures roughly 5 x 10 inches, with uprights that measure approximately 3/8 x 3/4 inches in cross section and approximately 8 inches in length. The crossbars are about 3 inches long and are shaped from 1/8 x 1-inch stock.
Feel free to adjust these numbers to suit your favorite models if you are inspired to make your own version.
Marian’s Doppeldecker
Not long after I submitted my May column, Marian reported that the maiden flight of his Fred Reese-designed Doppeldecker was a success. He tells me that it is perhaps his favorite flyer now, and it’s nearly always in his car as he heads to his local flying field. His enthusiasm has proved contagious, and I have since started on one of my own.
Assuming all goes as well as expected, I also intend to make parts available for others through the Flying Models Plan Store service.
And with that, I wish you all well for your summer flying season. Please do reach out if you have any questions or want to share your latest build.
SOURCES:
Brodak Manufacturing & Distributing Company, Inc.
(724) 966-2726
www.brodak.com
Flying Models Plan Store
www.store.flying-models.com