EASY SKIN GRAFT METHOD FOR CARBON-FIBER WING REPAIR
By Gordon Buckland | gordon@gatorf3b.com

I HAVE SPENT a lot of time after contests retrieving models in trees, swamps, and fences, and they are often damaged. We are fortunate to have an avid builder and repair expert who has taken the time to document how to repair damaged wings. Thank you, Dennis Harvey, for this fantastic contribution about the skin-graft technique.
It is disheartening when you find that your beautiful carbon-fiber sailplane has some serious wing damage. It’s not uncommon after a midair collision at an F5J contest or after misjudging the distance to the tree line. Often, the damage seems so bad that you fear it is irreparable or, if it is, that it will gain a lot of weight. Fear not! The technique in this article could solve both problems. I have used it on dozens of repairs for both my sailplanes and those of others.
The first step is to assess the damage. If there is spar damage, it should be repaired first to ensure that the wing is strong and true. For now, let’s assume that the spar is intact and jump into an ugly damage situation where there is a significant gouge in the wing.
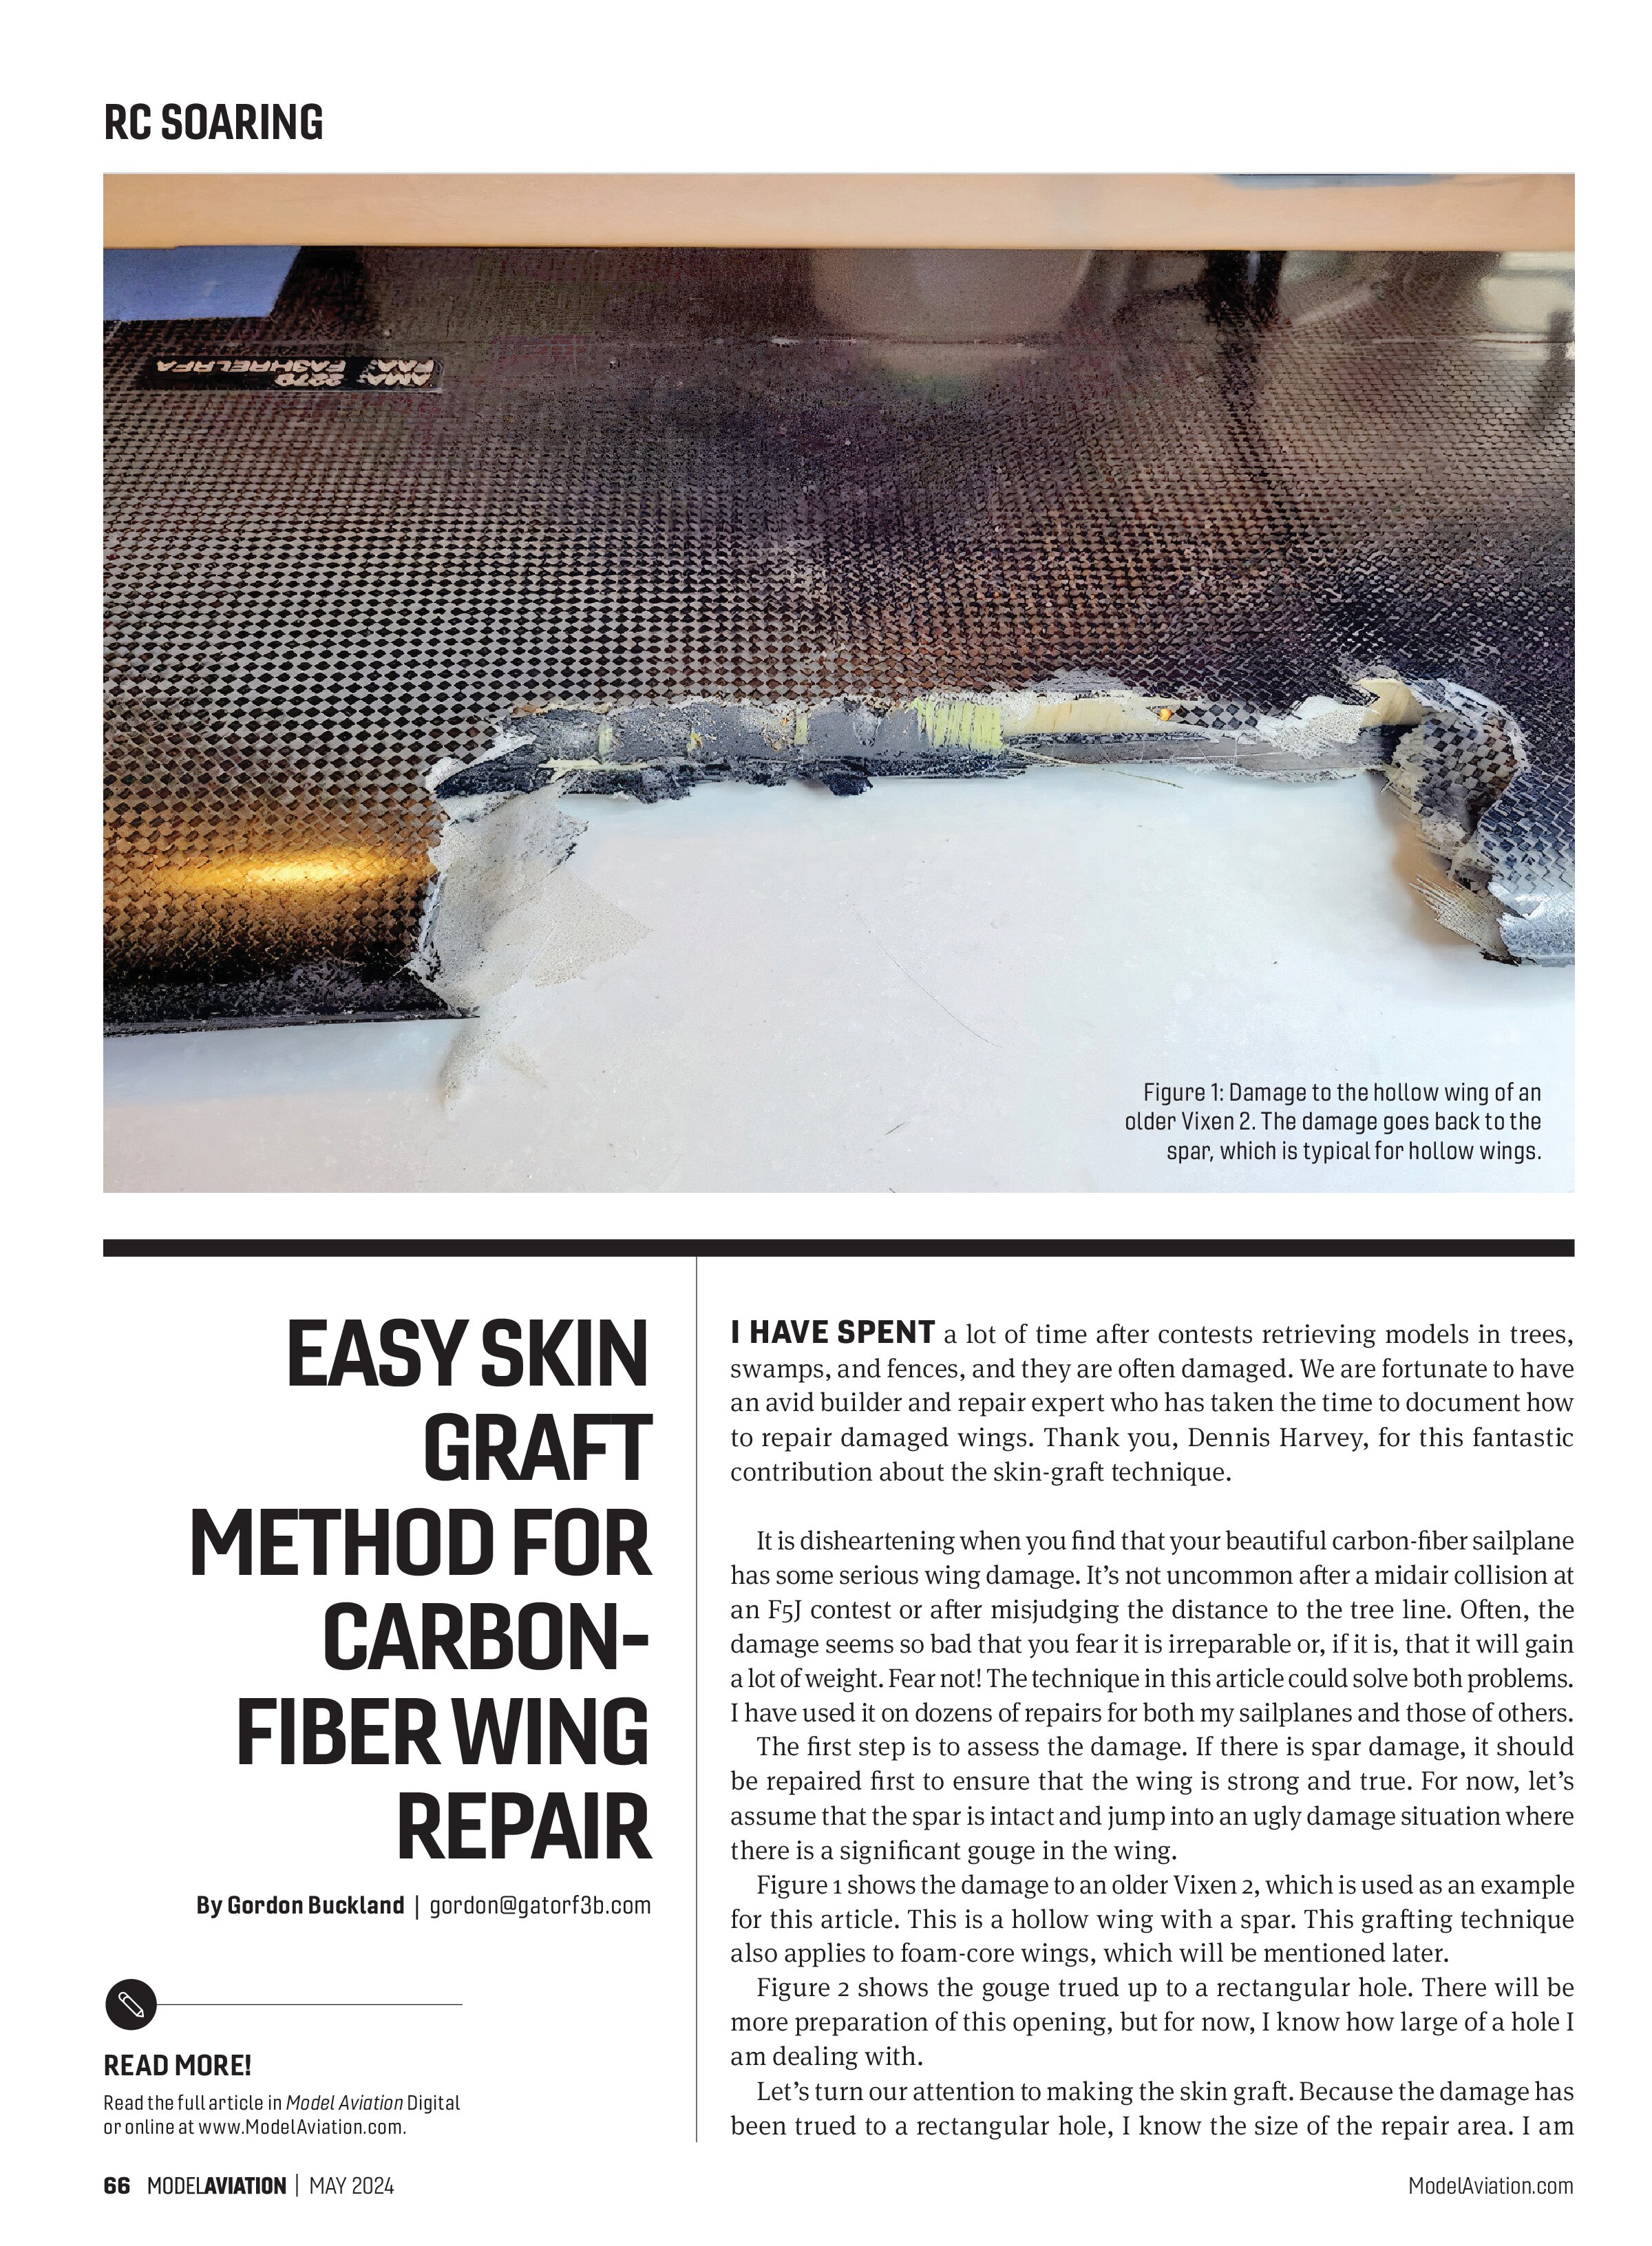
Figure 1 shows the damage to an older Vixen 2, which is used as an example for this article. This is a hollow wing with a spar. This grafting technique also applies to foam-core wings, which will be mentioned later.
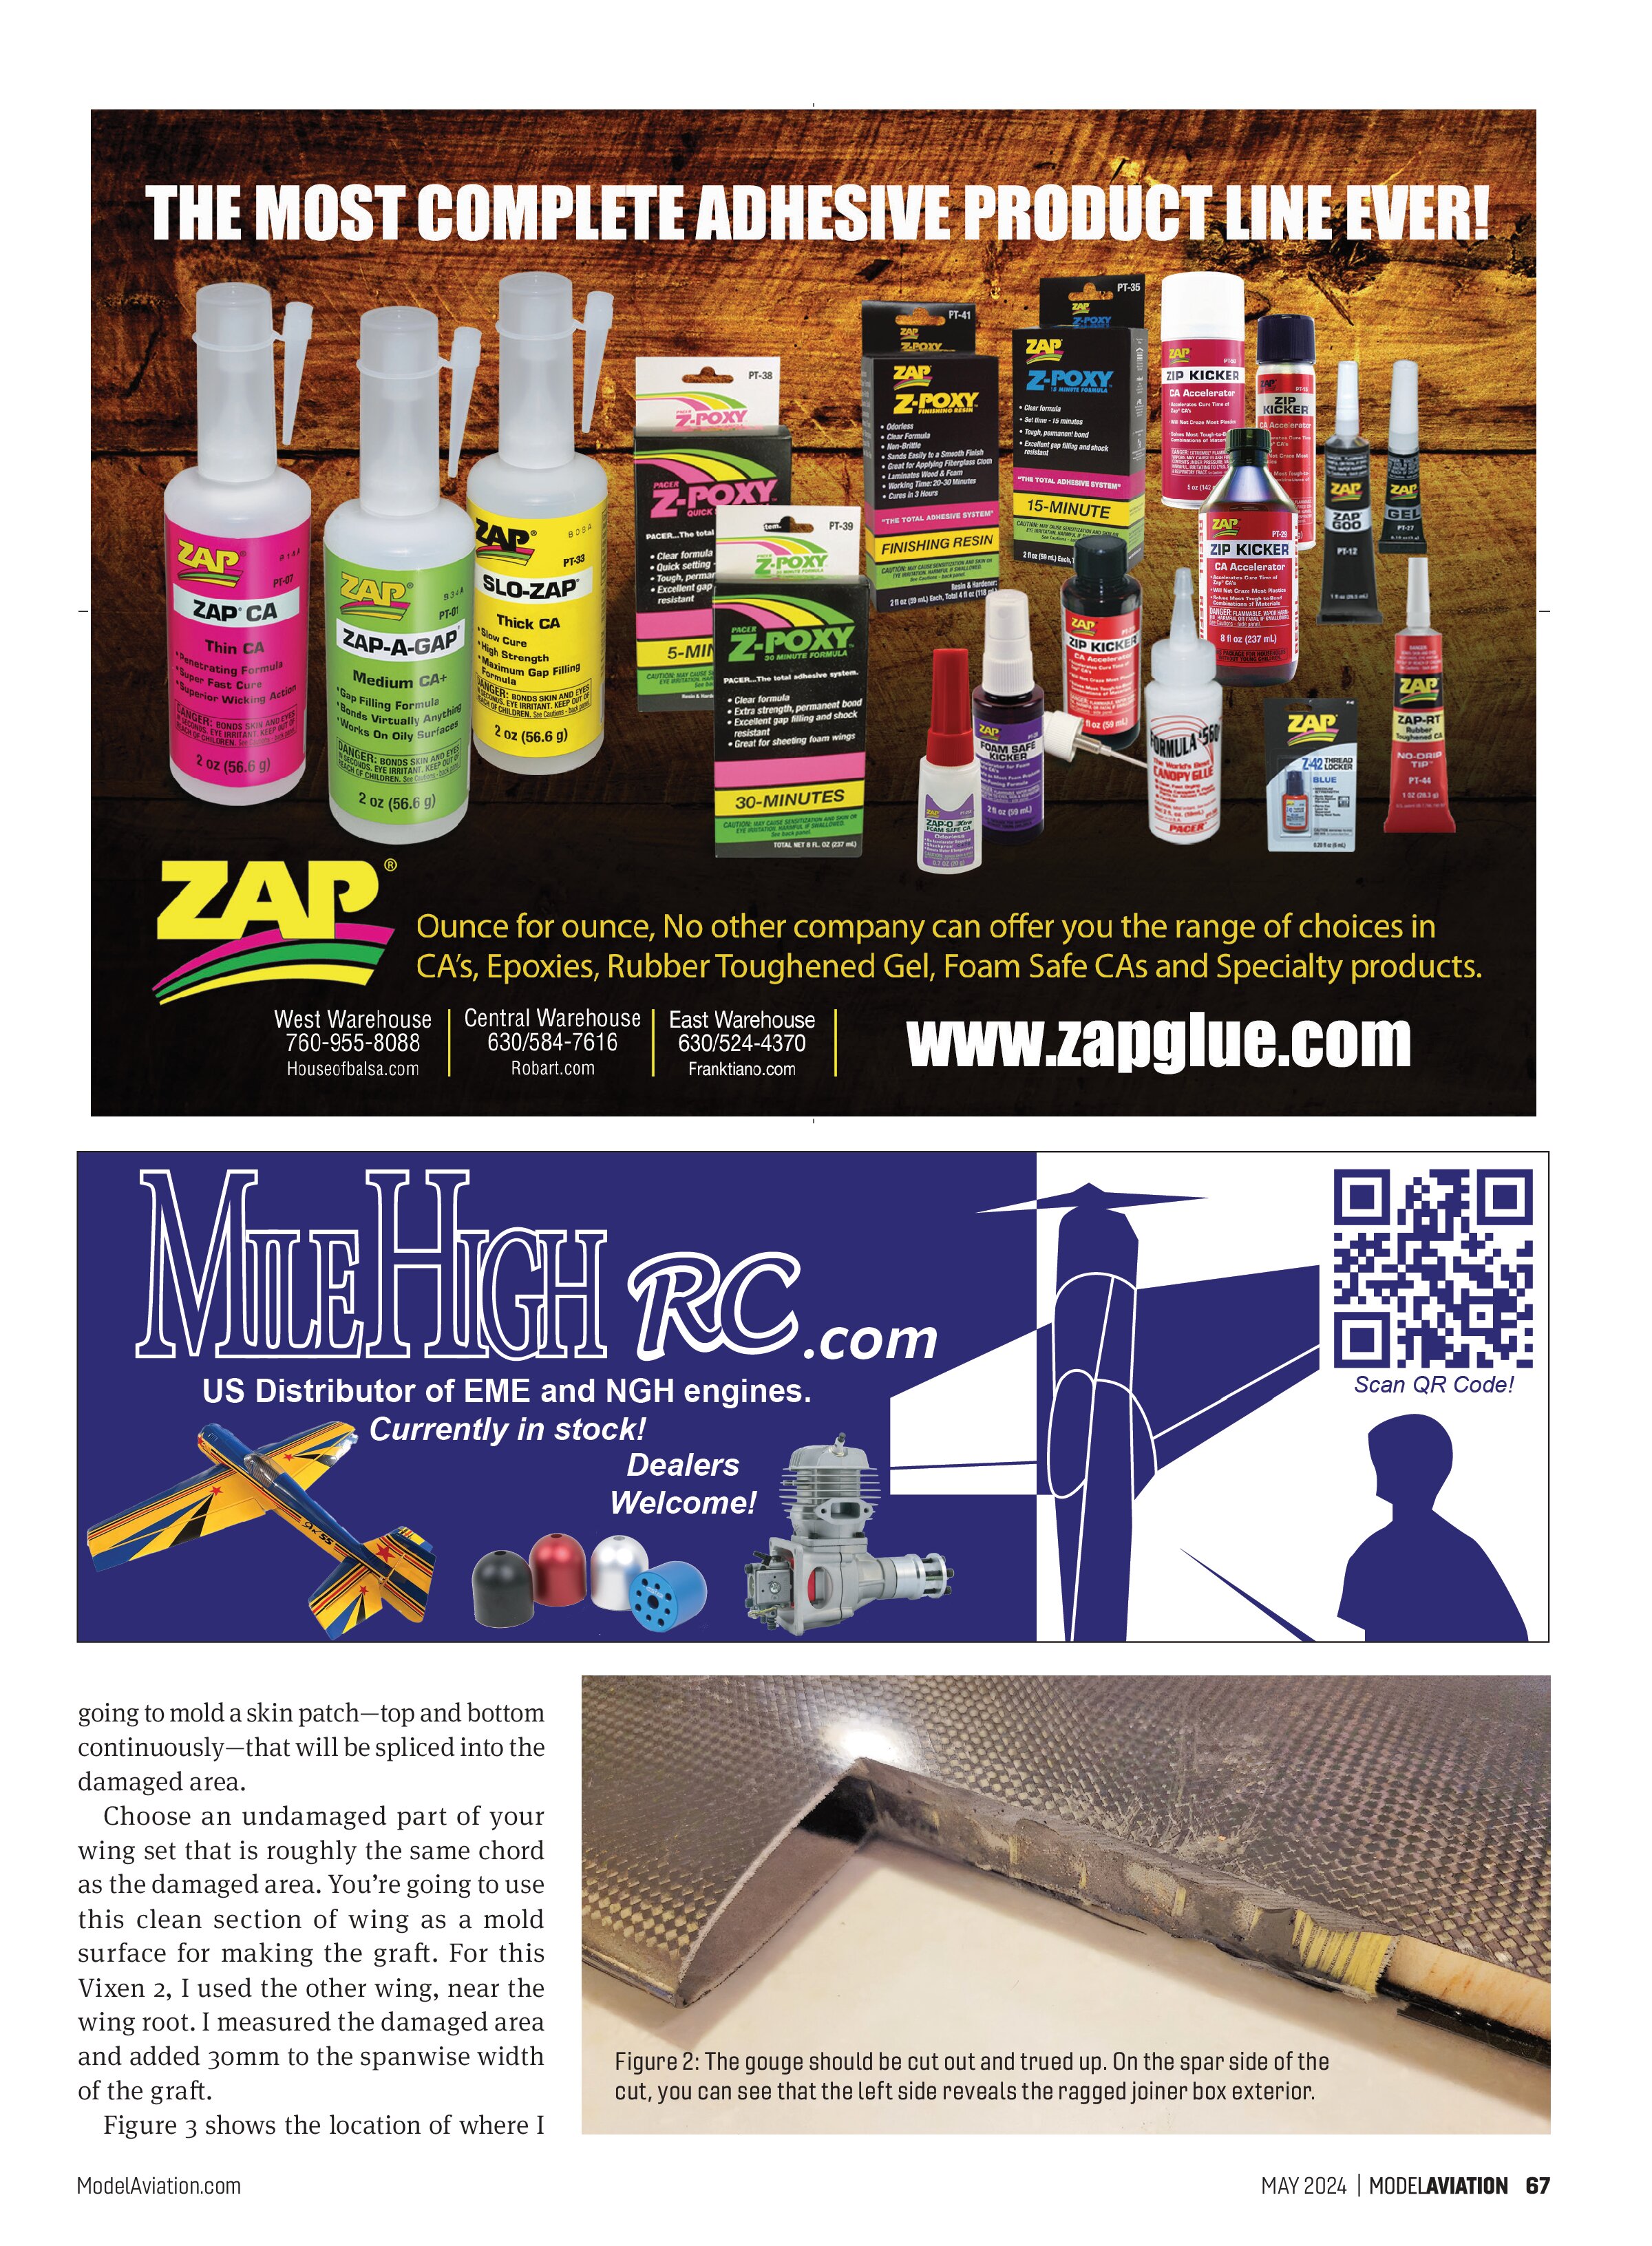
Figure 2 shows the gouge trued up to a rectangular hole. There will be more preparation of this opening, but for now, I know how large of a hole I am dealing with.
Let’s turn our attention to making the skin graft. Because the damage has been trued to a rectangular hole, I know the size of the repair area. I am going to mold a skin patch—top and bottom continuously—that will be spliced into the damaged area.
Choose an undamaged part of your wing set that is roughly the same chord as the damaged area. You’re going to use this clean section of wing as a mold surface for making the graft. For this Vixen 2, I used the other wing, near the wing root. I measured the damaged area and added 30mm to the spanwise width of the graft.
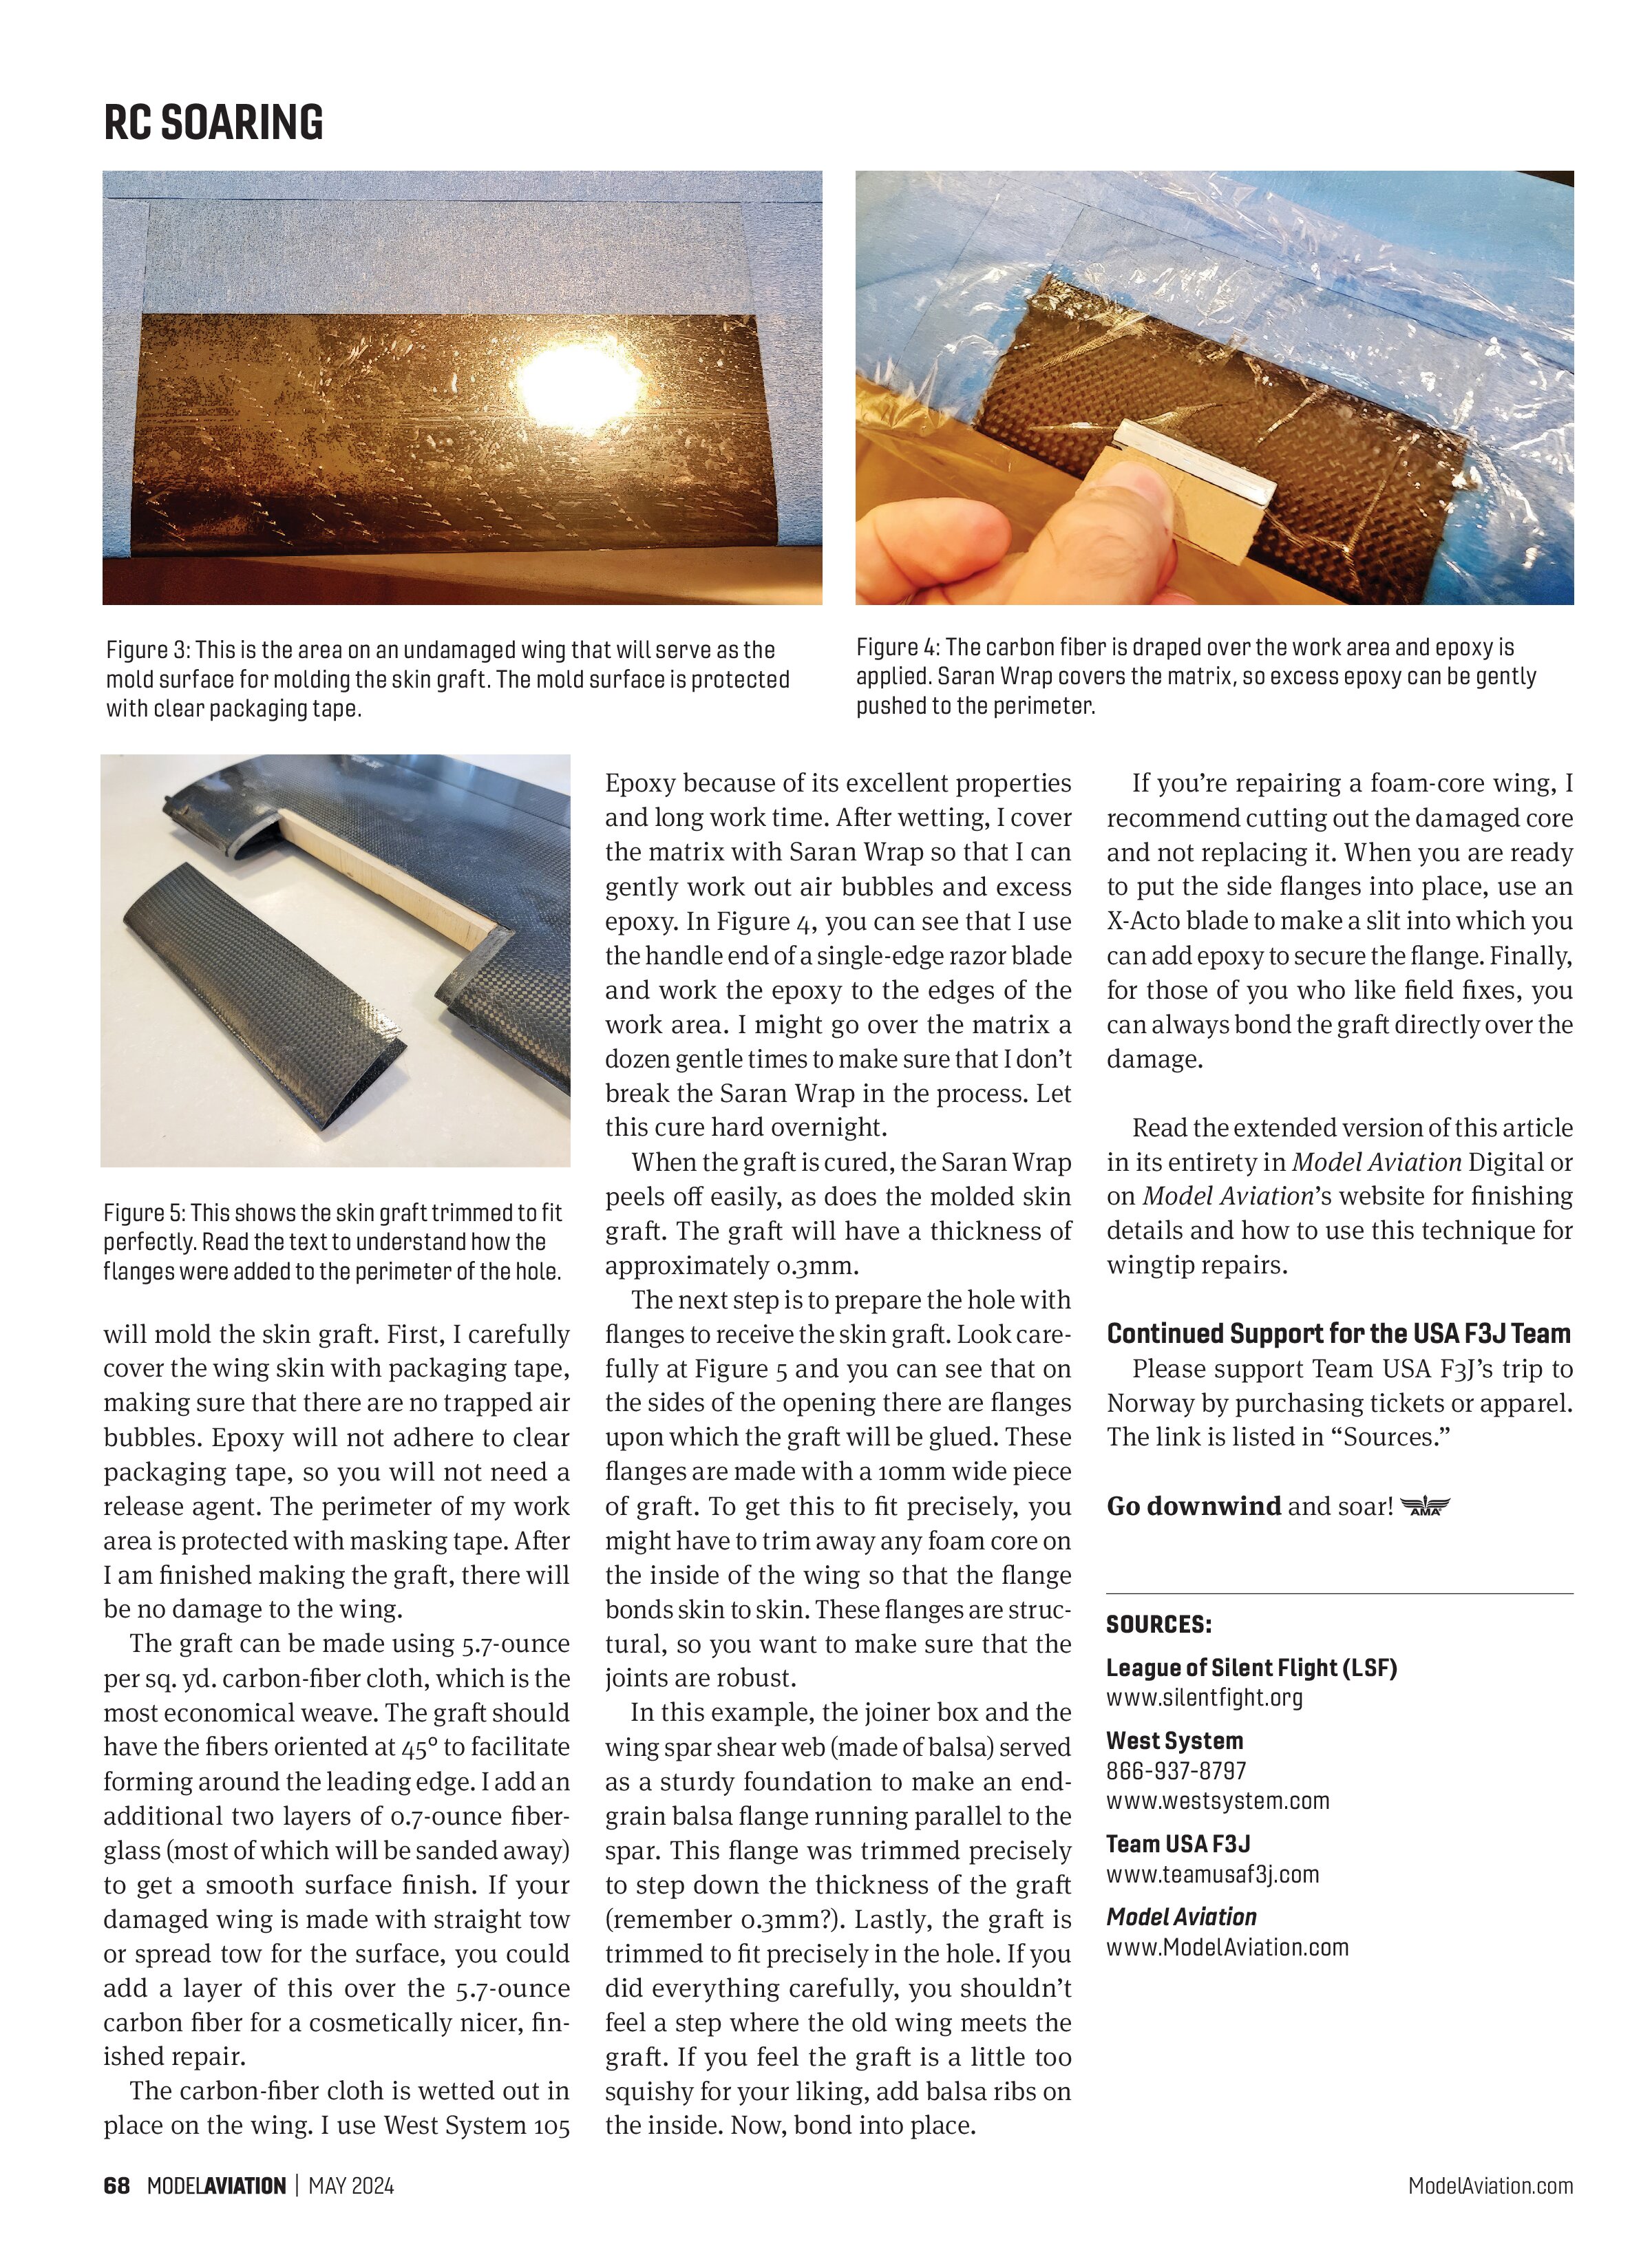
Figure 3 shows the location of where I


will mold the skin graft. First, I carefully cover the wing skin with packaging tape, making sure that there are no trapped air bubbles. Epoxy will not adhere to clear packaging tape, so you will not need a release agent. The perimeter of my work area is protected with masking tape. After I am finished making the graft, there will be no damage to the wing.
The graft can be made using 5.7-ounce per sq. yd. carbon-fiber cloth, which is the most economical weave. The graft should have the fibers oriented at 45° to facilitate forming around the leading edge. I add an additional two layers of 0.7-ounce fiberglass (most of which will be sanded away) to get a smooth surface finish. If your damaged wing is made with straight tow or spread tow for the surface, you could add a layer of this over the 5.7-ounce carbon fiber for a cosmetically nicer, finished repair.
The carbon-fiber cloth is wetted out in place on the wing. I use West System 105 Epoxy because of its excellent properties and long work time. After wetting, I cover the matrix with Saran Wrap so that I can gently work out air bubbles and excess epoxy. In Figure 4, you can see that I use the handle end of a single-edge razor blade and work the epoxy to the edges of the work area. I might go over the matrix a dozen gentle times to make sure that I don’t break the Saran Wrap in the process. Let this cure hard overnight.
When the graft is cured, the Saran Wrap peels off easily, as does the molded skin graft. The graft will have a thickness of approximately 0.3mm.
The next step is to prepare the hole with flanges to receive the skin graft. Look carefully at Figure 5 and you can see that on the sides of the opening there are flanges upon which the graft will be glued. These flanges are made with a 10mm wide piece of graft. To get this to fit precisely, you might have to trim away any foam core on the inside of the wing so that the flange bonds skin to skin. These flanges are structural, so you want to make sure that the joints are robust.
In this example, the joiner box and the wing spar shear web (made of balsa) served as a sturdy foundation to make an end-grain balsa flange running parallel to the spar. This flange was trimmed precisely to step down the thickness of the graft (remember 0.3mm?). Lastly, the graft is trimmed to fit precisely in the hole. If you did everything carefully, you shouldn’t feel a step where the old wing meets the graft. If you feel the graft is a little too squishy for your liking, add balsa ribs on the inside. Now, bond into place.
If you’re repairing a foam-core wing, I recommend cutting out the damaged core and not replacing it. When you are ready to put the side flanges into place, use an X-Acto blade to make a slit into which you can add epoxy to secure the flange. Finally, for those of you who like field fixes, you can always bond the graft directly over the damage.
Read the extended version of this article in its entirety in Model Aviation Digital or on Model Aviation’s website for finishing details and how to use this technique for wingtip repairs.