ENGINE INSIGHTS
Tips from the service desk at SH Engines
By Mike Greenshields
service@mikegoesflying.com
Photos courtesy of the author


Internal-combustion, fire-breathing engines have been a part of this hobby for almost as long as it’s been a hobby. As a second-generation modeler and a product of the 1970s and ’80s, I grew up running engines with my father, John Greenshields—glow engines, to be specific. These nitromethane- and alcohol-burning gems are all descended from Ohlsson and Rice glow engines from the early days of flying models.
It’s hard to believe that the glow engines that dominated the hobby in my formative years are currently “specialties” because we now live in a world dominated by electric motors, lithium batteries, and gasoline (petrol) spark/ignition engines. Funny how things change. Although I really enjoy all facets of modeling and the power that drives our models, I’ll quote Chip Mull, who is the former distributor of Stits to the modeling community: “I love the smell of glow fuel in the morning.”
Glow engines, however, are not always the easiest to operate. With so many people now trying glow engines for the first time, what is old is new again. That leaves people with a ton of questions. At SH Engines, we welcome questions. We know a lot of you are trying glow (or our somewhat unique glow/gas engines) for the first time.
I hope some of these topics will help you get things fired up so that you can tear up the sky at your local field. I’ll cover things we see, questions we’re asked, and the steps that we take to troubleshoot problems. I hope you will find this helpful.
Tank Setup
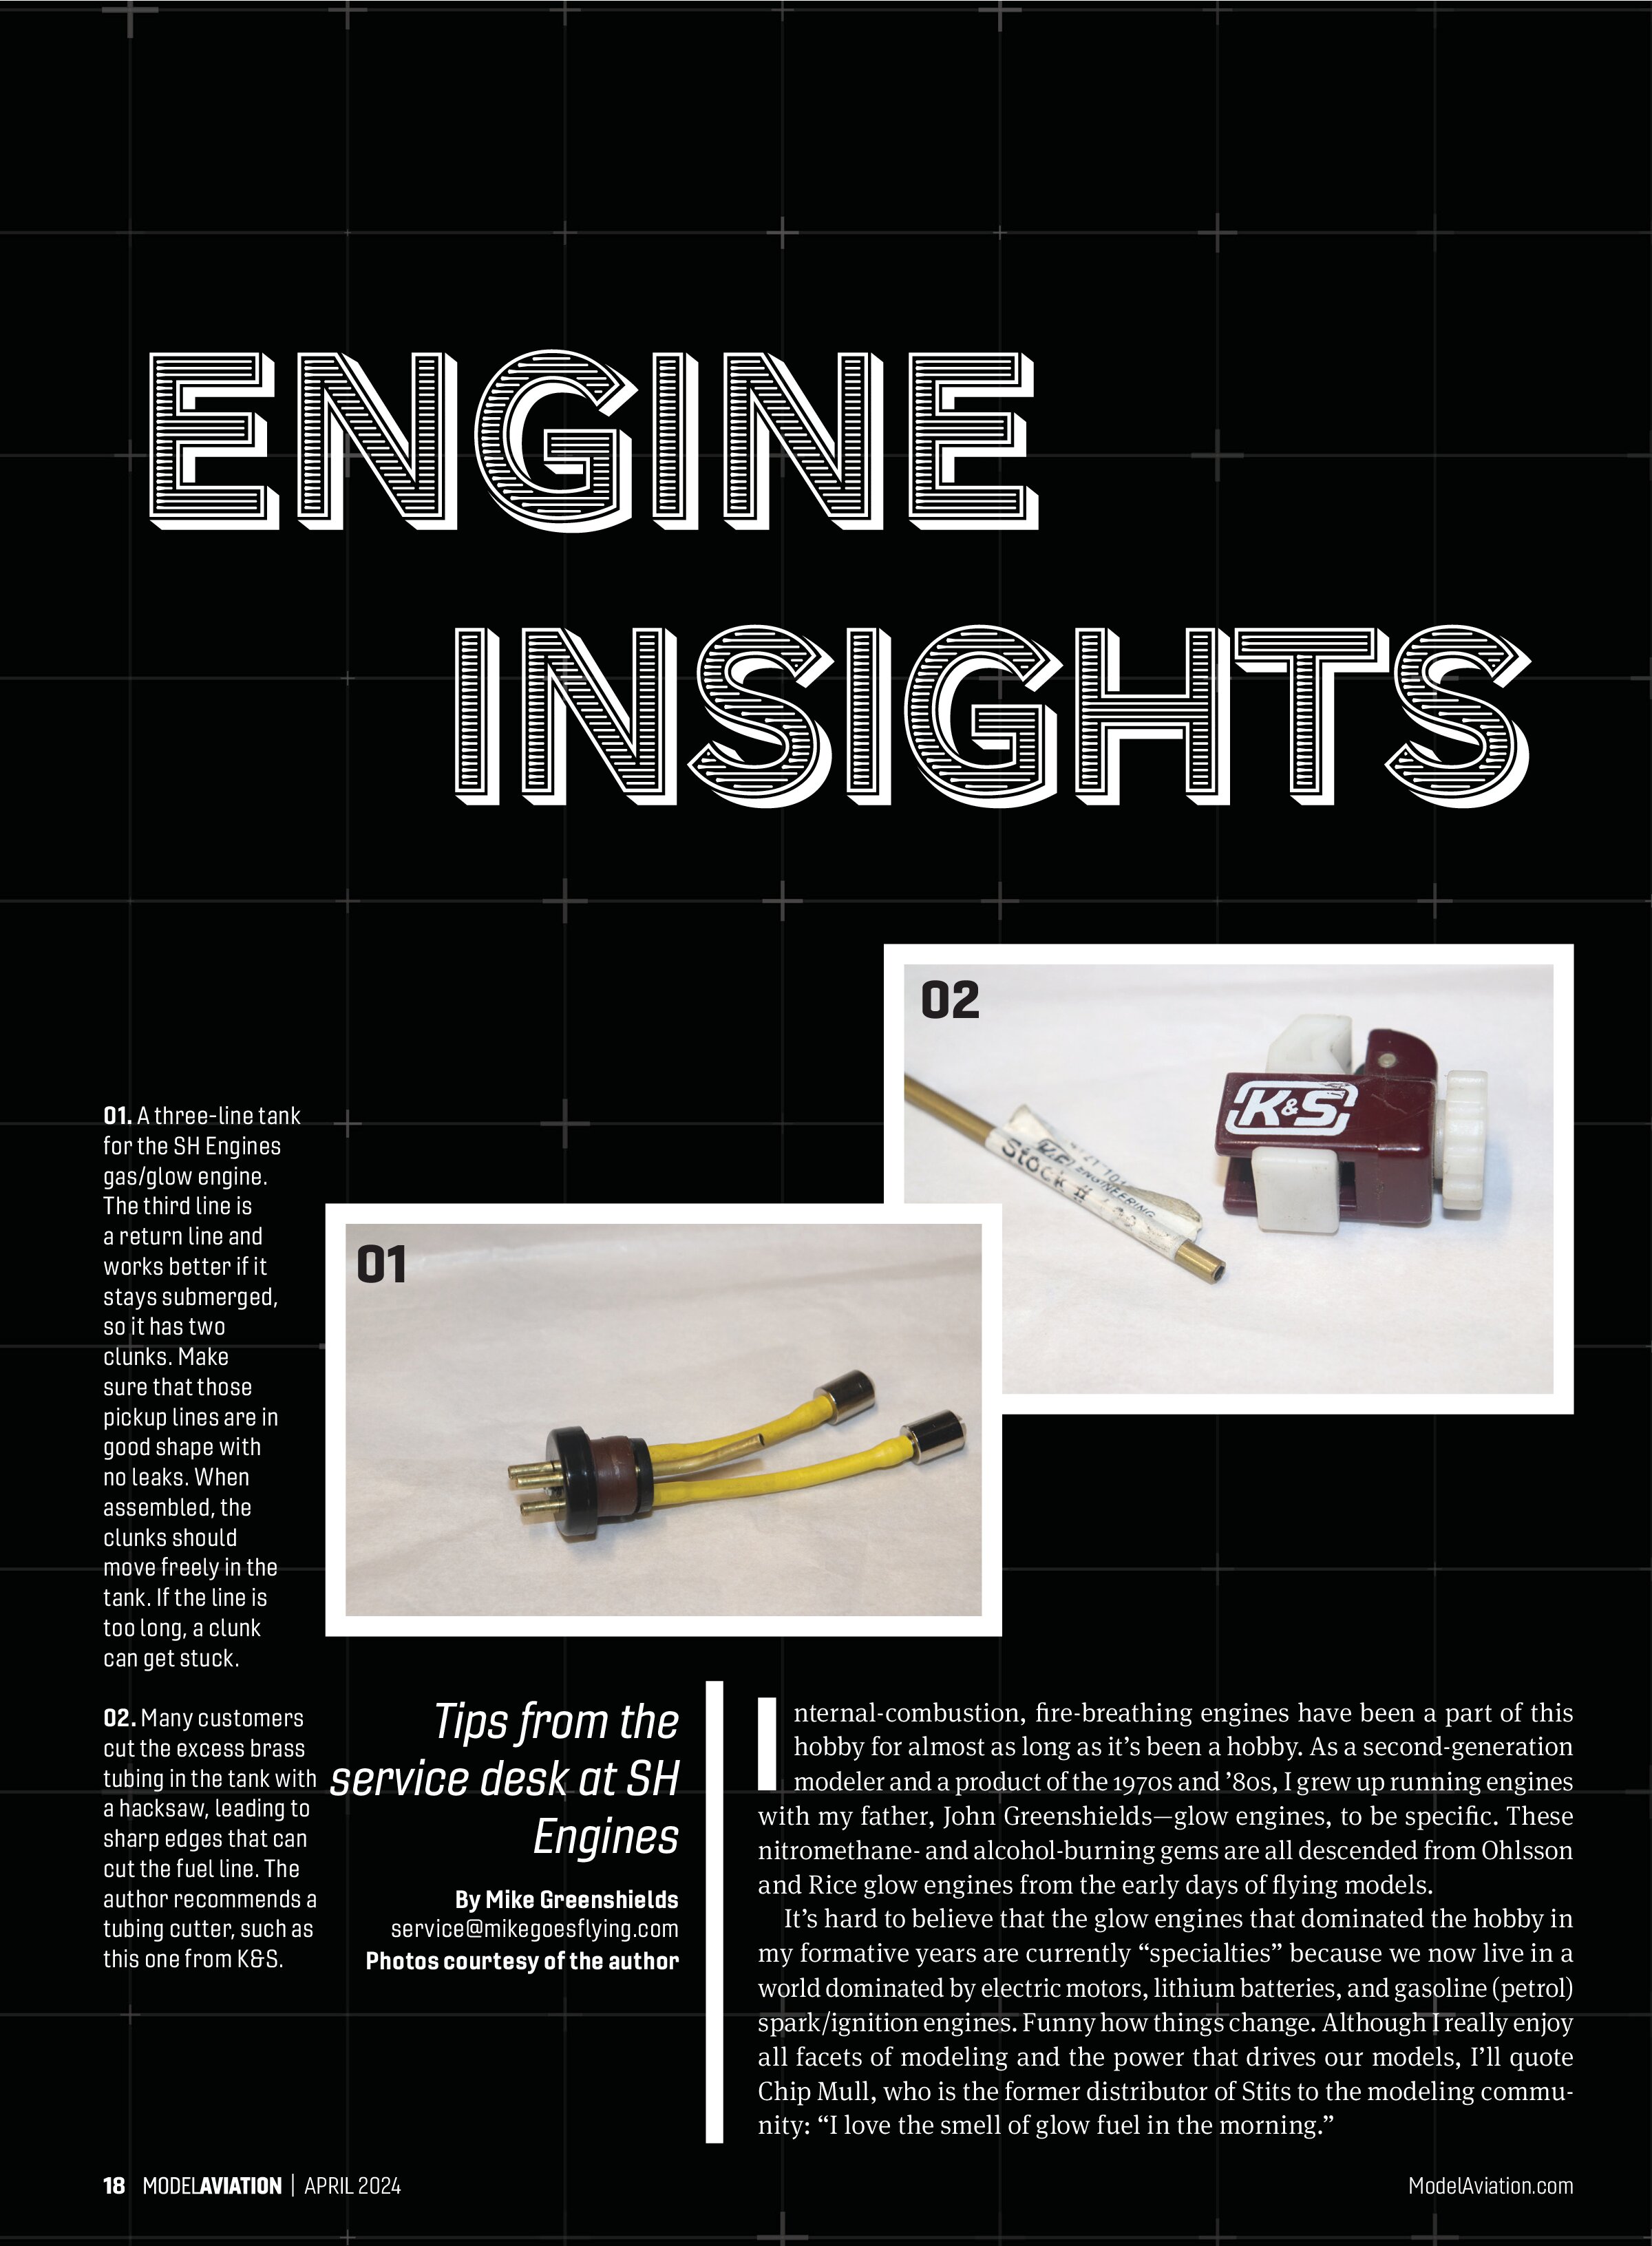
Dirty lines, broken lines, and leaks... Does the clunk stick at the back of the tank? Does the pickup line have a crack? Here’s what we find fairly often:
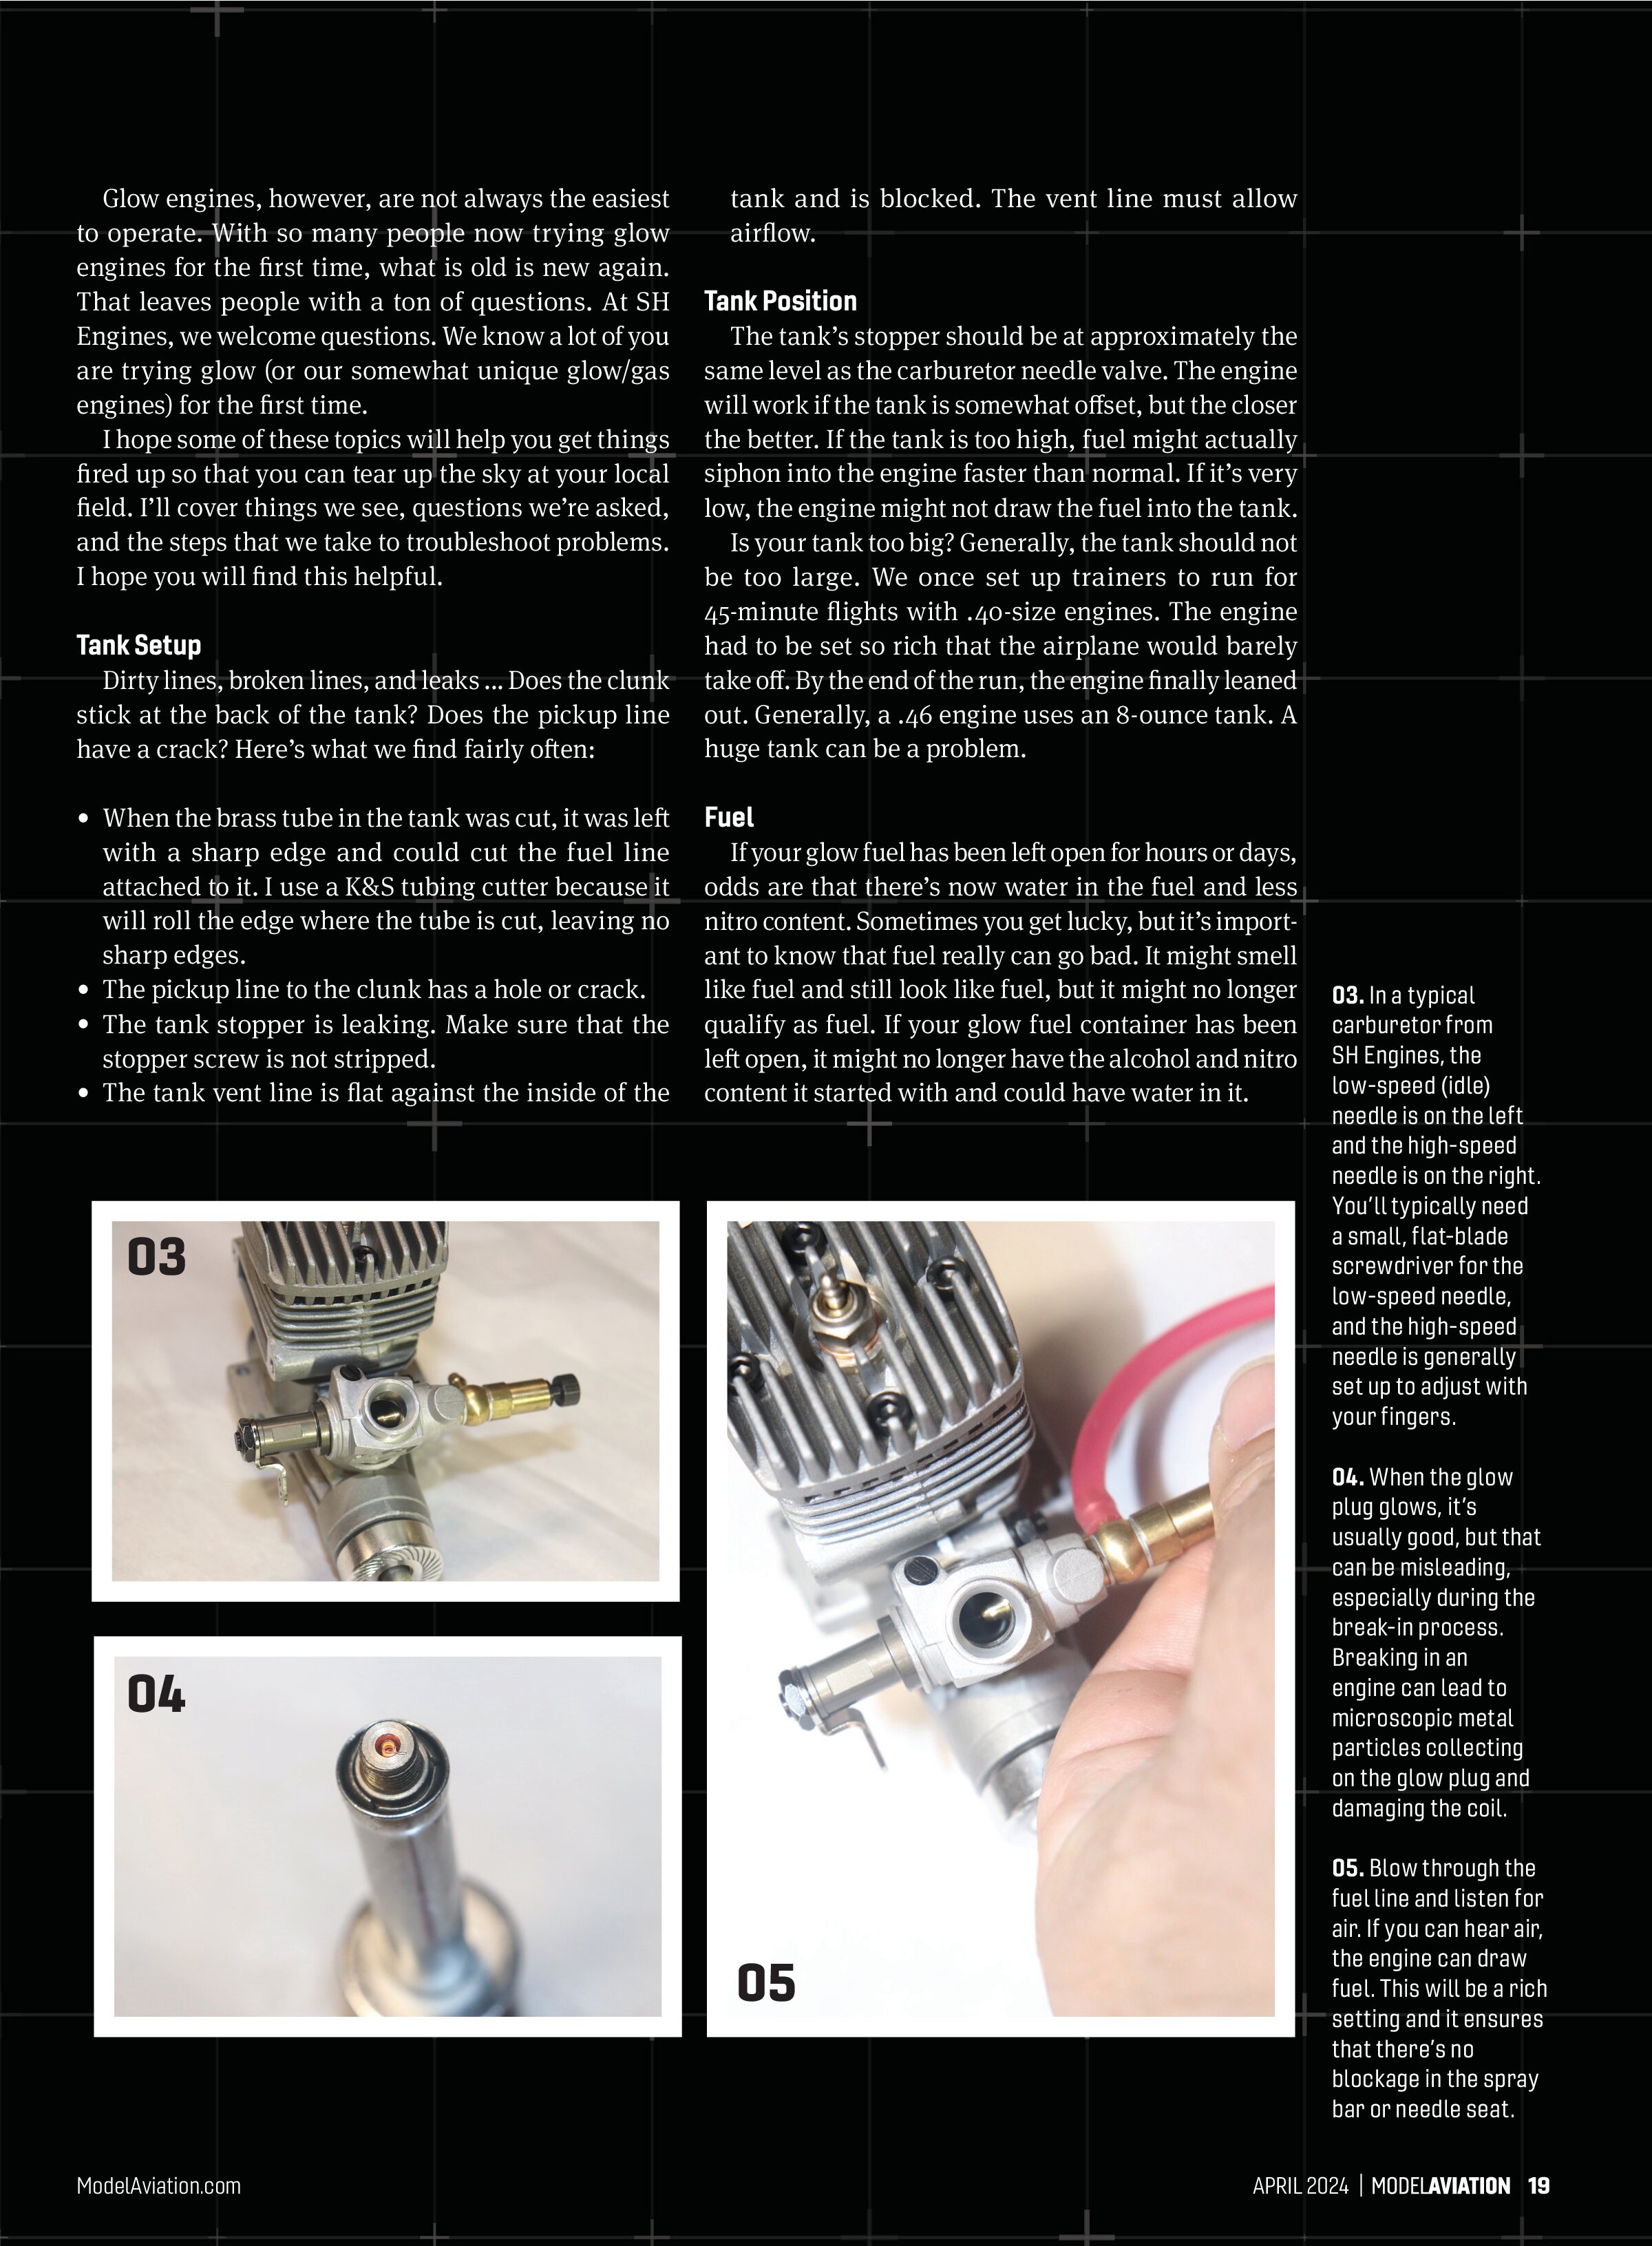
- When the brass tube in the tank was cut, it was left with a sharp edge and could cut the fuel line attached to it. I use a K&S tubing cutter because it will roll the edge where the tube is cut, leaving no sharp edges.
- The pickup line to the clunk has a hole or crack.
- The tank stopper is leaking. Make sure that the stopper screw is not stripped.
- The tank vent line is flat against the inside of the tank and is blocked. The vent line must allow airflow.
Tank Position
The tank’s stopper should be at approximately the same level as the carburetor needle valve. The engine will work if the tank is somewhat offset, but the closer the better. If the tank is too high, fuel might actually siphon into the engine faster than normal. If it’s very low, the engine might not draw the fuel into the tank.
Is your tank too big? Generally, the tank should not be too large. We once set up trainers to run for 45-minute flights with .40-size engines. The engine had to be set so rich that the airplane would barely take off. By the end of the run, the engine finally leaned out. Generally, a .46 engine uses an 8-ounce tank. A huge tank can be a problem.
Fuel
If your glow fuel has been left open for hours or days, odds are that there’s now water in the fuel and less nitro content. Sometimes you get lucky, but it’s important to know that fuel really can go bad. It might smell like fuel and still look like fuel, but it might no longer qualify as fuel. If your glow fuel container has been left open, it might no longer have the alcohol and nitro content it started with and could have water in it.


Sometimes the answer is fresh fuel. At $25 to $40 a gallon, it’s a good idea to take really good care of your fuel. If the lid is tight and the fuel has been stored out of the sun and off the floor, it can be stored indefinitely.
Know Your Carburetor
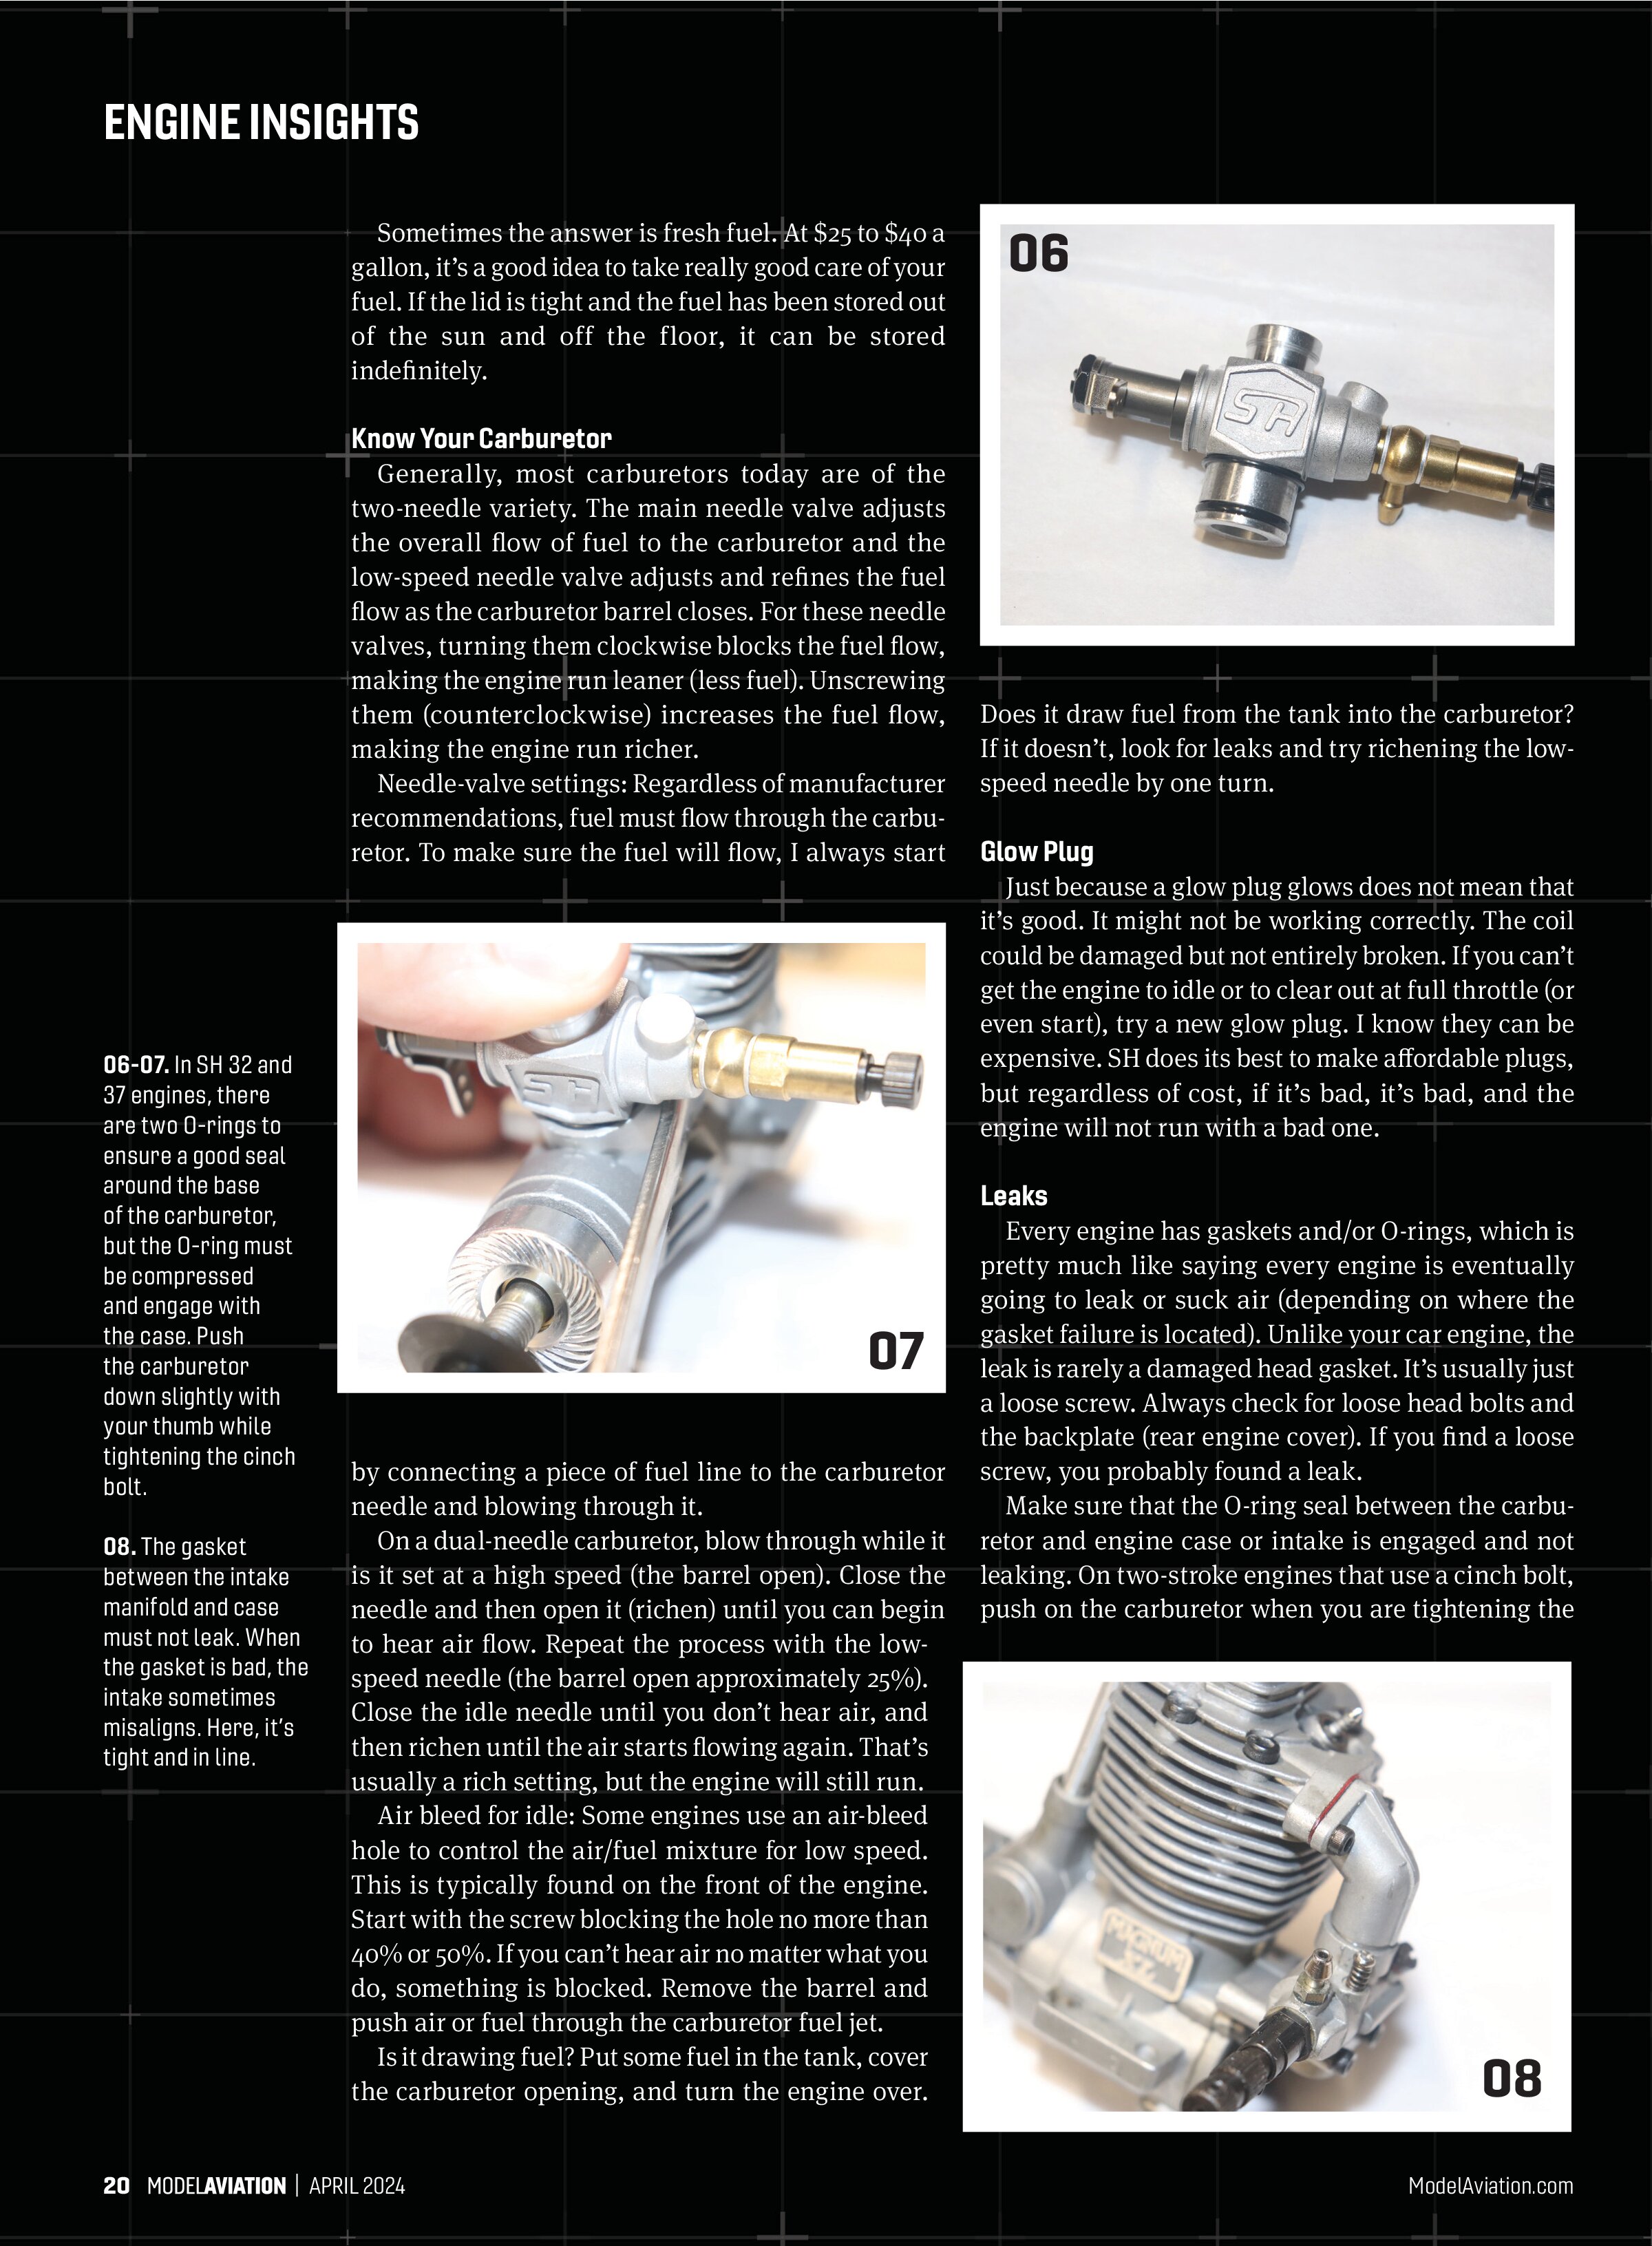
Generally, most carburetors today are of the two-needle variety. The main needle valve adjusts the overall flow of fuel to the carburetor and the low-speed needle valve adjusts and refines the fuel flow as the carburetor barrel closes. For these needle valves, turning them clockwise blocks the fuel flow, making the engine run leaner (less fuel). Unscrewing them (counterclockwise) increases the fuel flow, making the engine run richer.
Needle-valve settings: Regardless of manufacturer recommendations, fuel must flow through the carburetor. To make sure the fuel will flow, I always start

On a dual-needle carburetor, blow through while it is set at a high speed (the barrel open). Close the needle and then open it (rich en) until you can begin to hear air flow. Repeat the process with the low-speed needle (the barrel open approximately 25%). Close the idle needle until you don’t hear air, and then richen until the air starts flowing again. That’s usually a rich setting, but the engine will still run.
Air bleed for idle: Some engines use an air-bleed hole to control the air/fuel mixture for low speed. This is typically found on the front of the engine. Start with the screw blocking the hole no more than 40% or 50%. If you can’t hear air no matter what you do, something is blocked. Remove the barrel and push air or fuel through the carburetor fuel jet.
Is it drawing fuel? Put some fuel in the tank, cover the carburetor opening, and turn the engine over.

Does it draw fuel from the tank into the carburetor? If it doesn’t, look for leaks and try richening the low-speed needle by one turn.
Glow Plug
Just because a glow plug glows does not mean that it’s good. It might not be working correctly. The coil could be damaged but not entirely broken. If you can’t get the engine to idle or to clear out at full throttle (or even start), try a new glow plug. I know they can be expensive. SH does its best to make affordable plugs, but regardless of cost, if it’s bad, it’s bad, and the engine will not run with a bad one.
Leaks
Every engine has gaskets and/or O-rings, which is pretty much like saying every engine is eventually going to leak or suck air (depending on where the gasket failure is located). Unlike your car engine, the leak is rarely a damaged head gasket. It’s usually just a loose screw. Always check for loose head bolts and the backplate (rear engine cover). If you find a loose screw, you probably found a leak.
Make sure that the O-ring seal between the carburetor and engine case or intake is engaged and not leaking. On two-stroke engines that use a cinch bolt, push on the carburetor when you are tightening the cinch bolt to make sure that the O-ring is engaged.
On four-stroke engines, if the carburetor and the intake manifold are misaligned, this can mean that the intake manifold gasket is failing or is misaligned and leaking. On a friend’s engine, the intake manifold gasket had a leak. He sealed the gasket with a bit of high-temperature RTV silicone and reassembled it. Everything aligned and the engine worked.
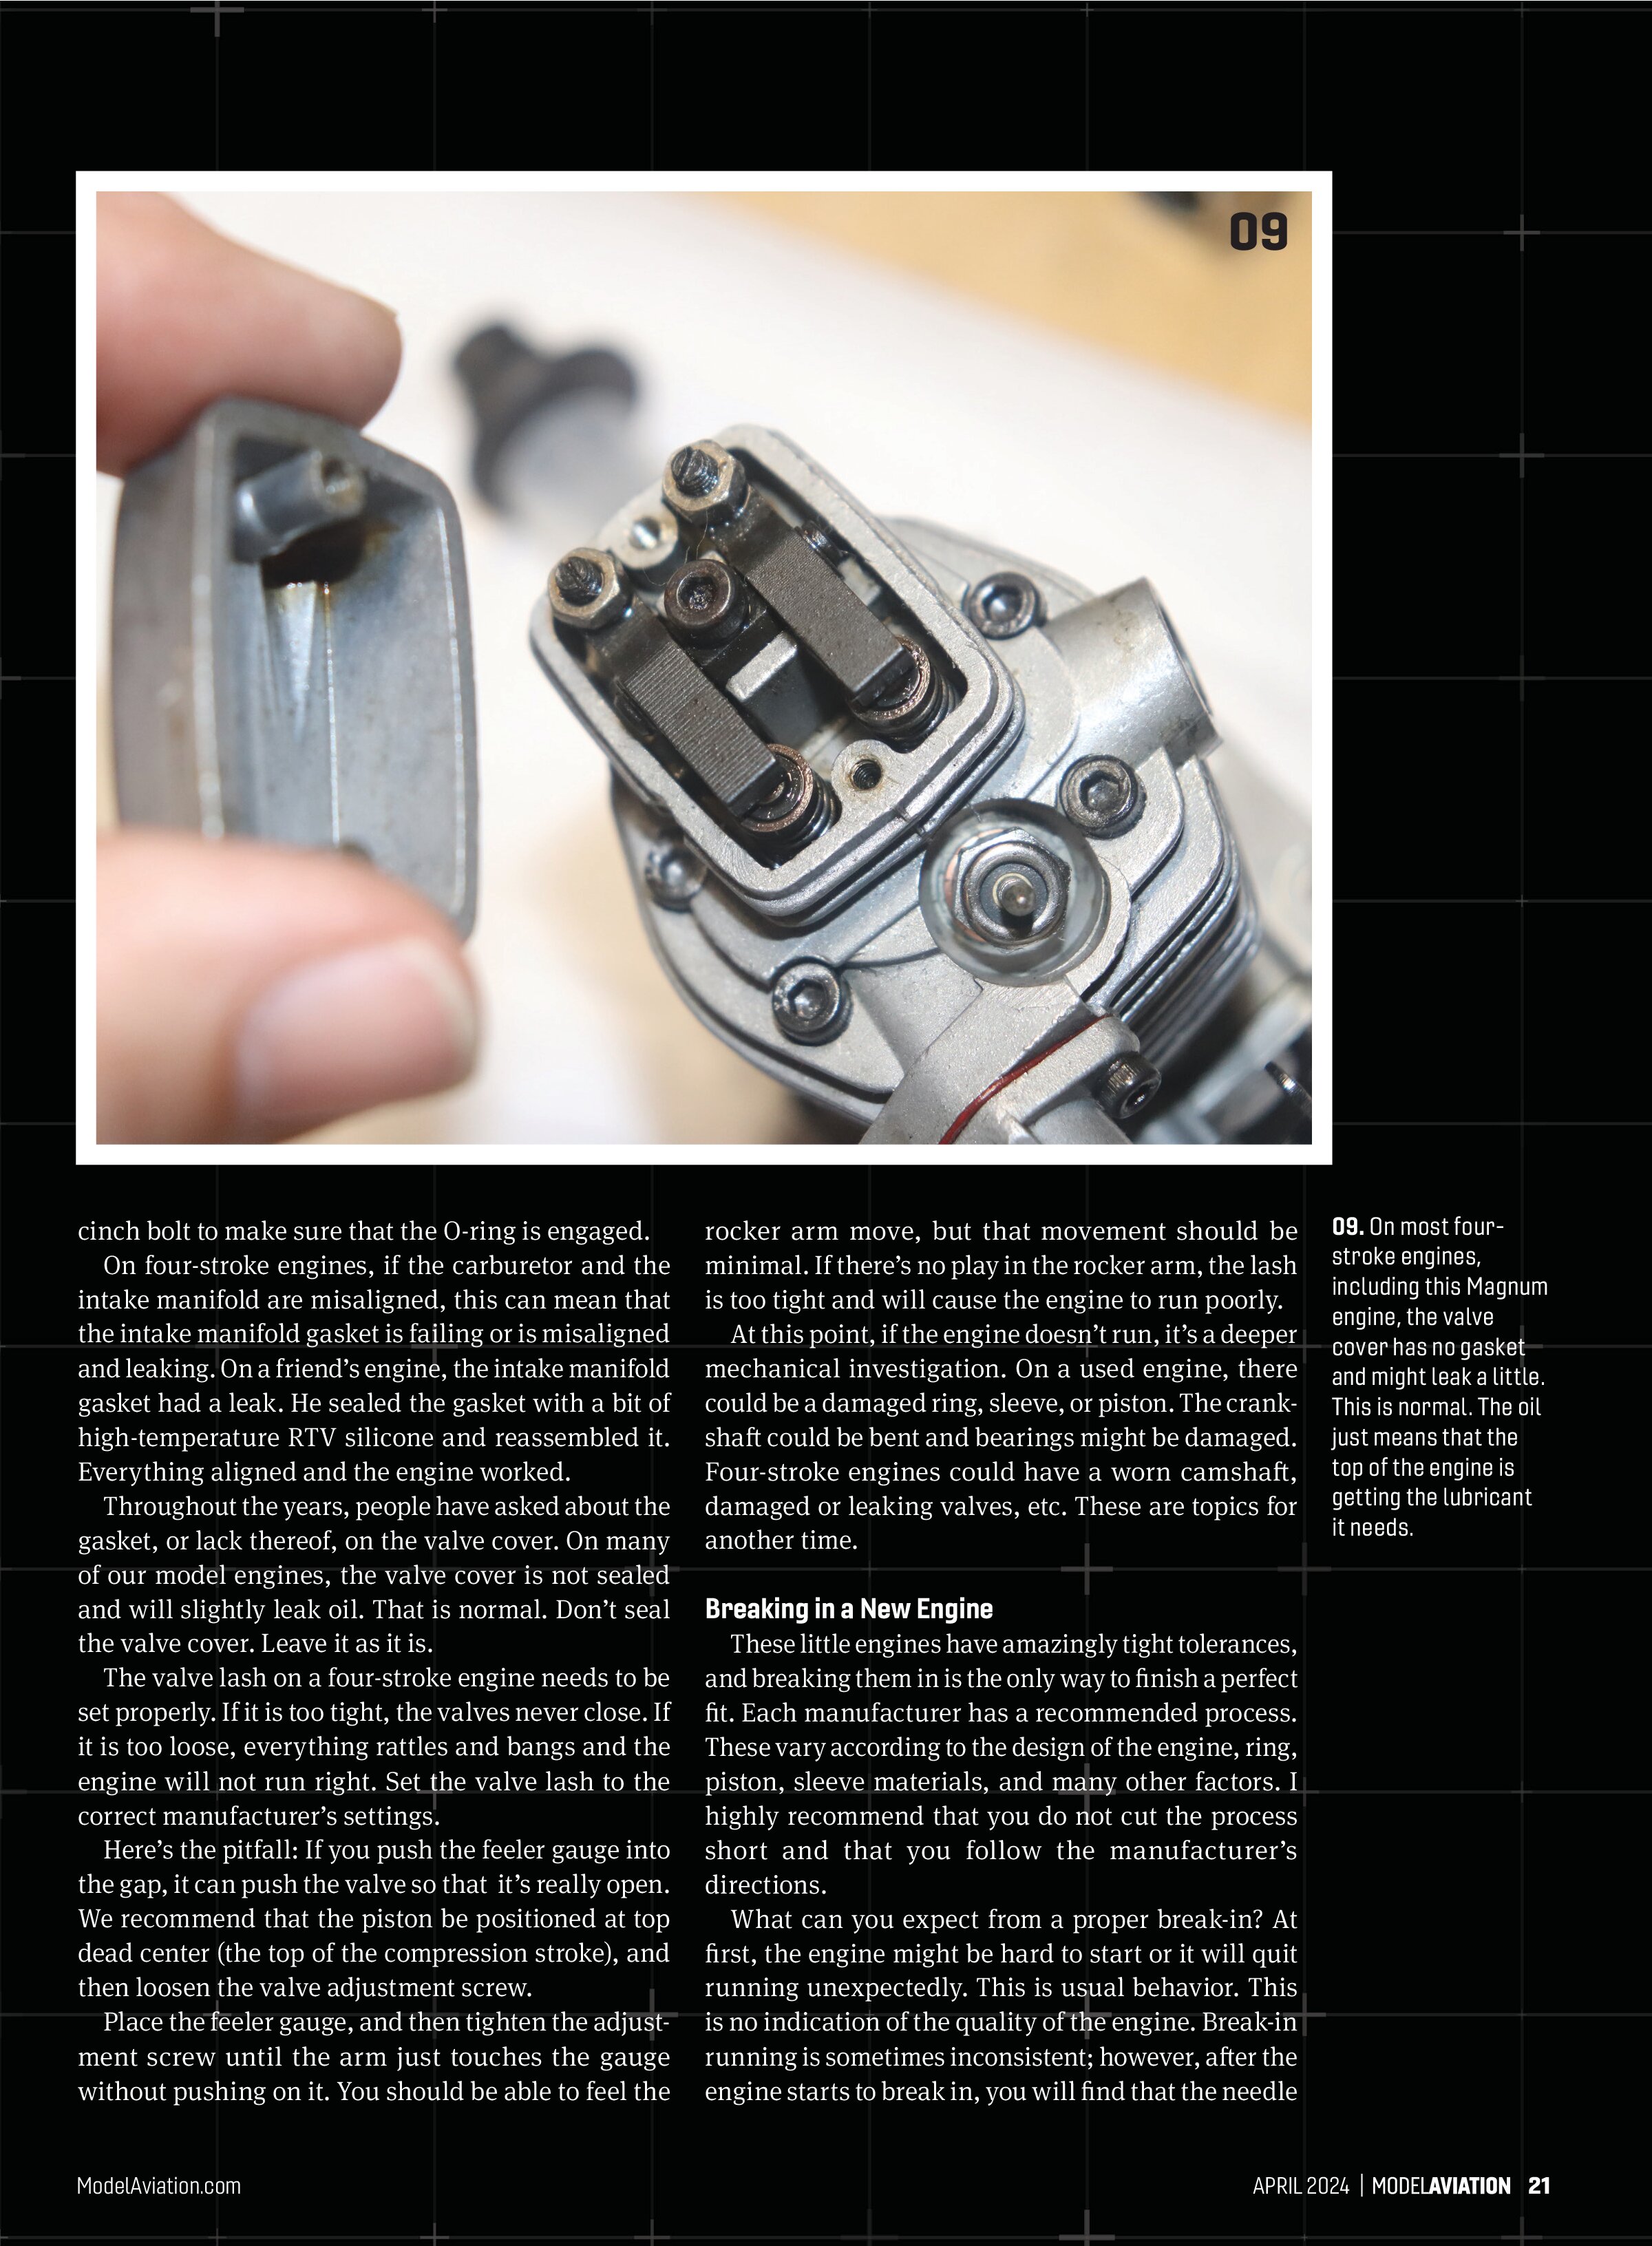
Throughout the years, people have asked about the gasket, or lack thereof, on the valve cover. On many of our model engines, the valve cover is not sealed and will slightly leak oil. That is normal. Don’t seal the valve cover. Leave it as it is.
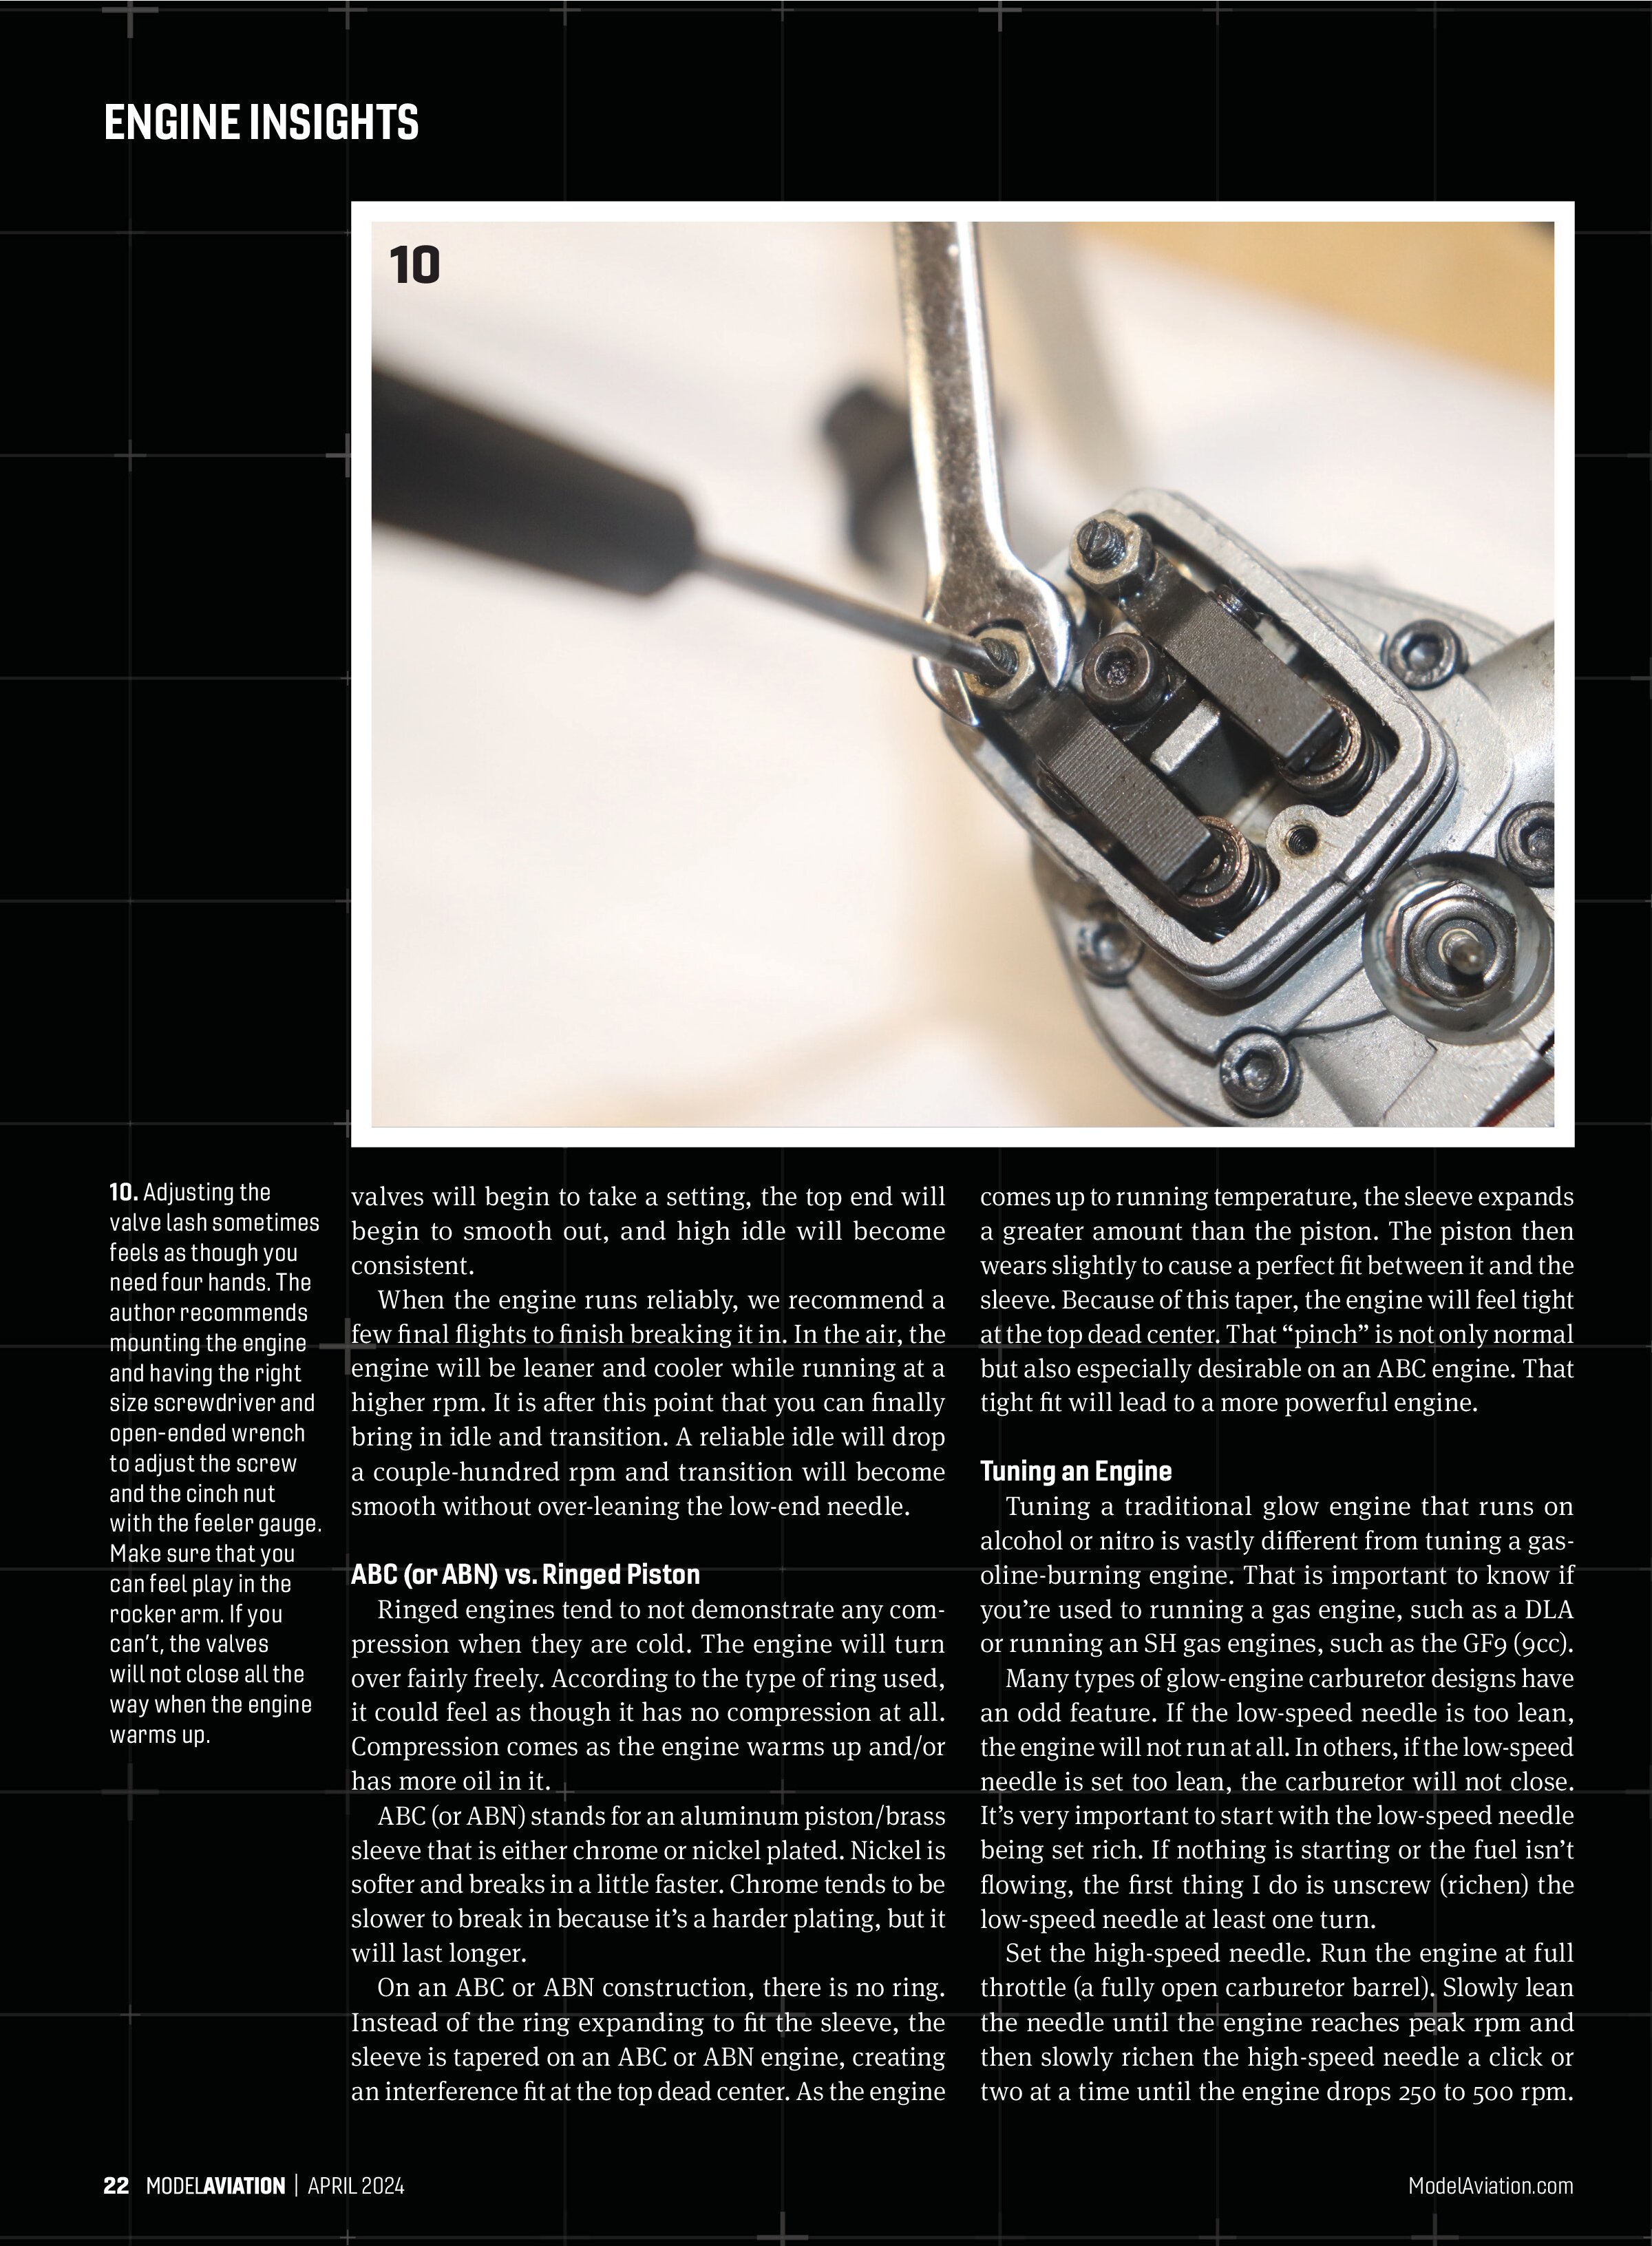
The valve lash on a four-stroke engine needs to be set properly. If it is too tight, the valves never close. If it is too loose, everything rattles and bangs and the engine will not run right. Set the valve lash to the correct manufacturer’s settings.
Here’s the pitfall: If you push the feeler gauge into the gap, it can push the valve so that it’s really open. We recommend that the piston be positioned at top dead center (the top of the compression stroke), and then loosen the valve adjustment screw.
Place the feeler gauge, and then tighten the adjustment screw until the arm just touches the gauge without pushing on it. You should be able to feel the rocker arm move, but that movement should be minimal. If there’s no play in the rocker arm, the lash is too tight and will cause the engine to run poorly. At this point, if the engine doesn’t run, it’s a deeper mechanical investigation. On a used engine, there could be a damaged ring, sleeve, or piston. The crankshaft could be bent and bearings might be damaged. Four-stroke engines could have a worn camshaft, damaged or leaking valves, etc. These are topics for another time.

Breaking in a New Engine
These little engines have amazingly tight tolerances, and breaking them in is the only way to finish a perfect fit. Each manufacturer has a recommended process. These vary according to the design of the engine, ring, piston, sleeve materials, and many other factors. I highly recommend that you do not cut the process short and that you follow the manufacturer’s directions.
What can you expect from a proper break-in? At first, the engine might be hard to start or it will quit running unexpectedly. This is usual behavior. This is no indication of the quality of the engine. Break-in running is sometimes inconsistent; however, after the engine starts to break in, you will find that the needle

valves will begin to take a setting, the top end will begin to smooth out, and high idle will become consistent.
When the engine runs reliably, we recommend a few final flights to finish breaking it in. In the air, the engine will be leaner and cooler while running at a higher rpm. It is after this point that you can finally bring in idle and transition. A reliable idle will drop a couple-hundred rpm and transition will become smooth without over-leaning the low-end needle.
ABC (or ABN) vs. Ringed Piston
Ringed engines tend to not demonstrate any compression when they are cold. The engine will turn over fairly freely. According to the type of ring used, it could feel as though it has no compression at all. Compression comes as the engine warms up and/or has more oil in it.
ABC (or ABN) stands for an aluminum piston/brass sleeve that is either chrome or nickel plated. Nickel is softer and breaks in a little faster. Chrome tends to be slower to break in because it’s a harder plating, but it will last longer.
On an ABC or ABN construction, there is no ring. Instead of the ring expanding to fit the sleeve, the sleeve is tapered on an ABC or ABN engine, creating an interference fit at the top dead center. As the engine comes up to running temperature, the sleeve expands a greater amount than the piston. The piston then wears slightly to cause a perfect fit between it and the sleeve. Because of this taper, the engine will feel tight at the top dead center. That “pinch” is not only normal but also especially desirable on an ABC engine. That tight fit will lead to a more powerful engine.
Tuning an Engine
Tuning a traditional glow engine that runs on alcohol or nitro is vastly different from tuning a gas oroline-burning engine. That is important to know if you’re used to running a gas engine, such as a DLA or running an SH gas engine, such as the GF9 (9cc).
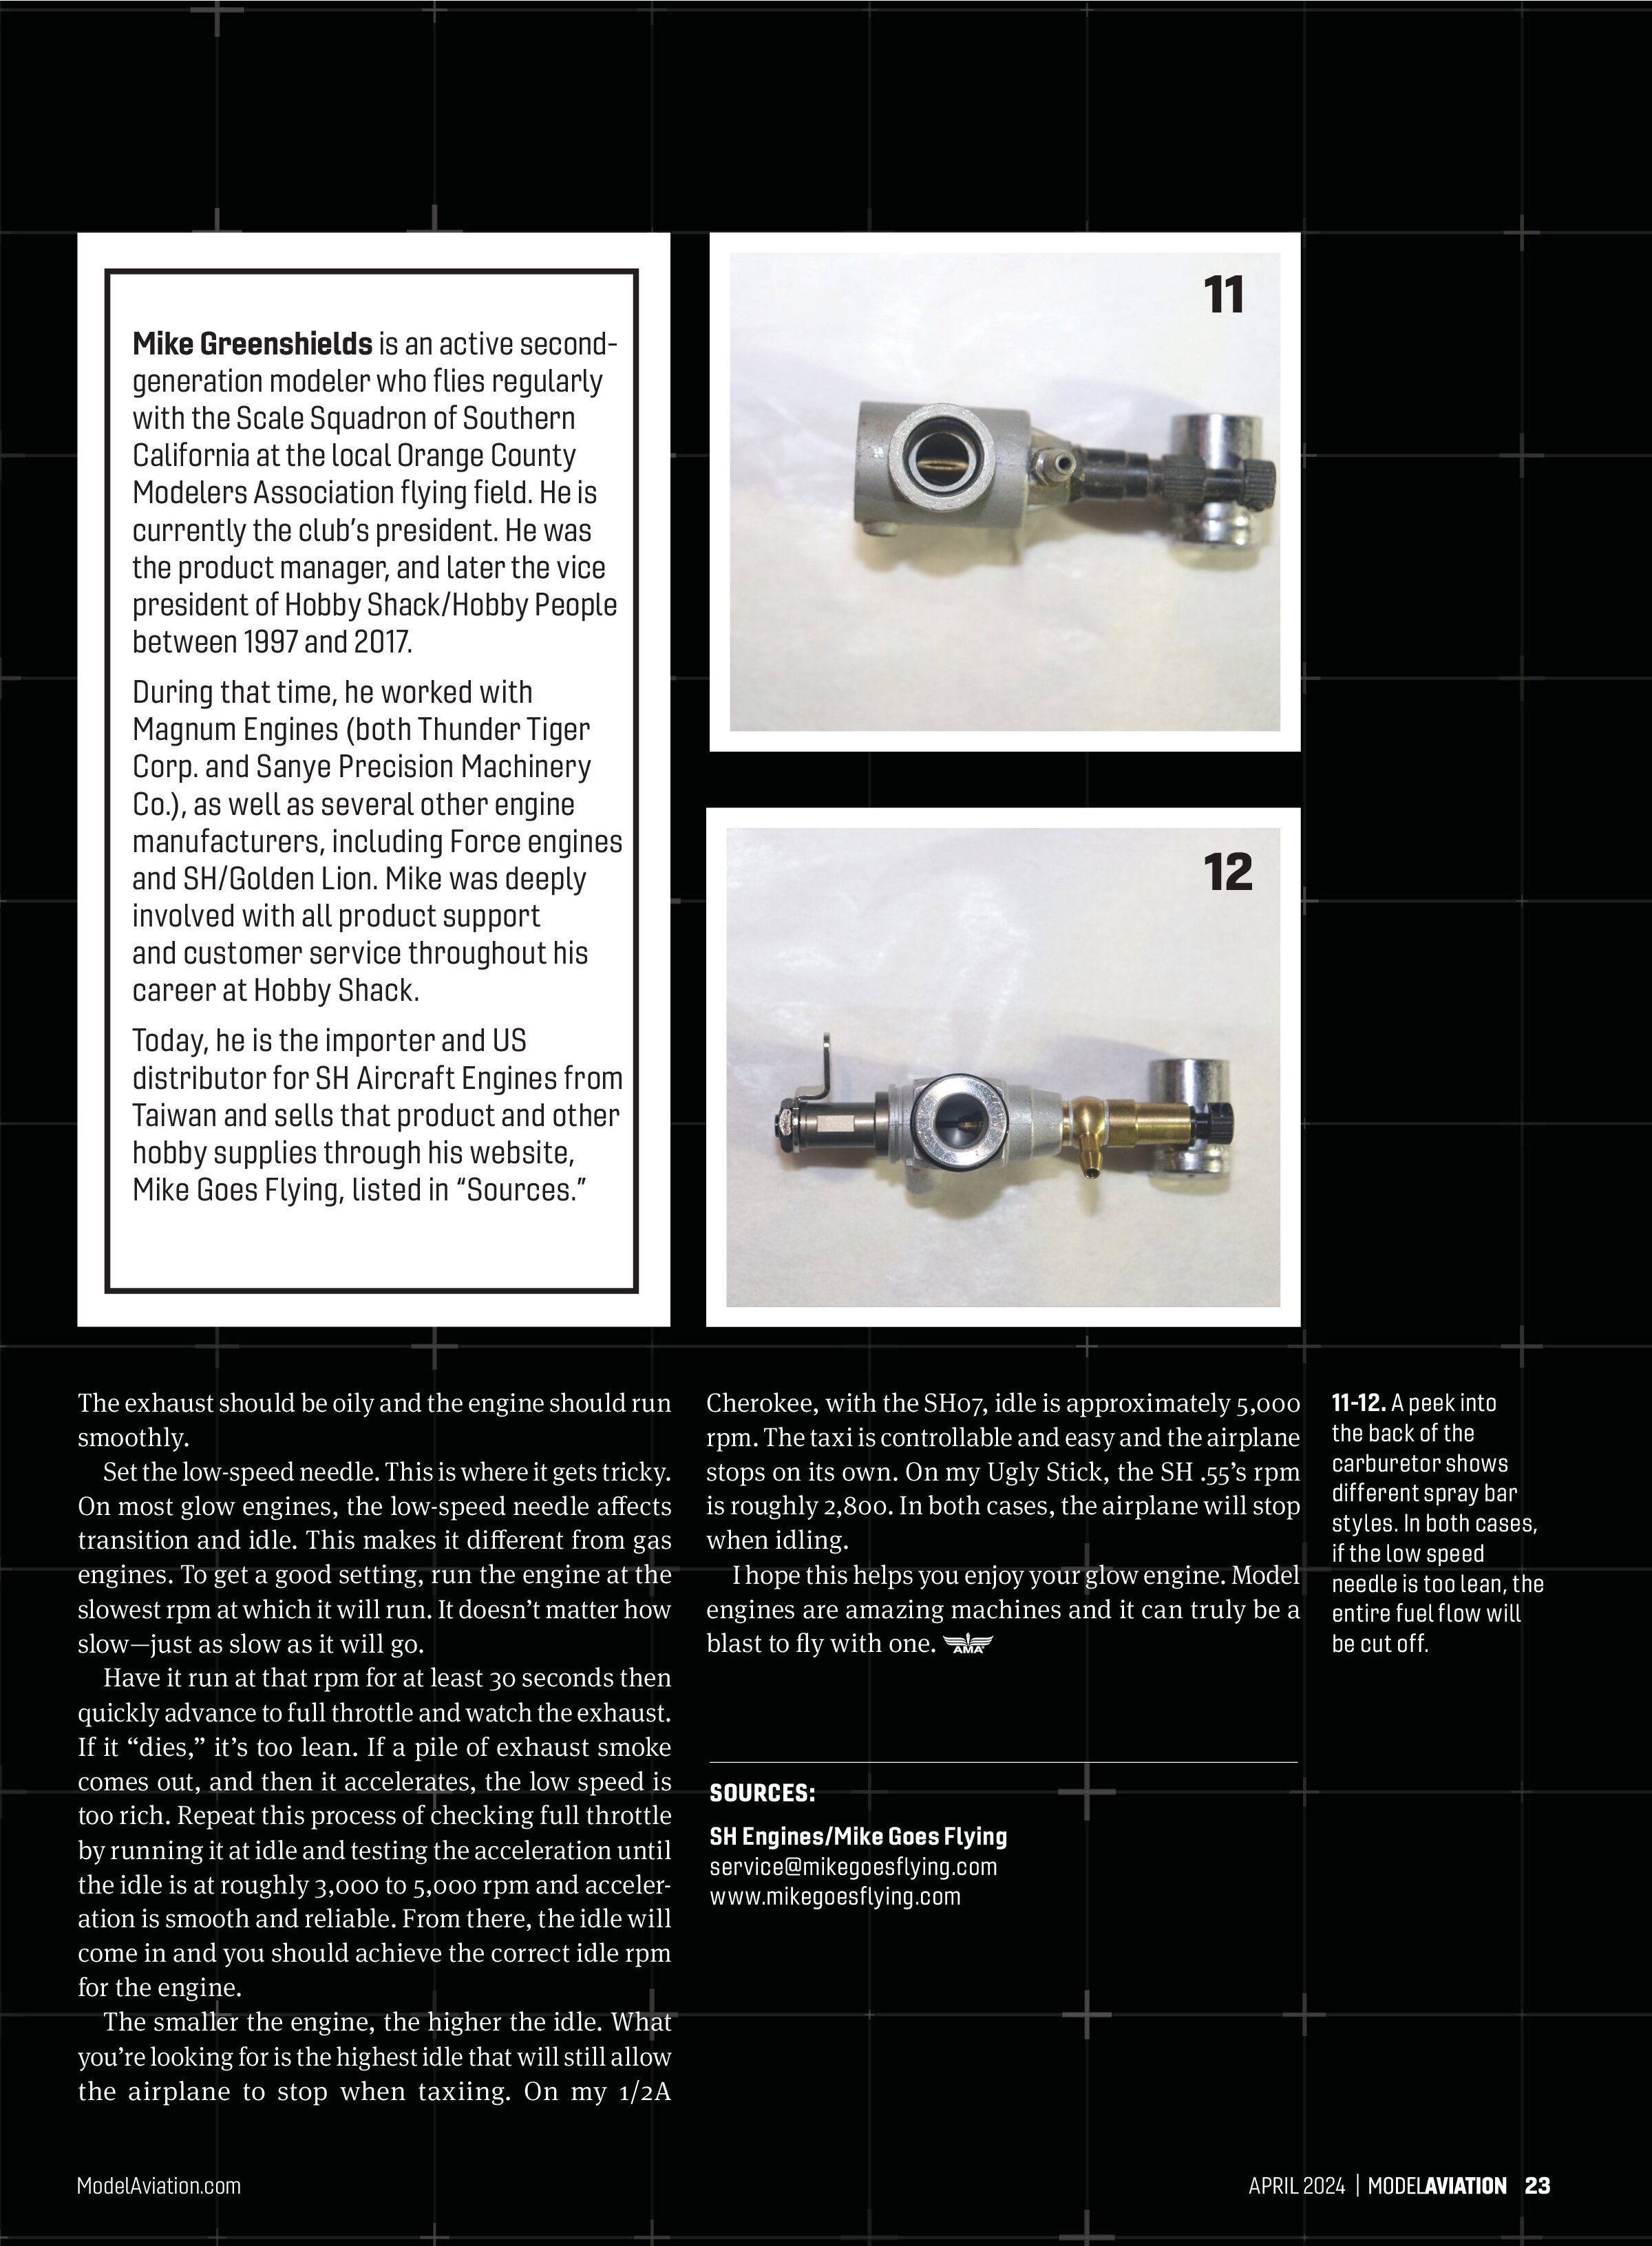
Many types of glow-engine carburetor designs have an odd feature. If the low-speed needle is too lean, the engine will not run at all. In others, if the low-speed needle is set too lean, the carburetor will not close. It’s very important to start with the low-speed needle being set rich. If nothing is starting or the fuel isn’t flowing, the first thing I do is unscrew (rich en) the low-speed needle at least one turn.
Set the high-speed needle. Run the engine at full throttle (a fully open carburetor barrel). Slowly lean the needle until the engine reaches peak rpm and then slowly richen the high-speed needle a click or two at a time until the engine drops 250 to 500 rpm.

The exhaust should be oily and the engine should run smoothly.
Set the low-speed needle. This is where it gets tricky. On most glow engines, the low-speed needle affects transition and idle. This makes it different from gas engines. To get a good setting, run the engine at the slowest rpm at which it will run. It doesn’t matter how slow—just as slow as it will go.
Have it run at that rpm for at least 30 seconds then quickly advance to full throttle and watch the exhaust. If it “dies,” it’s too lean. If a pile of exhaust smoke comes out, and then it accelerates, the low speed is too rich. Repeat this process of checking full throttle by running it at idle and testing the acceleration until the idle is at roughly 3,000 to 5,000 rpm and acceleration is smooth and reliable. From there, the idle will come in and you should achieve the correct idle rpm for the engine.
The smaller the engine, the higher the idle. What you’re looking for is the highest idle that will still allow the airplane to stop when taxiing. On my 1/2A Cherokee, with the SH07, idle is approximately 5,000 rpm. The taxi is controllable and easy and the airplane stops on its own. On my Ugly Stick, the SH .55’s rpm is roughly 2,800. In both cases, the airplane will stop when idling.
I hope this helps you enjoy your glow engine. Model engines are amazing machines and it can truly be a blast to fly with one.
Mike Greenshields is an active second-generation modeler who flies regularly with the Scale Squadron of Southern California at the local Orange County Modelers Association flying field. He is currently the club’s president. He was the product manager, and later the vice president of Hobby Shack/Hobby People between 1997 and 2017.
During that time, he worked with Magnum Engines (both Thunder Tiger Corp. and Sanye Precision Machinery Co.), as well as several other engine manufacturers, including Force engines and SH/Golden Lion. Mike was deeply involved with all product support and customer service throughout his career at Hobby Shack.
Today, he is the importer and US distributor for SH Aircraft Engines from Taiwan and sells that product and other hobby supplies through his website, Mike Goes Flying, listed in “Sources.”


SOURCES:
SH Engines/Mike Goes Flying
service@mikegoesflying.com
www.mikegoesflying.com