MAKING A REPLICA SINGLE-CYLINDER ENGINE
Add a scale look to
vintage electric models
By Mark Snowden
msnowden@hotmail.com
Photos by the author
My Super Kaos 60 build, from a 1970s kit, needed a dummy engine to keep it more like the original VECO .61 engine drawn on the plans. The idea was to make it fit above the 730 Kv electric motor.
I scoured the internet for a solution. Some people recommended sawing the bottom off of an old engine. One suggestion even had the electric motor fitted inside of a fuel engine. I saw 3D-printed radial engines, but I failed to find a balsa, single-cylinder dummy engine.
This is how to make a dummy engine out of balsa in 10 easy steps using scrap balsa sheets. The one that I developed used 3/32-inch and 1/16-inch balsa sheets and took roughly 6 hours.
Look closely at your model’s plans and take some measurements. Note the number of cooling fins down the sides and across the top. Study your model RC airplane. How much of the dummy engine needs to be seen, particularly from the side poking above the top? What will the base look like?
Start building with the cylinder. The fins on the plans drawing were 3/32 inch thick; 1-3/4 inches wide for the large fins; and 1-1/4 inches for the “inside” narrower fins. Use a drafting compass to draw the circles.
Cut out a top disk that is thicker (1/4 inch with a 3/32-inch section right below it). Make that disk 1/32 inch wider to fit over the other big disks. If you don’t have thick balsa sheet, you can laminate four 1/16-inch disks.


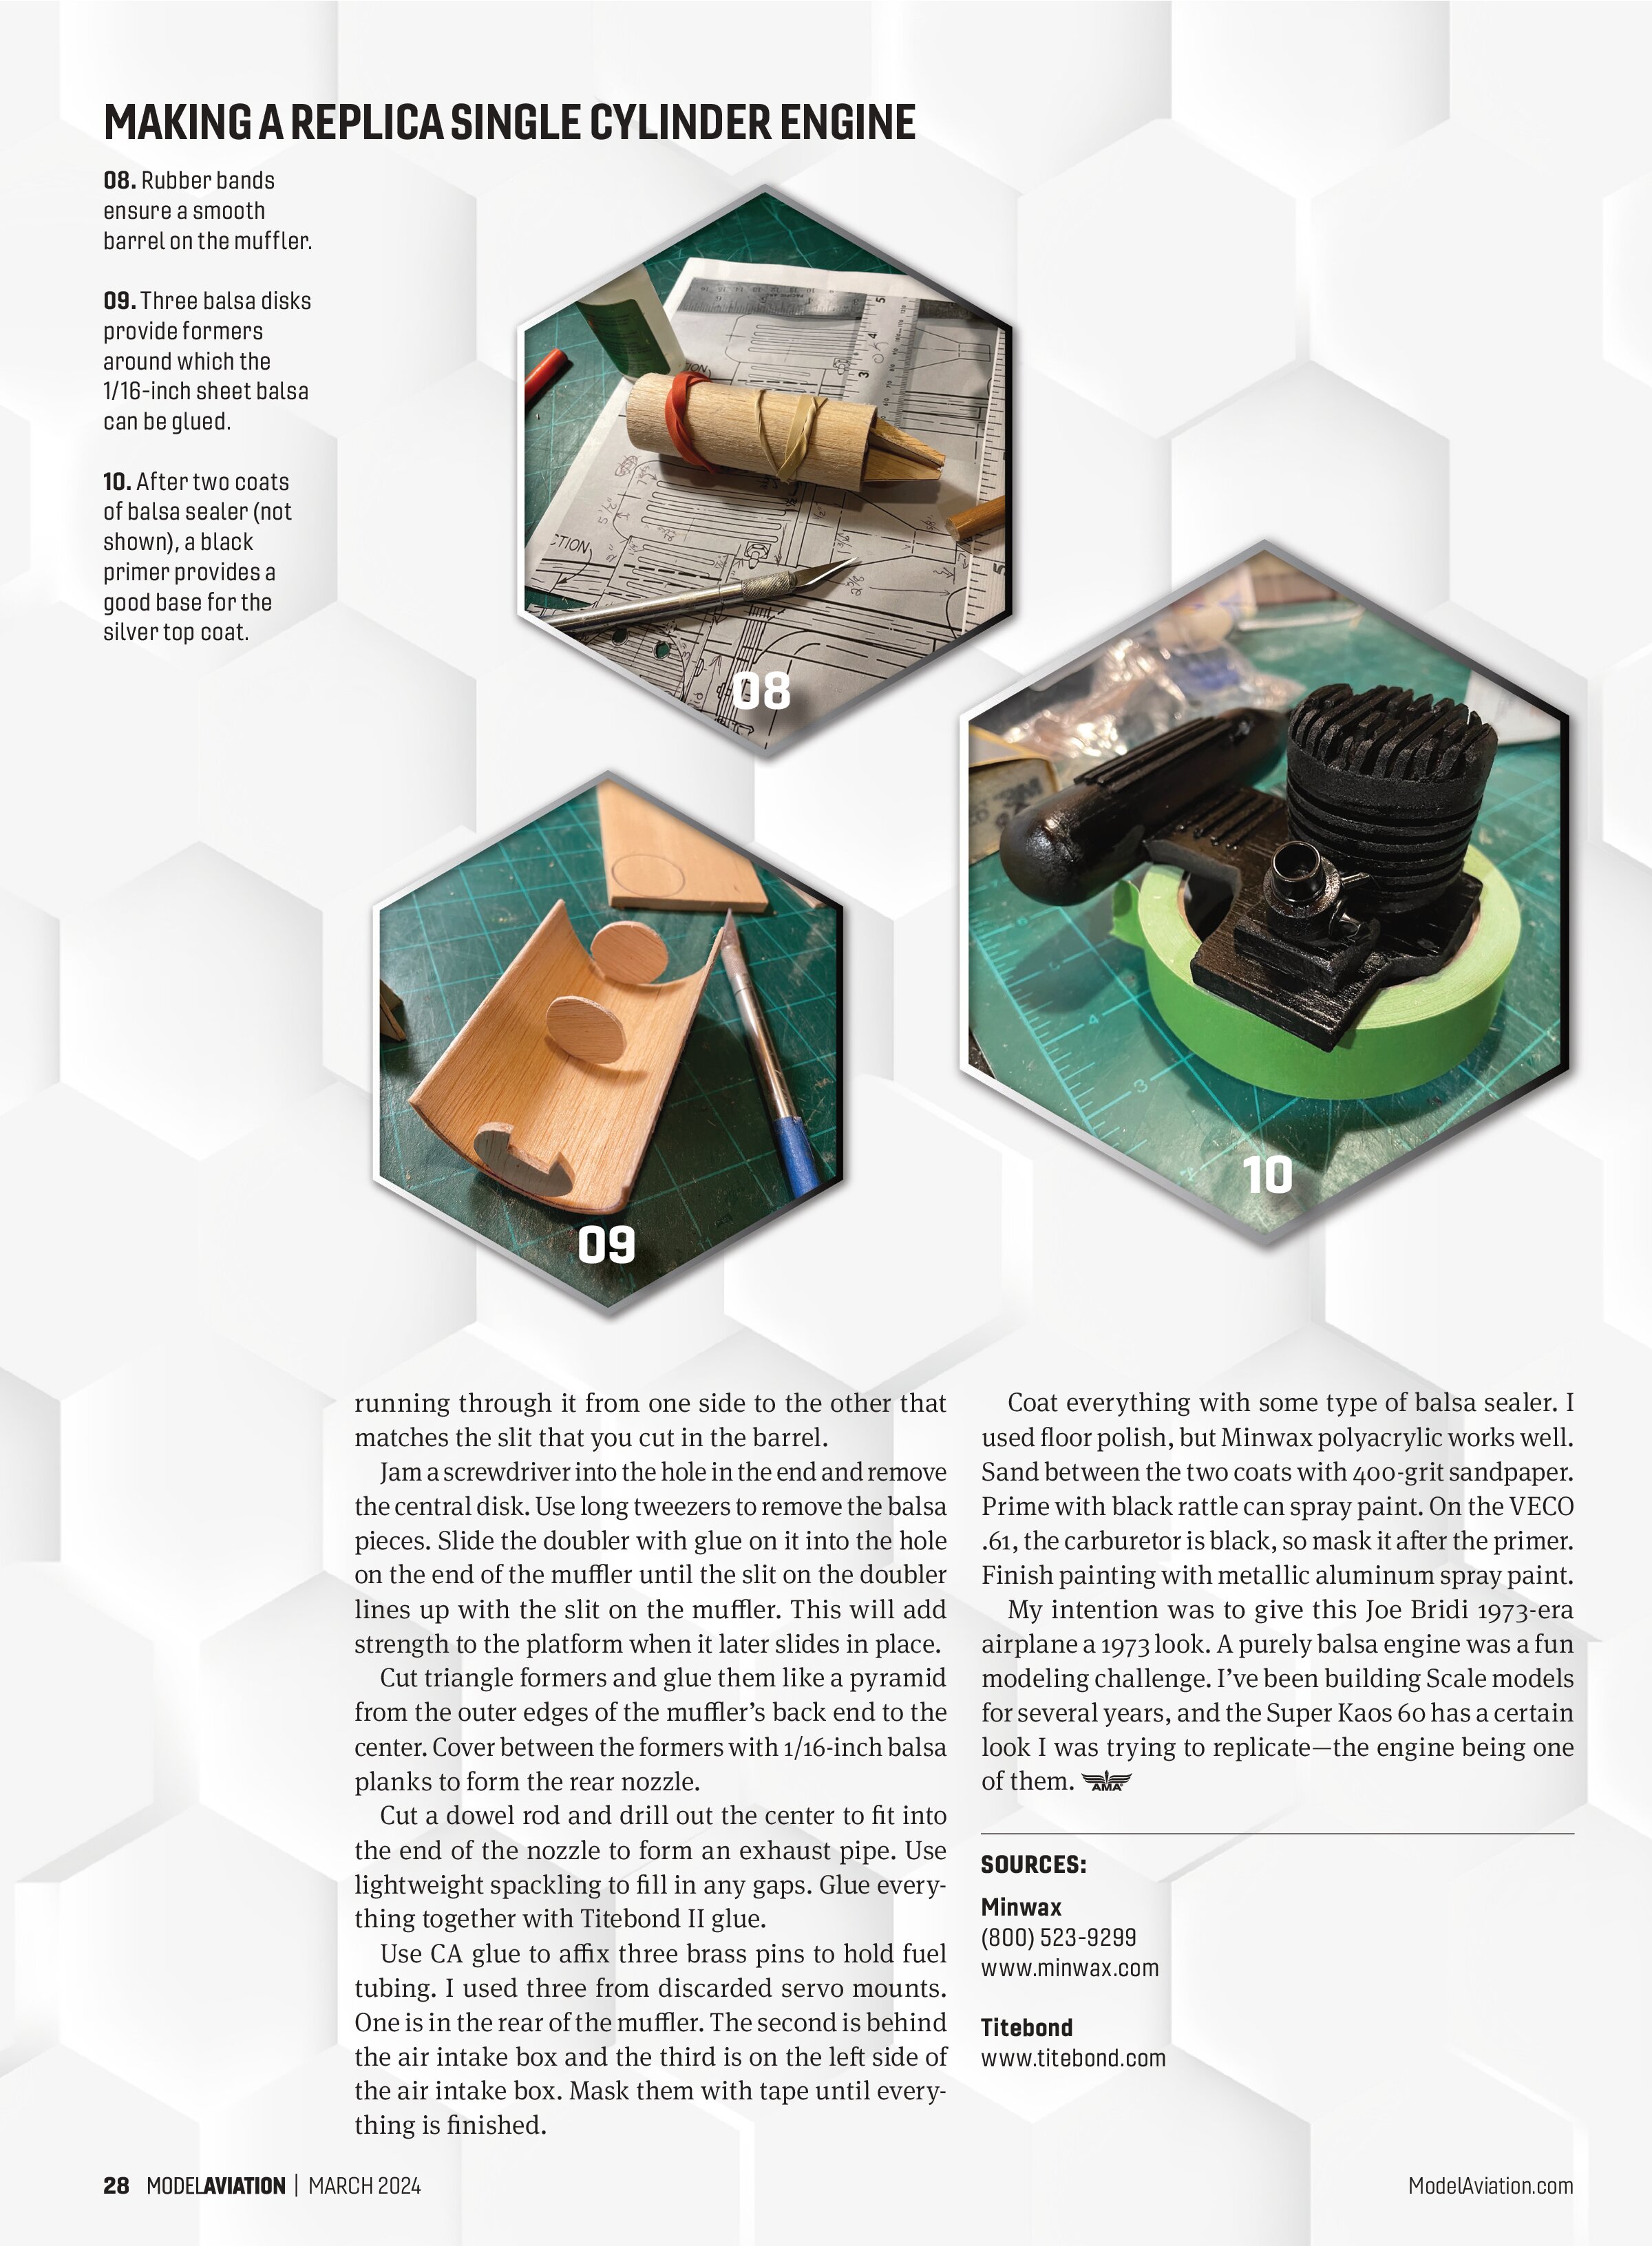
Count how many fins you’ll need across the top of the cylinder. Space them out from the screws on the plans. Make some holes and test your screws.
Make the spark plug top out of round, metal pieces or use a hand drill as a lathe and make your own. Run a long, straight T-pin into the center of each disk of similar size. Sand these with a lathe or, as I did, just make a curved motion until all of the outsides are smooth. When the large and small pins are sanded, slide the large 1/4-inch top cylinder disk into place and alternate disks while gluing them together. Make sure the bottom of the cylinder has two of the smaller 3/32-inch disks.
Make the platform. Measure from the left fuselage wall out to the muffler on the right side and add at least 1/4 inch of length. The balsa sheet should ideally be 1/4 inch thick (or a laminate).
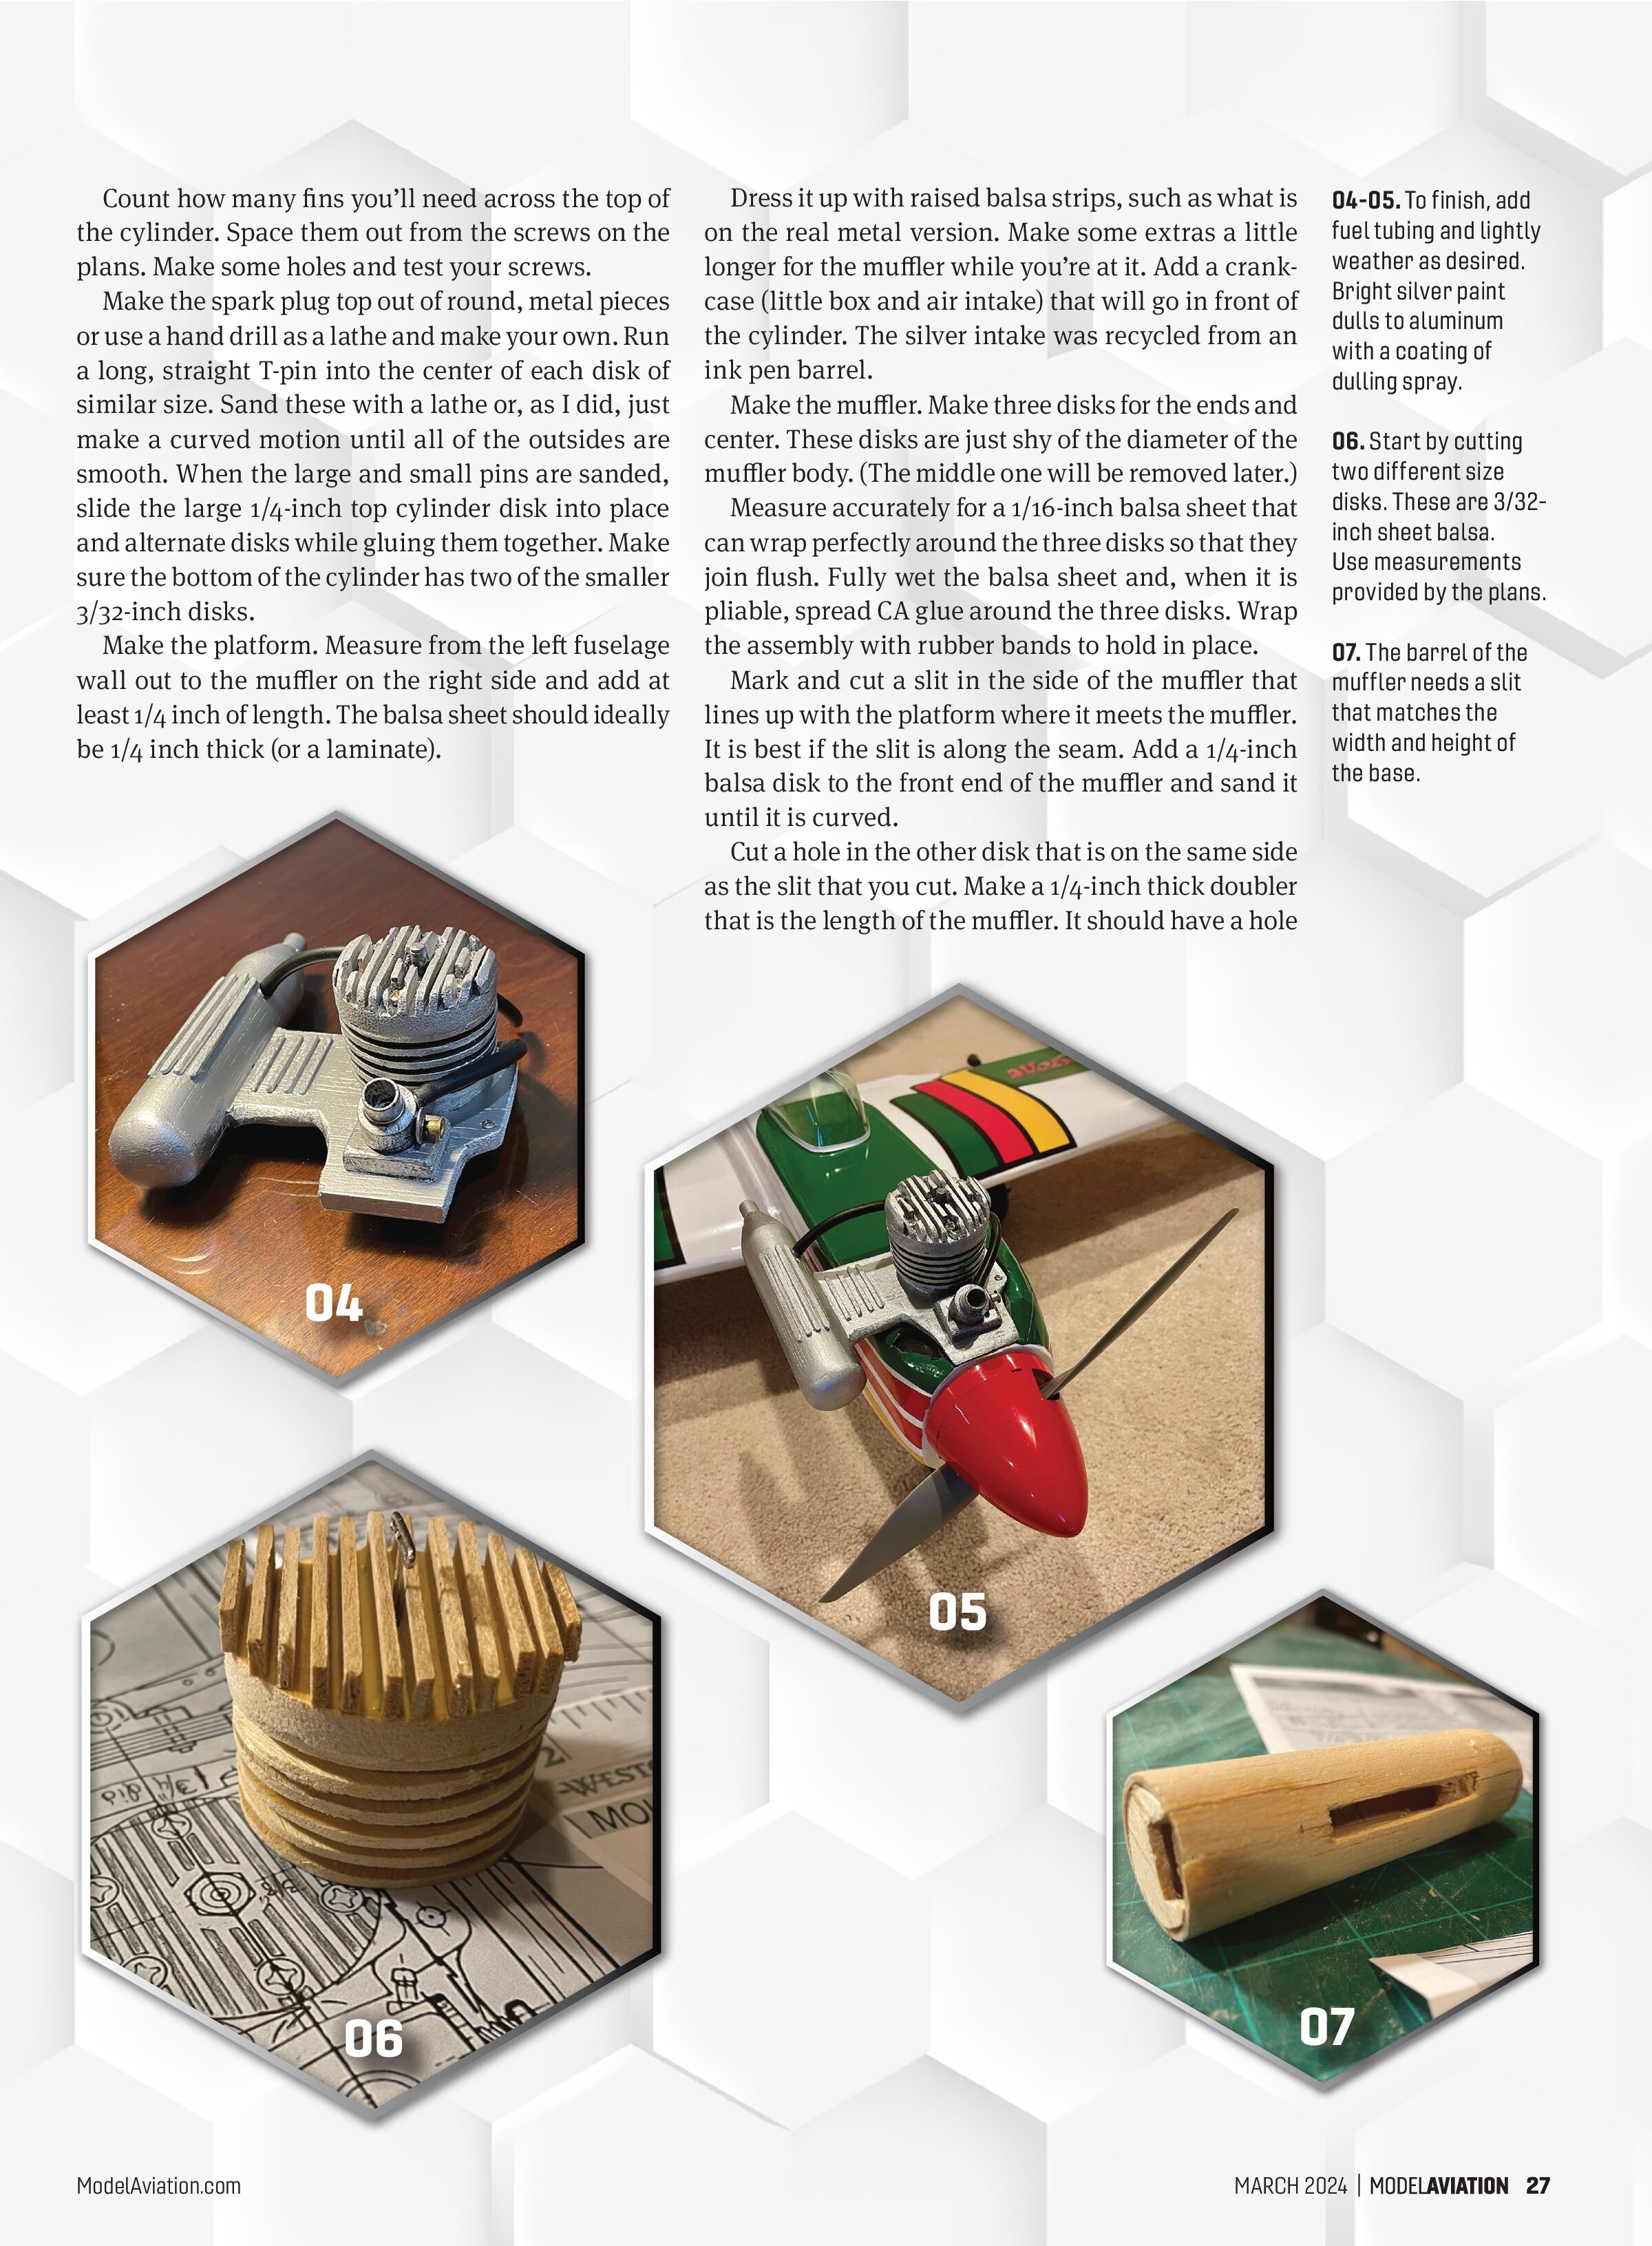
Dress it up with raised balsa strips, such as what is on the real metal version. Make some extras a little longer for the muffler while you’re at it. Add a crankcase (little box and air intake) that will go in front of the cylinder. The silver intake was recycled from an ink pen barrel.
Make the muffler. Make three disks for the ends and center. These disks are just shy of the diameter of the muffler body. (The middle one will be removed later.)
Measure accurately for a 1/16-inch balsa sheet that can wrap perfectly around the three disks so that they join flush. Fully wet the balsa sheet and, when it is pliable, spread CA glue around the three disks. Wrap the assembly with rubber bands to hold in place.
Mark and cut a slit in the side of the muffler that lines up with the platform where it meets the muffler. It is best if the slit is along the seam. Add a 1/4-inch balsa disk to the front end of the muffler and sand it until it is curved.
Cut a hole in the other disk that is on the same side as the slit that you cut. Make a 1/4-inch thick doubler that is the length of the muffler. It should have a hole.


running through it from one side to the other that matches the slit that you cut in the barrel.
Jam a screwdriver into the hole in the end and remove the central disk. Use long tweezers to remove the balsa pieces. Slide the doubler with glue on it into the hole on the end of the muffler until the slit on the doubler lines up with the slit on the muffler. This will add strength to the platform when it later slides in place.
Cut triangle formers and glue them like a pyramid from the outer edges of the muffler’s back end to the center. Cover between the formers with 1/16-inch balsa planks to form the rear nozzle.
Cut a dowel rod and drill out the center to fit into the end of the nozzle to form an exhaust pipe. Use lightweight spackling to fill in any gaps. Glue everything together with Titebond II glue.
Use CA glue to affix three brass pins to hold fuel tubing. I used three from discarded servo mounts. One is in the rear of the muffler. The second is behind the air intake box and the third is on the left side of the air intake box. Mask them with tape until everything is finished.
Coat everything with some type of balsa sealer. I used floor polish, but Minwax polyacrylic works well. Sand between the two coats with 400-grit sandpaper. Prime with black rattle can spray paint. On the VECO .61, the carburetor is black, so mask it after the primer. Finish painting with metallic aluminum spray paint.
My intention was to give this Joe Bridi 1973-era airplane a 1973 look. A purely balsa engine was a fun modeling challenge. I’ve been building Scale models for several years, and the Super Kaos 60 has a certain look I was trying to replicate—the engine being one of them.
SOURCES:
Minwax
(800) 523-9299
www.minwax.com
Titebond
www.titebond.com