A SIMPLER CHANGE OF PACE
By Thayer Syme | thayer@flying-models.com

A REGULAR READER of these pages, Marty Kocman, usually builds midsize and larger internal-combustion-powered Scale RC models, such as World War I and other vintage-era subjects. As an example, one of his COVID projects was an 80-inch Pietenpol. Another of his early birds was featured nearly a decade ago in the “Focal Point” section of the February 2014 issue of Model Aviation.
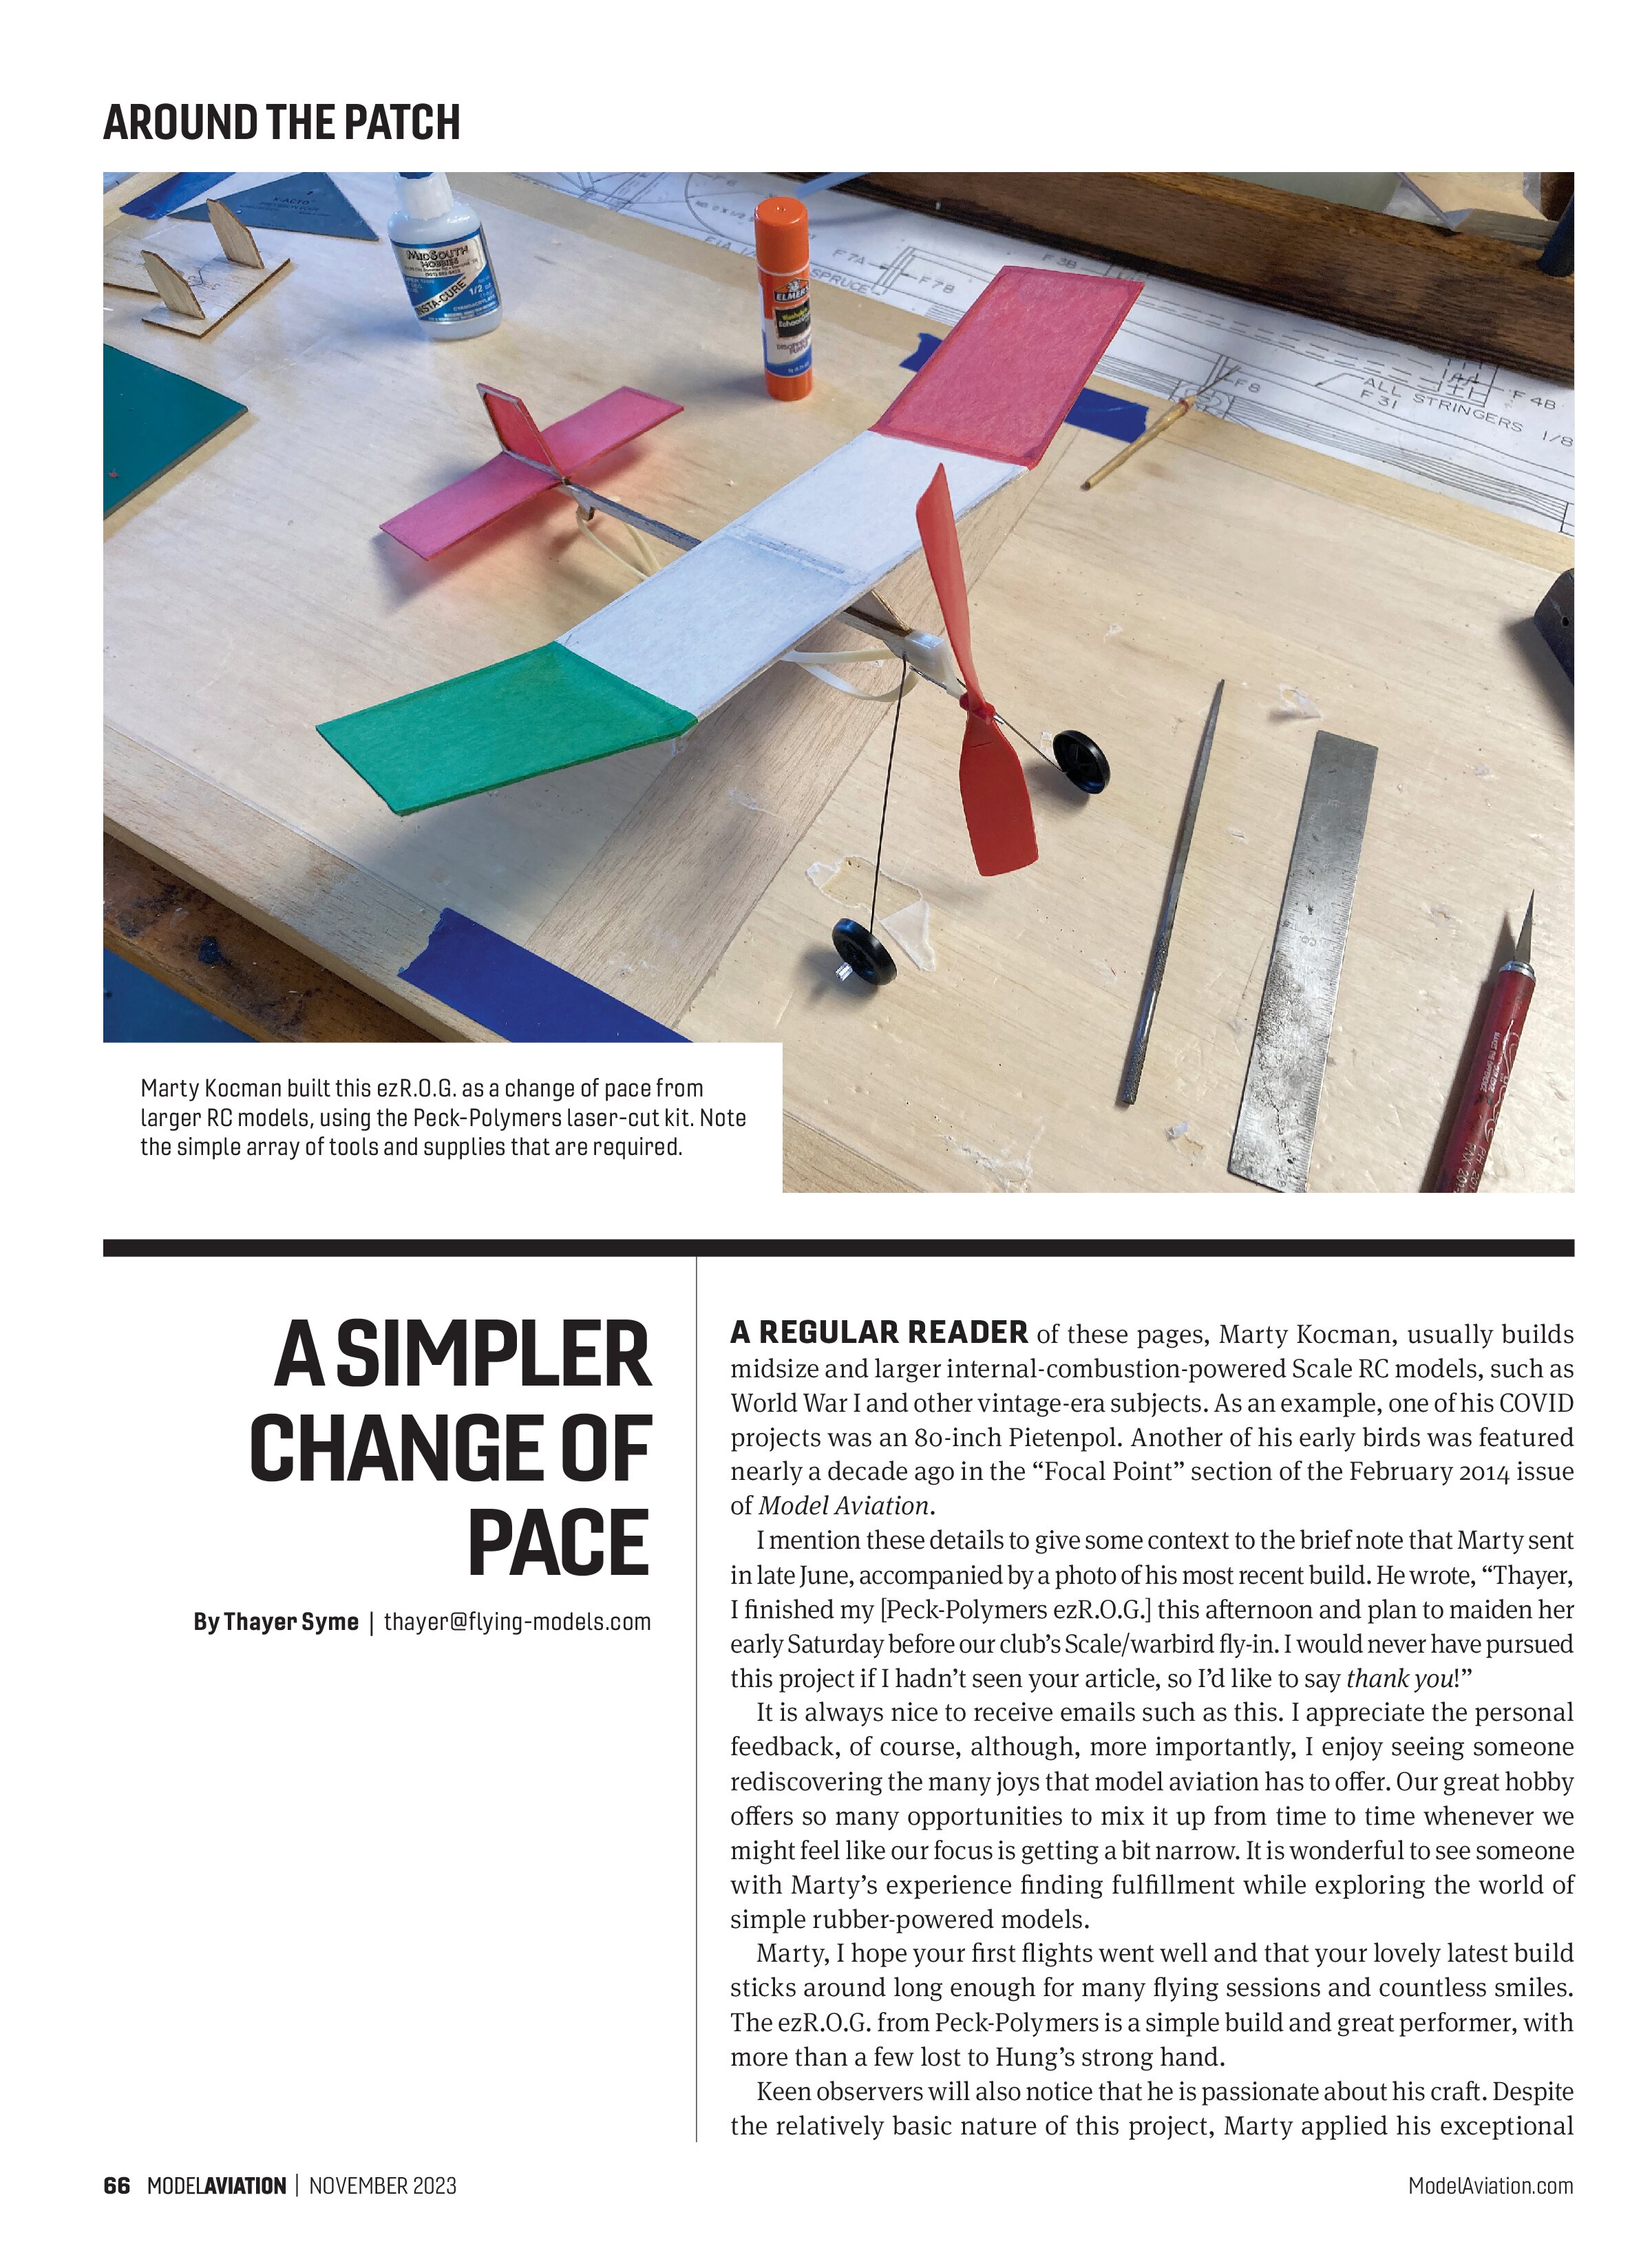
I mention these details to give some context to the brief note that Marty sent in late June, accompanied by a photo of his most recent build. He wrote, “Thayer, I finished my [Peck-Polymers ezR.O.G.] this afternoon and plan to maiden her early Saturday before our club’s Scale/warbird fly-in. I would never have pursued this project if I hadn’t seen your article, so I’d like to say thank you!”
It is always nice to receive emails such as this. I appreciate the personal feedback, of course, although, more importantly, I enjoy seeing someone rediscovering the many joys that model aviation has to offer. Our great hobby offers so many opportunities to mix it up from time to time whenever we might feel like our focus is getting a bit narrow. It is wonderful to see someone with Marty’s experience finding fulfillment while exploring the world of simple rubber-powered models.
Marty, I hope your first flights went well and that your lovely latest build sticks around long enough for many flying sessions and countless smiles. The ezR.O.G. from Peck-Polymers is a simple build and great performer, with more than a few lost to Hung’s strong hand.
Keen observers will also notice that he is passionate about his craft. Despite the relatively basic nature of this project, Marty applied his exceptional skills and attention to detail just as he does with his more complex models.


More 3D Engine Options
After reading about Gordon Johnson’s Monocoupe in my September column, Duane Smeckert reached out to ensure that I was aware of a valuable resource serving the 3D printing community.
Those who are just starting to investigate 3D printing are often intimidated by their perception of the computer skills that are required. Although the learning curve can seem steep at times, we don’t need to make that climb immediately. It is our good fortune that hundreds of other enthusiasts have gone before us with this game-changing new technology.
Thingiverse.com is a wildly popular online resource where people share their 3D CAD files. Poking around a bit will reveal pretty much anything you can imagine printing, from models of all types to more mundane household and workshop widgets. Downloads are free, and there is a voluntary opportunity to “tip” content creators, if you are so inspired.
A quick glance at the algorithm-driven sampling presented one evening showed foldable clothes hangers, some whimsical cartoony figures barely taller than their water bottle cap hats, and a functional padlock with a mating skeleton key.
More relevant to our pursuits, I’m also seeing a 5 to 80mm circle drawing template, a desk organizer (that would also be right at home on the workbench), and another organizer designed to hold 18 of the classic Testors square paint bottles, a selection of brushes, and other handy bits and bobs.
There is also a basic desktop CNC router that uses a Dremel tool as the spindle. Much of its structure consists of standard aluminum extrusion stock, with 20-plus printable components to tie it all together. I’ve no knowledge of the design beyond what is shown, but it does look like a viable DIY CNC project. The designer also includes a full list of hardware and additional items that are required for completion to help people follow the path to success.
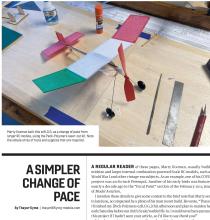
Getting back to what inspired this discussion, myriad options turn up when searching for “radial engine” or “dummy engine,” with many designed for specific RC models. More generic options are also available and can easily be scaled to suit your projects. If you are feeling a bit overwhelmed at this point, ask around. I

expect that most modelers will know someone who has a 3D printer and can help you out.
Before I wrap up this topic, I want to also give you some sense of the economics that are involved with 3D printing. The aforementioned paint rack will consume just a few dollars worth of material. I’ve checked a couple of basic radial engines that can be printed for approximately a dollar, and many simple detail parts can be printed for a few pennies.
Yes, there is also an acquisition cost of the printer, although they seem to be cheaper every time I look. A serviceable 3D printer can be had new for $200, and often much less if you can time your purchase to recurring promotional sales.
Closer to Home
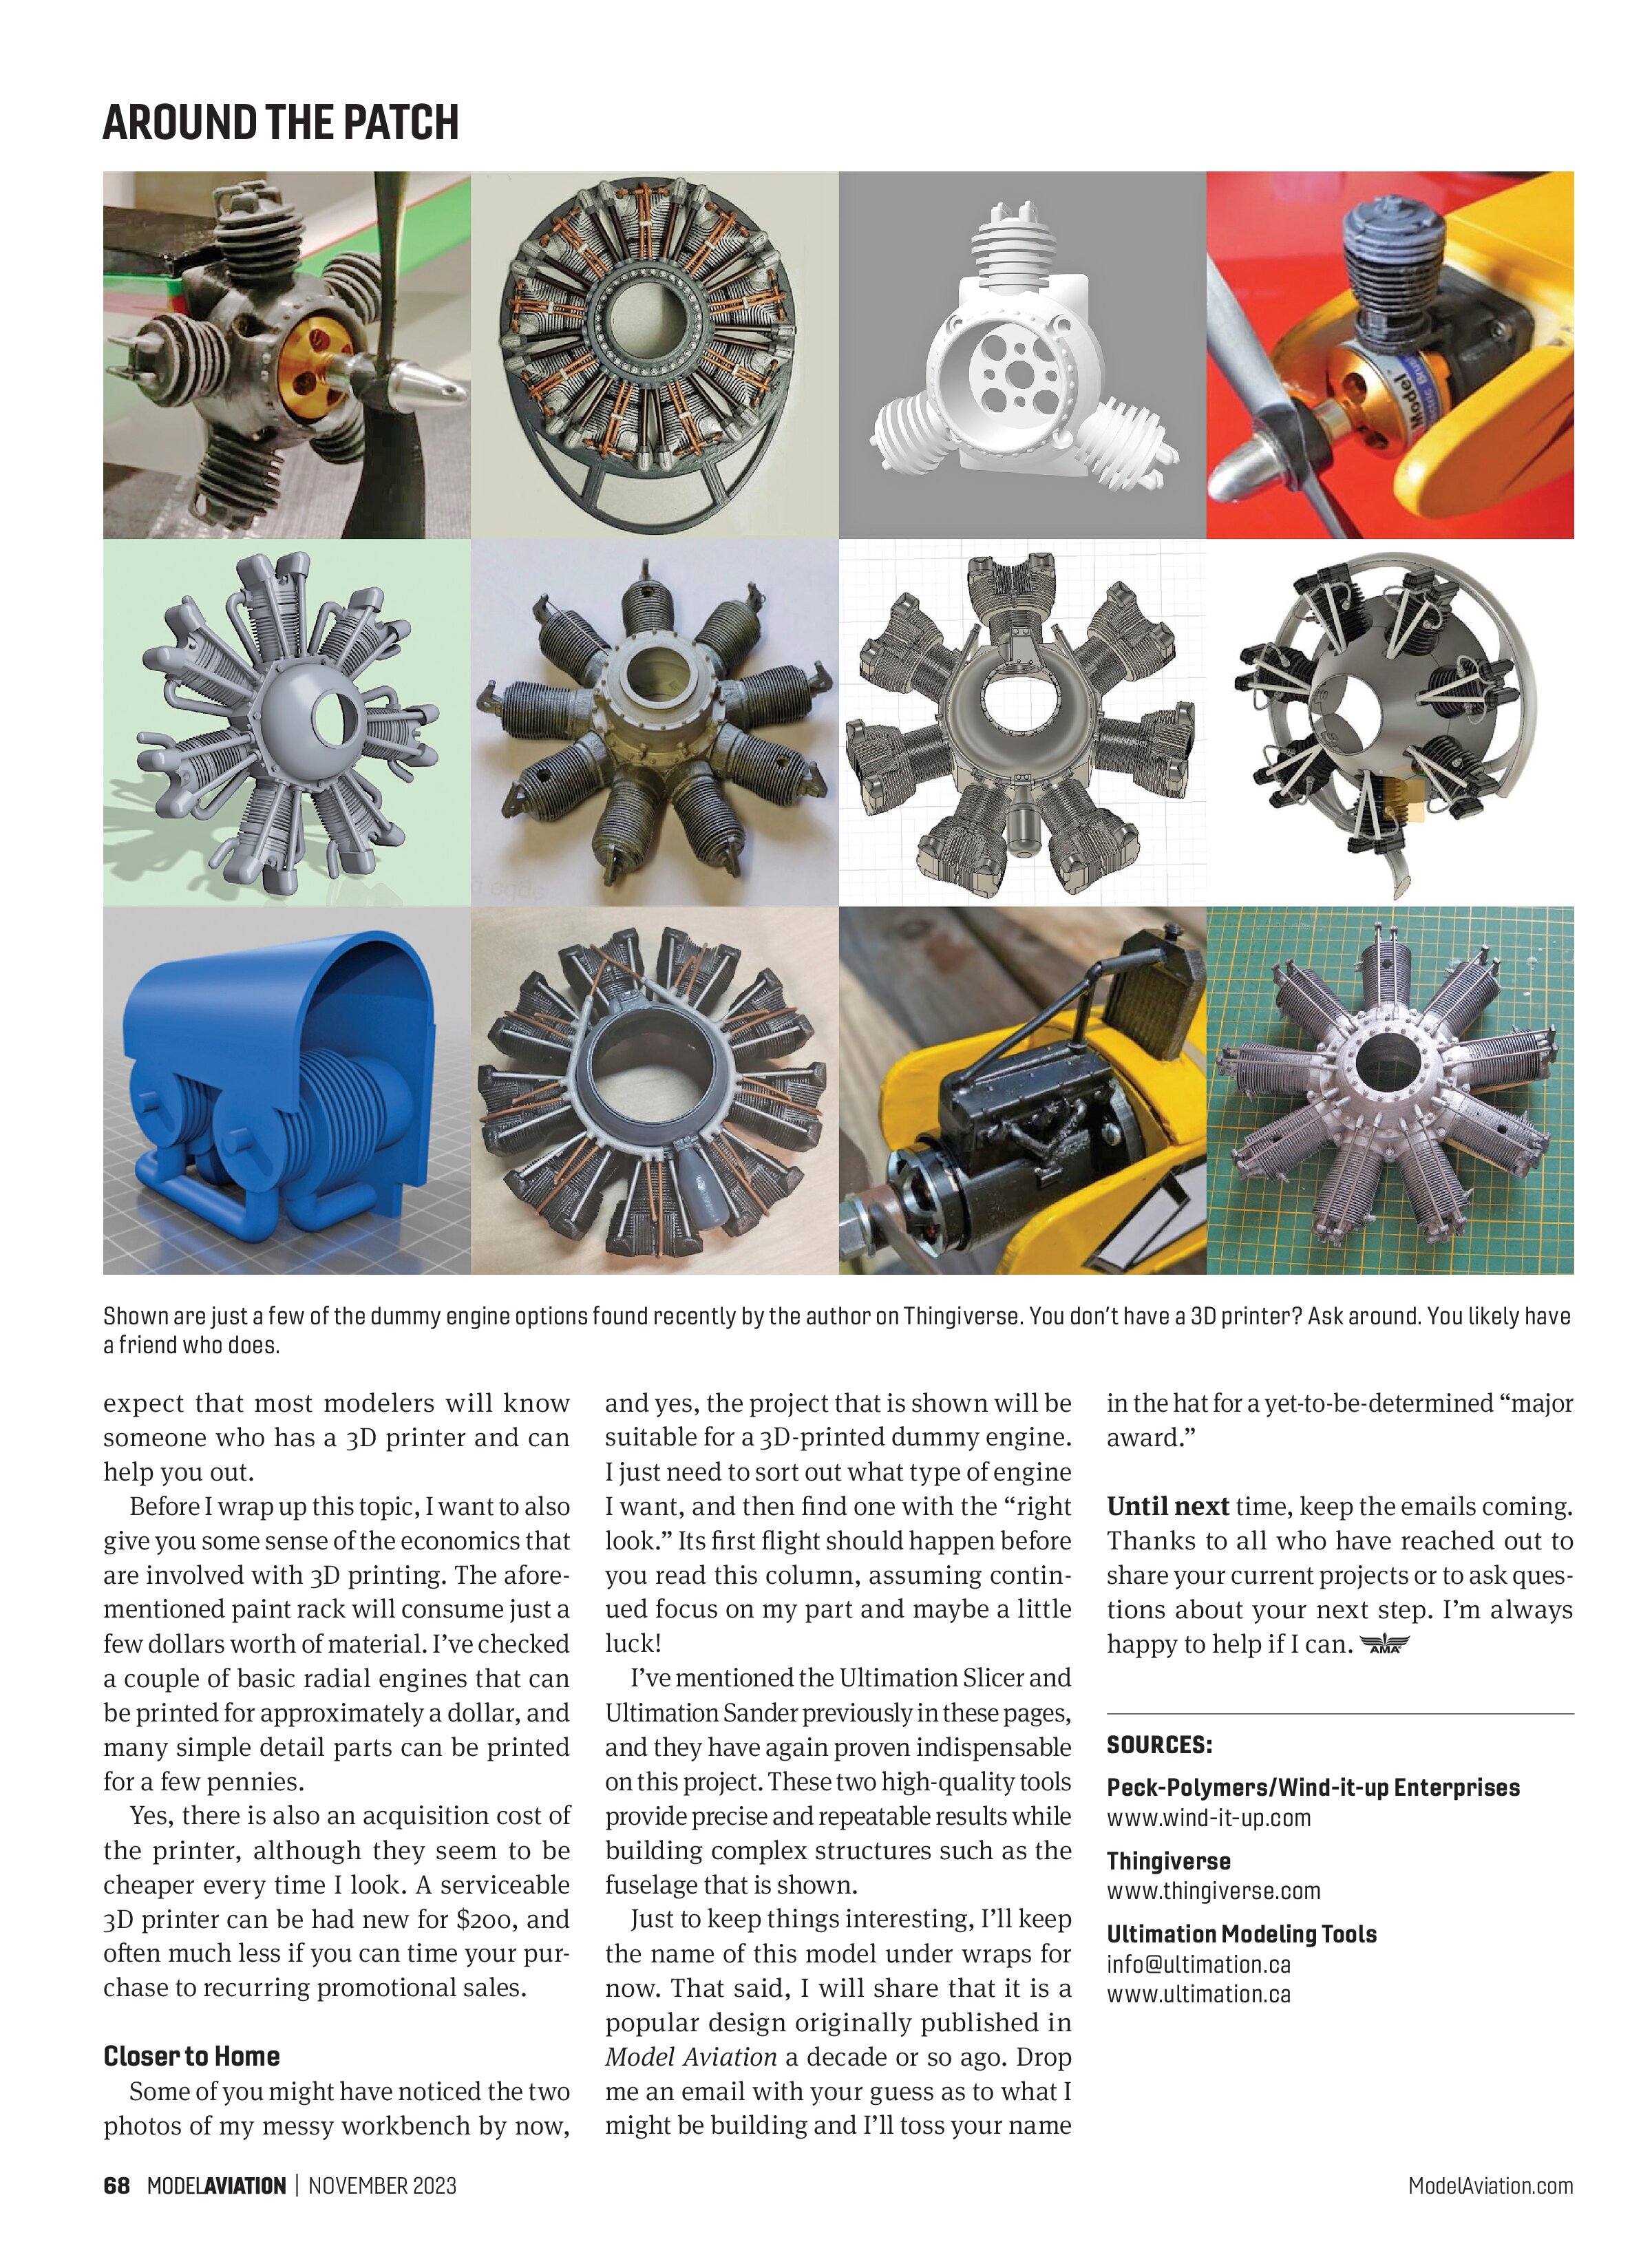
Some of you might have noticed the two photos of my messy workbench by now, and yes, the project that is shown will be suitable for a 3D-printed dummy engine. I just need to sort out what type of engine I want, and then find one with the “right look.” Its first flight should happen before you read this column, assuming continued focus on my part and maybe a little luck!
I’ve mentioned the Ultimation Slicer and Ultimation Sander previously in these pages, and they have again proven indispensable on this project. These two high-quality tools provide precise and repeatable results while building complex structures such as the fuselage that is shown.
Just to keep things interesting, I’ll keep the name of this model under wraps for now. That said, I will share that it is a popular design originally published in Model Aviation a decade or so ago. Drop me an email with your guess as to what I might be building and I’ll toss your name in the hat for a yet-to-be-determined “major award.”
Until next time, keep the emails coming. Thanks to all who have reached out to share your current projects or to ask questions about your next step. I’m always happy to help if I can.
SOURCES:
Pack-Polymers/Wind-it-up Enterprises
www.wind-it-up.com
Thingiverse
www.thingiverse.com
Ultimation Modeling Tools
info@ultimation.ca
www.ultimation.ca