RC SCALE AEROBATICS
FUEL TANK SELECTION, INSTALLATION, AND PLUMBING
By John Glezellis | jglezellis@gmail.com

SERIOUS INTERNATIONAL Miniature Aerobatic Club (IMAC) competitors must devote time not only to flying techniques for the sequences to be flown but also to the proper selection of components to be used on the aircraft, as well as correct build and setup practices.
To illustrate this, in my August 2023 column, I examined a few items pertaining to the execution of the Down Shark’s Tooth from not only a flight perspective but also the setup of the radio and engine, to result in consistent performance from the airframe.
This month, I will continue to examine the engine area of the aircraft. I will specifically look at the fuel tank installation, plumbing, and best overall practices to allow you to focus on your competition flight. Without further delay, let’s begin!
Tank Selection and Installation Practices
Even if a given fuel tank was supplied by the manufacturer of the model, I often replace it with a brand that I’ve used and trusted for years to minimize the possibility of a tank leaking. 3W round tanks allow you to easily access the internal fittings, tubing, and clunks because the front cap of the tank unthreads and is rather large. Given that it is round in shape, I prefer a tank mount.
Secraft also offers a few round tank options with a holder to simplify the installation. For rectangular tanks, B & B Specialties offers a tank configuration similar to that offered by 3W, where a rather large fuel cap can be removed to allow the internal plumbing to be easily accessed.

Du-Bro also offers great fuel tank options with different rubber stoppers, whether you use glow or gas as your fuel source.
Regardless of the fuel tank style, you must pay particular attention to the dimensions of the fuel tank and the proper mounting location within your aircraft. Verify measurements of the tank, as well as the expected fuel consumption of the engine, to make the appropriate size selection. Choosing the right tank is an easy way to ensure that you are not carrying ounces of unneeded weight!
For a competitor, it is best to install the fuel and smoke tank, if applicable, on or as close as possible to the center of gravity (CG) of the airplane. Using the Desert Aircraft 120cc engine as an example, the carburetor on this particular engine is pumped so that the fuel tank can be installed almost anywhere within reason.
For sizing, the manufacturer recommends a 32-ounce or larger fuel tank. Assuming that you use the same size smoke
tank, that would total 64 ounces. By having both tanks on the CG, the model will be perfectly balanced at all times and will not require the pilot to make any changes in elevator trim.
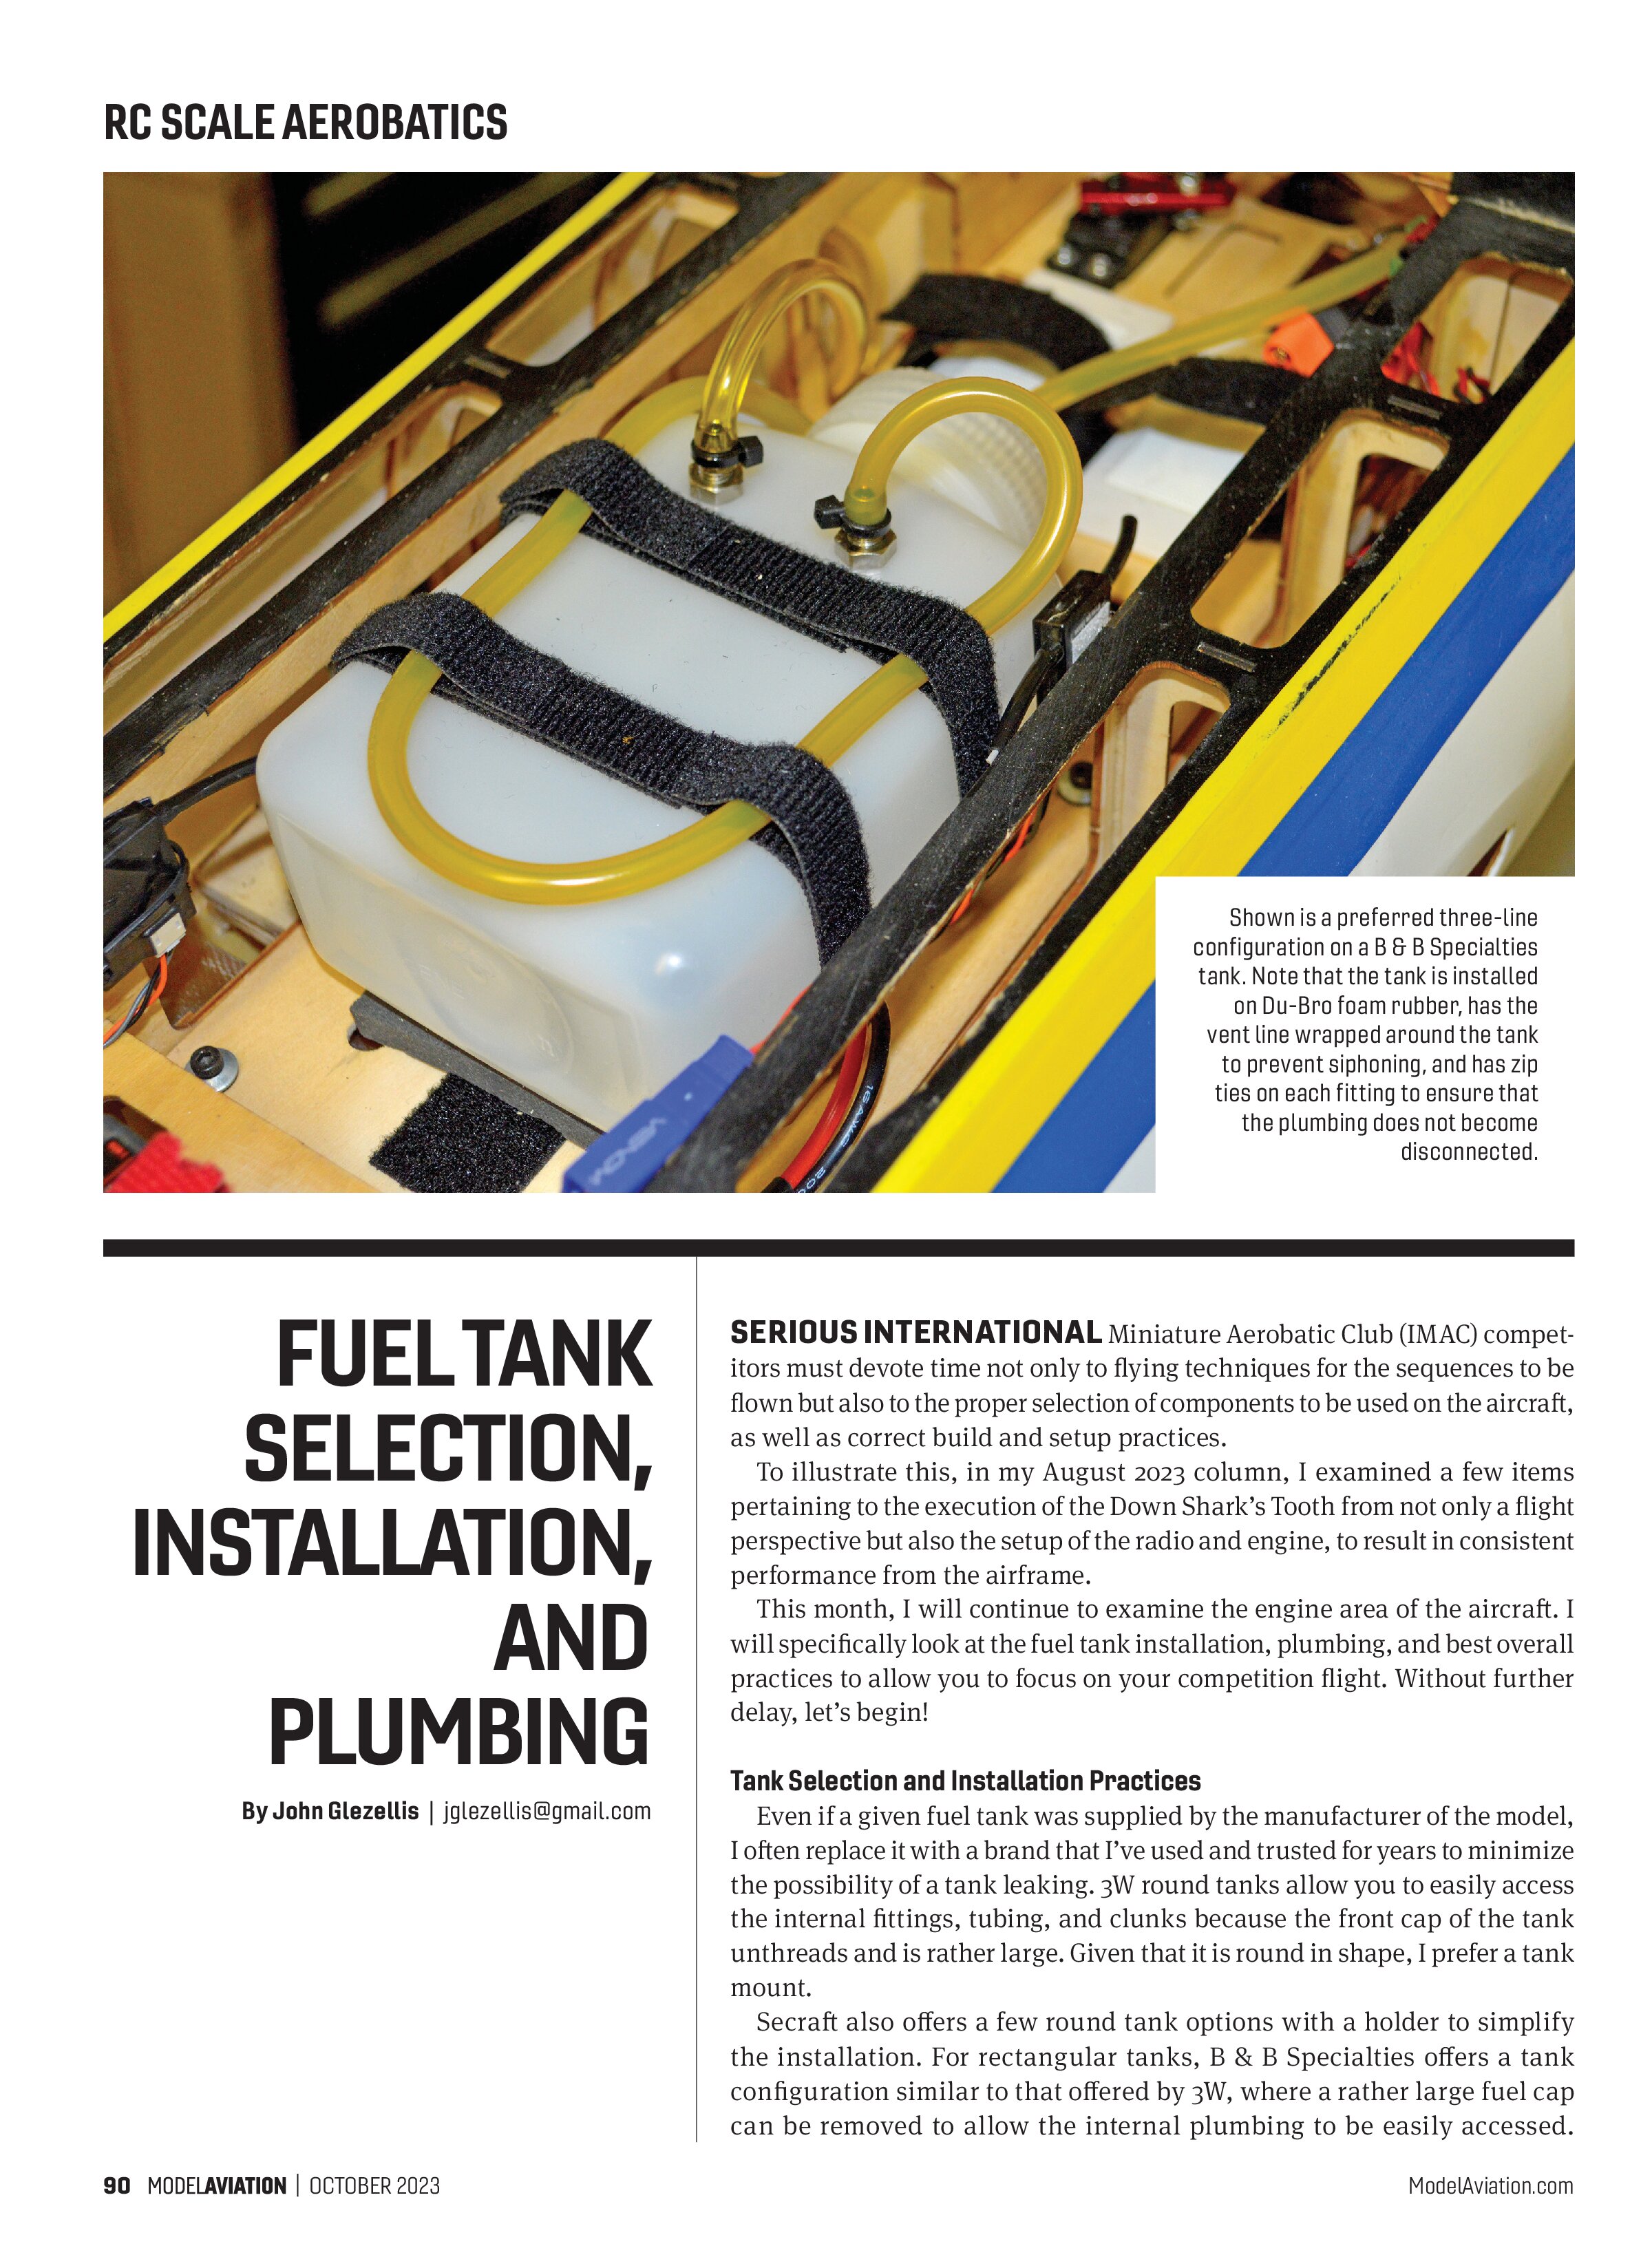
I prefer the use of Du-Bro foam rubber to protect the fuel tank from vibration and two hook-and-loop straps to secure the tank to a given tank tray. For added protection, adhesive hook-and-loop material is used to secure the tank to the foam rubber and the foam rubber to the structure of the airframe to prevent fore-and-aft movement of the tank.
Plumbing 101
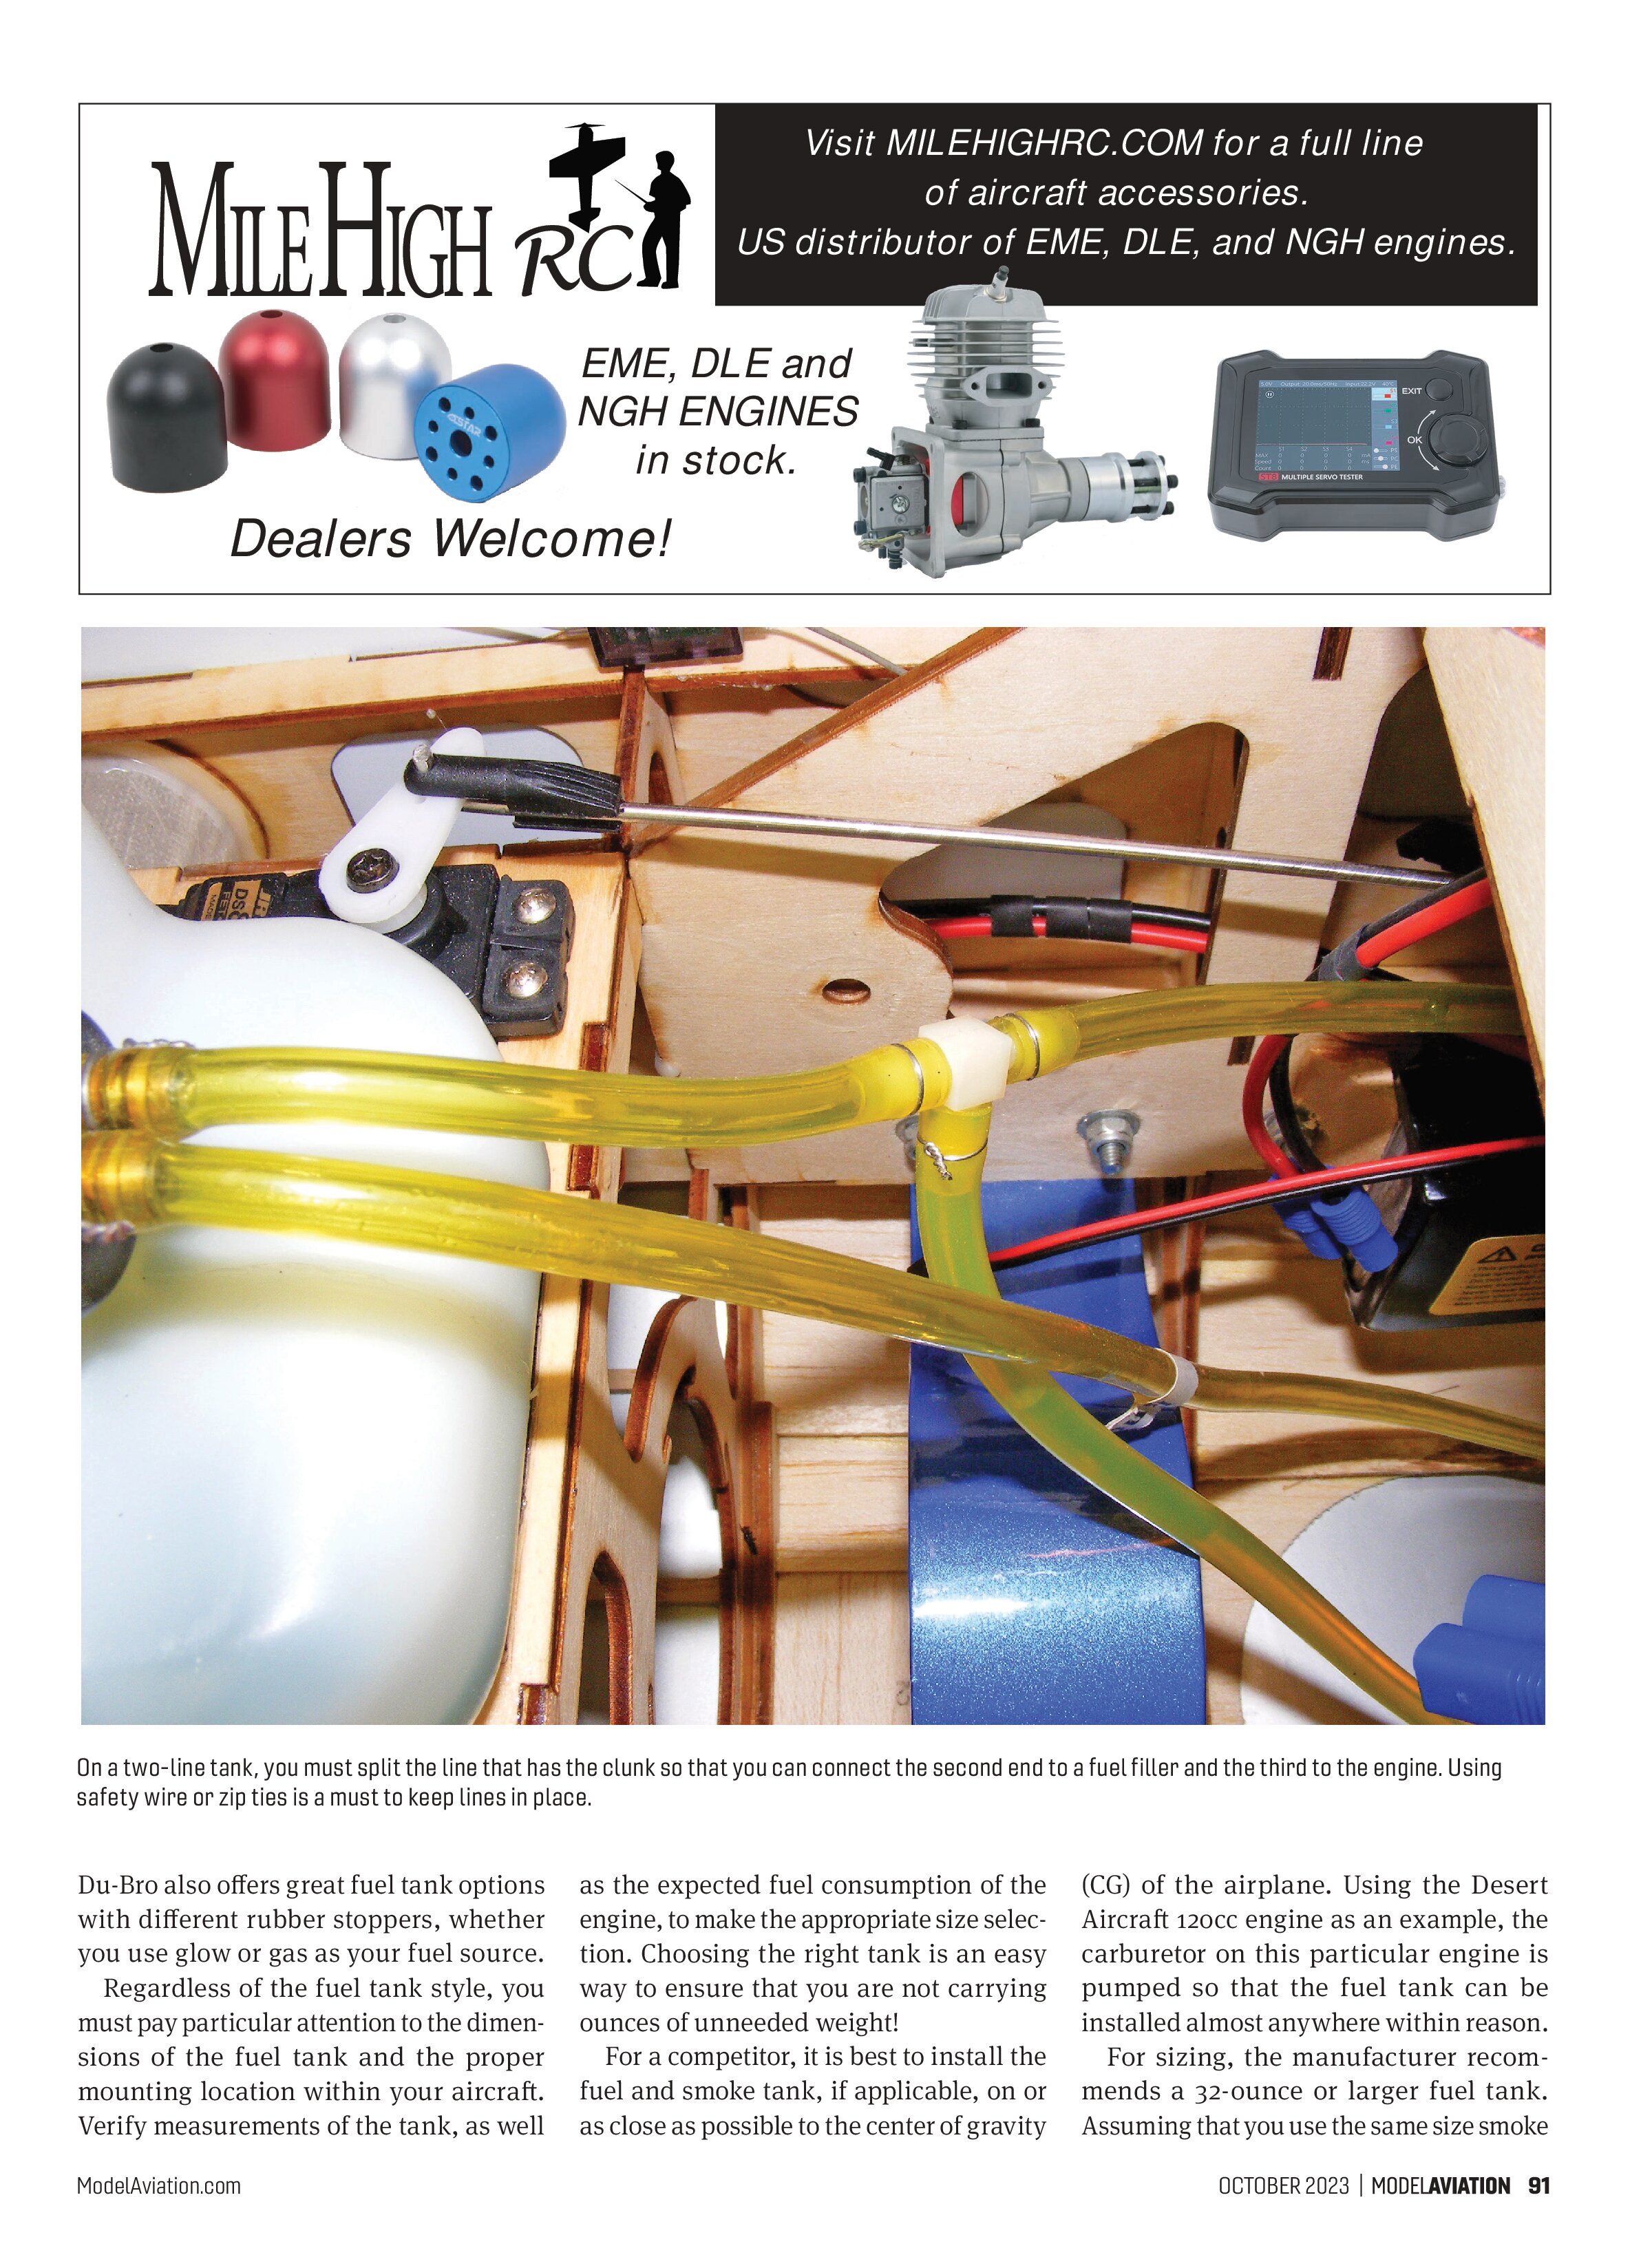
In a conventional two-line method, one line will be the vent line and the other will be the fuel pickup line, which will go from the tank to a three-way fitting. From this fitting, one end will go to a fuel filler (also referred to as a fuel dot) and the other will go to the carburetor. Although I have used this plumbing method on some smaller models (85cc and below), some pilots feel that potential leak points might be added if they use a two-line tank because of the three-way fitting, which brings me to my next plumbing option.
The three-line setup will require you to connect the “pickup” line from the tank to the carburetor, the fill line from the tank to a fuel filler, and finally, the vent line to a fitting found on the bottom of the aircraft. For this configuration, both the fill and pickup lines within the tank each have a clunk.
Regardless of whether you select a two- or three-line setup within the tank, you should ensure that the vent line does not contact the tank because it might cause harm throughout time. The clunk(s) must move freely but almost touch the rear of the tank.
Bending the internal brass tubes found within the tank and cutting them to specific lengths is required. That can be tedious without the right tools. To assist, both K&S Precision Metals and Du-Bro offer a few tools that greatly simplify this entire process.
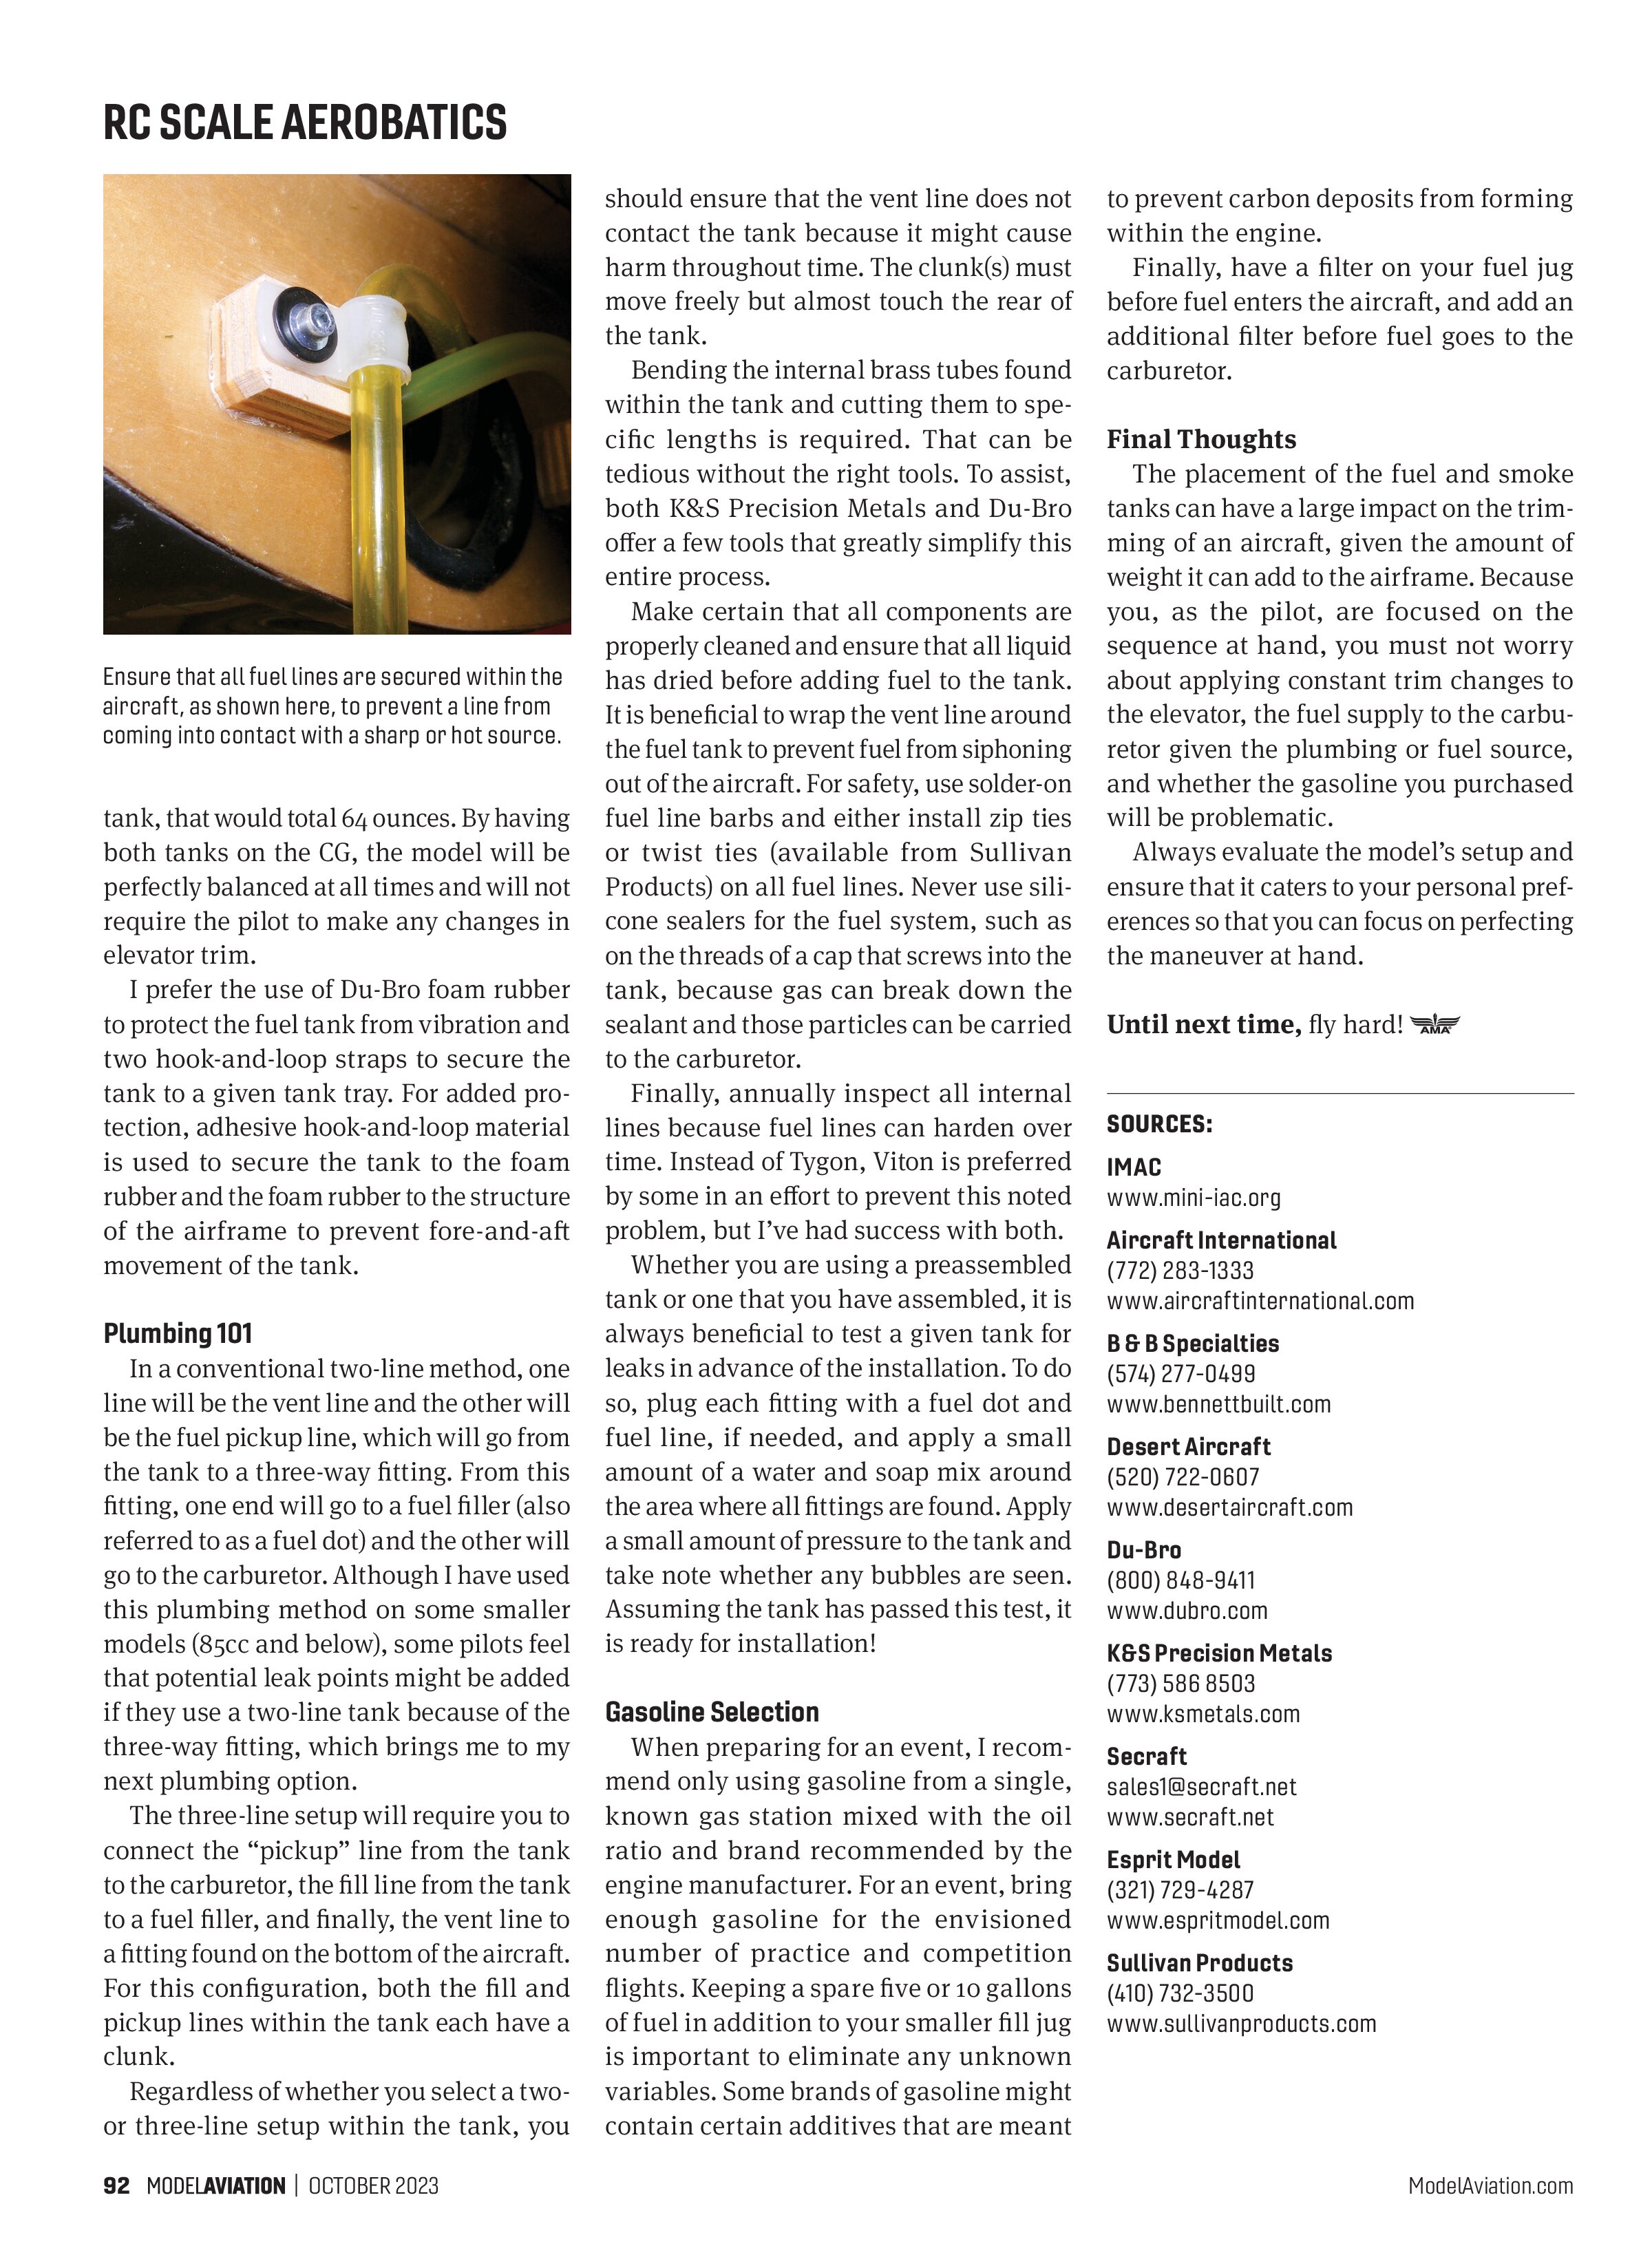
Make certain that all components are properly cleaned and ensure that all liquid has dried before adding fuel to the tank. It is beneficial to wrap the vent line around the fuel tank to prevent fuel from siphoning out of the aircraft. For safety, use solder-on fuel line barbs and either install zip ties or twist ties (available from Sullivan Products) on all fuel lines. Never use silicone sealers for the fuel system, such as on the threads of a cap that screws into the tank, because gas can break down the sealant and those particles can be carried to the carburetor.
Finally, annually inspect all internal lines because fuel lines can harden over time. Instead of Tygon, Viton is preferred by some in an effort to prevent this noted problem, but I’ve had success with both.
Whether you are using a preassembled tank or one that you have assembled, it is always beneficial to test a given tank for leaks in advance of the installation. To do so, plug each fitting with a fuel dot and fuel line, if needed, and apply a small amount of a water and soap mix around the area where all fittings are found. Apply a small amount of pressure to the tank and take note whether any bubbles are seen. Assuming the tank has passed this test, it is ready for installation!
Gasoline Selection
When preparing for an event, I recommend only using gasoline from a single, known gas station mixed with the oil ratio and brand recommended by the engine manufacturer. For an event, bring enough gasoline for the envisioned number of practice and competition flights. Keeping a spare five or 10 gallons of fuel in addition to your smaller fill jug is important to eliminate any unknown variables. Some brands of gasoline might contain certain additives that are meant to prevent carbon deposits from forming within the engine.
Finally, have a filter on your fuel jug before fuel enters the aircraft, and add an additional filter before fuel goes to the carburetor.
Final Thoughts
The placement of the fuel and smoke tanks can have a large impact on the trimming of an aircraft, given the amount of weight it can add to the airframe. Because you, as the pilot, are focused on the sequence at hand, you must not worry about applying constant trim changes to the elevator, the fuel supply to the carburetor given the plumbing or fuel source, and whether the gasoline you purchased will be problematic.
Always evaluate the model’s setup and ensure that it caters to your personal preferences so that you can focus on perfecting the maneuver at hand.
Until next time, fly hard!
SOURCES:
IMAC
www.mini-iac.org
Aircraft International
(772) 283-1333
www.aircraftinternational.com
B & B Specialties
(574) 277-0499
www.bennettbuilt.com
Desert Aircraft
(520) 722-0607
www.desertaircraft.com
Du-Bro
(800) 848-9411
www.dubro.com
K&S Precision Metals
(773) 586 8503
www.ksmetals.com
Secraft
sales1@secraft.net
www.secraft.net
Esprit Model
(321) 729-4287
www.espritmodel.com
Sullivan Products
(410) 732-3500
www.sullivanproducts.com