SCAT TWIN REVISITED

Now available
as a short kit 37
years after its
creation
By Steve Broome
sb0131@icloud.com
Photos courtesy of Linda Broome
This story is for pilots who would like to fly a multiengine airplane but worry about the bad things that can happen if you lose an engine. I experienced this once when I was flying a conventional twin. I was flying in level flight when the aircraft suddenly made a pretty snap roll and went into a spin.
I instantly cut the throttle, dove out of the spin, and glided in for a smooth landing. During the 1980s, I decided to invent a twin-engine airplane that did not do bad things if an engine dies. Through many mishaps, I created a cool twin push/pull canard that I named Scat Twin. If it loses an engine, it just slows down a bit and continues to fly. There is a saying, “History repeats itself.” This article recounts some history and how a story can repeat itself.
In 1986, I wanted to build a twin canard. I had never seen one in person but had seen pictures. The Beechcraft Starship made its maiden flight in 1986, so I thought I would scratch-build a sport version. I had been an RC flier for six years and I thought it would be cool. I built a twin .40 pusher and, not knowing that its center of gravity (CG) is in front of the main wing, it proceeded to do a backflip on takeoff. That’s when I explored where a canard’s CG should be.
After adding a ridiculous amount of lead and ratchet sockets in the nose, it flew well. I then decided to try two .25 O.S. engines in a push/pull tandem, and I didn’t need any nose weight. I advanced to a .40-size engine and have settled on that size. There were three crashes from the vertical stabilizer tearing off mid-flight, but that has been solved. That is a long, terrifying, and costly story in itself.
After becoming satisfied with the final version, I built a succession of twin canards that flew well but had the bad habit of having the vertical stabilizer fly off in the air. I lost three aircraft that were completely uncontrollable. The first two had the stabilizer glued onto the top of the fuselage like most conventional airplanes, and they tore off.
I redesigned the vertical stabilizer by cutting a slot in the fuselage and gluing it both inside and outside to prevent this from happening again. Unfortunately, I did not glue a reinforcement on the outside of the fuselage on the third canard and it also tore off. Now I completely reinforce the vertical stabilizer both inside and out.
I built a new canard using two O.S. .46 engines and a simple Texas flag MonoKote design. I thought that my development issues would be a cool topic for a story, so I approached Radio Control Modeler (RCM) magazine in 1988 and asked if it was interested in publishing a construction article. It was, and I built a second Scat Twin with a simple US flag design.
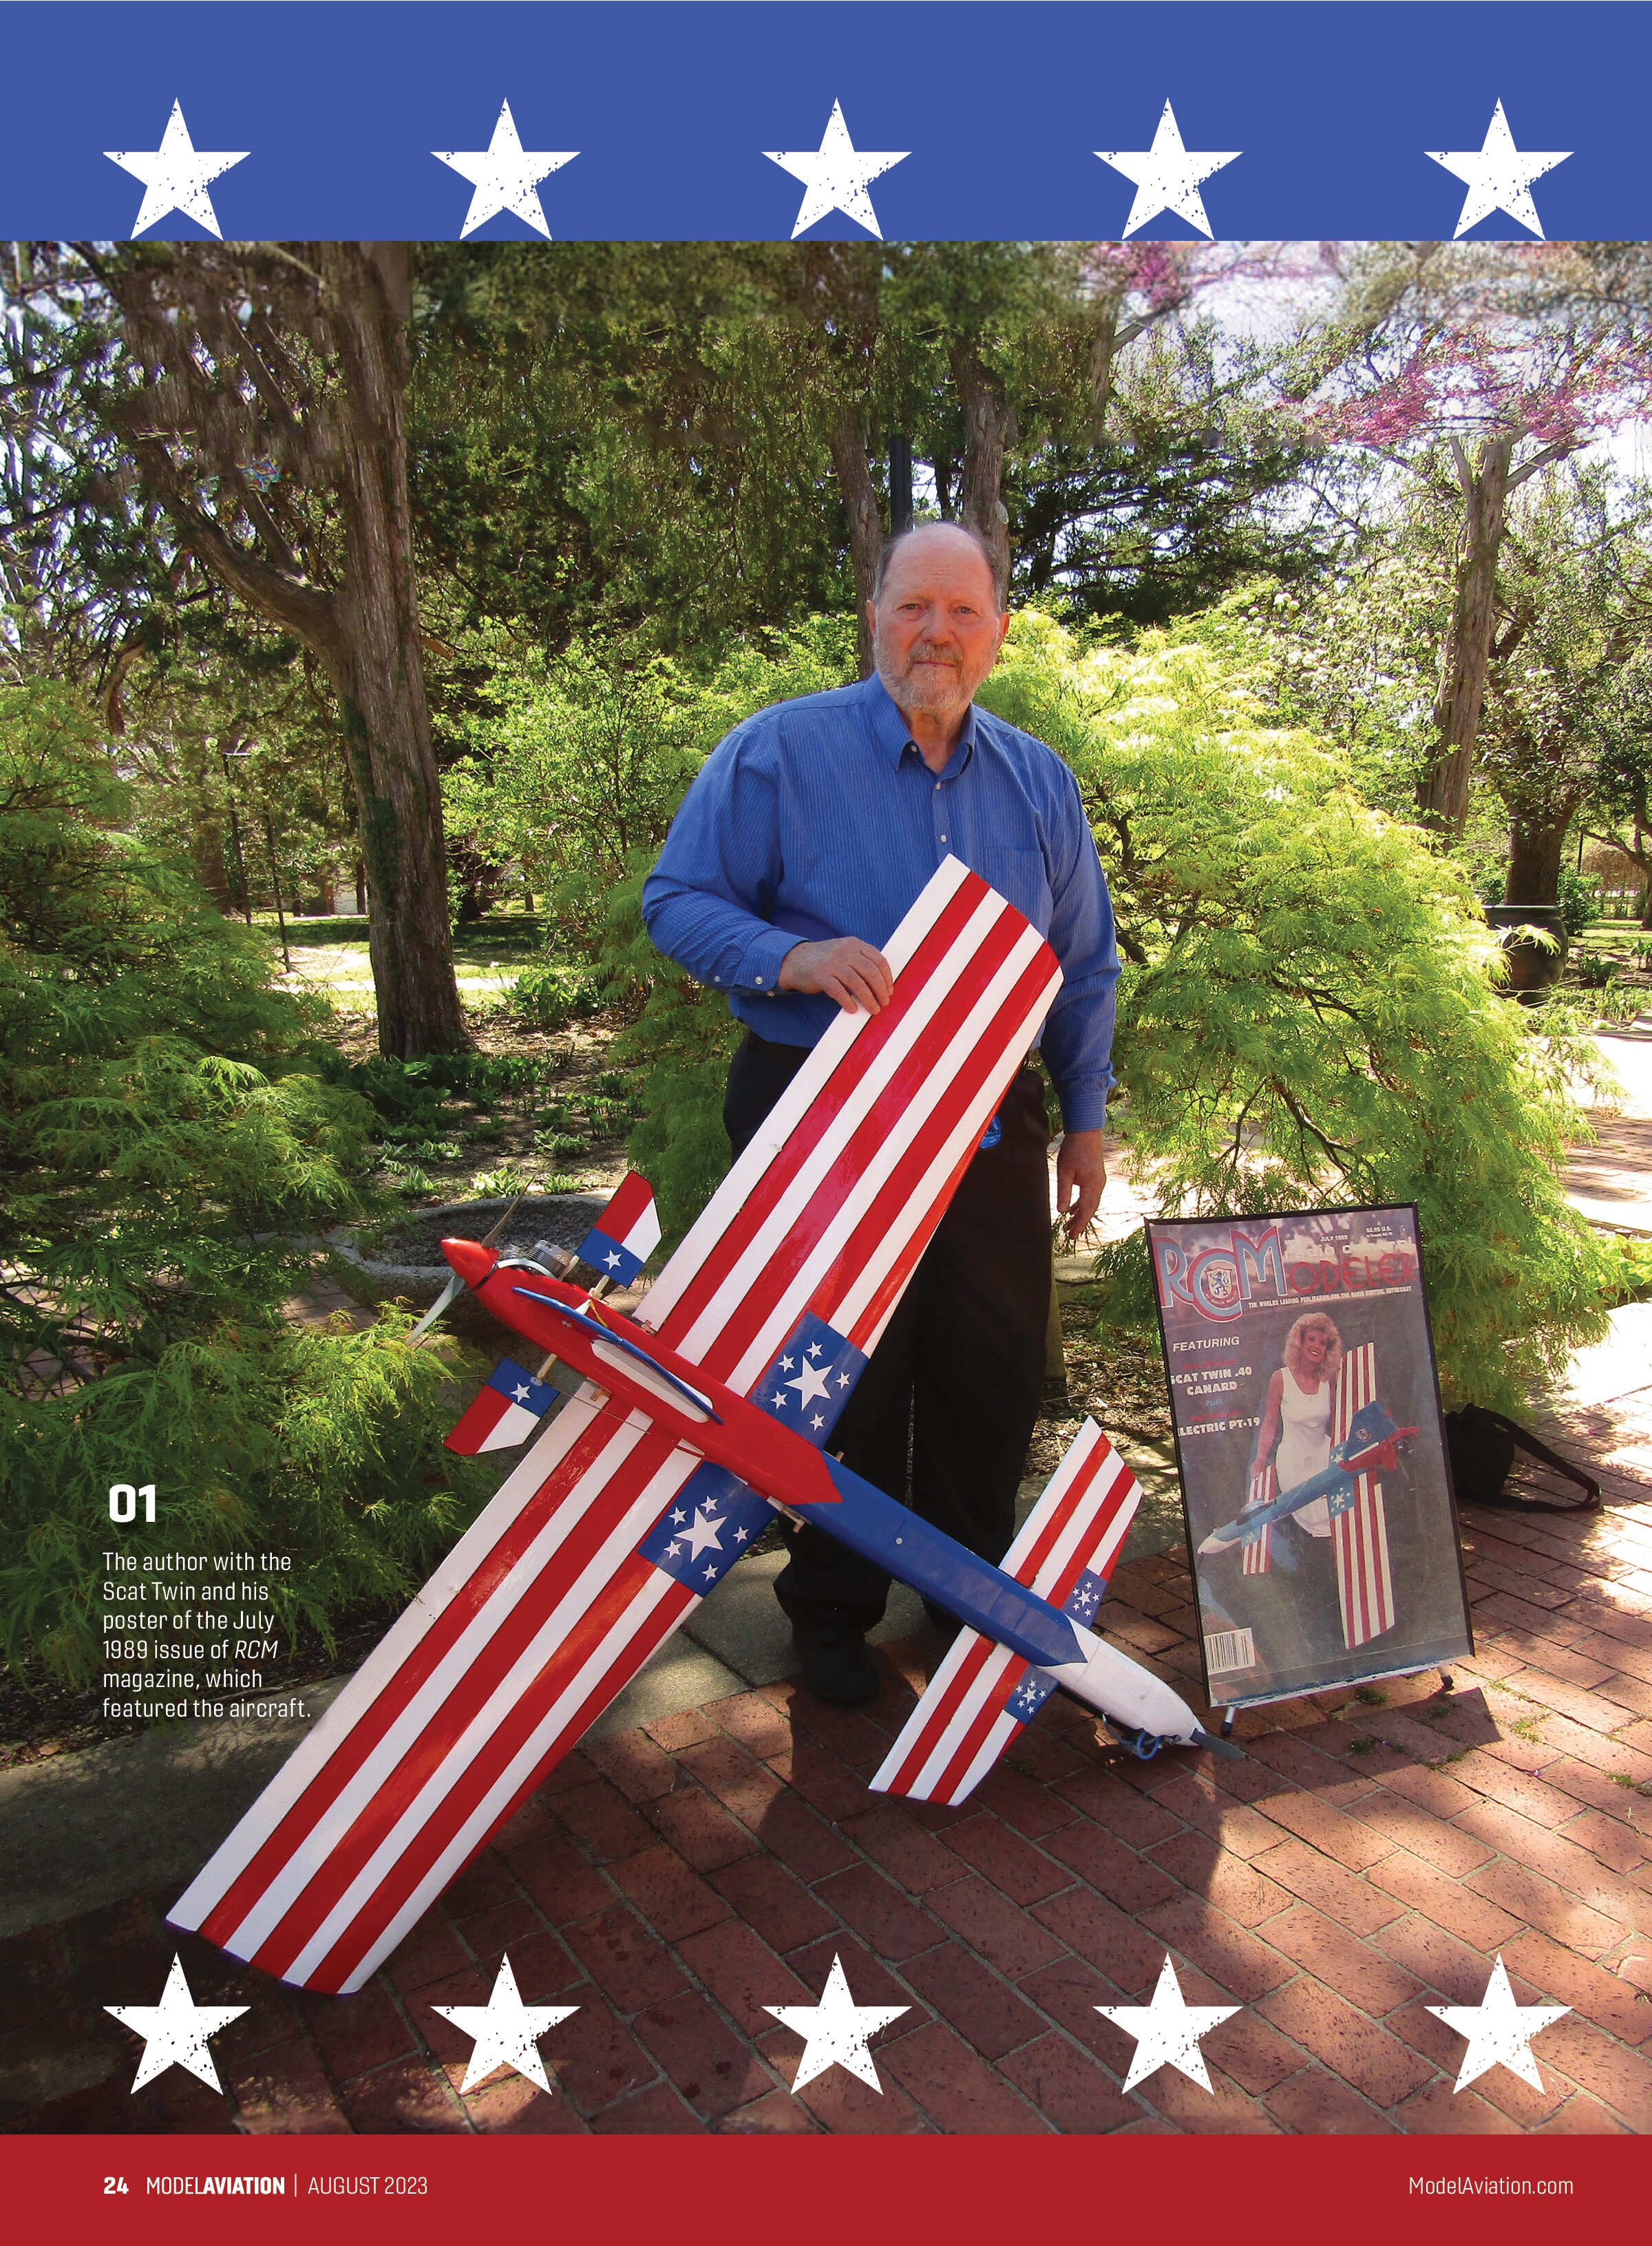
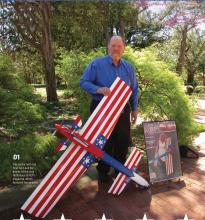
I asked a friend to pose with both airplanes, and to my surprise, RCM published it on the cover of the July 1989 issue.
It was the only nonscale airplane featured on the cover that year. I heard from fliers across the US, and even some from overseas, and received some cool pictures of their Scat Twins.
In 1990, my wife, Linda, gave me a full-size poster of the RCM cover. I display it with my Scat Twin at fun-flys and in photos. I flew both twin canards at fun-fly events for many years. At one event, I let the best pilot put on a show and he flew the paint off the airplane. All went well until he tried a low-level, knife-edge pass and it crashed in front of hundreds of spectators and pilots. That was the only mishap in dozens of flights.


Available Again
Fast-forward to 2023, and the mighty Scat Twin has been resurrected! Eureka Aircraft Co. announced that it would reintroduce some older airplanes and chose the Scat Twin as its first release.
I contacted the owner, Bruce Van Beek, and offered to build the first model. He agreed and sent me a kit for fit/completeness checks. After a few modifications, I felt that I had a good short kit and proceeded to build.
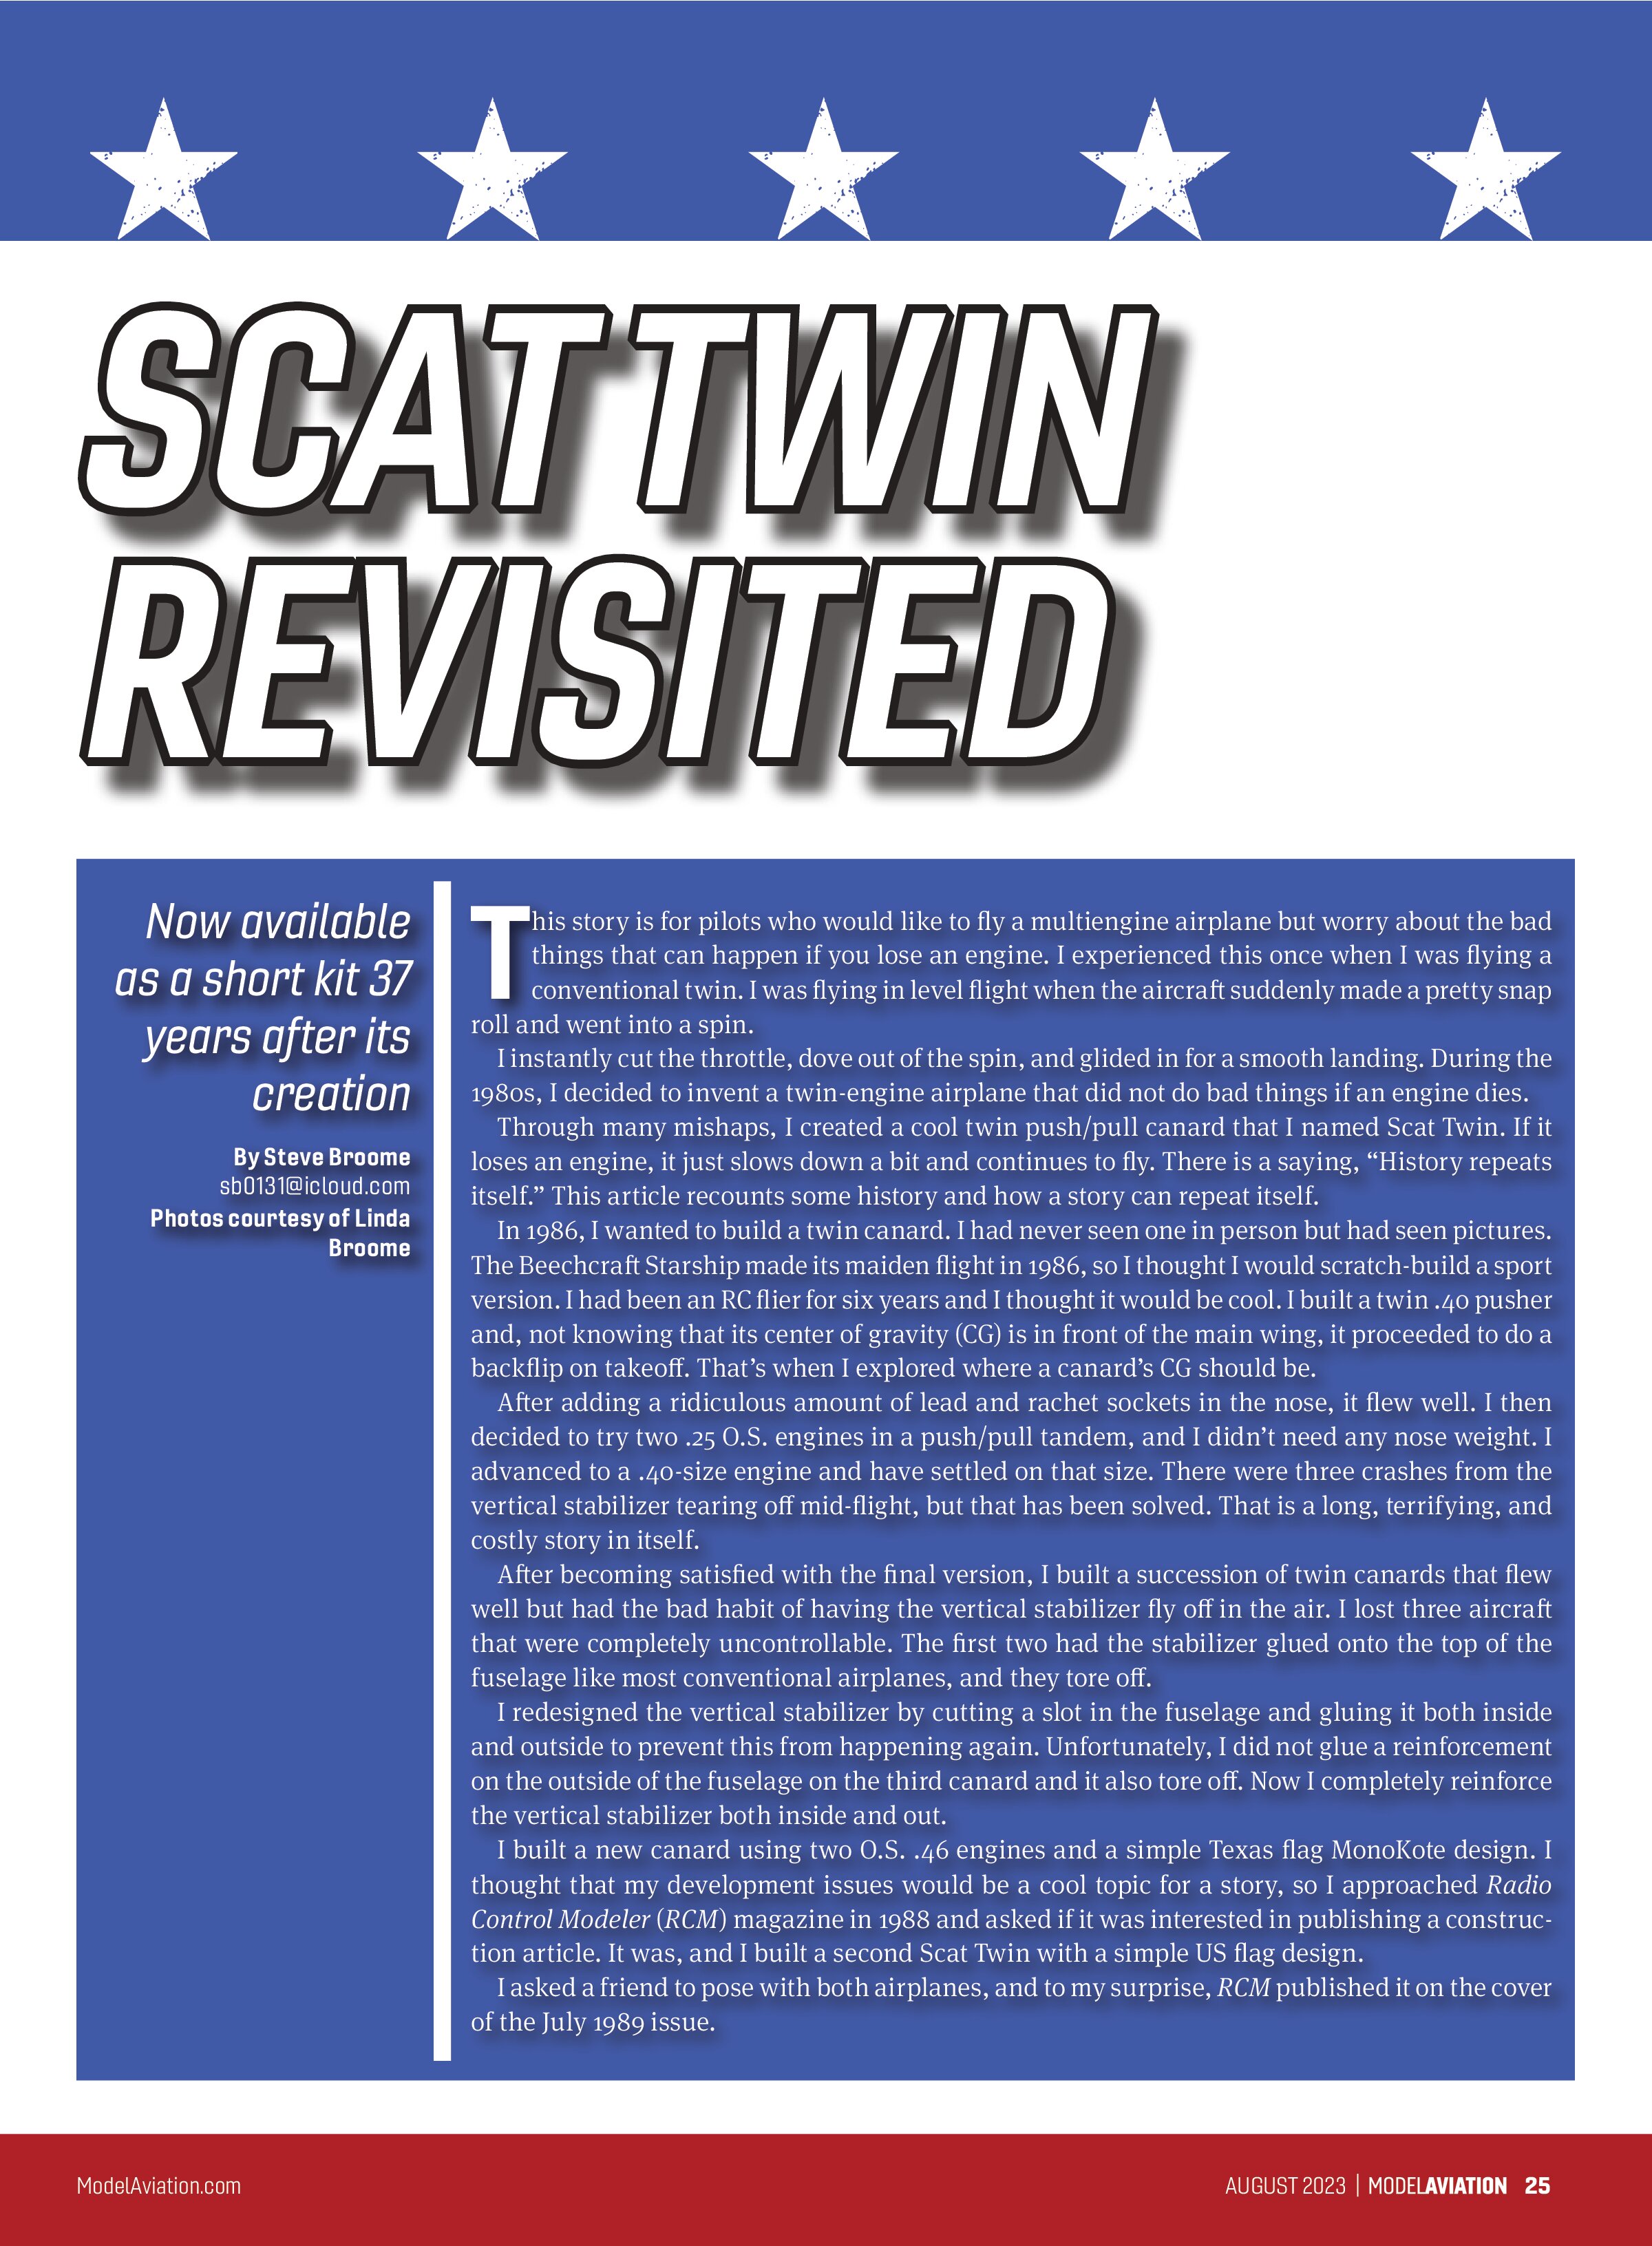
For anyone who does not know what a short kit is, it is all of the wood that has to be cut to size, such as the balsa and plywood fuselage, including the wing saddle, two firewalls, vertical fin/rudder, horizontal canard/elevators, and optional stabilator. All other wood must be purchased separately. There will be two 8-1/2 x 11 page plans, the original construction article, including all of the original pictures that were part of the article, plus a bill of materials. If you want full-size plans, they are available online at various sites.
I am older and have lost some of my building skills, so I asked a good flying buddy, Gene Snyder, to be my technical consultant/co-builder. I have flown every year since 1989 and have seen airplanes come and go. To me, no model has been more exciting than the Scat Twin. It can be viewed on YouTube using its name to find it.
Our world has become more technical, and everything RC is more complicated. The Scat Twin is a throwback to simple construction and straight lines. The canard and vertical stabilizer are both slab balsa. There is only one curve in the entire airplane: the wing saddle. The fuselage is literally a rectangular box with a firewall on each end.
The foam wing is sheeted with balsa, which makes it nearly indestructible. There are no carbon-fiber tubes, fiberglass, or resin, which makes it pretty simple. After taking notes, I have a pretty good narrative of how to build this simple model. I tried to recreate the same color scheme as the 1989 RCM airplane, with one exception: the original stabilator was solid red, and the 2023 version is a Texas flag.
It had also been a long time since I have used rubber bands to secure a wing. For this airplane, I just cut off the rubber bands after each flight so that I don’t have to deal with oily rubber bands. A big pack of rubber bands will last an entire year and costs roughly $4.
Installing bolts involves adding hardwood blocks and reinforcing the wing. This extra weight is behind the CG and needs added weight for balance. I used rubber bands and did not add any lead to balance the 2023 version.
For fliers who want to build something new again, the Scat Twin can give you an easy introduction to multiengines. It flies well, looks great in the air, and gets good feedback at the field. This would be a good first twin because it will not do something bad if an engine fails, and it is easy to build.
Scat Twin Construction
Much has changed since I originally designed this airplane, including how I build aircraft. On the 2023 Scat Twin, I changed three things from the original. Instead of using one aileron servo, I changed to a servo in each wing half that is linked with a servo connector.
I couldn’t put ailerons on separate channels because I needed channel 5 for both throttles and channel 6 for both elevators. I left off the hardwood triangle that connected each elevator half. Using a Carl Goldberg 1/8-inch strip aileron #403 will work because it is strong enough to properly hold each elevator.
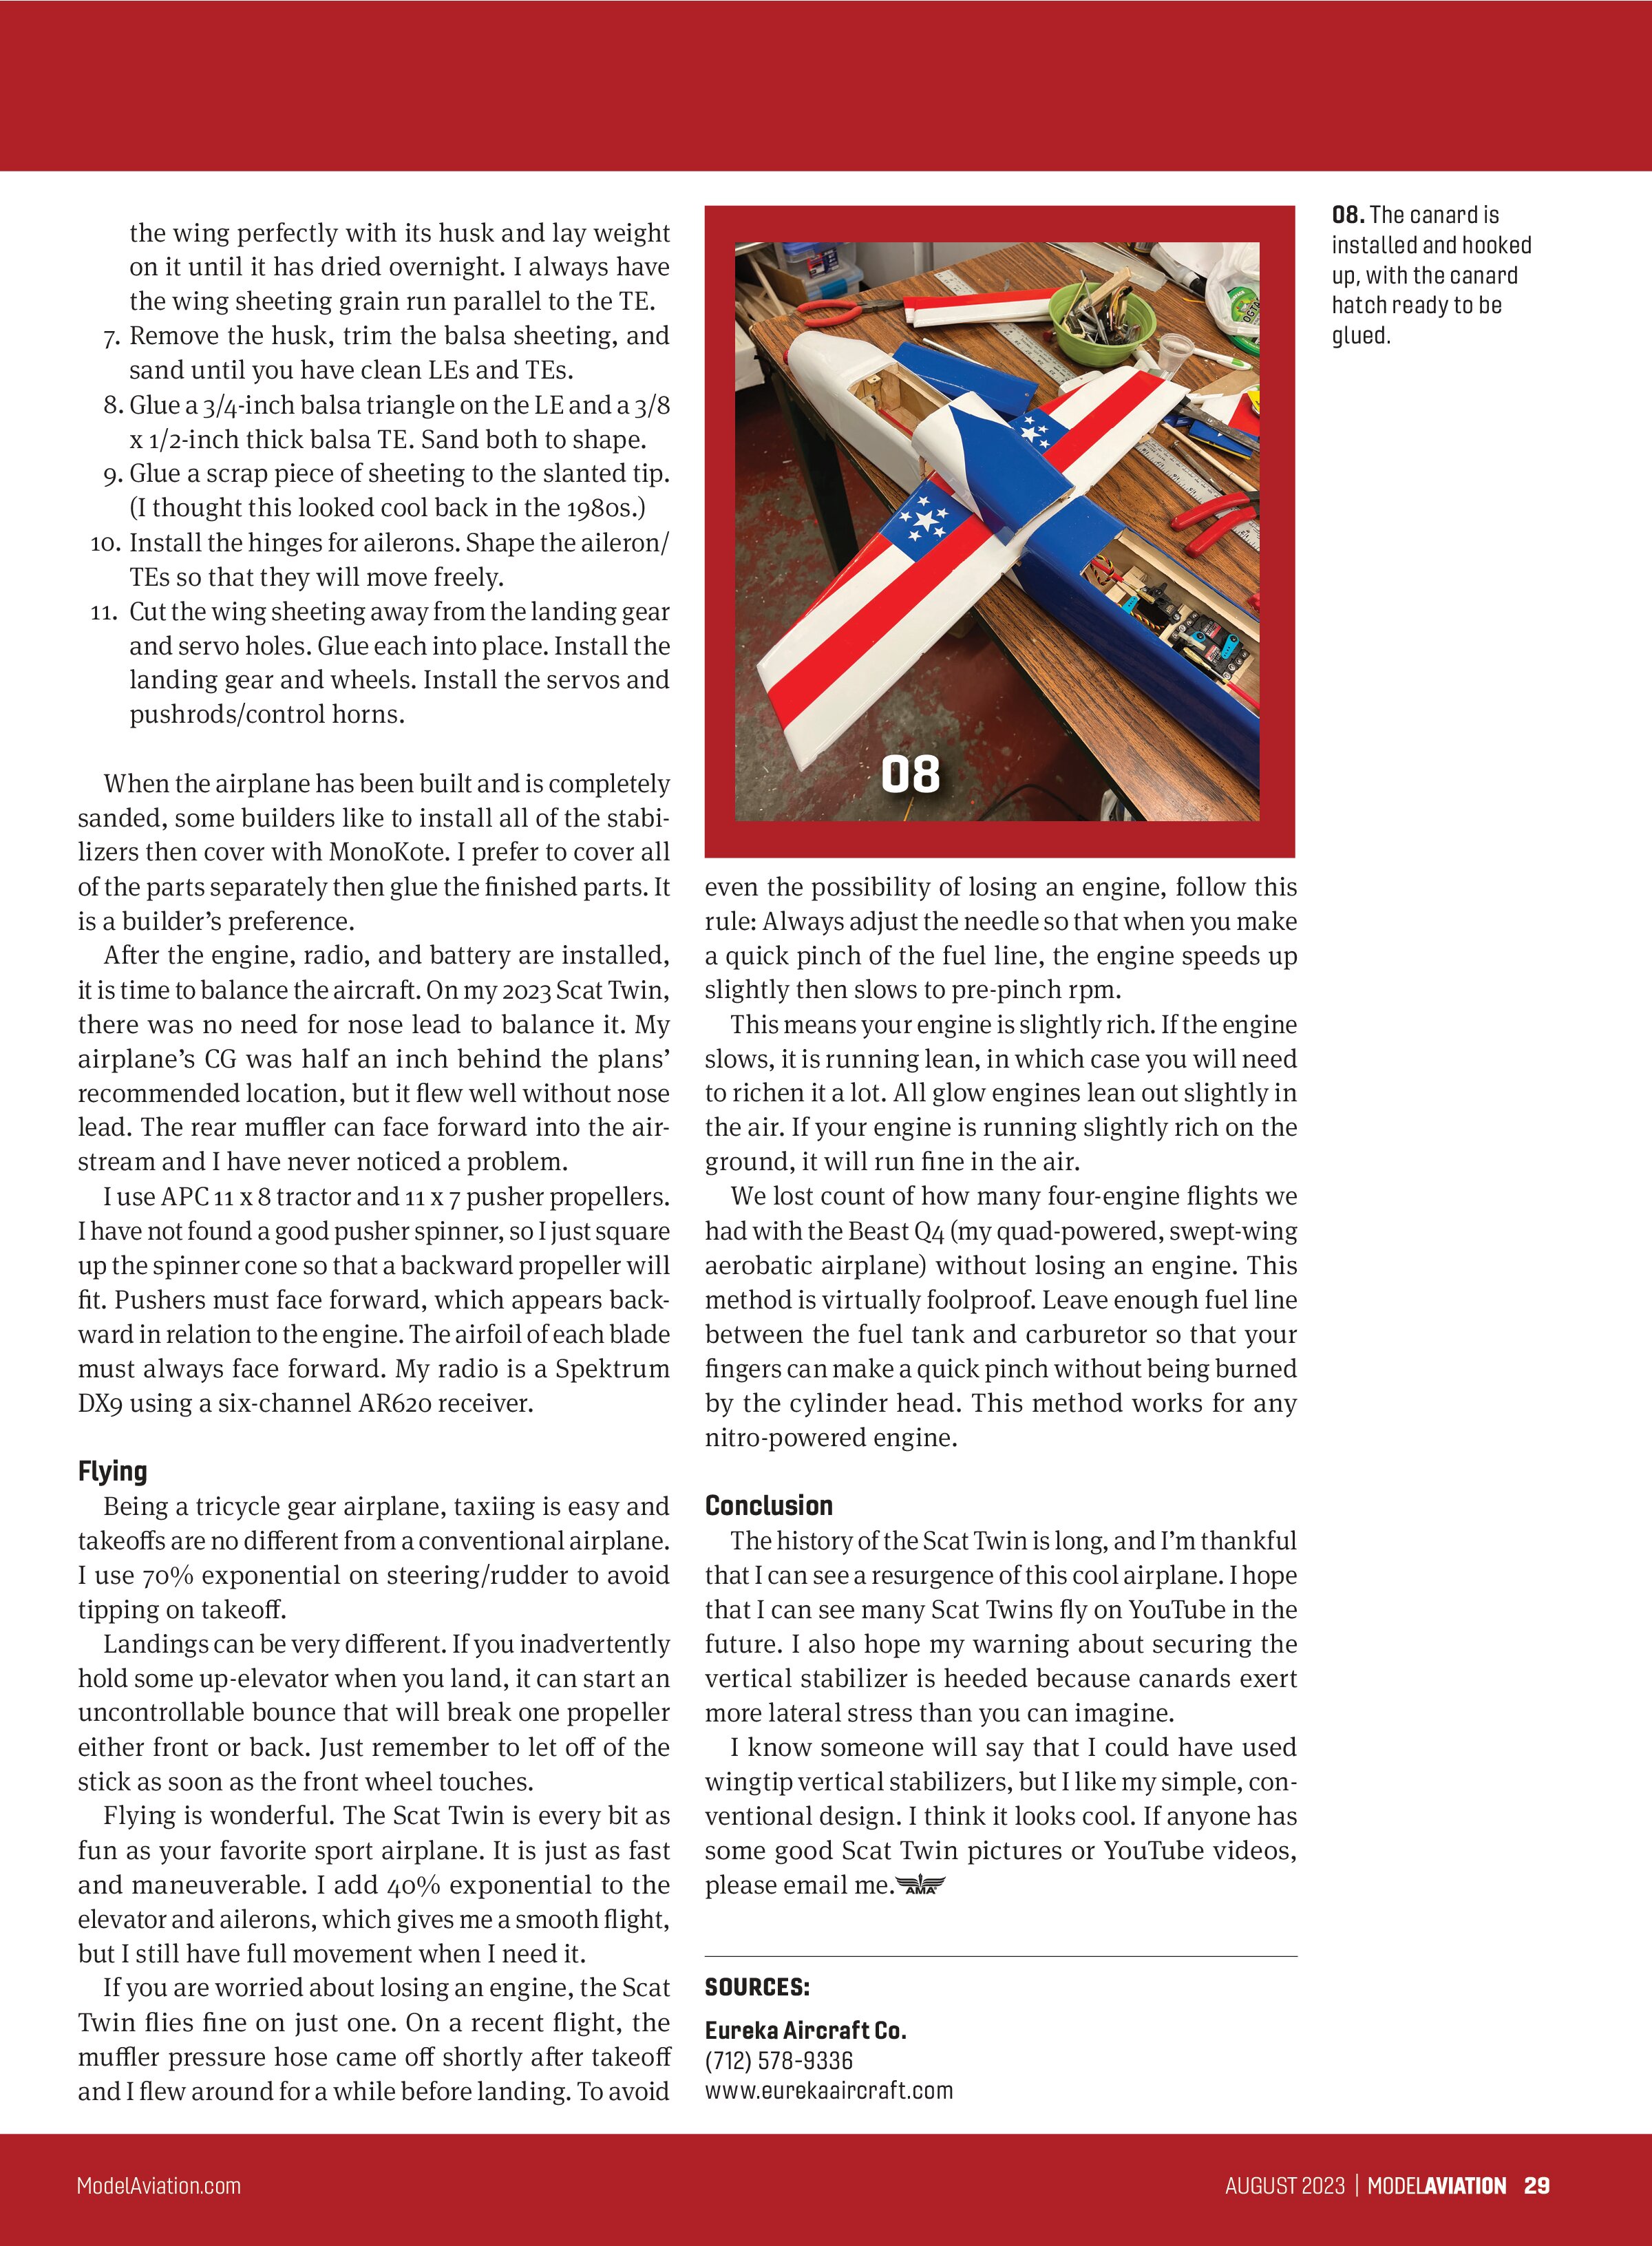
Instead of building a canard hatch, which involves some unnecessary work, I leave it as a permanent part of the fuselage. It is sanded and covered with MonoKote. I then use a saw to cut out a temporary hatch, install the canard, hook up the canard servo, and then glue it in place, leaving a small cut that can be covered with a small strip of MonoKote. Either method works, although cutting the fuselage is far less work.
Fuselage
Unpack the kit and separate all laser-cut parts. Sand all of the edges until they are smooth. Measure the firewalls and draw both vertical and horizontal centerlines. Align the engine mounts and drill bolt holes. Insert the blind nuts and epoxy them in place. Drill holes for the nose gear and install the blind nuts. Drill the fuel and muffler hoses and throttle holes.
Each balsa fuselage half is in two pieces. Join them so that they are ready for the plywood doubler. Make very sure to prepare to glue the plywood doublers so that you will have one left side and one right side. I use thick CA glue (you can use epoxy) and coat the plywood rear piece and layup on the balsa side. Repeat with the longer piece then do the same for the other fuselage side.
This airplane has no bulkheads, but it does have many hatch, canard, and servo rails—now is the time to install them. Because the fuselage will have round edges, the two hatches will need support. Make a small split in 3/4-inch triangle stock for both hatches and glue the small section to the fuselage.
It doesn’t matter if you make a clean cut in the triangle balsa. When the small piece is glued permanently in place, the upper piece, which forms the hatch sides, should align perfectly. This will give the radio and fuel hatches support.
When the top decking is applied, the fuel and radio hatches will be made using the larger piece of 3/4-inch triangle stock that was previously split. The pictures show this.
Now each firewall can be glued into place. I use 12-minute epoxy so that I will have enough work time to ensure that both firewalls align with both fuselage sides. Unlike other conventional airplanes with bulkheads, there will not be a fuselage until the firewalls are glued, so be careful to ensure proper alignment.
Glue the top and bottom decking in place. Now is the time to create the two hatches. When the fuselage is completely built and covered, you can make two clean cuts in the front and back of the canard slot.
Lift out the cut section, insert the canard, glue it permanently into the fuselage, and connect it to the servo. You can then reinstall the canard hatch and cover the two cuts with thin strips of MonoKote.
Cut three pieces of 3/8-inch sheet balsa and glue them together with a 1/2-inch triangle to form front and rear cowlings. Cut two 1/8-inch plywood cowling rings 2-1/4 inches in diameter to match the spinners then sand them to shape.
To avoid a boxy-looking fuselage, I run an electric planer along each edge and sand them for a more rounded look. Lots of sanding will produce rounded edges, giving it a tubular shape.


Vertical Stabilizer
The vertical stabilizer is a tricky situation. I have seen a few conventional models lose their vertical stabilizers. All landed successfully, but they were not a canard. On a canard, the tail would spin around for
a second then flutter and spin again until it hit the ground, completely out of control.
After the fuselage is built, reinforce the stabilizer slot with a small strip of 1/64-inch plywood under the top deck. Glue all of the parts together and sand to shape. Install hinges so that the rudder has full movement.
The stabilizer is inserted through the slot and glued under the deck with a 1/4-inch triangle and on the outside with a 1/2-inch triangle. With both inside and outside reinforcement, I have not lost any stabilizers. It is the builder’s choice, but I do not install the vertical fin and canard until the fuselage is finished, including the radio and pushrods.
Canard Stabilizer
Glue all of the parts together and sand to shape. Install the hinges and sand them so that each elevator has full movement. Install the strip aileron hardware to each elevator and solder both together so that they can connect to the elevator servo. (I used Carl Goldberg 1/8-inch strip aileron connectors.) The plans call for a hardwood triangle to connect the elevators, but I found it unnecessary.
Stabilator
If you choose to not use a stabilator, just leave the fuselage holes covered. I like it because it makes for tighter turns and aerobatics, plus, I think it looks cool. If you just want some fun weekend flying, you can skip it.
Cut a 1/4-inch dowel to 14 inches in length and grind four flat edges to fit into the stabilizers. Cut 1/64-inch pieces of plywood to cover the top and bottom leading edges (LEs) and trailing edges (TEs). Test-fit it into the dowel and glue the 1/64-inch plywood pieces to create a left and right side, but do not permanently glue both onto the dowel.
The last step, after completely finishing the airplane, is to glue the stabilizers to the dowel. A simple way to keep it centered is to put a control horn on the dowel between the left stabilator and the fuselage. It will rub on the fuselage but will not cause harm. The other side will have another control horn connected to the servo.

Foam-Core Wing
A lot of fliers tell me that they are hesitant to build a foam wing, but foam is far easier than ribs. There are only a few steps required, and Eureka Aircraft Co. cuts a good core. There will be no need for a jig. The steps follow:
- If you use fiberglass, you can skip this step. If not, cut two 1/8-inch slots, one long (leading) and one short (trailing), in both wing halves for a wing brace. Cut two pieces of 1/8-inch plywood to fit in the slots. The braces will be glued into place when the wing is joined.
- Cut a slot for each landing gear block. Include a deeper hole under the root side of the gear block so that you can glue a square block under the long gear wood. This will be used to extend music wire vertically for more strength. After it is glued into place, a hole will be drilled for the vertical portion of the music wire gear for stability.
- Bend the 5/32 music wire gear according to the plans. Plans assumed a 10-inch propeller would be on the rear. If you use an 11-inch propeller, bend gear 1/2 inch taller to maintain adequate ground clearance.
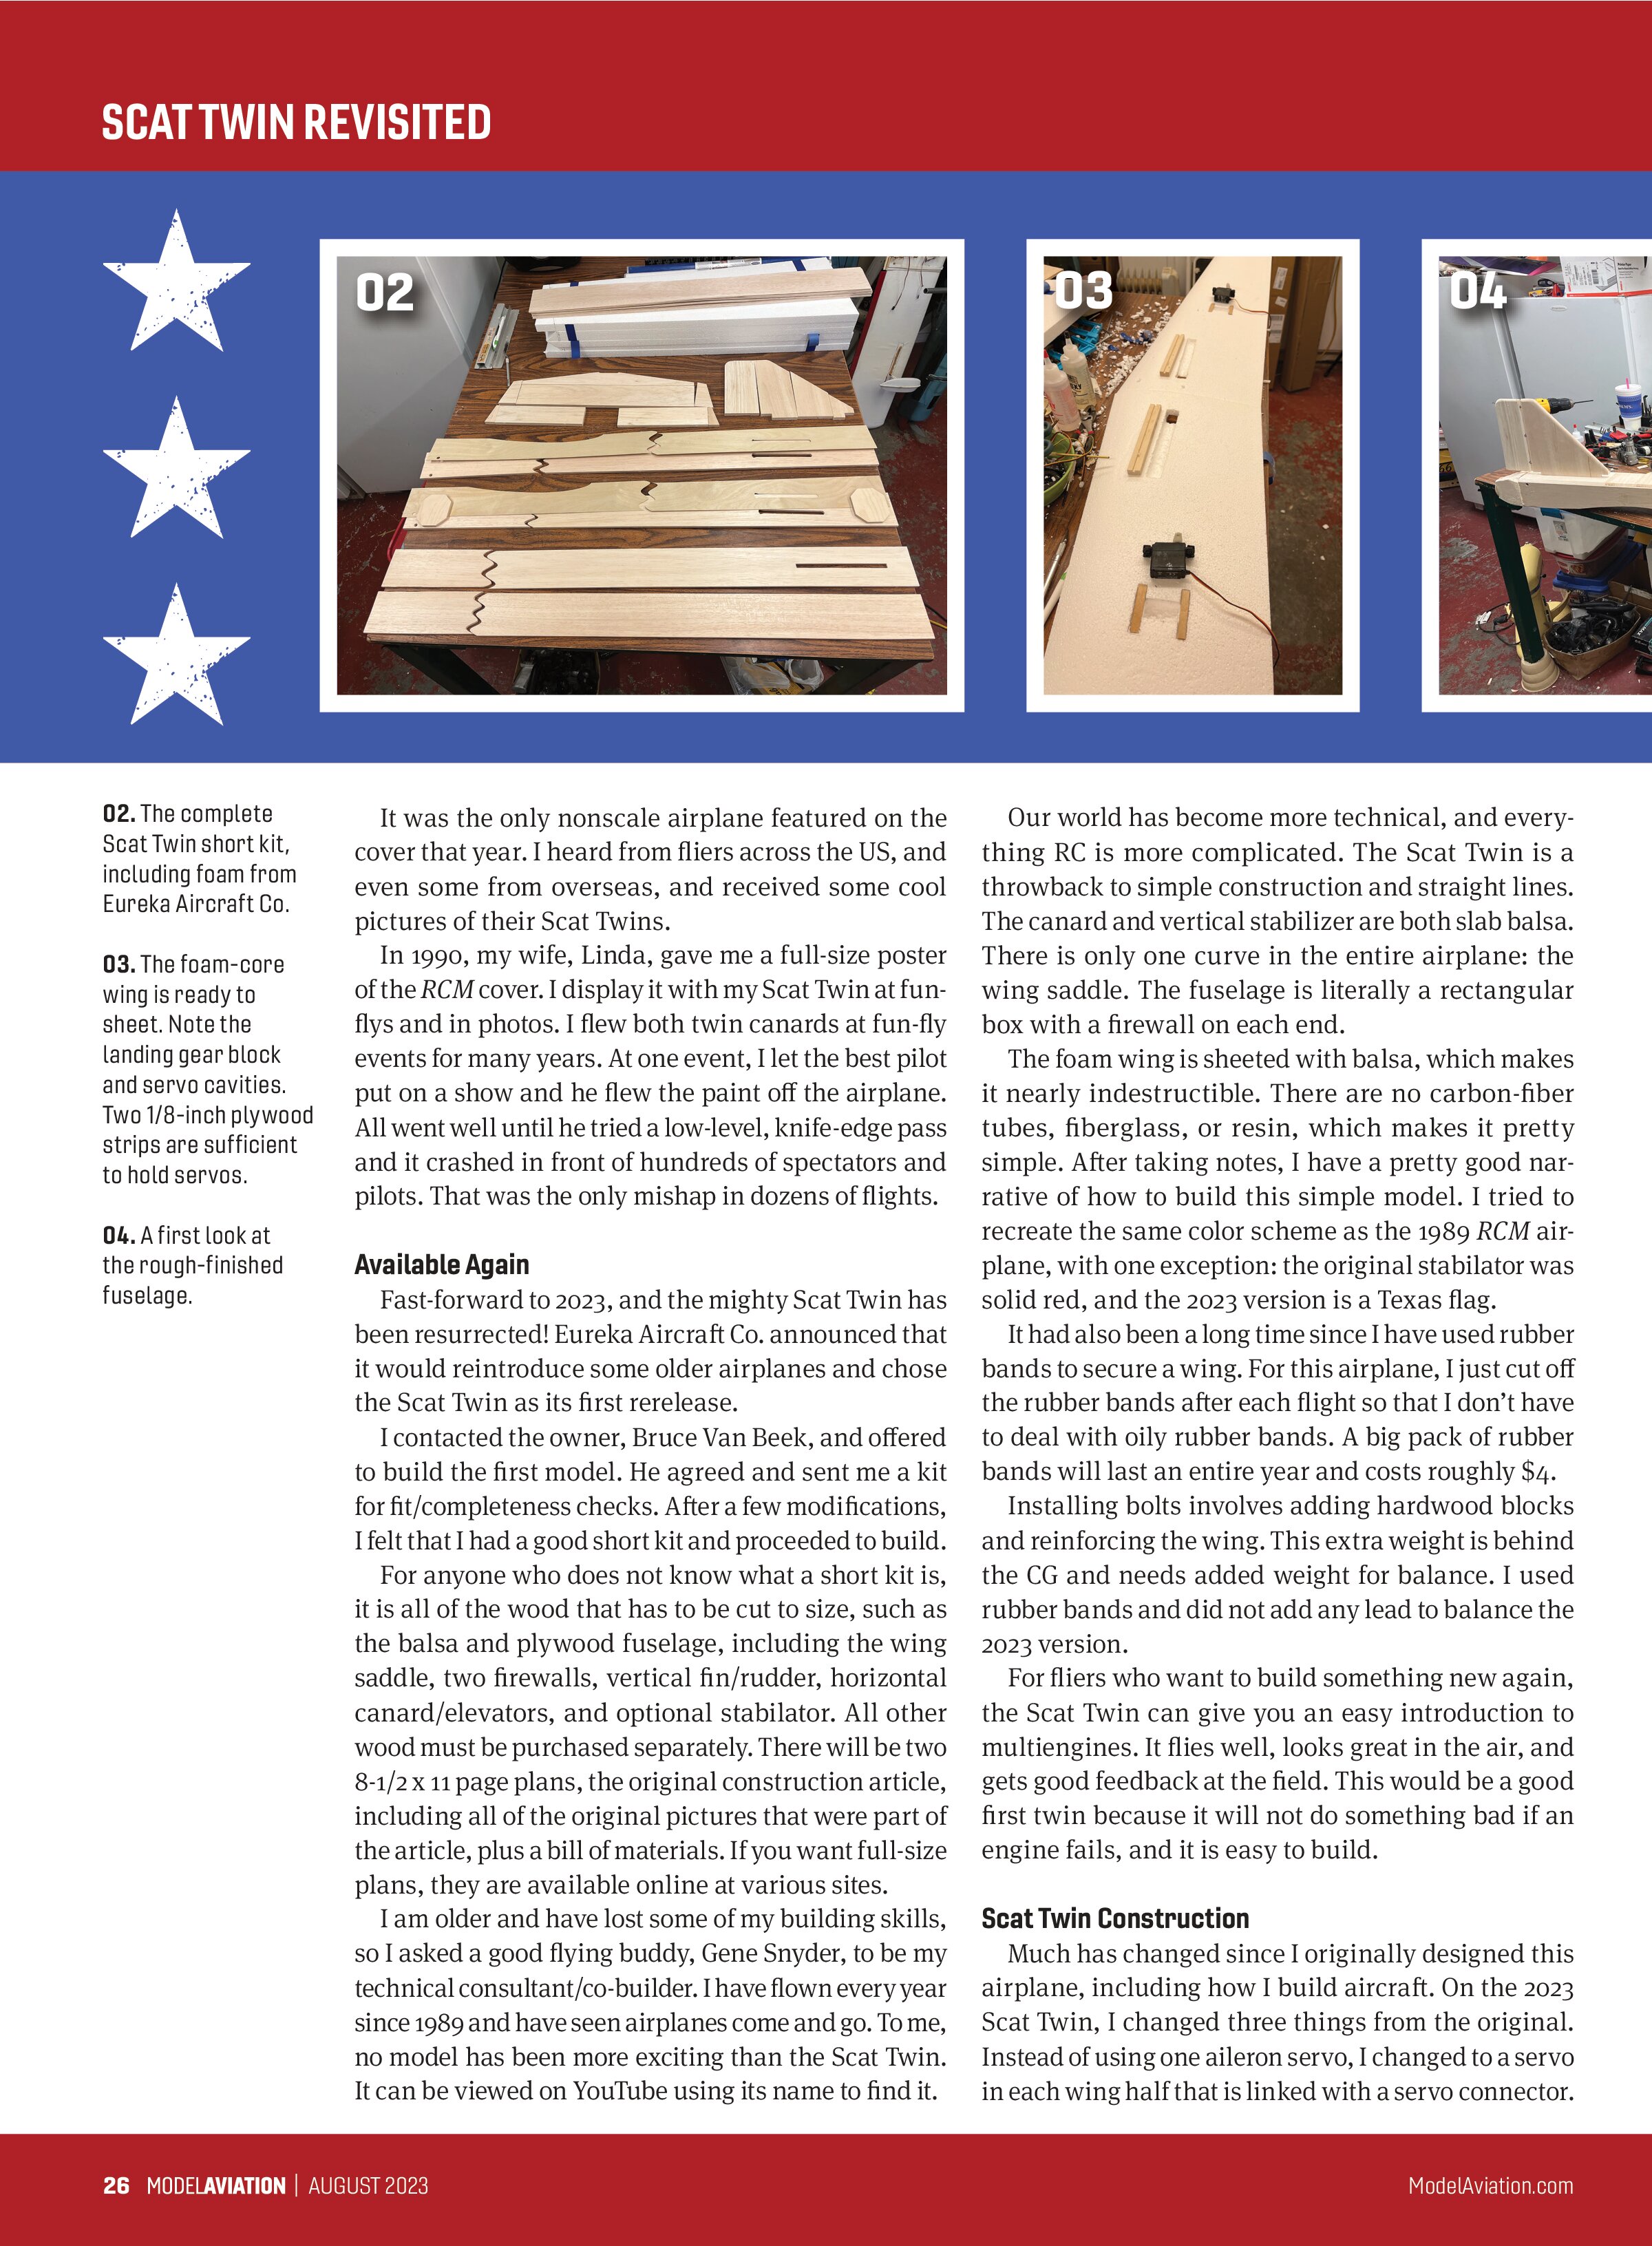
- Cut a hole for each aileron servo. In the 1980s, we used one servo in the center of the wing to work both ailerons and wondered why we had so much flutter. Protect your airplane and use two aileron servos. Before sheeting, cut either a tunnel or a trench on the wing and place a string in it to pull the servo wire through after sheeting.
- Take each sheet of 1/16-inch balsa and straighten the edges so that each sheet joins cleanly. A 36-inch aluminum yard stick works well for this. Apply a strip of masking tape over the seam. Expose the seam and fill it with medium CA glue, flatten it out, wipe off any excess adhesive, flip it over, remove the masking tape, again wipe off any excess CA, and hit the seam with a shot of accelerator. Repeat until you have four sheets that will completely cover each wing half, both top and bottom. Test-fit and cut off the excess. A piece of excess can be used to glue the wingtips.
- Remove the core from its husk and paint both the top and the bottom with a thin coat of Gorilla Glue. Lay one balsa sheet in the bottom husk, lay the wing over it, lay the top balsa sheet over the wing, and then lay the top husk over the balsa. You should have a sheeted wing in its husk. Align the wing perfectly with its husk and lay weight on it until it has dried overnight. I always have the wing sheeting grain run parallel to the TE.
- Remove the husk, trim the balsa sheeting, and sand until you have clean LEs and TEs.
- Glue a 3/4-inch balsa triangle on the LE and a 3/8 x 1/2-inch thick balsa TE. Sand both to shape.
- Glue a scrap piece of sheeting to the slanted tip. (I thought this looked cool back in the 1980s.)
- Install the hinges for ailerons. Shape the aileron/TEs so that they will move freely.
- Cut the wing sheeting away from the landing gear and servo holes. Glue each into place. Install the landing gear and wheels. Install the servos and pushrods/control horns.
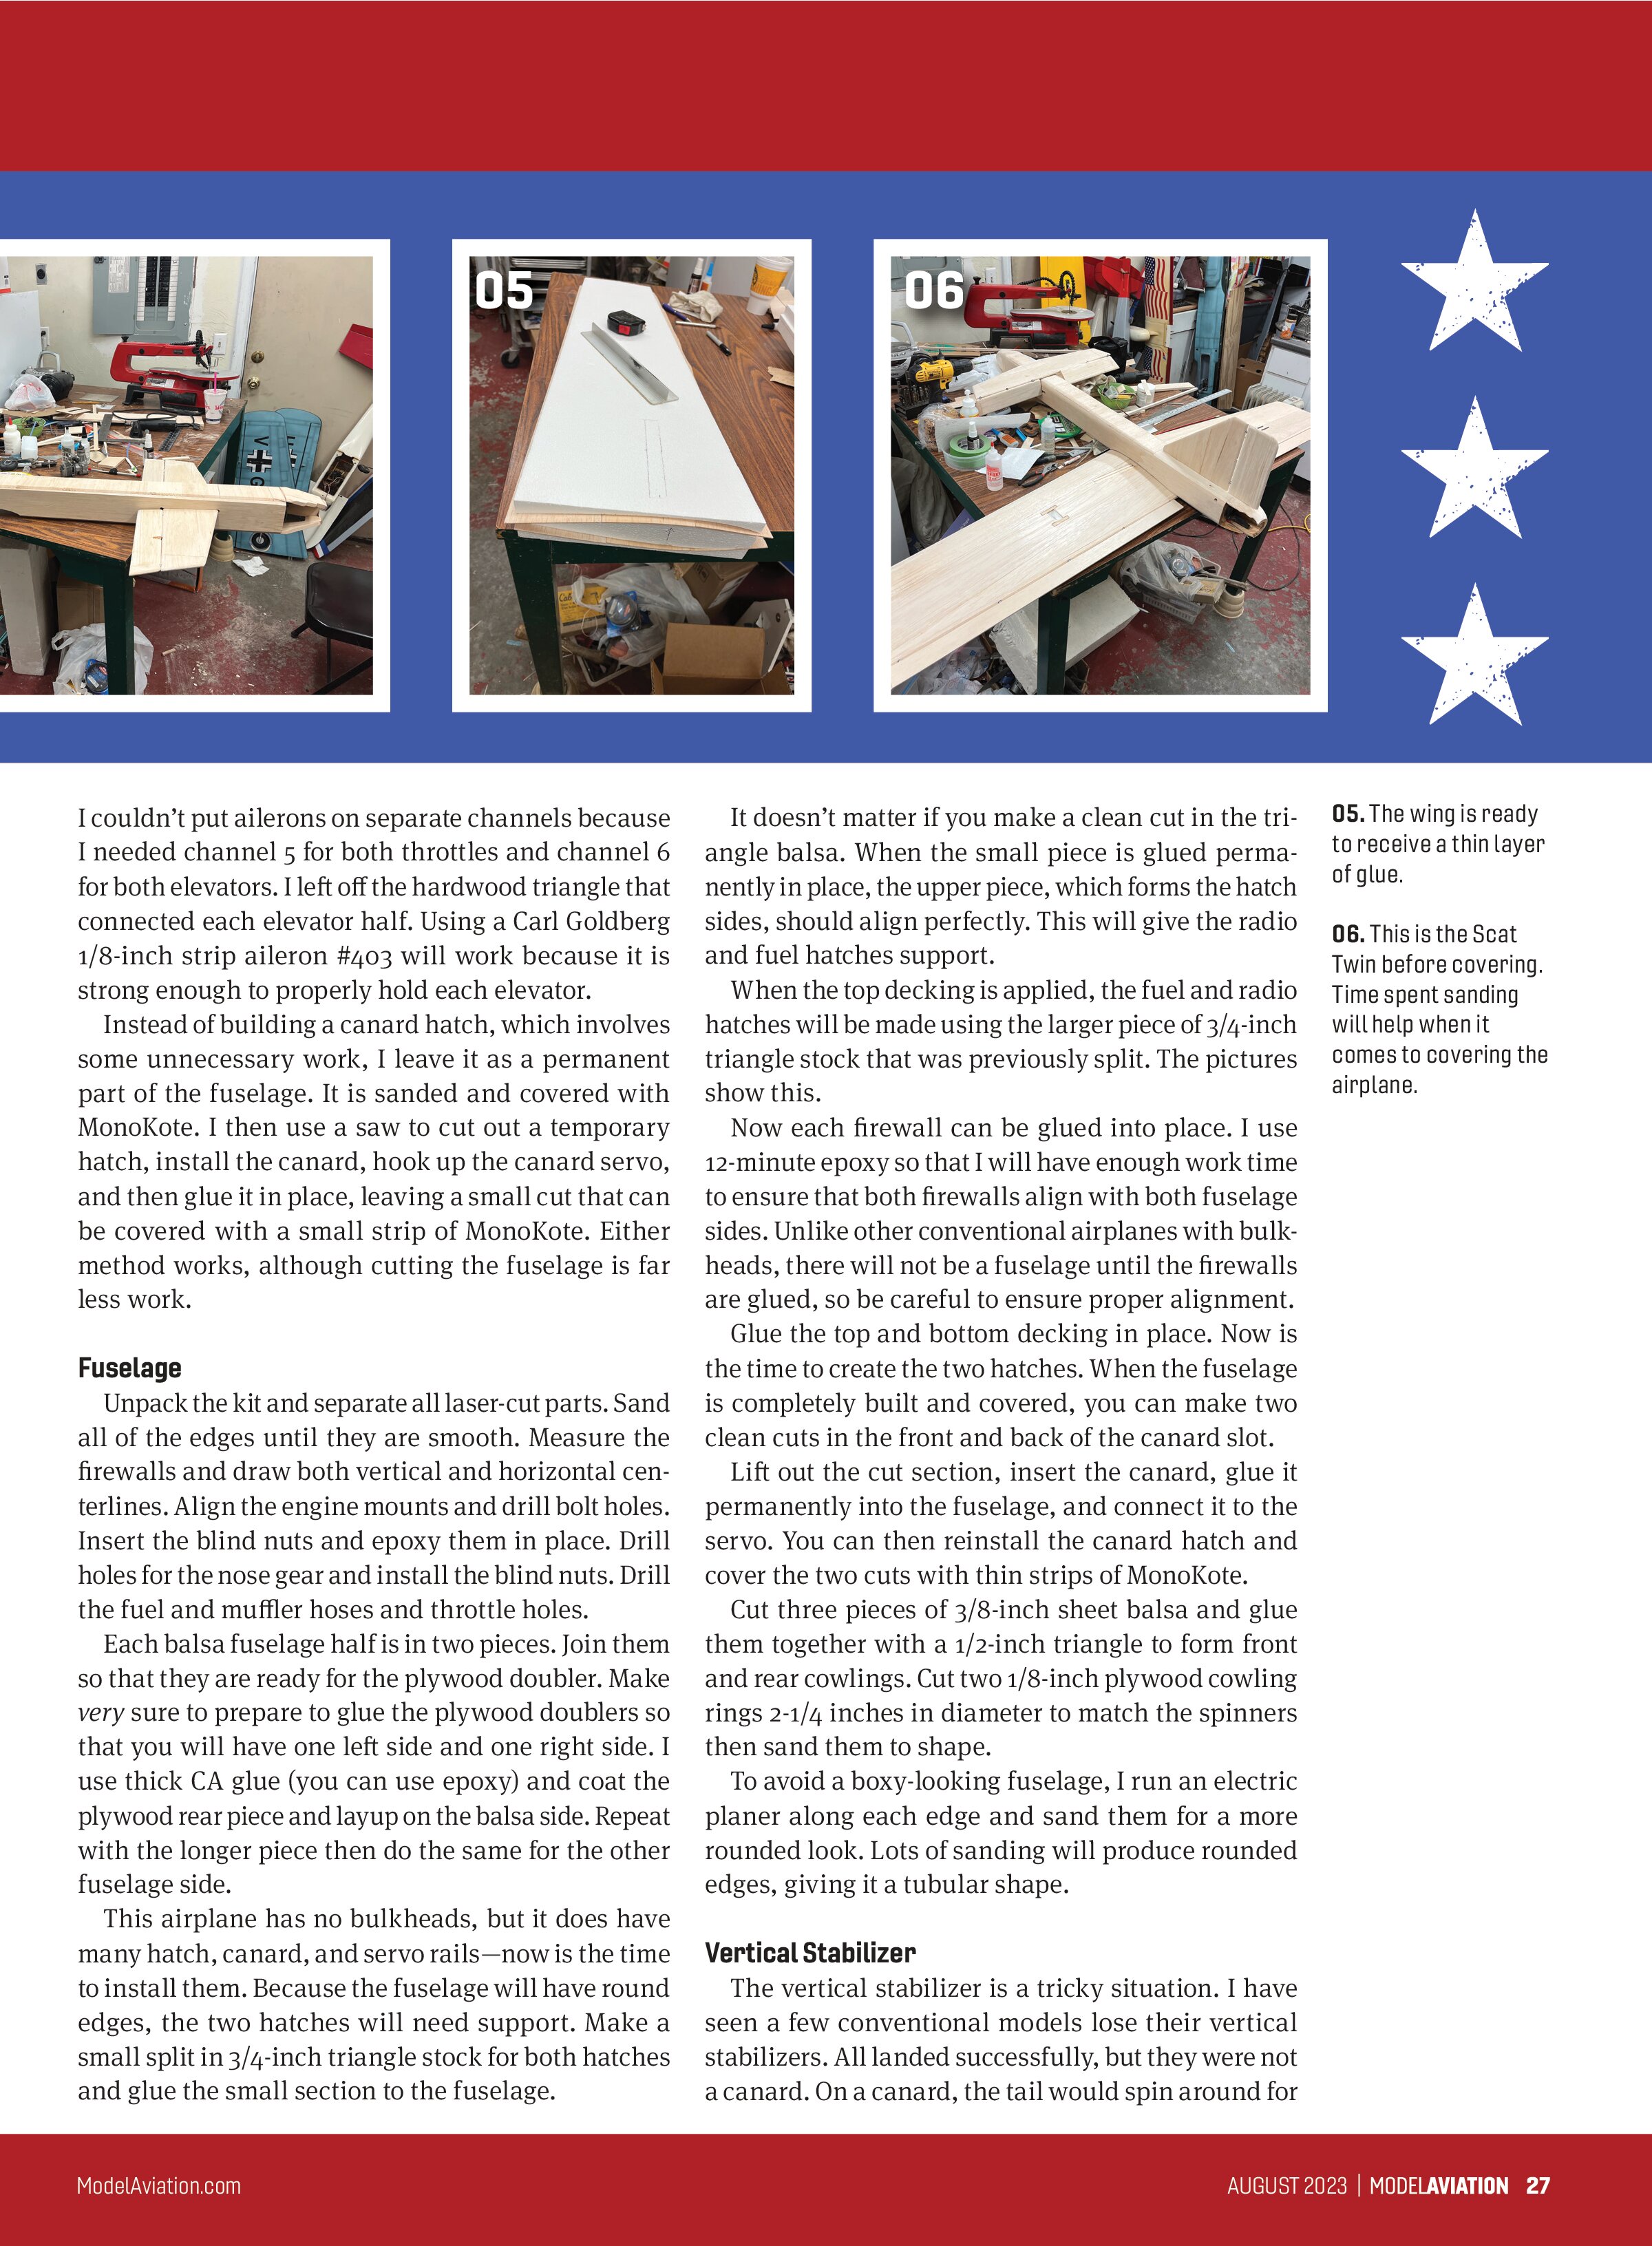
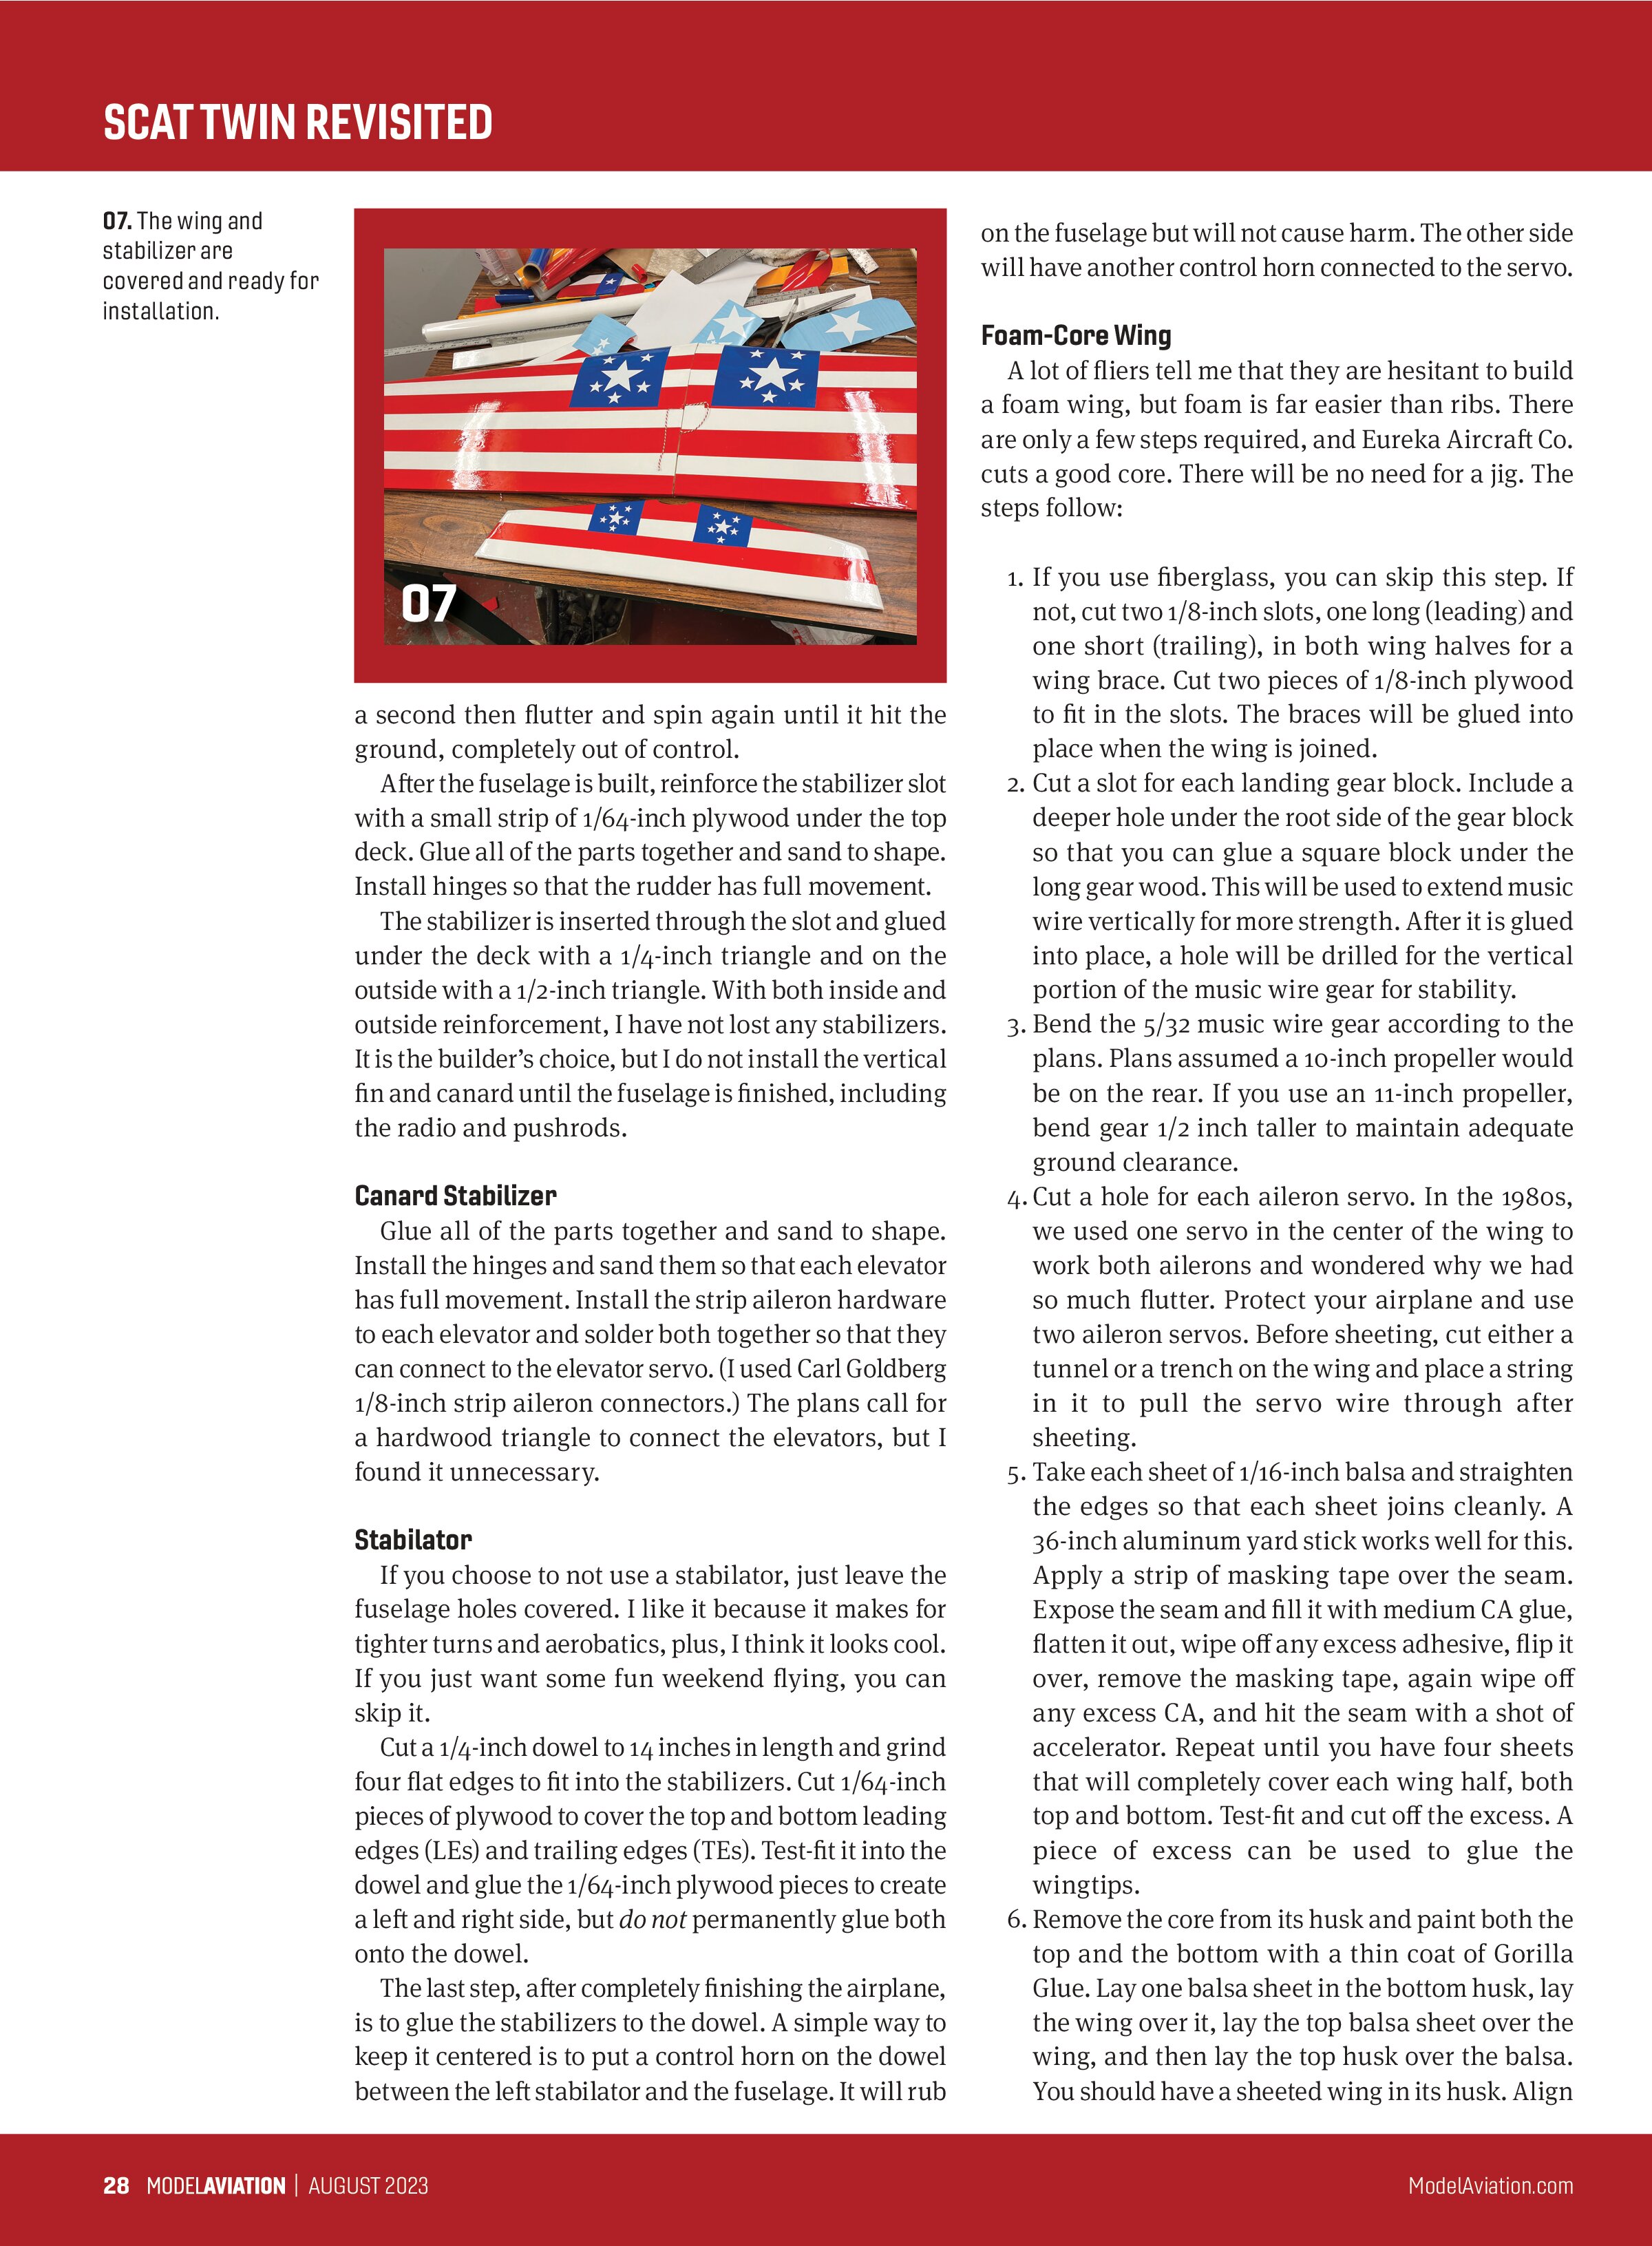
When the airplane has been built and is completely sanded, some builders like to install all of the stabilizers then cover with MonoKote. I prefer to cover all of the parts separately then glue the finished parts. It is a builder’s preference.
After the engine, radio, and battery are installed, it is time to balance the aircraft. On my 2023 Scat Twin, there was no need for nose lead to balance it. My airplane’s CG was half an inch behind the plans’ recommended location, but it flew well without nose lead. The rear muffler can face forward into the airstream and I have never noticed a problem.
I use APC 11 x 8 tractor and 11 x 7 pusher propellers. I have not found a good pusher spinner, so I just square up the spinner cone so that a backward propeller will fit. Pushers must face forward, which appears backward in relation to the engine. The airfoil of each blade must always face forward. My radio is a Spektrum DX9 using a six-channel AR620 receiver.
Flying
Being a tricycle gear airplane, taxiing is easy and takeoffs are no different from a conventional airplane. I use 70% exponential on steering/rudder to avoid tipping on takeoff.
Landings can be very different. If you inadvertently hold some up-elevator when you land, it can start an uncontrollable bounce that will break one propeller either front or back. Just remember to let off of the stick as soon as the front wheel touches.
Flying is wonderful. The Scat Twin is every bit as fun as your favorite sport airplane. It is just as fast and maneuverable. I add 40% exponential to the elevator and ailerons, which gives me a smooth flight, but I still have full movement when I need it.
If you are worried about losing an engine, the Scat Twin flies fine on just one. On a recent flight, the muffler pressure hose came off shortly after takeoff and I flew around for a while before landing. To avoid even the possibility of losing an engine, follow this rule: Always adjust the needle so that when you make a quick pinch of the fuel line, the engine speeds up slightly then slows to pre-pinch rpm.
This means your engine is slightly rich. If the engine slows, it is running lean, in which case you will need to enrich it a lot. All glow engines lean out slightly in the air. If your engine is running slightly rich on the ground, it will run fine in the air.
We lost count of how many four-engine flights we had with the Beast Q4 (my quad-powered, swept-wing aerobatic airplane) without losing an engine. This method is virtually foolproof. Leave enough fuel line between the fuel tank and carburetor so that your fingers can make a quick pinch without being burned by the cylinder head. This method works for any nitro-powered engine.

Conclusion
The history of the Scat Twin is long, and I’m thankful that I can see a resurgence of this cool airplane. I hope that I can see many Scat Twins fly on YouTube in the future. I also hope my warning about securing the vertical stabilizer is heeded because canards exert more lateral stress than you can imagine.
I know someone will say that I could have used wingtip vertical stabilizers, but I like my simple, conventional design. I think it looks cool. If anyone has some good Scat Twin pictures or YouTube videos, please email me.
SOURCES:
Eureka Aircraft Co.
(712) 578-9336
www.eurekaaircraft.com