AROUND THE PATCH
PECK-POLYMERS ezR.O.G.
By Thayer Syme | thayer@flying-models.com

HAVE YOU EVER found life’s frantic pace seeping into your hobby? We expect such pressures at work or with household tasks, but does it have to happen with our hobby as well? Isn’t this what we do to diffuse tension and to help us relax?
When I impart undue hobby pressure on myself, the simple response is to set aside whatever model I “think” I have to work on, take a break, and find a simple project to distract me. Model building is supposed to be fun after all, and this is a perfect time to take a breath. More often than not, that means a basic rubber-powered model for me.
Bob and Sandy Peck founded Peck-Polymers in 1971 and quickly found themselves marketing model airplane kits based on designs drawn by Bob and some friends. Their kits soon enjoyed a worldwide following, which continues to this day.
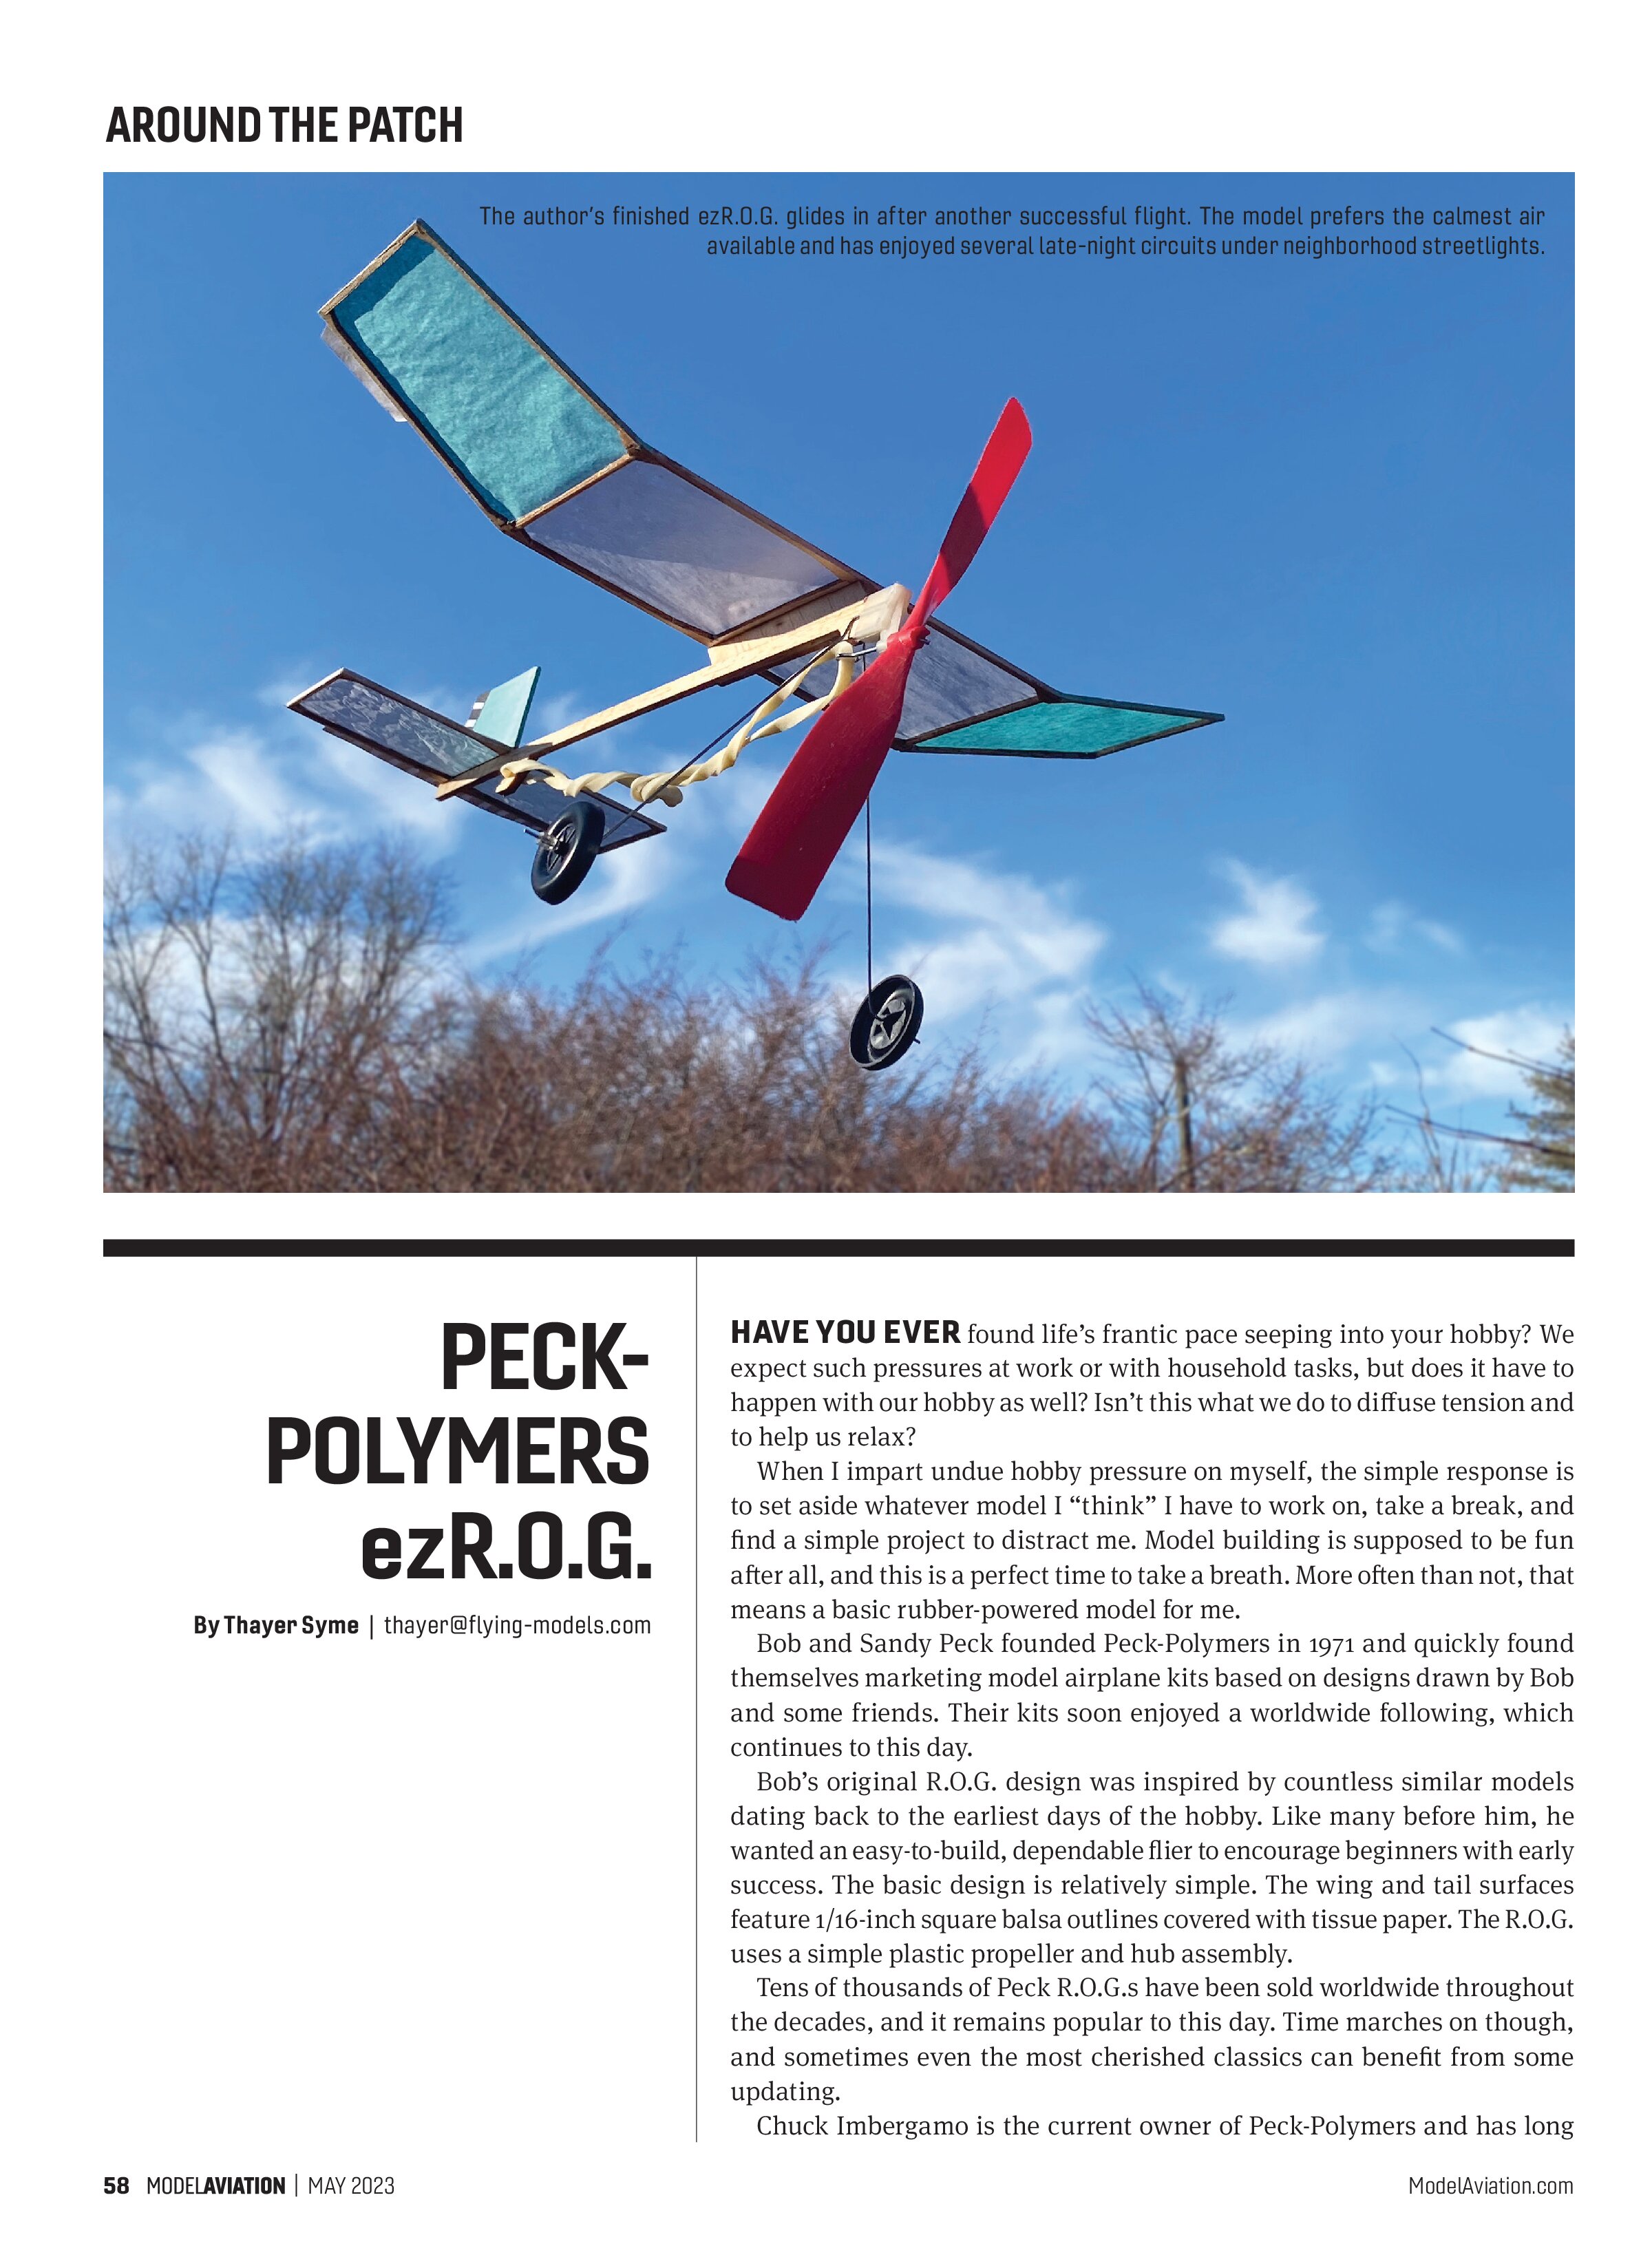
Bob’s original R.O.G. design was inspired by countless similar models dating back to the earliest days of the hobby. Like many before him, he wanted an easy-to-build, dependable flier to encourage beginners with early success. The basic design is relatively simple. The wing and tail surfaces feature 1/16-inch square balsa outlines covered with tissue paper. The R.O.G. uses a simple plastic propeller and hub assembly.
Tens of thousands of Peck R.O.G.s have been sold worldwide throughout the decades, and it remains popular to this day. Time marches on though, and sometimes even the most cherished classics can benefit from some updating.
Chuck Imbergamo is the current owner of Peck-Polymers and has long

envisioned a new laser-cut R.O.G. kit that could be assembled faster and more accurately than the original. One of his goals was to build a knifeless kit that could be fully assembled without using a hobby knife or razor blade. The ezR.O.G. is the result.
Assembling the kit requires nothing more than a scrap of fine sandpaper or emery board, some glue for the airframe, and a glue stick for covering. You can use an actual building board as shown if you want, but in truth, the kit can be assembled on any surface that resists your chosen glue. Chuck recommends using CA, and doing so will let you complete the kit in as little as an hour. Traditional wood glue works just as well, although you will have to wait for the few glue joints to dry. In such a case, I would recommend using some pins.
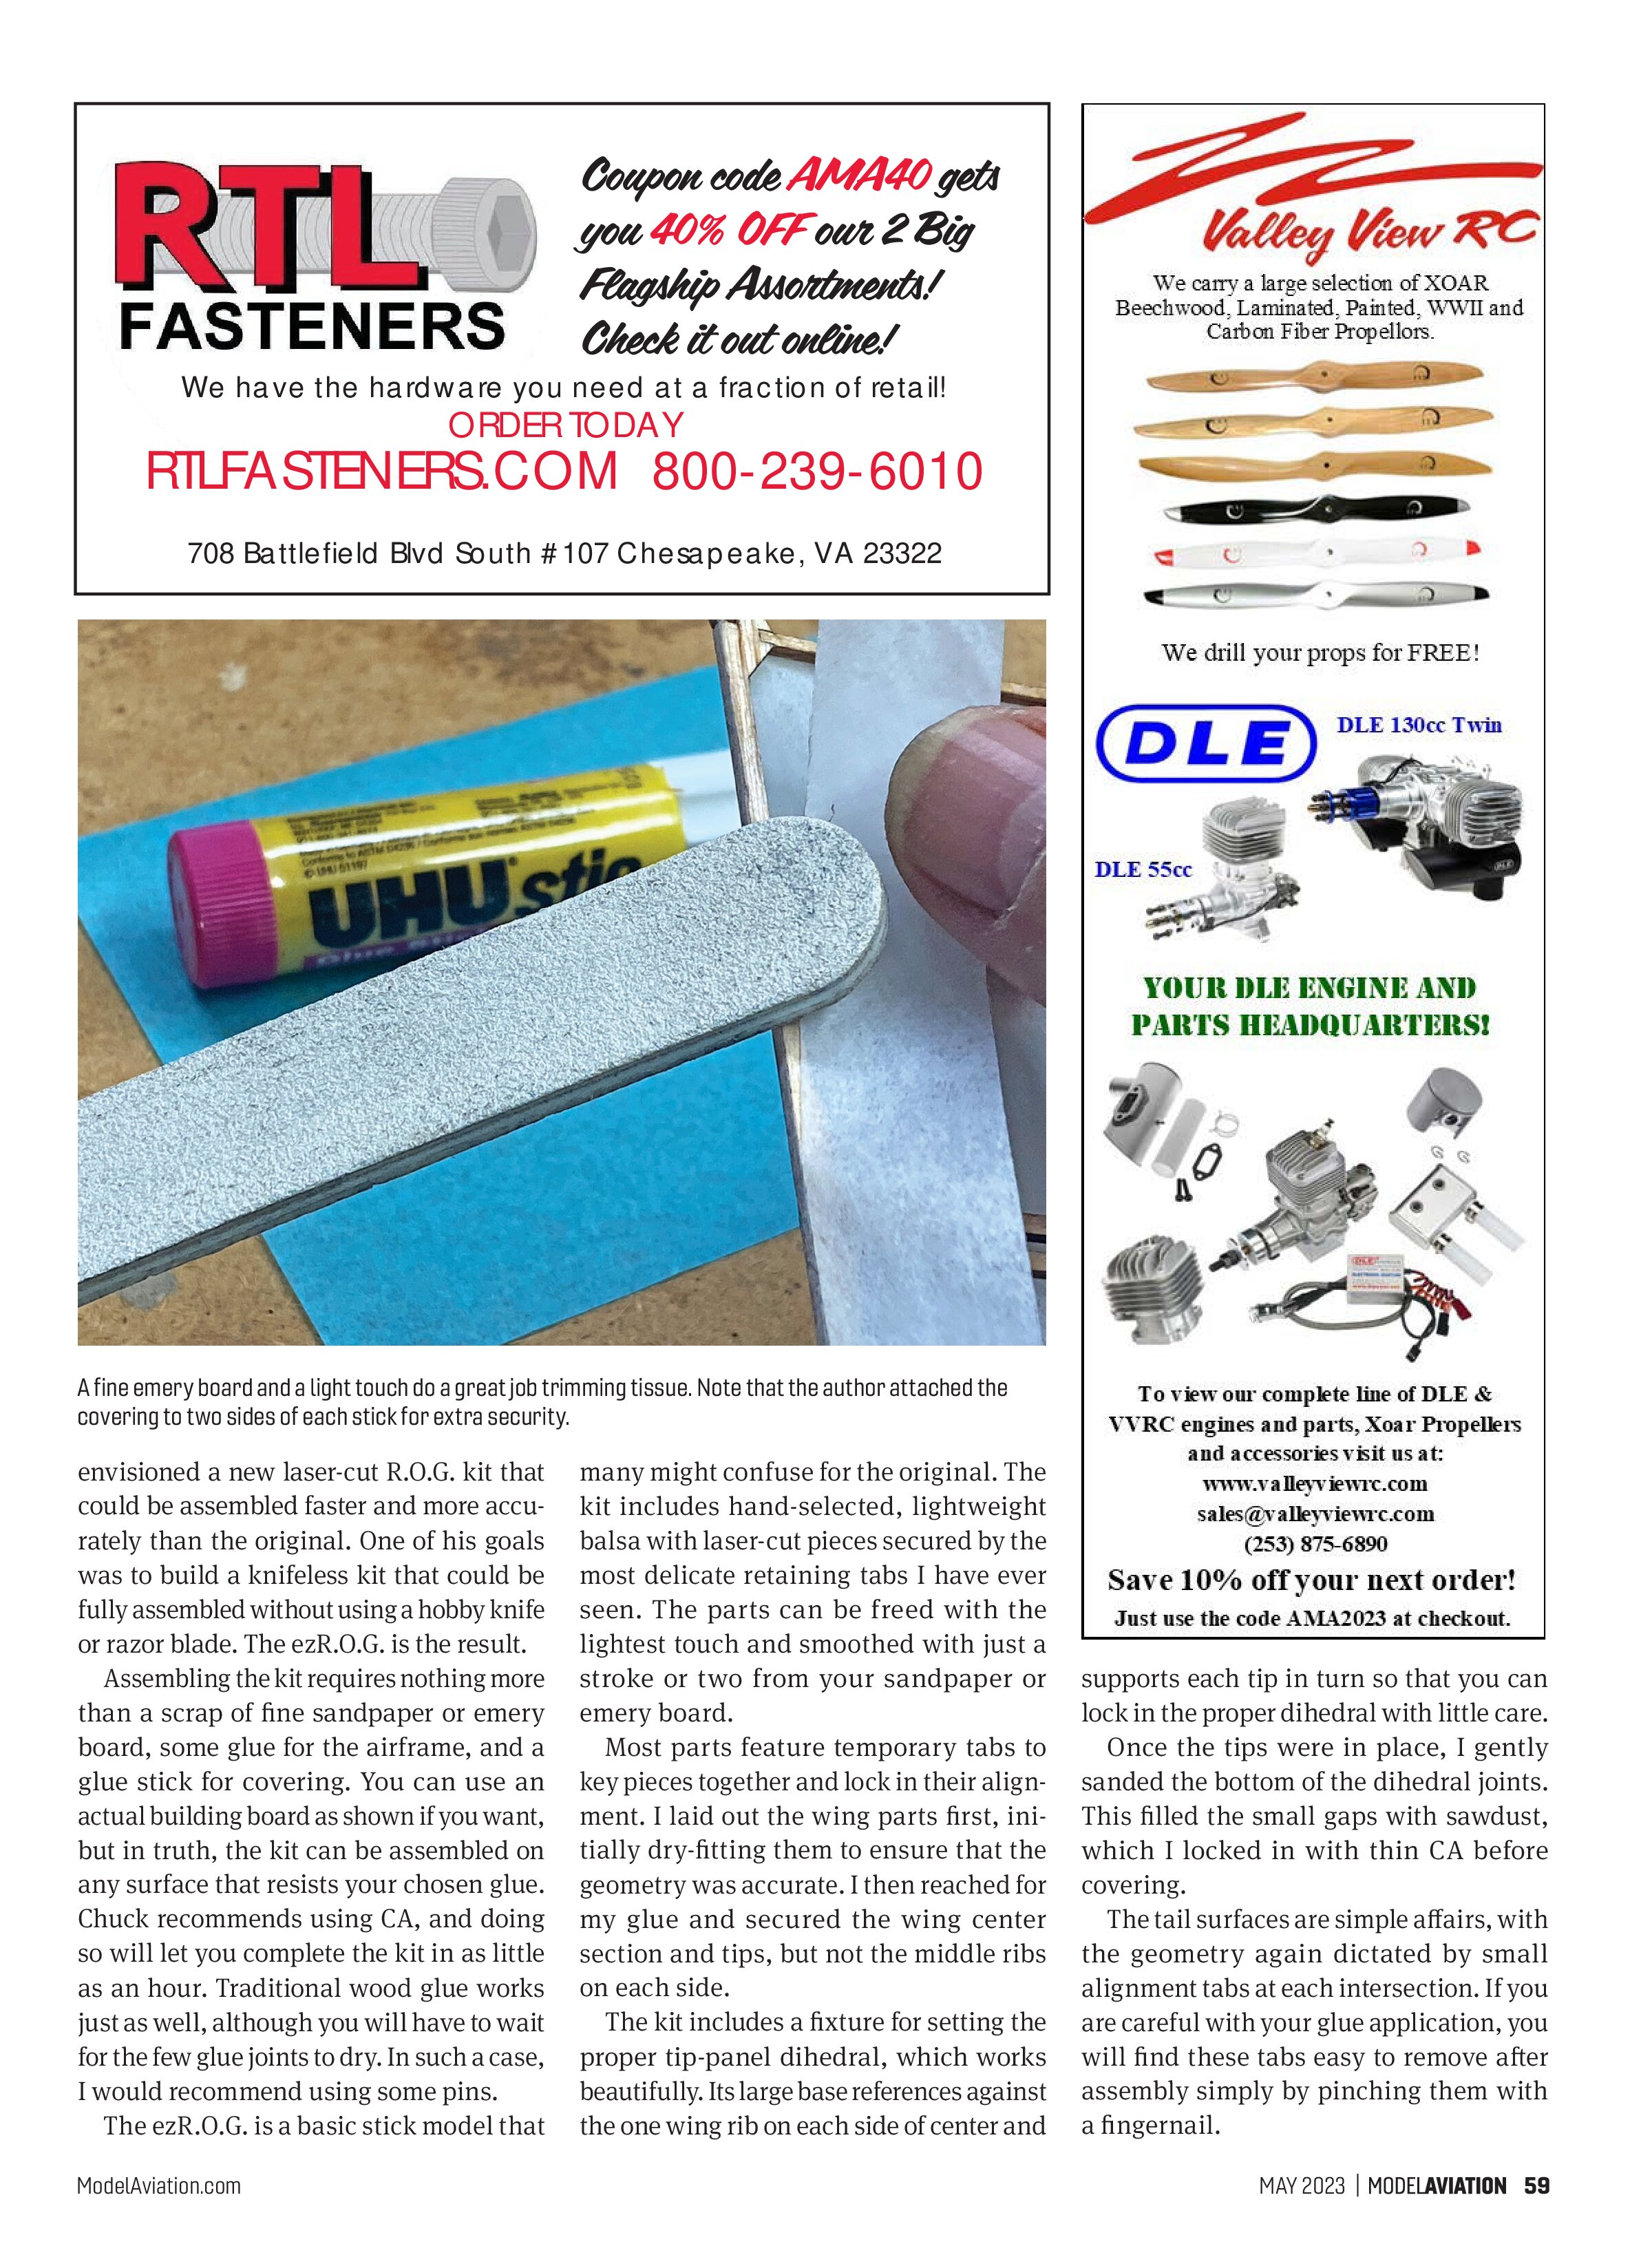
The ezR.O.G. is a basic stick model that many might confuse for the original. The kit includes hand-selected, lightweight balsa with laser-cut pieces secured by the most delicate retaining tabs I have ever seen. The parts can be freed with the lightest touch and smoothed with just a stroke or two from your sandpaper or emery board.
Most parts feature temporary tabs to key pieces together and lock in their alignment. I laid out the wing parts first, initially dry-fitting them to ensure that the geometry was accurate. I then reached for my glue and secured the wing center section and tips, but not the middle ribs on each side.
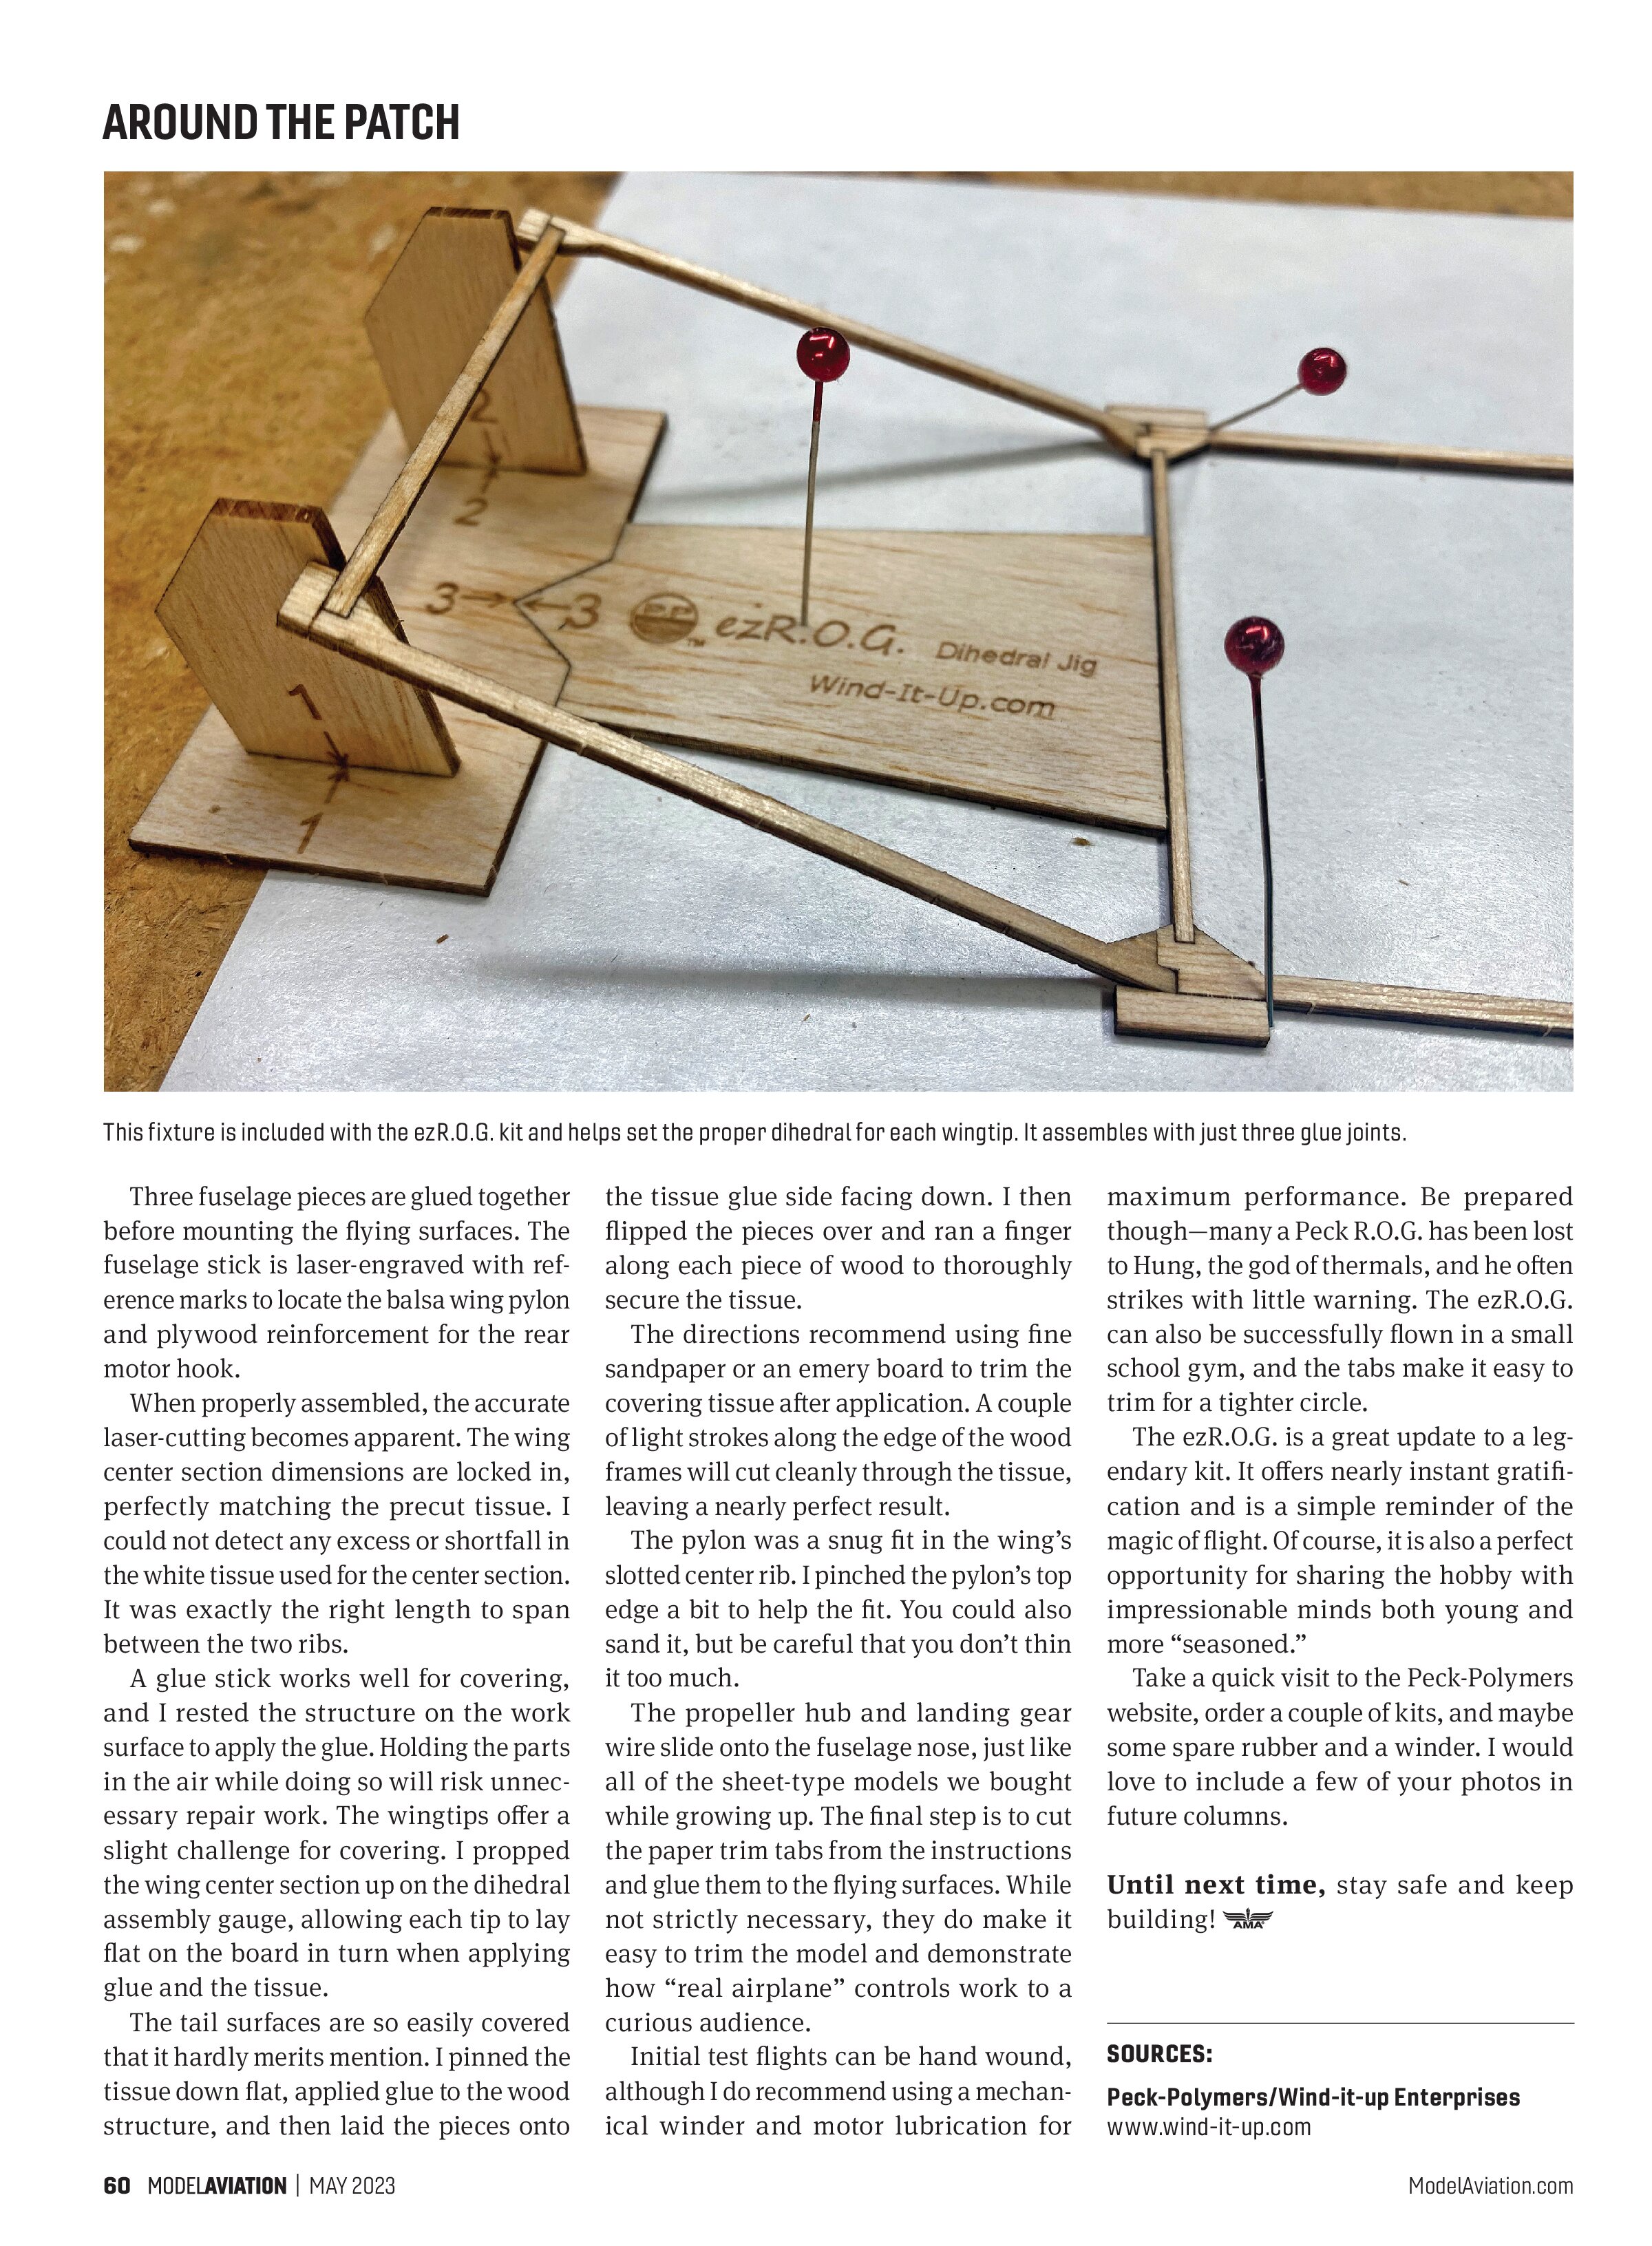
The kit includes a fixture for setting the proper tip-panel dihedral, which works beautifully. Its large base references against the one wing rib on each side of center and supports each tip in turn so that you can lock in the proper dihedral with little care.
Once the tips were in place, I gently sanded the bottom of the dihedral joints. This filled the small gaps with sawdust, which I locked in with thin CA before covering.
The tail surfaces are simple affairs, with the geometry again dictated by small alignment tabs at each intersection. If you are careful with your glue application, you will find these tabs easy to remove after assembly simply by pinching them with a fingernail.

Three fuselage pieces are glued together before mounting the flying surfaces. The fuselage stick is laser-engraved with reference marks to locate the balsa wing pylon and plywood reinforcement for the rear motor hook.
When properly assembled, the accurate laser-cutting becomes apparent. The wing center section dimensions are locked in, perfectly matching the precut tissue. I could not detect any excess or shortfall in the white tissue used for the center section. It was exactly the right length to span between the two ribs.
A glue stick works well for covering, and I rested the structure on the work surface to apply the glue. Holding the parts in the air while doing so will risk unnecessary repair work. The wingtips offer a slight challenge for covering. I propped the wing center section up on the dihedral assembly gauge, allowing each tip to lay flat on the board in turn when applying glue and the tissue.
The tail surfaces are so easily covered that it hardly merits mention. I pinned the tissue down flat, applied glue to the wood structure, and then laid the pieces onto the tissue glue side facing down. I then flipped the pieces over and ran a finger along each piece of wood to thoroughly secure the tissue.
The directions recommend using fine sandpaper or an emery board to trim the covering tissue after application. A couple of light strokes along the edge of the wood frames will cut cleanly through the tissue, leaving a nearly perfect result.
The pylon was a snug fit in the wing’s slotted center rib. I pinched the pylon’s top edge a bit to help the fit. You could also sand it, but be careful that you don’t thin it too much.
The propeller hub and landing gear wire slide onto the fuselage nose, just like all of the sheet-type models we bought while growing up. The final step is to cut the paper trim tabs from the instructions and glue them to the flying surfaces. While not strictly necessary, they do make it easy to trim the model and demonstrate how “real airplane” controls work to a curious audience.
Initial test flights can be hand wound, although I do recommend using a mechanical winder and motor lubrication for maximum performance. Be prepared though—many a Peck R.O.G. has been lost to Hung, the god of thermals, and he often strikes with little warning. The ezR.O.G. can also be successfully flown in a small school gym, and the tabs make it easy to trim for a tighter circle.
The ezR.O.G. is a great update to a legendary kit. It offers nearly instant gratification and is a simple reminder of the magic of flight. Of course, it is also a perfect opportunity for sharing the hobby with impressionable minds both young and more “seasoned.”
Take a quick visit to the Peck-Polymers website, order a couple of kits, and maybe some spare rubber and a winder. I would love to include a few of your photos in future columns.
Until next time, stay safe and keep building!
SOURCES:
Peck-Polymers/Wind-it-up Enterprises
www.wind-it-up.com