RC AEROBATICS

MORE ABOUT LOOPS!
By Justin Wells | justinwells@mac.com
IN MY LAST COLUMN, I walked you through the approach to making your loops round, all while keeping your track straight and making more use of the throttle. I put a lot in front of you, and I hope you didn’t find yourself frustrated.
Let’s take a second and try to analyze your loop based on the contest downgrades provided by the National Society of Radio Controlled Aerobatics (NSRCA). Be honest with yourself, and let’s do a quick exercise on scoring your maneuver.
The common downgrades for a loop are listed below. You will find that the downgrades grow as you move through the classes and more things are added to the simple loop. For example, in the Sportsman class, you have to do two loops superimposed over each other. It’s not as hard as it sounds, but it will grow your abilities. Review the downgrades and deduct 1 point per error that you find when you do your loop. You might find the same error multiple times. Start from 10 then subtract all of your errors to give you an idea of your score.
- Loops are not round.
- The wing is not level during loops.
- Changes in track occur during loops.
- The exit is not the same altitude and track as the entry.
This is a good exercise in analyzing your flight and having a good idea of how you would be scored in a contest. This also helps you if you are called upon to judge at a contest. Know your downgrades and know what they look like.

Let’s continue with another type of loop that you will see in all of the Pattern classes, the triangle loop! This is one of my favorite maneuvers. It’s unusual looking but fun to fly. It’s basically a triangle flown upside down. This is also a backbone maneuver that is built on as you go through the classes, so the basics are key. Let’s unpack as much as possible in the next few paragraphs.
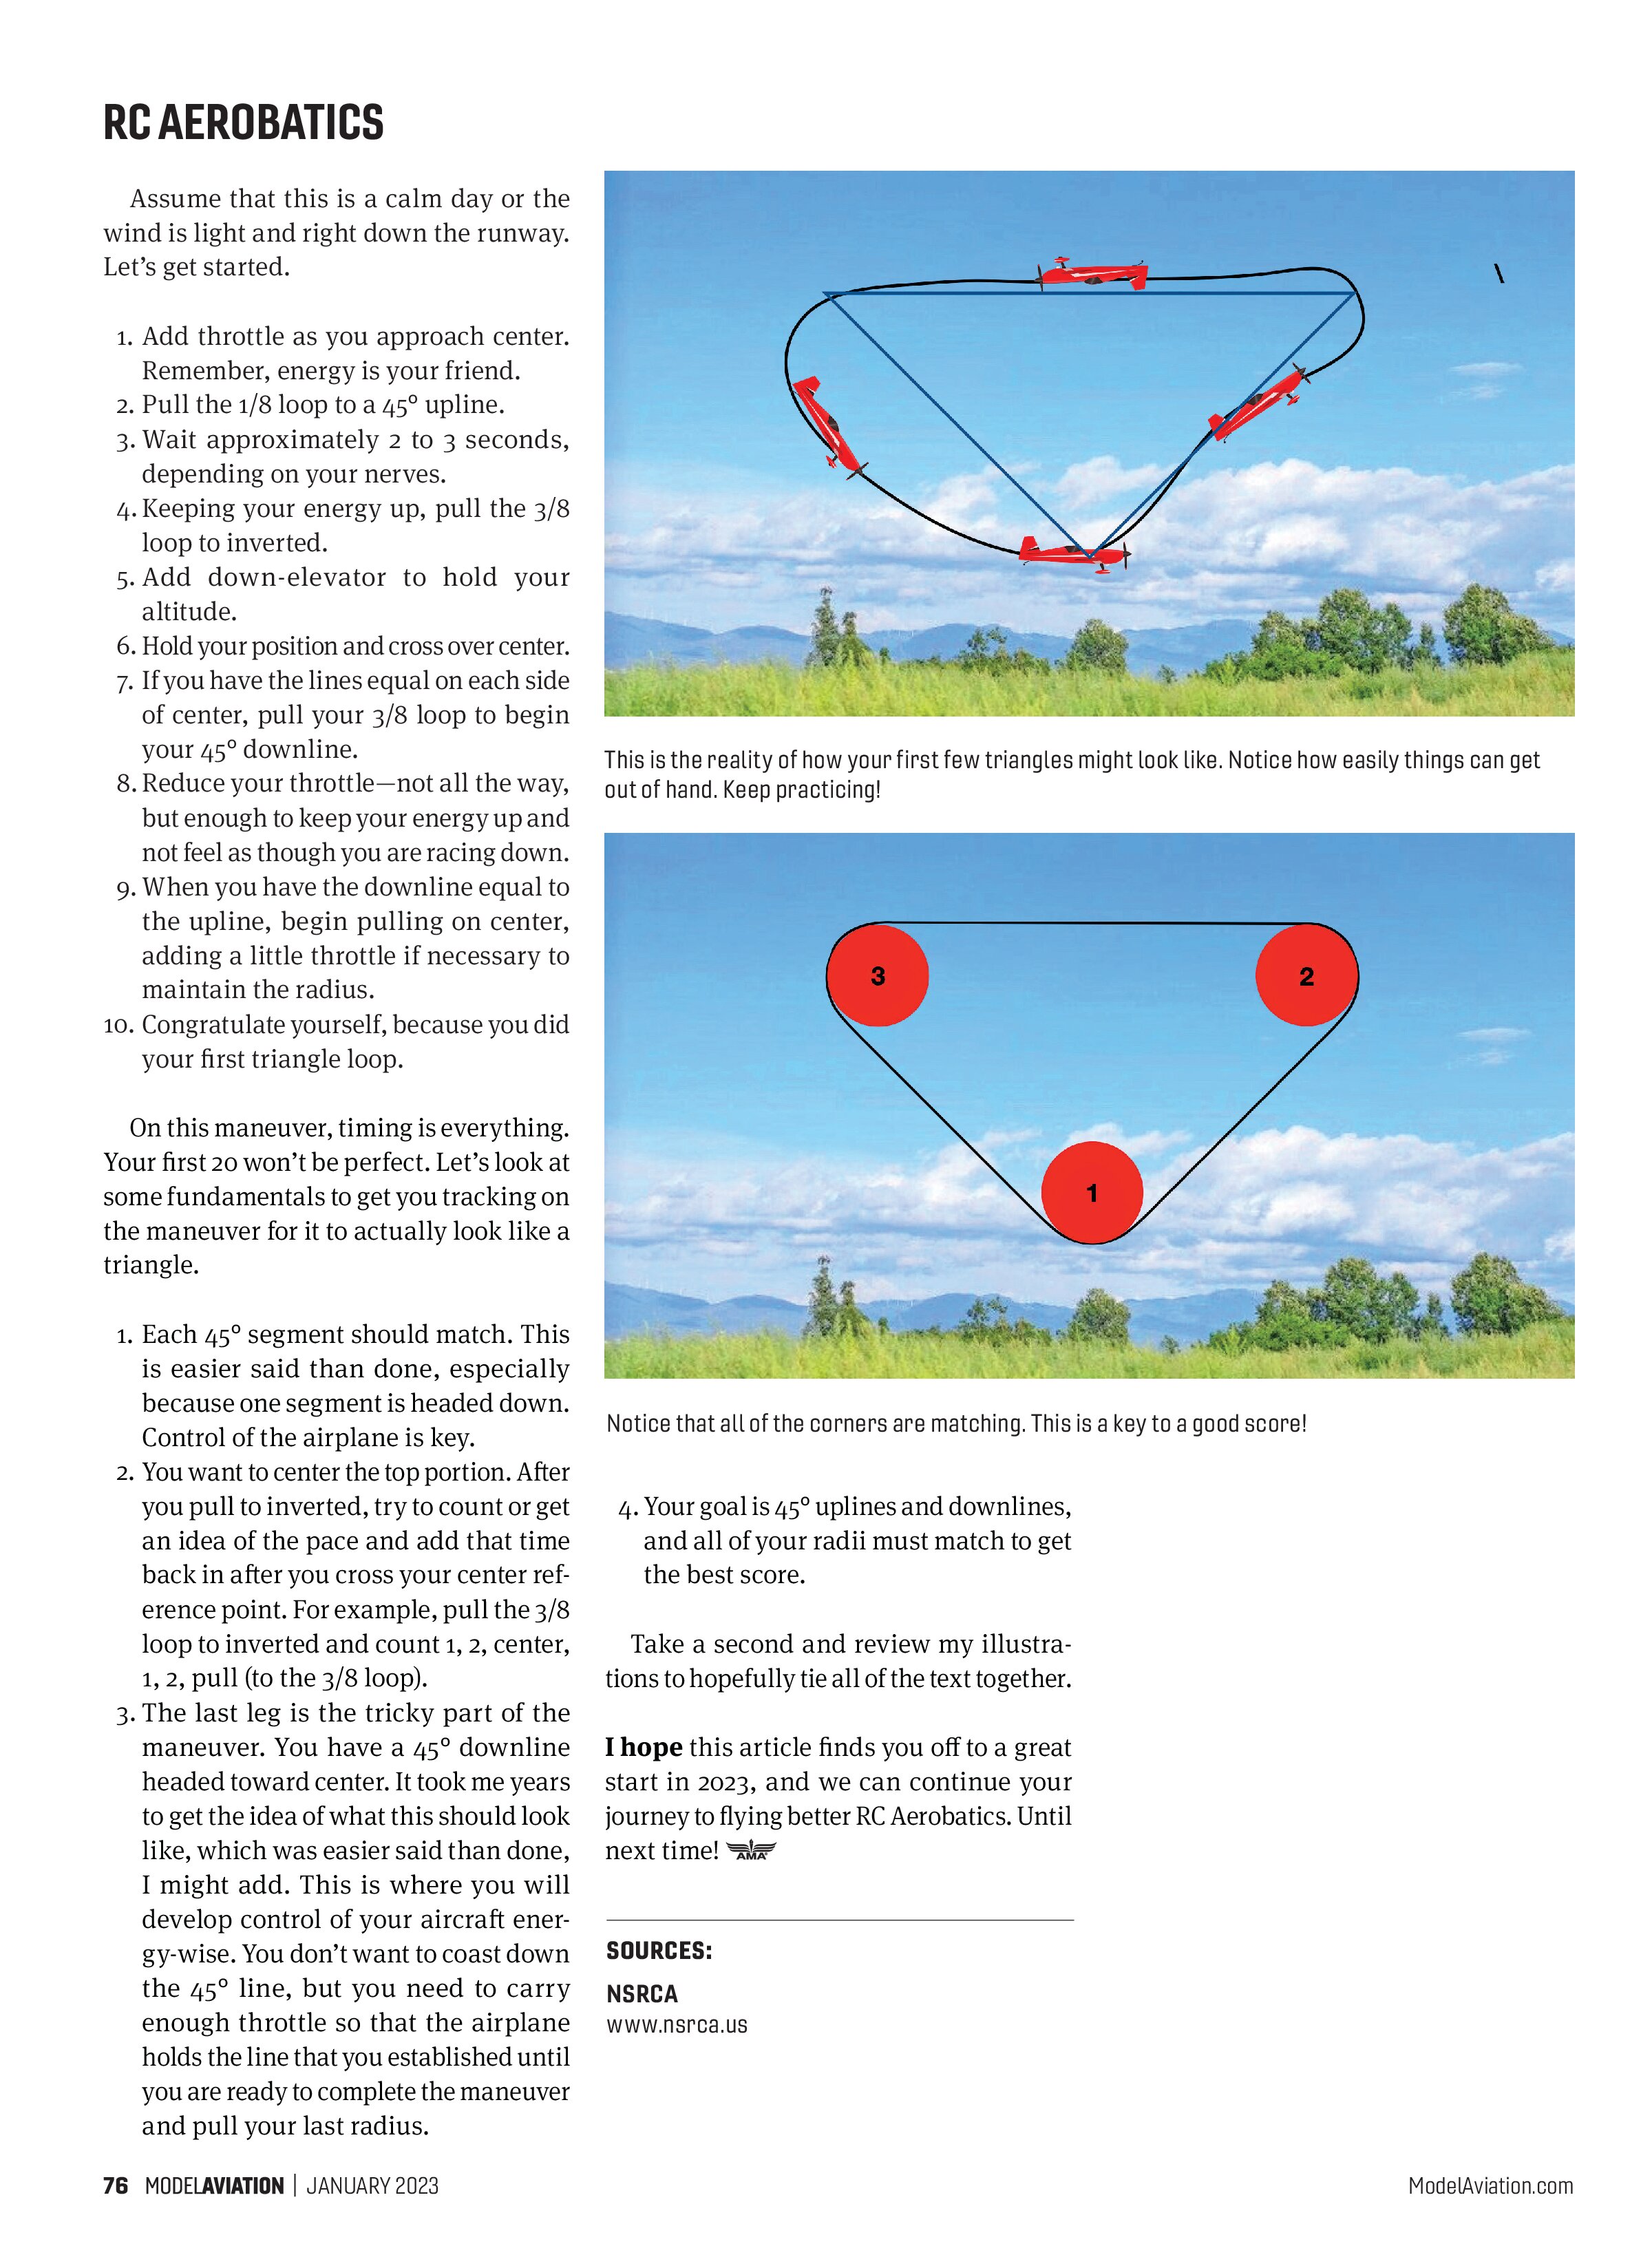
In the illustration above, you see the layout of the maneuver. It’s basically an upside-down triangle. The trick to this maneuver is to make sure that both side legs are 45° and that you match all of the radii. The triangle loop, similar to the regular loop, is done on center, so you start it right in front of you. I recommend that you start by just pulling to a 45° line a few times to get the feel. Have someone watch you to make sure that you are “nailing” the 45° line, which is key to this maneuver looking correct.
Make sure that you have adequate speed before approaching the 45° upline. You can always throttle back, but if you start the maneuver lacking energy (throttle), you’ll find trouble ahead throughout the entire maneuver. The top is flown inverted, so make sure that you are two or three mistakes high if you are not yet comfortable with inverted flying.
As before, I’ll break this down in sections so that you can try to visualize flying through it.
As you step out to the flightline, try to find a center point and keep that in front of you. Anything in the distance that you can reference will work fine; this helps with centering on these maneuvers.
Assume that this is a calm day or the wind is light and right down the runway. Let’s get started.
- Add throttle as you approach center. Remember, energy is your friend.
- Pull the 1/8 loop to a 45° upline.
- Wait approximately 2 to 3 seconds, depending on your nerves.
- Keeping your energy up, pull the 3/8 loop to inverted.
- Add down-elevator to hold your altitude.
- Hold your position and cross over center.
- If you have the lines equal on each side of center, pull your 3/8 loop to begin your 45° downline.
- Reduce your throttle—not all the way, but enough to keep your energy up and not feel as though you are racing down.
- When you have the downline equal to the upline, begin pulling on center, adding a little throttle if necessary to maintain the radius.
- Congratulate yourself, because you did your first triangle loop.
On this maneuver, timing is everything. Your first 20 won’t be perfect. Let’s look at some fundamentals to get you tracking on the maneuver for it to actually look like a triangle.
- Each 45° segment should match. This is easier said than done, especially because one segment is headed down. Control of the airplane is key.
- You want to center the top portion. After you pull to inverted, try to count or get an idea of the pace and add that time back in after you cross your center reference point. For example, pull the 3/8 loop to inverted and count 1, 2, center, 1, 2, pull (to the 3/8 loop).
- The last leg is the tricky part of the maneuver. You have a 45° downline headed toward center. It took me years to get the idea of what this should look like, which was easier said than done, I might add. This is where you will develop control of your aircraft energy-wise. You don’t want to coast down the 45° line, but you need to carry enough throttle so that the airplane holds the line that you established until you are ready to complete the maneuver and pull your last radius.


4. Your goal is 45° uplines and downlines, and all of your radii must match to get the best score.
Take a second and review my illustrations to hopefully tie all of the text together.
I hope this article finds you off to a great start in 2023, and we can continue your journey to flying better RC Aerobatics. Until next time!
SOURCES:
NSRCA
www.nsrca.us