THE AERONKISH
A Cartoon Scale creation for indoors or out
By Stan Alexander | onawing4602@att.net
Photos by the author

The Aeronkish is another of Buzzard Models’ Cartoon Scale creations, similar to the Fokkerish (the Fokker DRI was reviewed in the June 2022 issue), but even simpler for indoor or limited-space outdoor models.
Nearly all of the parts are precut from Depron foam and ready to take out of the form and start assembly. I suggest that you dry-fit the parts before adding any glue. I’ve found that it’s easier to paint some of the parts before assembly on this and many other airplanes.
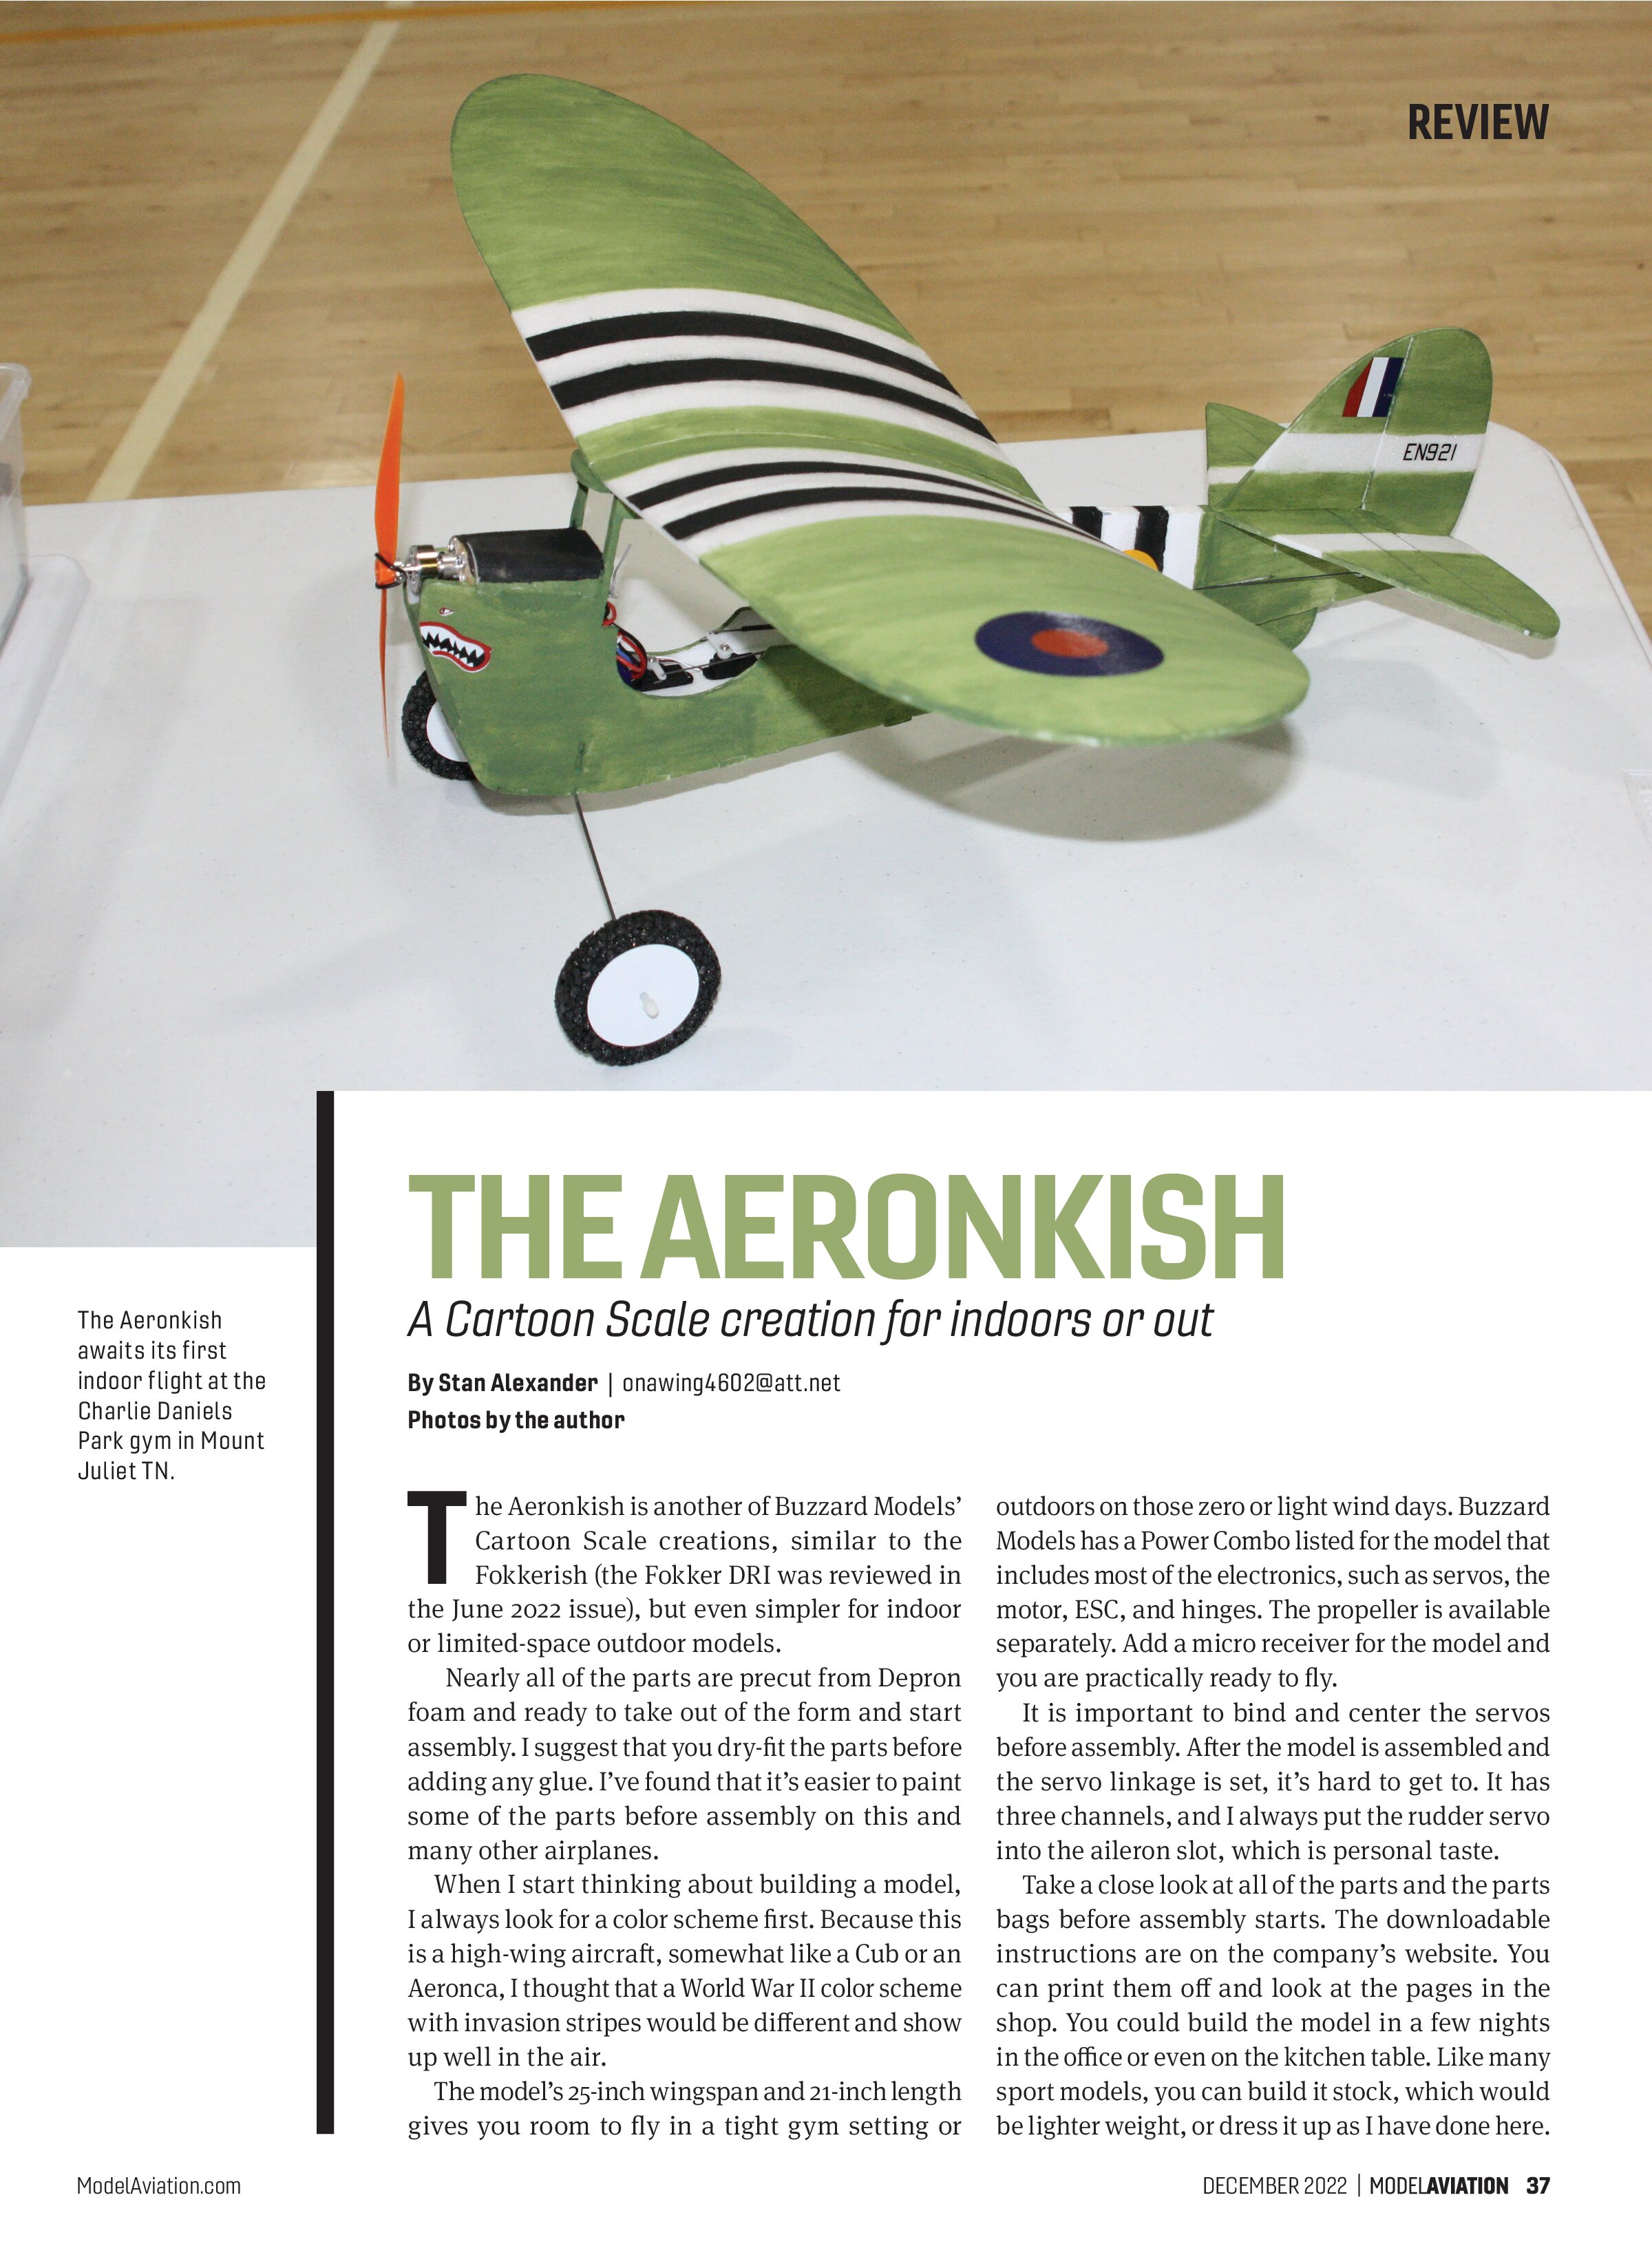
When I start thinking about building a model, I always look for a color scheme first. Because this is a high-wing aircraft, somewhat like a Cub or an Aeronca, I thought that a World War II color scheme with invasion stripes would be different and show up well in the air.
The model’s 25-inch wingspan and 21-inch length gives you room to fly in a tight gym setting or
outdoors on those zero or light wind days. Buzzard Models has a Power Combo listed for the model that includes most of the electronics, such as servos, the motor, ESC, and hinges. The propeller is available separately. Add a micro receiver for the model and you are practically ready to fly.
It is important to bind and center the servos before assembly. After the model is assembled and the servo linkage is set, it’s hard to get to. It has three channels, and I always put the rudder servo into the aileron slot, which is personal taste.
Take a close look at all of the parts and the parts bags before assembly starts. The downloadable instructions are on the company’s website. You can print them off and look at the pages in the shop. You could build the model in a few nights in the office or even on the kitchen table. Like many sport models, you can build it stock, which would be lighter weight, or dress it up as I have done here.
At a Glance
Specifications
Wingspan: 25 inches
Length: 21 inches
Ready-to-fly weight: 3.7 ounces (105 grams)
Construction: Depron foam
Power system: Turnigy nano-tech 300 mAh 2S 35 to 70 mAh LiPo battery (not included)
Receiver: Four-channel CM421DSM2-compatible
Propeller: APC 7 x 4.1 slow flyer indoor 3D (not included)
Kit price: $34.95
Power Combo: $44.99
Pluses
· Quick assembly.
Minuses
· Be sure to add the motor to the firewall before assembly to the airframe.
Manufacturer/Distributor
Buzzard Models
info@buzzardmodels.com
www.buzzardmodels.com

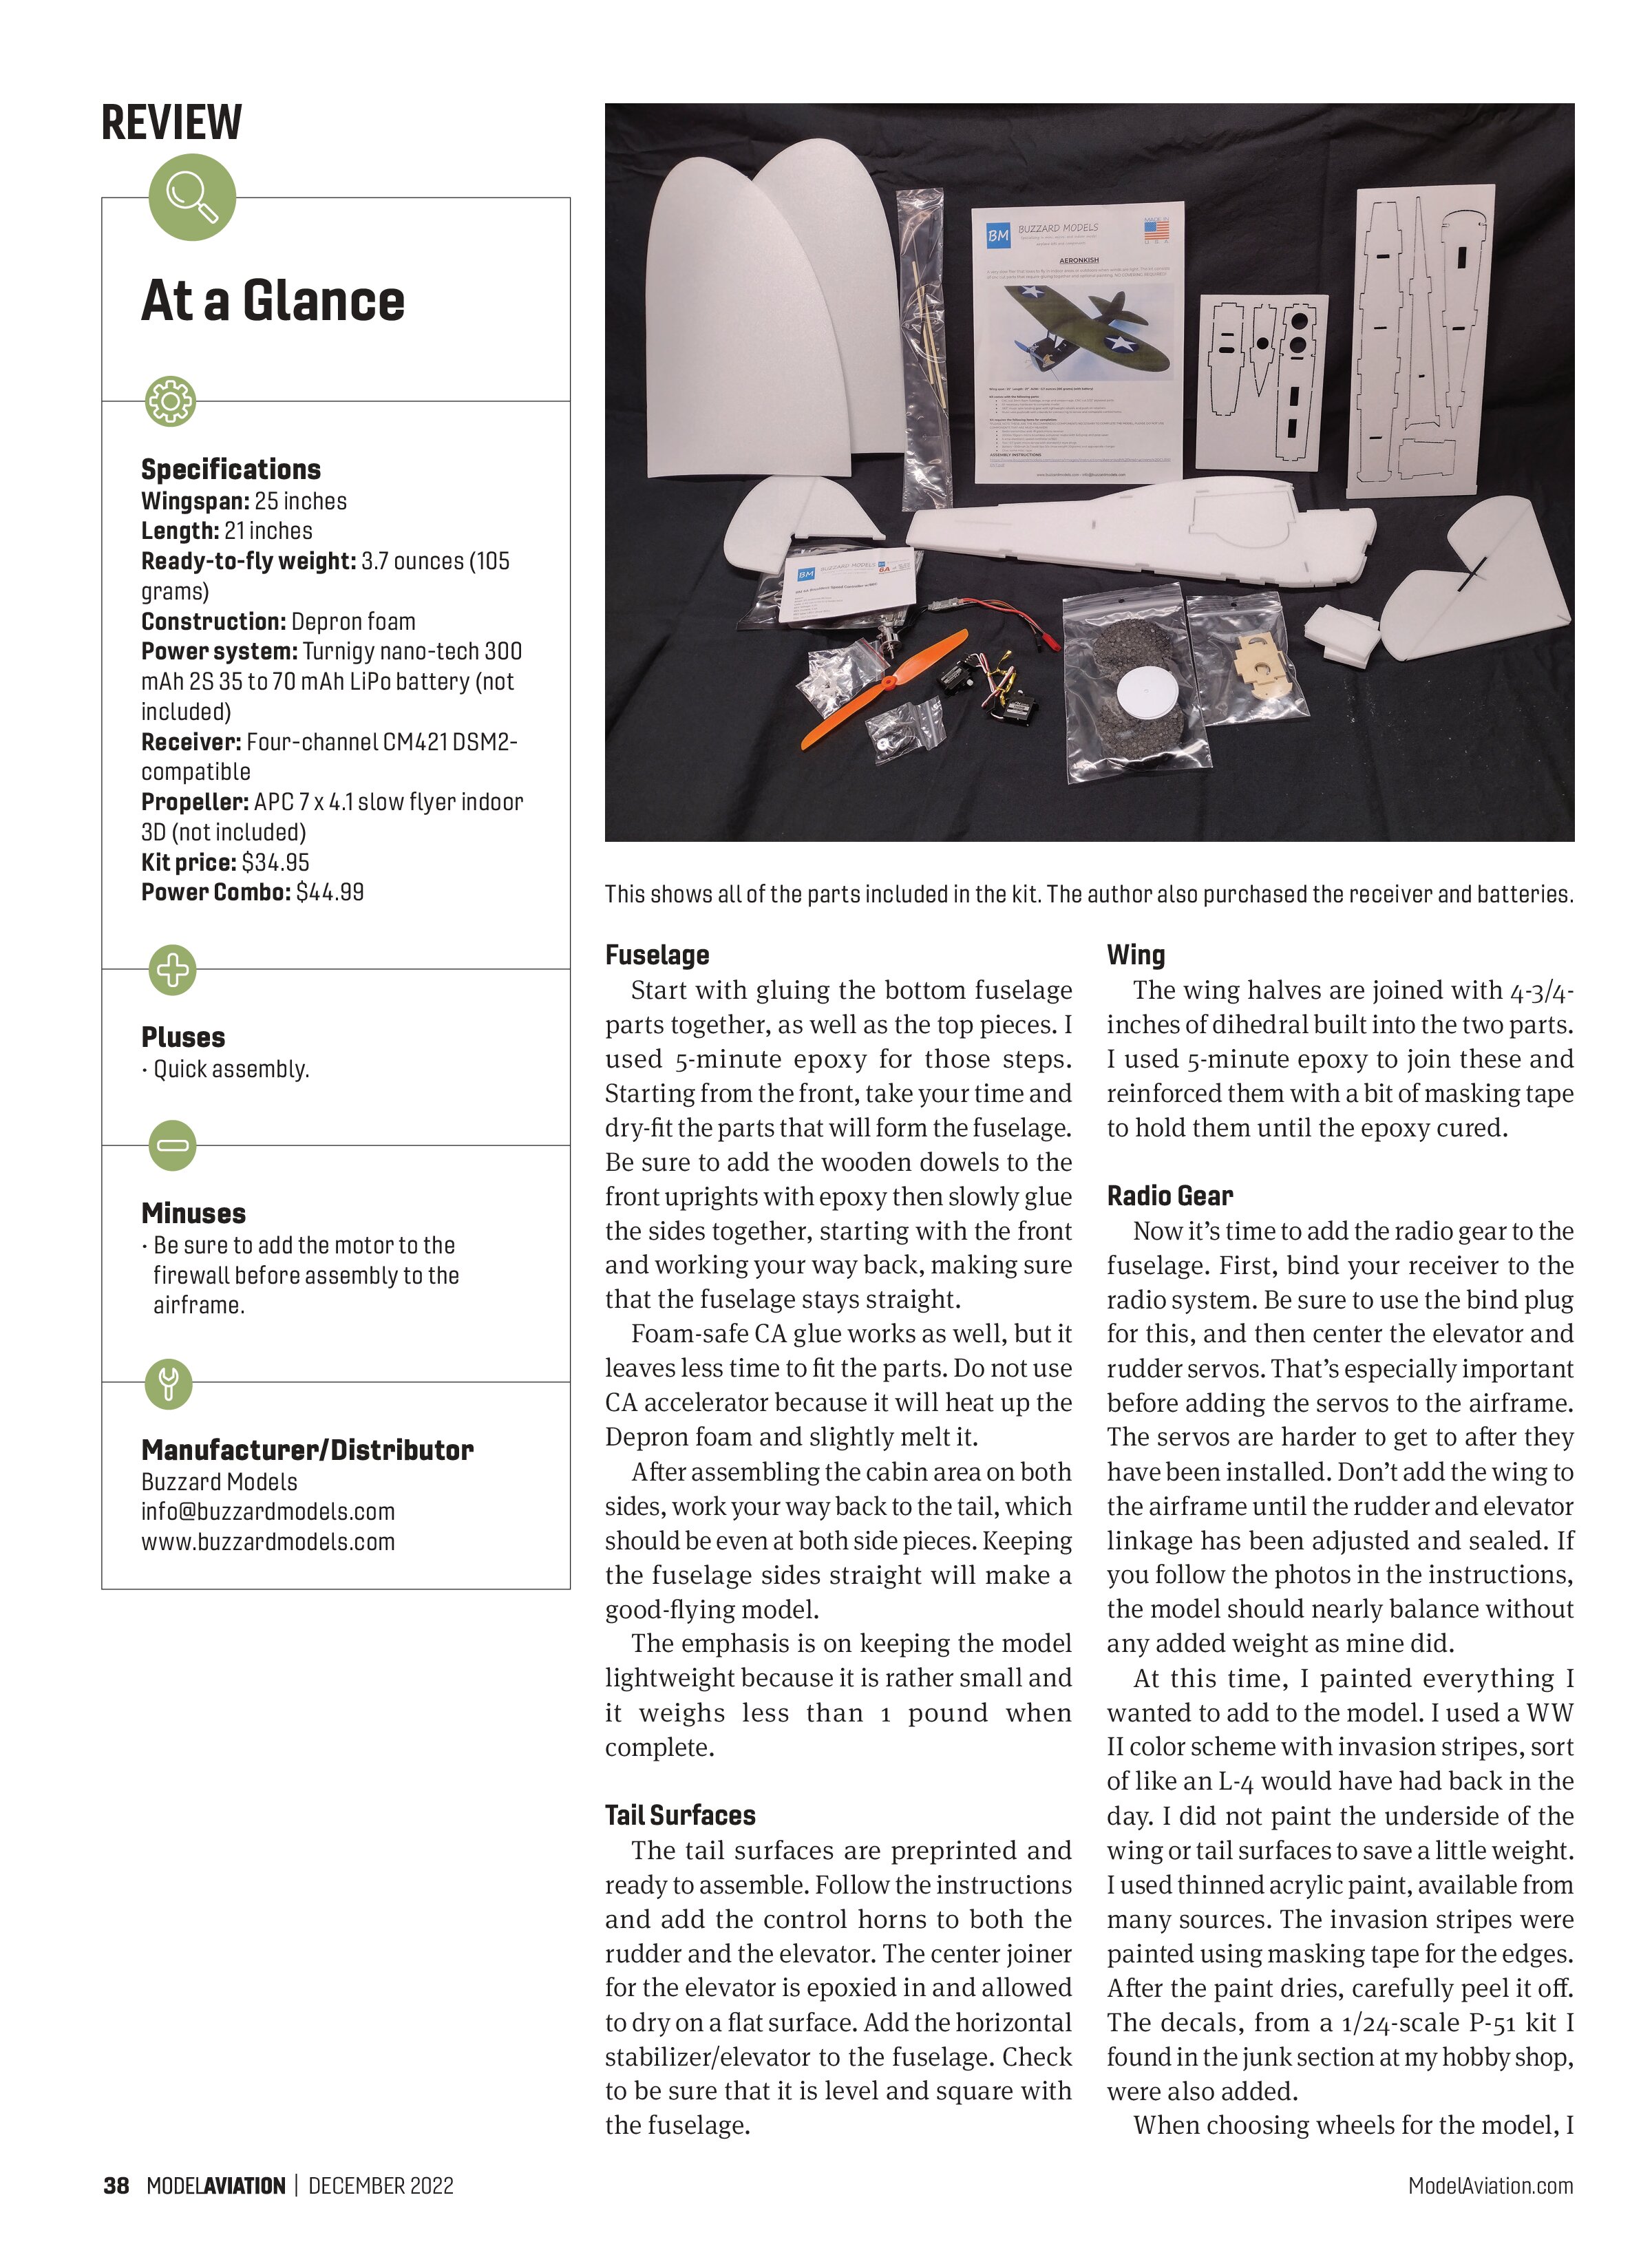
This shows all of the parts included in the kit. The author also purchased the receiver and batteries.
Fuselage
Start with gluing the bottom fuselage parts together, as well as the top pieces. I used 5-minute epoxy for those steps. Starting from the front, take your time and dry-fit the parts that will form the fuselage. Be sure to add the wooden dowels to the front uprights with epoxy then slowly glue the sides together, starting with the front and working your way back, making sure that the fuselage stays straight.
Foam-safe CA glue works as well, but it leaves less time to fit the parts. Do not use CA accelerator because it will heat up the Depron foam and slightly melt it.
After assembling the cabin area on both sides, work your way back to the tail, which should be even at both side pieces. Keeping the fuselage sides straight will make a good-flying model.
The emphasis is on keeping the model lightweight because it is rather small and it weighs less than 1 pound when complete.
Tail Surfaces
The tail surfaces are preprinted and ready to assemble. Follow the instructions and add the control horns to both the rudder and the elevator. The center joiner for the elevator is epoxied in and allowed to dry on a flat surface. Add the horizontal stabilizer/elevator to the fuselage. Check to be sure that it is level and square with the fuselage.
Wing
The wing halves are joined with 4-3/4-inches of dihedral built into the two parts. I used 5-minute epoxy to join these and reinforced them with a bit of masking tape to hold them until the epoxy cured.
Radio Gear
Now it’s time to add the radio gear to the fuselage. First, bind your receiver to the radio system. Be sure to use the bind plug for this, and then center the elevator and rudder servos. That’s especially important before adding the servos to the airframe. The servos are harder to get to after they have been installed. Don’t add the wing to the airframe until the rudder and elevator linkage has been adjusted and sealed. If you follow the photos in the instructions, the model should nearly balance without any added weight as mine did.
At this time, I painted everything I wanted to add to the model. I used a WW II color scheme with invasion stripes, sort of like an L-4 would have had back in the day. I did not paint the underside of the wing or tail surfaces to save a little weight. I used thinned acrylic paint, available from many sources. The invasion stripes were painted using masking tape for the edges. After the paint dries, carefully peel it off. The decals, from a 1/24-scale P-51 kit I found in the junk section at my hobby shop, were also added.

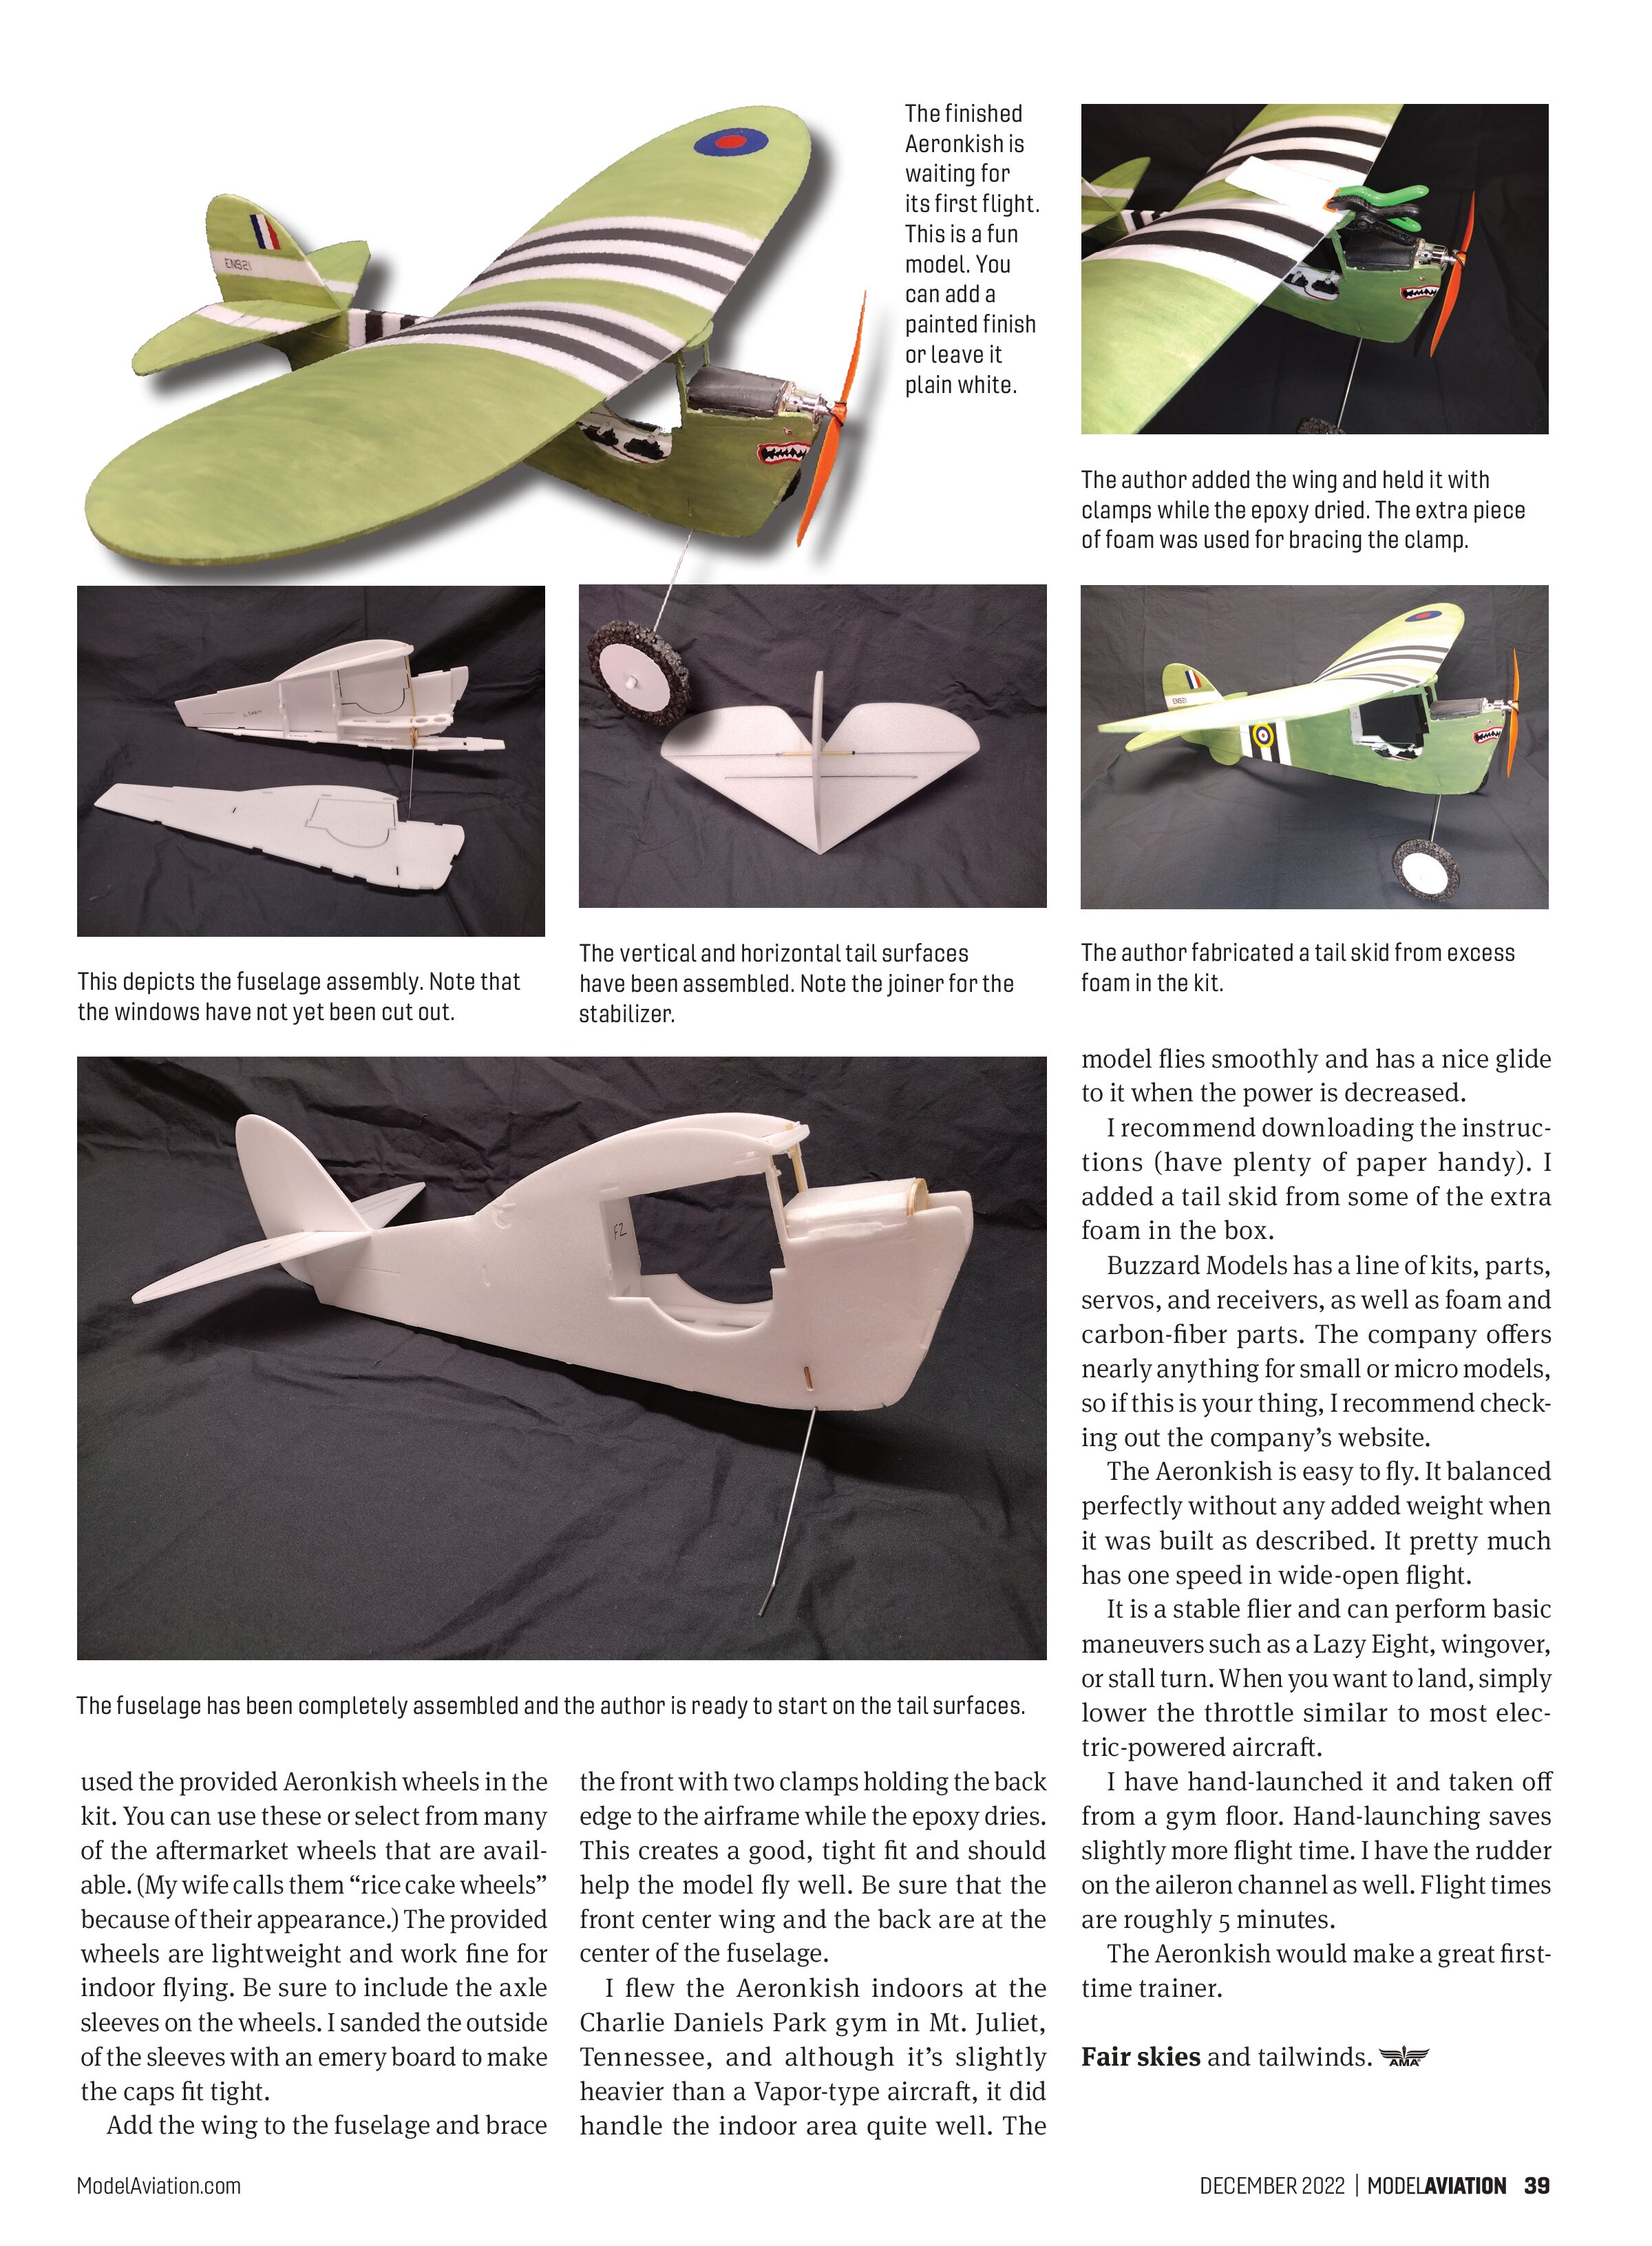
The finished Aeronkish is waiting for its first flight. This is a fun model. You can add a painted finish or leave it plain white.

The author added the wing and held it with clamps while the epoxy dried. The extra piece of foam was used for bracing the clamp.

This depicts the fuselage assembly. Note that the windows have not yet been cut out.

The vertical and horizontal tail surfaces have been assembled. Note the joiner for the stabilizer.

The author fabricated a tail skid from excess foam in the kit.

The fuselage has been completely assembled and the author is ready to start on the tail surfaces.
When choosing wheels for the model, I used the provided Aeronkish wheels in the kit. You can use these or select from many of the aftermarket wheels that are available. (My wife calls them “rice cake wheels” because of their appearance.) The provided wheels are lightweight and work fine for indoor flying. Be sure to include the axle sleeves on the wheels. I sanded the outside of the sleeves with an emery board to make the caps fit tight.
Add the wing to the fuselage and brace the front with two clamps holding the back edge to the airframe while the epoxy dries. This creates a good, tight fit and should help the model fly well. Be sure that the front center wing and the back are at the center of the fuselage.
I flew the Aeronkish indoors at the Charlie Daniels Park gym in Mt. Juliet, Tennessee, and although it’s slightly heavier than a Vapor-type aircraft, it did handle the indoor area quite well. The model flies smoothly and has a nice glide to it when the power is decreased.
I recommend downloading the instructions (have plenty of paper handy). I added a tail skid from some of the extra foam in the box.
Buzzard Models has a line of kits, parts, servos, and receivers, as well as foam and carbon-fiber parts. The company offers nearly anything for small or micro models, so if this is your thing, I recommend checking out the company’s website.
The Aeronkish is easy to fly. It balanced perfectly without any added weight when it was built as described. It pretty much has one speed in wide-open flight.
It is a stable flier and can perform basic maneuvers such as a Lazy Eight, wingover, or stall turn. When you want to land, simply lower the throttle similar to most electric-powered aircraft.
I have hand-launched it and taken off from a gym floor. Hand-launching saves slightly more flight time. I have the rudder on the aileron channel as well. Flight times are roughly 5 minutes.
The Aeronkish would make a great first-time trainer.
Fair skies and tailwinds.