RC SCALE AEROBATICS
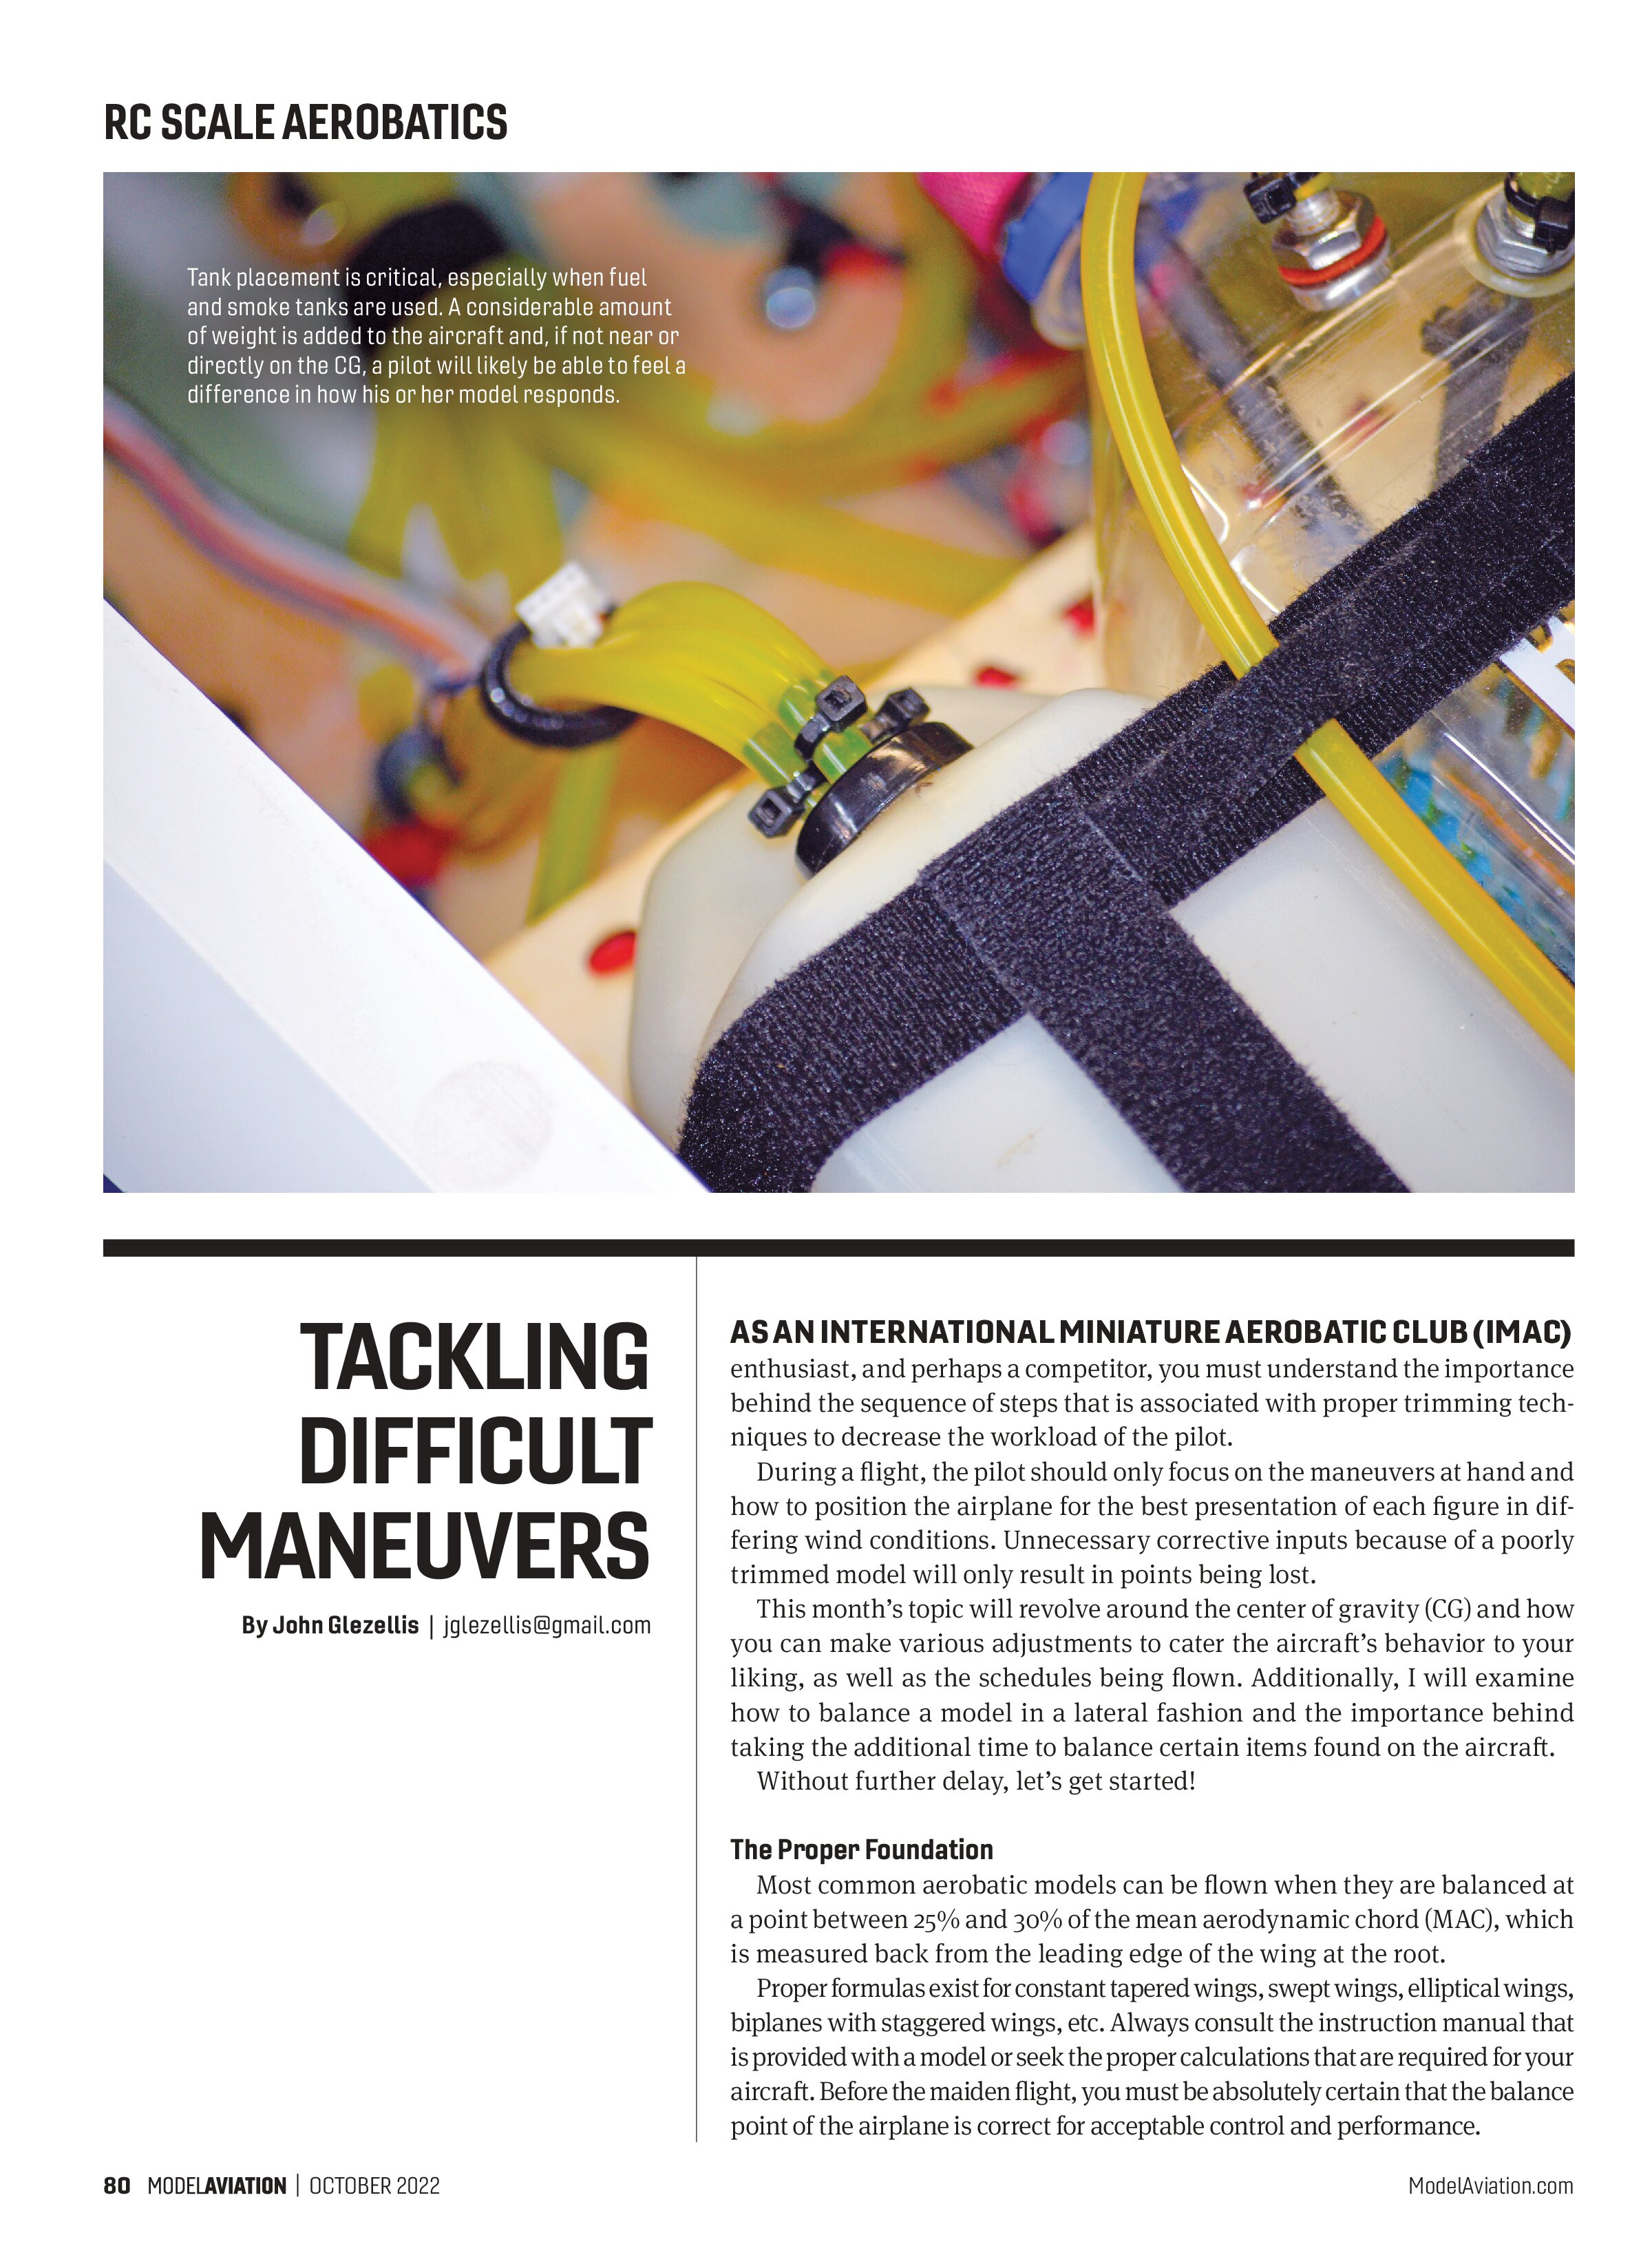
Tank placement is critical, especially when fuel and smoke tanks are used. A considerable amount of weight is added to the aircraft and, if not near or directly on the CG, a pilot will likely be able to feel a difference in how his or her model responds.
TACKLING
DIFFICULT
MANEUVERS
By John Glezellis | jglezellis@gmail.com
AS AN INTERNATIONAL MINIATURE AEROBATIC CLUB (IMAC)
enthusiast, and perhaps a competitor, you must understand the importance behind the sequence of steps that is associated with proper trimming techniques to decrease the workload of the pilot.
During a flight, the pilot should only focus on the maneuvers at hand and how to position the airplane for the best presentation of each figure in differing wind conditions. Unnecessary corrective inputs because of a poorly trimmed model will only result in points being lost.
This month’s topic will revolve around the center of gravity (CG) and how you can make various adjustments to cater the aircraft’s behavior to your liking, as well as the schedules being flown. Additionally, I will examine how to balance a model in a lateral fashion and the importance behind taking the additional time to balance certain items found on the aircraft.
Without further delay, let’s get started!
The Proper Foundation
Most common aerobatic models can be flown when they are balanced at a point between 25% and 30% of the mean aerodynamic chord (MAC), which is measured back from the leading edge of the wing at the root.
Proper formulas exist for constant tapered wings, swept wings, elliptical wings, biplanes with staggered wings, etc. Always consult the instruction manual that is provided with a model or seek the proper calculations that are required for your aircraft. Before the maiden flight, you must be absolutely certain that the balance point of the airplane is correct for acceptable control and performance.

The location of the fuel tank has an important role in how your aircraft will respond throughout a given flight. I prefer to have my tanks as close to the CG as possible, so no matter how much fuel is in the tank, the CG will be the same or quite close to the same.
Having a large 40- or 50-ounce tank behind the firewall in a 40%-scale airplane is highly undesirable, especially if you are using smoke and fuel tanks. Check the manual provided with your engine to ensure that it is pumped and will not have any problems with a tank mounted away from the carburetor.
Do not always assume that the factory-recommended CG is one that should be accepted by all. I recently performed the maiden flight on a 35% Extra 330NG. The builder followed the recommended CG, and after initial aileron, rudder, and elevator trim inputs were added, he found that the aircraft, when rolling to inverted at approximately 75% throttle, was rather tail-heavy. In fact, the model actually climbed slightly while inverted with a CG that was recommended from the factory.
A tail-heavy model is challenging to fly precisely because it will respond in a non-linear manner to any elevator input. Although some might prefer this balance point for hovering or extreme 3D, it should be avoided. I think that a model must first be able to execute a precise aerobatic routine. Setting up the CG is a vital step to ensure success for any model because an airplane that is poorly set up can be difficult—if not impossible—to safely control.
Because the CG was not in a preferred location for my liking, I did not proceed with the tuning process (e.g., corrective mixes, differential, rates, exponential settings, etc.). The CG had to be addressed first. Any change to the CG at a later point will require you to start over and check your entire trim setup again. In fact, the CG will affect differential, knife-edge flight, and downline tracking.
If you question whether or not your model is nose-heavy or tail-heavy, enter a sequence-style spin, such as the last 2022 Basic Known maneuver, which is a 1-1/2-turn positive spin from upright with an upright exit. During the spin entry, pay close attention to how the aircraft slows down and approaches a stall.
As speed is decreased and up-elevator

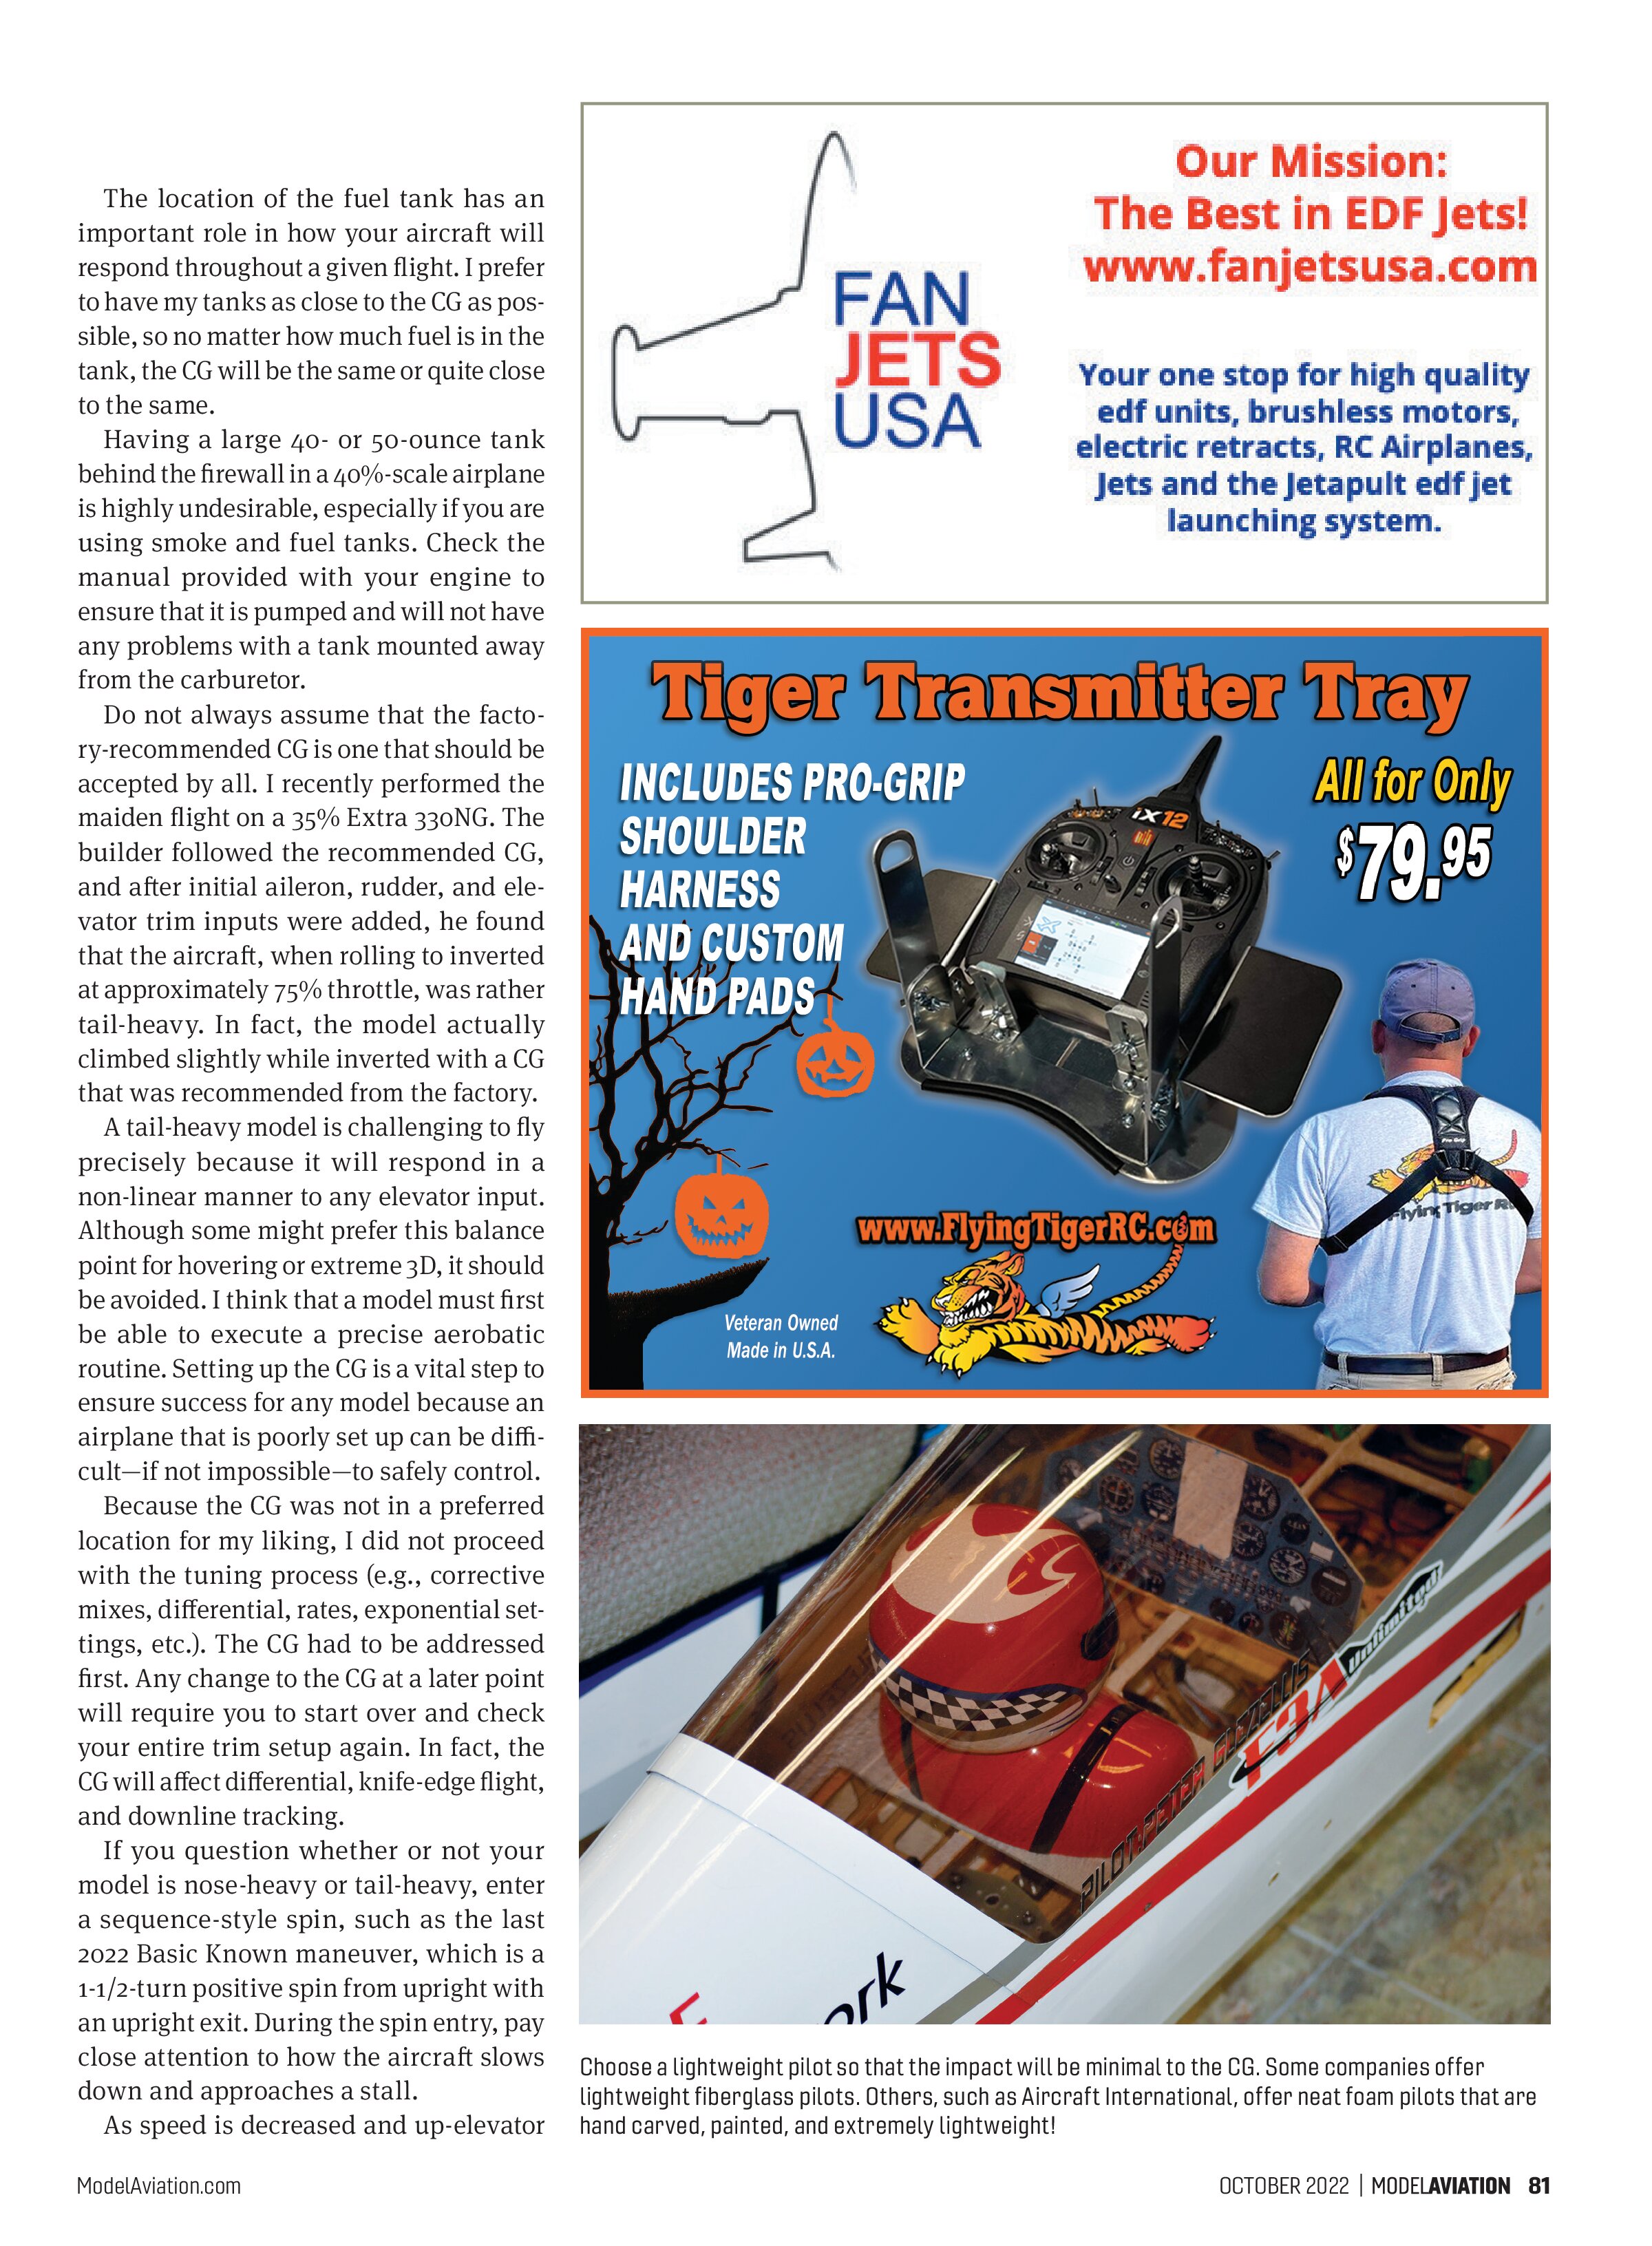
Choose a lightweight pilot so that the impact will be minimal to the CG. Some companies offer lightweight fiberglass pilots. Others, such as Aircraft International, offer neat foam pilots that are hand carved, painted, and extremely lightweight!

is applied to maintain altitude, the model should come to a stop and stall where the nose and a wingtip drop simultaneously. If it does not stall and instead mushes with no noticeable stall, the CG might be too far forward. On the contrary, if the model is pitch-sensitive and unpredictable in how it stalls, it might be too far aft.
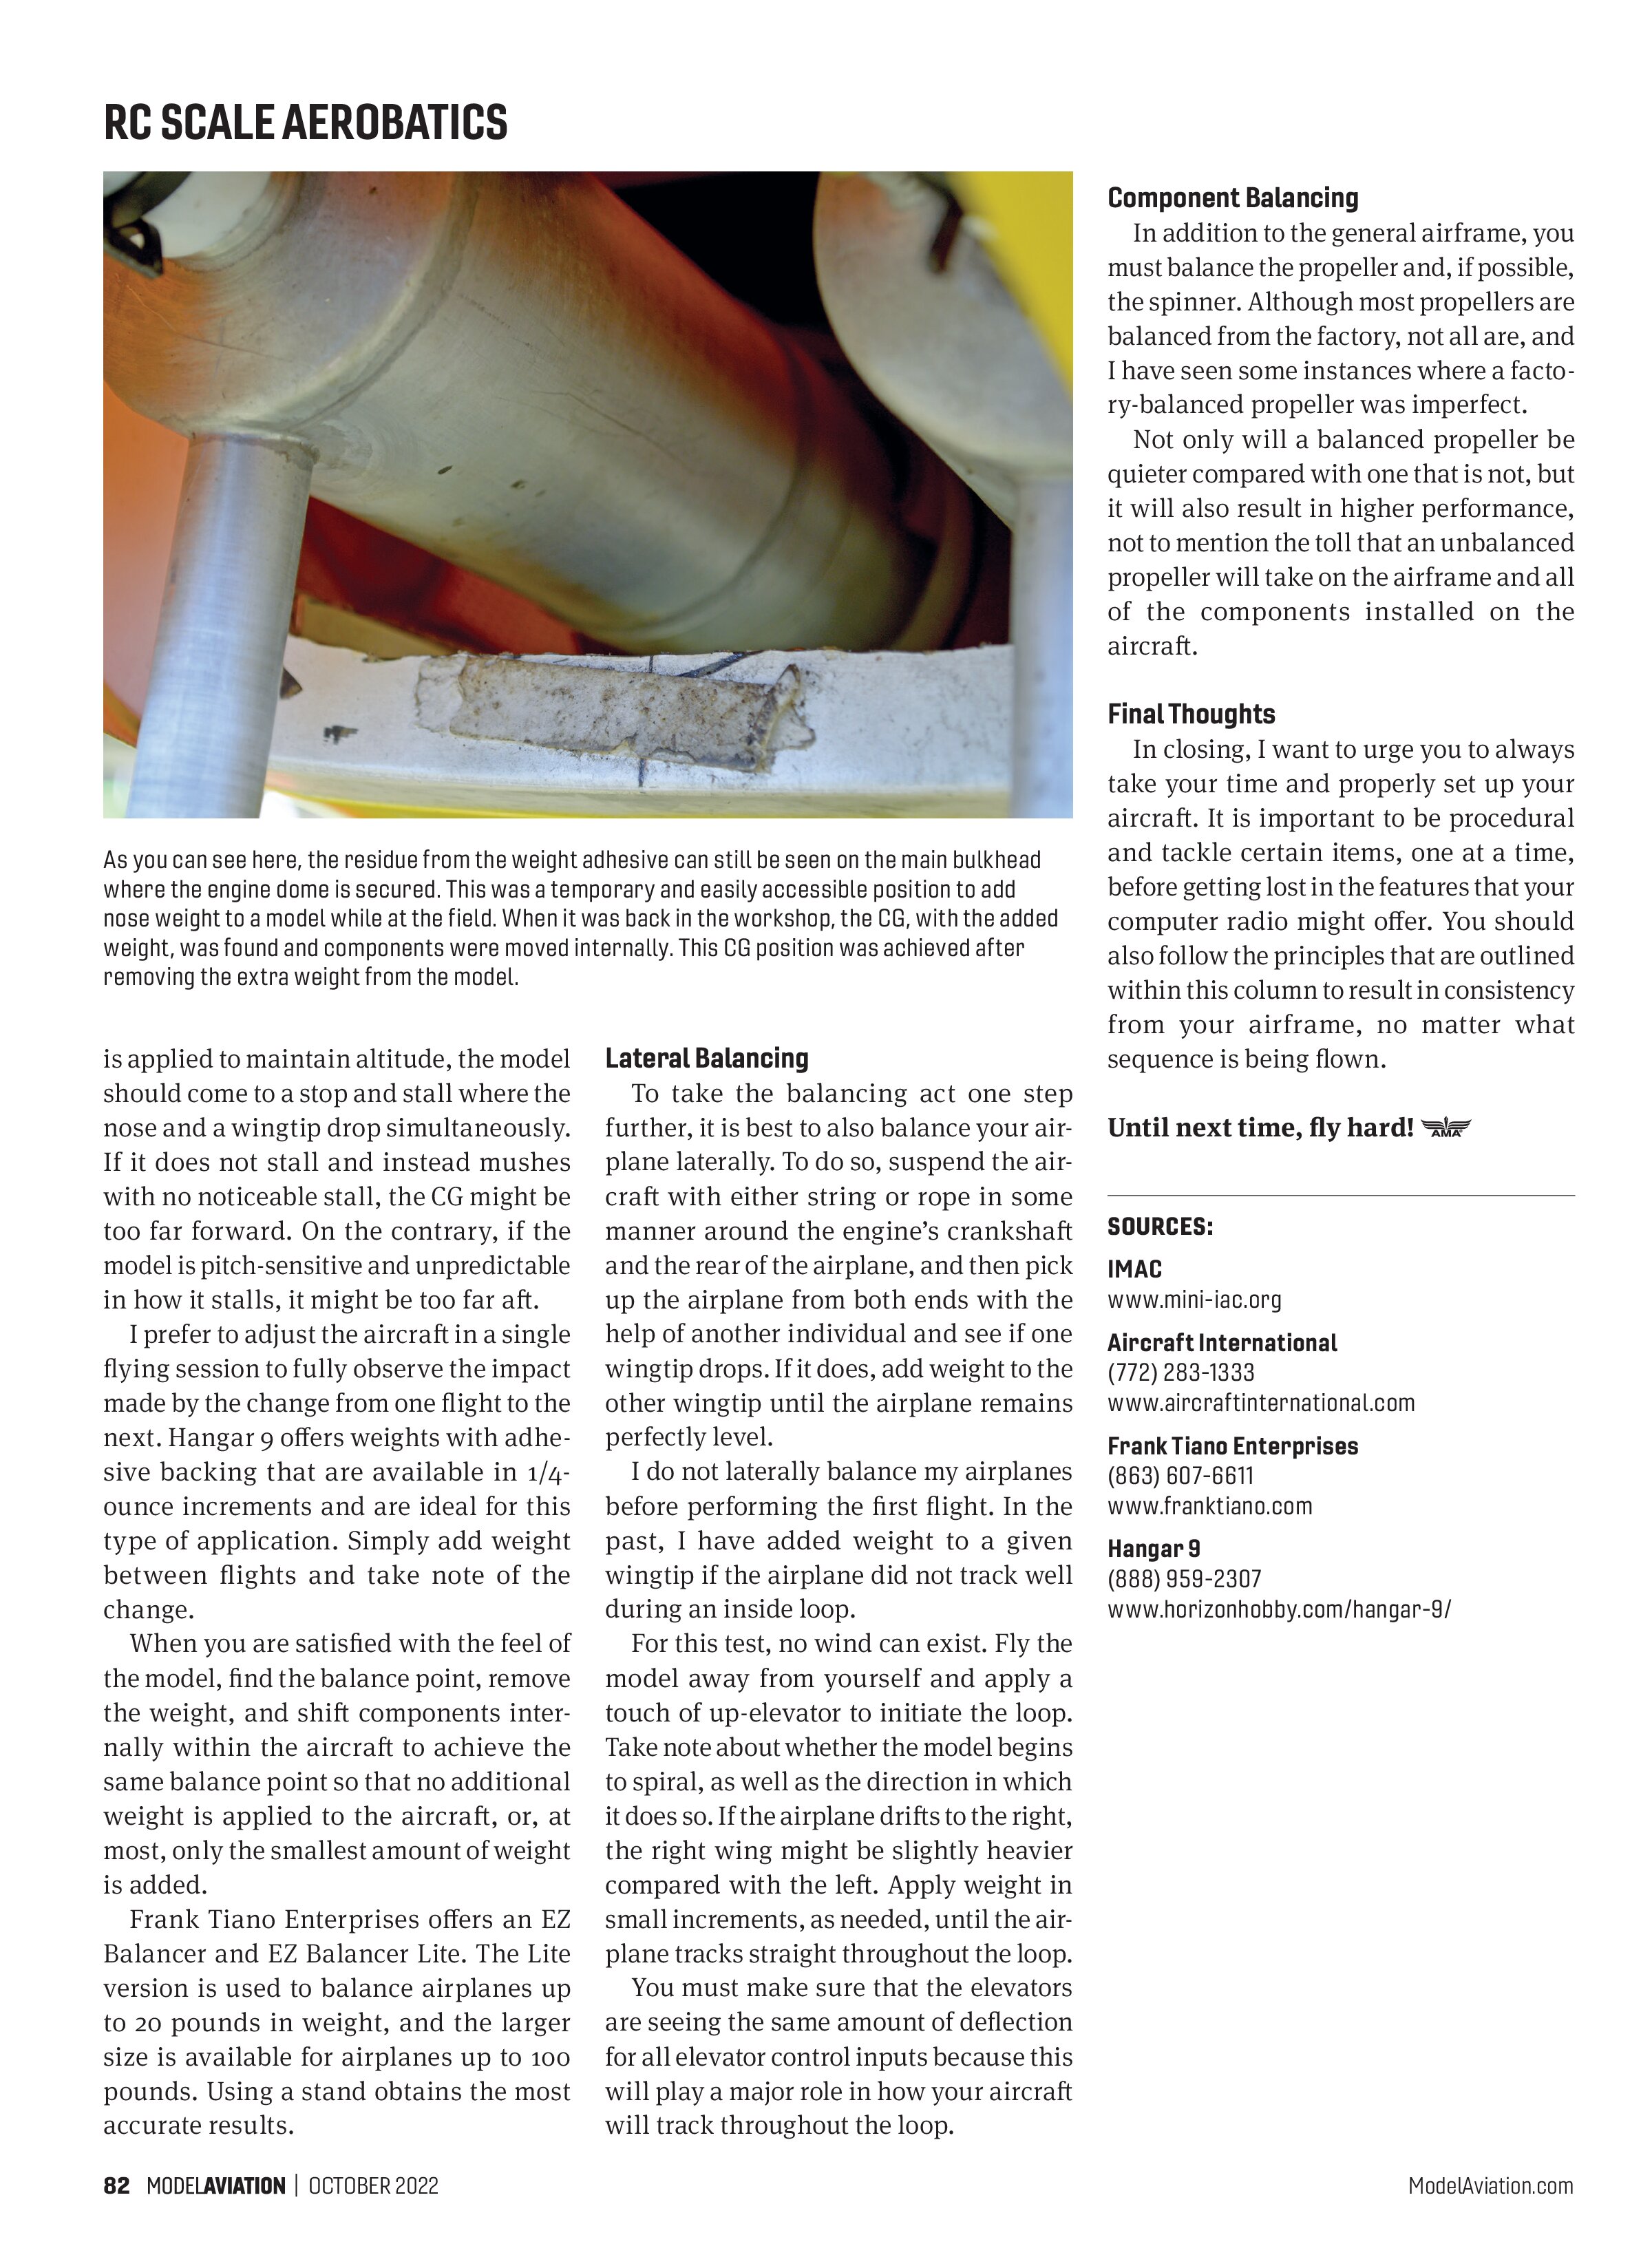
I prefer to adjust the aircraft in a single flying session to fully observe the impact made by the change from one flight to the next. Hangar 9 offers weights with adhesive backing that are available in 1/4-ounce increments and are ideal for this type of application. Simply add weight between flights and take note of the change.
When you are satisfied with the feel of the model, find the balance point, remove the weight, and shift components internally within the aircraft to achieve the same balance point so that no additional weight is applied to the aircraft, or, at most, only the smallest amount of weight is added.
Frank Tiano Enterprises offers an EZ Balancer and EZ Balancer Lite. The Lite version is used to balance airplanes up to 20 pounds in weight, and the larger size is available for airplanes up to 100 pounds. Using a stand obtains the most accurate results.
Lateral Balancing
To take the balancing act one step further, it is best to also balance your airplane laterally. To do so, suspend the aircraft with either string or rope in some manner around the engine’s crankshaft and the rear of the airplane, and then pick up the airplane from both ends with the help of another individual and see if one wingtip drops. If it does, add weight to the other wingtip until the airplane remains perfectly level.
I do not laterally balance my airplanes before performing the first flight. In the past, I have added weight to a given wingtip if the airplane did not track well during an inside loop.
For this test, no wind can exist. Fly the model away from yourself and apply a touch of up-elevator to initiate the loop. Take note about whether the model begins to spiral, as well as the direction in which it does so. If the airplane drifts to the right, the right wing might be slightly heavier compared with the left. Apply weight in small increments, as needed, until the airplane tracks straight throughout the loop.
You must make sure that the elevators are seeing the same amount of deflection for all elevator control inputs because this will play a major role in how your aircraft will track throughout the loop.
Component Balancing
In addition to the general airframe, you must balance the propeller and, if possible, the spinner. Although most propellers are balanced from the factory, not all are, and I have seen some instances where a factory-balanced propeller was imperfect.
Not only will a balanced propeller be quieter compared with one that is not, but it will also result in higher performance, not to mention the toll that an unbalanced propeller will take on the airframe and all of the components installed on the aircraft.
Final Thoughts
In closing, I want to urge you to always take your time and properly set up your aircraft. It is important to be procedural and tackle certain items, one at a time, before getting lost in the features that your computer radio might offer. You should also follow the principles that are outlined within this column to result in consistency from your airframe, no matter what sequence is being flown.
Until next time, fly hard!
SOURCES:
IMAC
www.mini-iac.org
Aircraft International
(772) 283-1333
www.aircraftinternational.com
Frank Tiano Enterprises
(863) 607-6611
www.franktiano.com
Hangar 9
(888) 959-2307
www.horizonhobby.com/hangar-9/