TIPS FOR KEEPING YOUR AIRPLANE PARALLEL WITH THE RUNWAY
By Justin Wells | justinwells@mac.com
In my July 2022 column, I discussed two simple maneuvers, referred to as turnarounds. The goals with that exercise were to see how your airplane flew after you did some of the trimming methods, to get you out of the habit of flying a racetrack pattern, and to add in flying a straight line (what we refer to as the conveyer).
You might be thinking that this was too easy, that you’re moving on until these get more interesting, or, if you had a hard time keeping the airplane parallel to the runway, you might be furious that my descriptions and illustrations made it seem so simple.
Let me first remind you that RC Aerobatics (Pattern) is about holding the line, so the simple exercise from my last column was to introduce you to the idea that we are scored on a parallel line. As you graduate up through the classes, you are judged on turnarounds and keeping your airplane on the line.
In the Sportsman class, you get the opportunity for a “free turnaround” between sets of maneuvers to give you a chance to breathe. I encourage anyone who is flying the Sportsman class to utilize this free time to make any adjustments that are necessary, even if it means a giant circle turn.
I’ll get more into that as we progress through these maneuvers, but if you are eager to jump into Sportsman, you can look back at the July 2016 and September 2016 Model Aviation “RC Aerobatics” columns that were written by Peter Vogel and walked you through each of the Sportsman class maneuvers.
Let’s dive into some helpful tips on holding the line if you struggle keeping the airplane parallel to the runway. I’ll try to break down the challenges as much as possible.
Using the Rudder
It was probably 10 years into the hobby before I realized that the rudder had more uses than taxiing and stall turns. Yes, I confess, I didn’t even use it on landing. When flying parallel, you want to utilize the rudder just as much as any other stick to help keep your airplane on track.
You don’t need to be in the habit of making obvious corrections, but you do want to use it to adjust the nose of your aircraft to hold your line parallel to the runway. This might come easily to many of you, but for me, it was quite a learning experience.
Make sure that you are comfortable with the throws and exponential on your rudder so that you are not jerking the airplane back and forth during a flight. The idea is to make it smooth and not obvious. You might practice making some rudder turns to get the feel of it. Your goal is to be as comfortable with it as you would be using your aileron or elevator.
Use the rudder to make your turns while keeping the wing level with the ailerons. This will give you the feel for using both sticks at the same time. Adjust throws, exponential, and even some delay to make sure that this works well for you.
Just to clarify, the idea here is not to set it up for knife-edge loops but for less obvious adjustments. You want to be smooth and not noticeable. This sounds easier than it really is, but take your time and work on keeping the aircraft straight and parallel to the runway with your rudder. After a few flights, I’m certain you will work this into your normal flying routine.
Wings-Level Flight
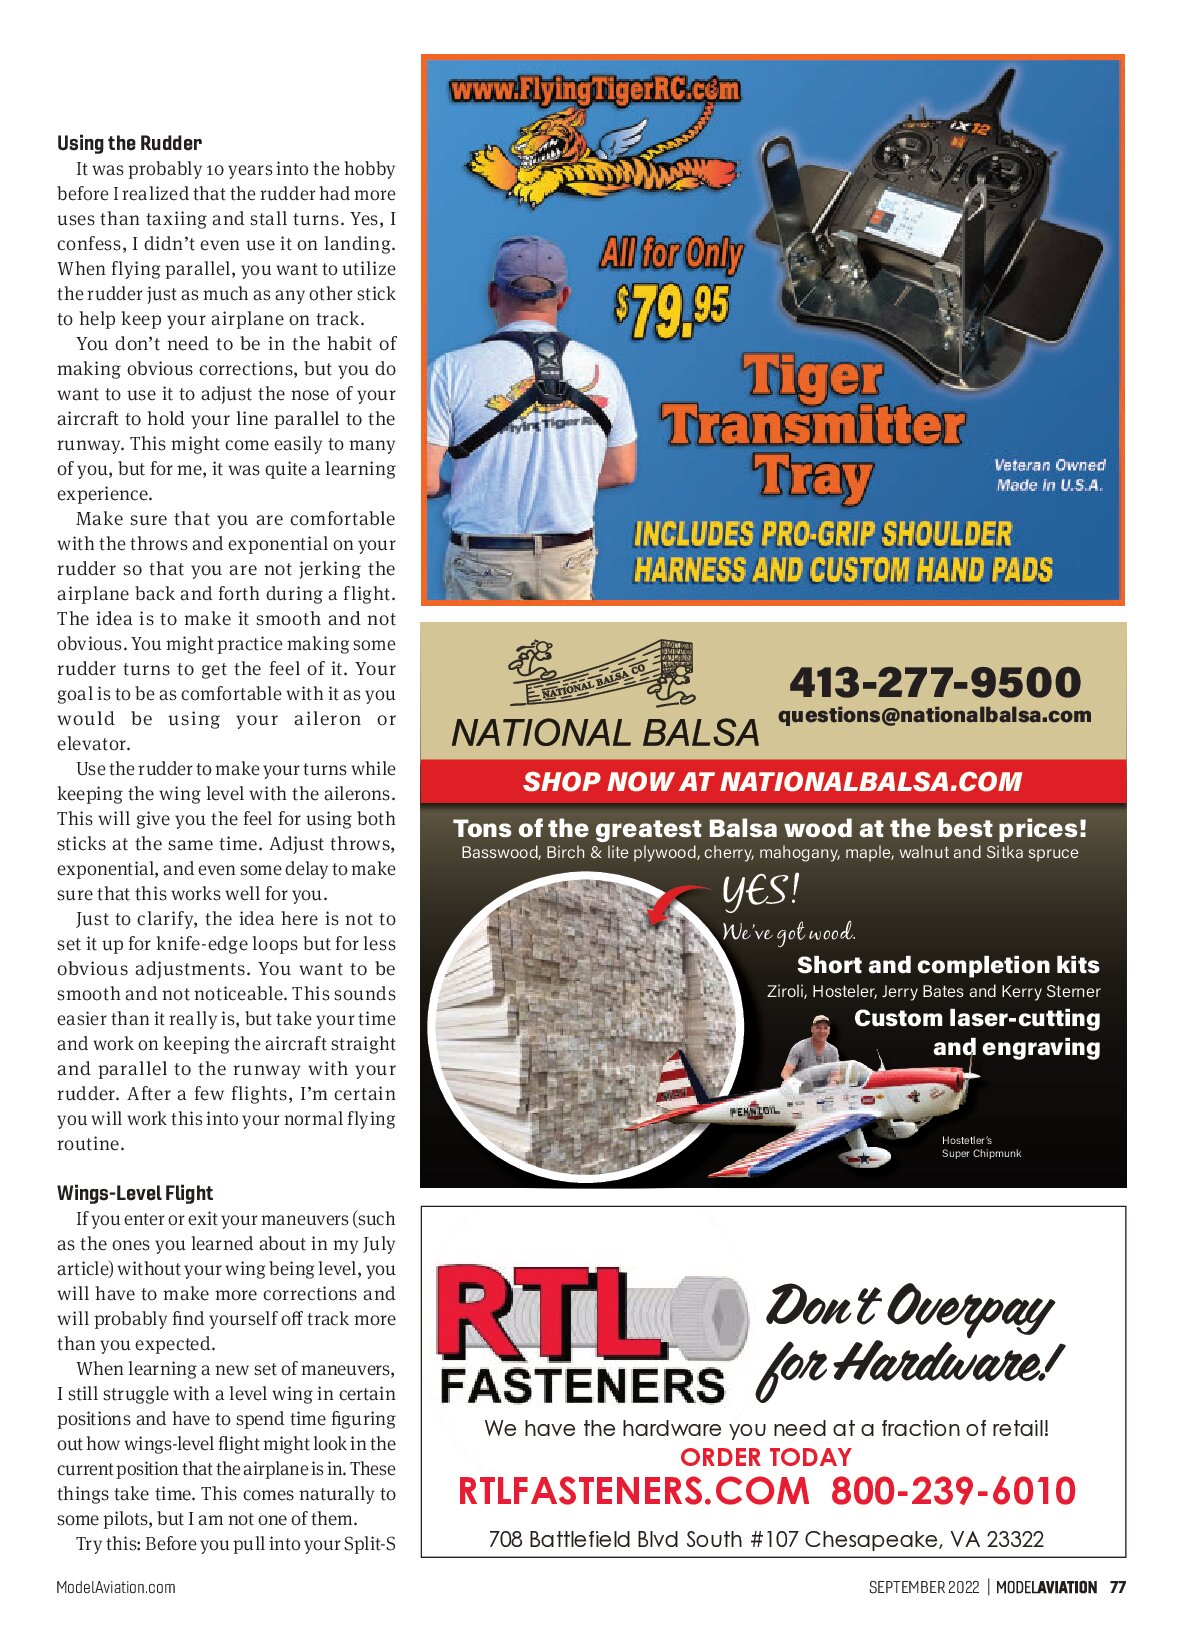
If you enter or exit your maneuvers (such as the ones you learned about in my July article) without your wing being level, you will have to make more corrections and will probably find yourself off track more than you expected.
When learning a new set of maneuvers, I still struggle with a level wing in certain positions and have to spend time figuring out how wings-level flight might look in the current position that the airplane is in. These things take time. This comes naturally to some pilots, but I am not one of them.
Try this: Before you pull into your Split-S

or Immelmann, check that your wing is level on entry and exit. Try to drive the airplane a little and make these small wing adjustments before adding elevator. You should find that you need less rudder work to keep your airplane parallel to the runway. This might not eliminate it, depending on the conditions, but it will minimize it.
Wind Correction
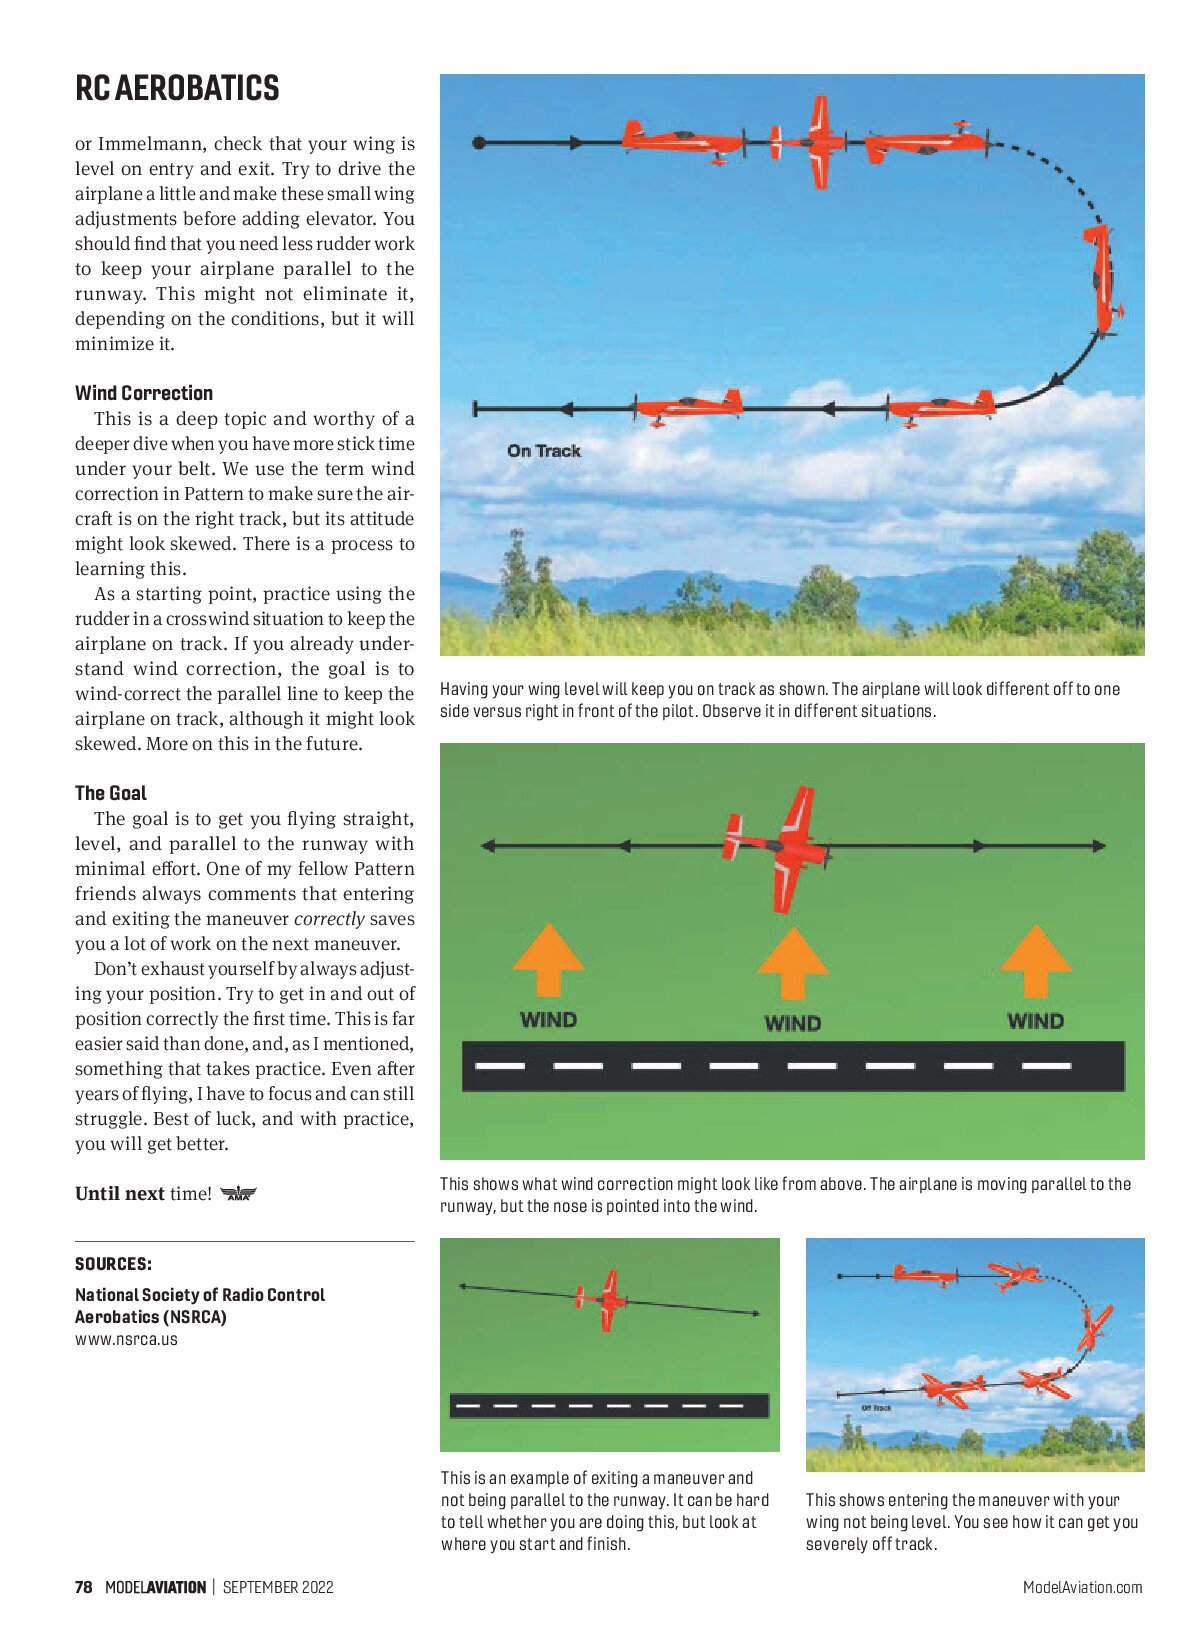
This is a deep topic and worthy of a deeper dive when you have more stick time under your belt. We use the term wind correction in Pattern to make sure the aircraft is on the right track, but its attitude might look skewed. There is a process to learning this.
As a starting point, practice using the rudder in a crosswind situation to keep the airplane on track. If you already understand wind correction, the goal is to wind-correct the parallel line to keep the airplane on track, although it might look skewed. More on this in the future.
The Goal
The goal is to get you flying straight, level, and parallel to the runway with minimal effort. One of my fellow Pattern friends always comments that entering and exiting the maneuver correctly saves you a lot of work on the next maneuver.
Don’t exhaust yourself by always adjusting your position. Try to get in and out of position correctly the first time. This is far easier said than done, and, as I mentioned, something that takes practice. Even after years of flying, I have to focus and can still struggle. Best of luck, and with practice, you will get better.
Until next time!


SOURCES:
National Society of Radio Control Aerobatics (NSRCA)
www.nsrca.us