HANSA BRANDENBURG W.29 UPDATE

By Thayer Syme | thayer@flying-models.com
LAST MENTIONED IN my July 2021 column, the Hansa Brandenburg W.29 that Chris Parent and I developed was the basis for a group build at the 2021 Northeast Electric Aircraft Technology (NEAT) Fair. The 36-inch wingspan Sport Scale model is built primarily from 6mm Depron foam, and I am happy to report that it was a great success.
For those who might not recall, the Hansa Brandenburg W.29 was a two-seat, World War I German monoplane fighter that flew on floats from North Sea bases. Its most prominent feature was the “inverted” rudder, designed to increase visibility for the observer/gunner in the rear seat and reduce the chance of it being shot off the airframe by its own crew!
The W.29 was used after the war by several countries for training, search and rescue, mail delivery, and other tasks for which its basic design was suited. Some examples remained in active service until the 1930s.
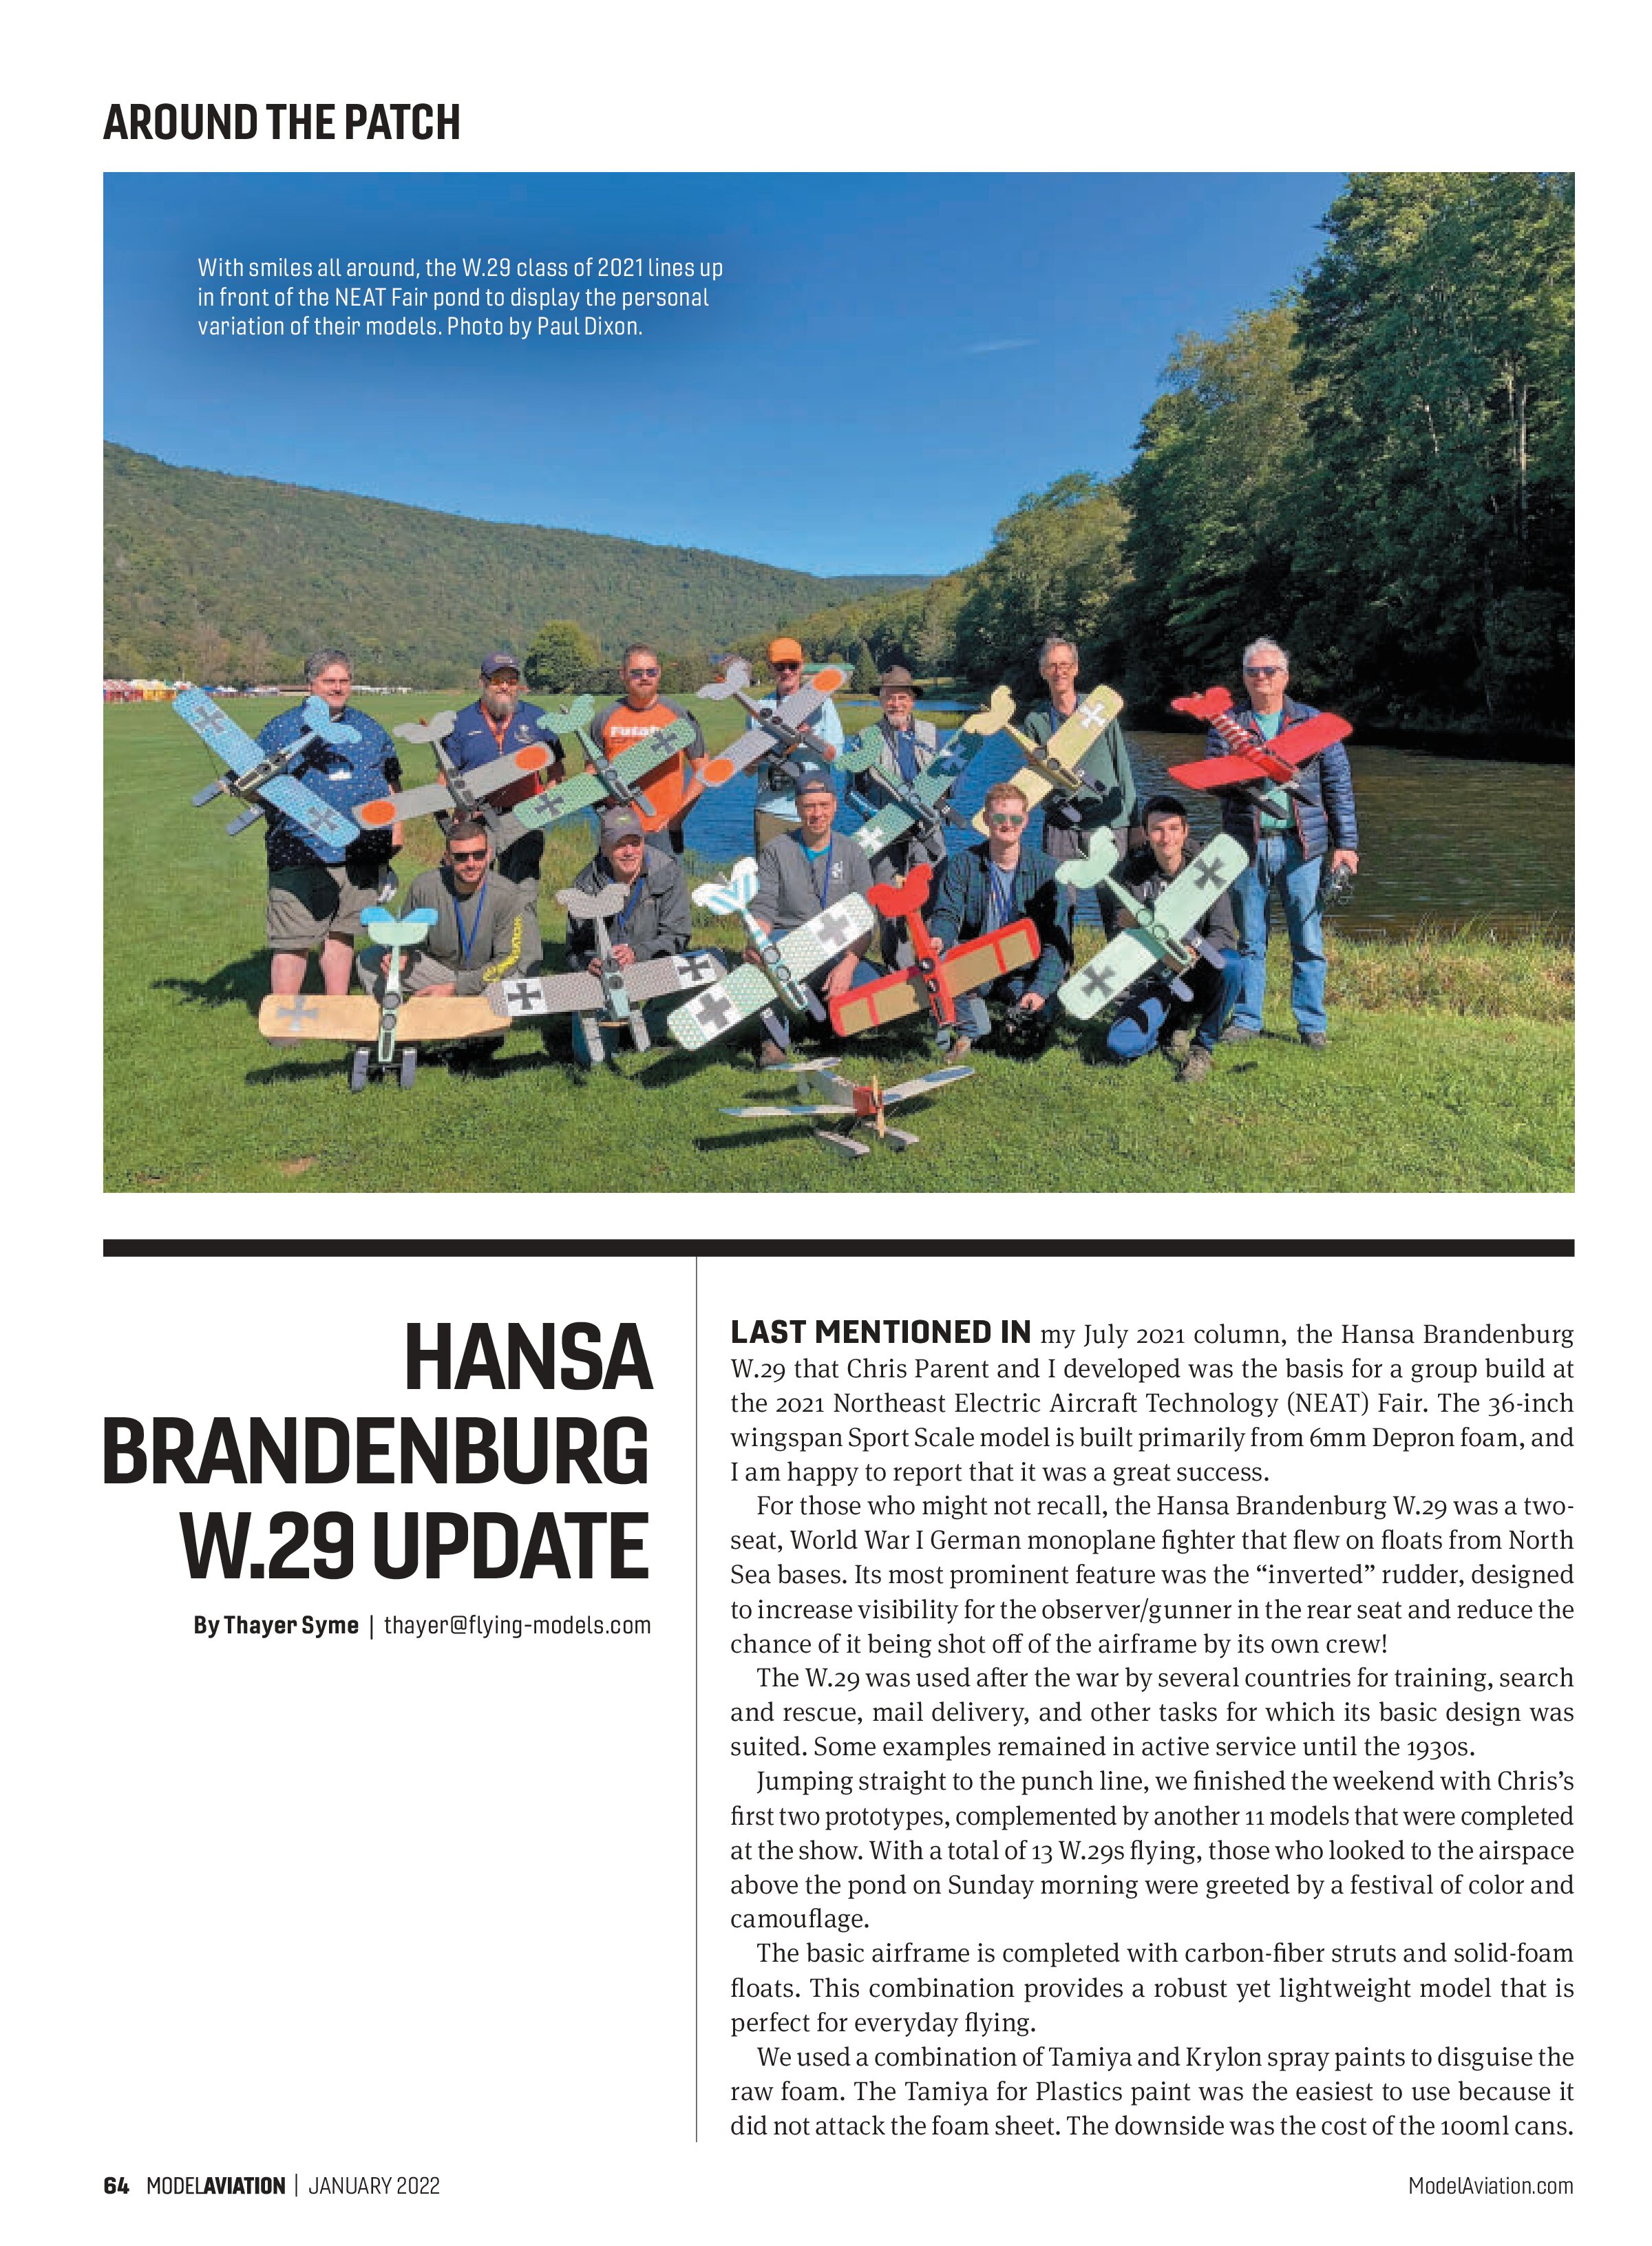
Jumping straight to the punch line, we finished the weekend with Chris’s first two prototypes, complemented by another 11 models that were completed at the show. With a total of 13 W.29s flying, those who looked to the airspace above the pond on Sunday morning were greeted by a festival of color and camouflage.
The basic airframe is completed with carbon-fiber struts and solid-foam floats. This combination provides a robust yet lightweight model that is perfect for everyday flying.
We used a combination of Tamiya and Krylon spray paints to disguise the raw foam. The Tamiya for Plastics paint was the easiest to use because it did not attack the foam sheet. The downside was the cost of the 100ml cans.
Krylon Fusion and ColorMax also worked, with their 400ml cans both less expensive than the Tamiya and significantly larger. The downside is that their solvents/propellants will attack the foam if applied too heavily, so more care is needed when applying these paints.
Our choices for power were the small 2203-52 Cobra motor and 11-amp ESC that are available from Innov8tive Designs. This motor worked out perfectly when coupled with an APC 8 x 3.8 slow-flyer propeller and a 2S LiPo battery.
For those who have not visited the Innov8tive Designs website yet, please do so. Owner Lucien Miller believes that an informed customer is more likely to be a happy customer. Toward that end, he tests each new motor size with a full range of suitable battery and propeller combinations, and then shares his resulting data on the company’s website. Such data makes it easy to match the ideal power to your new airframe.
The battery choice was not as critical. In the end, we found that the model had a forgiving center of gravity (CG) range, and most balanced well with 2S LiPo packs in the 500 to 1,000 mAh range.
The W.29 was conceived as a basic three-channel model. As such, it needs only a pair of servos to maintain control. I laser cut the servo trays to accommodate Hitec’s benchmark HS-55 servo, a dependable servo that has been available for years. The affordable HS-55 has proven to be well constructed and reliable for models of this size and weight range.
The basic airframe is quite simple, with fewer than 20 laser-cut Depron pieces making up the inventory. The motor and servo mount is laser-cut from 1/8-inch light plywood. The floats were precut from 2-inch pink foam sheet that was salvaged from a construction site, using my modified Stepcraft desktop CNC machine. The struts are all 1.5mm pultruded carbon-fiber rod from Windcatcher RC, and a few remaining pieces of styrene sheet and craft foam made up the balance of the kit, which will soon be available from the Flying Models plans website.
Construction began with the fuselage assembly and went quickly because of the low parts count. The upper fuselage sheeting was the last part added so that we could install the Du-Bro pushrods before closing in the aft fuselage.
Most builders used foam-safe CA glue from Bob Smith Industries or Zap Glue for assembly. To avoid interaction between the foam-safe kicker and paint when finishing, we wiped down the completed fuselage assemblies with rubbing alcohol before adding color. The wing and tail surfaces were painted before assembly, so any interaction was not a concern for them.
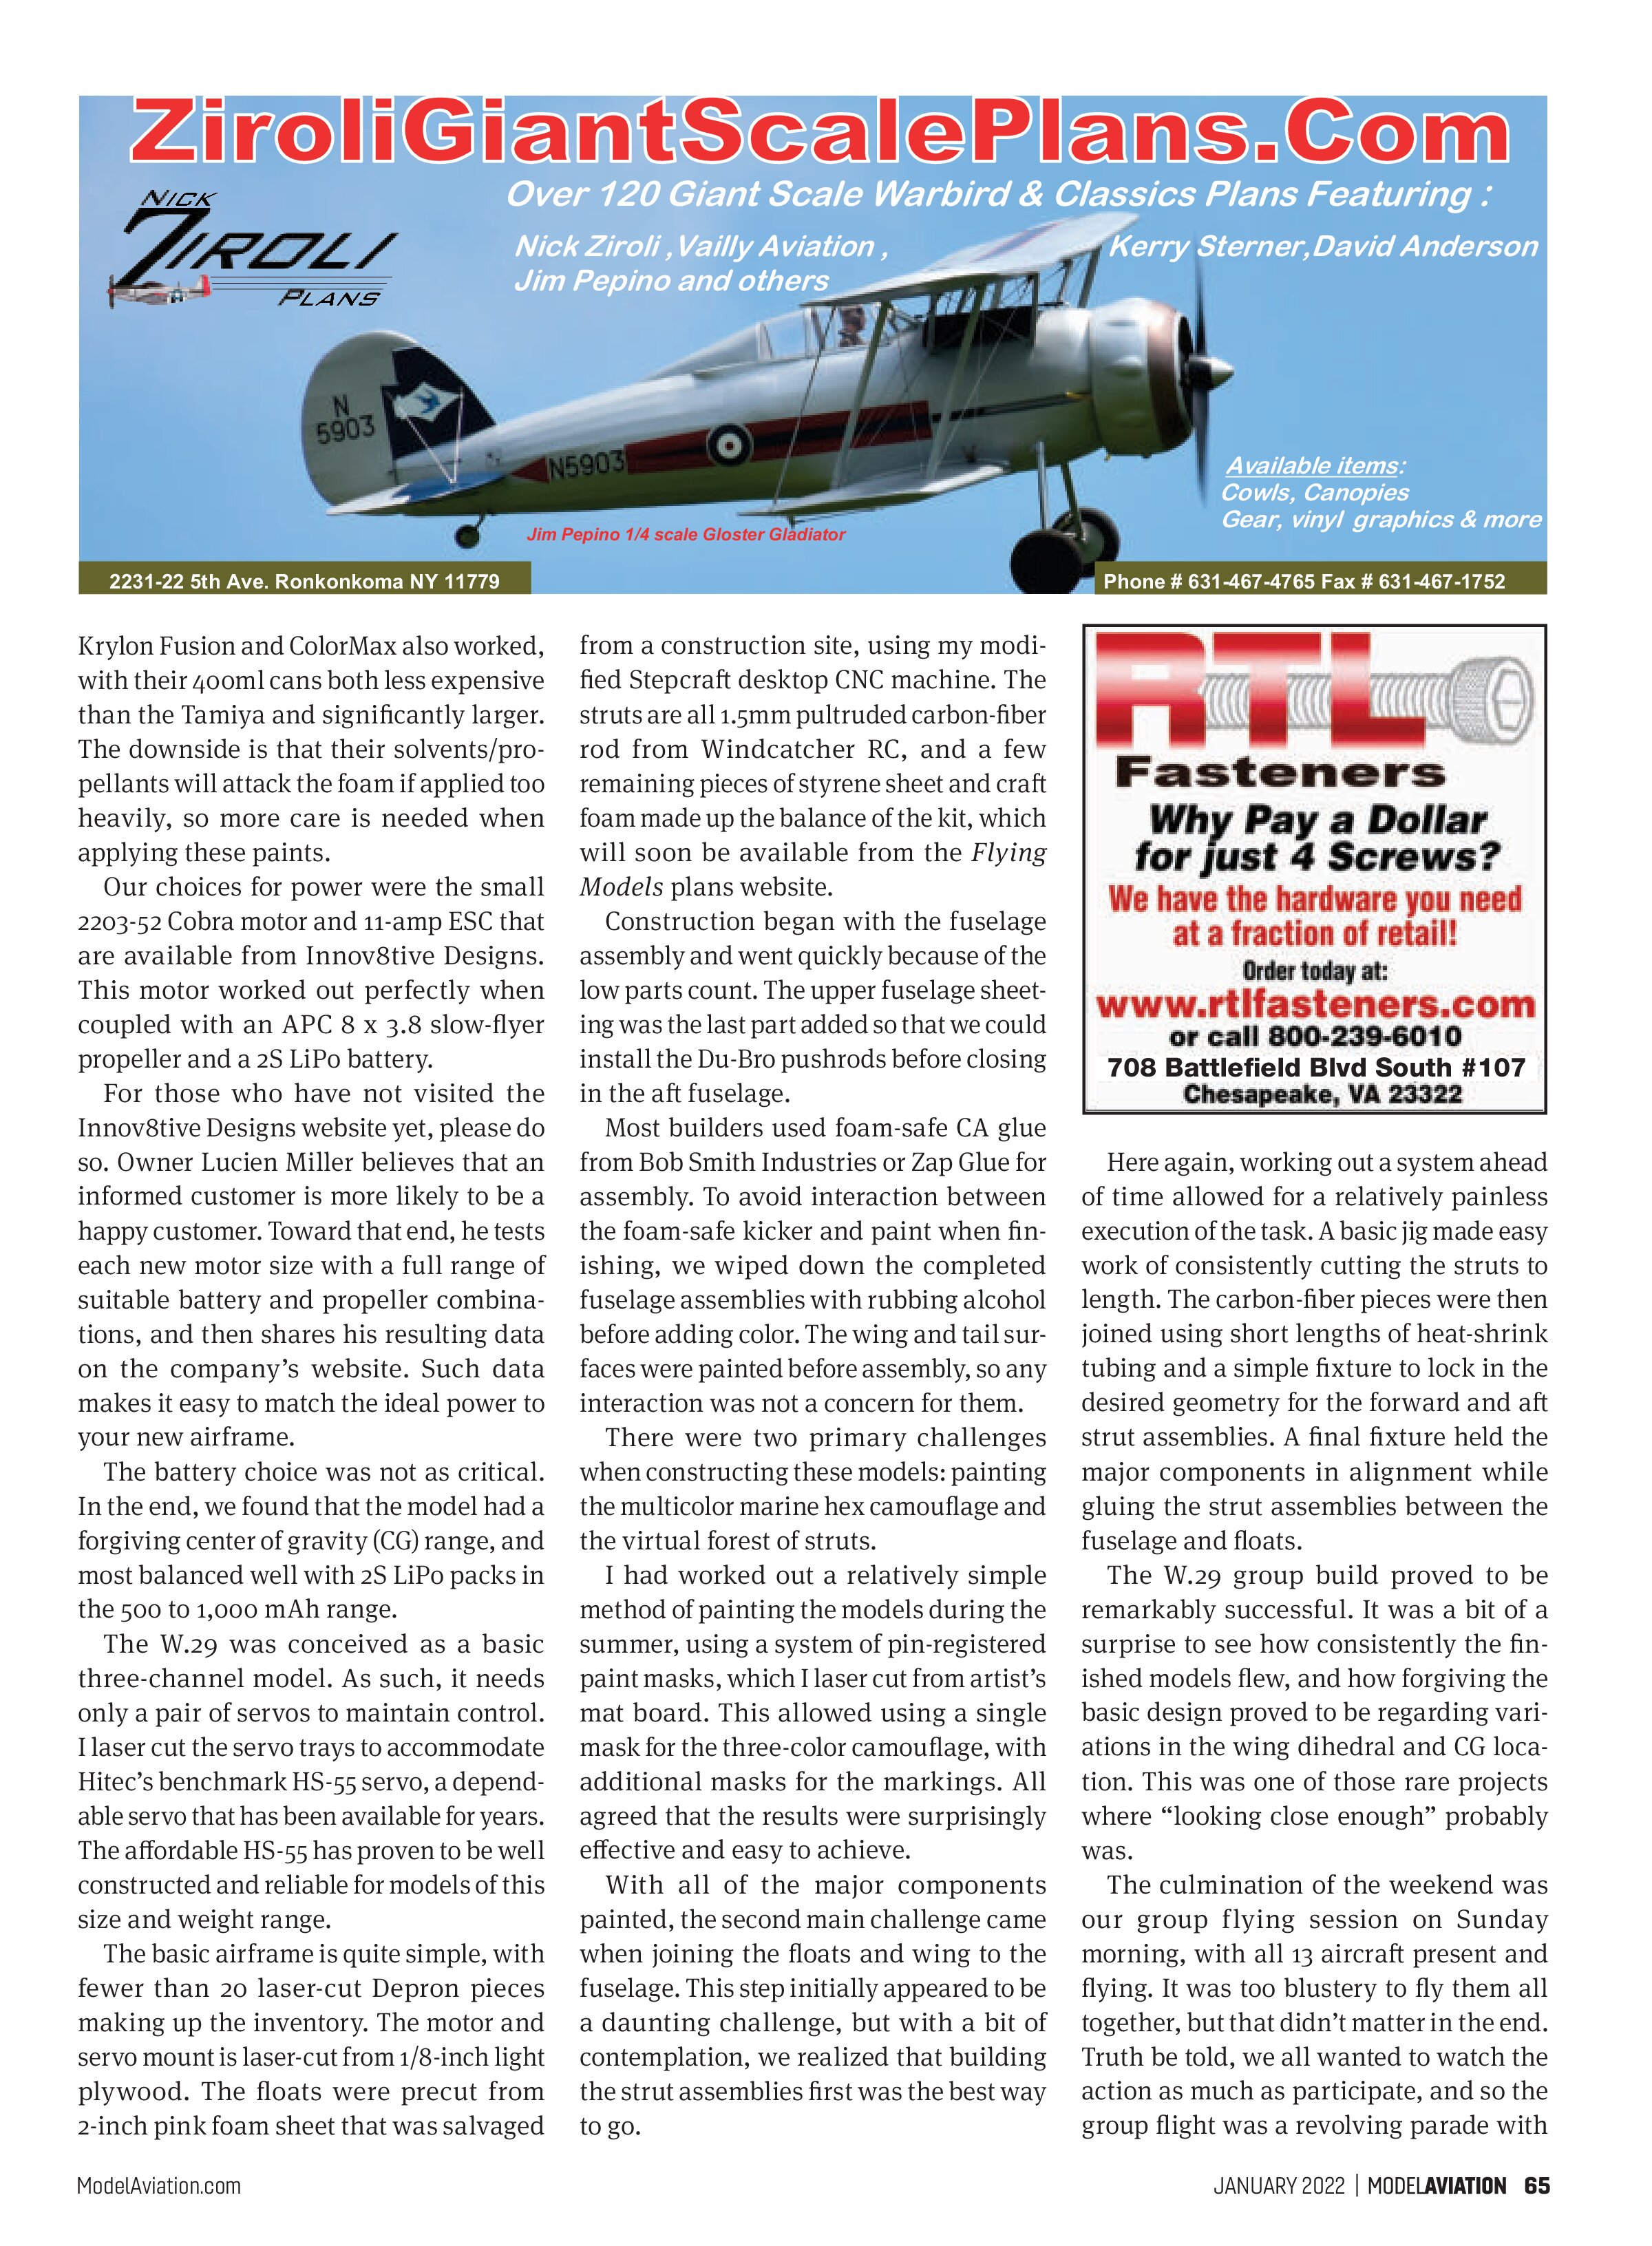
There were two primary challenges when constructing these models: painting the multicolor marine hex camouflage and the virtual forest of struts.
I had worked out a relatively simple method of painting the models during the summer, using a system of pin-registered paint masks, which I laser cut from artist’s mat board. This allowed using a single mask for the three-color camouflage, with additional masks for the markings. All agreed that the results were surprisingly effective and easy to achieve.
With all of the major components painted, the second main challenge came when joining the floats and wing to the fuselage. This step initially appeared to be a daunting challenge, but with a bit of contemplation, we realized that building the strut assemblies first was the best way to go.
Here again, working out a system ahead of time allowed for a relatively painless execution of the task. A basic jig made easy work of consistently cutting the struts to length. The carbon-fiber pieces were then joined using short lengths of heat-shrink tubing and a simple fixture to lock in the desired geometry for the forward and aft strut assemblies. A final fixture held the major components in alignment while gluing the strut assemblies between the fuselage and floats.
The W.29 group build proved to be remarkably successful. It was a bit of a surprise to see how consistently the finished models flew, and how forgiving the basic design proved to be regarding variations in the wing dihedral and CG location. This was one of those rare projects where “looking close enough” probably was.
The culmination of the weekend was our group flying session on Sunday morning, with all 13 aircraft present and flying. It was too blustery to fly them all together, but that didn’t matter in the end. Truth be told, we all wanted to watch the action as much as participate, and so the group flight was a revolving parade with
approximately half of the aircraft in the air at any given time.
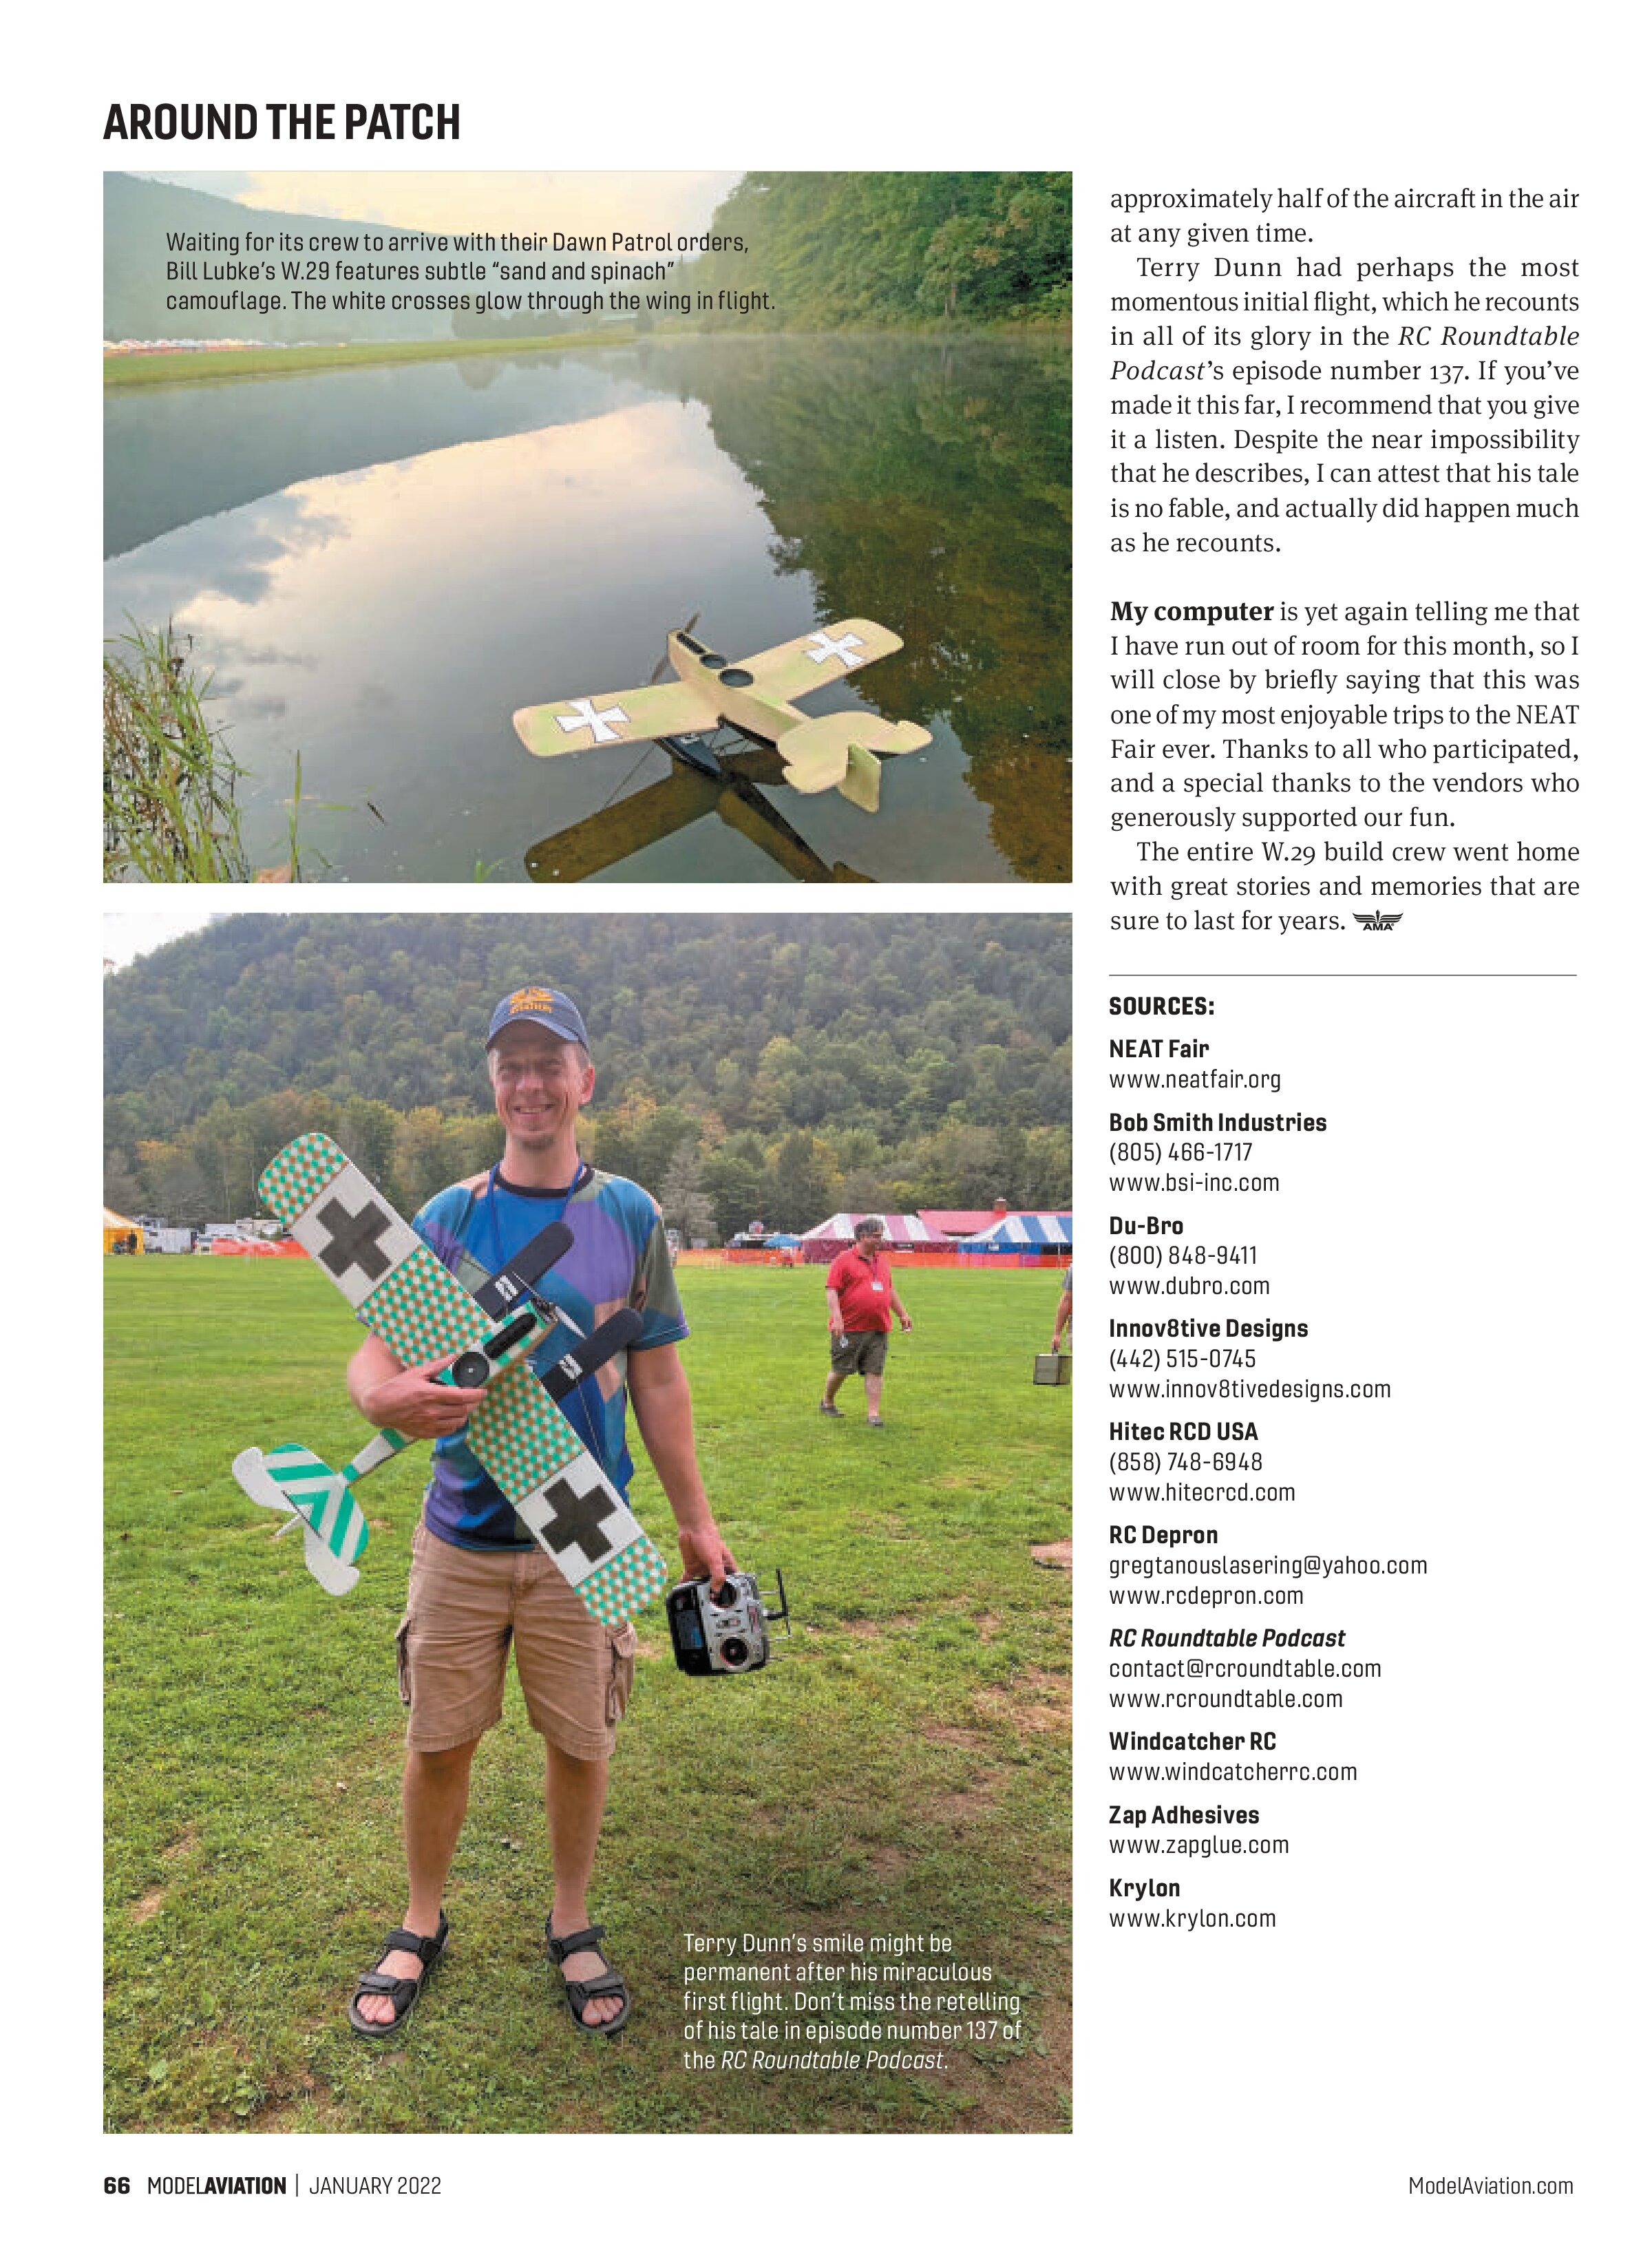
Terry Dunn had perhaps the most momentous initial flight, which he recounts in all of its glory in the RC Roundtable Podcast’s episode number 137. If you’ve made it this far, I recommend that you give it a listen. Despite the near impossibility that he describes, I can attest that his tale is no fable, and actually did happen much as he recounts.
My computer is yet again telling me that I have run out of room for this month, so I will close by briefly saying that this was one of my most enjoyable trips to the NEAT Fair ever. Thanks to all who participated, and a special thanks to the vendors who generously supported our fun.
The entire W.29 build crew went home with great stories and memories that are sure to last for years.


SOURCES:
NEAT Fair
www.neatfair.org
Bob Smith Industries
(805) 466-1717
www.bsi-inc.com
Du-Bro
(800) 848-9411
www.dubro.com
Innov8tive Designs
(442) 515-0745
www.innov8tivedesigns.com
Hitec RCD USA
(858) 748-6948
www.hitecrcd.com
RC Depron
gregtanouslasering@yahoo.com
www.rcdepron.com
RC Roundtable Podcast
contact@rcroundtable.com
www.rcroundtable.com
Windcatcher RC
www.windcatcherrc.com
Zap Adhesives
www.zapglue.com
Krylon
www.krylon.com