Transmitter Settings
that the steel ball on the main rotor blade pitch arm is loose and requires tightening, or you might find that the plastic ball links or the servo gear train are worn and have play.
Another source of control flexibility is weak servos. Check to make sure that the double-sided foam tape that holds the gyro is not peeling. Most modern flybarless controllers prefer the use of thin, double-sided tape, such as 1mm thick, instead of the 2mm- to 3mm-thick, double-sided sticky foam tape that was used years ago on tail gyros. These situations can make hovering less precise and affect the performance of the flybarless gyro.
Nearly all helicopters that are sold on the market now are flybarless. The pitching moment from the main rotor blade is transmitted directly from the blade pitch control arm through the pushrods and swashplate to the servos. Every time the helicopter blades encounter a gust or perturbation, the servos feel the jolt.
A decade ago, model helicopter designers sometimes inserted a push-pull bellcrank between the servo and the swashplate to help take up the feedback load from the swashplate to the servos and to reduce sideloads on the servo output shaft. Modern helicopter designers connect the servo directly to the swashplate because it is easier to design and build, and modern digital servos have a more powerful motor, stronger holding torque, more precise centering, and a better metal gear train.
Servo performance has improved throughout the last 10 years. I recommend that high-voltage digital servos with metal gear trains be used for all medium to large flybarless helicopters and that the servo output shaft be supported by two ball bearings.
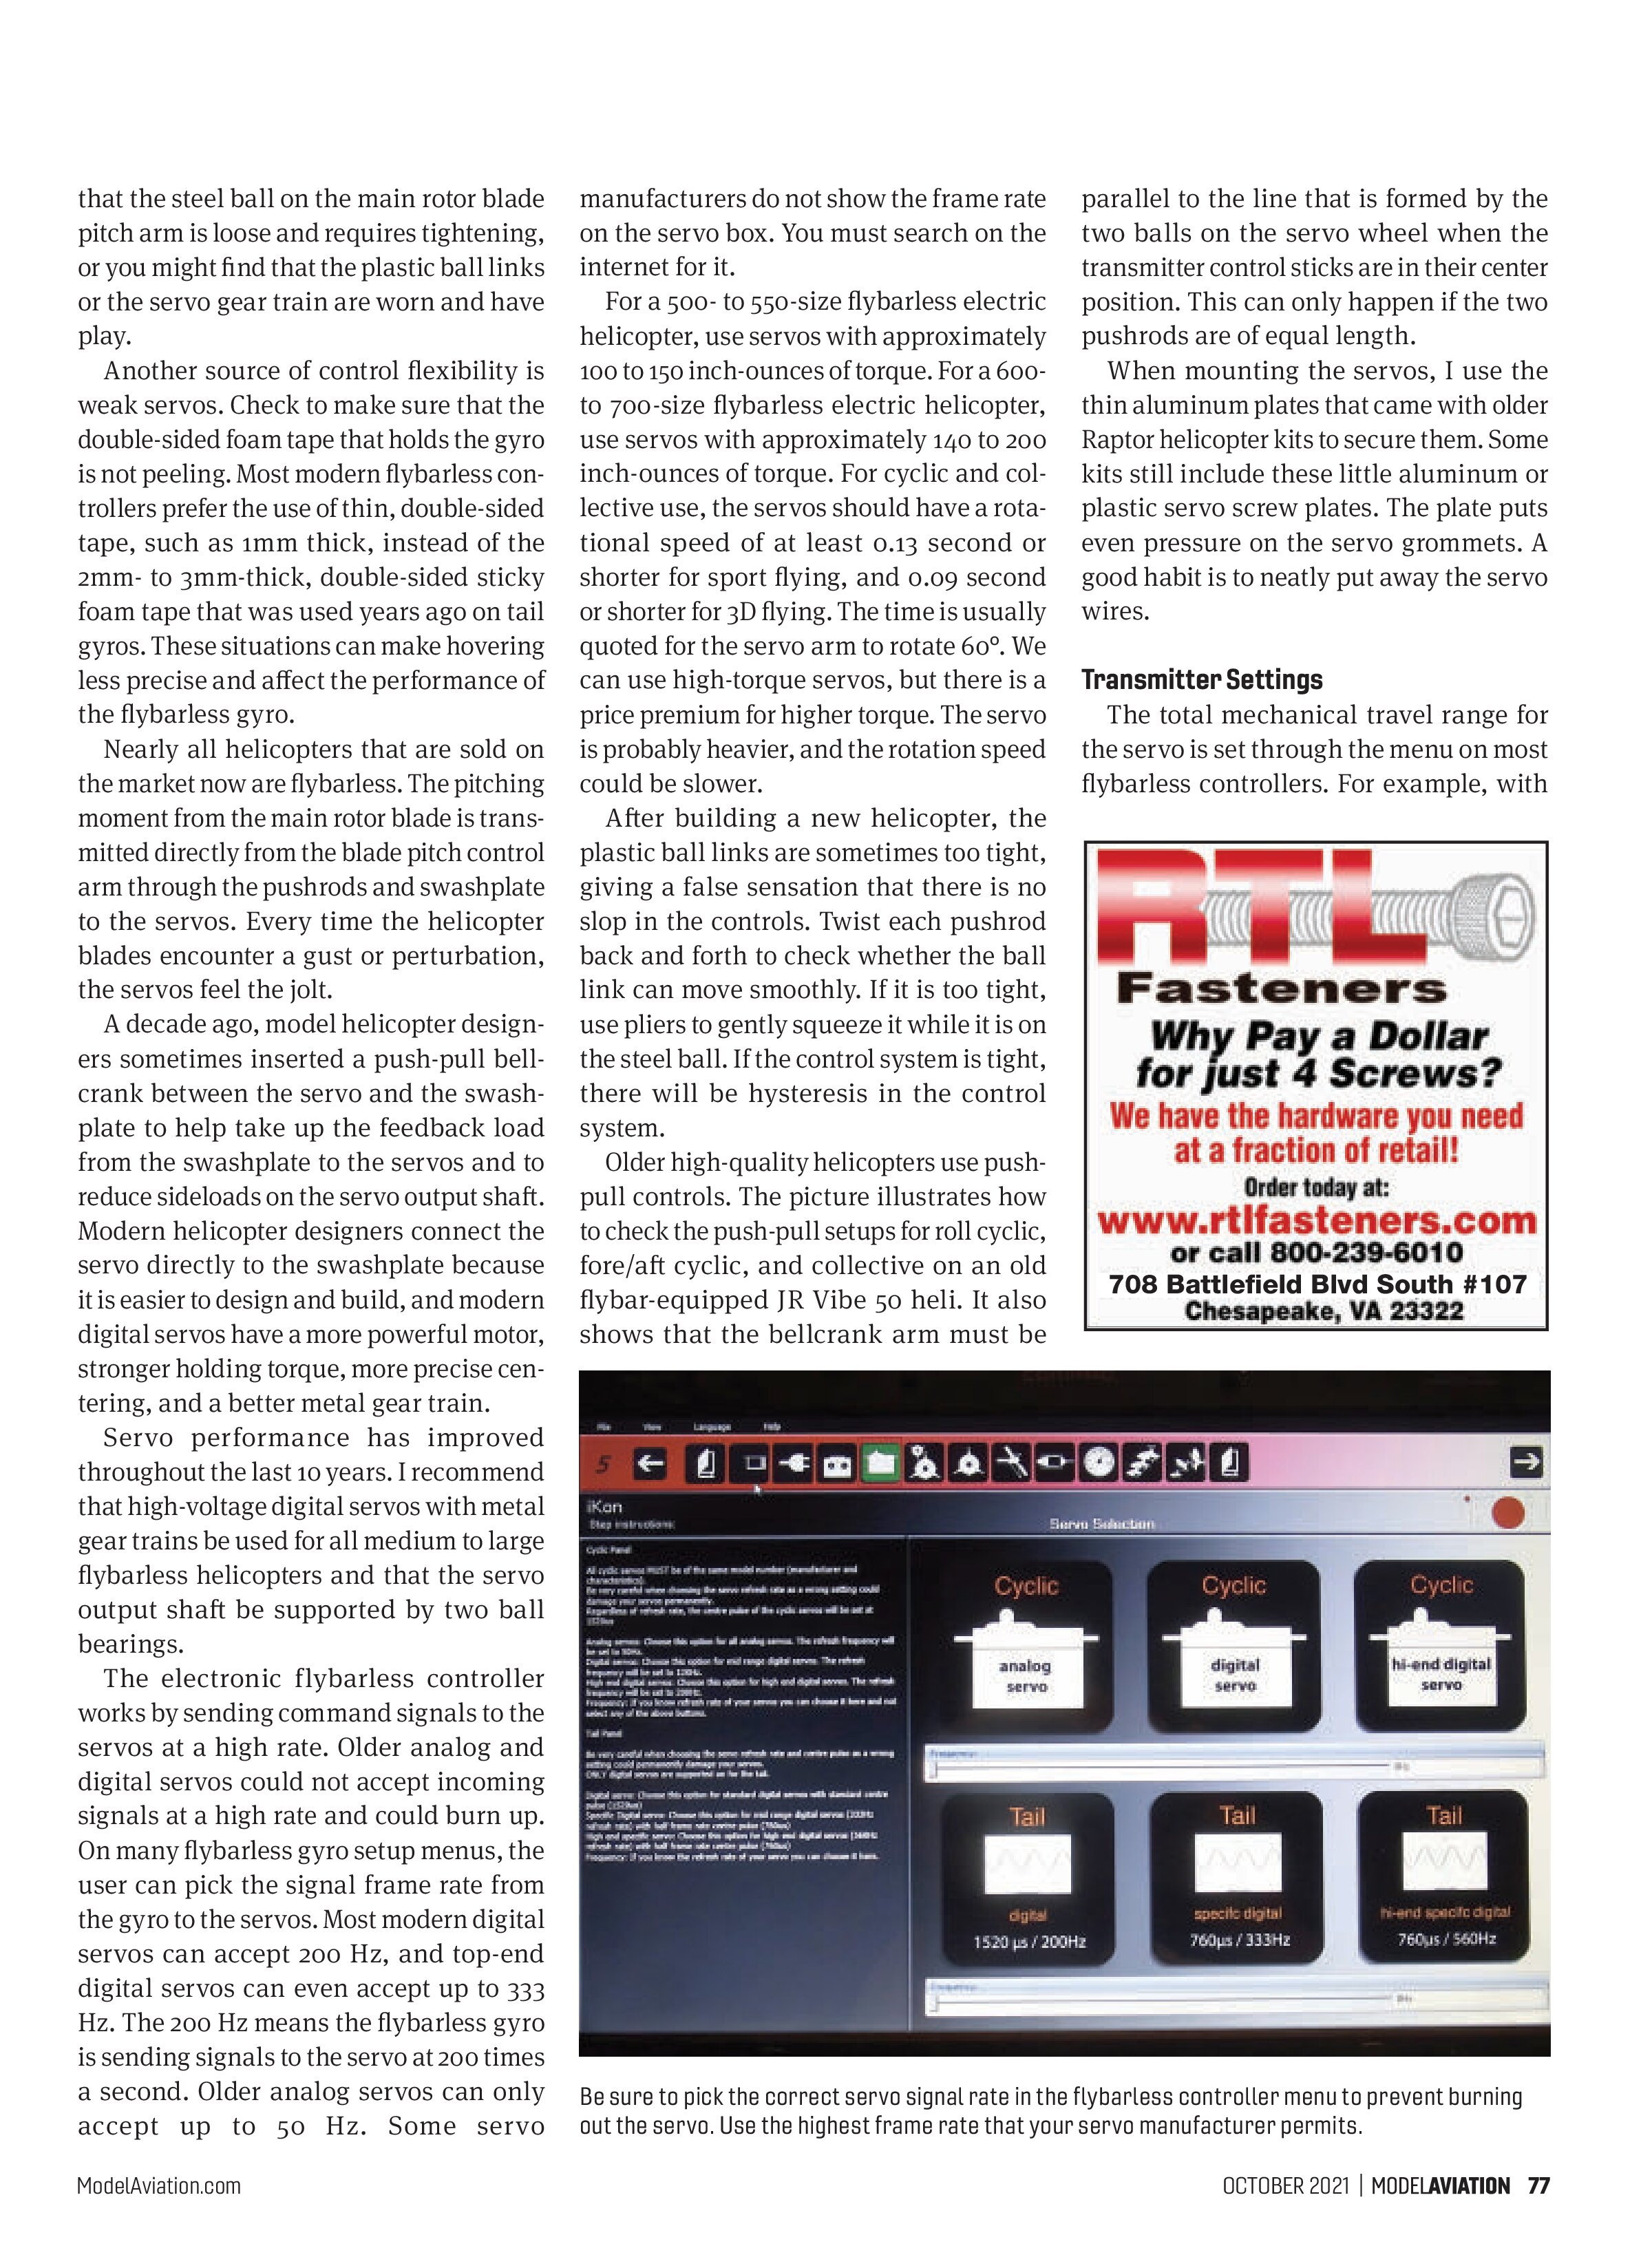
The electronic flybarless controller works by sending command signals to the servos at a high rate. Older analog and digital servos could not accept incoming signals at a high rate and could burn up. On many flybarless gyro setup menus, the user can pick the signal frame rate from the gyro to the servos. Most modern digital servos can accept 200 Hz, and top-end digital servos can even accept up to 333 Hz. The 200 Hz means the flybarless gyro is sending signals to the servo at 200 times a second. Older analog servos can only accept up to 50 Hz. Some servo manufacturers do not show the frame rate on the servo box. You must search on the internet for it.
For a 500- to 550-size flybarless electric helicopter, use servos with approximately 100 to 150 inch-ounces of torque. For a 600- to 700-size flybarless electric helicopter, use servos with approximately 140 to 200 inch-ounces of torque. For cyclic and collective use, the servos should have a rotational speed of at least 0.13 second or shorter for sport flying, and 0.09 second or shorter for 3D flying. The time is usually quoted for the servo arm to rotate 60°. We can use high-torque servos, but there is a price premium for higher torque. The servo is probably heavier, and the rotation speed could be slower.
After building a new helicopter, the plastic ball links are sometimes too tight, giving a false sensation that there is no slop in the controls. Twist each pushrod back and forth to check whether the ball link can move smoothly. If it is too tight, use pliers to gently squeeze it while it is on the steel ball. If the control system is tight, there will be hysteresis in the control system.
Older high-quality helicopters use push-pull controls. The picture illustrates how to check the push-pull setups for roll cyclic, fore/aft cyclic, and collective on an old flybar-equipped JR Vibe 50 heli. It also shows that the bellcrank arm must be
parallel to the line that is formed by the two balls on the servo wheel when the transmitter control sticks are in their center position. This can only happen if the two pushrods are of equal length.
When mounting the servos, I use the thin aluminum plates that came with older Raptor helicopter kits to secure them. Some kits still include these little aluminum or plastic servo screw plates. The plate puts even pressure on the servo grommets. A good habit is to neatly put away the servo wires.
Transmitter Settings
The total mechanical travel range for the servo is set through the menu on most flybarless controllers. For example, with

Be sure to pick the correct servo signal rate in the flybarless controller menu to prevent burning out the servo. Use the highest frame rate that your servo manufacturer permits.

the popular and successful BEASTX MICROBEAST flybarless system, Mikado VBar mini Version 5.3, and iKon flybarless gyros, the amount of swashplate tilt angle and tail rotor pitch travel range are set through the flybarless controllers’ menu; adjust the total travel so that there is no mechanical binding.
Having a tremendous amount of mechanical tilt for the swashplate and tail rotor blade pitch angle travel does not guarantee quicker control response. The quickness of the cyclic and yaw control responses is determined by the travel endpoint or travel throw in your transmitter. When you buy a new transmitter, the default travel throw value is 100% for each channel. To make the helicopter roll, pitch, or yaw faster, you need to increase the travel endpoint to greater than 100%.
To get the helicopter to have a balanced control feel (to make the roll rate the same as the pitch rate), it might sometimes require different travel endpoints for the aileron and elevator channels. I notice that many helicopters require slightly higher travel endpoint values for the ailerons than for the elevator. The aileron travel is at
approximately 115% and the elevator travel is nearly 110% on most of my helicopters.
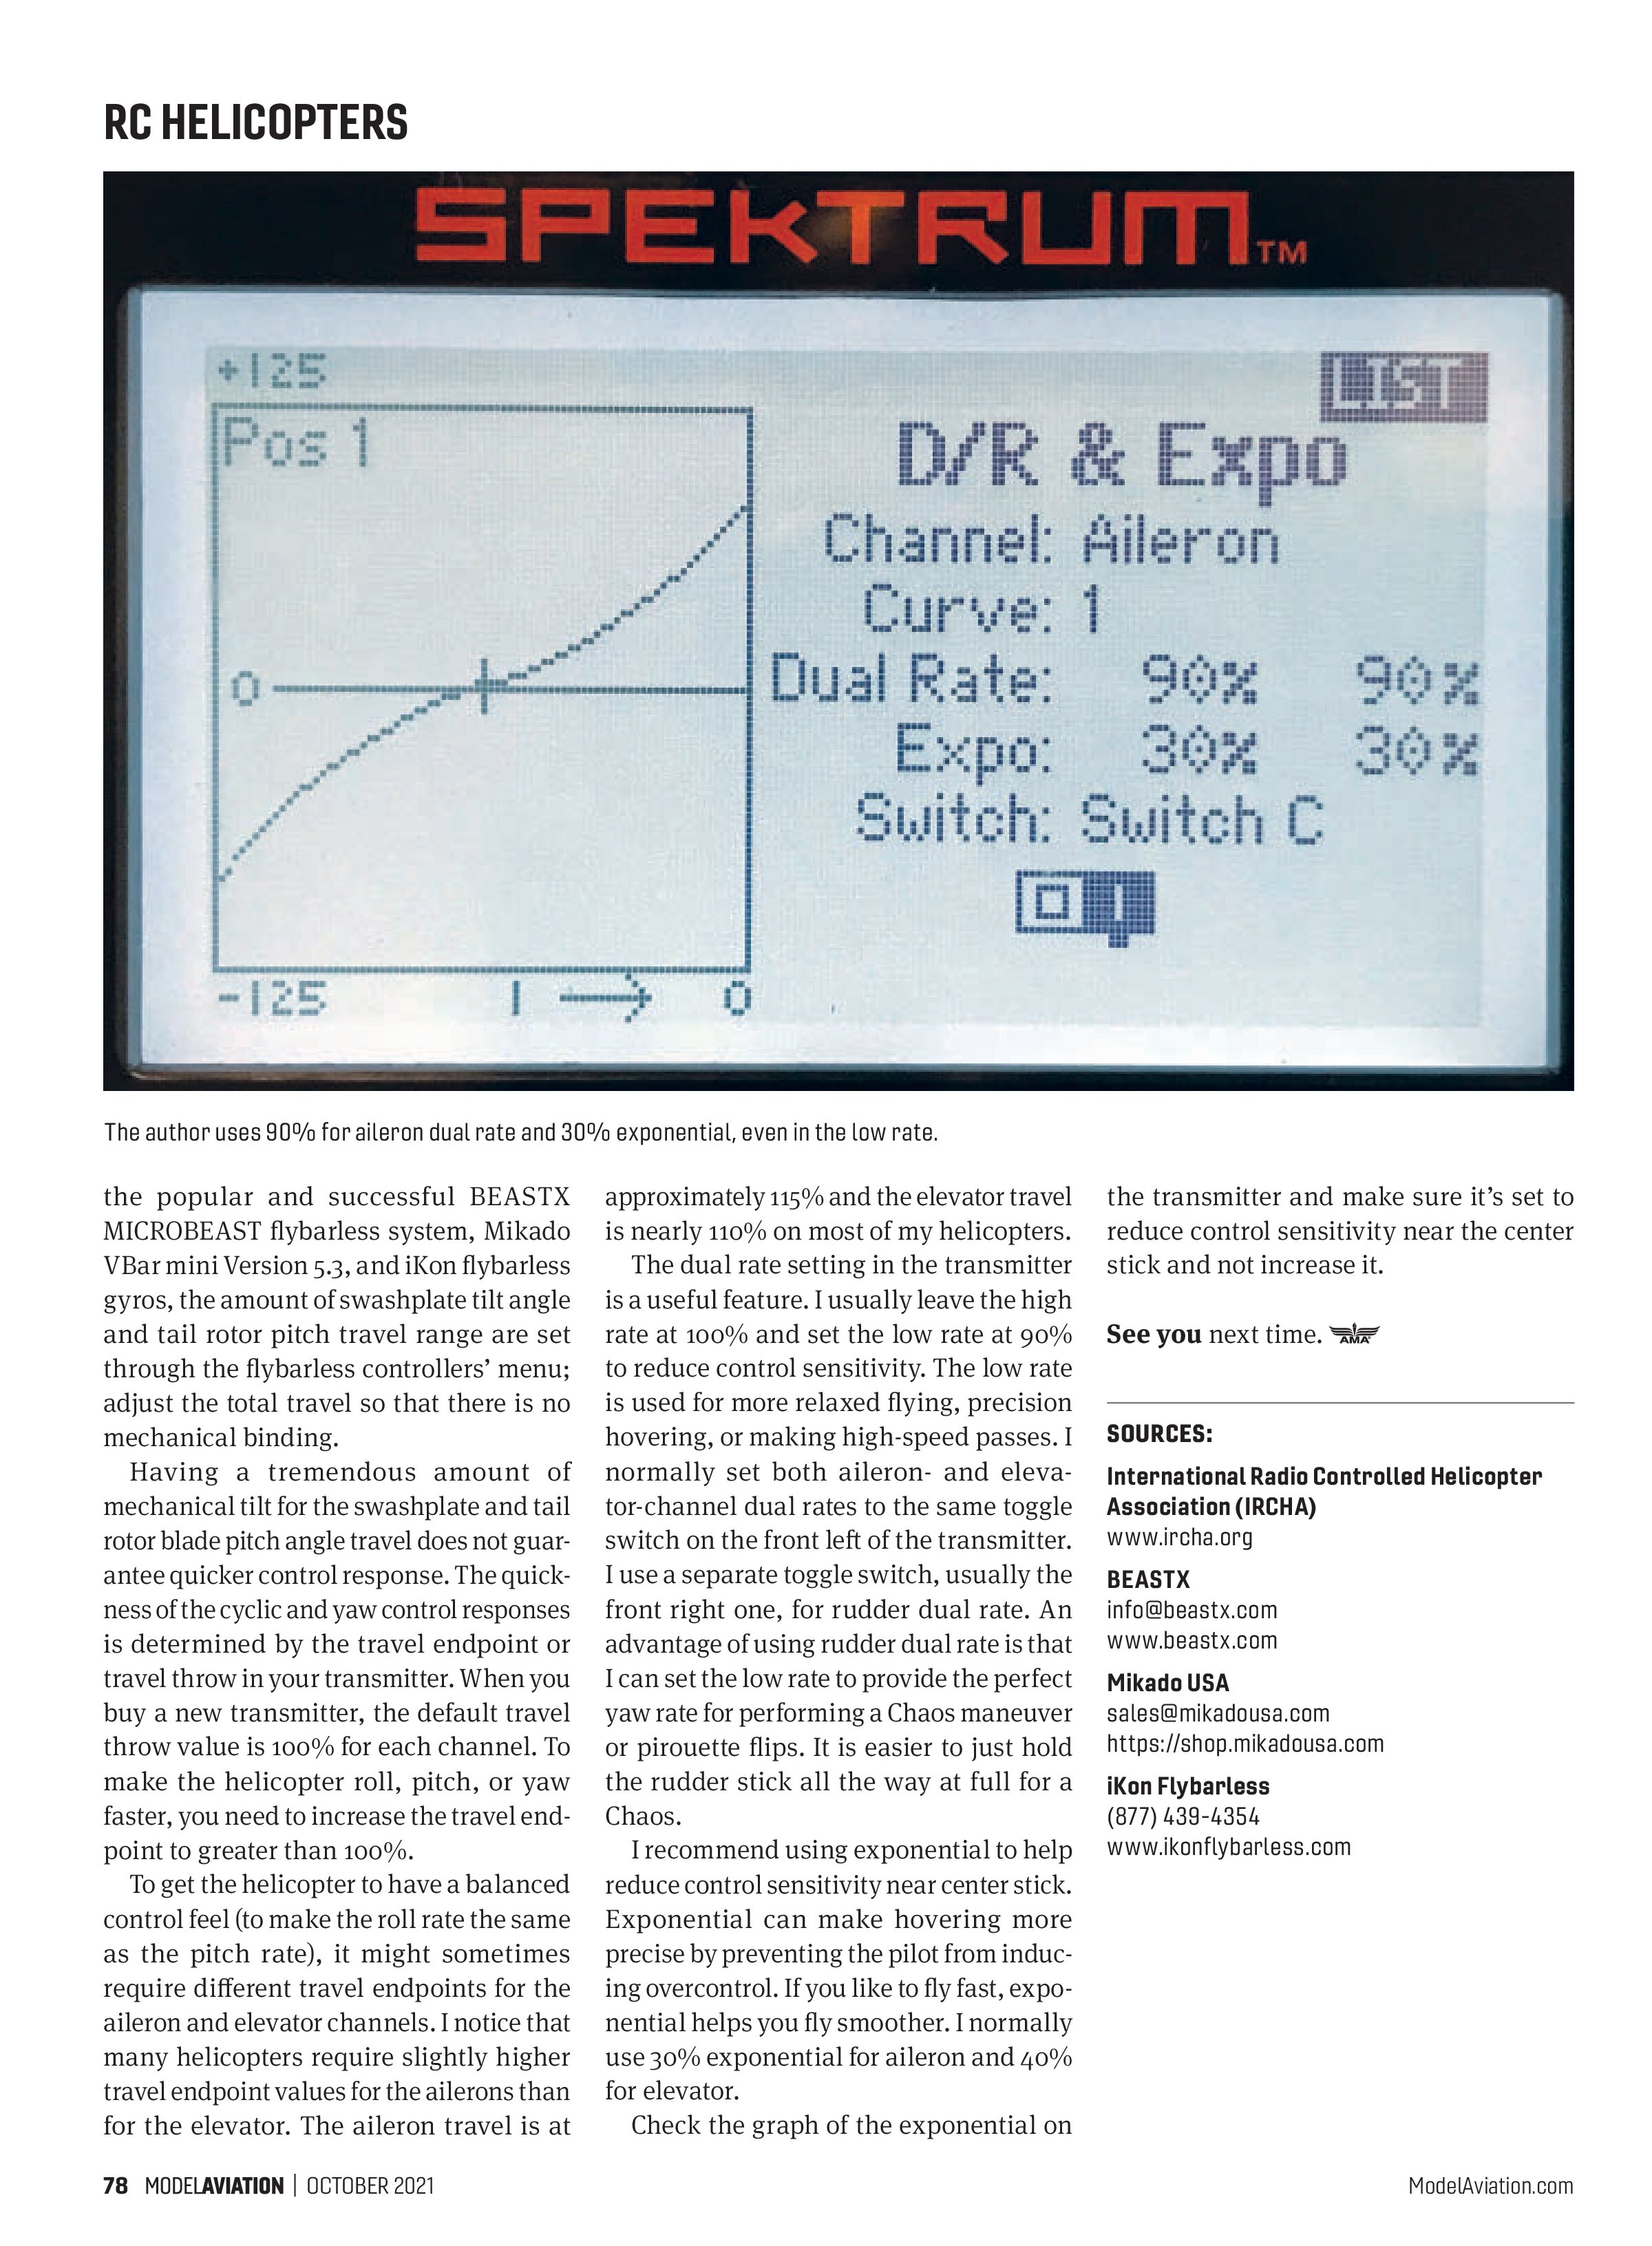
The dual rate setting in the transmitter is a useful feature. I usually leave the high rate at 100% and set the low rate at 90% to reduce control sensitivity. The low rate is used for more relaxed flying, precision hovering, or making high-speed passes. I normally set both aileron- and elevator-channel dual rates to the same toggle switch on the front left of the transmitter. I use a separate toggle switch, usually the front right one, for rudder dual rate. An advantage of using rudder dual rate is that I can set the low rate to provide the perfect yaw rate for performing a Chaos maneuver or pirouette flips. It is easier to just hold the rudder stick all the way at full for a Chaos.
I recommend using exponential to help reduce control sensitivity near center stick. Exponential can make hovering more precise by preventing the pilot from inducing overcontrol. If you like to fly fast, exponential helps you fly smoother. I normally use 30% exponential for aileron and 40% for elevator.
Check the graph of the exponential on the transmitter and make sure it’s set to reduce control sensitivity near the center stick and not increase it.
See you next time.
SOURCES:
International Radio Controlled Helicopter Association (IRCHA)
www.ircha.org
BEASTX
info@beastx.com
www.beastx.com
Mikado USA
sales@mikadousa.com
https://shop.mikadousa.com
iKon Flybarless
(877) 439-4354
www.ikonflybarless.com