RE “TREE” VED
SKY BUNNY
By Thayer Syme | thayer@flying-models.com

LONGTIME BUILDERS OFTEN APPRECIATE that simple models can be a great change of pace from our normal routine. Mixing it up with these so-called “quickie” projects now and again can be a great way to reset and take a breather after finishing—or even before starting—a more complex build.
You might recall that AMA members and Peck-Polymers teamed up last summer to host the Bill Warner Memorial Sky Bunny Postal Contest. In addition to honoring Bill and his great contributions to our hobby, the 2020 Postal Contest was also a chance for many to remember those long-ago summer days spent flying simple models such as the Sky Bunny. Several readers sent messages telling me that the contest offered a perfect excuse to build a rubber-powered model again, and one particularly gratifying exchange stands out.
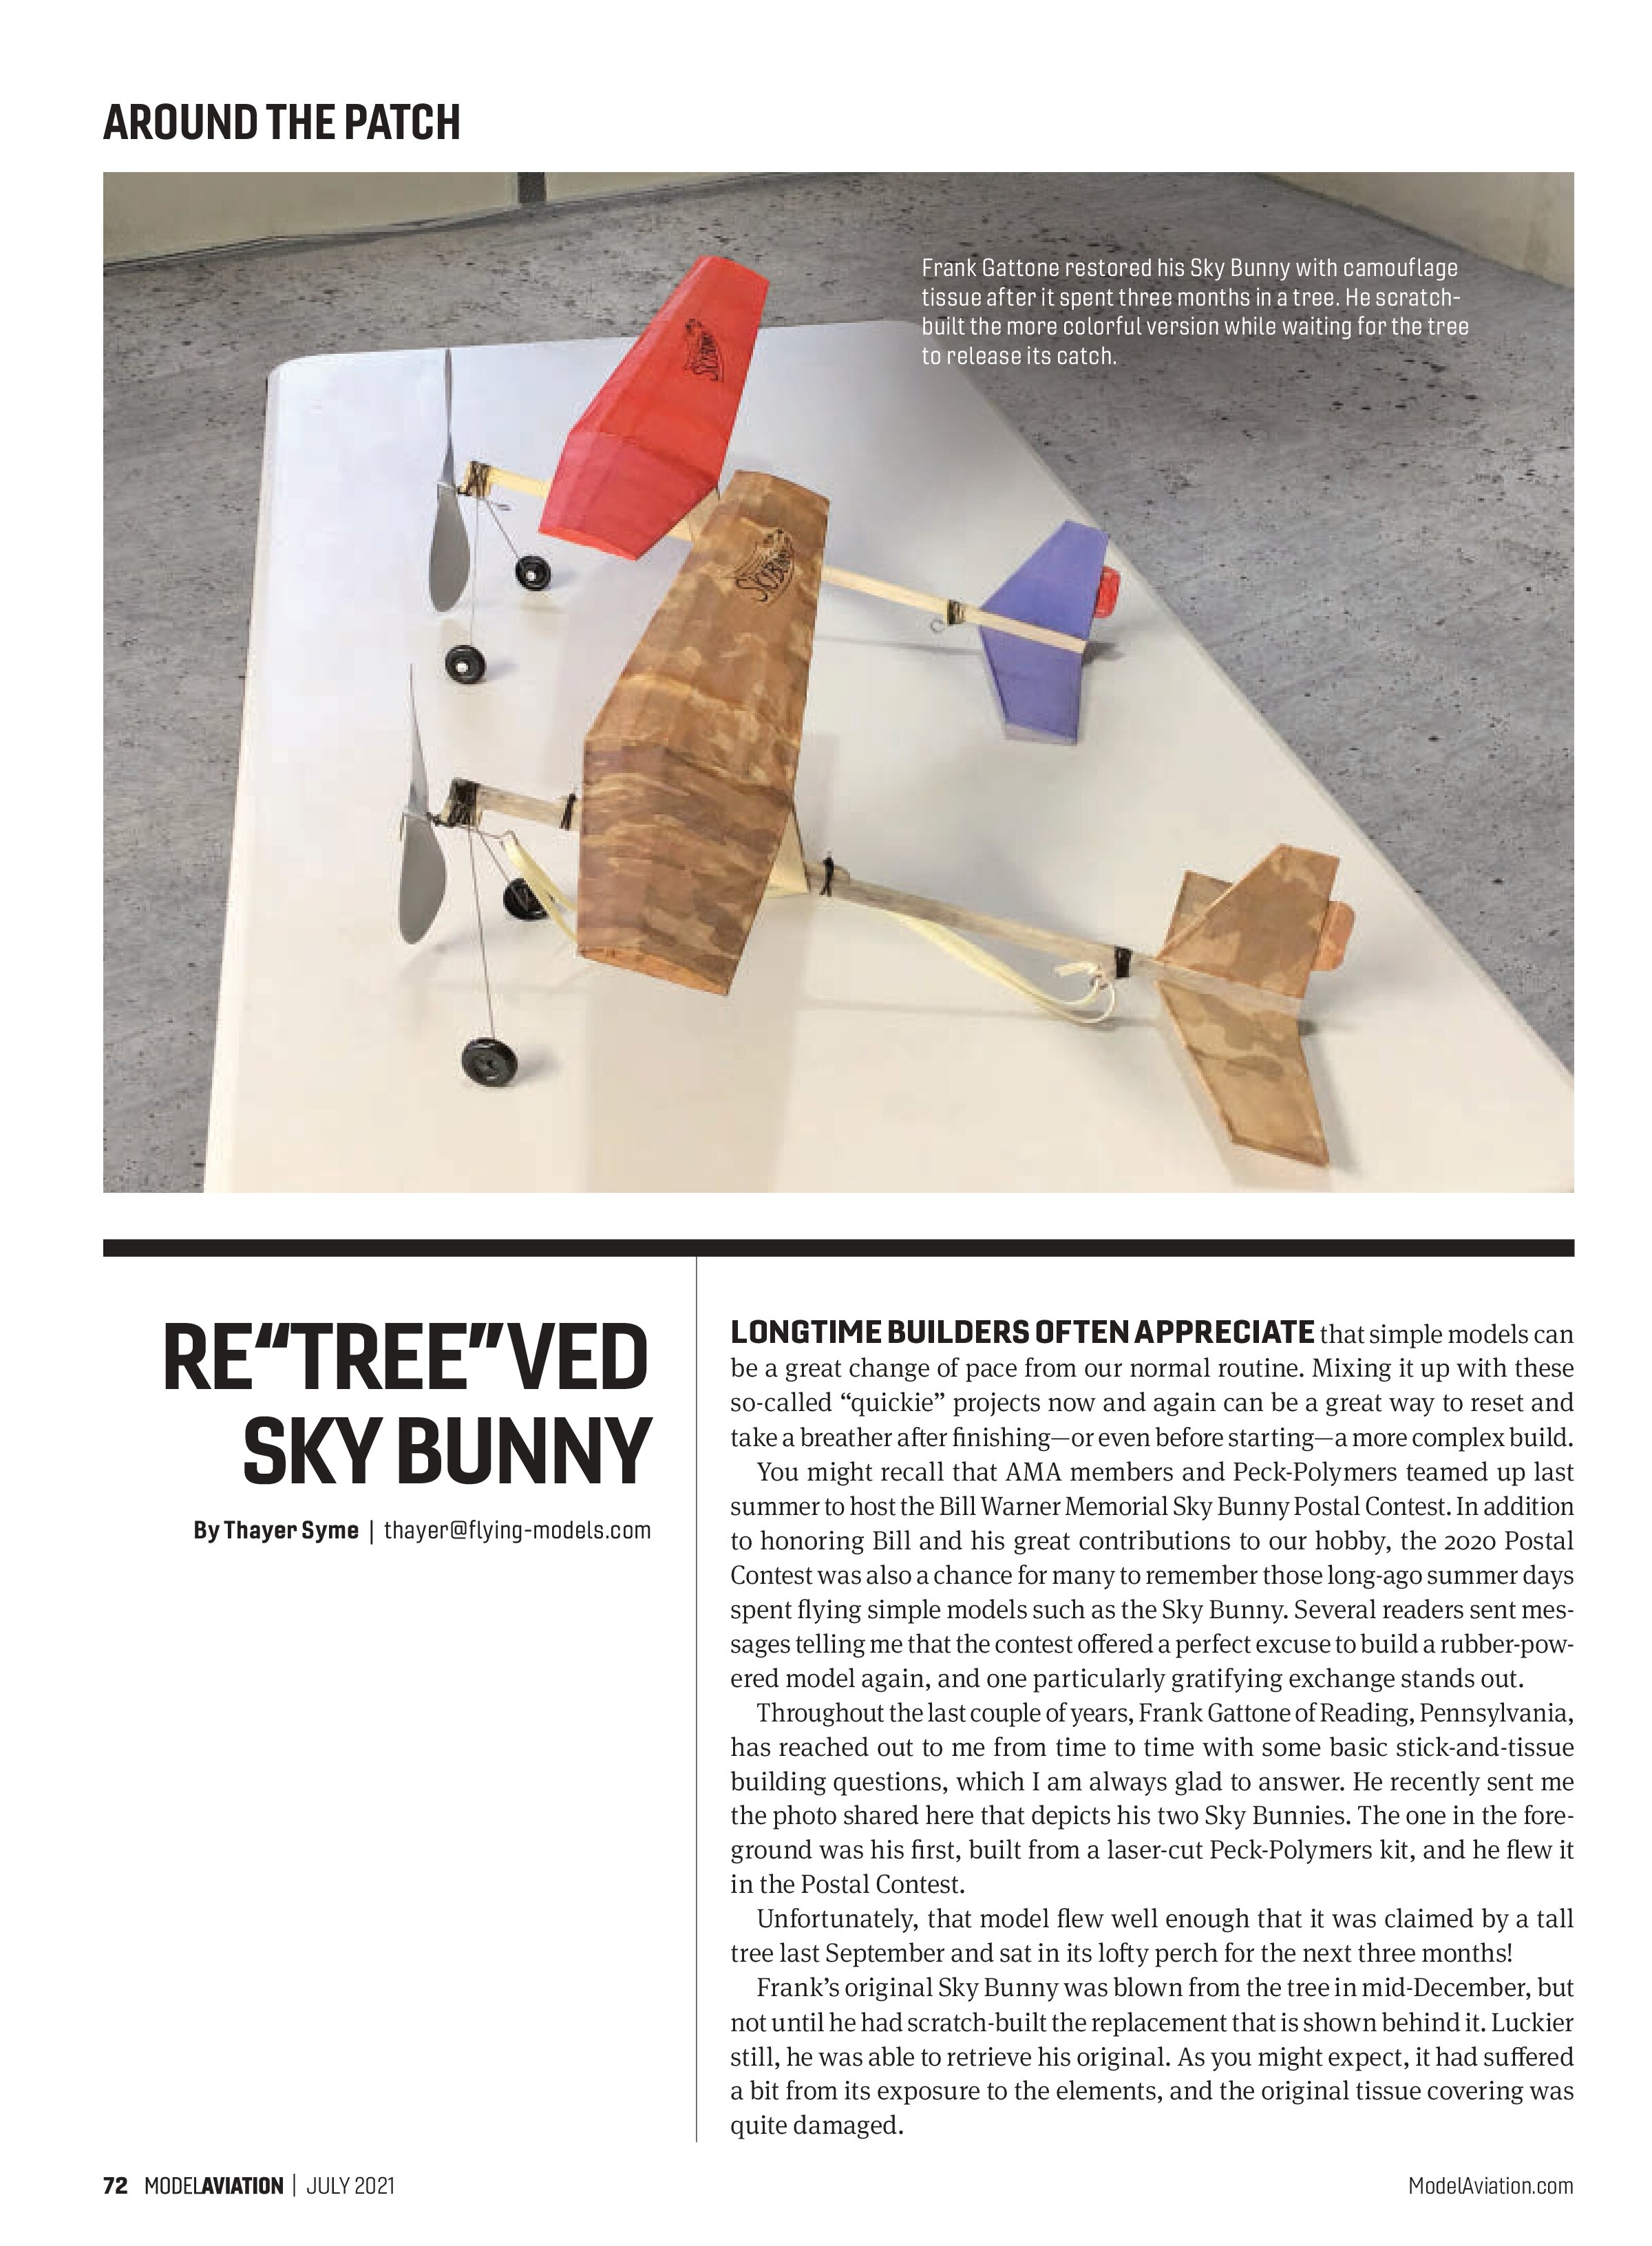
Throughout the last couple of years, Frank Gattone of Reading, Pennsylvania, has reached out to me from time to time with some basic stick-and-tissue building questions, which I am always glad to answer. He recently sent me the photo shared here that depicts his two Sky Bunnies. The one in the foreground was his first, built from a laser-cut Peck-Polymers kit, and he flew it in the Postal Contest.
Unfortunately, that model flew well enough that it was claimed by a tall tree last September and sat in its lofty perch for the next three months! Frank’s original Sky Bunny was blown from the tree in mid-December, but not until he had scratch-built the replacement that is shown behind it. Luckier still, he was able to retrieve his original. As you might expect, it had suffered a bit from its exposure to the elements, and the original tissue covering was quite damaged.
Surprisingly though, the wood was intact. Frank had made the original glue joints using Titebond II that was slightly thinned with water according to my recommendation, and they held up quite well to the exposure. Seeing this, he decided to restore the model.
Frank left the fuselage its weathered gray color as part of its story. He then re-covered the wing and tail surfaces with some tissue from his wife’s crafting supply. As you can see, he tempted fate by first printing the brown camouflage pattern on the tissue, as a tribute to its long “vacation” in the tree last fall.
Frank is apparently a firm believer that lightning will not strike his Sky Bunny twice, and I sincerely hope he is right. It looks great and should fly just as well as before. I would, however, recommend putting it away for the season when the leaves begin to turn again!
Splashing Around at NEAT
Speaking of stepping aside from our normal paths, I recently decided that this was just what I needed to help shed my COVID-19 funk. Regular readers will know that I usually build with balsa and prefer early aircraft for their often distinctive and, at times, even quirky designs.
Several of my friends have been talking about doing a group build of World War I models for the Northeast Electric Aircraft Technology (NEAT) Fair this year. Precision scale is not the goal. Instead, we want unique, fun models that we can fly without concern of risking hundreds of hours of shop time.
As part of that discussion, Ross Clements happened to mention an interest in the Hansa-Brandenburg W.29. This float-equipped German two-seat monoplane fighter oozes character. It has been on my own list for years, and we were soon musing about flying a few of them together.
The W.29 has a unique, almost cartoonish look to the modern eye, enhanced by an underslung rudder. That design detail was not driven by looks though. Hanging it “upside down” removed it from the sightline of the observer/gunner in the rear cockpit and prevented him from shooting it off in the heat of battle.
My earliest sketches for this design were sized for a geared Speed 400 motor and a 10-cell NiCd battery pack, which dates them to at least 25 years ago. I also had fun several years ago flying a larger ARF of this design that is still available from Maxford USA. So yeah, I was instantly all-in.
Flying at the NEAT Fair pond requires that models conform to the AMA Park Pilot Program park flyer weight and performance parameters, so Ross and I decided that a sport scale, three-channel version with a 36-inch wingspan was the way to go. Laser-cut Depron would also make this design more approachable for others who wanted to join the fun and provide a waterproof airframe without any extra effort. We also soon realized that these models could be quickly built on-site when aided by a basic assembly fixture.
The forest of struts is clearly the trickiest part of this build, and we have simplified this step as well. I designed the assembly fixture to hold the fuselage and floats in the desired geometry while installing the simple carbon-fiber rod struts. After the glue cures on that assembly, the fixture will also locate the wing, locking in the proper dihedral and angle of attack.
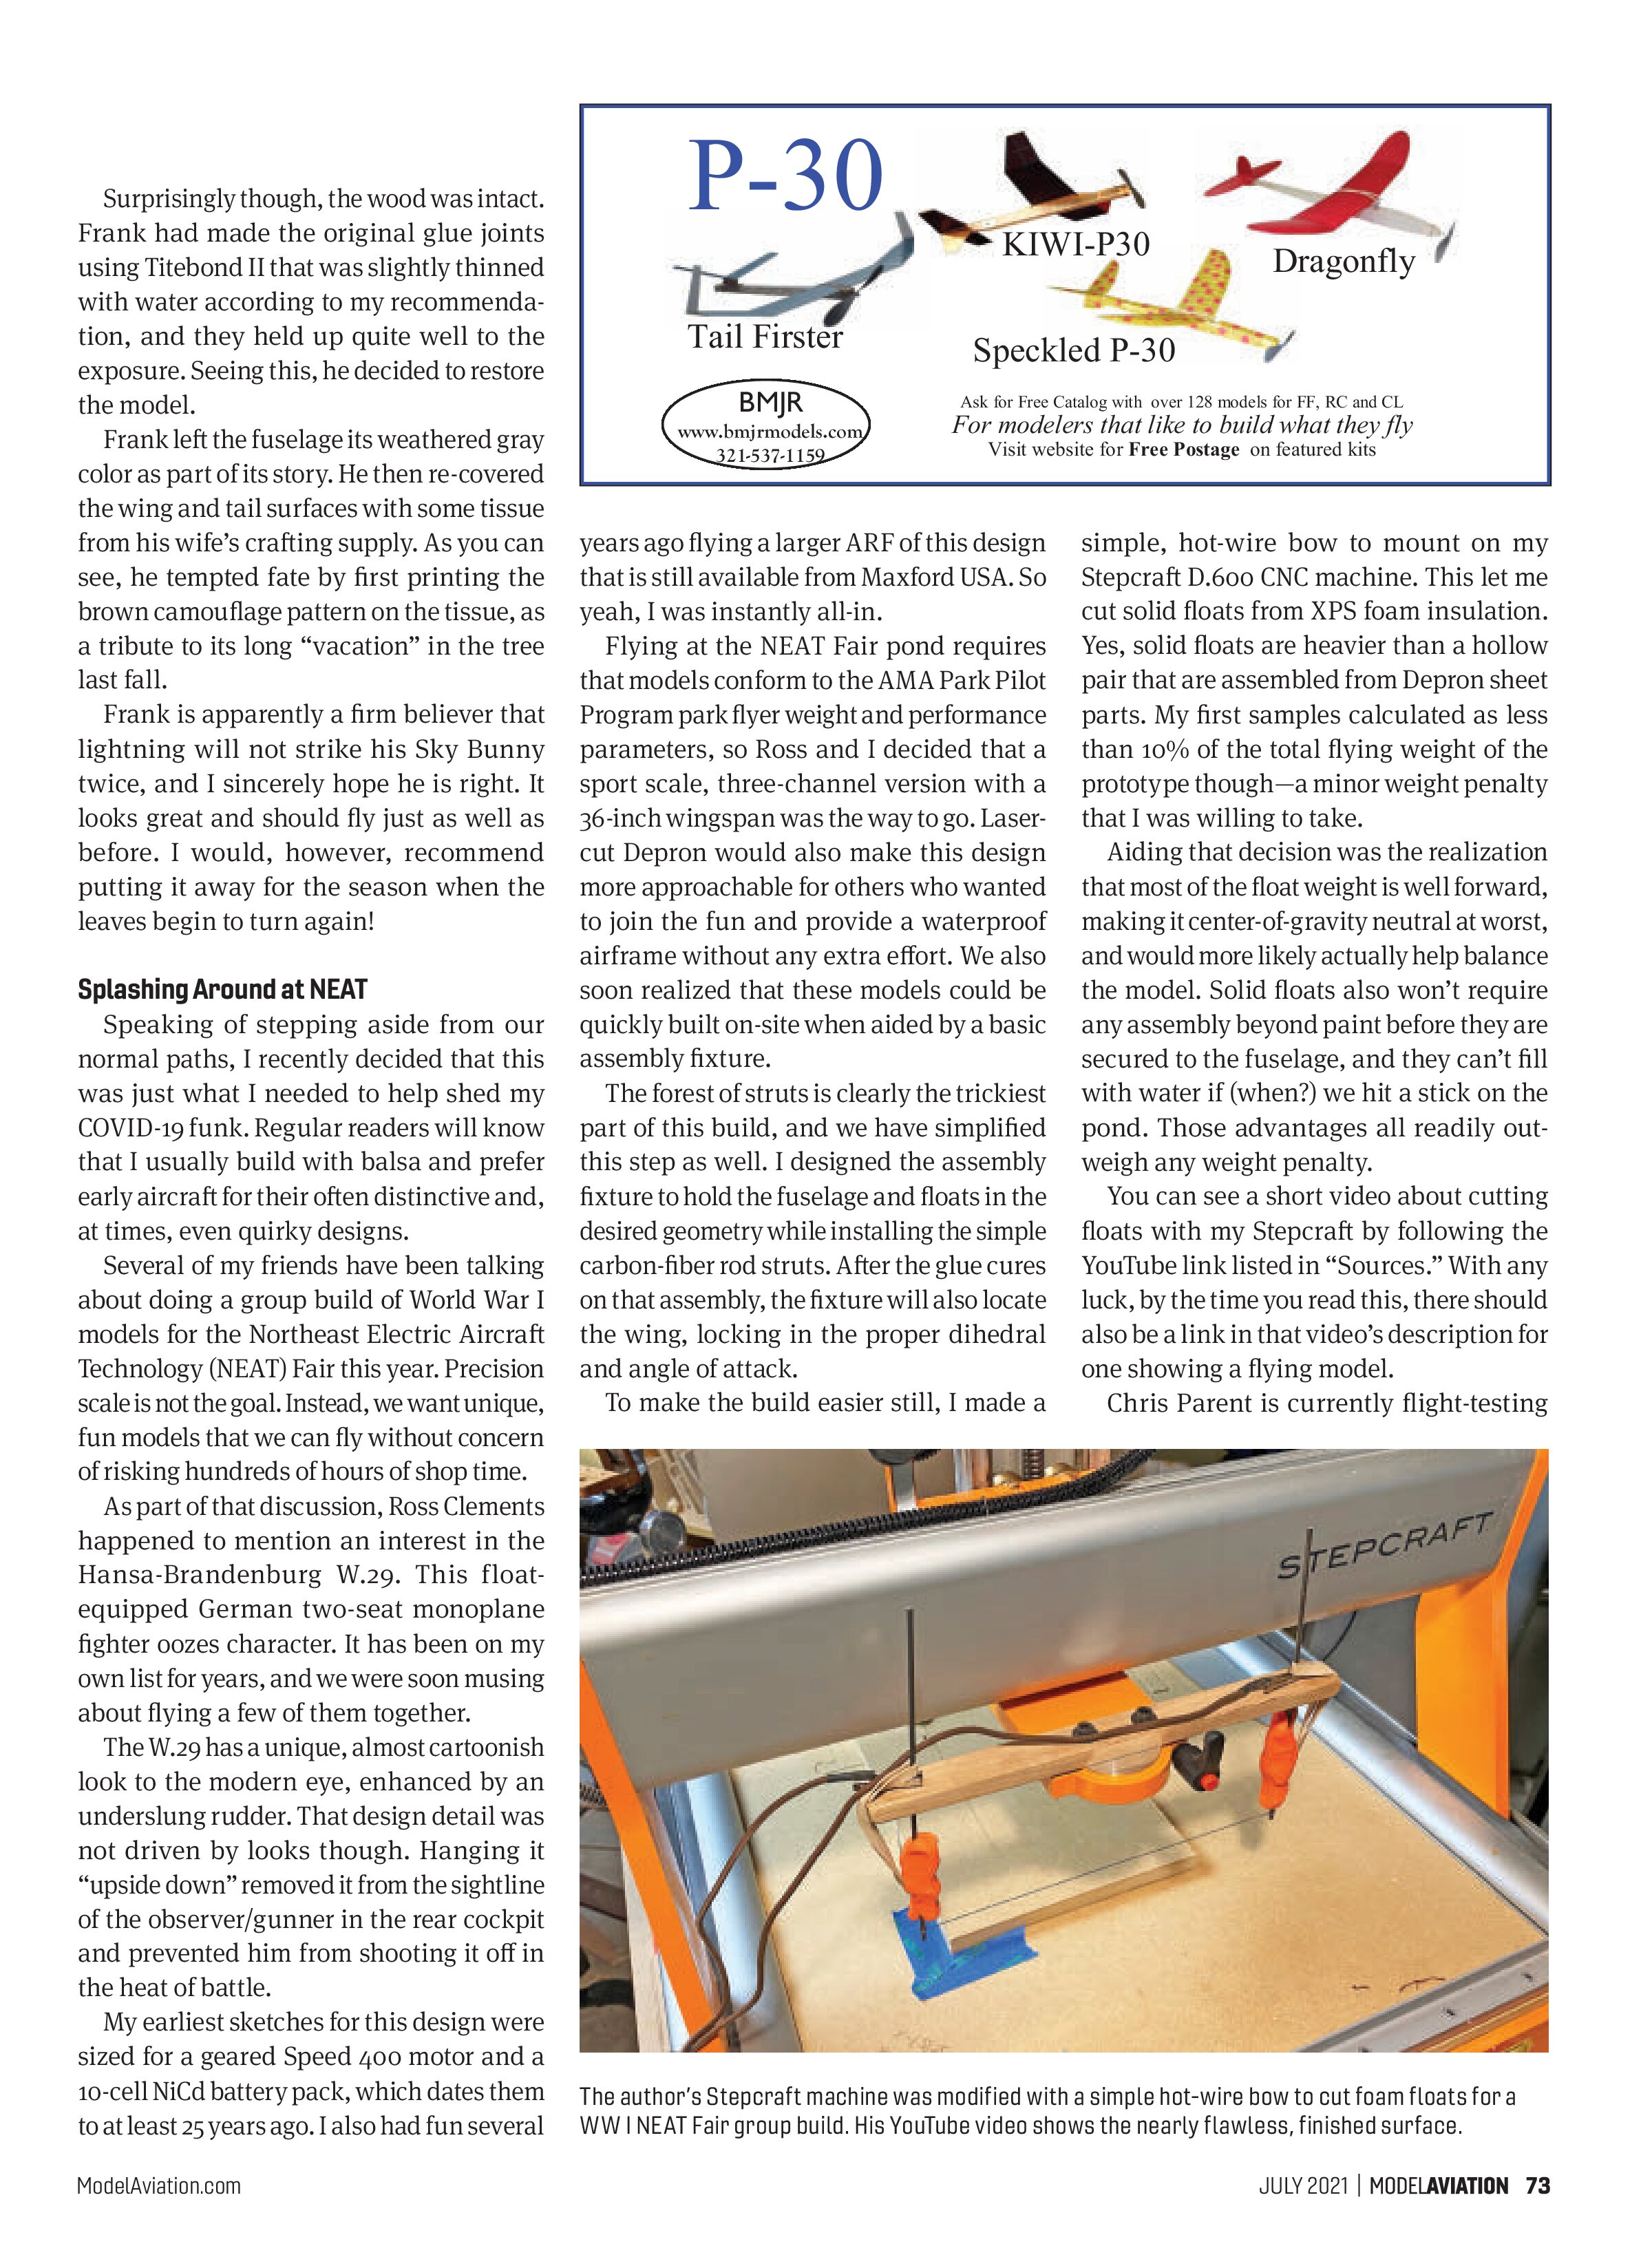
To make the build easier still, I made a simple, hot-wire bow to mount on my Stepcraft D.600 CNC machine. This let me cut solid floats from XPS foam insulation. Yes, solid floats are heavier than a hollow pair that are assembled from Depron sheet parts. My first samples calculated as less than 10% of the total flying weight of the prototype though—a minor weight penalty that I was willing to take.
Aiding that decision was the realization that most of the float weight is well forward, making it center-of-gravity neutral at worst, and would more likely actually help balance the model. Solid floats also won’t require any assembly beyond paint before they are secured to the fuselage, and they can’t fill with water if (when?) we hit a stick on the pond. Those advantages all readily outweigh any weight penalty.
You can see a short video about cutting floats with my Stepcraft by following the YouTube link listed in “Sources.” With any luck, by the time you read this, there should also be a link in that video’s description for one showing a flying model.
Chris Parent is currently flight-testing

and tuning our initial prototype as I write this in early April. Although it is almost too ugly to show here, everything seems to be falling into place according to plan. We expect to have a squadron of several models circling the NEAT Fair pond when conditions allow. Feel free to email me if you would like one too. Full building and finishing support will be available at NEAT in September.
The Ultimation Sander
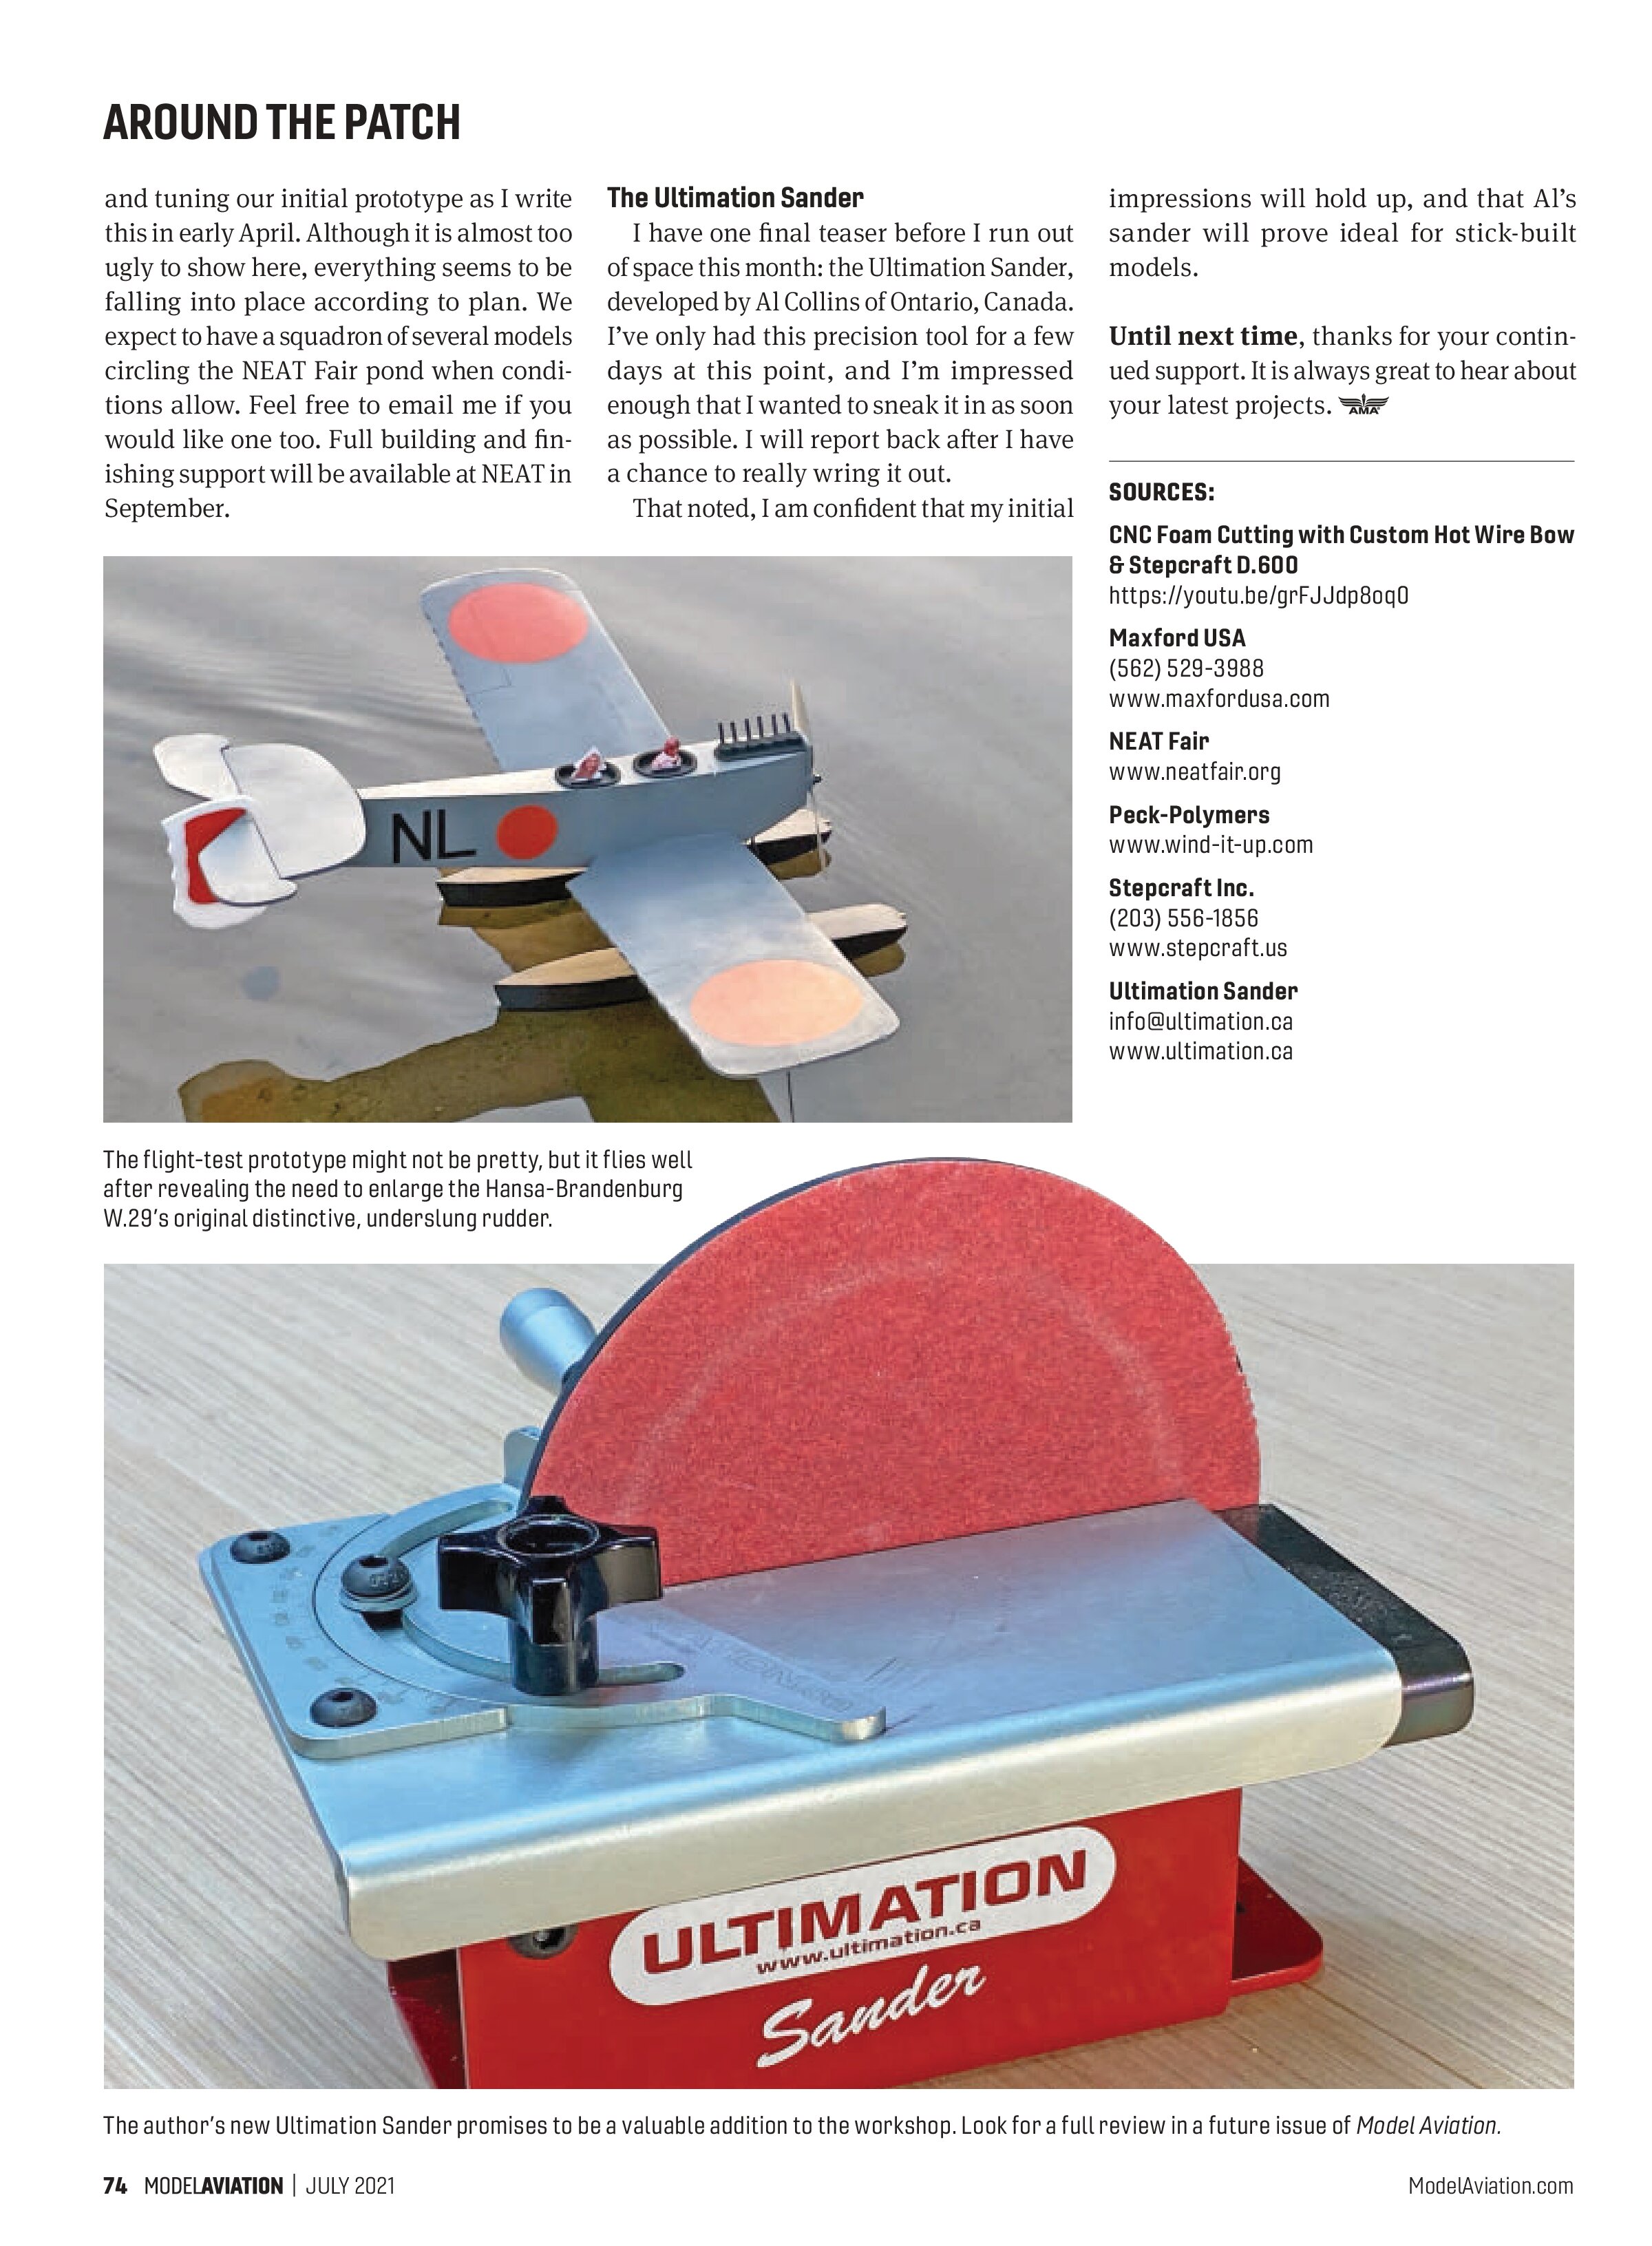
I have one final teaser before I run out of space this month: the Ultimation Sander, developed by Al Collins of Ontario, Canada. I’ve only had this precision tool for a few days at this point, and I’m impressed enough that I wanted to sneak it in as soon as possible. I will report back after I have a chance to really wring it out.
That noted, I am confident that my initial impressions will hold up, and that Al’s sander will prove ideal for stick-built models.
Until next time, thanks for your continued support. It is always great to hear about your latest projects.
SOURCES:
CNC Foam Cutting with Custom Hot Wire Bow & Stepcraft D.600
https://youtu.be/grFJdp8oq0
Maxford USA
(562) 529-3988
www.maxfordusa.com
NEAT Fair
www.neatfair.org
Peck-Polymers
www.wind-it-up.com
Stepcraft Inc.
(203) 556-1856
www.stepcraft.us
Ultimation Sander
info@ultimation.ca
www.ultimation.ca