Drawing on Balsa
FREE FLIGHT DURATION

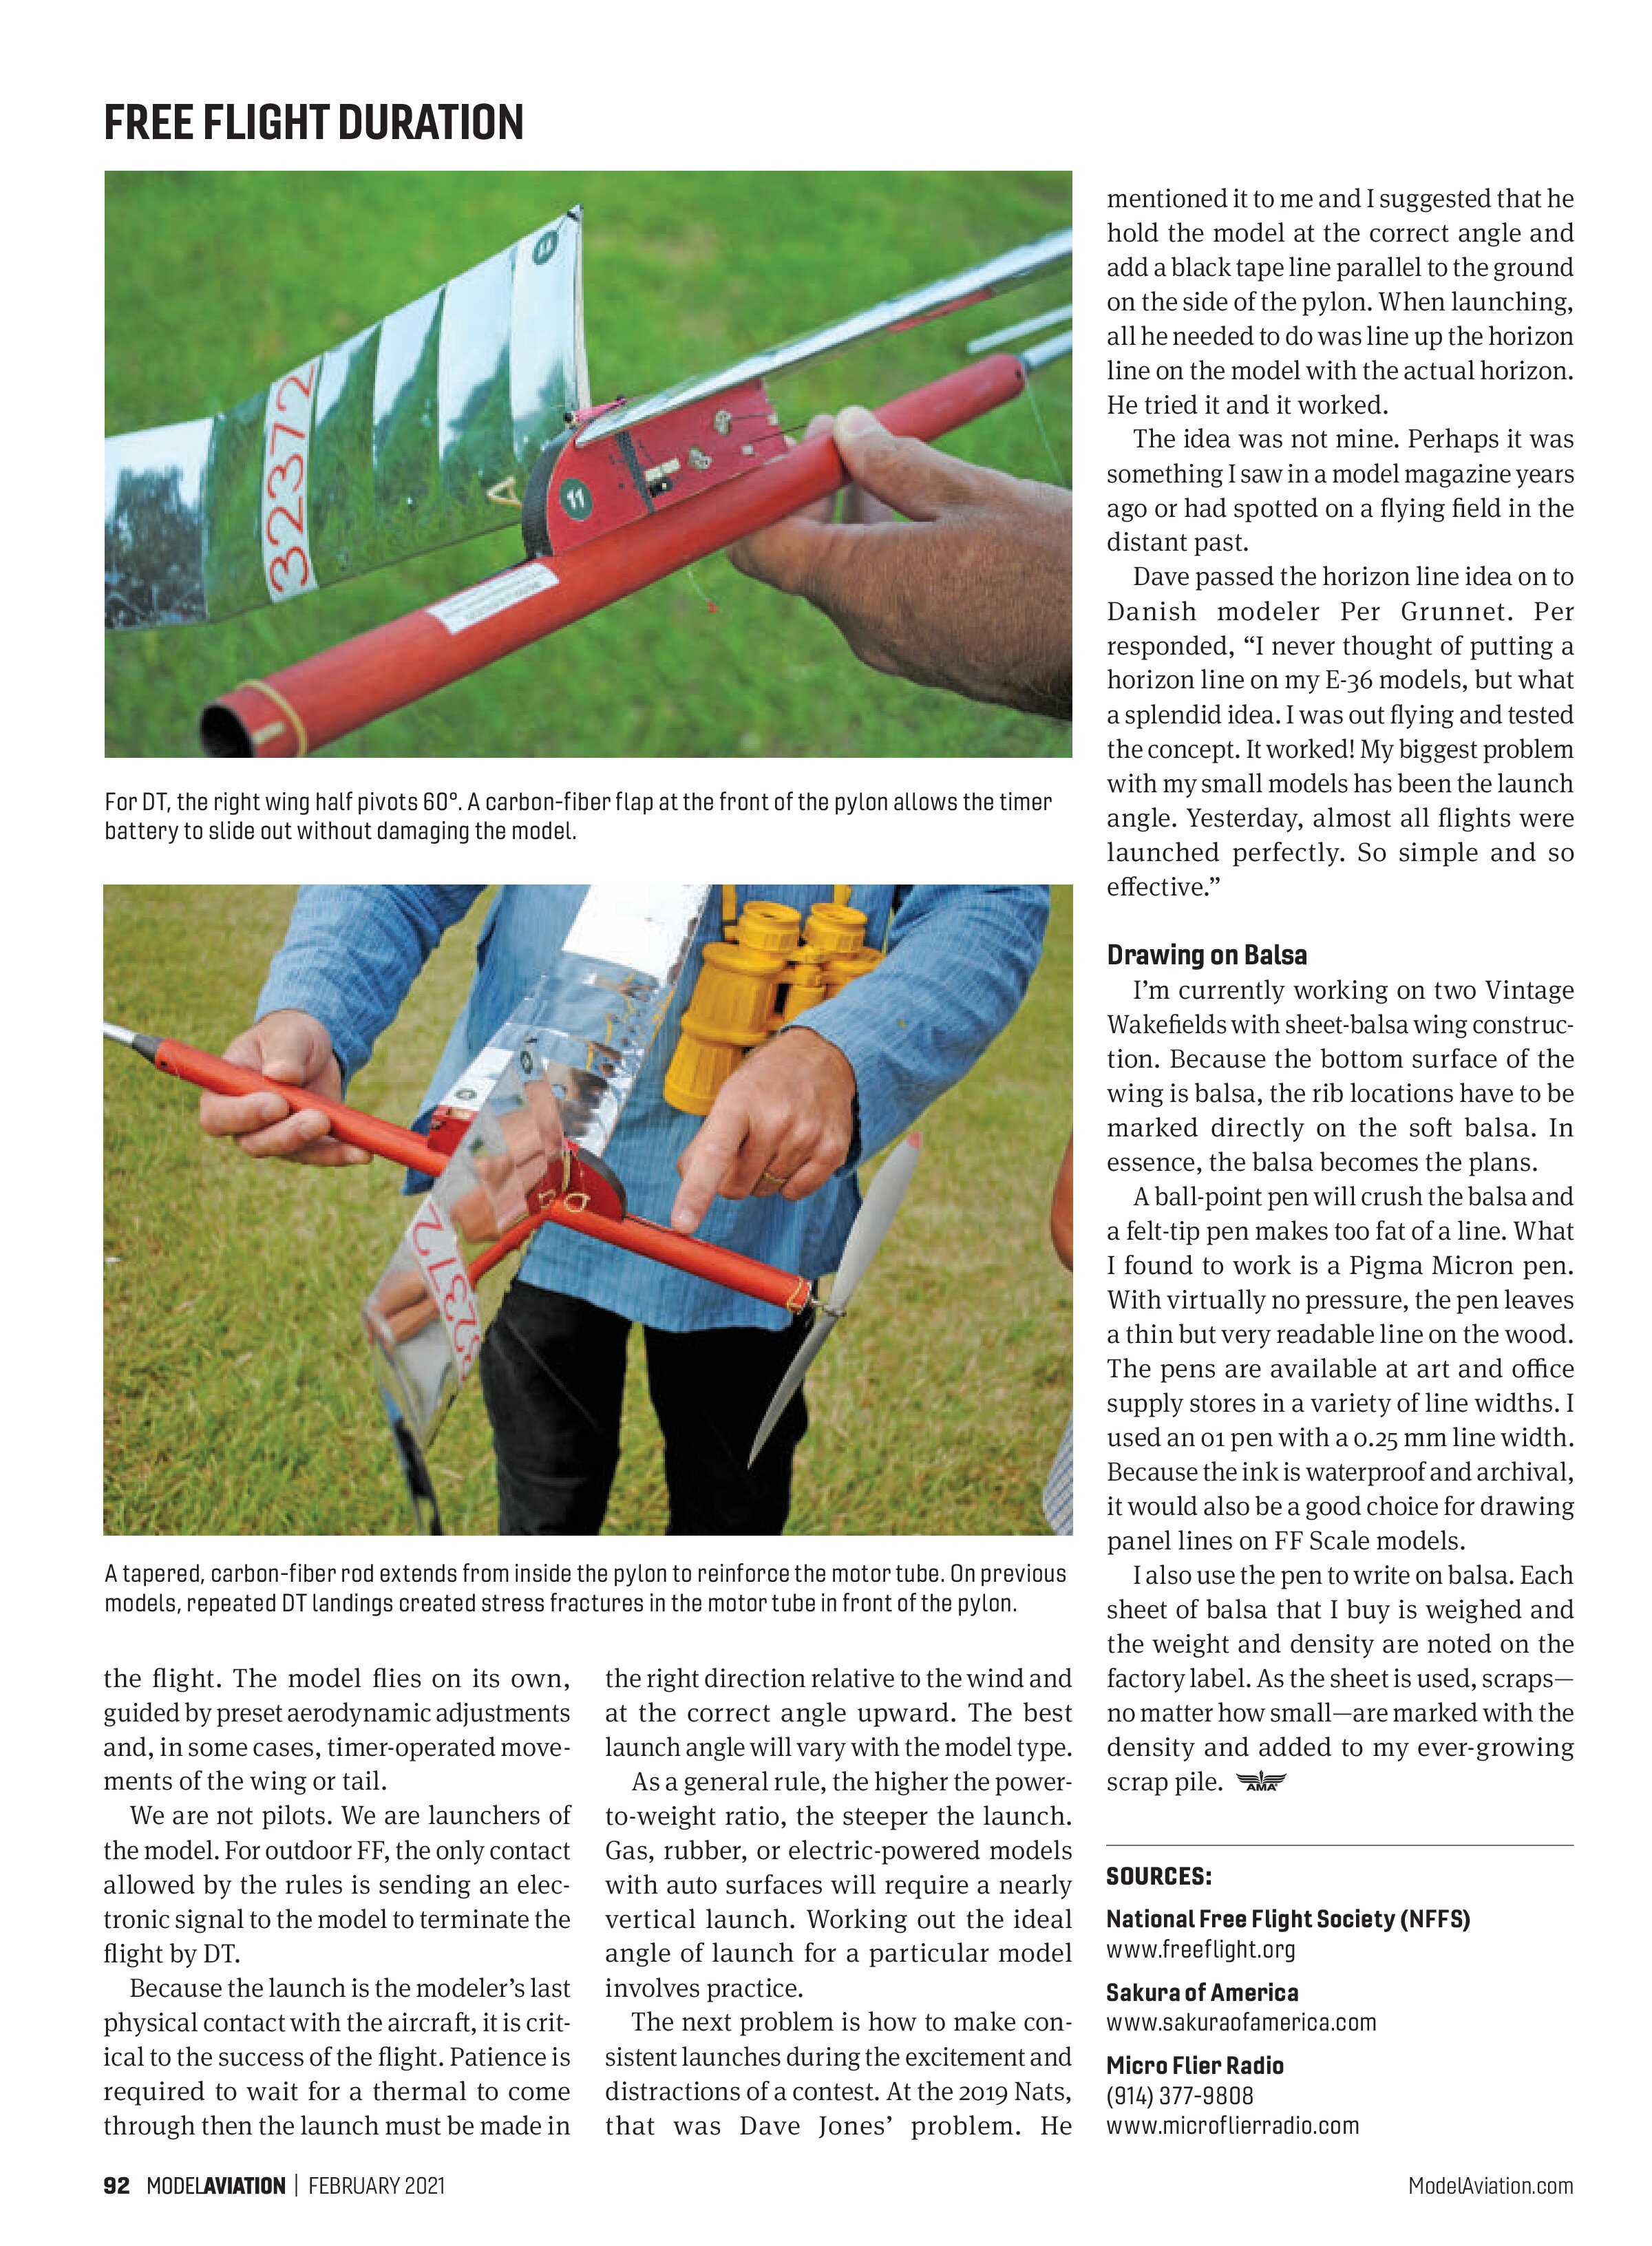
For DT, the right wing half pivots 60°. A carbon-fiber flap at the front of the pylon allows the timer battery to slide out without damaging the model.

A tapered, carbon-fiber rod extends from inside the nylon to reinforce the motor tube. On previous models, repeated DT landings created stress fractures in the motor tube in front of the pylon.
the flight. The model flies on its own, guided by preset aerodynamic adjustments and, in some cases, timer-operated movements of the wing or tail.
We are not pilots. We are launchers of the model. For outdoor FF, the only contact allowed by the rules is sending an electronic signal to the model to terminate the flight by DT.
Because the launch is the modeler’s last physical contact with the aircraft, it is critical to the success of the flight. Patience is required to wait for a thermal to come through then the launch must be made in the right direction relative to the wind and at the correct angle upward. The best launch angle will vary with the model type.
As a general rule, the higher the power-to-weight ratio, the steeper the launch. Gas, rubber, or electric-powered models with auto surfaces will require a nearly vertical launch. Working out the ideal angle of launch for a particular model involves practice.
The next problem is how to make consistent launches during the excitement and distractions of a contest. At the 2019 Nats, that was Dave Jones’ problem. He mentioned it to me and I suggested that he hold the model at the correct angle and add a black tape line parallel to the ground on the side of the pylon. When launching, all he needed to do was line up the horizon line on the model with the actual horizon. He tried it and it worked.
The idea was not mine. Perhaps it was something I saw in a model magazine years ago or had spotted on a flying field in the distant past.
Dave passed the horizon line idea on to Danish modeler Per Grunnet. Per responded, “I never thought of putting a horizon line on my E-36 models, but what a splendid idea. I was out flying and tested the concept. It worked! My biggest problem with my small models has been the launch angle. Yesterday, almost all flights were launched perfectly. So simple and so effective.”
Drawing on Balsa
I’m currently working on two Vintage Wakefields with sheet-balsa wing construction. Because the bottom surface of the wing is balsa, the rib locations have to be marked directly on the soft balsa. In essence, the balsa becomes the plans.
A ball-point pen will crush the balsa and a felt-tip pen makes too fat of a line. What I found to work is a Pigma Micron pen. With virtually no pressure, the pen leaves a thin but very readable line on the wood. The pens are available at art and office supply stores in a variety of line widths. I used an 01 pen with a 0.25 mm line width. Because the ink is waterproof and archival, it would also be a good choice for drawing panel lines on FF Scale models.
I also use the pen to write on balsa. Each sheet of balsa that I buy is weighed and the weight and density are noted on the factory label. As the sheet is used, scraps—no matter how small—are marked with the density and added to my ever-growing scrap pile.
SOURCES:
National Free Flight Society (NFFS)
www.freeflight.org
Sakura of America
www.sakuraofamerica.com
Micro Flier Radio
(914) 377-9808
www.microflierradio.com