Landings aren’t optional
Small-Field Flying
Pat Trittle
patscustommodels@gmail.com
When it comes to flying model airplanes, we have several options. We can fly sport models, scale models, aerobatics, Free Flight, Control Line, RC, or nearly anything with wings that the mind can conceive. At the risk of a “pun,” the sky really is the limit to the things we can—and have—flown in our modeling careers. The best part is that these “options” truly are optional and are totally up to the individuals’ desires and modeling goals.
There is, however, one facet of flying RC model airplanes that is not optional: the landing. A pilot can choose not to take off, but when the model is committed to flight, it will ultimately return to terra firma one way or another. The best bet is to learn the art of landing properly.
Landing, especially in less-than-ideal conditions, is the most demanding part of a flight. It’s the most-avoided maneuver until it becomes absolutely necessary. After 25 years of flying models of all types, my favorite thing now is to go out and shoot touch-and-gos—a lot of them. The best part is that it never gets boring because of constantly changing conditions. Every landing is a new adventure, and landings are always performed at low altitudes, so “three mistakes high” does not apply.
I believe that landing a model airplane is the most challenging maneuver you’ll do. Why? Because you can’t practice landings at altitude or well above stall speed.
By nature, if a landing is going to work, it has to be done low and slow. However, learning to land does begin at a safe altitude by stall testing your model to learn how it will respond at lower air speeds. After you know how your model will react at a full stall, you can start working on your approach, which, in simple terms, contains only three elements: downwind leg, base leg, and final approach.

The downwind leg is used to bleed off altitude and slow the model down a bit. After the aircraft passes the end of the runway, the base leg turn is done by turning into the wind, reducing altitude, and lining the model up with the runway.
All too often, missing the runway is way too easy, but a good rule of thumb to keep the model lined up on final approach is to align your shoulders parallel with the runway and fly the model straight at the end of your nose. As the model gets closer, it will be aligned with the runway centerline and won’t need correction. Don’t worry. You won’t run over yourself.
The whole idea for a smooth landing is to have the model at the right speed and attitude when the ground gets there. The aircraft will often be either too fast or too slow. Because there is no “airspeed indicator,” the right speed for your model is a judgment call learned purely from experience.
Another factor is sink rate. This is controlled by speed and attitude. Speed is controlled with power and attitude with the elevator. Always remember that it’s not the elevator that makes the model go up—it’s power. The elevator will only change the angle of attack.

It’s been said, “Pull up and the trees get smaller. Keep pulling up and they’ll start getting bigger again.”
On final approach, I prefer to fly the model level or slightly nose up, using minute throttle corrections to control the sink rate. Ailerons are used to keep the wings level and the rudder to keep the model lined up with the runway.
The idea is to set up a steady sink rate slightly above stall then ease the nose up slightly before touchdown and reduce power smoothly so that the model will gently settle onto the runway. If you’re too early, the model will stall and fall onto the runway; too late and it’s likely to bounce back into the air.
One thing I have learned throughout the years is that a good approach is the key to a good landing. If your approach begins to fall apart early on, don’t try to salvage a lousy setup. If you find yourself fighting it, simply power up, go around, and start over.
With practice, there’s no doubt you’ll get it figured out and will be doing smooth landings and touch-and-gos consistently. They will be a whole lot more fun than wrestling with the model simply trying to get it back on the ground in one piece. By practicing your landings as you would any other maneuver, before you know it you’ll be spending more time in the shop building new models rather than fixing the old ones.
As they say, “A good landing is one you can walk away from. A great landing is one you can walk away from—and use the airplane again.”
Scale Details
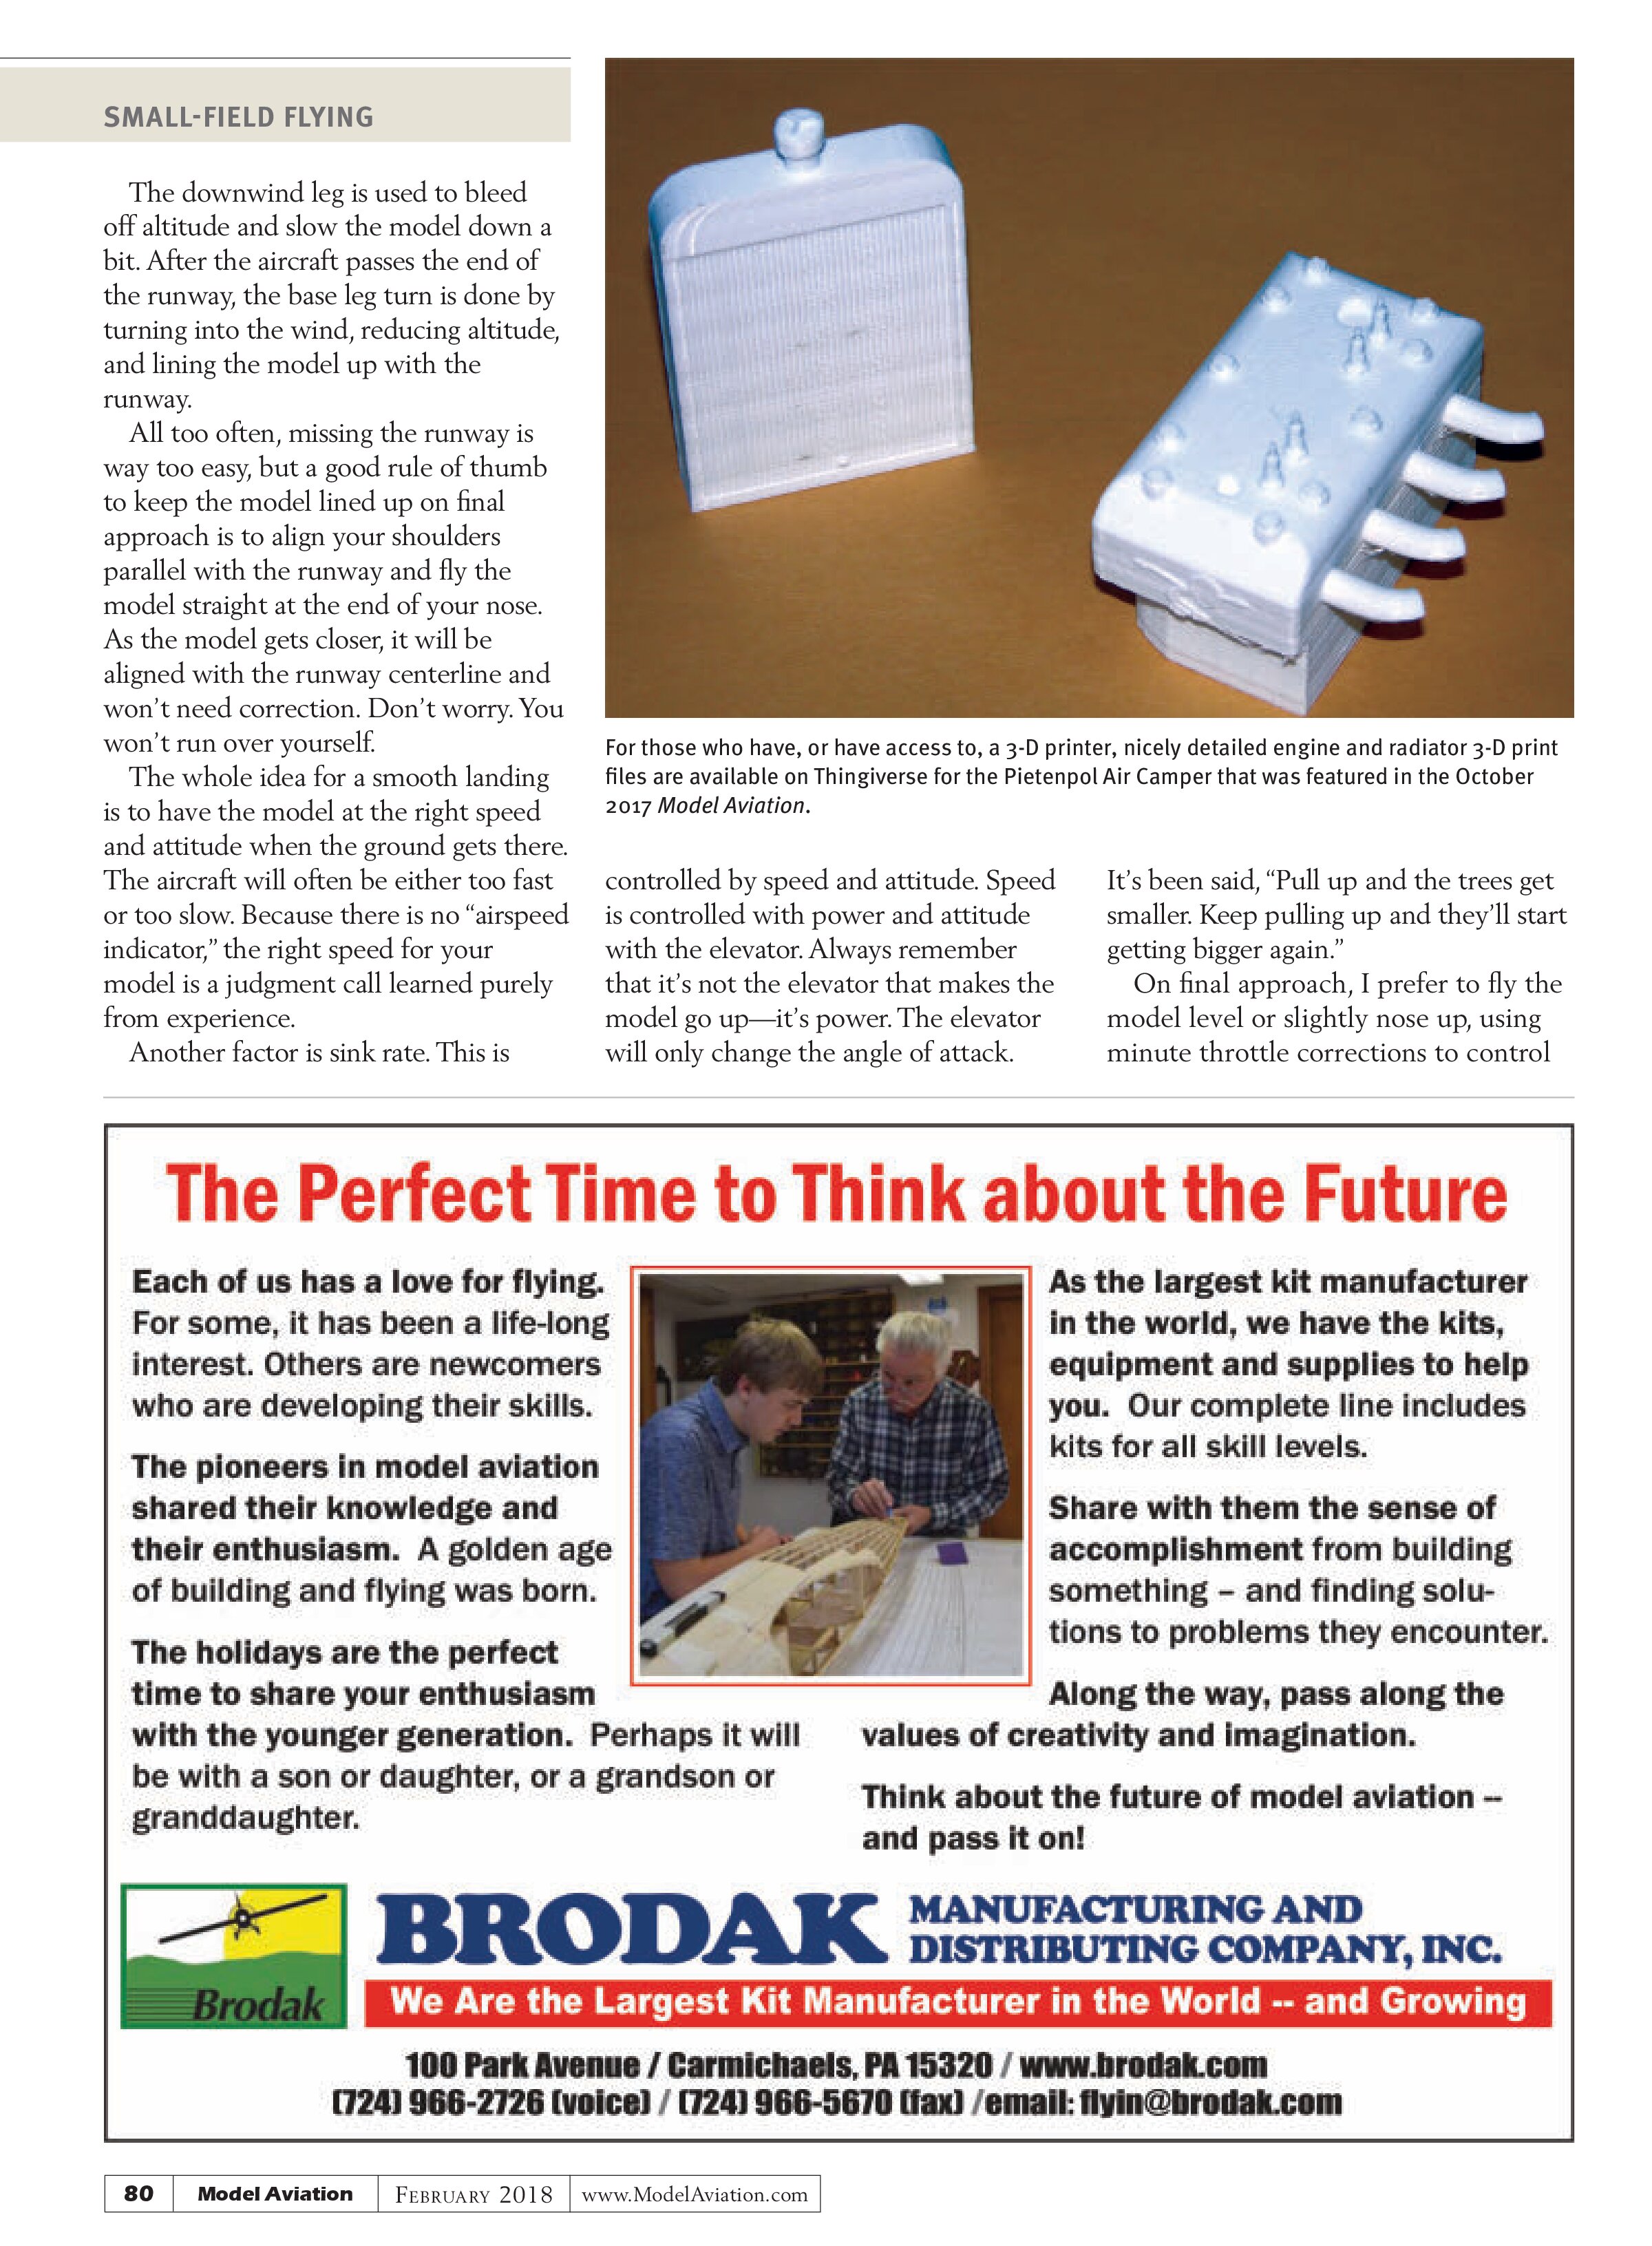
3D printing is quickly gaining in popularity. For those who own or have access to a 3D printer, there is no limit to the ability to fabricate scale detail parts.

Tom Jacoby sent a link to access files for a beautiful Model A engine and radiator that is the perfect size for the Pietenpol Air Camper that was featured in the October 2017 issue of Model Aviation.
To download the files, visit the Thingiverse website and enter the number 2094424 or “FT Pietenpol Model A” in the search box. For those with the CAD skills to make 3D models, the possibilities for detailed parts such as instrument panels, machine guns, landing gear struts, engine details, and other items, are virtually endless.
I’ve had a number of requests about the source of the wheels on the Pietenpol. Unfortunately, the wheels used on my model are long out of production. However, three options are available. Manzano Laser Works offers 3-inch World War I-style wheel kits built from plywood. Dare/Brodak Manufacturing carries a 3-inch spoke wheel kit and assembly jig. There are also 3-inch wheel kits available from Maxford USA. Contact information for these companies is listed in “Sources.”
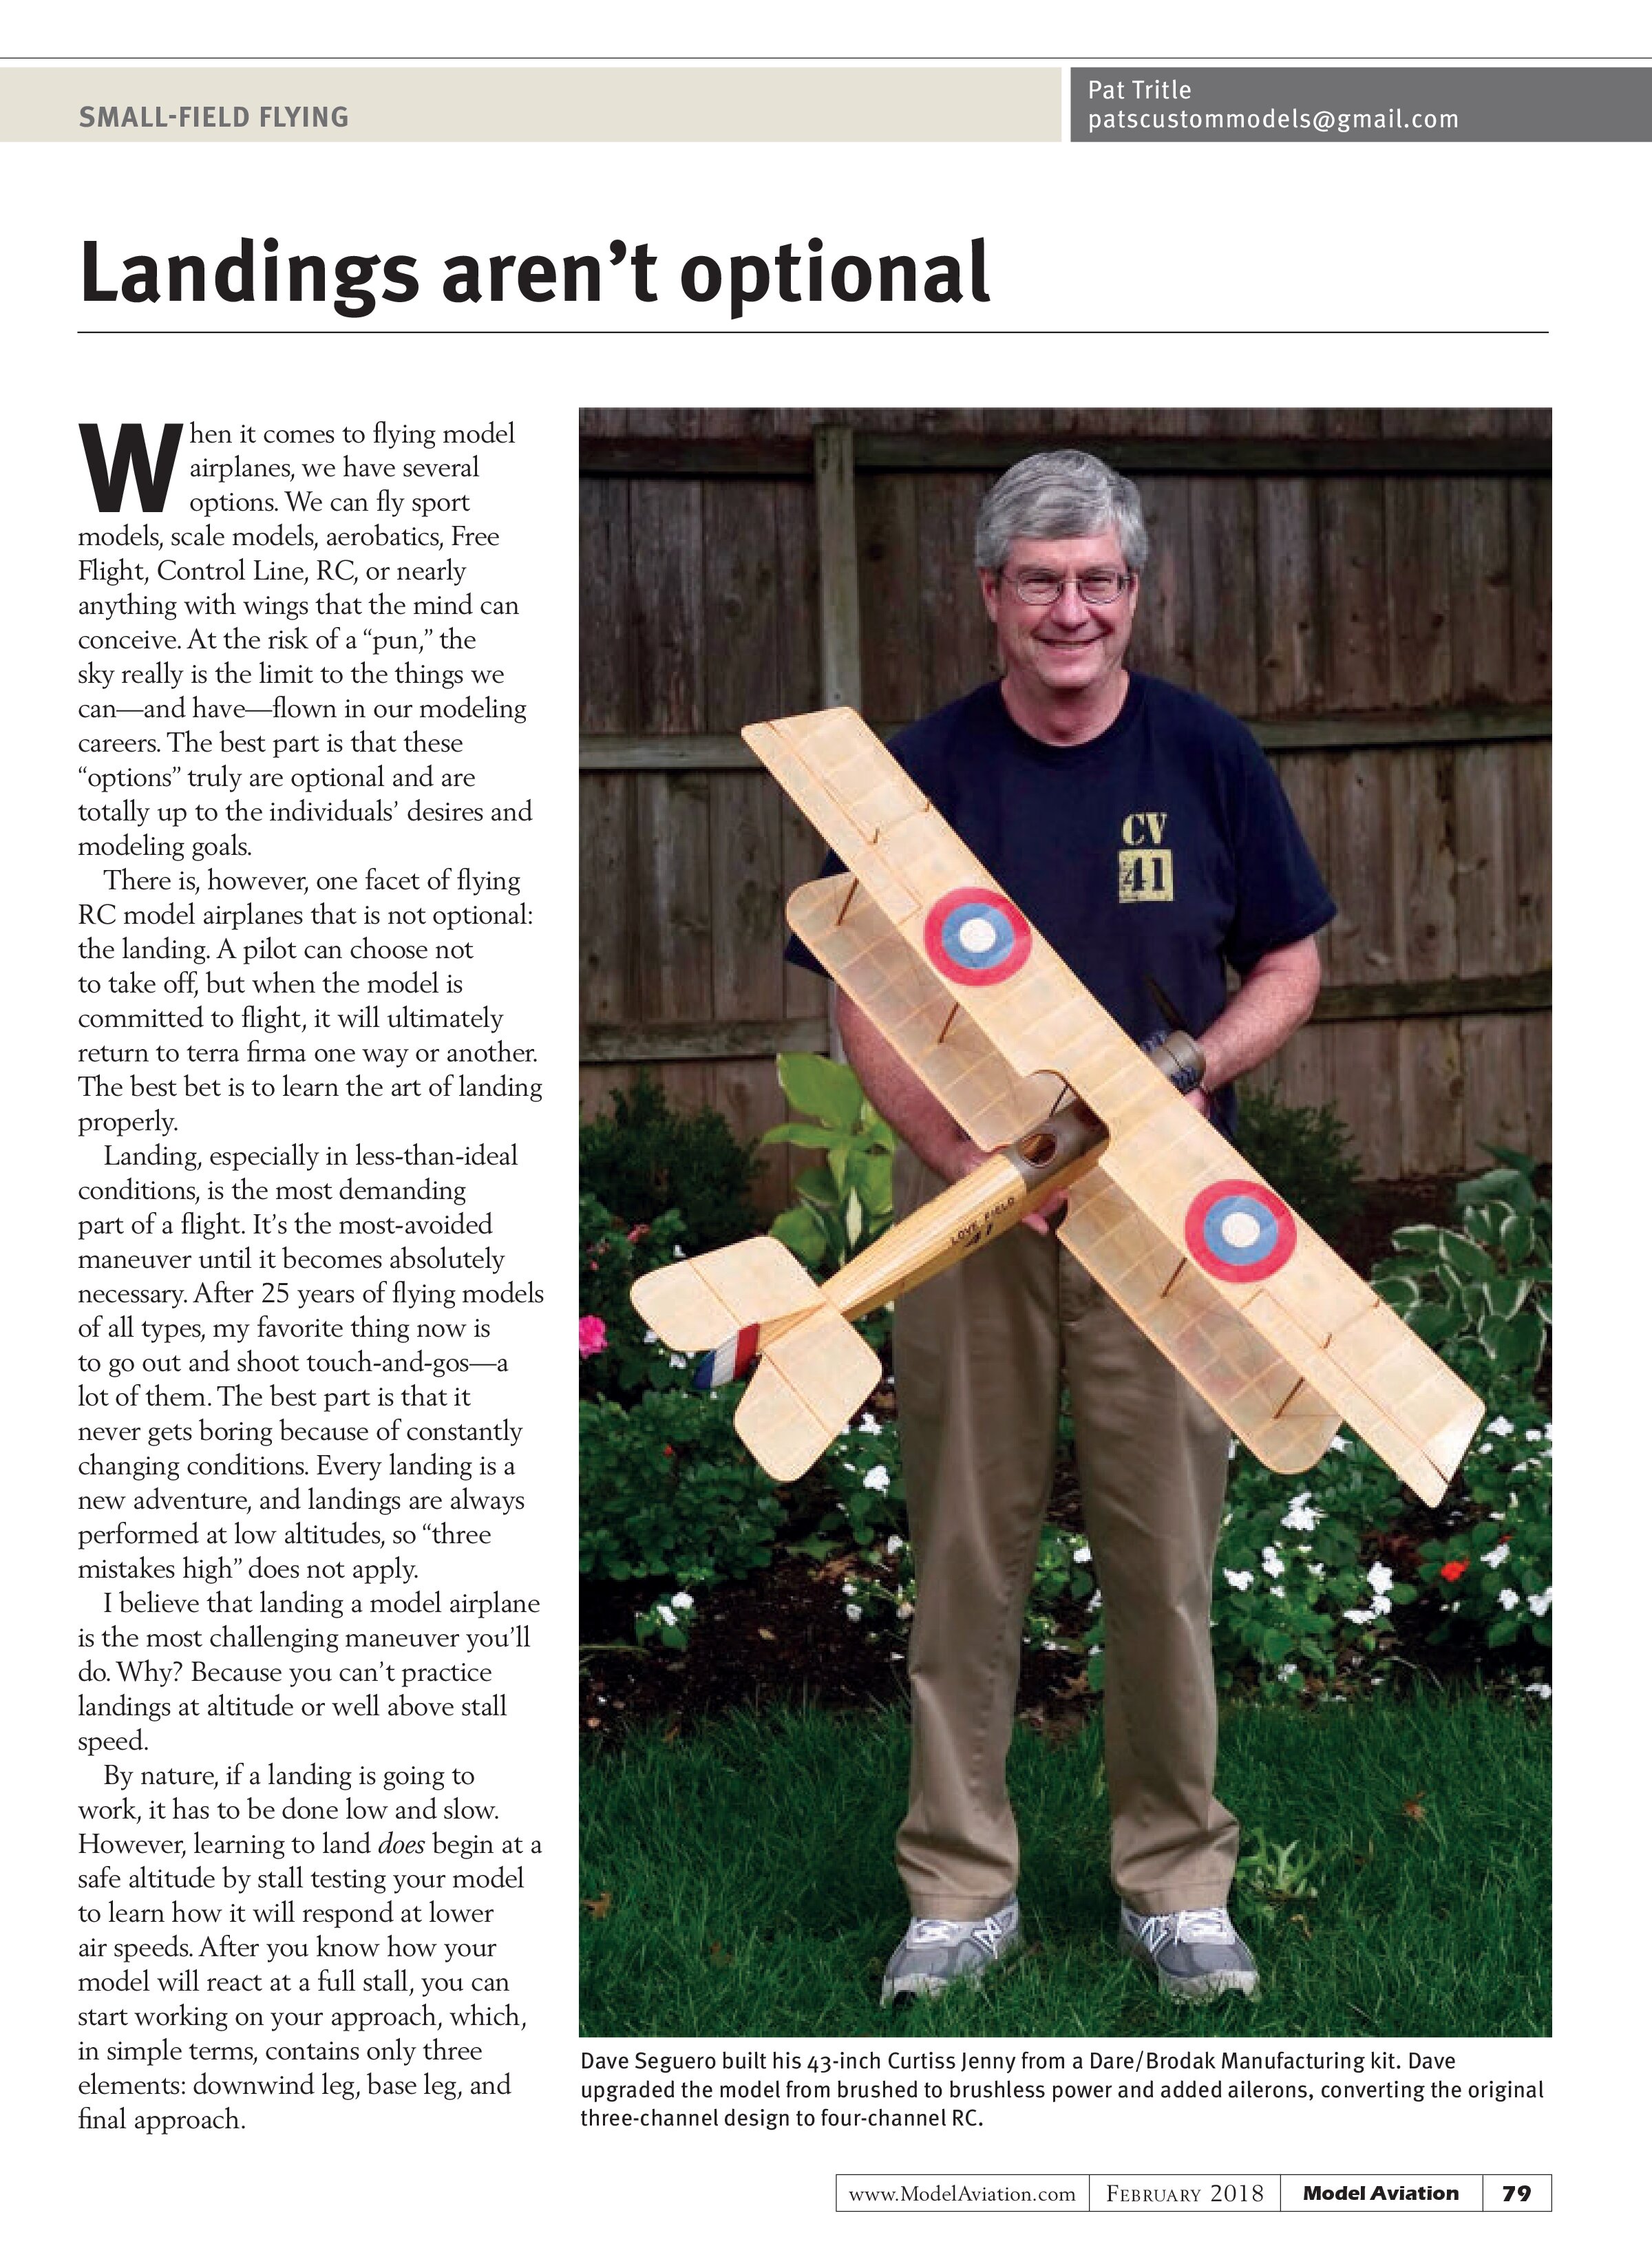
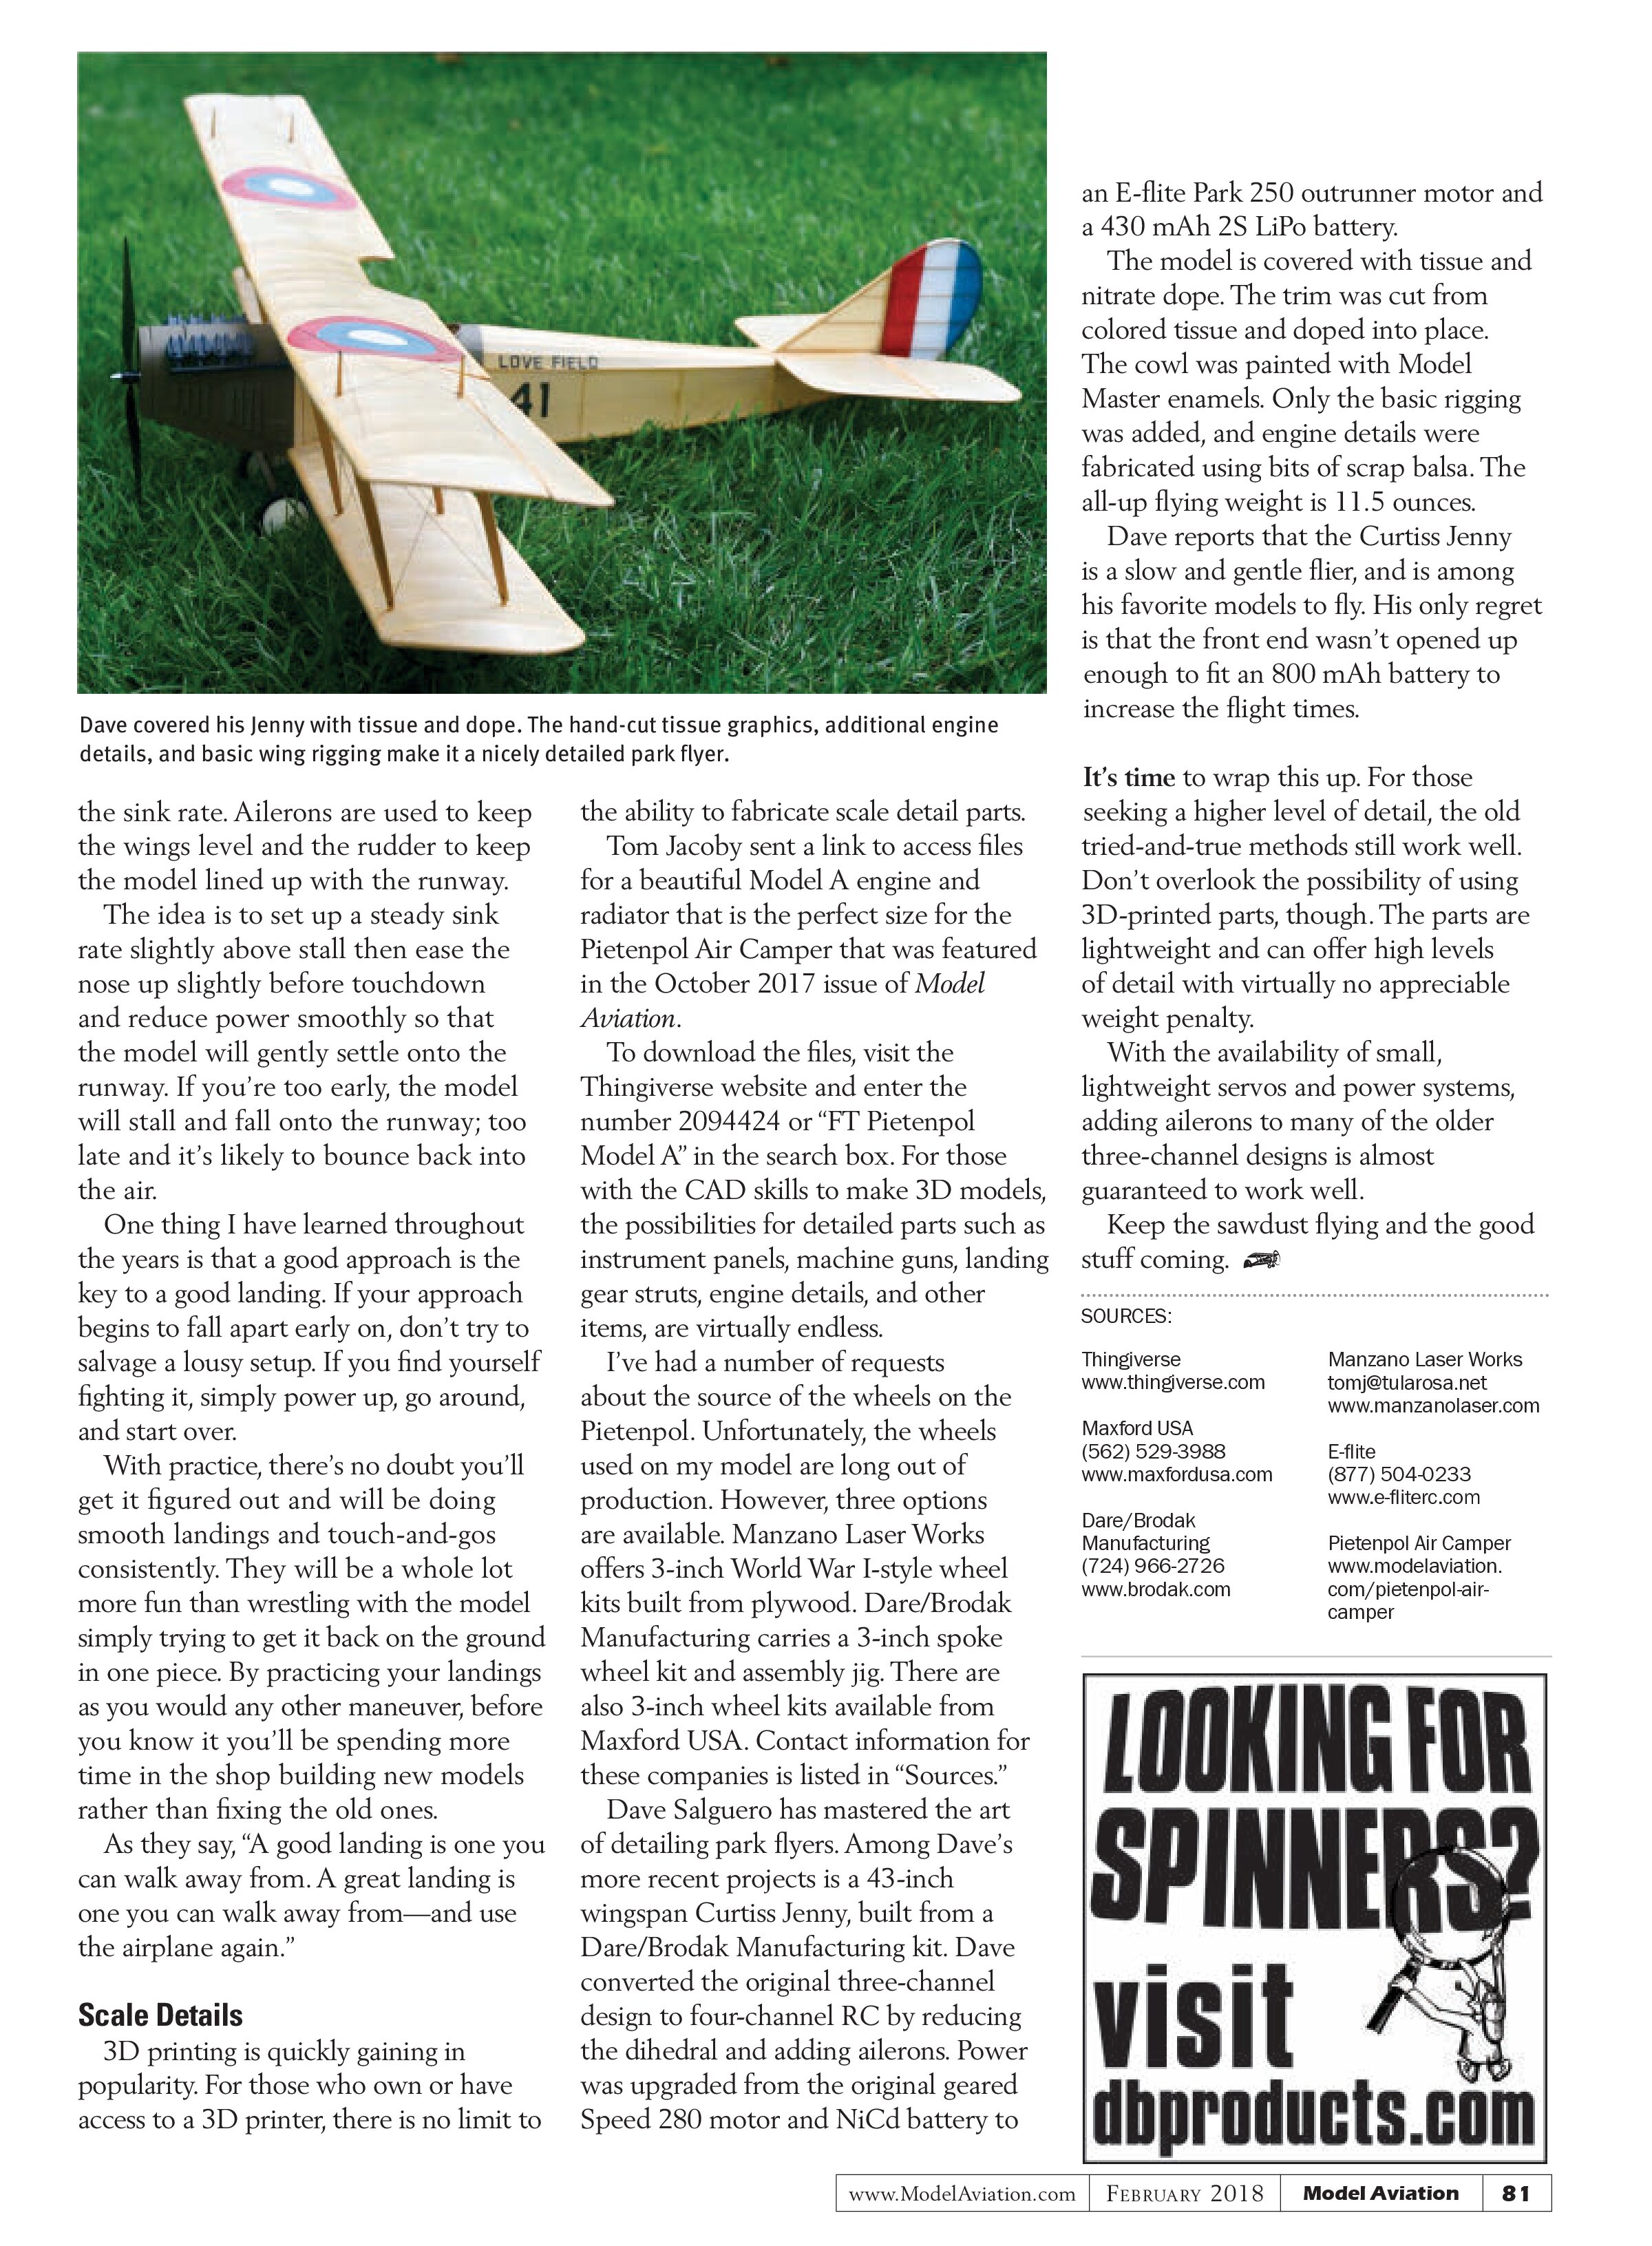
Dave Salguero has mastered the art of detailing park flyers. Among Dave’s more recent projects is a 43-inch wingspan Curtiss Jenny, built from a Dare/Brodak Manufacturing kit. Dave converted the original three-channel design to four-channel RC by reducing the dihedral and adding ailerons. Power was upgraded from the original geared Speed 280 motor and NiCd battery to an E-flite Park 250 outrunner motor and a 430 mAh 2S LiPo battery.
The model is covered with tissue and nitrate dope. The trim was cut from colored tissue and doped into place. The cowl was painted with Model Master enamels. Only the basic rigging was added, and engine details were fabricated using bits of scrap balsa. The all-up flying weight is 11.5 ounces.
Dave reports that the Curtiss Jenny is a slow and gentle flier, and is among his favorite models to fly. His only regret is that the front end wasn’t opened up enough to fit an 800 mAh battery to increase the flight times.
It’s time to wrap this up. For those seeking a higher level of detail, the old tried-and-true methods still work well. Don’t overlook the possibility of using 3D-printed parts, though. The parts are lightweight and can offer high levels of detail with virtually no appreciable weight penalty.
With the availability of small, lightweight servos and power systems, adding ailerons to many of the older three-channel designs is almost guaranteed to work well.
Keep the sawdust flying and the good stuff coming.
SOURCES:
Thingiverse
www.thingiverse.com
Maxford USA
(562) 529-3988
www.maxfordusa.com
Dare/Brodak Manufacturing
(724) 966-2726
www.brodak.com
Manzano Laser Works
tomj@tularosa.net
www.manzanolaser.com
E-flite
(877) 504-0233
www.e-fliterc.com
Pietenpol Air Camper
www.modelaviation.com/pietenpol-air-camper