The joy of building model airplanes, part three
by Dave Garwood
dave.garwood.518@gmail.com
Welcome to the building season, for those of us who live in parts of the country that were once covered by the Wisconsin glaciation ice sheet. Why build when you can buy prebuilt model aircraft? The main reasons for me are to get exactly what I want, to know what’s inside, and to learn how it goes together. Here is how a couple of flying friends answered that question:
Steve Savoie, Portland, Maine
- One builds so one can repair.
- One builds so one understands the structural design and limits of flight-induced stress.
- One builds because it is 12° outside and another 10 inches of snow is predicted to add to the 22 inches on the ground already.
Jan Carstanjen, Cape Cod, Massachusetts
Building, to me, is the enjoyment of working with my hands, solving problems, and learning about new materials and techniques. Sometimes I get ahead of myself in scratch-building, put the project aside, build something else to gain the appropriate skills, and then return to that project and complete it. We, as builders, are also fortunate to have outstanding designers and kit producers such as Jack Cooper, Brian Laird, and others who are always willing to assist.
Accessibility to Onboard Components
The April 2017 “RC Slope Soaring” column referenced Ken Hawkins’ innovative solution to the problem of providing accessibility to onboard components, which, in EPP foam fuselages, are often located deep inside

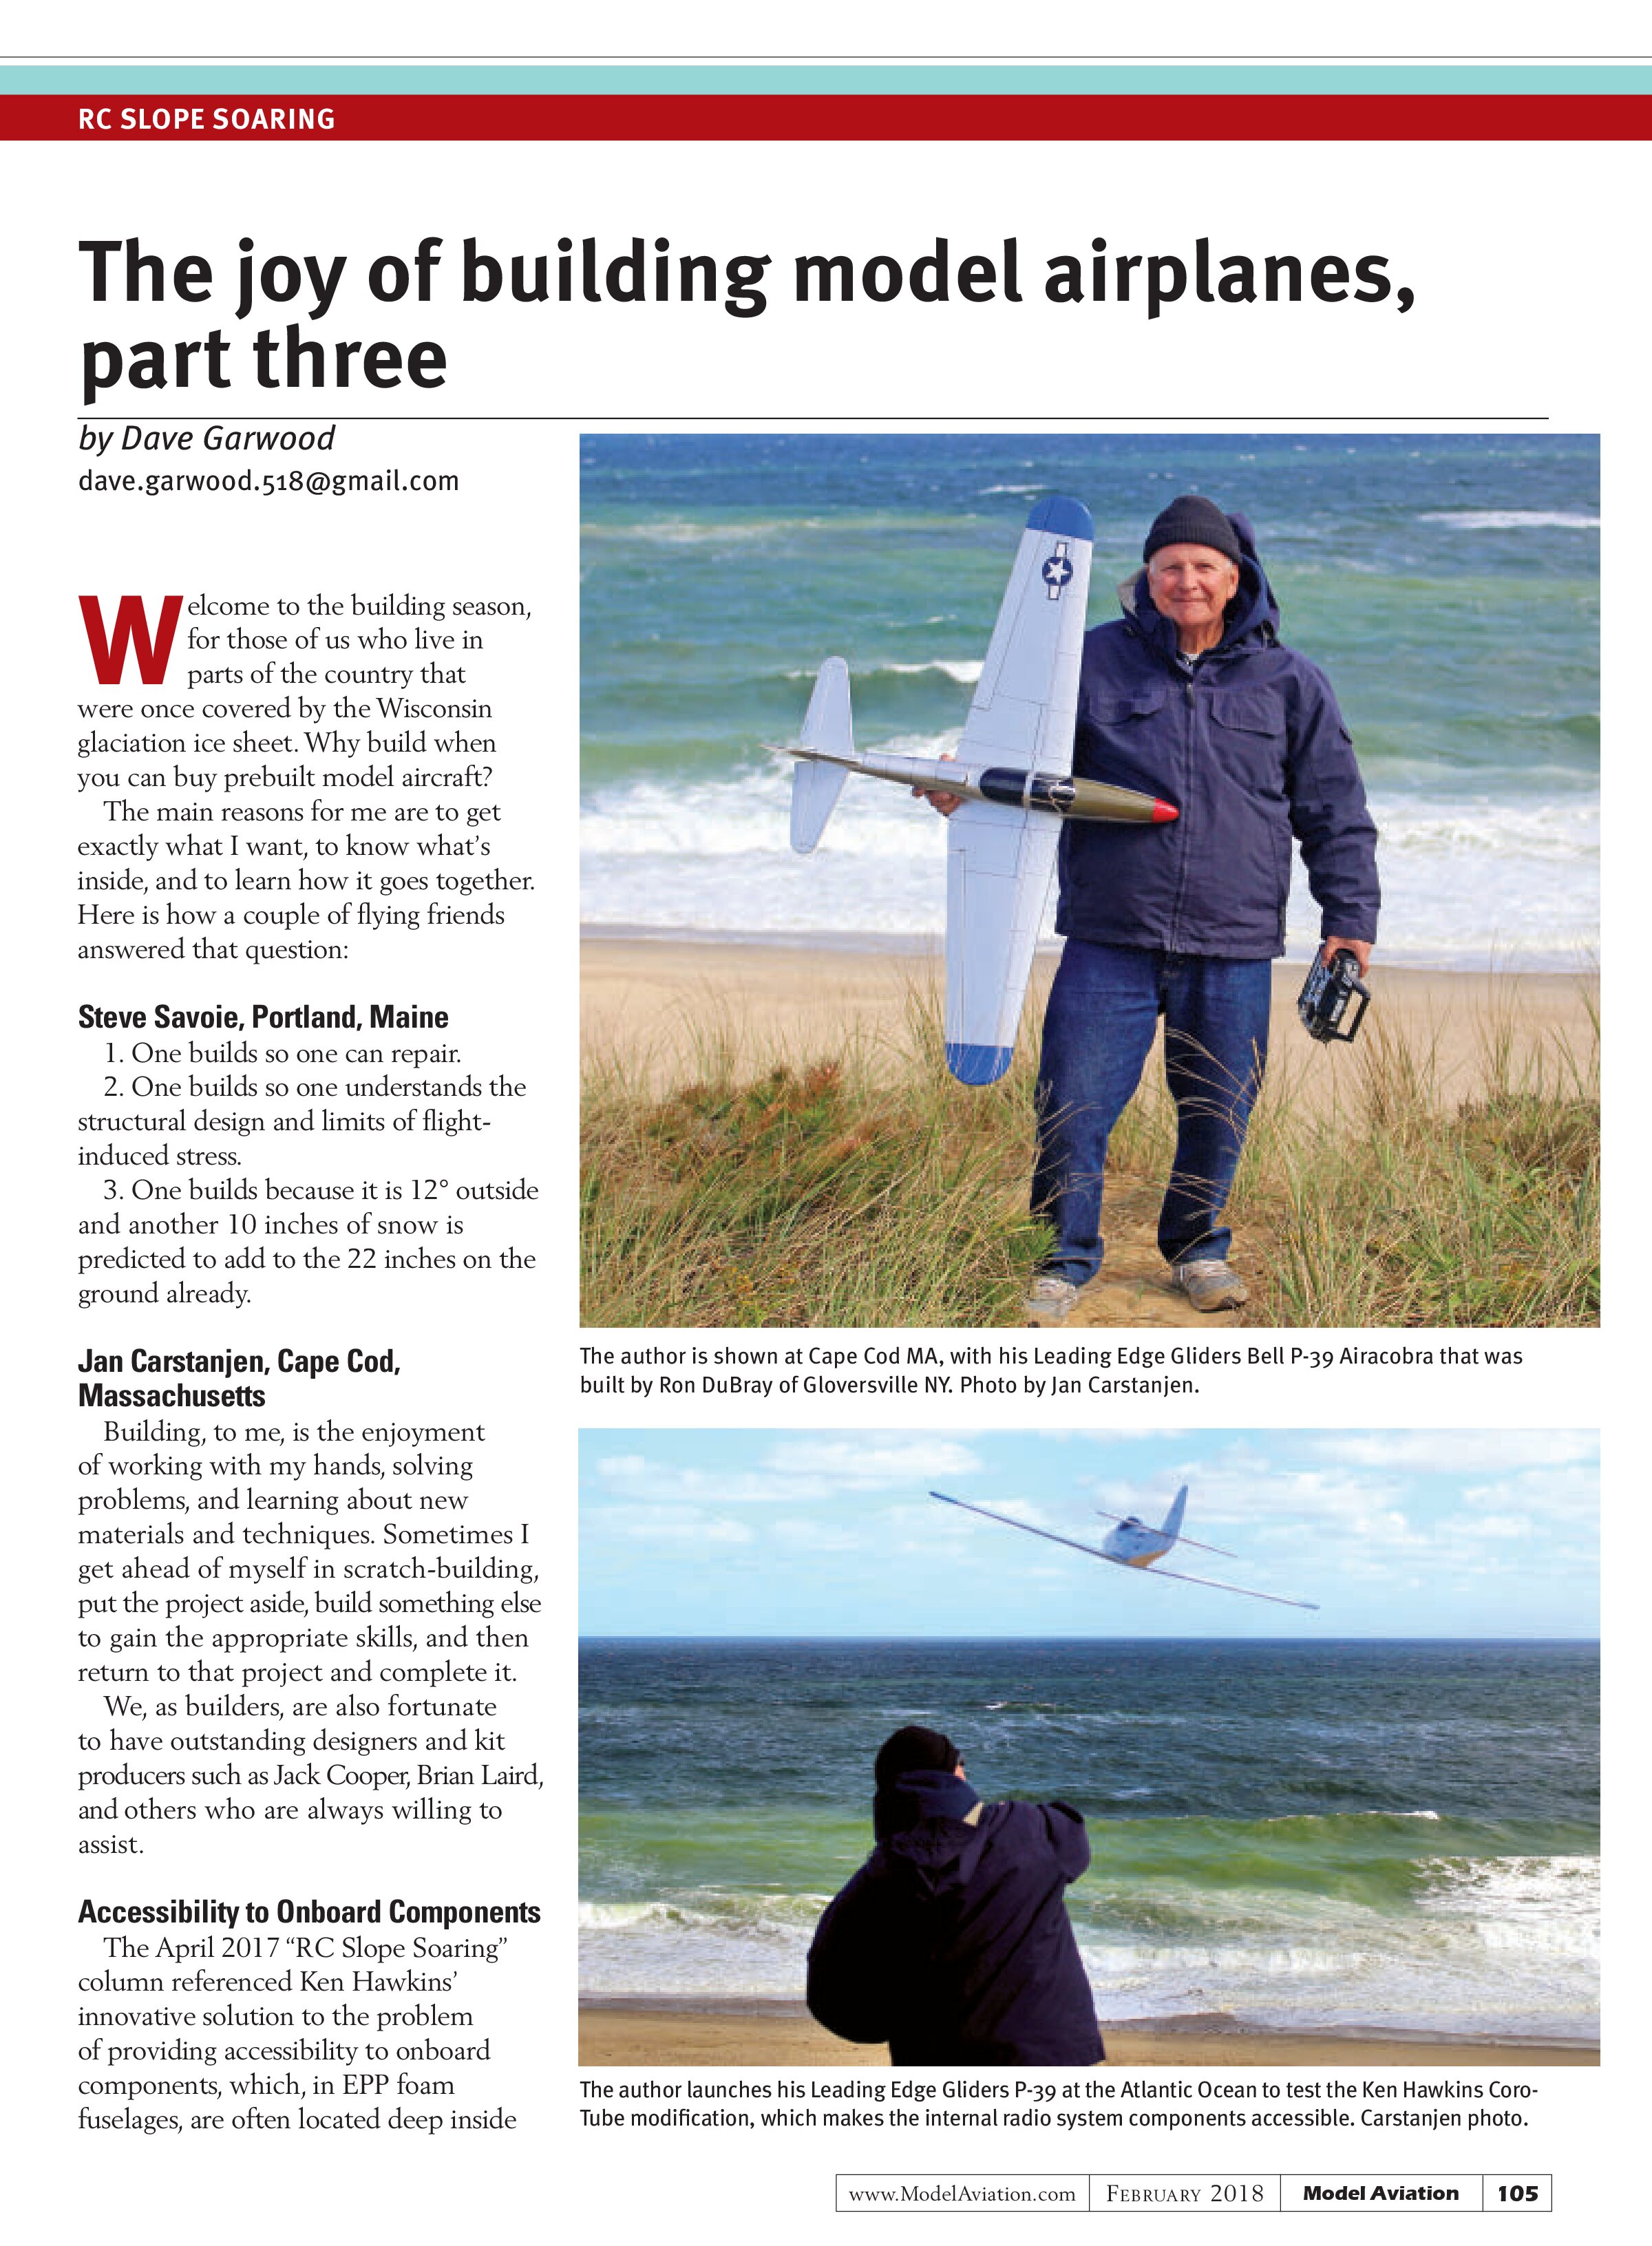
The author is shown at Cape Cod MA, with his Leading Edge Gliders Bell P-39 Airacobra that was built by Ron DuBray of Gloversville NY. Photo by Jan Carstanjen.

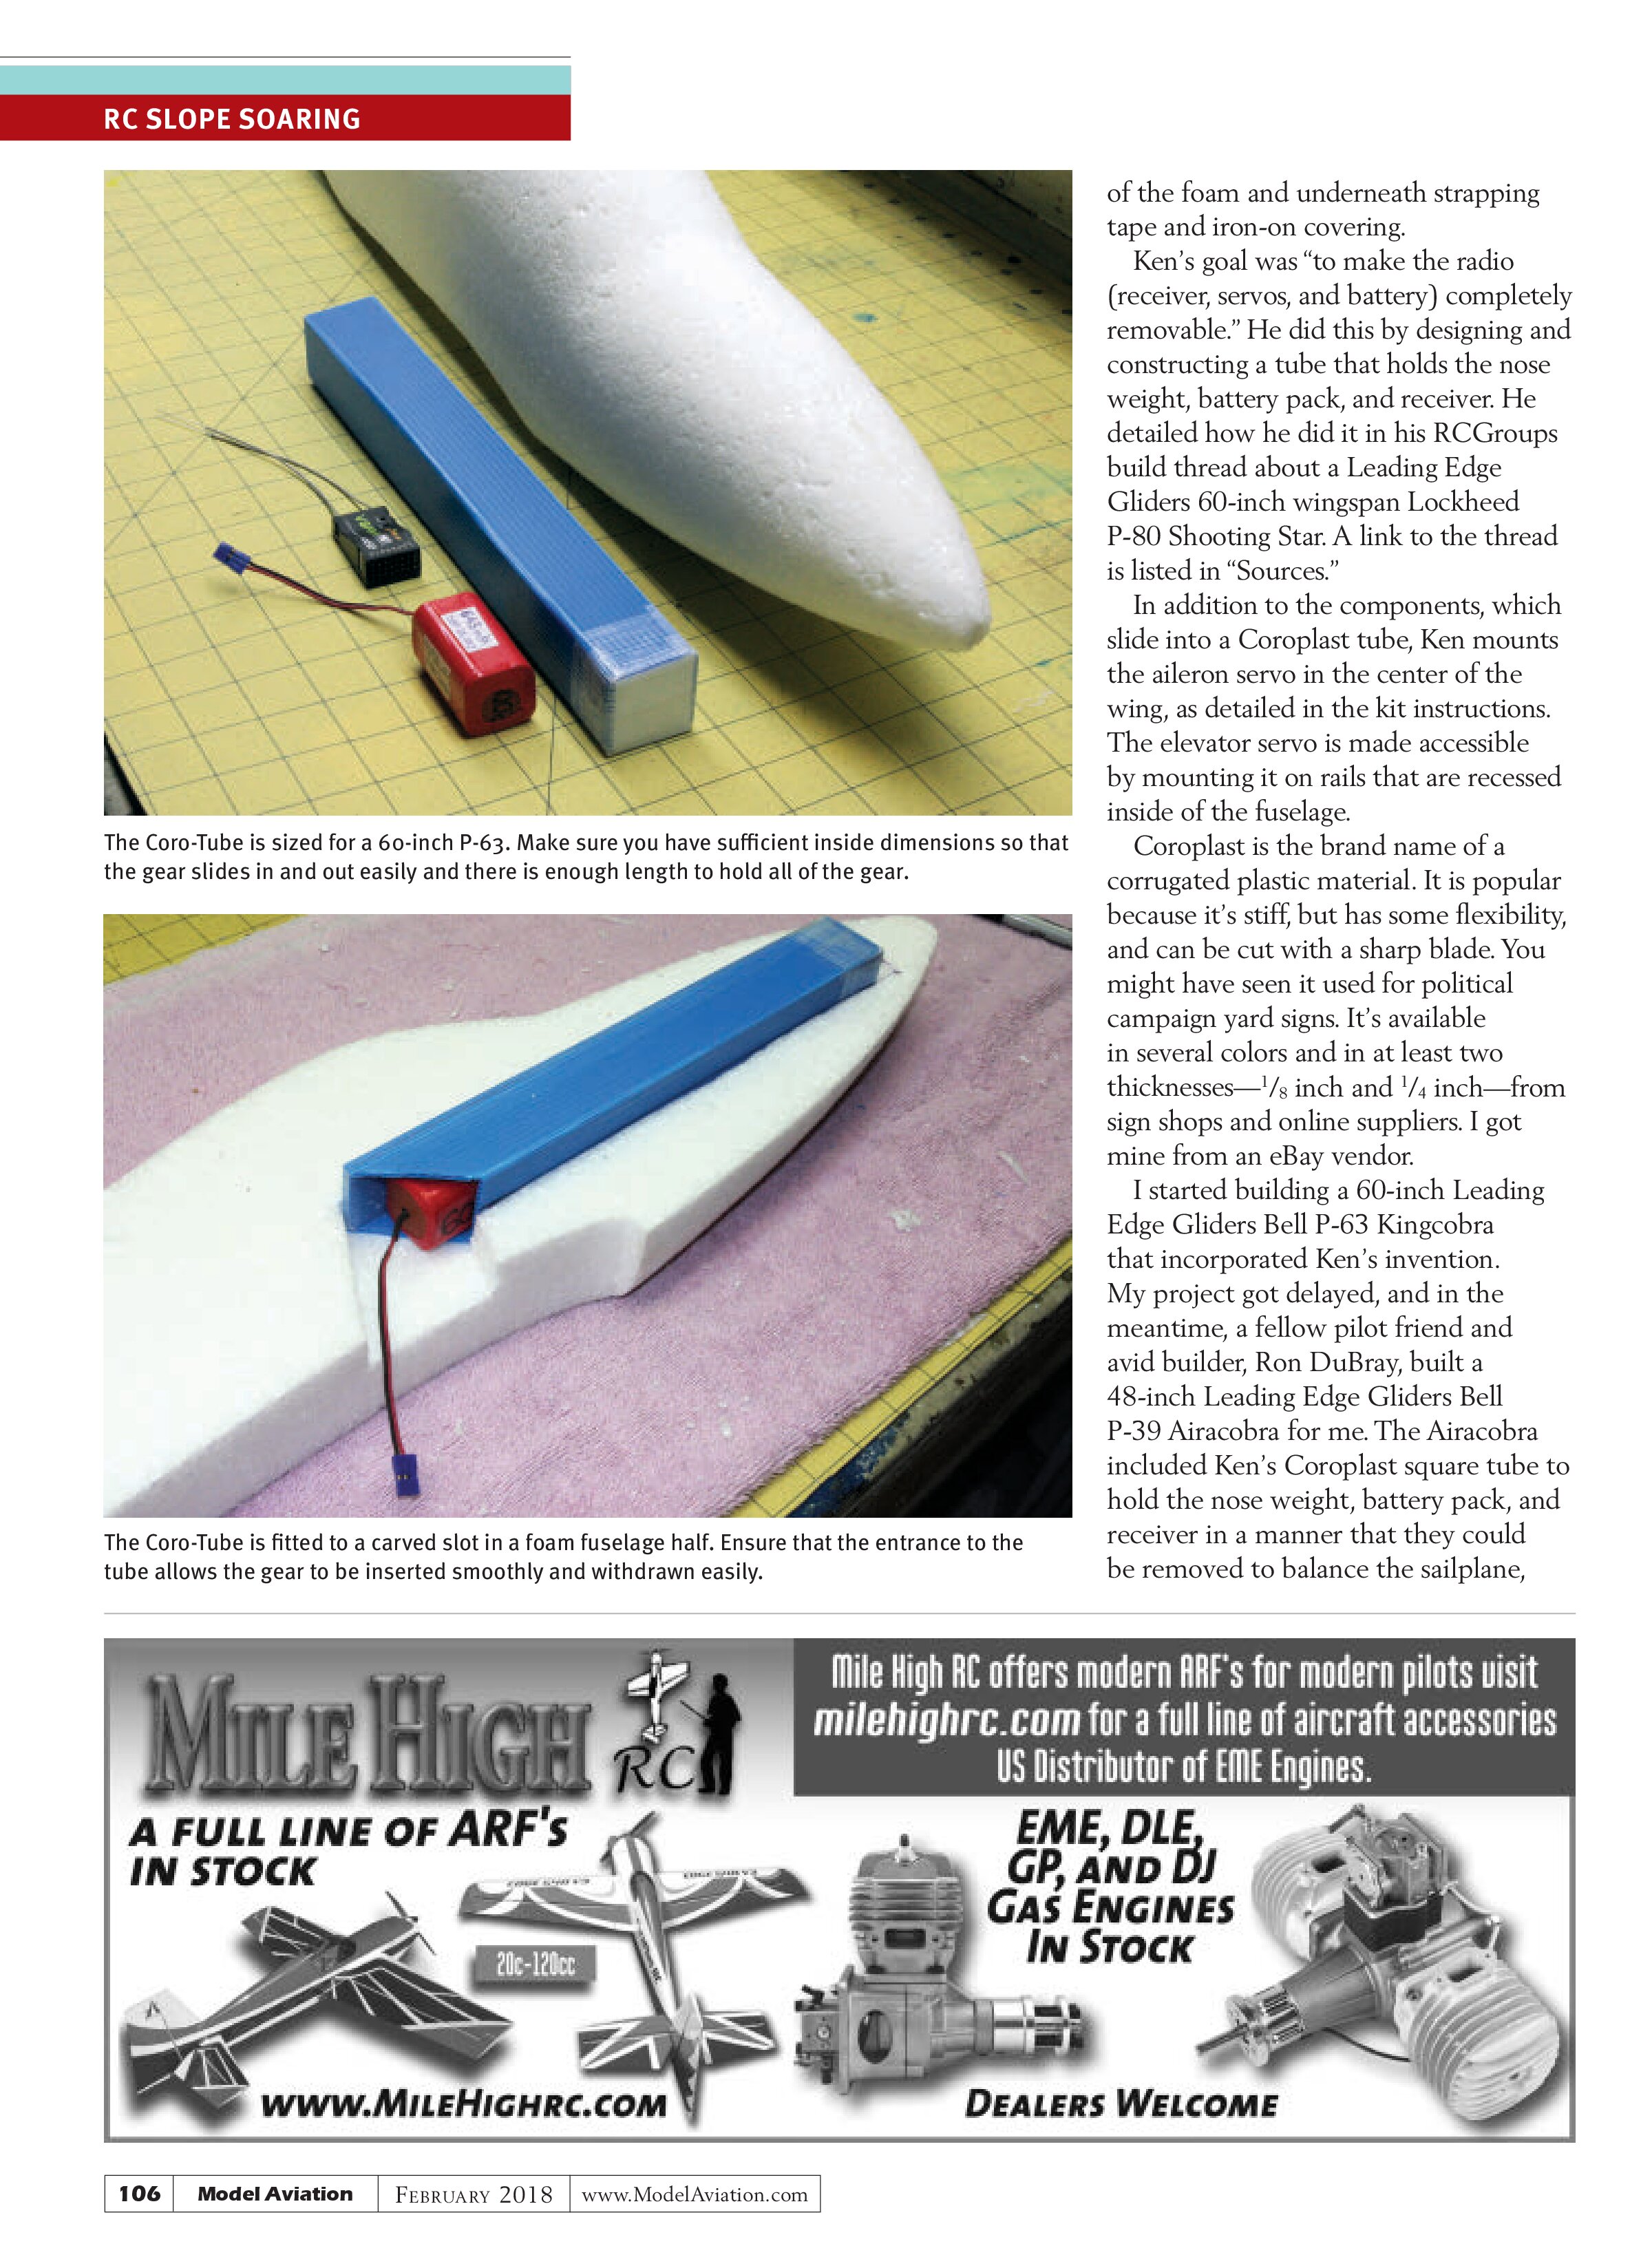
The author launches his Leading Edge Gliders P-39 at the Atlantic Ocean to test the Ken Hawkins Coro-Tube modification, which makes the internal radio system components accessible. Carstanjen photo.

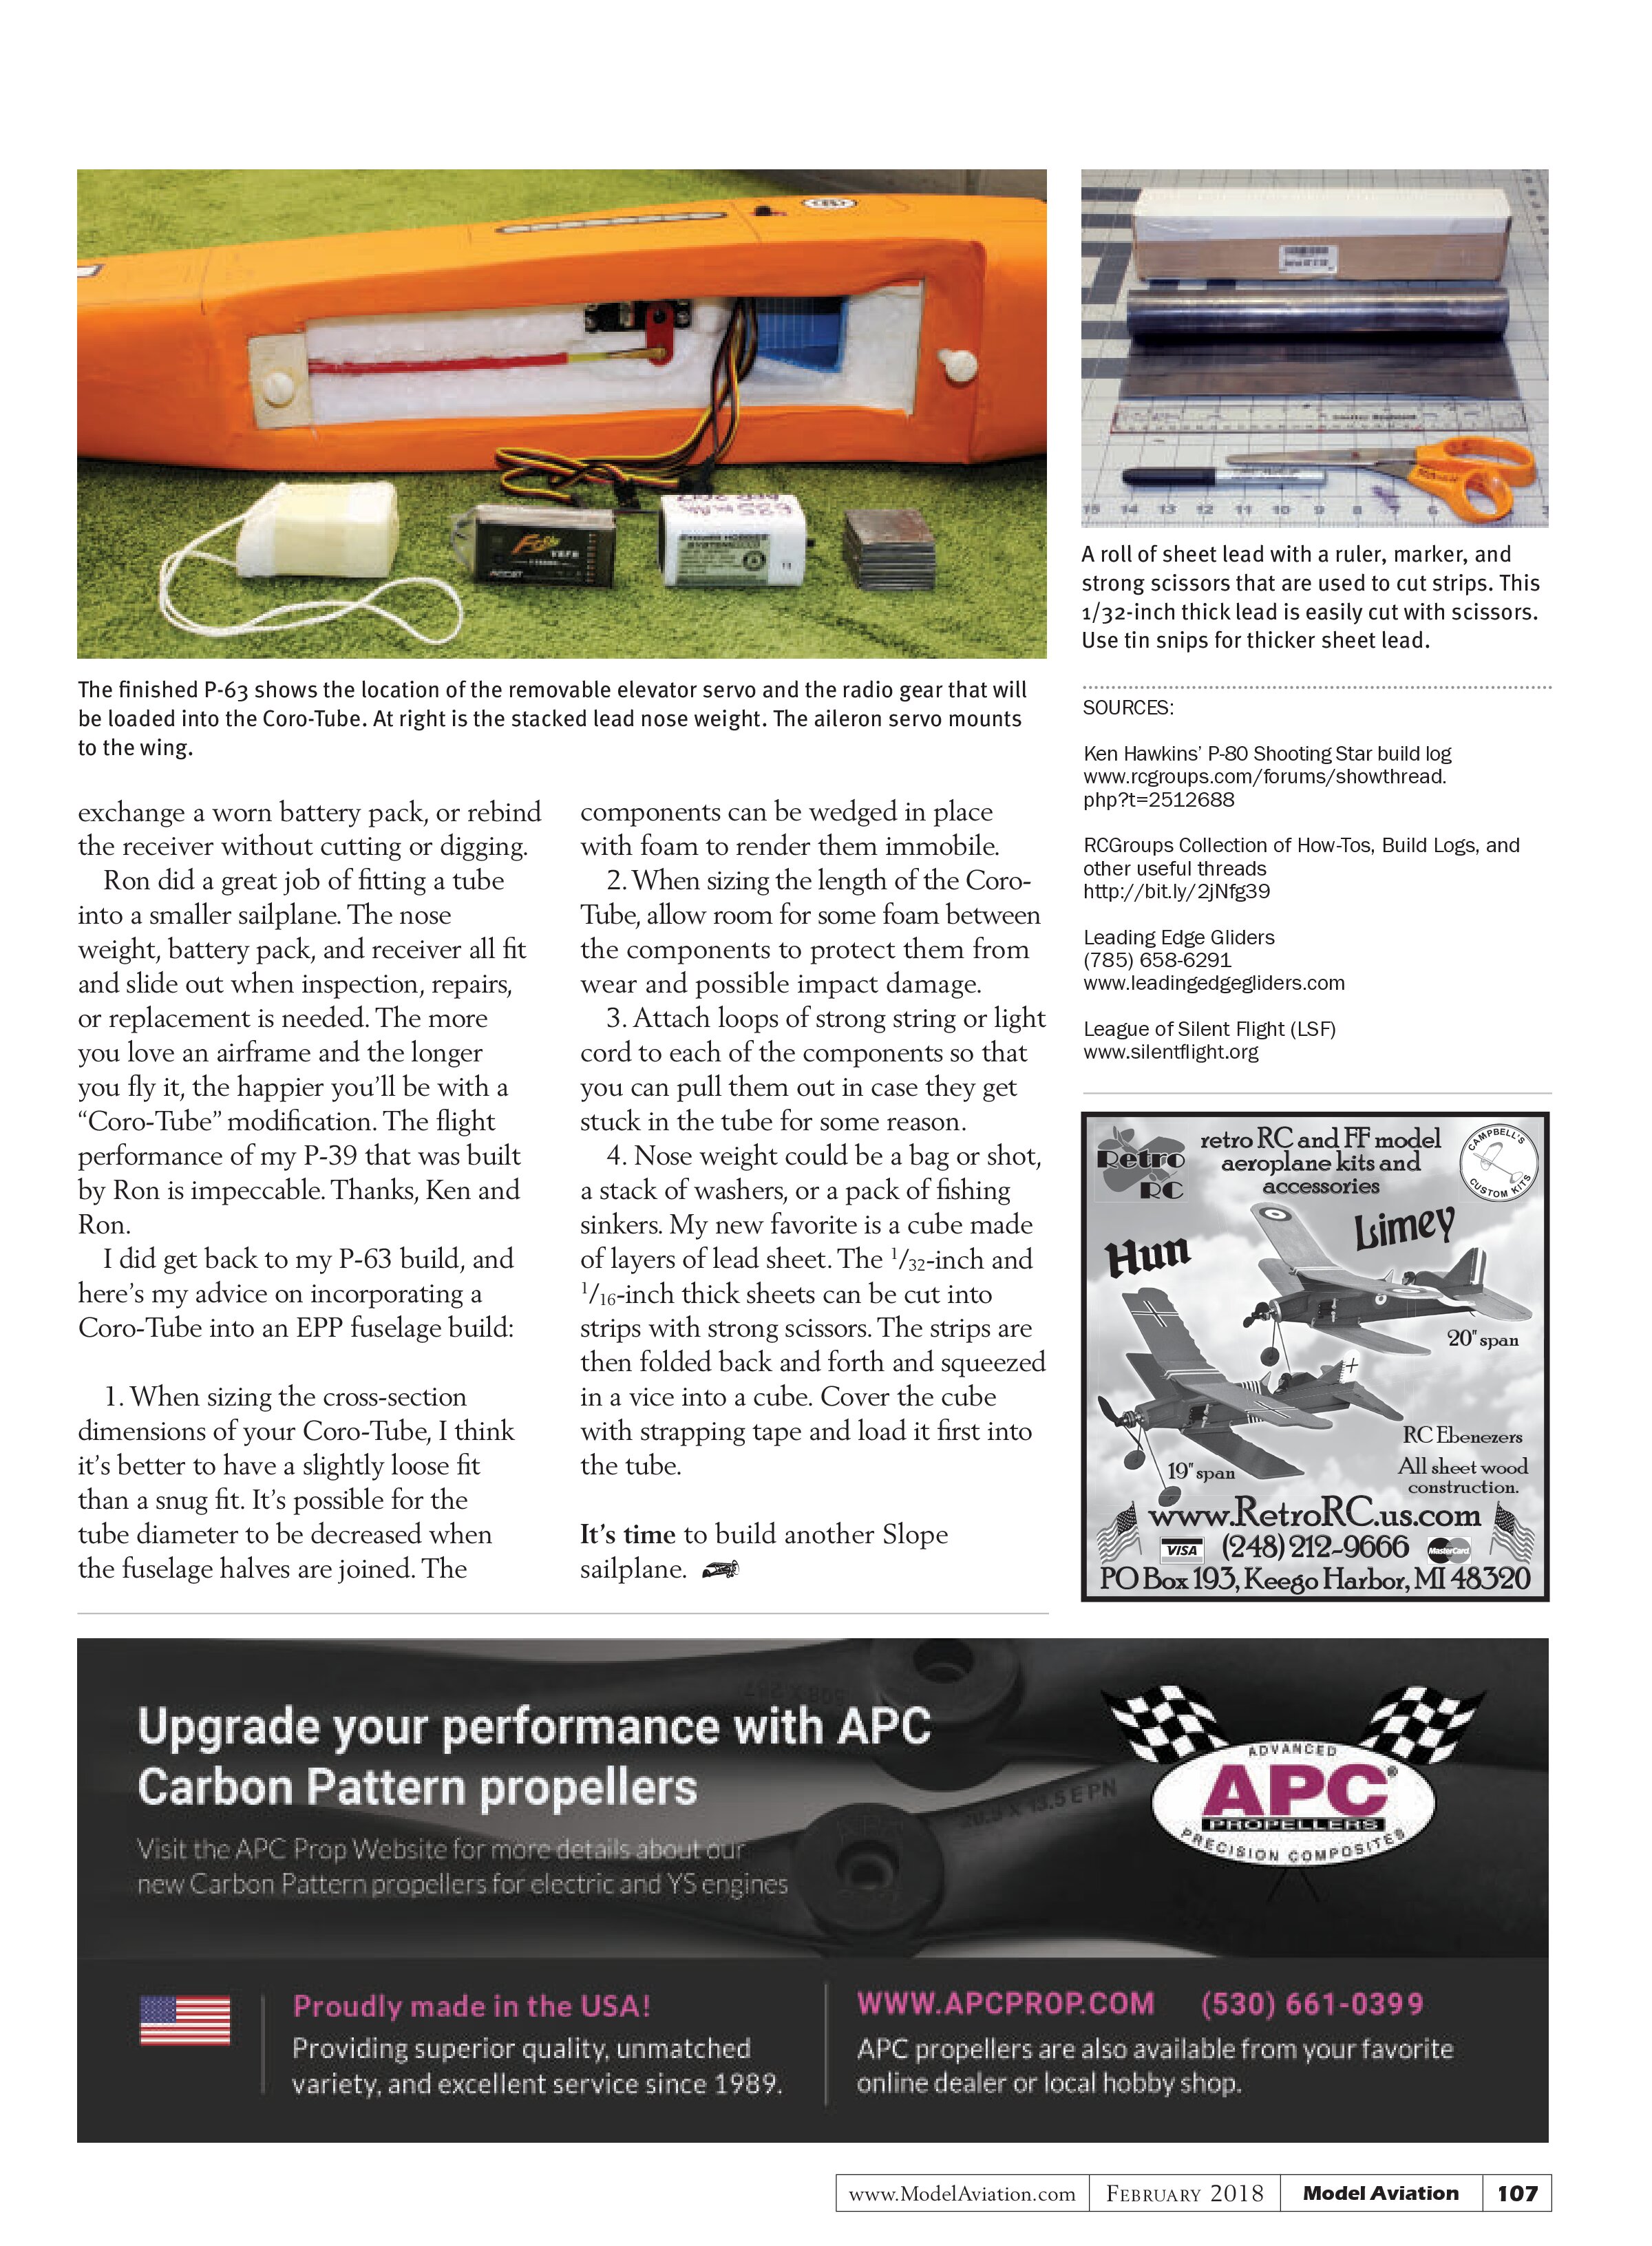
The Coro-Tube is sized for a 60-inch P-63. Make sure you have sufficient inside dimensions so that the gear slides in and out easily and there is enough length to hold all of the gear.

The Coro-Tube is fitted to a carved slot in a foam fuselage half. Ensure that the entrance to the tube allows the gear to be inserted smoothly and withdrawn easily.
of the foam and underneath strapping tape and iron-on covering.
Ken’s goal was “to make the radio (receiver, servos, and battery) completely removable.” He did this by designing and constructing a tube that holds the nose weight, battery pack, and receiver. He detailed how he did it in his RCGroups build thread about a Leading Edge Gliders 60-inch wingspan Lockheed P-80 Shooting Star. A link to the thread is listed in “Sources.”
In addition to the components, which slide into a Coroplast tube, Ken mounts the aileron servo in the center of the wing, as detailed in the kit instructions. The elevator servo is made accessible by mounting it on rails that are recessed inside of the fuselage.
Coroplast is the brand name of a corrugated plastic material. It is popular because it’s stiff, but has some flexibility, and can be cut with a sharp blade. You might have seen it used for political campaign yard signs. It’s available in several colors and in at least two thicknesses—⅛ inch and ¼ inch—from sign shops and online suppliers. I got mine from an eBay vendor.
I started building a 60-inch Leading Edge Gliders Bell P-63 Kingcobra that incorporated Ken’s invention. My project got delayed, and in the meantime, a fellow pilot friend and avid builder, Ron DuBray, built a 48-inch Leading Edge Gliders Bell P-39 Airacobra for me. The Airacobra included Ken’s Coroplast square tube to hold the nose weight, battery pack, and receiver in a manner that they could be removed to balance the sailplane,

The finished P-63 shows the location of the removable elevator servo and the radio gear that will be loaded into the Coro-Tube. At right is the stacked lead nose weight. The aileron servo mounts to the wing.

A roll of sheet lead with a ruler, marker, and strong scissors that are used to cut strips. This 1/32-inch thick lead is easily cut with scissors. Use tin snips for thicker sheet lead.
exchange a worn battery pack, or rebind the receiver without cutting or digging.
Ron did a great job of fitting a tube into a smaller sailplane. The nose weight, battery pack, and receiver all fit and slide out when inspection, repairs, or replacement is needed. The more you love an airframe and the longer you fly it, the happier you’ll be with a “Coro-Tube” modification. The flight performance of my P-39 that was built by Ron is impeccable. Thanks, Ken and Ron.
I did get back to my P-63 build, and here’s my advice on incorporating a Coro-Tube into an EPP fuselage build:
- When sizing the cross-section dimensions of your Coro-Tube, I think it’s better to have a slightly loose fit than a snug fit. It’s possible for the tube diameter to be decreased when the fuselage halves are joined. The components can be wedged in place with foam to render them immobile.
- When sizing the length of the Coro-Tube, allow room for some foam between the components to protect them from wear and possible impact damage.
- Attach loops of strong string or light cord to each of the components so that you can pull them out in case they get stuck in the tube for some reason.
- Nose weight could be a bag or shot, a stack of washers, or a pack of fishing sinkers. My new favorite is a cube made of layers of lead sheet. The 1/32-inch and 1/16-inch thick sheets can be cut into strips with strong scissors. The strips are then folded back and forth and squeezed in a vice into a cube. Cover the cube with strapping tape and load it first into the tube.
It’s time to build another Slope sailplane.
SOURCES:
Ken Hawkins’ P-80 Shooting Star build log
www.rcgroups.com/forums/showthread.php?t=2512688
RCGroups Collection of How-Tos, Build Logs, and other useful threads
http://bit.ly/2jNfg39
Leading Edge Gliders
(785) 658-6291
www.leadingedgegliders.com
League of Silent Flight (LSF)
www.silentflight.org