Product Spotlight
New products that are Worth a Closer Look
HOLY SMOKES RC SMOKE PUMP
Andrew Griffith reviewed the Holy Smokes RC Smoke Pump. Here is what he had to say:
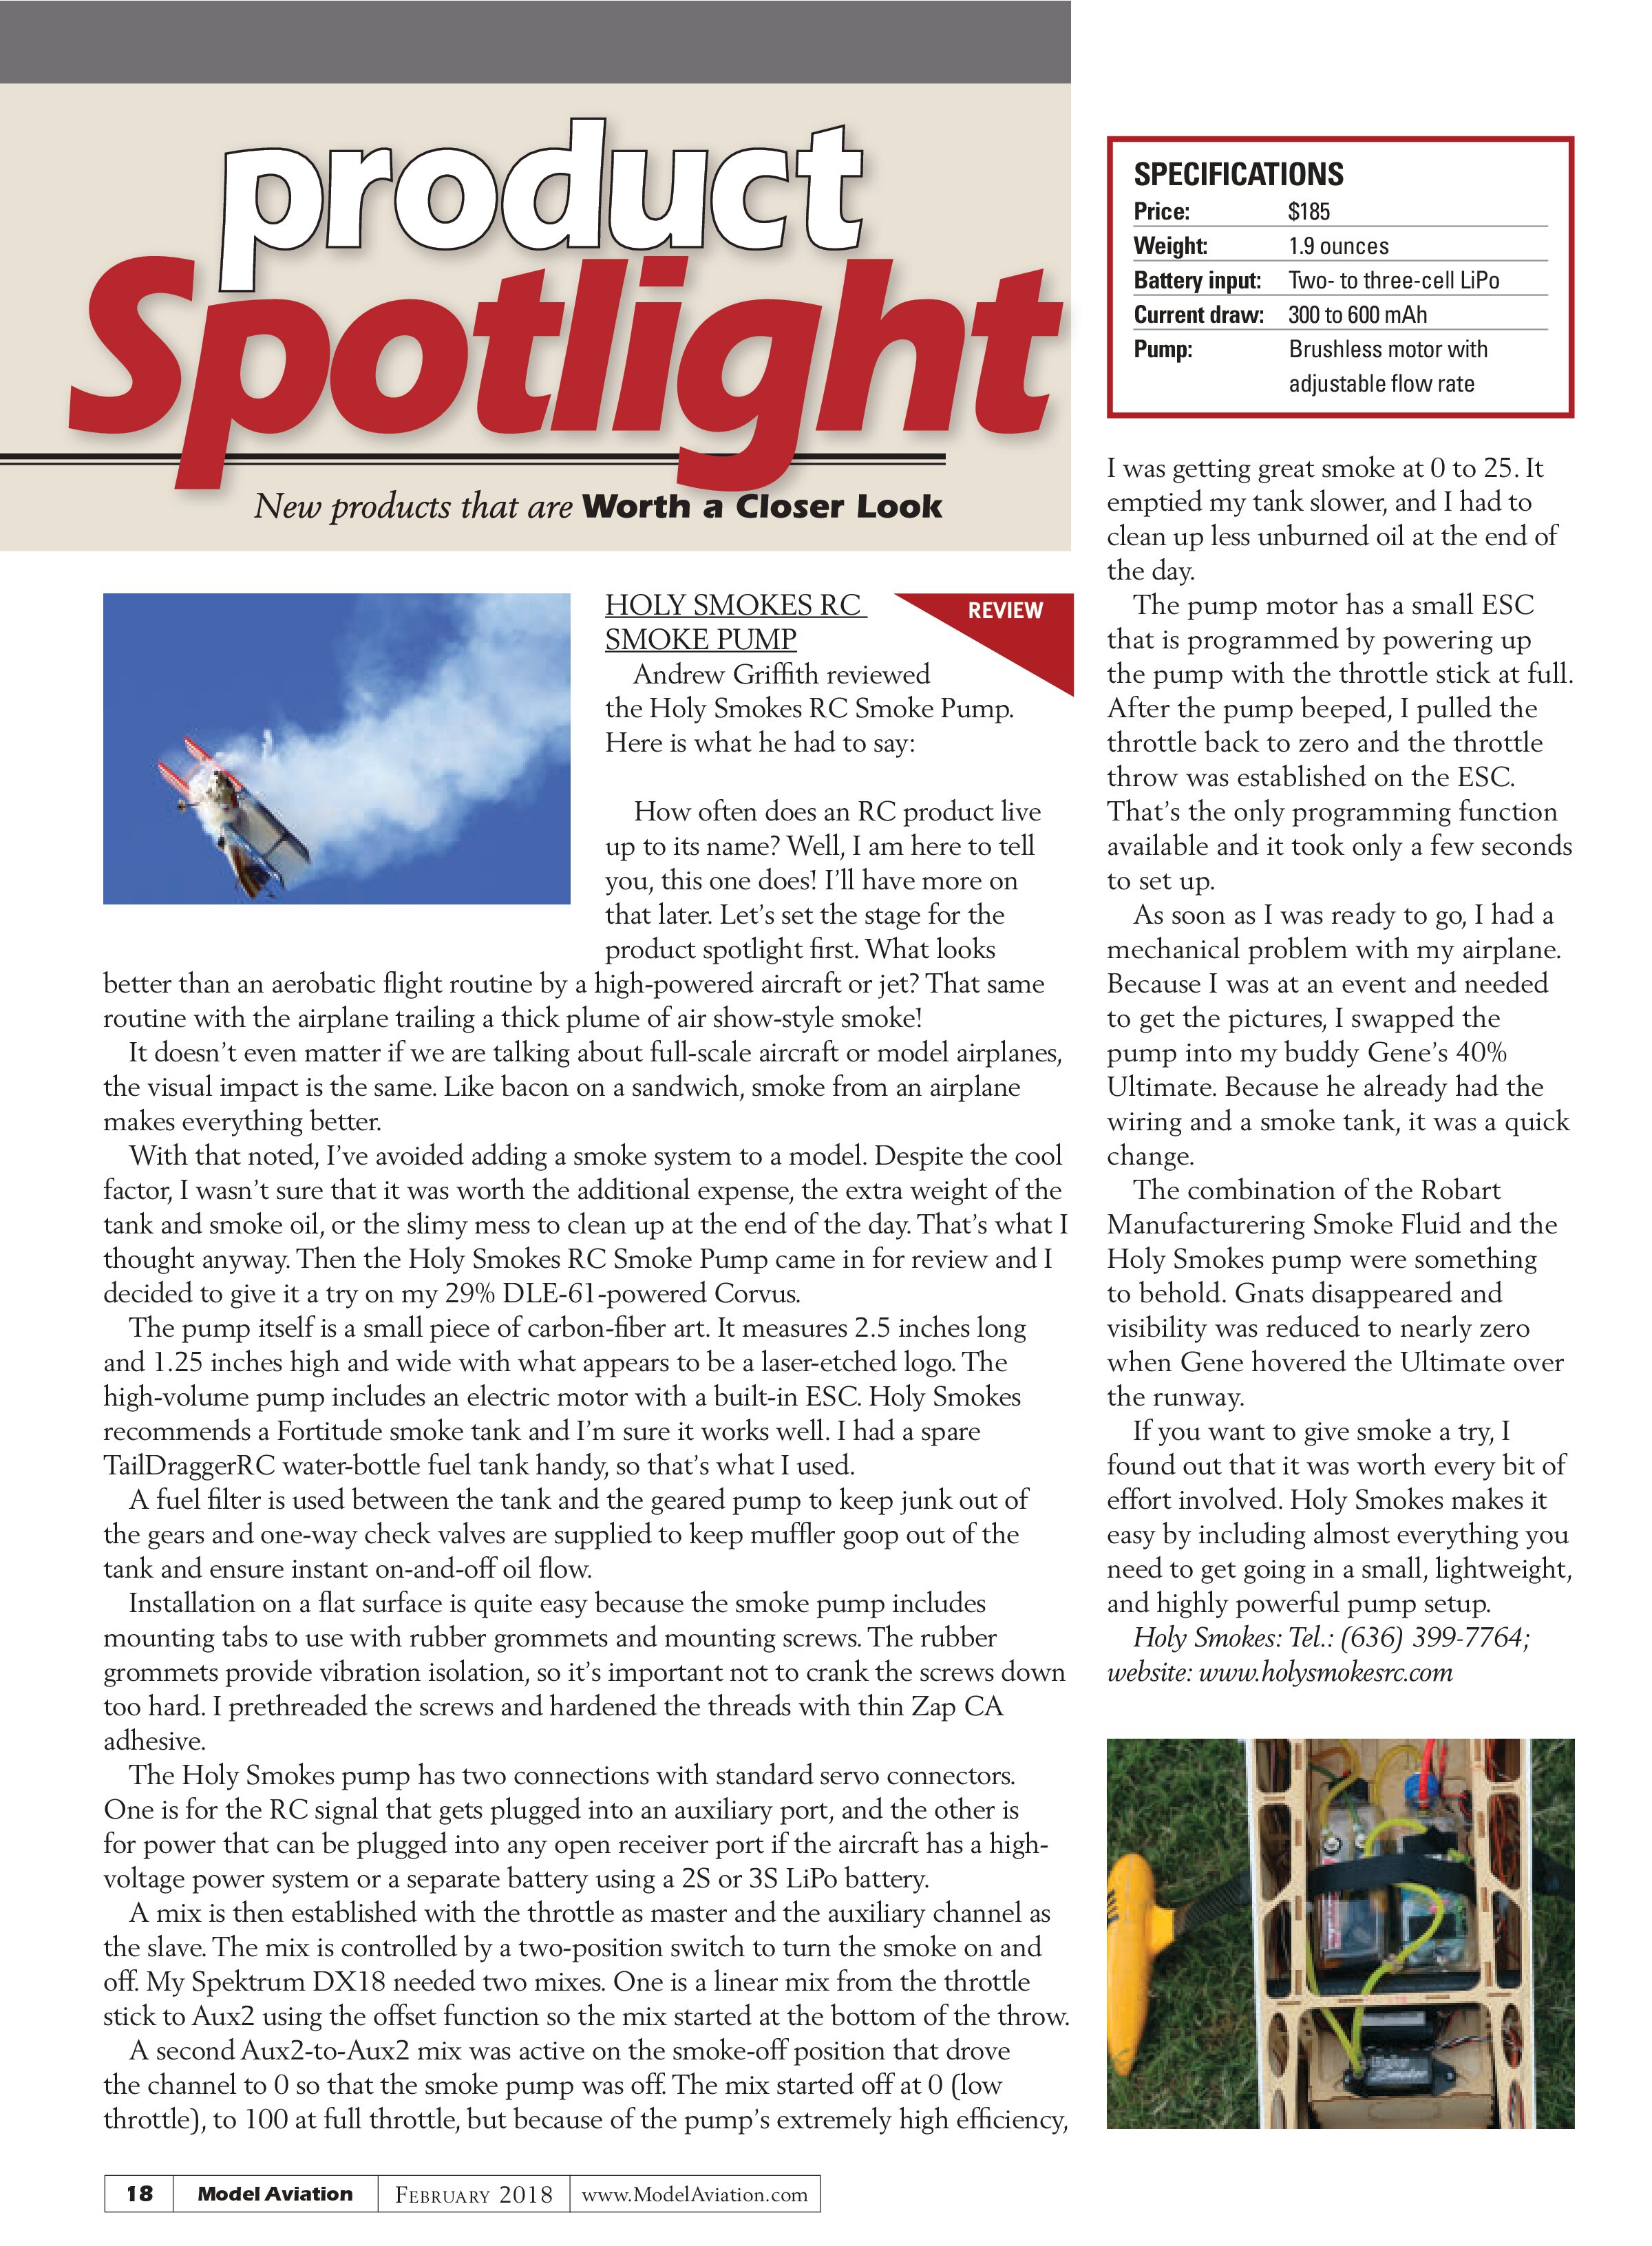
How often does an RC product live up to its name? Well, I am here to tell you, this one does! I’ll have more on that later. Let’s set the stage for the product spotlight first. What looks better than an aerobatic flight routine by a high-powered aircraft or jet? That same routine with the airplane trailing a thick plume of air show-style smoke!
It doesn’t even matter if we are talking about full-scale aircraft or model airplanes, the visual impact is the same. Like bacon on a sandwich, smoke from an airplane makes everything better.
With that noted, I’ve avoided adding a smoke system to a model. Despite the cool factor, I wasn’t sure that it was worth the additional expense, the extra weight of the tank and smoke oil, or the slimy mess to clean up at the end of the day. That’s what I thought anyway. Then the Holy Smokes RC Smoke Pump came in for review and I decided to give it a try on my 29% DLE-61-powered Corvus.
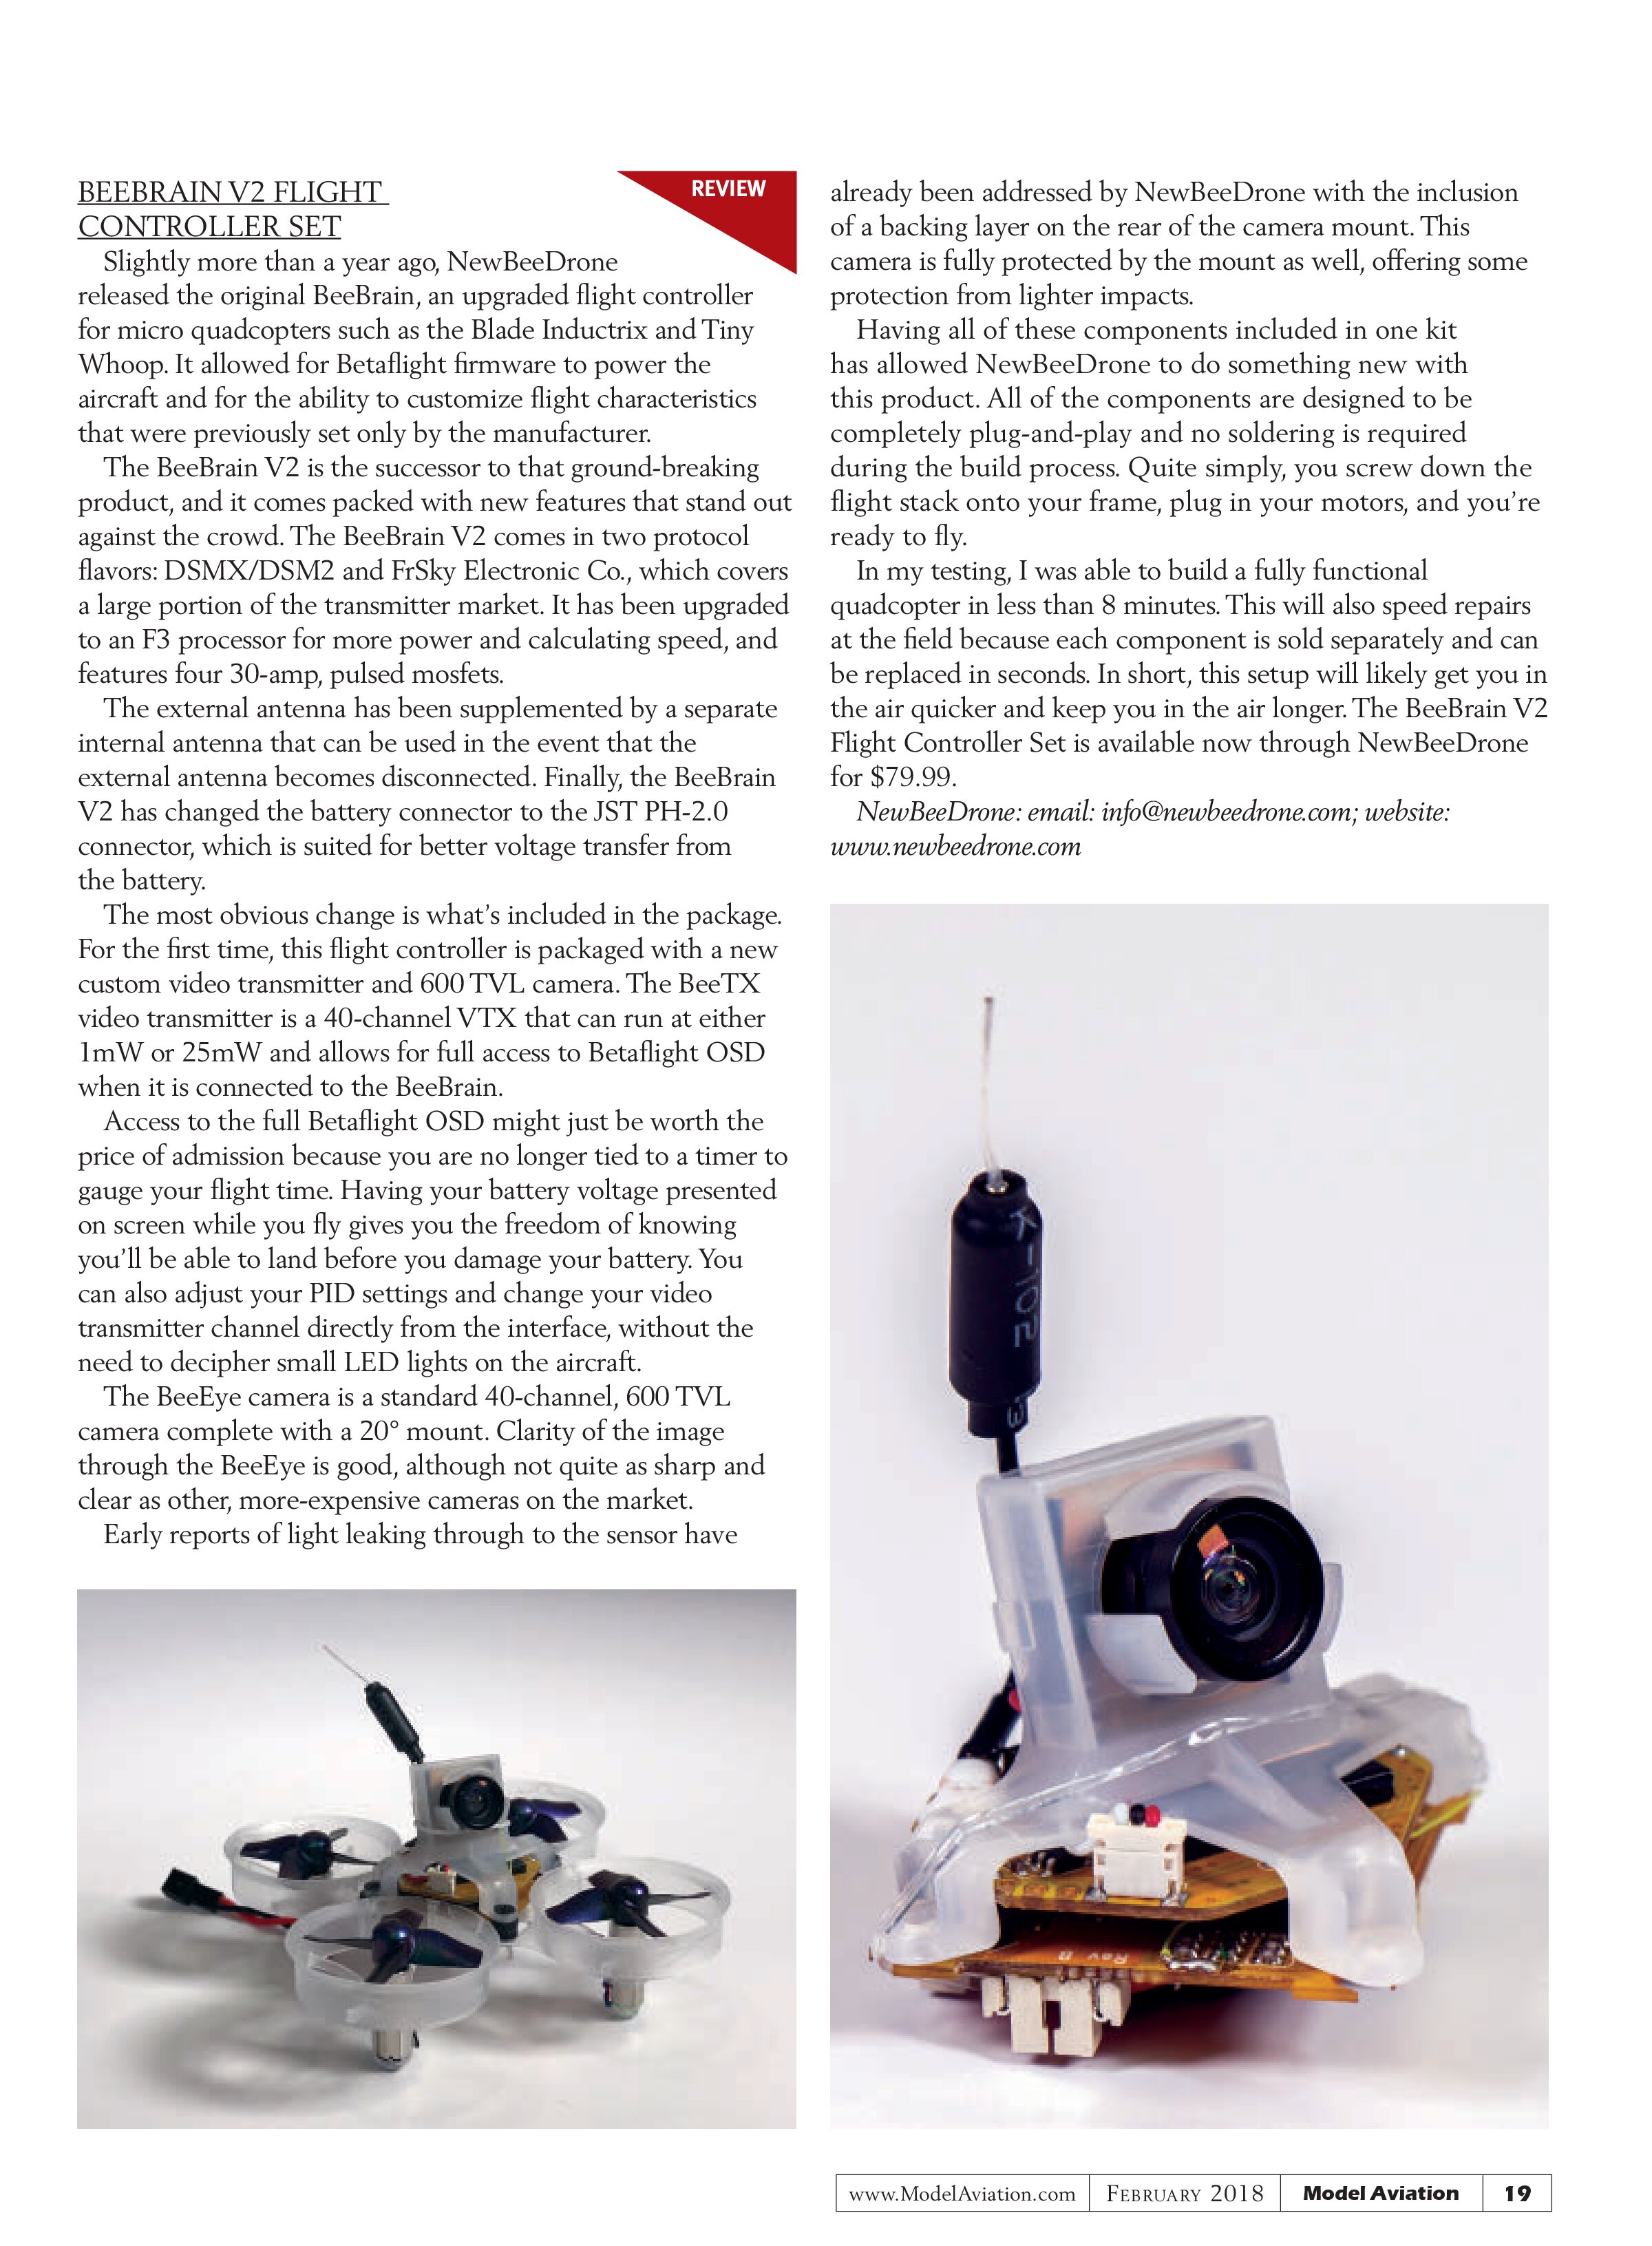
The pump itself is a small piece of carbon-fiber art. It measures 2.5 inches long and 1.25 inches high and wide with what appears to be a laser-etched logo. The high-volume pump includes an electric motor with a built-in ESC. Holy Smokes recommends a Fortitude smoke tank and I’m sure it works well. I had a spare TailDraggerRC water-bottle fuel tank handy, so that’s what I used.
A fuel filter is used between the tank and the geared pump to keep junk out of the gears and one-way check valves are supplied to keep muffler goop out of the tank and ensure instant on-and-off oil flow.
Installation on a flat surface is quite easy because the smoke pump includes mounting tabs to use with rubber grommets and mounting screws. The rubber grommets provide vibration isolation, so it’s important not to crank the screws down too hard. I prethreaded the screws and hardened the threads with thin Zap CA adhesive.
The Holy Smokes pump has two connections with standard servo connectors. One is for the RC signal that gets plugged into an auxiliary port, and the other is for power that can be plugged into any open receiver port if the aircraft has a high-voltage power system or a separate battery using a 2S or 3S LiPo battery.
A mix is then established with the throttle as master and the auxiliary channel as the slave. The mix is controlled by a two-position switch to turn the smoke on and off. My Spektrum DX18 needed two mixes. One is a linear mix from the throttle stick to Aux2 using the offset function so the mix started at the bottom of the throw.
A second Aux2-to-Aux2 mix was active on the smoke-off position that drove the channel to 0 so that the smoke pump was off. The mix started off at 0 (low throttle), to 100 at full throttle, but because of the pump’s extremely high efficiency,

I was getting great smoke at 0 to 25. It emptied my tank slower, and I had to clean up less unburned oil at the end of the day.
The pump motor has a small ESC that is programmed by powering up the pump with the throttle stick at full. After the pump beeped, I pulled the throttle back to zero and the throttle throw was established on the ESC. That’s the only programming function available and it took only a few seconds to set up.
As soon as I was ready to go, I had a mechanical problem with my airplane. Because I was at an event and needed to get the pictures, I swapped the pump into my buddy Gene’s 40% Ultimate. Because he already had the wiring and a smoke tank, it was a quick change.
The combination of the Robart Manufacturing Smoke Fluid and the Holy Smokes pump were something to behold. Gnats disappeared and visibility was reduced to nearly zero when Gene hovered the Ultimate over the runway.
If you want to give smoke a try, I found out that it was worth every bit of effort involved. Holy Smokes makes it easy by including almost everything you need to get going in a small, lightweight, and highly powerful pump setup.
Holy Smokes: Tel.: (636) 399-7764; website: www.holysmokesrc.com

BEEBRAIN V2 FLIGHT CONTROLLER SET
Slightly more than a year ago, NewBeeDrone released the original BeeBrain, an upgraded flight controller for micro quadcopters such as the Blade Inductrix and Tiny Whoop. It allowed for Betaflight firmware to power the aircraft and for the ability to customize flight characteristics that were previously set only by the manufacturer.
The BeeBrain V2 is the successor to that ground-breaking product, and it comes packed with new features that stand out against the crowd. The BeeBrain V2 comes in two protocol flavors: DSMX/DSM2 and FrSky Electronic Co., which covers a large portion of the transmitter market. It has been upgraded to an F3 processor for more power and calculating speed, and features four 30-amp, pulsed mosfets.
The external antenna has been supplemented by a separate internal antenna that can be used in the event that the external antenna becomes disconnected. Finally, the BeeBrain V2 has changed the battery connector to the JST PH-2.0 connector, which is suited for better voltage transfer from the battery.
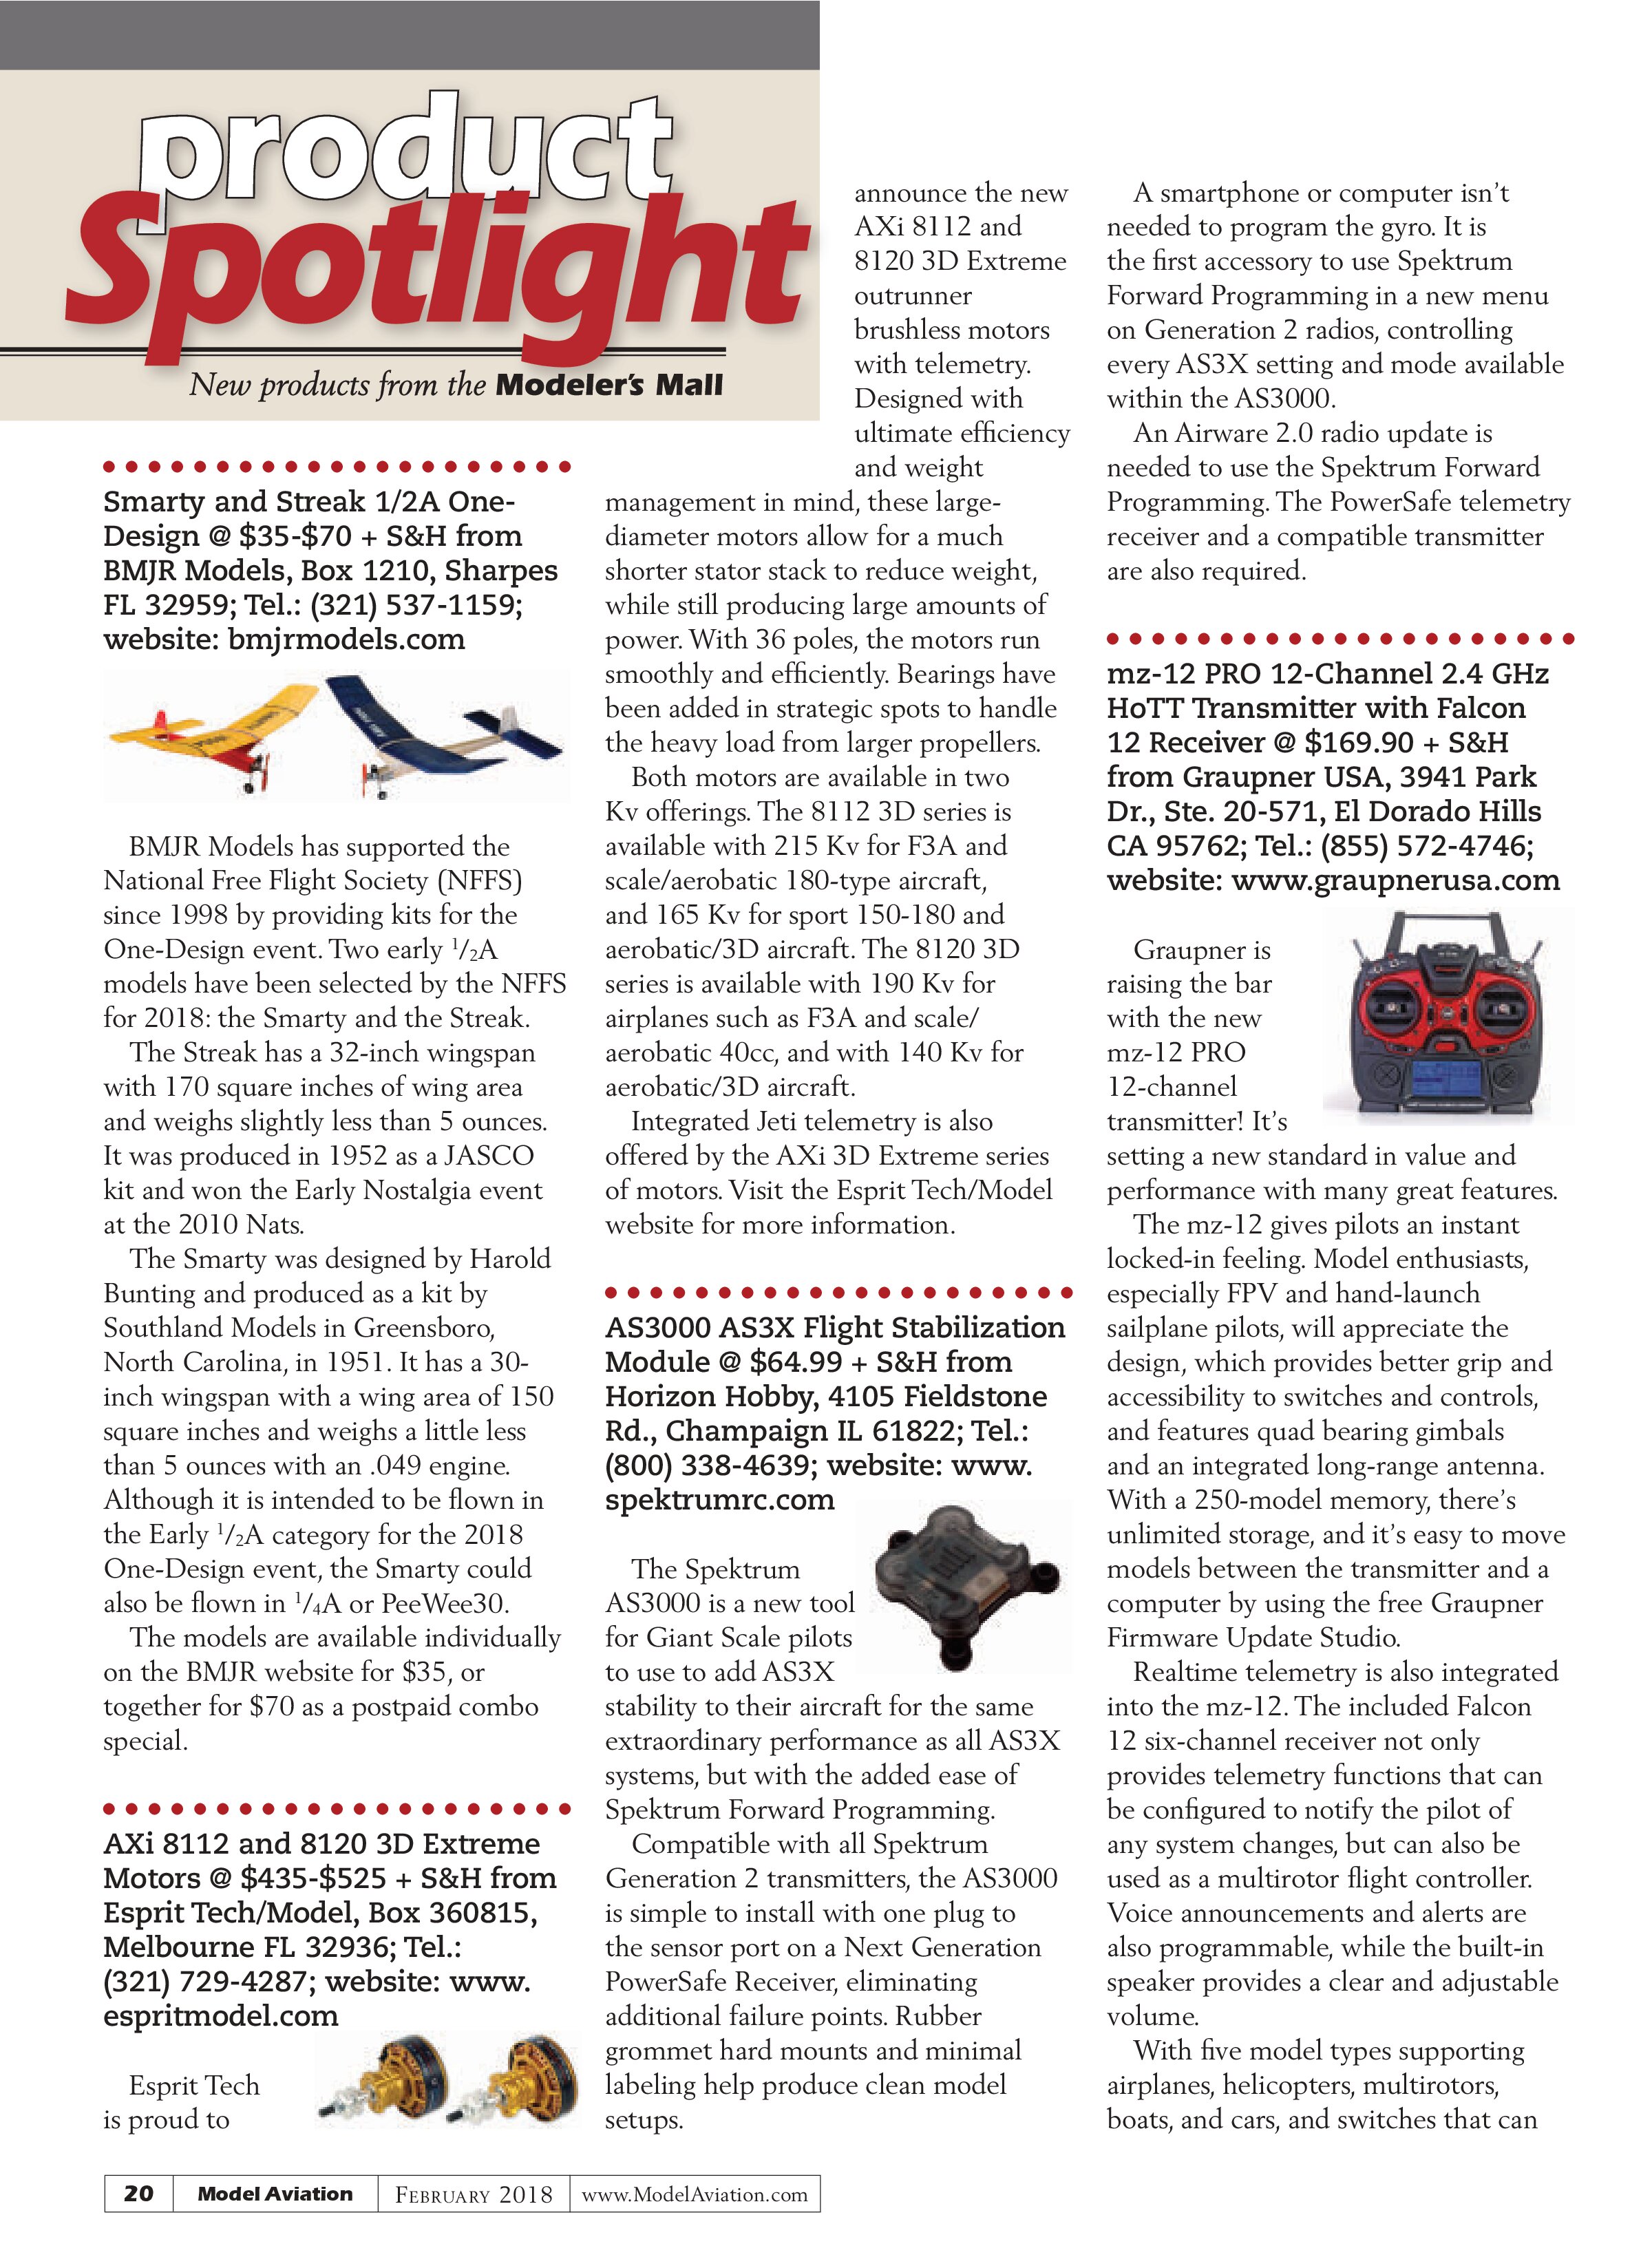
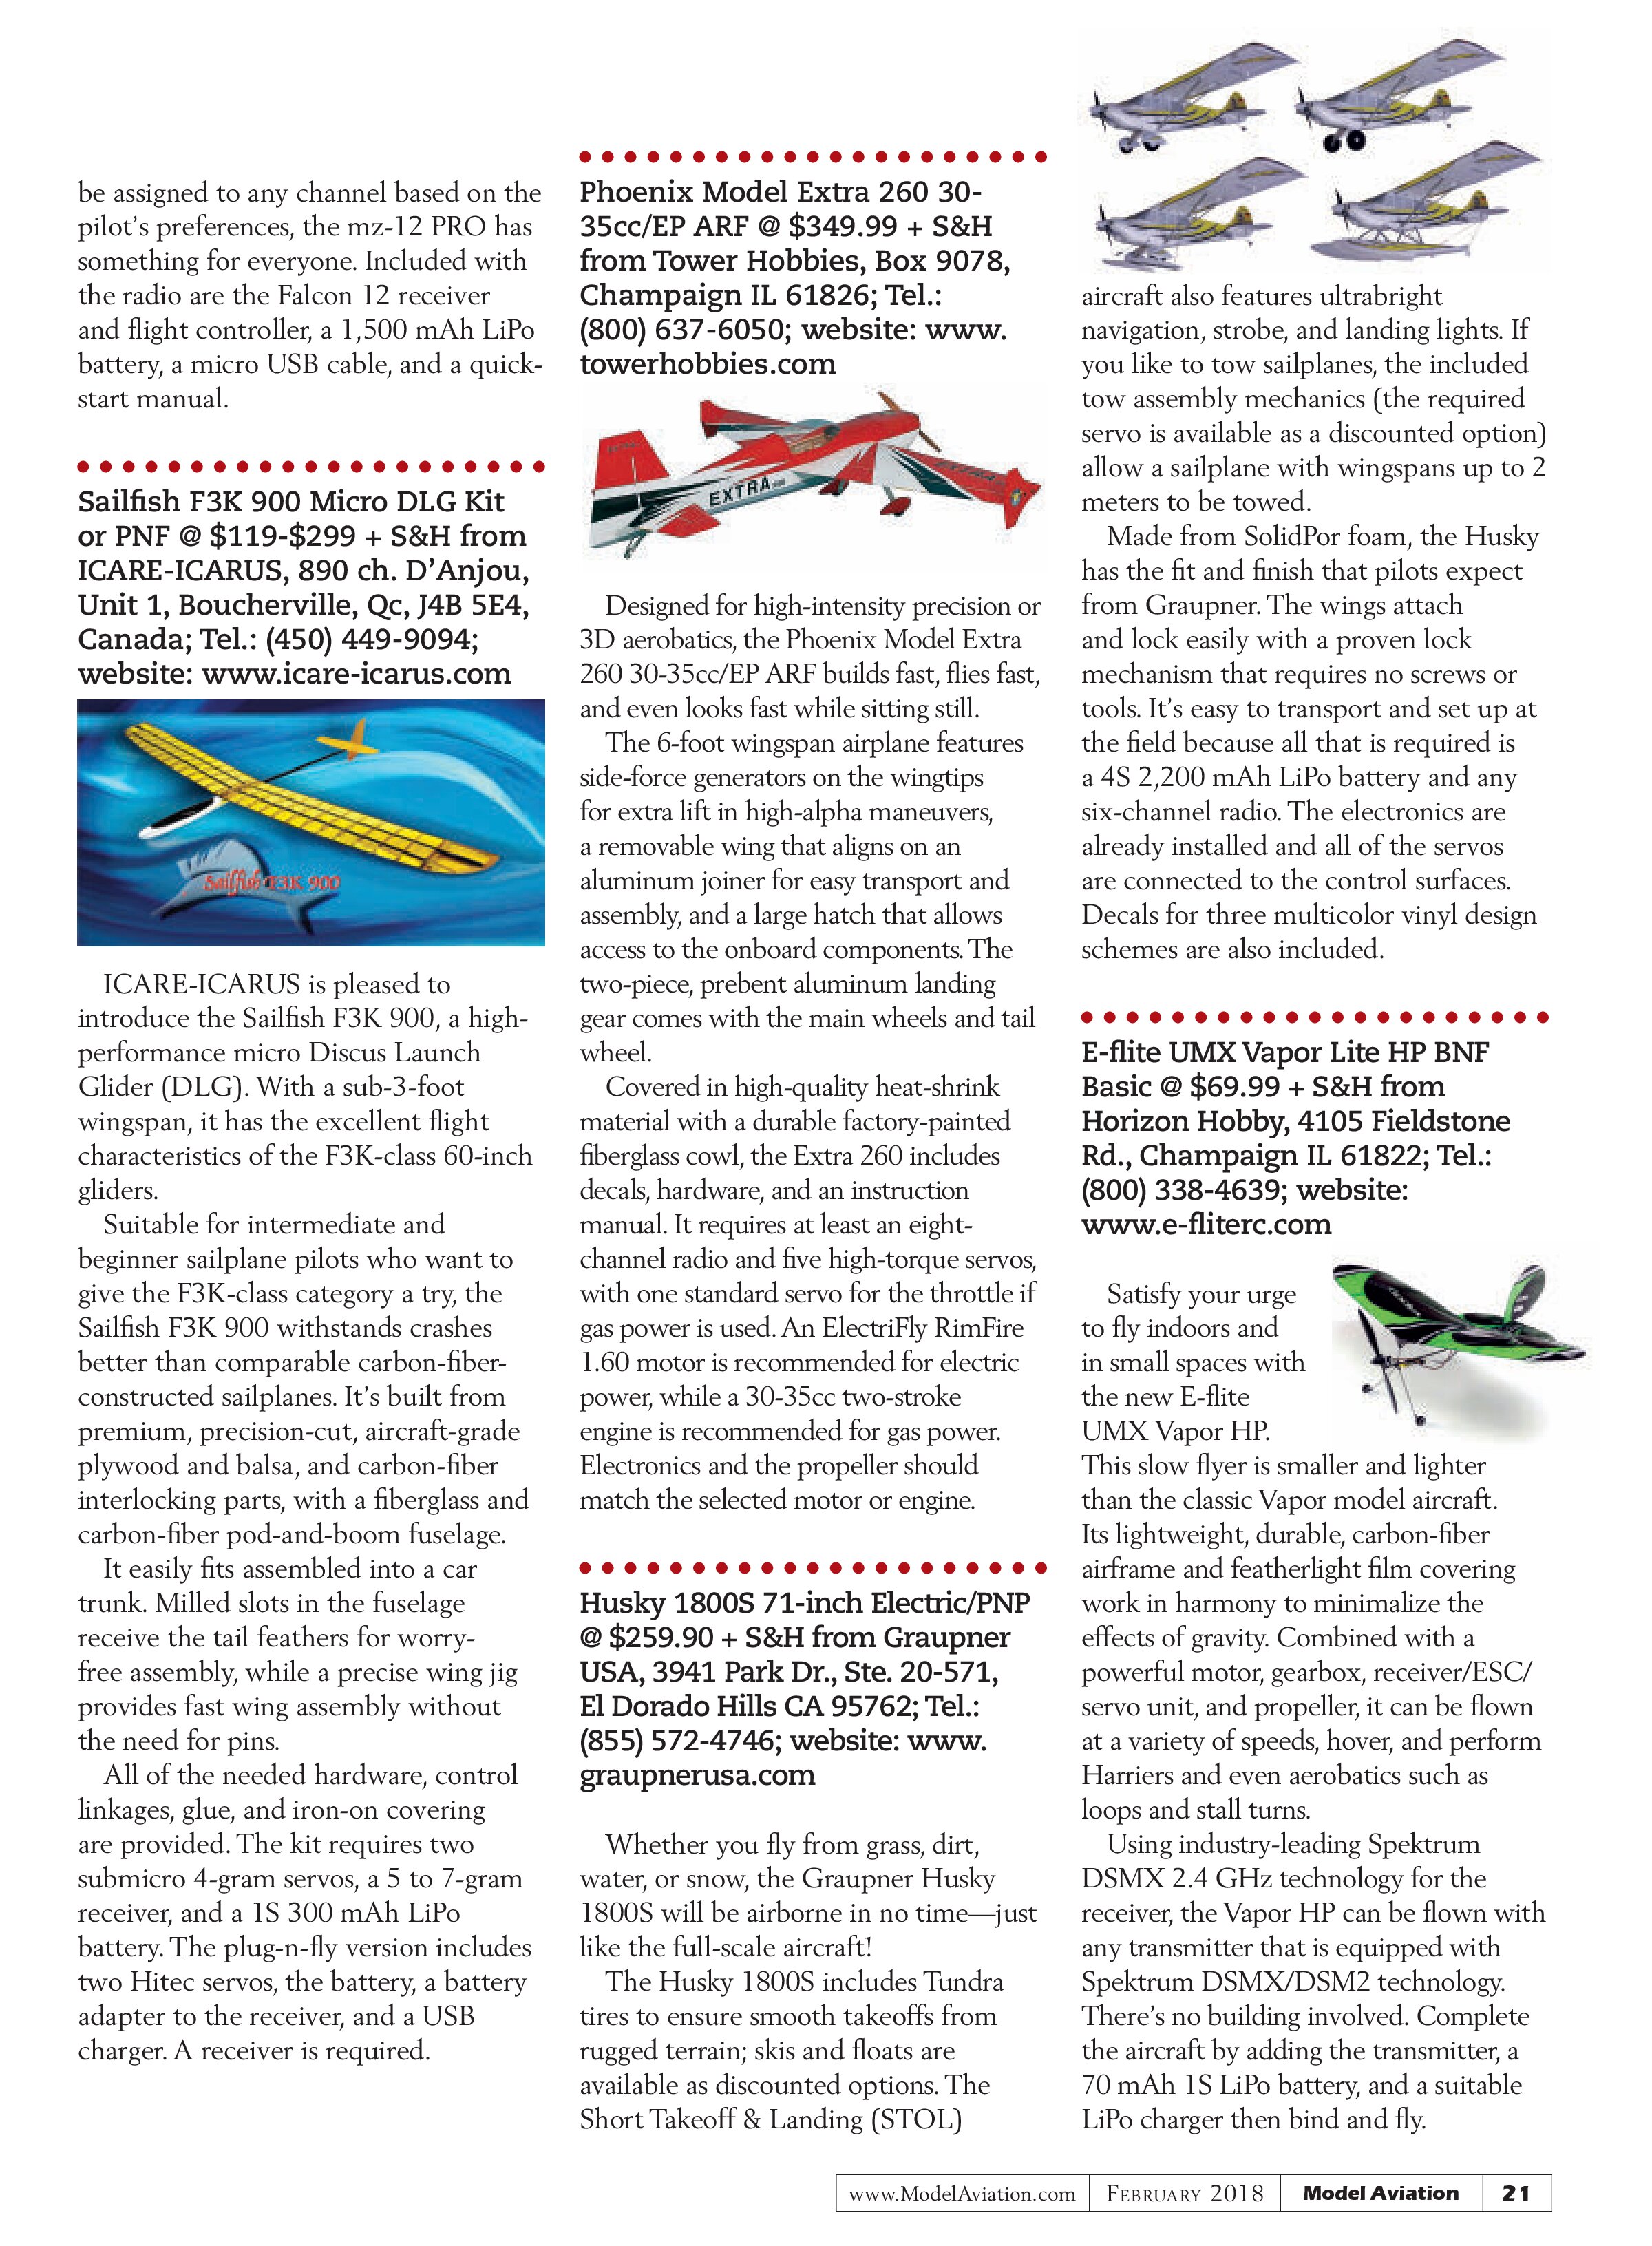
The most obvious change is what’s included in the package. For the first time, this flight controller is packaged with a new custom video transmitter and 600 TVL camera. The BeeTX video transmitter is a 40-channel VTX that can run at either 1mW or 25mW and allows for full access to Betaflight OSD when it is connected to the BeeBrain.
Access to the full Betaflight OSD might just be worth the price of admission because you are no longer tied to a timer to gauge your flight time. Having your battery voltage presented on screen while you fly gives you the freedom of knowing you’ll be able to land before you damage your battery. You can also adjust your PID settings and change your video transmitter channel directly from the interface, without the need to decipher small LED lights on the aircraft.
The BeeEye camera is a standard 40-channel, 600 TVL camera complete with a 20° mount. Clarity of the image through the BeeEye is good, although not quite as sharp and clear as other, more-expensive cameras on the market.
Early reports of light leaking through to the sensor have already been addressed by NewBeeDrone with the inclusion of a backing layer on the rear of the camera mount. This camera is fully protected by the mount as well, offering some protection from lighter impacts.
Having all of these components included in one kit has allowed NewBeeDrone to do something new with this product. All of the components are designed to be completely plug-and-play and no soldering is required during the build process. Quite simply, you screw down the flight stack onto your frame, plug in your motors, and you’re ready to fly.
In my testing, I was able to build a fully functional quadcopter in less than 8 minutes. This will also speed repairs at the field because each component is sold separately and can be replaced in seconds. In short, this setup will likely get you in the air quicker and keep you in the air longer. The BeeBrain V2 Flight Controller Set is available now through NewBeeDrone for $79.99.
NewBeeDrone: email: info@newbeedrone.com; website: www.newbeedrone.com


Smarty and Streak 1/2A One-Design @ $35-$70 + S&H from BMJR Models, Box 1210, Sharpes FL 32959; Tel.: (321) 537-1159; website: bmjrmodels.com
BMJR Models has supported the National Free Flight Society (NFFS) since 1998 by providing kits for the One-Design event. Two early ½A models have been selected by the NFFS for 2018: the Smarty and the Streak.
The Streak has a 32-inch wingspan with 170 square inches of wing area and weighs slightly less than 5 ounces. It was produced in 1952 as a JASCO kit and won the Early Nostalgia event at the 2010 Nats.
The Smarty was designed by Harold Bunting and produced as a kit by Southland Models in Greensboro, North Carolina, in 1951. It has a 30-inch wingspan with a wing area of 150 square inches and weighs a little less than 5 ounces with an .049 engine. Although it is intended to be flown in the Early ½A category for the 2018 One-Design event, the Smarty could also be flown in ¼A or PeeWee30.
The models are available individually on the BMJR website for $35, or together for $70 as a postpaid combo special.

AXi 8112 and 8120 3D Extreme Motors @ $435-$525 + S&H from Esprit Tech/Model, Box 360815, Melbourne FL 32936; Tel.: (321) 729-4287; website: www.espritmodel.com

Esprit Tech is proud to announce the new AXi 8112 and 8120 3D Extreme outrunner brushless motors with telemetry. Designed with ultimate efficiency and weight management in mind, these large-diameter motors allow for a much shorter stator stack to reduce weight, while still producing large amounts of power. With 36 poles, the motors run smoothly and efficiently. Bearings have been added in strategic spots to handle the heavy load from larger propellers.
Both motors are available in two Kv offerings. The 8112 3D series is available with 215 Kv for F3A and scale/aerobatic 180-type aircraft, and 165 Kv for sport 150-180 and aerobatic/3D aircraft. The 8120 3D series is available with 190 Kv for airplanes such as F3A and scale/aerobatic 40cc, and with 140 Kv for aerobatic/3D aircraft.
Integrated Jeti telemetry is also offered by the AXi 3D Extreme series of motors. Visit the Esprit Tech/Model website for more information.
AS3000 AS3X Flight Stabilization Module @ $64.99 + S&H from Horizon Hobby, 4105 Fieldstone Rd., Champaign IL 61822; Tel.: (800) 338-4639; website: www.spektrumrc.com

The Spektrum AS3000 is a new tool for Giant Scale pilots to use to add AS3X stability to their aircraft for the same extraordinary performance as all AS3X systems, but with the added ease of Spektrum Forward Programming.
Compatible with all Spektrum Generation 2 transmitters, the AS3000 is simple to install with one plug to the sensor port on a Next Generation PowerSafe Receiver, eliminating additional failure points. Rubber grommet hard mounts and minimal labeling help produce clean model setups.
A smartphone or computer isn’t needed to program the gyro. It is the first accessory to use Spektrum Forward Programming in a new menu on Generation 2 radios, controlling every AS3X setting and mode available within the AS3000.
An Airware 2.0 radio update is needed to use the Spektrum Forward Programming. The PowerSafe telemetry receiver and a compatible transmitter are also required.
mz-12 PRO 12-Channel 2.4 GHz HoTT Transmitter with Falcon 12 Receiver @ $169.90 + S&H from Graupner USA, 3941 Park Dr., Ste. 20-571, El Dorado Hills CA 95762; Tel.: (855) 572-4746; website: www.graupnerusa.com

Graupner is raising the bar with the new mz-12 PRO 12-channel transmitter! It’s setting a new standard in value and performance with many great features.
The mz-12 gives pilots an instant locked-in feeling. Model enthusiasts, especially FPV and hand-launch sailplane pilots, will appreciate the design, which provides better grip and accessibility to switches and controls, and features quad bearing gimbals and an integrated long-range antenna. With a 250-model memory, there’s unlimited storage, and it’s easy to move models between the transmitter and a computer by using the free Graupner Firmware Update Studio.
Realtime telemetry is also integrated into the mz-12. The included Falcon 12 six-channel receiver not only provides telemetry functions that can be configured to notify the pilot of any system changes, but can also be used as a multirotor flight controller. Voice announcements and alerts are also programmable, while the built-in speaker provides a clear and adjustable volume.
With five model types supporting airplanes, helicopters, multirotors, boats, and cars, and switches that can be assigned to any channel based on the pilot’s preferences, the mz-12 PRO has something for everyone. Included with the radio are the Falcon 12 receiver and flight controller, a 1,500 mAh LiPo battery, a micro USB cable, and a quick-start manual.
Sailfish F3K 900 Micro DLG Kit or PNF @ $119-$299 + S&H from ICARE-ICARUS, 890 ch. D’Anjou, Unit 1, Boucherville, Qc, J4B 5E4, Canada; Tel.: (450) 449-9094; website: www.icare-icarus.com

ICARE-ICARUS is pleased to introduce the Sailfish F3K 900, a high-performance micro Discus Launch Glider (DLG). With a sub-3-foot wingspan, it has the excellent flight characteristics of the F3K-class 60-inch gliders.
Suitable for intermediate and beginner sailplane pilots who want to give the F3K-class category a try, the Sailfish F3K 900 withstands crashes better than comparable carbon-fiber-constructed sailplanes. It’s built from premium, precision-cut, aircraft-grade plywood and balsa, and carbon-fiber interlocking parts, with a fiberglass and carbon-fiber pod-and-boom fuselage.
It easily fits assembled into a car trunk. Milled slots in the fuselage receive the tail feathers for worry-free assembly, while a precise wing jig provides fast wing assembly without the need for pins.
All of the needed hardware, control linkages, glue, and iron-on covering are provided. The kit requires two submicro 4-gram servos, a 5 to 7-gram receiver, and a 1S 300 mAh LiPo battery. The plug-n-fly version includes two Hitec servos, the battery, a battery adapter to the receiver, and a USB charger. A receiver is required.
Phoenix Model Extra 260 30-35cc/EP ARF @ $349.99 + S&H from Tower Hobbies, Box 9078, Champaign IL 61826; Tel.: (800) 637-6050; website: www.towerhobbies.com

Designed for high-intensity precision or 3D aerobatics, the Phoenix Model Extra 260 30-35cc/EP ARF builds fast, flies fast, and even looks fast while sitting still.
The 6-foot wingspan airplane features side-force generators on the wingtips for extra lift in high-alpha maneuvers, a removable wing that aligns on an aluminum joiner for easy transport and assembly, and a large hatch that allows access to the onboard components. The two-piece, prebent aluminum landing gear comes with the main wheels and tail wheel.
Covered in high-quality heat-shrink material with a durable factory-painted fiberglass cowl, the Extra 260 includes decals, hardware, and an instruction manual. It requires at least an eight-channel radio and five high-torque servos, with one standard servo for the throttle if gas power is used. An ElectriFly RimFire 1.60 motor is recommended for electric power, while a 30-35cc two-stroke engine is recommended for gas power. Electronics and the propeller should match the selected motor or engine.
Husky 1800S 71-inch Electric/PNP @ $259.90 + S&H from Graupner USA, 3941 Park Dr., Ste. 20-571, El Dorado Hills CA 95762; Tel.: (855) 572-4746; website: www.graupnerusa.com
Whether you fly from grass, dirt, water, or snow, the Graupner Husky 1800S will be airborne in no time—just like the full-scale aircraft!
The Husky 1800S includes Tundra tires to ensure smooth takeoffs from rugged terrain; skis and floats are available as discounted options. The Short Takeoff & Landing (STOL) aircraft also features ultrabright navigation, strobe, and landing lights. If you like to tow sailplanes, the included tow assembly mechanics (the required servo is available as a discounted option) allow a sailplane with wingspans up to 2 meters to be towed.
Made from SolidPor foam, the Husky has the fit and finish that pilots expect from Graupner. The wings attach and lock easily with a proven lock mechanism that requires no screws or tools. It’s easy to transport and set up at the field because all that is required is a 4S 2,200 mAh LiPo battery and any six-channel radio. The electronics are already installed and all of the servos are connected to the control surfaces. Decals for three multicolor vinyl design schemes are also included.

E-flite UMX Vapor Lite HP BNF Basic @ $69.99 + S&H from Horizon Hobby, 4105 Fieldstone Rd., Champaign IL 61822; Tel.: (800) 338-4639; website: www.e-fliterc.com

Satisfy your urge to fly indoors and in small spaces with the new E-flite UMX Vapor HP. This slow flyer is smaller and lighter than the classic Vapor model aircraft. Its lightweight, durable, carbon-fiber airframe and featherlight film covering work in harmony to minimize the effects of gravity. Combined with a powerful motor, gearbox, receiver/ESC/servo unit, and propeller, it can be flown at a variety of speeds, hover, and perform Harriers and even aerobatics such as loops and stall turns.
Using industry-leading Spektrum DSMX 2.4 GHz technology for the receiver, the Vapor HP can be flown with any transmitter that is equipped with Spektrum DSMX/DSM2 technology. There’s no building involved. Complete the aircraft by adding the transmitter, a 70 mAh 1S LiPo battery, and a suitable LiPo charger then bind and fly.
3D Printing Commonly Used Terms
- 3D file is a file that represents a three-dimensional file.
- 3D model is a three-dimensional model of an object.
- ABS Acrylonitrile Butadiene Styrene is a strong and durable thermoplastic polymer commonly used for 3D printing.
- Additive Manufacturing is the process of building up a three-dimensional object, one thin layer at a time.
- CAD is Computer-Aided Design software used to create 3D models for printing.
- CNC is Computer Numerical Control that provides the automation of machine tools using computers.
- Extruder is a group of parts that handles feeding and extruding of the build material.
- Filament is the base material, such as ABS or PLA that is used to 3D print objects via fused deposition modeling (FDM).
- PLA is Polylactic Acid, a biodegradable thermoplastic polymer made from plant starch, used as a 3D printing material.
- Printbed is the surface where the printed part is formed. Some printbeds are heated, allowing them to be used with different printing materials.
- Resolution is the surface quality of a 3D print, normally defined by the layer height.
- Slice is one layer of a 3D-printed model.
- STL is the most popular file format used in 3D printing.
- TPU, or thermoplastic polyurethane, is a soft, flexible plastic that retains its shape and form.

then make any changes to it before printing. To prepare the file to print, you have the option to “Repair” the file, which analyzes the file and repairs and rotates it to work best with the printer. This step is not required to print.
Next is “Layout,” which allows you to move and rotate the item to be printed, as well as adjust the scale, making it smaller or larger. Being able to move the item being printed is helpful because it normally defaults to printing in the center of the printbed and will wear out the build tape faster. I like to move items around when space allows.
“Slice” is the final step. It allows adjustments to the layer height (speed), perimeters (the strength or weakness of the item), and infill density (hollow to solid). After all of that information is selected and the slice completes, you will then be ready to click “Build” and start printing. It is also at this point that you will be told the amount of time required to complete printing.
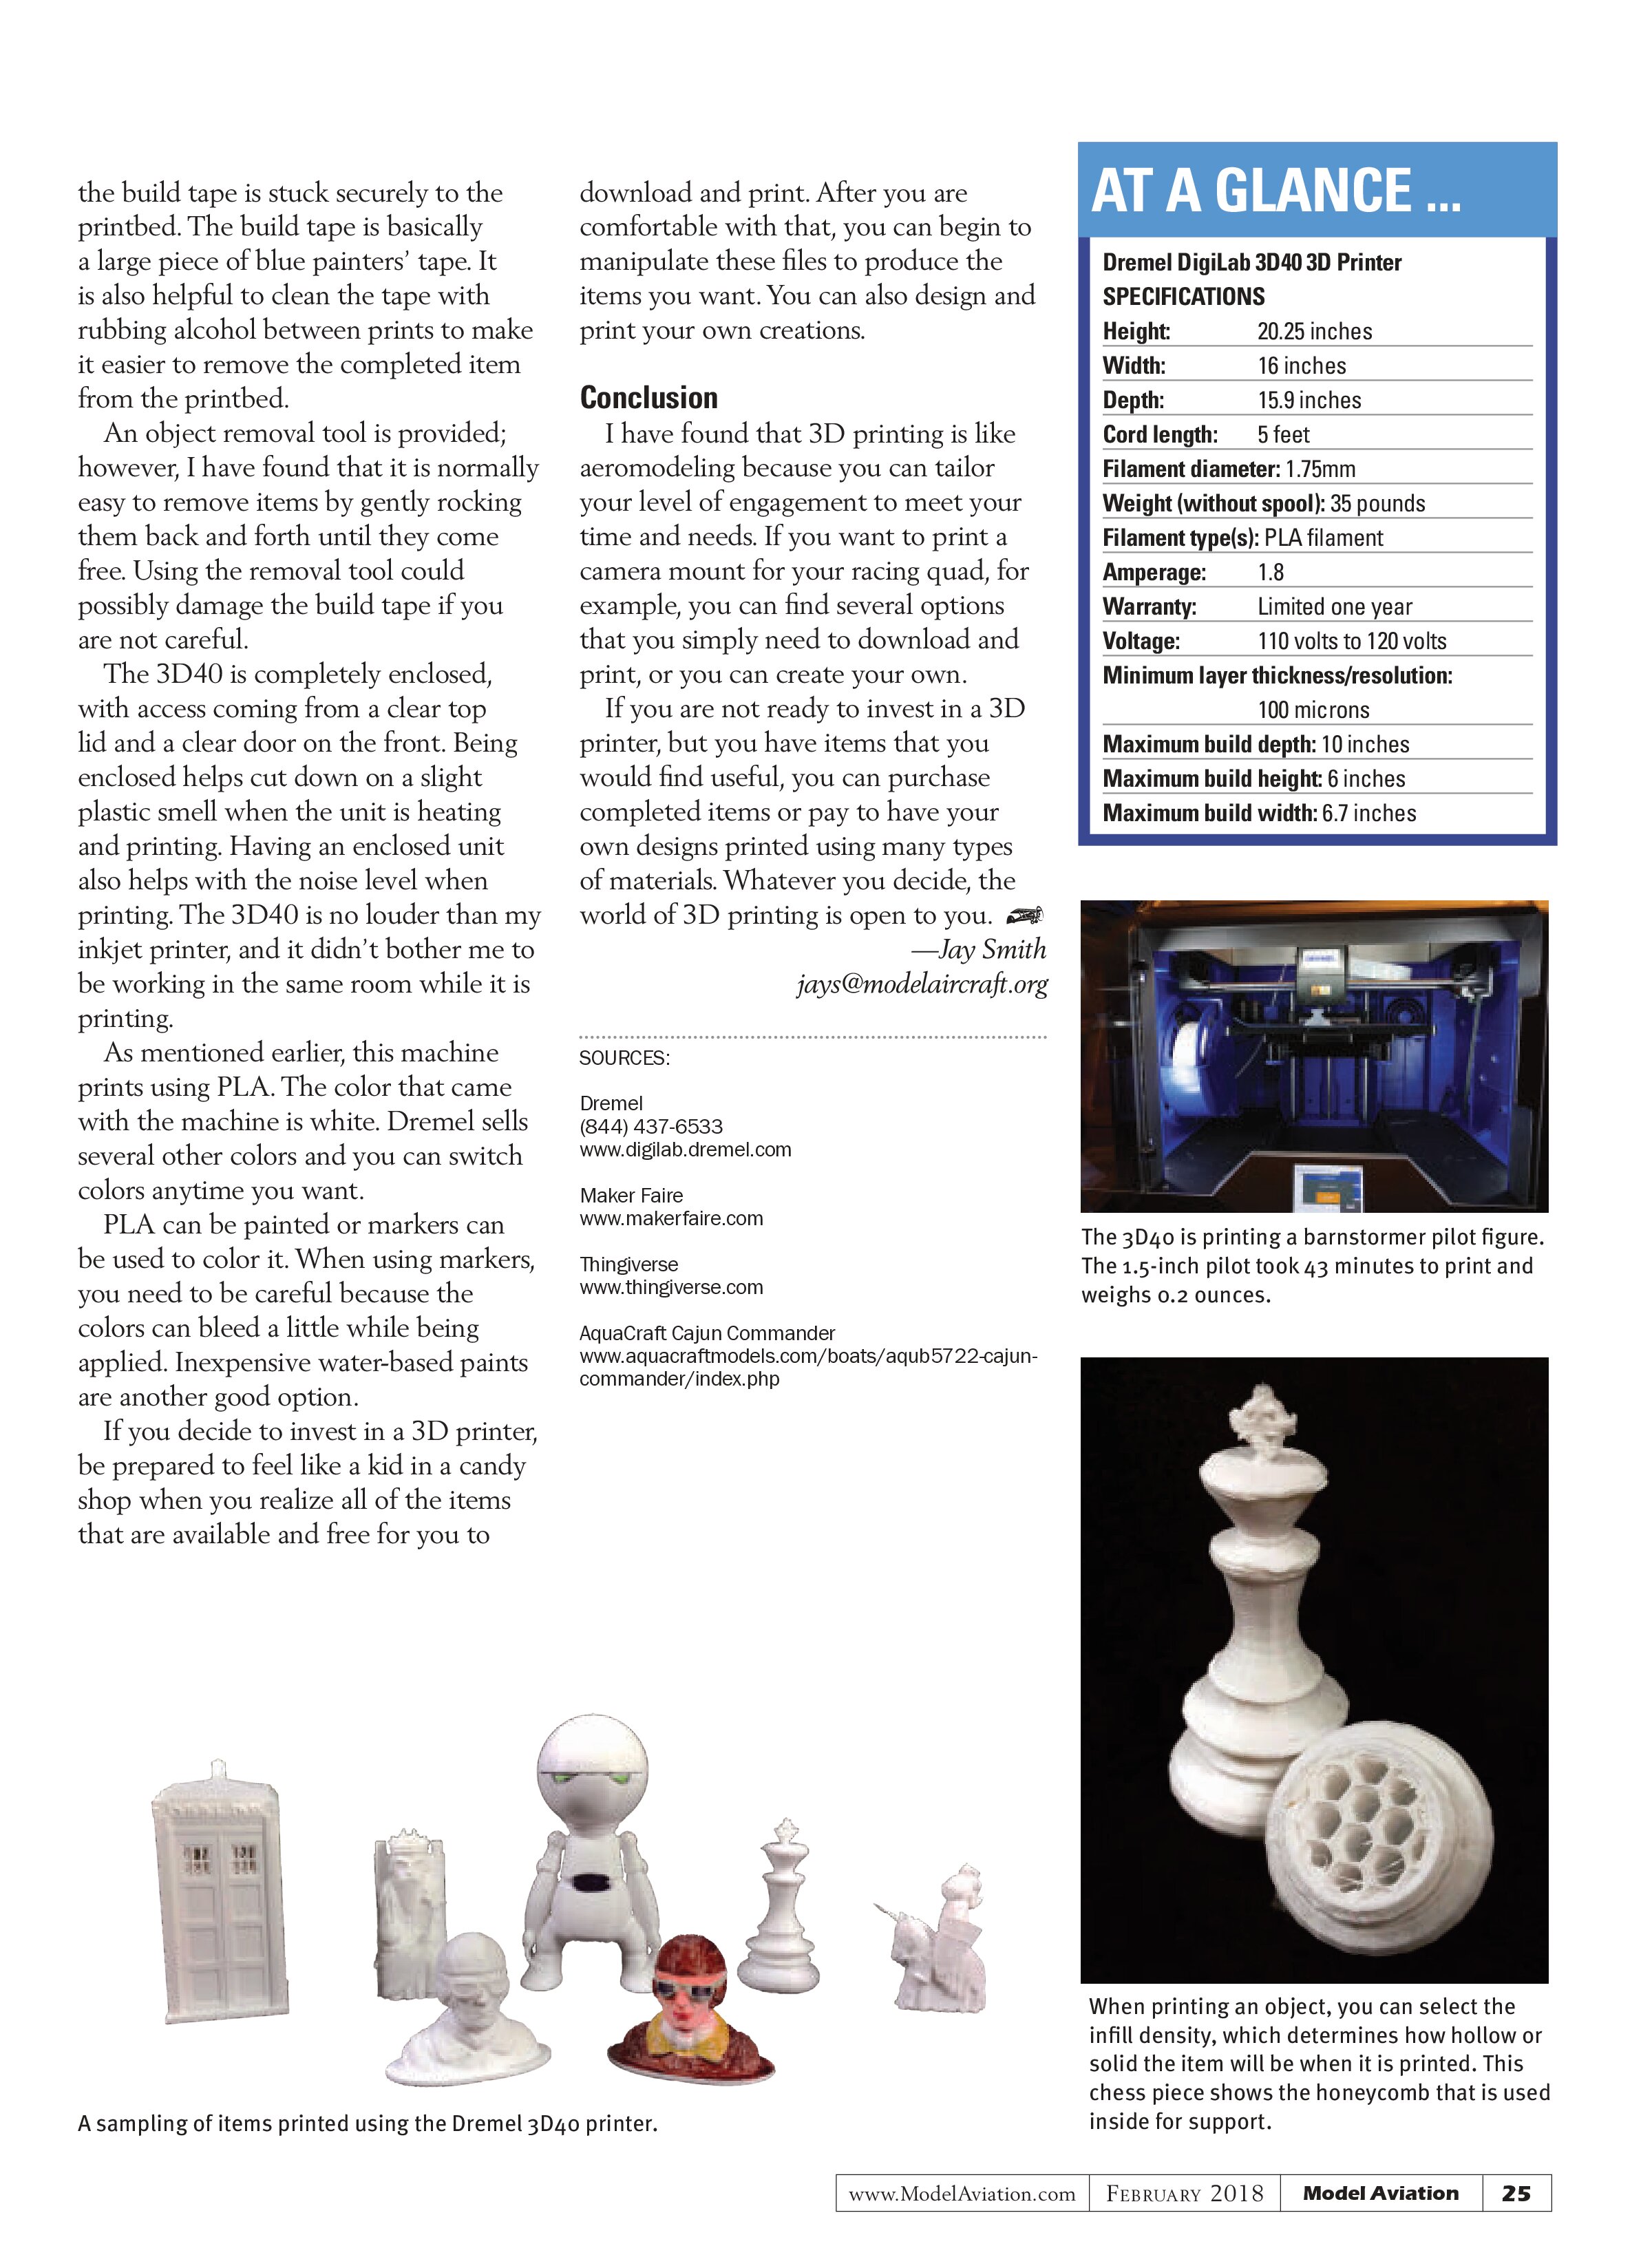
Dremel had several items on its website that could be printed, including a barnstormer pilot figure that I liked and printed. Unfortunately, after a website redesign, these files are no longer accessible. I contacted Dremel support to inquire about the files and was told it was likely that they would not be made available again. The representative I spoke with referred me to Thingiverse to find numerous items to print.
Observations
I have found that it is best to start simple when selecting things to print. The more complex the piece, the longer it will take; it could even require that parts be printed separately.
It is important to level the printbed before each item is printed. With the 3D40, you can select leveling on the touchscreen and the machine will test the printbed. If adjustments are required, you simply turn the knobs located under the printbed in the direction listed on the screen.
It is also important to ensure that the build tape is stuck securely to the printbed. The build tape is basically a large piece of blue painters’ tape. It is also helpful to clean the tape with rubbing alcohol between prints to make it easier to remove the completed item from the printbed.
An object removal tool is provided; however, I have found that it is normally easy to remove items by gently rocking them back and forth until they come free. Using the removal tool could possibly damage the build tape if you are not careful.
The 3D40 is completely enclosed, with access coming from a clear top lid and a clear door on the front. Being enclosed helps cut down on a slight plastic smell when the unit is heating and printing. Having an enclosed unit also helps with the noise level when printing. The 3D40 is no louder than my inkjet printer, and it didn’t bother me to be working in the same room while it is printing.
As mentioned earlier, this machine prints using PLA. The color that came with the machine is white. Dremel sells several other colors and you can switch colors anytime you want.
PLA can be painted or markers can be used to color it. When using markers, you need to be careful because the colors can bleed a little while being applied. Inexpensive water-based paints are another good option.
If you decide to invest in a 3D printer, be prepared to feel like a kid in a candy shop when you realize all of the items that are available and free for you to download and print. After you are comfortable with that, you can begin to manipulate these files to produce the items you want. You can also design and print your own creations.
Conclusion
I have found that 3D printing is like aeromodeling because you can tailor your level of engagement to meet your time and needs. If you want to print a camera mount for your racing quad, for example, you can find several options that you simply need to download and print, or you can create your own.
If you are not ready to invest in a 3D printer, but you have items that you would find useful, you can purchase completed items or pay to have your own designs printed using many types of materials. Whatever you decide, the world of 3D printing is open to you.
—Jay Smith
jays@modelaircraft.org
SOURCES:
Dremel
(844) 437-6533
www.digilab.dremel.com
Maker Faire
www.makerfaire.com
Thingiverse
www.thingiverse.com
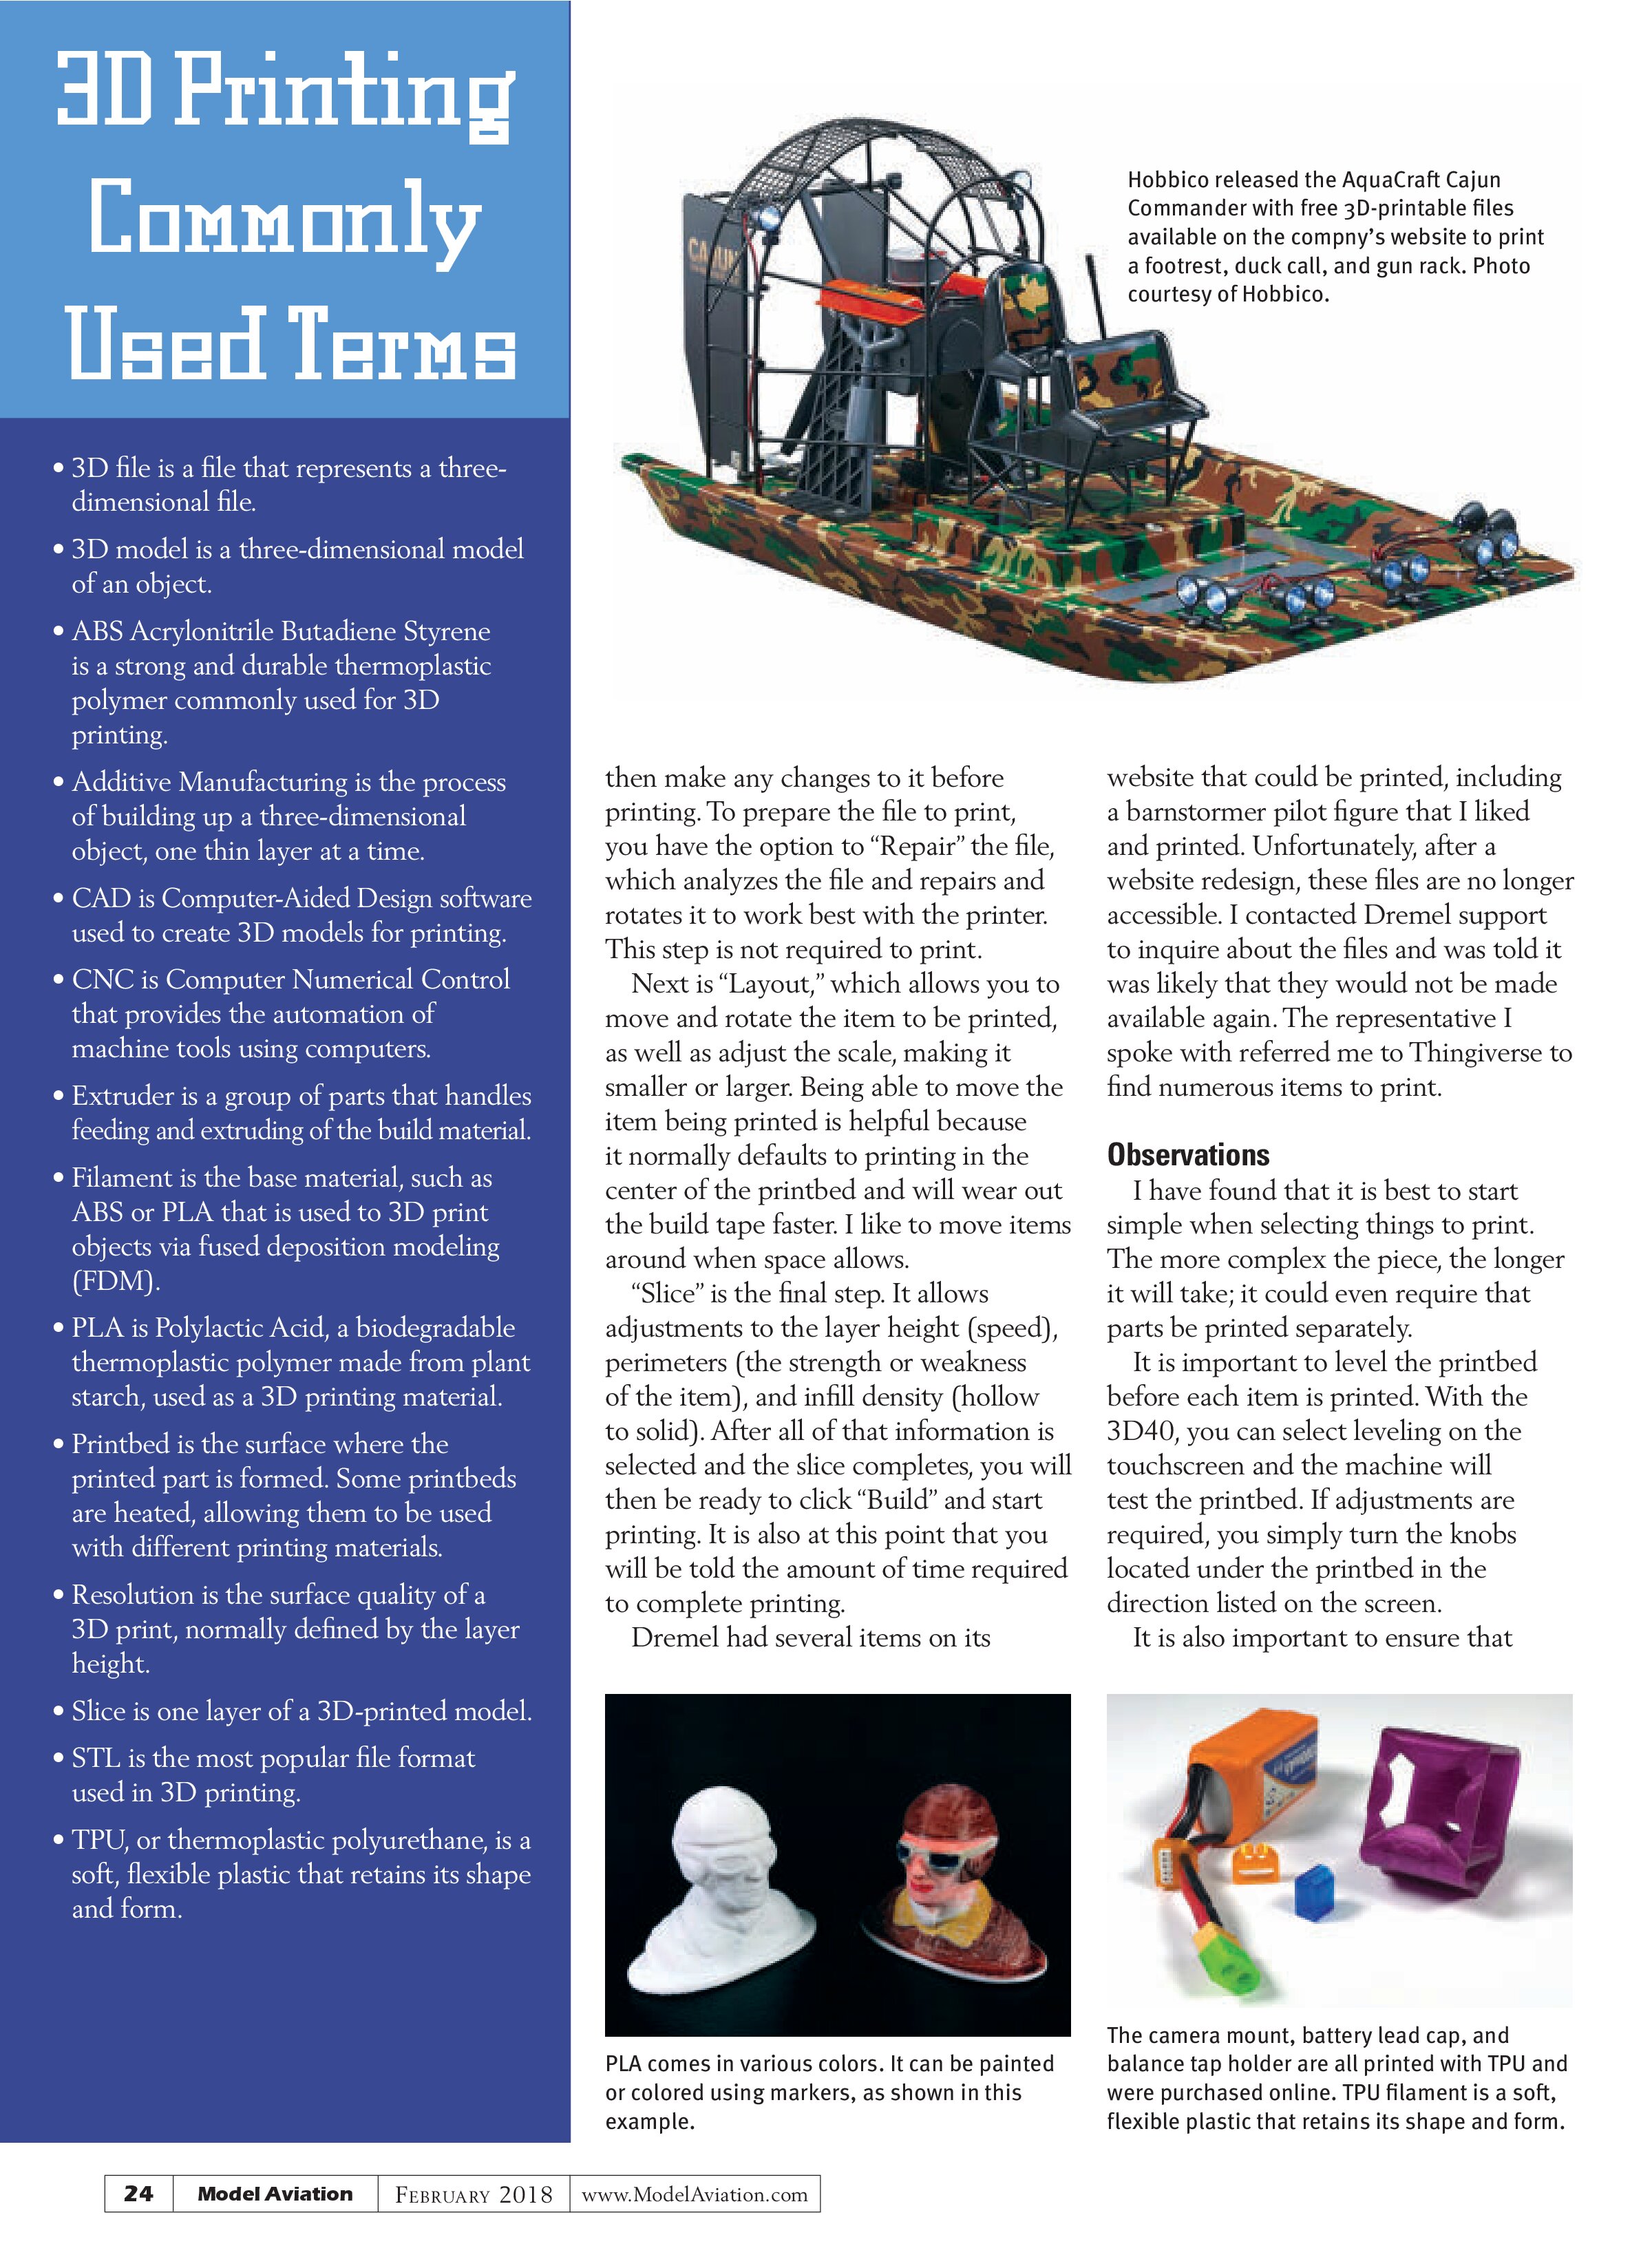
AquaCraft Cajun Commander
www.aquacraftmodels.com/boats/aqub5722-cajun-commander/index.php


AT A GLANCE ...
Dremel DigiLab 3D40 3D Printer
SPECIFICATIONS
Height: 20.25 inches
Width: 16 inches
Depth: 15.9 inches
Cord length: 5 feet
Filament diameter: 1.75mm
Weight (without spool): 35 pounds
Filament type(s): PLA filament
Amperage: 1.8
Warranty: Limited one year
Voltage: 110 volts to 120 volts
Minimum layer thickness/resolution: 100 microns
Maximum build depth: 10 inches
Maximum build height: 6 inches
Maximum build width: 6.7 inches