Two-point roll
by Peter Vogel
vogel.peter@gmail.com
Having finished discussing the Split-S turnaround maneuver in the November 2018 “RC Aerobatics” column, I’m nearing the end of the Sportsman sequence! There are only two more center maneuvers and one turnaround before you get to the landing! This month, I’ll tackle the two-point roll, which, in my experience, is one of the more intimidating maneuvers for a Sportsman pilot because you are rolling the airplane at a relatively low altitude and you need to sustain inverted flight to draw a noticeable line.
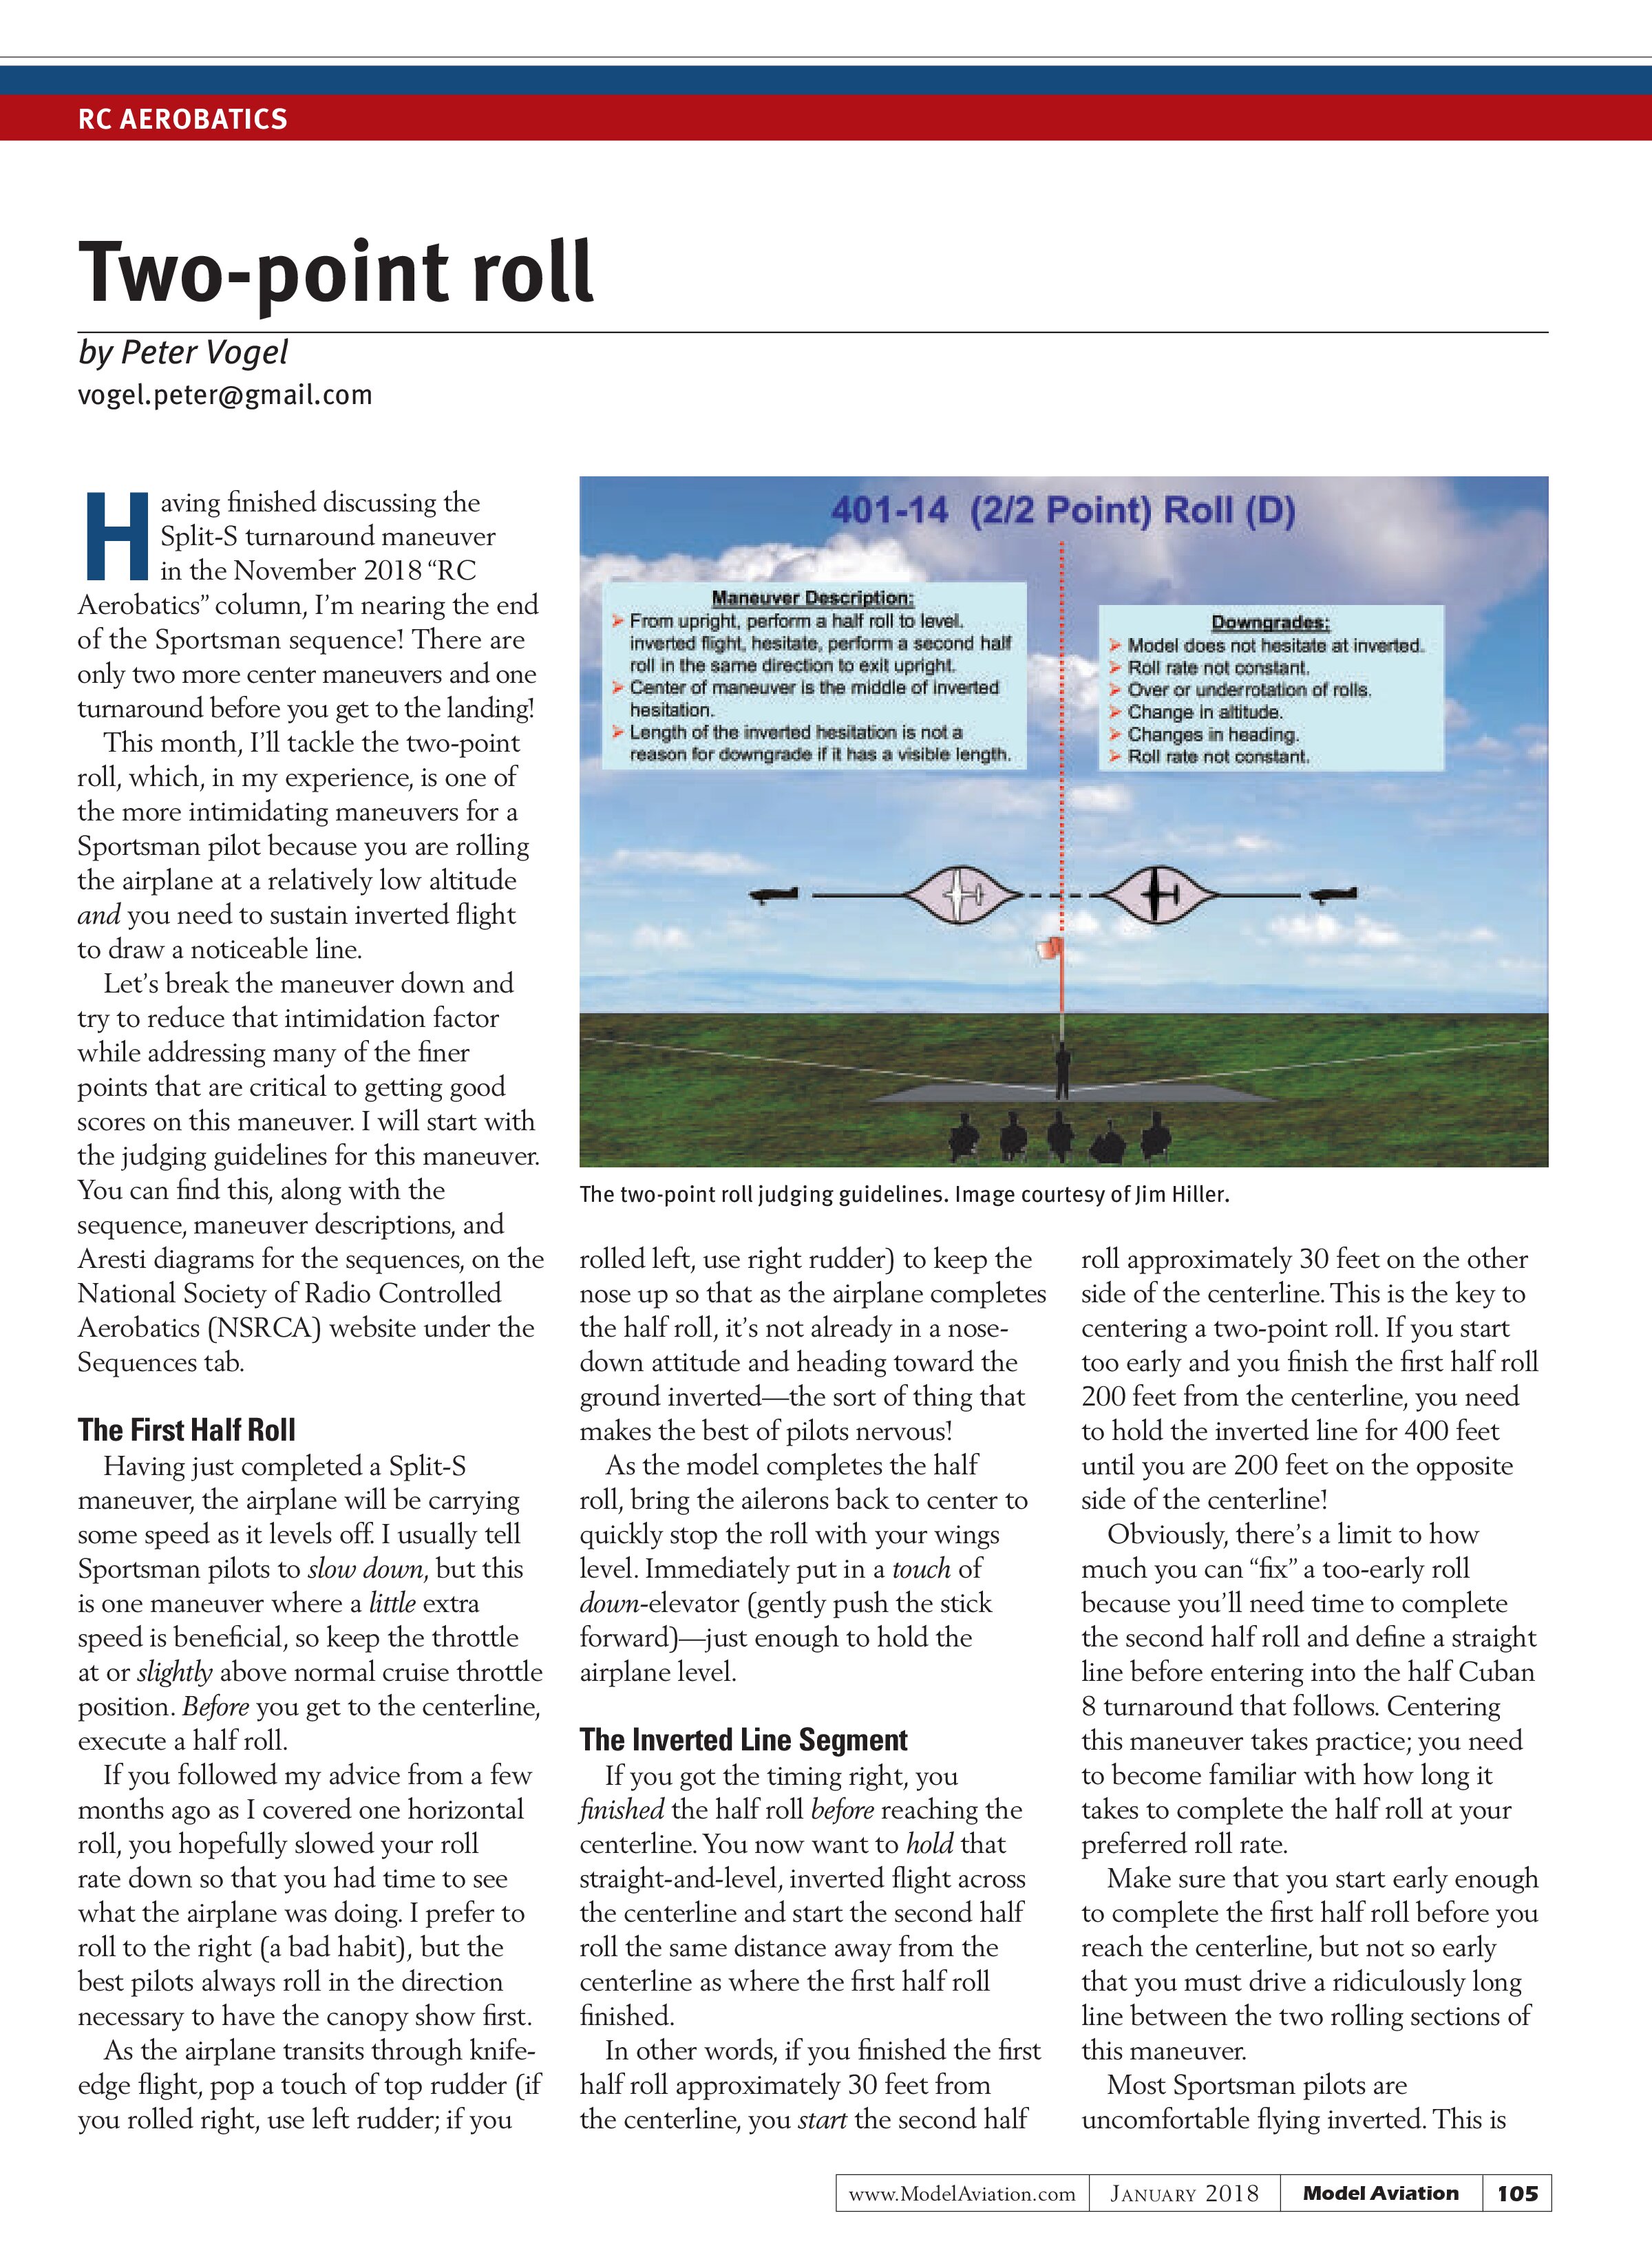
Let’s break the maneuver down and try to reduce that intimidation factor while addressing many of the finer points that are critical to getting good scores on this maneuver. I will start with the judging guidelines for this maneuver. You can find this, along with the sequence, maneuver descriptions, and Aresti diagrams for the sequences, on the National Society of Radio Controlled Aerobatics (NSRCA) website under the Sequences tab.
The First Half Roll
Having just completed a Split-S maneuver, the airplane will be carrying some speed as it levels off. I usually tell Sportsman pilots to slow down, but this is one maneuver where a little extra speed is beneficial, so keep the throttle at or slightly above normal cruise throttle position. Before you get to the centerline, execute a half roll.
If you followed my advice from a few months ago as I covered one horizontal roll, you hopefully slowed your roll rate down so that you had time to see what the airplane was doing. I prefer to roll to the right (a bad habit), but the best pilots always roll in the direction necessary to have the canopy show first.
As the airplane transits through knife-edge flight, pop a touch of top rudder (if you rolled right, use left rudder; if you rolled left, use right rudder) to keep the nose up so that as the airplane completes the half roll, it’s not already in a nose-down attitude and heading toward the ground inverted—the sort of thing that makes the best of pilots nervous!
As the model completes the half roll, bring the ailerons back to center to quickly stop the roll with your wings level. Immediately put in a touch of down-elevator (gently push the stick forward)—just enough to hold the airplane level.
The Inverted Line Segment
If you got the timing right, you finished the half roll before reaching the centerline. You now want to hold that straight-and-level, inverted flight across the centerline and start the second half roll the same distance away from the centerline as where the first half roll finished.
In other words, if you finished the first half roll approximately 30 feet from the centerline, you start the second half roll approximately 30 feet on the other side of the centerline. This is the key to centering a two-point roll. If you start too early and you finish the first half roll 200 feet from the centerline, you need to hold the inverted line for 400 feet until you are 200 feet on the opposite side of the centerline!
Obviously, there’s a limit to how much you can “fix” a too-early roll because you’ll need time to complete the second half roll and define a straight line before entering into the half Cuban 8 turnaround that follows. Centering this maneuver takes practice; you need to become familiar with how long it takes to complete the half roll at your preferred roll rate.
Make sure that you start early enough to complete the first half roll before you reach the centerline, but not so early that you must drive a ridiculously long line between the two rolling sections of this maneuver.
Most Sportsman pilots are uncomfortable flying inverted. This is

completely understandable because down-elevator is up and up-elevator is expensive (because the airplane’s nose aims directly toward the ground and the panic will almost certainly lead to more of the wrong elevator input)! Worse, rudder is “reversed” as well!
Adjust the exponential setting in your radio to keep the elevator gentle around center and so that you are comfortable with the amount of down-elevator pressure you need to hold to keep the nose level during inverted flight. It should be something you can consistently repeat. Building comfort with inverted flight is absolutely critical to your growth as an RC Aerobatics competitor!
If you need to correct your airplane’s heading, especially if you got the timing of the elevator or rudder a little wrong during the first half roll. The rule of thumb that I like to use to keep straight on rudder corrections while the airplane is inverted is to pretend my rudder thumb is touching the tip of the inside wing. Whichever direction I move my thumb is the direction it will move the inside wingtip.
As an example, if the airplane is traveling inverted from the pilot’s left to the pilot’s right, and the airplane’s heading isn’t parallel to the runway, but instead is flying in toward the pilot, the inside wingtip needs to be moved to the right to get the airplane’s heading parallel to the runway—so move the rudder stick to the right!
Others have success with the idea that when you are inverted, you are steering the tail of the airplane instead of the nose. That has never worked for me, but everyone is different!
Finally, if you are in doubt about which direction to move the rudder and you need to correct your heading (especially to avoid having the airplane fly toward you), first make a small move on the rudder. If it does the wrong thing, go the other direction with confidence. If it does the correct thing, adjust the amount of rudder as needed to get your heading fixed then come off of it. Remember that small corrections are more subtle and less likely to be downgraded by the judges!
The Second Half Roll
Having centered the inverted line, you need to complete the second point roll and get your airplane back to flying upright! This is much like the first half roll, except that the bump of rudder you use should be in the same direction as the aileron stick (in the first half roll, it was opposite rudder).
If you are rolling right, you initiate the second half roll with right aileron. As you cross knife-edge flight, you bump a touch of right rudder to keep the nose up then complete the roll and come off the aileron to stop at wings-level, upright flight.
The trick to good scores here is in the relationship of the second half roll to the first half roll. I already discussed starting the second half roll at the same distance from center that you finished the first half roll, but you also want the roll rate (how fast the airplane is rolling) to be the same. The easiest way to do that is to maintain the same airspeed throughout the maneuver and use the same amount of aileron deflection in both rolls.
My preference is to use low-rate aileron and simply use full aileron deflection, adjusting my low rates until I get a roll rate that I am comfortable with and allowing me to get the timing right for the rudder bumps (and, in the case of a full roll, the elevator bump at inverted).
I’m still working on further slowing down my rolls. This is totally counterintuitive, but rolls are easier if you slow them down—not just because the rudder and elevator timing becomes easier, but because it’s easier to stop the roll exactly where you want it with the wings level!
Keep in mind that as you slow the rolls, you’ll need to start them earlier to finish the first one before center. In RC Aerobatics, each adjustment you make influences how you perform and the timing of the maneuvers. If your rolls are currently fast, slow them down gradually or wait for your off season and begin practice next year with the significant change. Don’t give up on that change when the first few times aren’t perfect!
Trust me when I tell you that even if you can sneak through Sportsman with fast rolls and no rudder bump, when it comes time to do two consecutive rolls in the Intermediate class or three consecutive rolls in the Advanced class (not to mention four-point rolls), you will want a slower roll! It is better to get used to the slower roll now than later.
SOURCES:
NSRCA
www.nsrca.us