I’ll focus on the aspects that are most likely to be appreciated and used by experienced modelers.
There are two primary flight modes on the Mavic: Positioning (P-mode), and Sport (S-mode). You can select either mode during flight with a physical switch on the transmitter. P-mode utilizes GPS as well as downward-facing optical and ultrasonic sensors to maintain altitude and position. There are also forward-facing cameras that are part of the Mavic’s obstacle avoidance system.
As you approach something that is blocking your flight path, the system will warn you and eventually bring the quad to a halt if you do not change your course. Using obstacle sensing will limit your top flight speed to 22 mph. Disabling the forward cameras bumps the maximum P-mode speed to 36 mph.
Within P-mode, there are several “intelligent” flight modes that are selectable via the app. You can have the Mavic maintain a constant height above

undulating ground using Terrain Follow Mode. It is even possible to command the camera to take a photo of you using only a series of hand gestures.
For me, the most useful intelligent mode is Tripod. This mode makes the Mavic extremely docile, with a top speed of slightly above 2 mph. You’ll want to use Tripod when flying among trees and other tight locations, or when


you need to capture extremely smooth video footage.
Flipping the switch to S-mode disables the obstacle avoidance system, but GPS positioning is still active. Top speed edges up to 40 mph and the controls become more responsive. S-mode falls short of being aerobatic, but it is certainly lively. I think it’s about as aggressive as you’d want to get with a gimbal and camera onboard. It’s nice to be able to cut loose with a few hot laps to break up a session of smooth video flying.
Flying the Mavic Pro
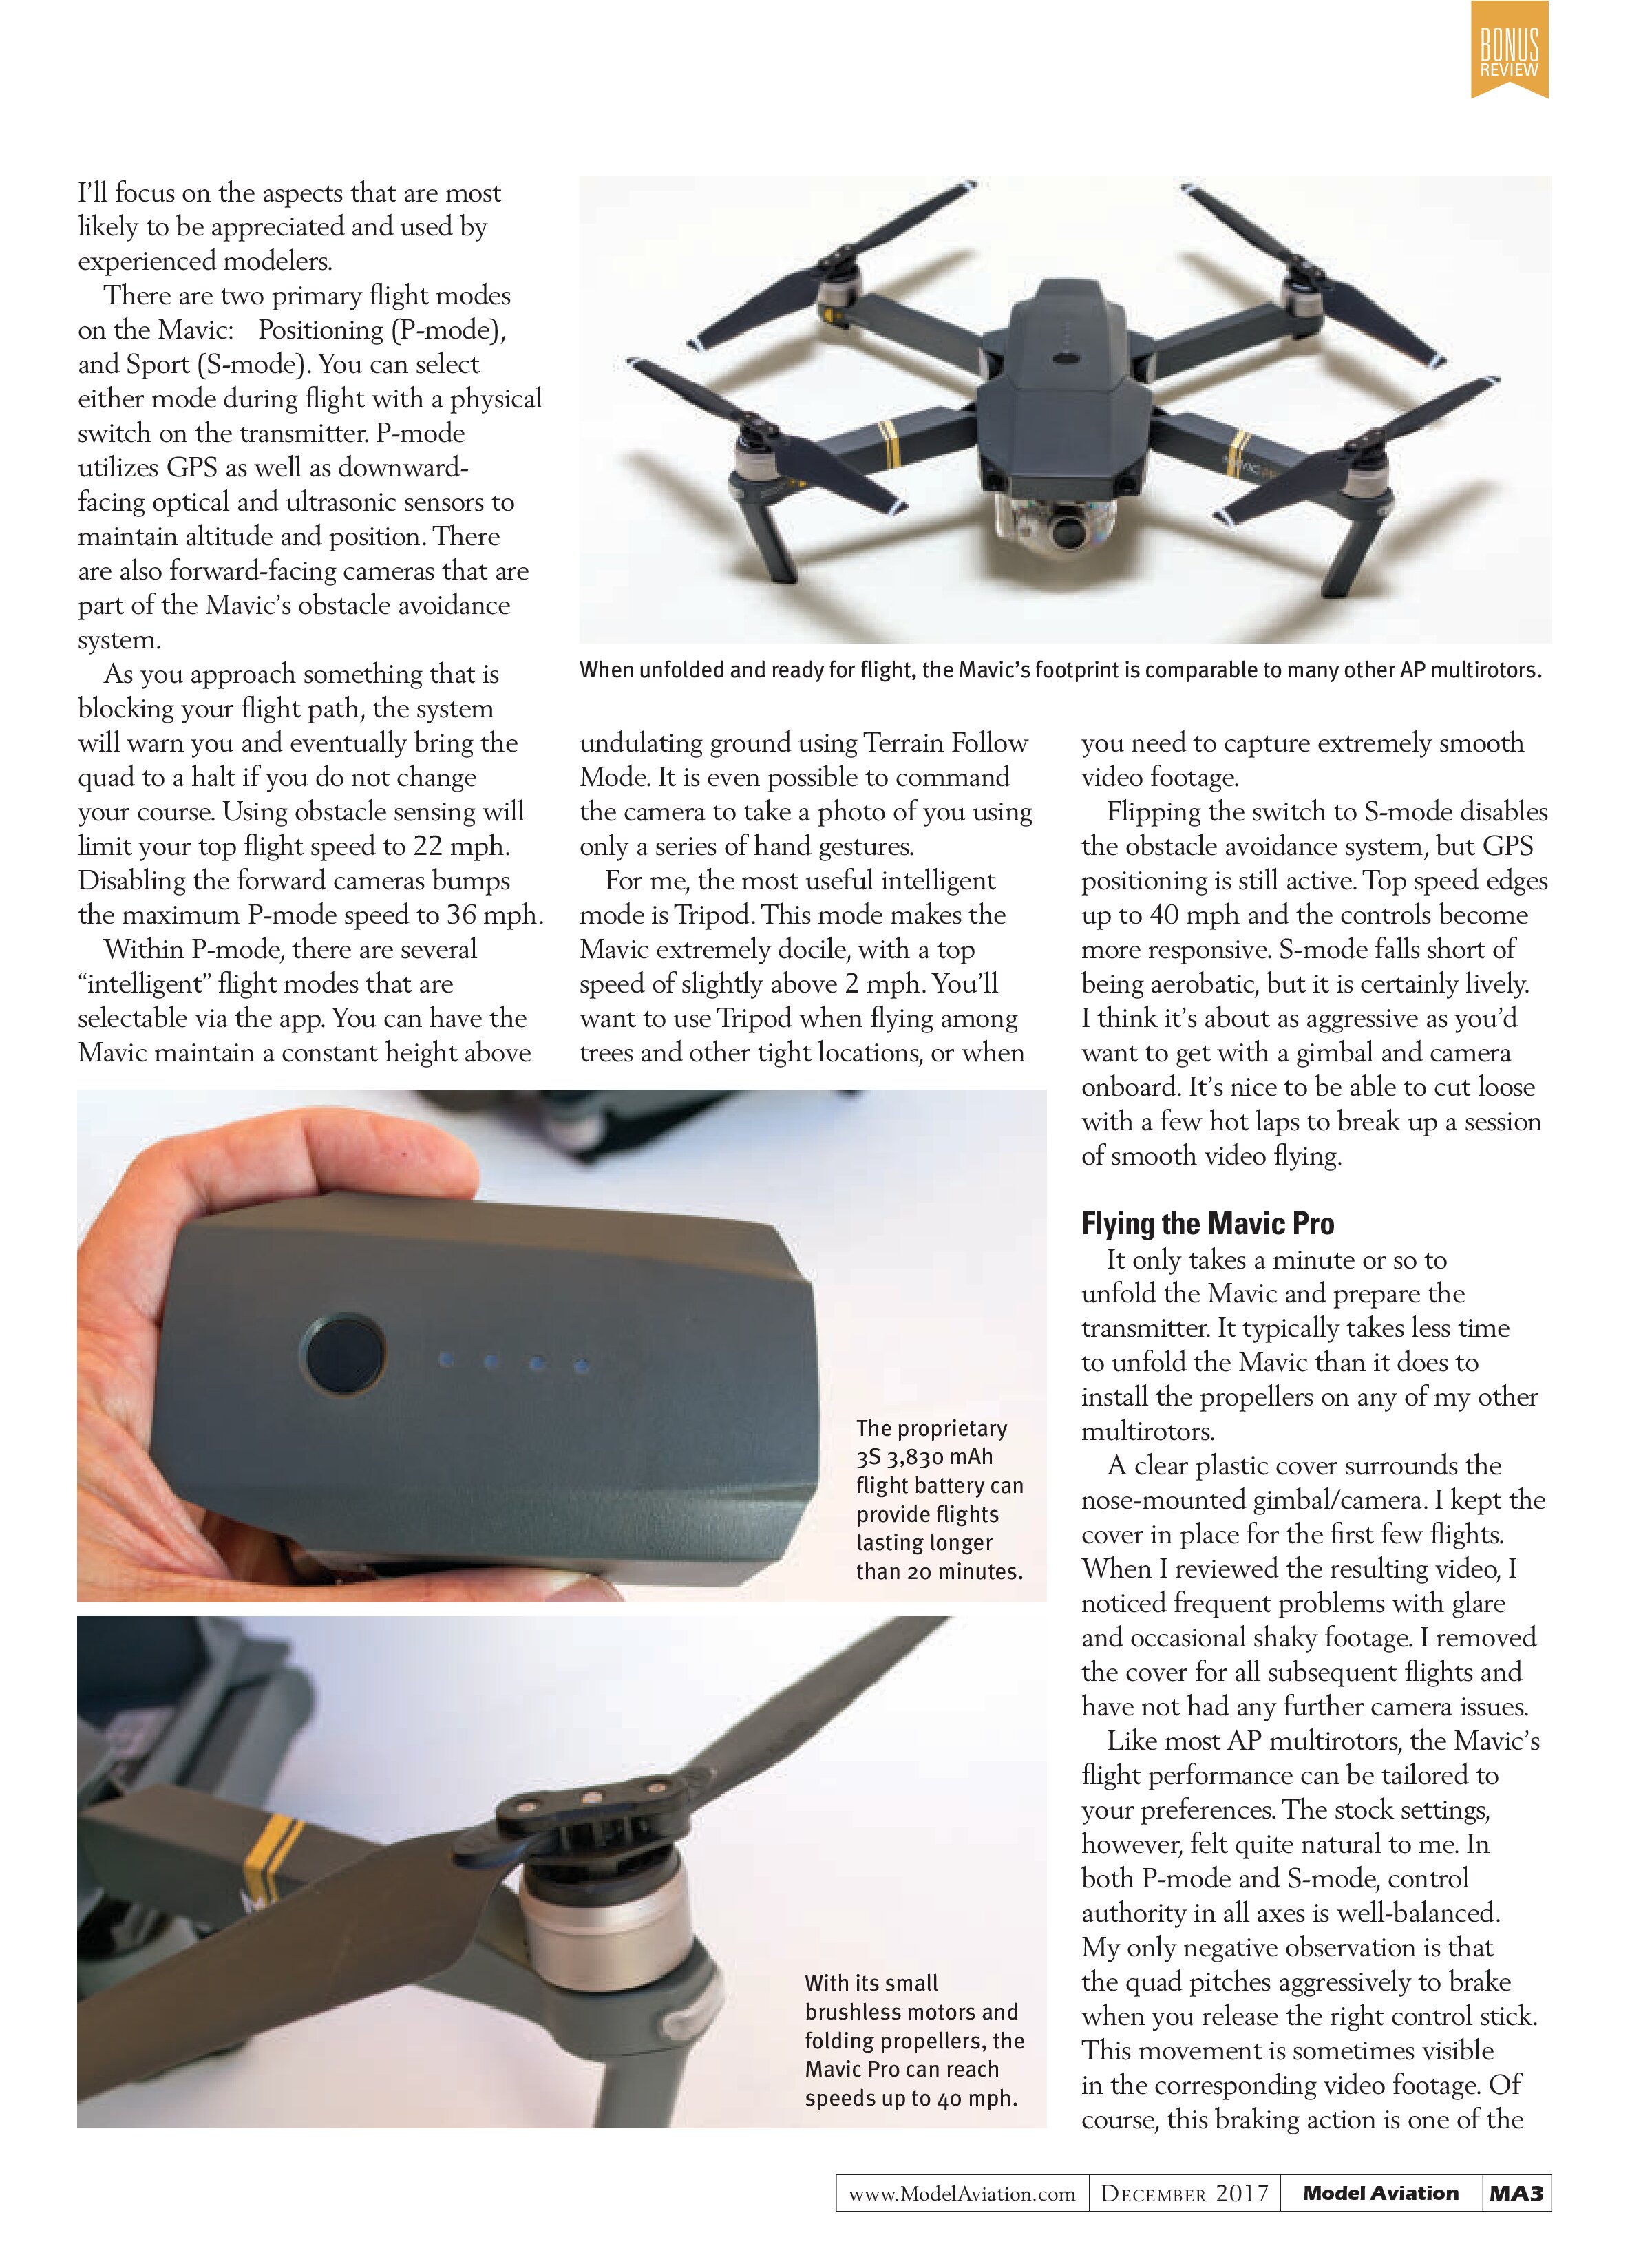
It only takes a minute or so to unfold the Mavic and prepare the transmitter. It typically takes less time to unfold the Mavic than it does to install the propellers on any of my other multirotors.
A clear plastic cover surrounds the nose-mounted gimbal/camera. I kept the cover in place for the first few flights. When I reviewed the resulting video, I noticed frequent problems with glare and occasional shaky footage. I removed the cover for all subsequent flights and have not had any further camera issues.
Like most AP multirotors, the Mavic’s flight performance can be tailored to your preferences. The stock settings, however, felt quite natural to me. In both P-mode and S-mode, control authority in all axes is well-balanced. My only negative observation is that the quad pitches aggressively to brake when you release the right control stick. This movement is sometimes visible in the corresponding video footage. Of course, this braking action is one of the

Seamless integration with DJI products
Pilots who are interested in using multirotor aircraft for capturing aerial media are often forced to face the challenging dilemma of sunshine-induced screen glare on the smartphone or tablet that they are using to view the real-time video signal being fed back from the drone’s onboard camera.
Although any variety of hoods and shields can be used to at least partially mitigate the problem, a better solution, and one that can completely eliminate the problem, is using a video headset or a pair of FPV goggles.
Donning a headset or a pair of goggles when taking to the air comes with the bonus of a much more immersive flight experience. These devices typically block all of the ambient daylight and allow pilots to fully focus on the color images displayed on the device’s screen(s). One caveat when wearing a headset or goggles is that fliers surrender the ability to easily look skyward in order to view and control their aircraft using the conventional line-of-sight method long used by RC pilots. This task is relegated to the spotter.
DJI, a well-established and prolific designer/manufacturer of mult icopter flight controllers and aerial media platforms, has taken a step in a new direction with the release of the DJI Goggles. This headset is designed to be used with a plethora of DJI-branded aerial media drones, including the Phantom 4, Inspires 1 and 2, Mavic, and Spark. A compatibility matrix, found in the product manual, thoroughly defines the functionality of the goggles when used with the various DJI aerial media platforms.
One glance at the matrix reveals that the goggles were designed to most fully complement the DJI Mavic. Ten modes and features are called out in the chart, and the Mavic is the only platform that is listed as supporting all of them. The oldest platform included in the compatibility matrix is the Inspire 1. Pilots who wish to use the goggles when flying this legacy DJI product are limited to connecting the goggles to the Inspire
AT A GLANCE ...
SPECIFICATIONS
Screen resolution: 1920 x 1080 (combined displays = 3840 x 1080)
Field of view: 85°
Video downlink resolution: 1080p 30 FPS; 720p 60 FPS; 720p 30 FPS
Refresh rate: 60 Hz
Operating frequency: 2.4 GHz
Video downlink latency: Mavic Pro 110ms; Phantom 4 Pro/Advanced series 150ms; Phantom 4 167ms; Inspire 2+X5S 140ms; Inspire 2+X4S 190ms
Battery capacity: 9,440 mAh
Battery energy: 35.44 watt hours
Typical battery duration: 6 hours
Operating temperature range: 32° F to 104° F
I/O interface: Micro-USB; 3.5mm audio jack; HDMI type-D, micro-SD card slot
HDMI modes supported: HDMI 1.4b; HDCP 1.4
Dimensions: Headset 195 x 155 x 110 mm; headband 255 x 205 x 92 mm
Weight: Headset 495 grams; headband 500 grams
Price: $449
PLUSES
- Headset can be used with many of DJI’s drones, with varying levels of functionality and integration.
- Pilots with less-than-perfect vision can leave their glasses on while wearing this headset.
- Trackpad-style control interface allows pilots easy access to an extensive menu system with the headset in place.
- 100% wireless connection when used with the DJI Mavic.
MINUSES
- Pilots with extremely large heads might not be able to comfortably wear the headset.
- Those who wear glasses might need to amend their prescription or obtain reading glasses with a different magnifier.

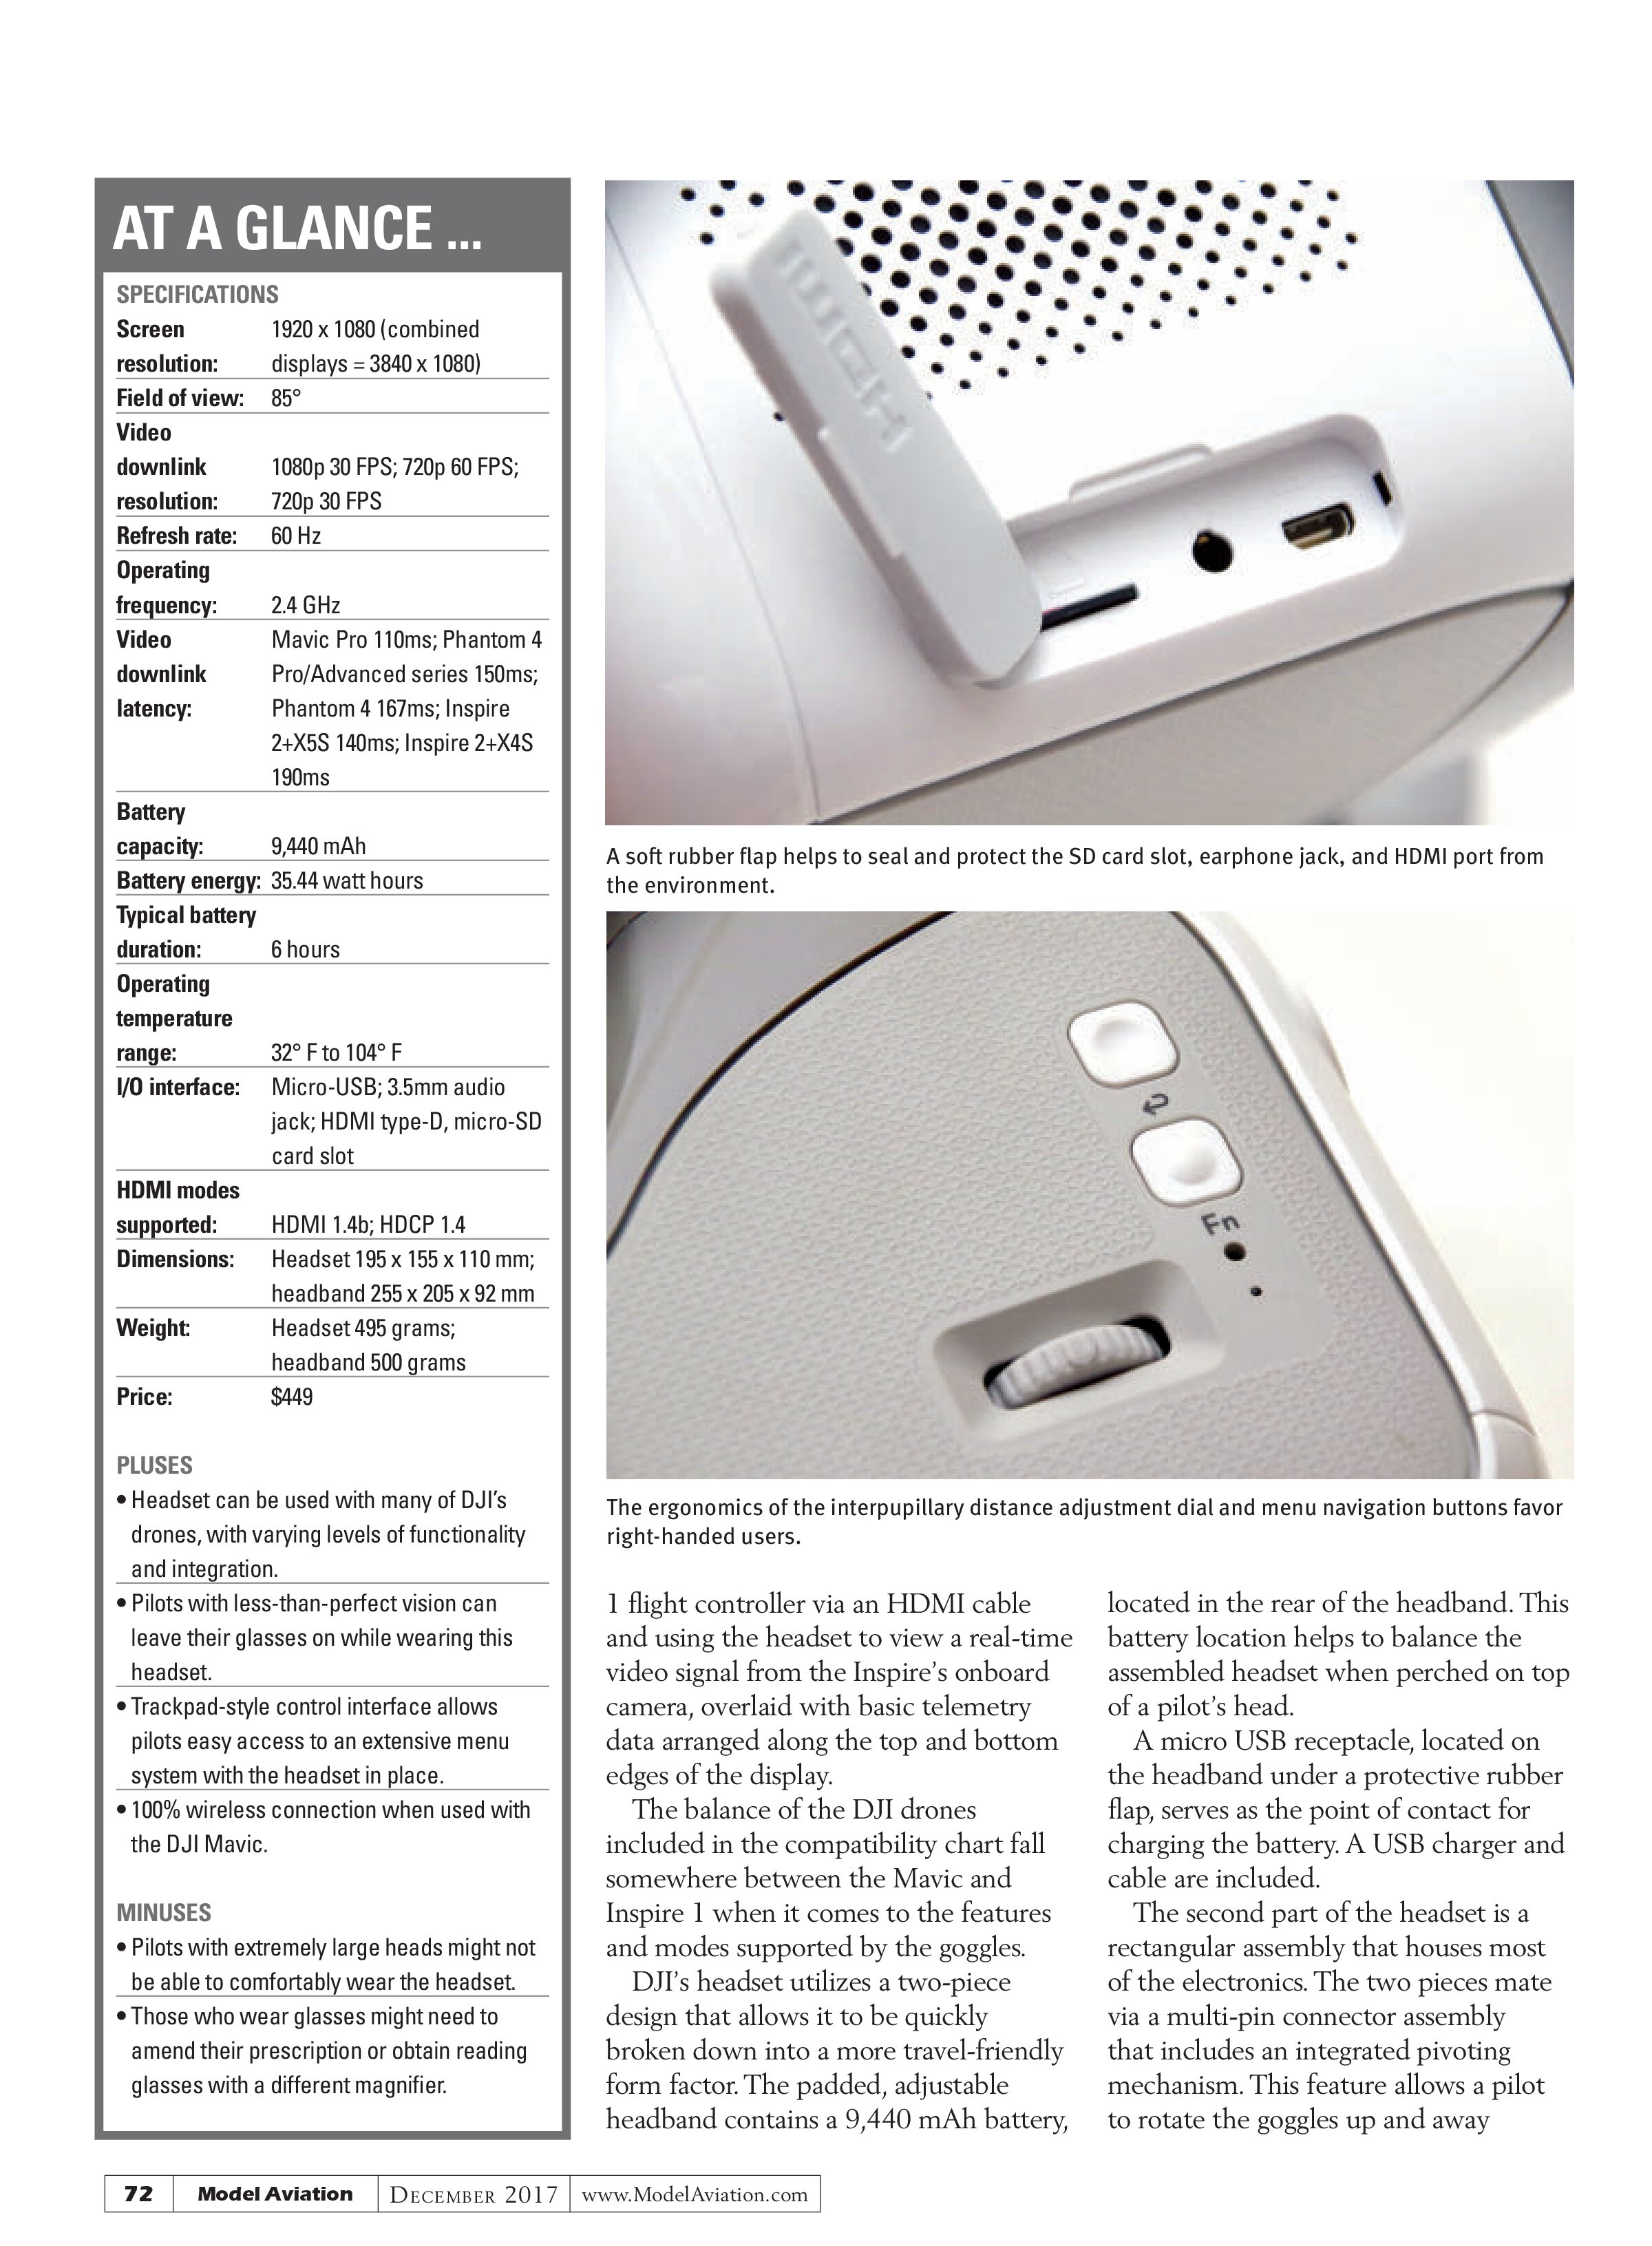
A soft rubber flap helps to seal and protect the SD card slot, earphone jack, and HDMI port from the environment.

The ergonomics of the interpupillary distance adjustment dial and menu navigation buttons favor right-handed users.
1 flight controller via an HDMI cable and using the headset to view a real-time video signal from the Inspire’s onboard camera, overlaid with basic telemetry data arranged along the top and bottom edges of the display.
The balance of the DJI drones included in the compatibility chart fall somewhere between the Mavic and Inspire 1 when it comes to the features and modes supported by the goggles.
DJI’s headset utilizes a two-piece design that allows it to be quickly broken down into a more travel-friendly form factor. The padded, adjustable headband contains a 9,440 mAh battery, located in the rear of the headband. This battery location helps to balance the assembled headset when perched on top of a pilot’s head.
A micro USB receptacle, located on the headband under a protective rubber flap, serves as the point of contact for charging the battery. A USB charger and cable are included.
The second part of the headset is a rectangular assembly that houses most of the electronics. The two pieces mate via a multi-pin connector assembly that includes an integrated pivoting mechanism. This feature allows a pilot to rotate the goggles up and away from his or her face while wearing the headset. A spring-loaded push button allows the two pieces to separate for storage and transport.
Initially, a pilot might be slightly puzzled as to how to properly separate the two components. After he or she has done it a few times, the amount of force required and the proper angle at which to pull the two pieces apart becomes apparent.
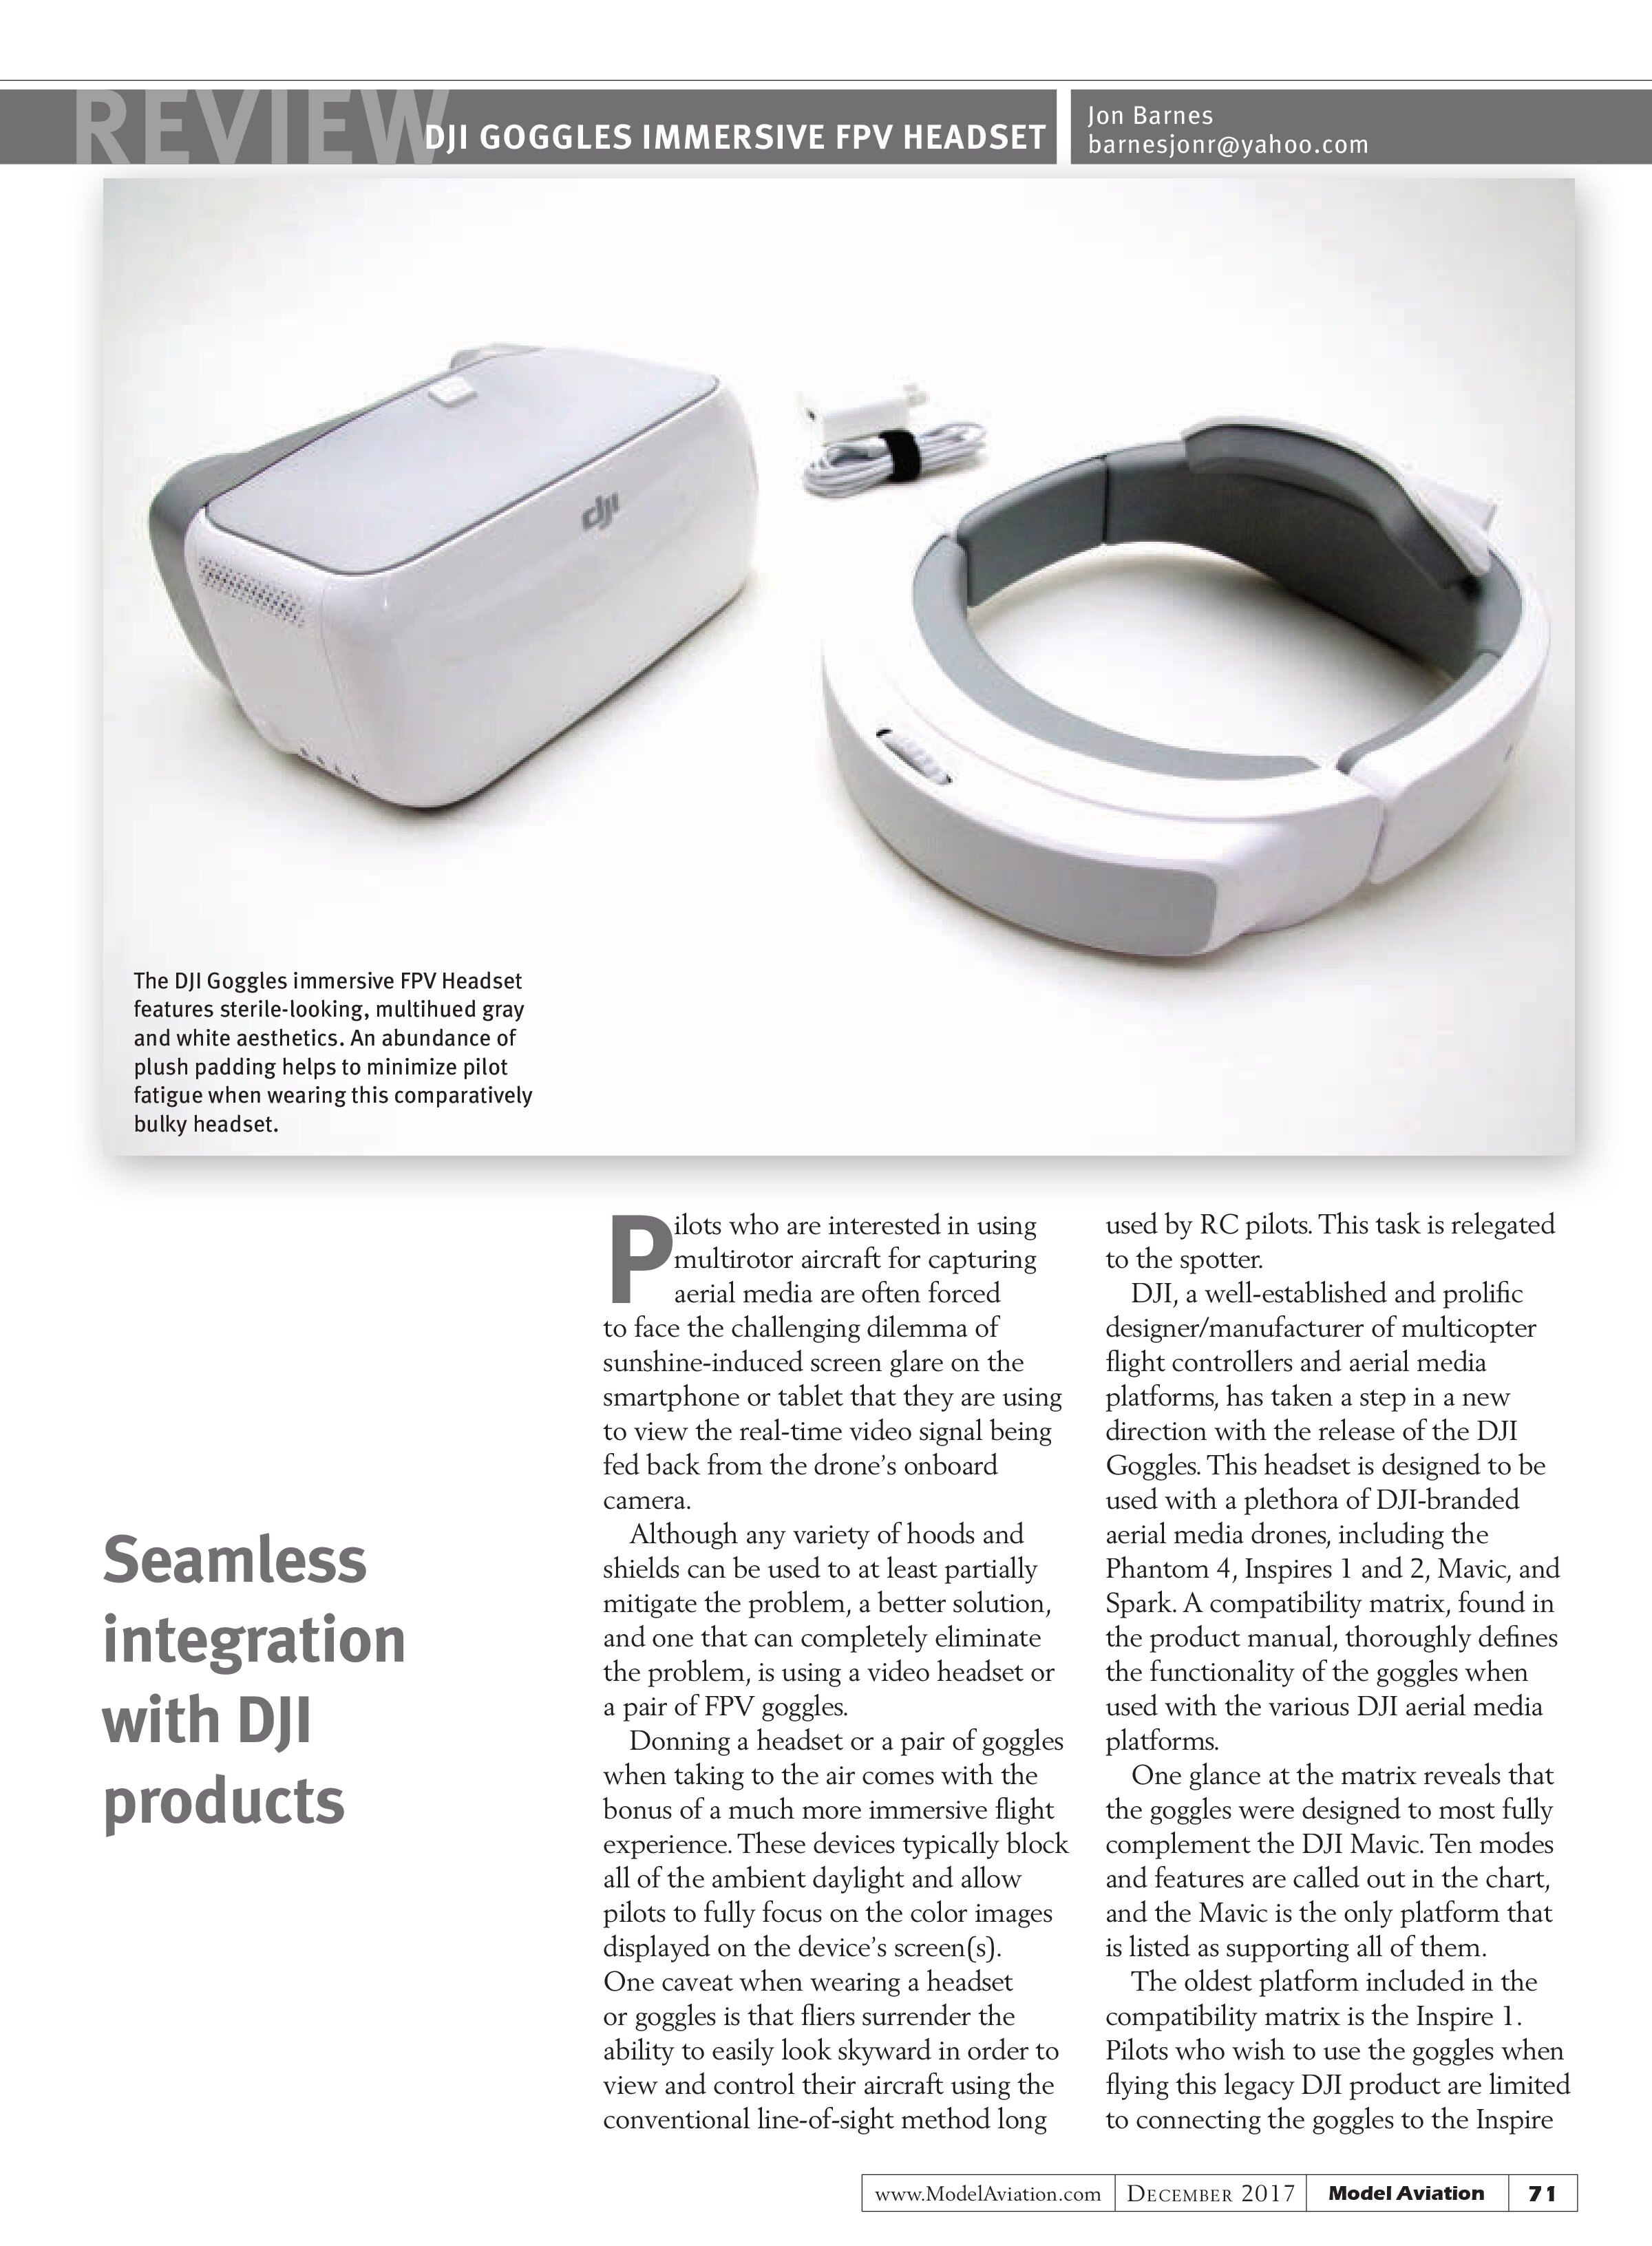
Ancillary items boxed with the headset include a micro USB cable, HDMI cable, plastic wire retention clip, USB charger, and a small cleaning cloth. The goggles’ understated, sterile-looking, white and gray color scheme makes for aesthetics that would be at home in any hospital or medical facility.
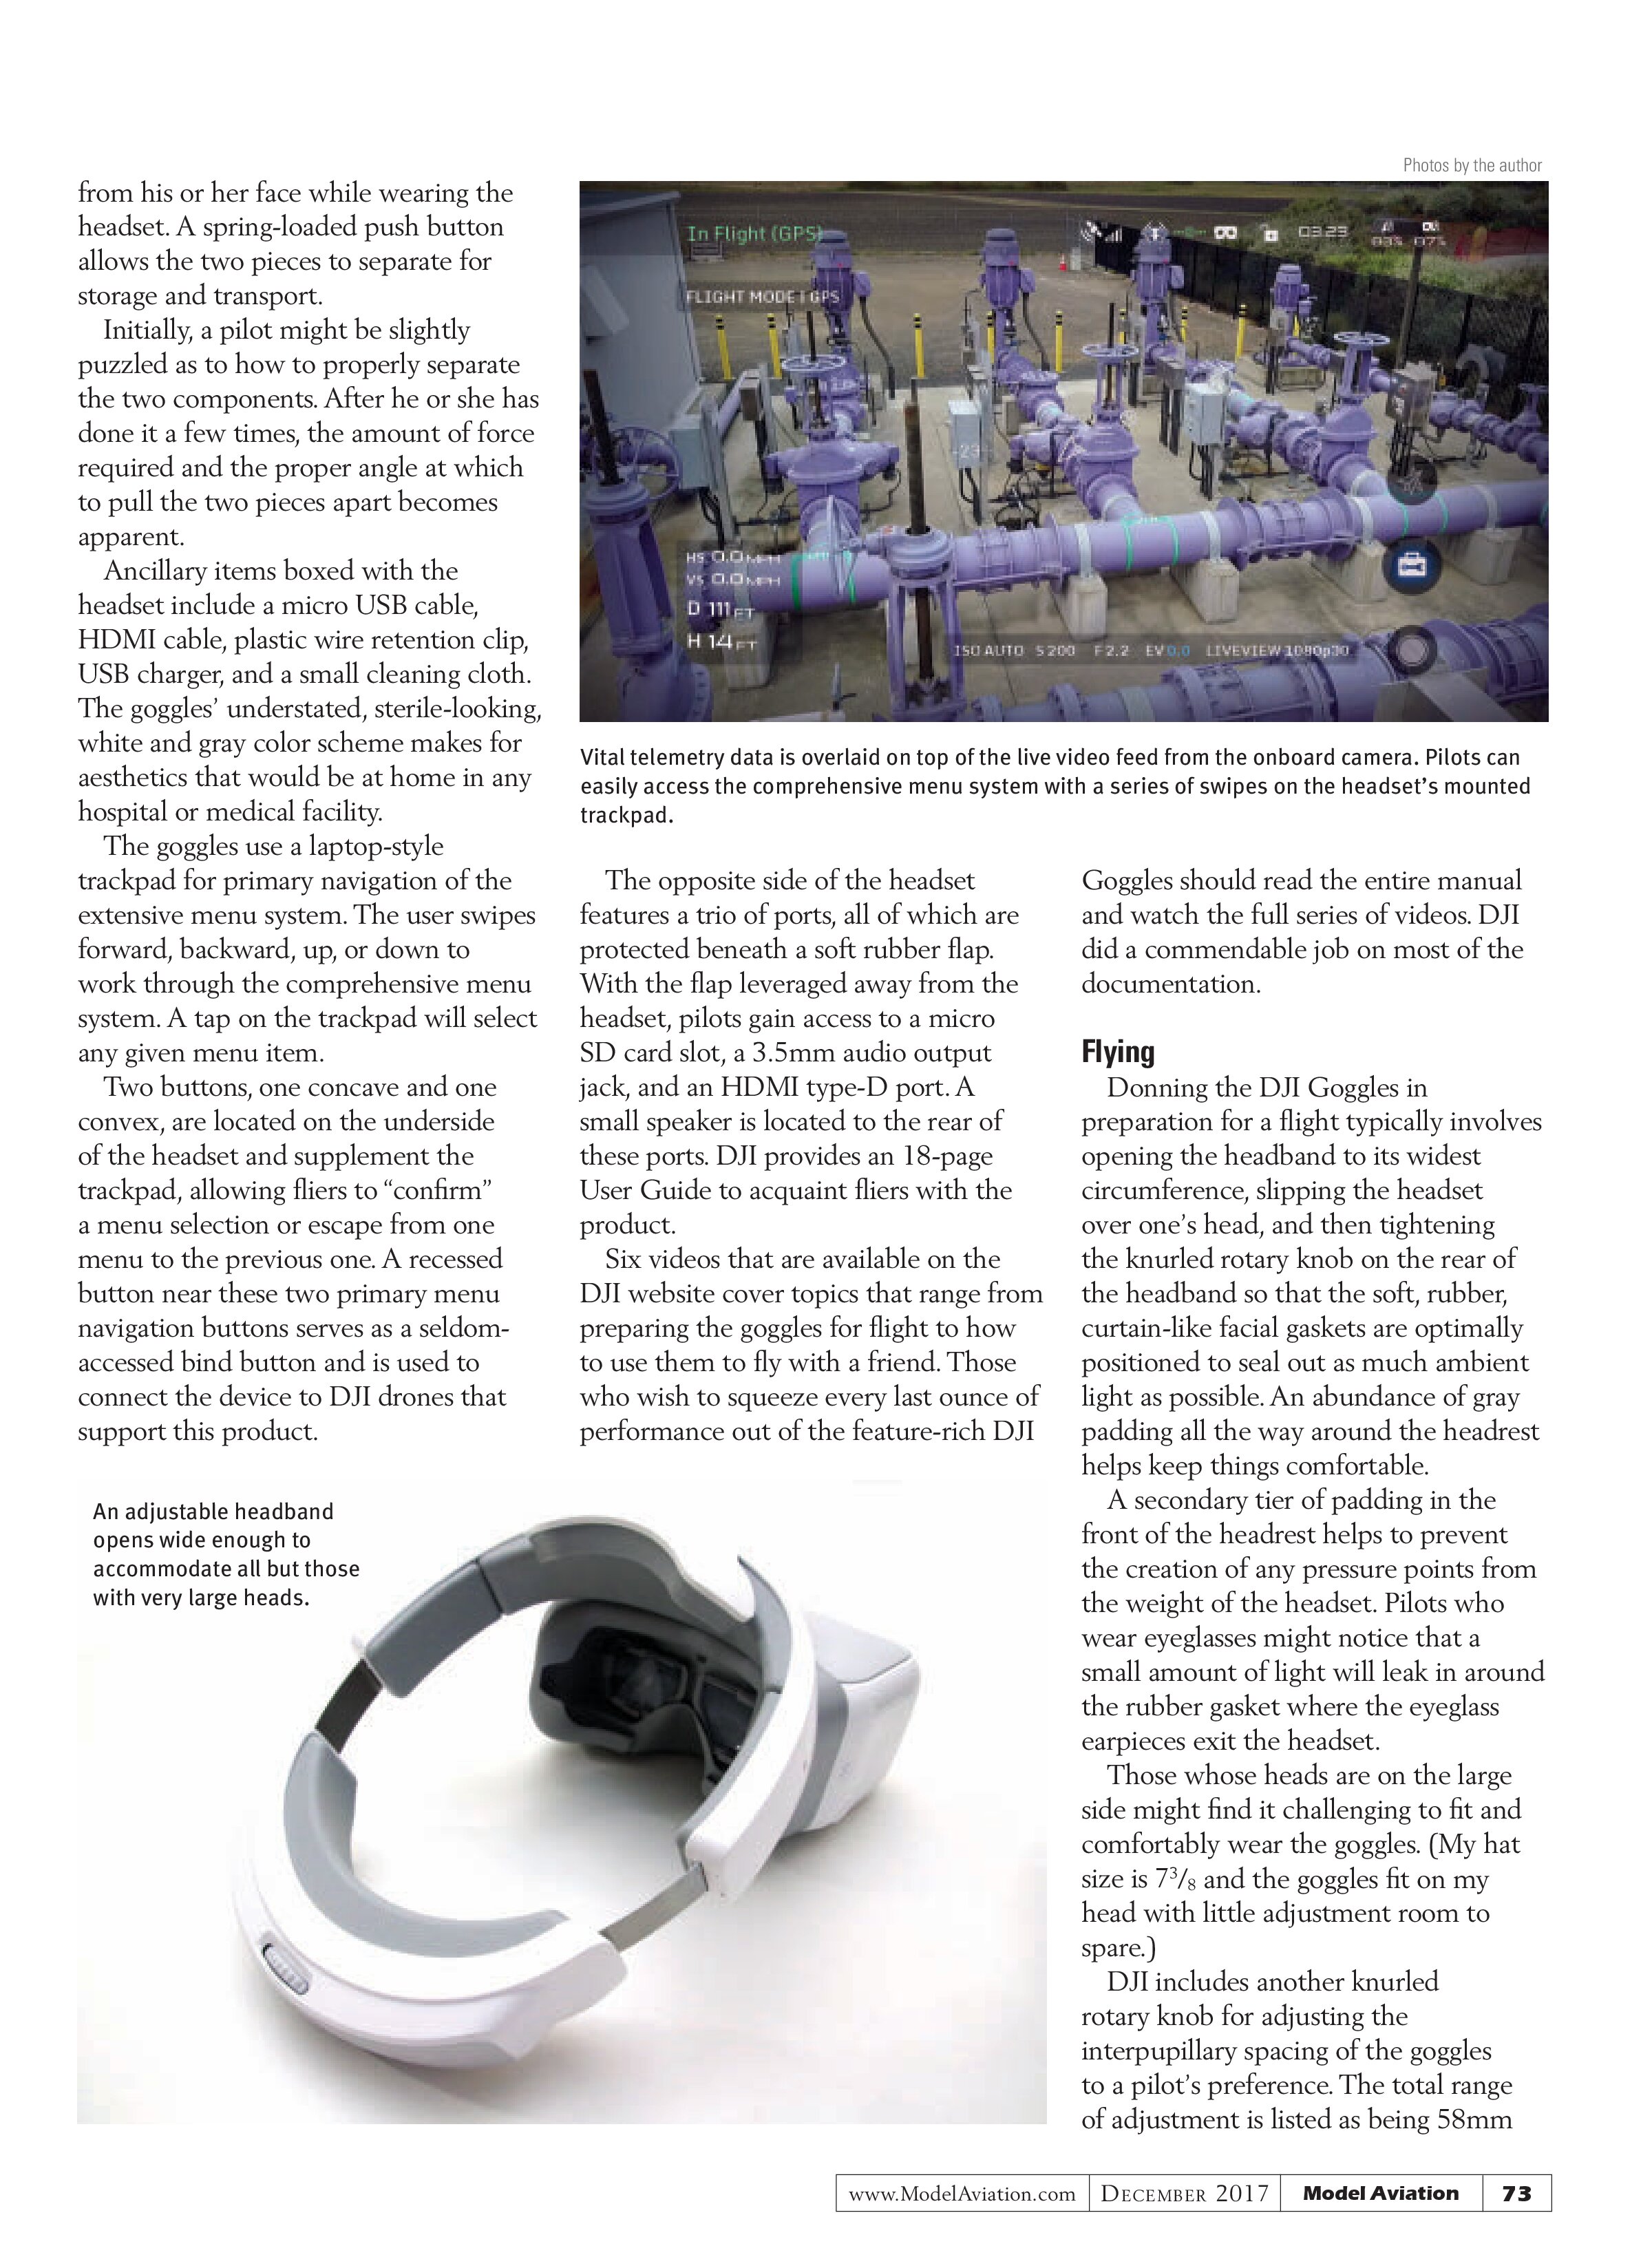
The goggles use a laptop-style trackpad for primary navigation of the extensive menu system. The user swipes forward, backward, up, or down to work through the comprehensive menu system. A tap on the trackpad will select any given menu item.
Two buttons, one concave and one convex, are located on the underside of the headset and supplement the trackpad, allowing fliers to “confirm” a menu selection or escape from one menu to the previous one. A recessed button near these two primary menu navigation buttons serves as a seldom-accessed bind button and is used to connect the device to DJI drones that support this product.
Photos by the author

Vital telemetry data is overlaid on top of the live video feed from the onboard camera. Pilots can easily access the comprehensive menu system with a series of swipes on the headset’s mounted trackpad.
The opposite side of the headset features a trio of ports, all of which are protected beneath a soft rubber flap. With the flap leveraged away from the headset, pilots gain access to a micro SD card slot, a 3.5mm audio output jack, and an HDMI type-D port. A small speaker is located to the rear of these ports. DJI provides an 18-page User Guide to acquaint fliers with the product.
Six videos that are available on the DJI website cover topics that range from preparing the goggles for flight to how to use them to fly with a friend. Those who wish to squeeze every last ounce of performance out of the feature-rich DJI Goggles should read the entire manual and watch the full series of videos. DJI did a commendable job on most of the documentation.
Flying
Donning the DJI Goggles in preparation for a flight typically involves opening the headband to its widest circumference, slipping the headset over one’s head, and then tightening the knurled rotary knob on the rear of the headband so that the soft, rubber, curtain-like facial gaskets are optimally positioned to seal out as much ambient light as possible. An abundance of gray padding all the way around the headrest helps keep things comfortable.
A secondary tier of padding in the front of the headrest helps to prevent the creation of any pressure points from the weight of the headset. Pilots who wear eyeglasses might notice that a small amount of light will leak in around the rubber gasket where the eyeglass earpieces exit the headset.
Those whose heads are on the large side might find it challenging to fit and comfortably wear the goggles. (My hat size is 7⅜ and the goggles fit on my head with little adjustment room to spare.)
DJI includes another knurled rotary knob for adjusting the interpupillary spacing of the goggles to a pilot’s preference. The total range of adjustment is listed as being 58mm
An adjustable headband opens wide enough to accommodate all but those with very large heads.

Focus-Fixers
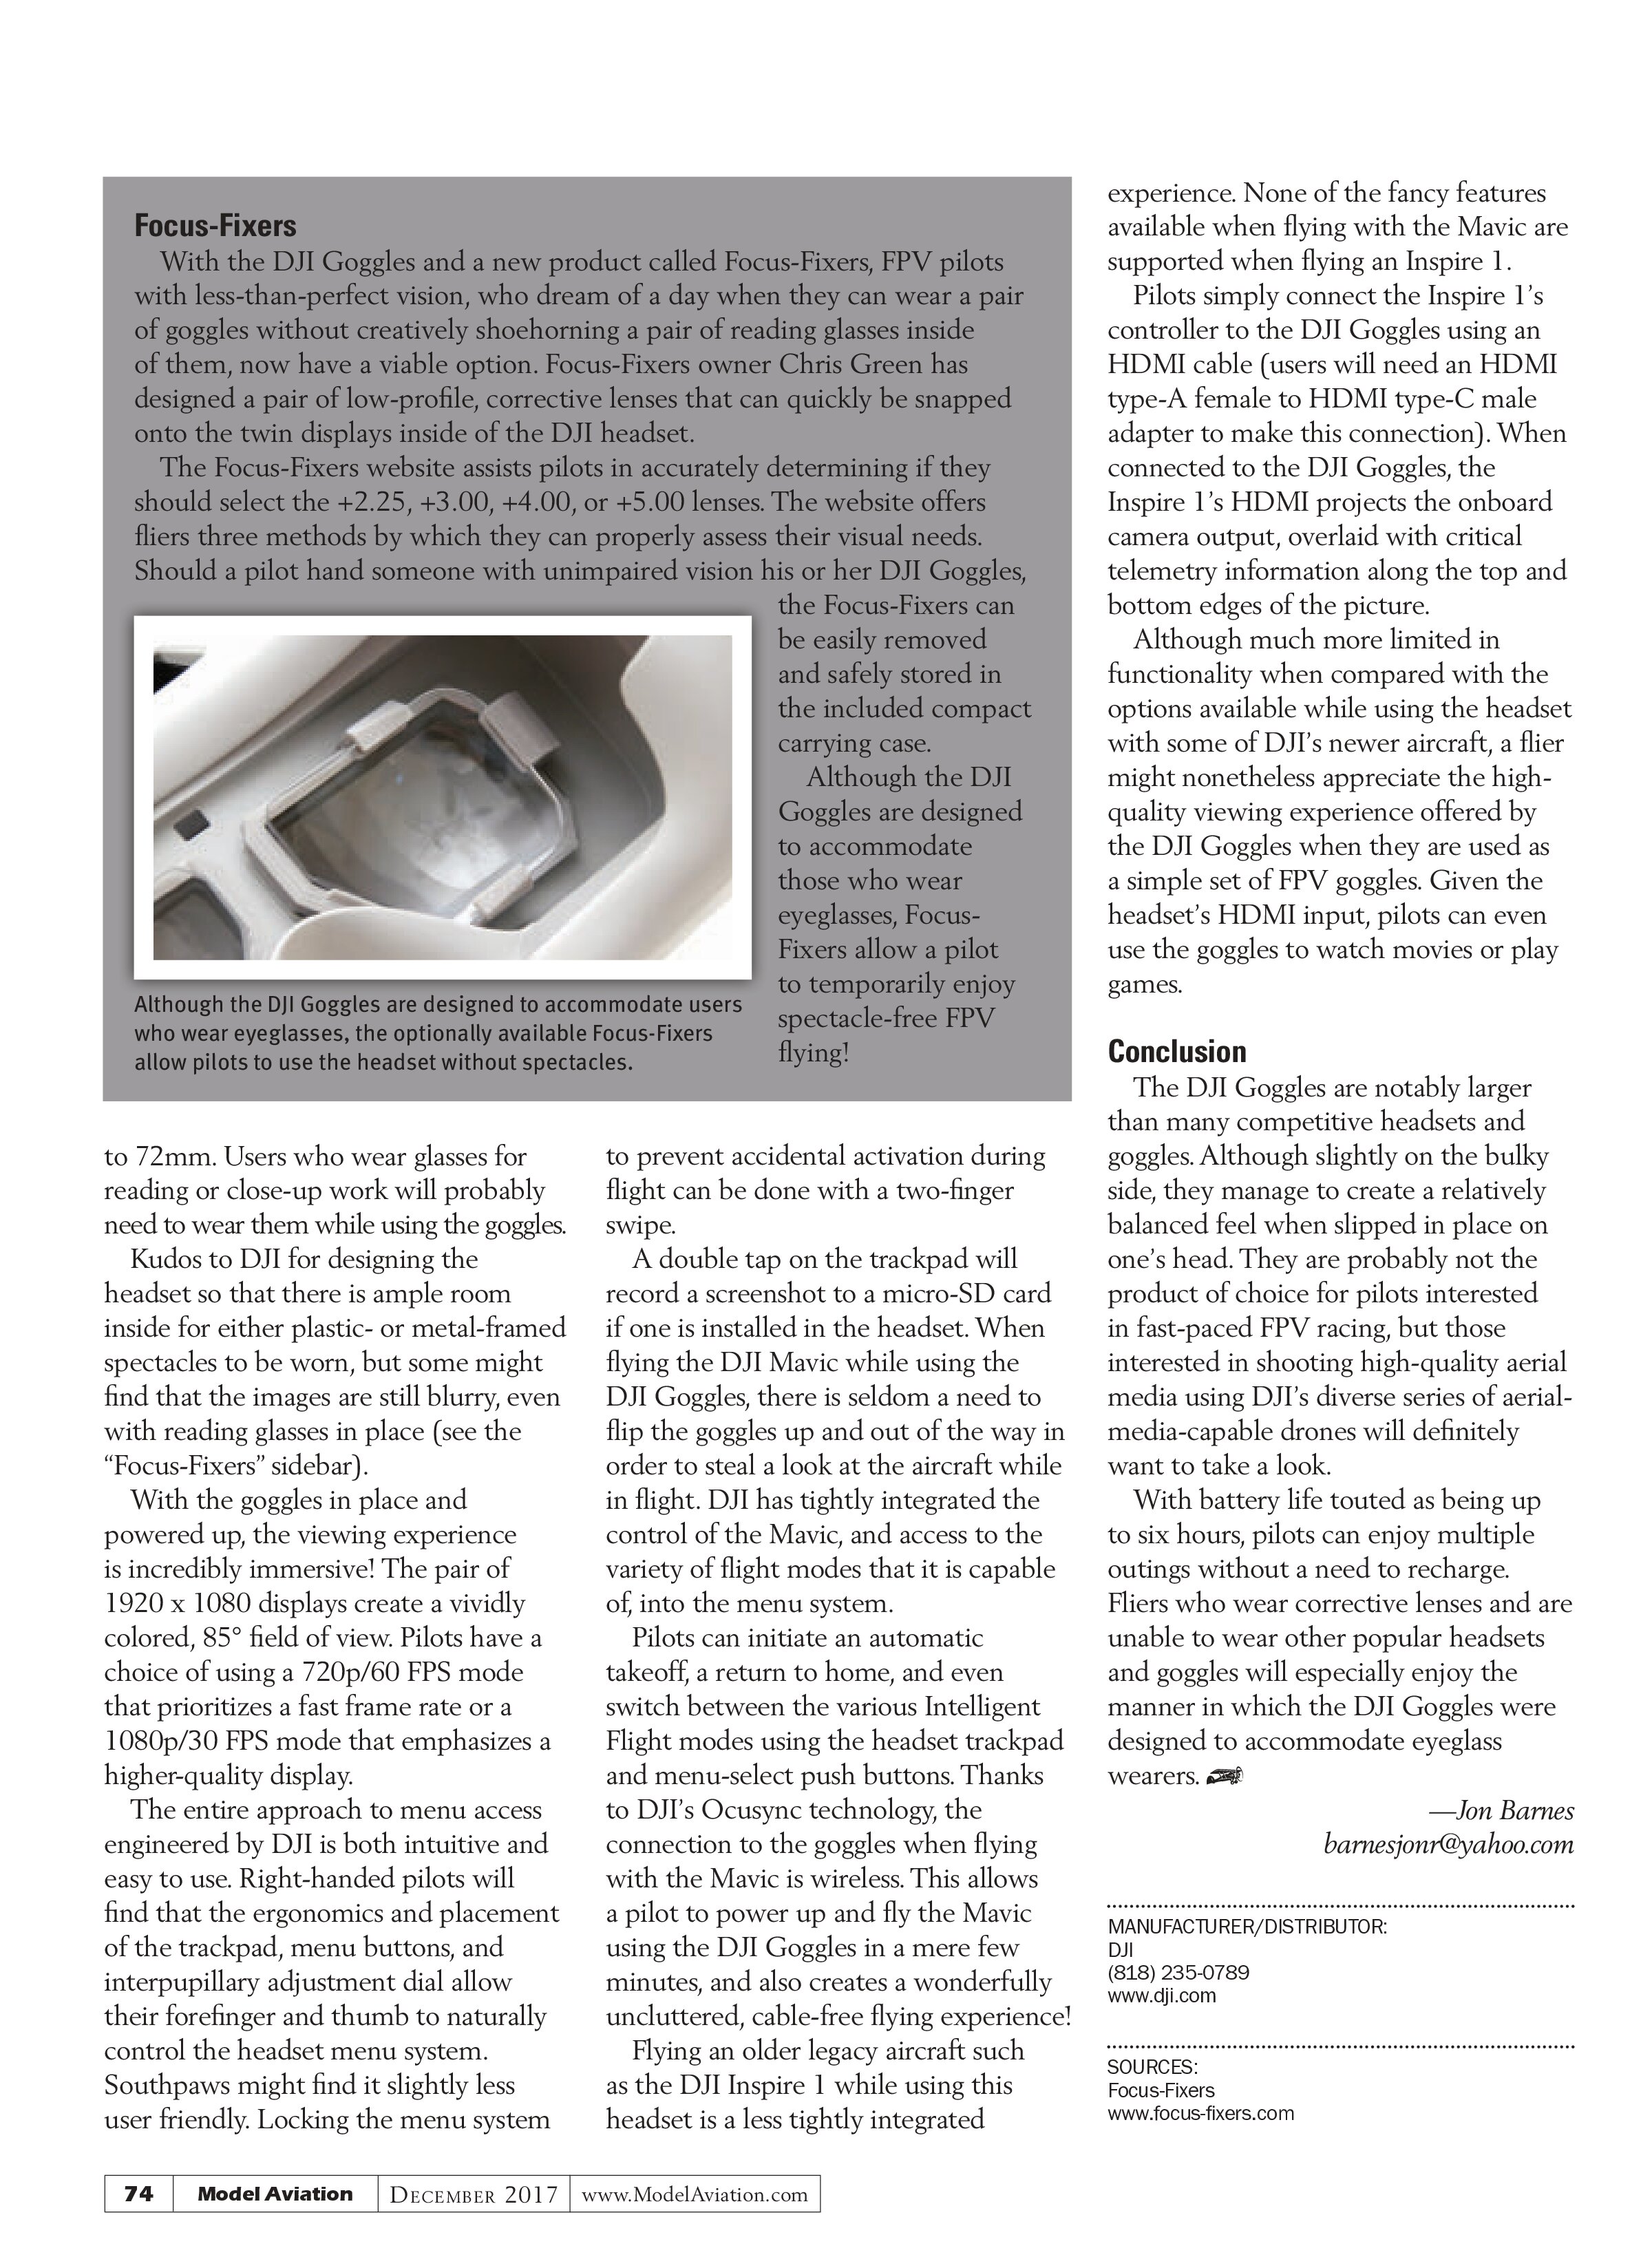
With the DJI Goggles and a new product called Focus-Fixers, FPV pilots with less-than-perfect vision, who dream of a day when they can wear a pair of goggles without creatively shoehorning a pair of reading glasses inside of them, now have a viable option. Focus-Fixers owner Chris Green has designed a pair of low-profile, corrective lenses that can quickly be snapped onto the twin displays inside of the DJI headset.
The Focus-Fixers website assists pilots in accurately determining if they should select the +2.25, +3.00, +4.00, or +5.00 lenses. The website offers fliers three methods by which they can properly assess their visual needs. Should a pilot hand someone with unimpaired vision his or her DJI Goggles,

the Focus-Fixers can be easily removed and safely stored in the included compact carrying case. Although the DJI Goggles are designed to accommodate those who wear eyeglasses, Focus-Fixers allow a pilot to temporarily enjoy spectacle-free FPV flying!
to 72mm. Users who wear glasses for reading or close-up work will probably need to wear them while using the goggles.
Kudos to DJI for designing the headset so that there is ample room inside for either plastic- or metal-framed spectacles to be worn, but some might find that the images are still blurry, even with reading glasses in place (see the “Focus-Fixers” sidebar).
With the goggles in place and powered up, the viewing experience is incredibly immersive! The pair of 1920 x 1080 displays create a vividly colored, 85° field of view. Pilots have a choice of using a 720p/60 FPS mode that prioritizes a fast frame rate or a 1080p/30 FPS mode that emphasizes a higher-quality display.
The entire approach to menu access engineered by DJI is both intuitive and easy to use. Right-handed pilots will find that the ergonomics and placement of the trackpad, menu buttons, and interpupillary adjustment dial allow their forefinger and thumb to naturally control the headset menu system. Southpaws might find it slightly less user friendly. Locking the menu system
to prevent accidental activation during flight can be done with a two-finger swipe.
A double tap on the trackpad will record a screenshot to a micro-SD card if one is installed in the headset. When flying the DJI Mavic while using the DJI Goggles, there is seldom a need to flip the goggles up and out of the way in order to steal a look at the aircraft while in flight. DJI has tightly integrated the control of the Mavic, and access to the variety of flight modes that it is capable of, into the menu system.
Pilots can initiate an automatic takeoff, a return to home, and even switch between the various Intelligent Flight modes using the headset trackpad and menu-select push buttons. Thanks to DJI’s Ocusync technology, the connection to the goggles when flying with the Mavic is wireless. This allows a pilot to power up and fly the Mavic using the DJI Goggles in a mere few minutes, and also creates a wonderfully uncluttered, cable-free flying experience!
Flying an older legacy aircraft such as the DJI Inspire 1 while using this headset is a less tightly integrated experience. None of the fancy features available when flying with the Mavic are supported when flying an Inspire 1. Pilots simply connect the Inspire 1’s controller to the DJI Goggles using an HDMI cable (users will need an HDMI type-A female to HDMI type-C male adapter to make this connection). When connected to the DJI Goggles, the Inspire 1’s HDMI projects the onboard camera output, overlaid with critical telemetry information along the top and bottom edges of the picture.
Although much more limited in functionality when compared with the options available while using the headset with some of DJI’s newer aircraft, a flier might nonetheless appreciate the high-quality viewing experience offered by the DJI Goggles when they are used as a simple set of FPV goggles. Given the headset’s HDMI input, pilots can even use the goggles to watch movies or play games.
Conclusion
The DJI Goggles are notably larger than many competitive headsets and goggles. Although slightly on the bulky side, they manage to create a relatively balanced feel when slipped in place on one’s head. They are probably not the product of choice for pilots interested in fast-paced FPV racing, but those interested in shooting high-quality aerial media using DJI’s diverse series of aerial-media-capable drones will definitely want to take a look.
With battery life touted as being up to six hours, pilots can enjoy multiple outings without a need to recharge. Fliers who wear corrective lenses and are unable to wear other popular headsets and goggles will especially enjoy the manner in which the DJI Goggles were designed to accommodate eyeglass wearers.
—Jon Barnes
barnesjonr@yahoo.com
MANUFACTURER/DISTRIBUTOR:
DJI
(818) 235-0789
www.dji.com
SOURCES:
Focus-Fixers
www.focus-fixers.com