Nakajima Ki-43 Hayabusa build
by Sal Calvagna
rcgiants@optonline.net

Welcome back. Fall is here and I hope all of my readers are enjoying the latter part of the 2017 flying season. For me, the enjoyment I receive from this wonderful hobby can be defined with three words: flying, camaraderie, and building. I believe that for all AMA members, it’s only the order or emphasis that may differ. In this column, I’ll discuss building and some flying. I hope you enjoy it.
I have to say that building model airplanes comes in a close second to the camaraderie and lifelong friends that I have made throughout the span of my modeling career, which, of course, puts flying in third place. It wasn’t always this way. In my younger days, flying was the prominent reason for modeling. Throughout time and with age, I have found building to be the therapy I need to escape the daily drudge that life tends to throw at us—especially here in New York, where life zooms by quickly.
My current project is a 1/5-scale Jerry Bates Plans Nakajima Ki-43 Hayabusa, code-named Oscar by the Allies during World War II. The Ki-43 was the Japanese Army’s partner to the Japanese Navy’s Mitsubishi A6M Zero fighter. I purchased a laser-cut short kit from Lasercut USA, which is owned and operated by a great person to deal with, Pat Fallacaro. The laser-cut parts fit like a glove and make alignment a no-brainer.
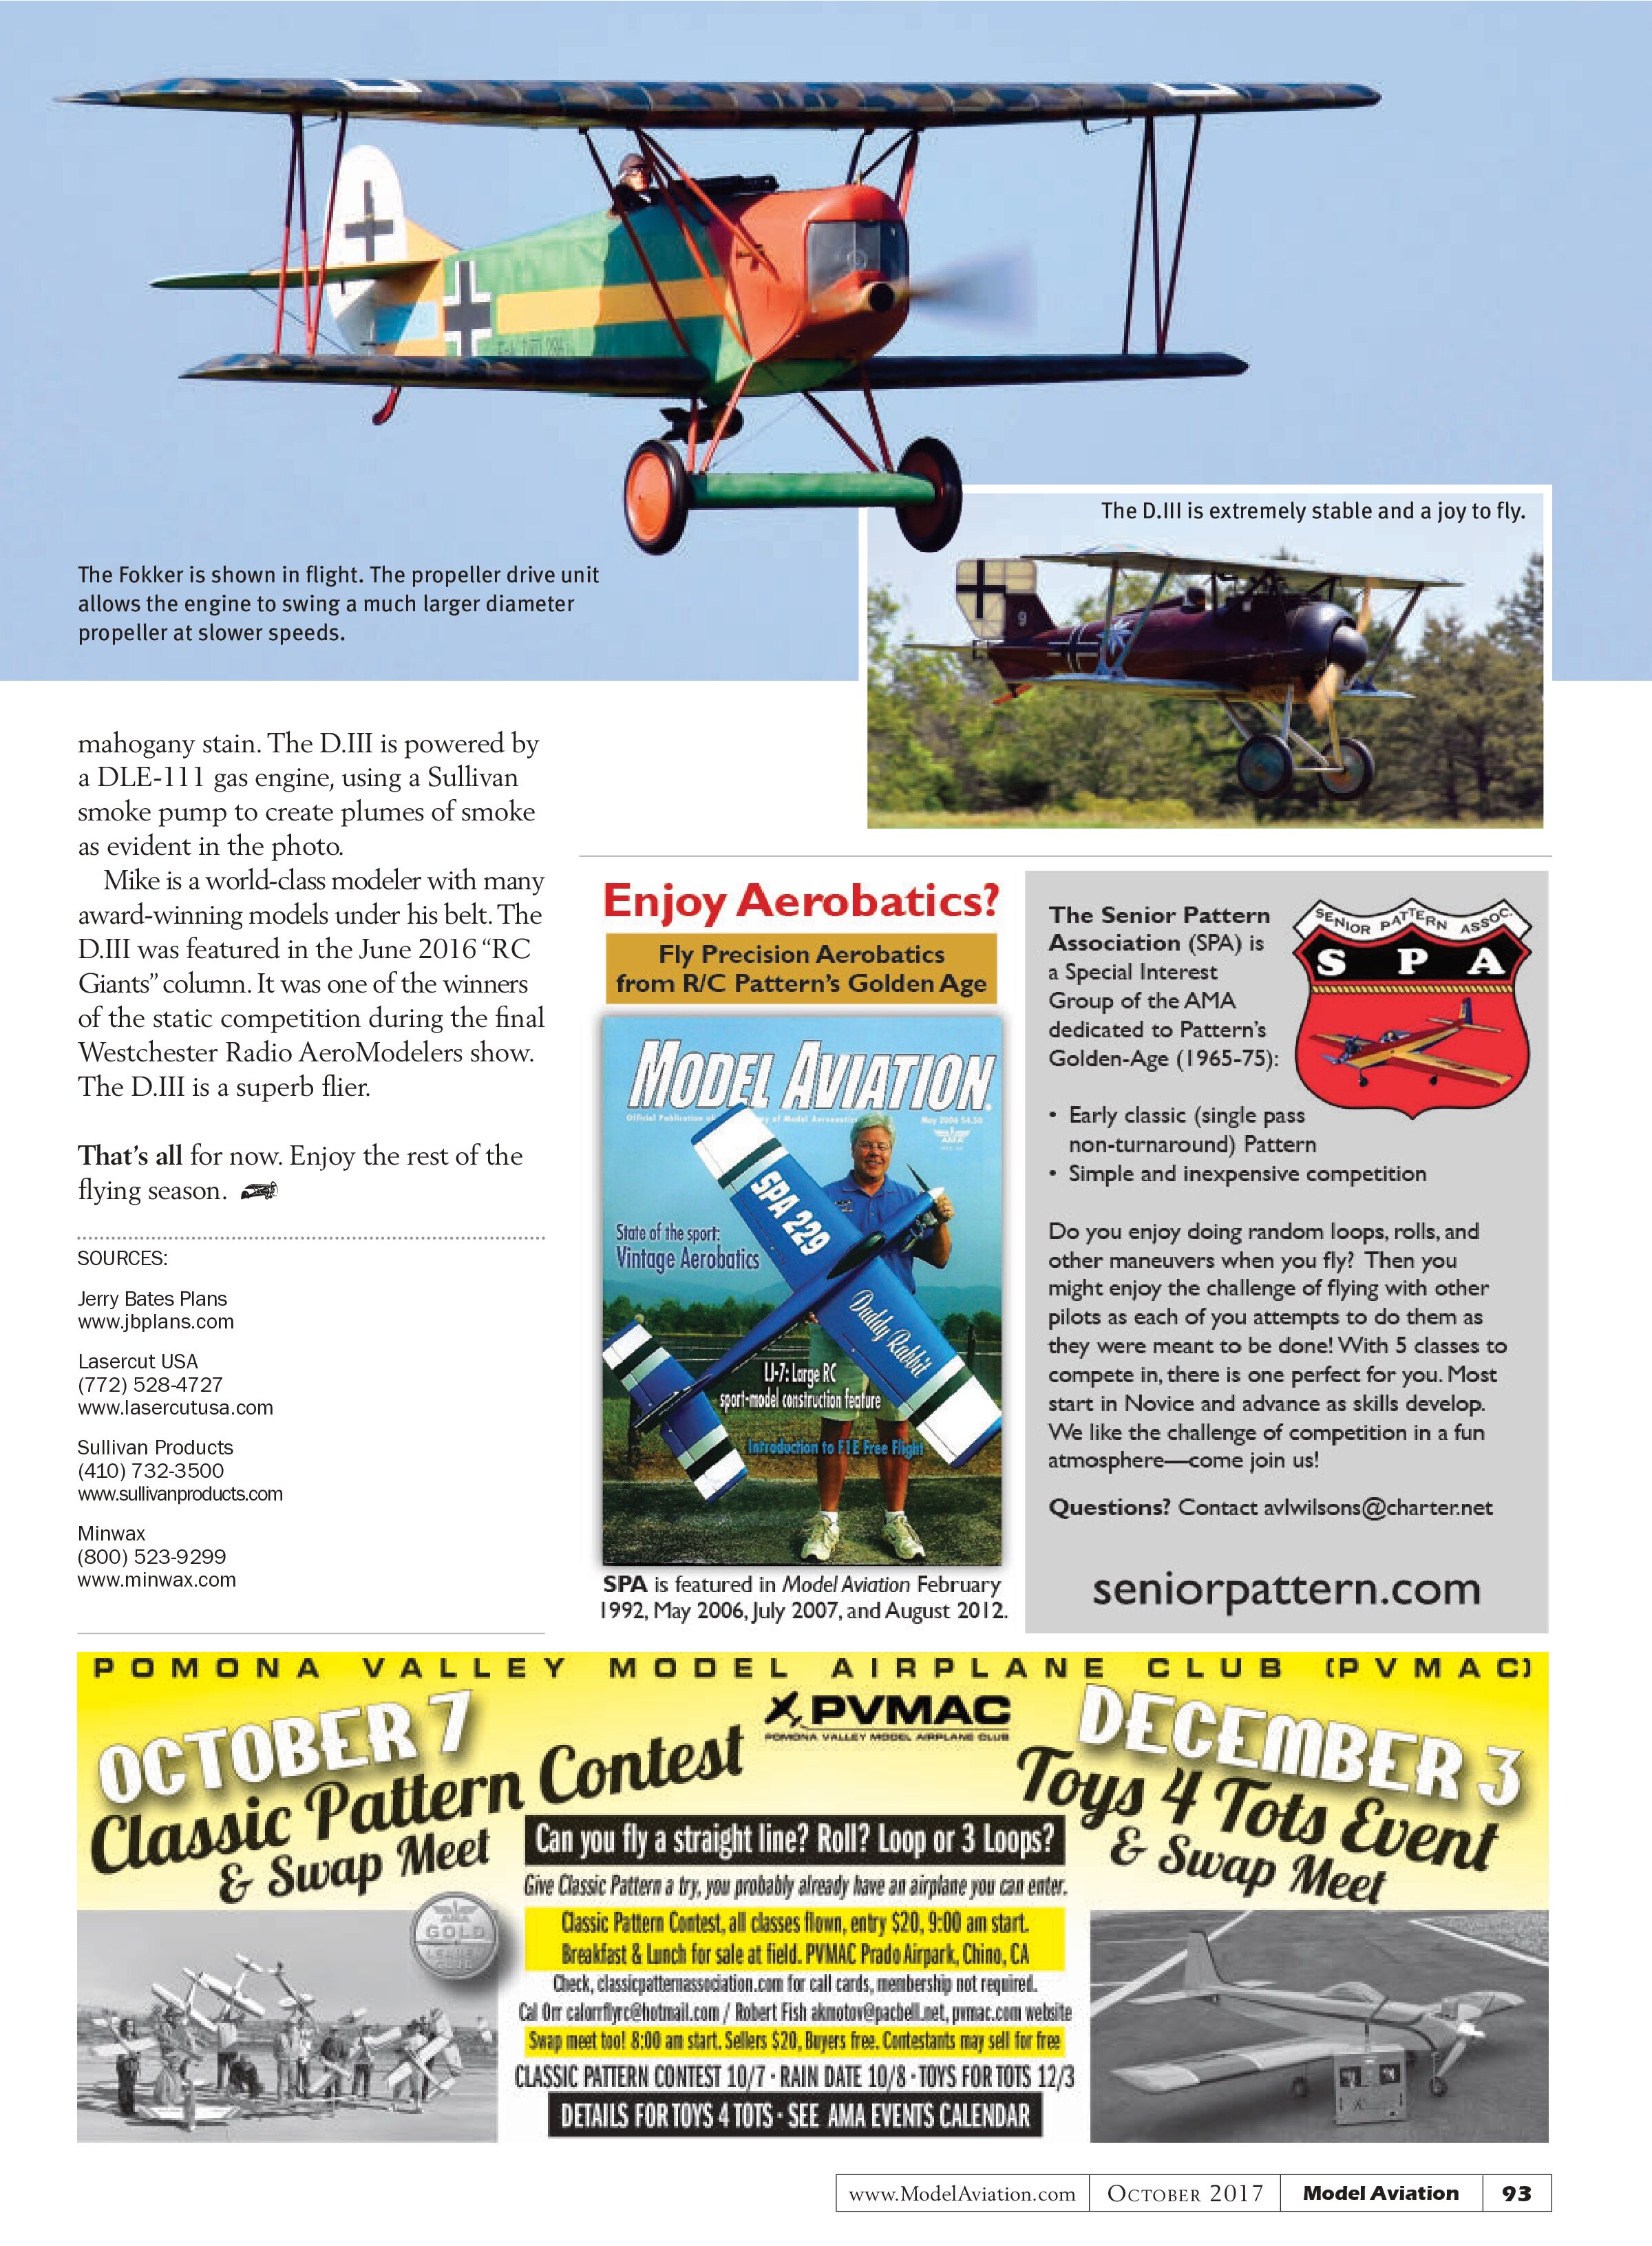
One of the photos shows where I started framing the fuselage. Two 1/4 x 1/2-inch balsa longerons were laid flat on top of the plans and the top half of the fuselage formers were attached. With the addition of some stringers, the top half of the fuselage was sheeted and turned upside down to accept the bottom half of the fuselage formers. It is simple to build a perfectly aligned fuselage using this method.
In another photo, there’s much to examine. The fuselage top half has been sheeted, the bottom half has the formers and stringers attached, the stabilizer is finished, and the elevator halves are nearly completed. The wing has been framed and is almost ready for sheeting and landing gear installation, but there’s more to the photo. It also shows the tools that I typically use to build Giant Scale models. There’s a long, steel straightedge/ruler that I use to check dimensions and check for straightness. It’s great for a leading edge (LE) or to check a flat surface.

I use two large sanding blocks made from 3/4-inch plywood. The dimensions are 2 3/4 inches wide by approximately 15 inches long. Using a little 3M 77 spray adhesive, you can stick your favorite grit sandpaper to the blocks. I like to use 60- to 80-grit sandpaper on one block and 100 or 150 grit on the other. They are easy to hold and great for sanding LEs.
Also shown are an X-Acto knife with the ubiquitous #11 blade, which is paramount for any builder, and a small square to help align ribs, formers, etc. Of course, my favorite types of adhesives are CA, which makes building go fast, and epoxy for those areas such as the firewall, where vibration is the strongest.
There you have it. This is the progress I have made to date. I look forward to the rest of the build and hope that some of my readers will try it for themselves.
For more information about Jerry Bates Plans and Lasercut USA, visit the websites listed in “Sources.”
Bob Allen’s Balsa USA 1/3-Scale Fokker D.VII
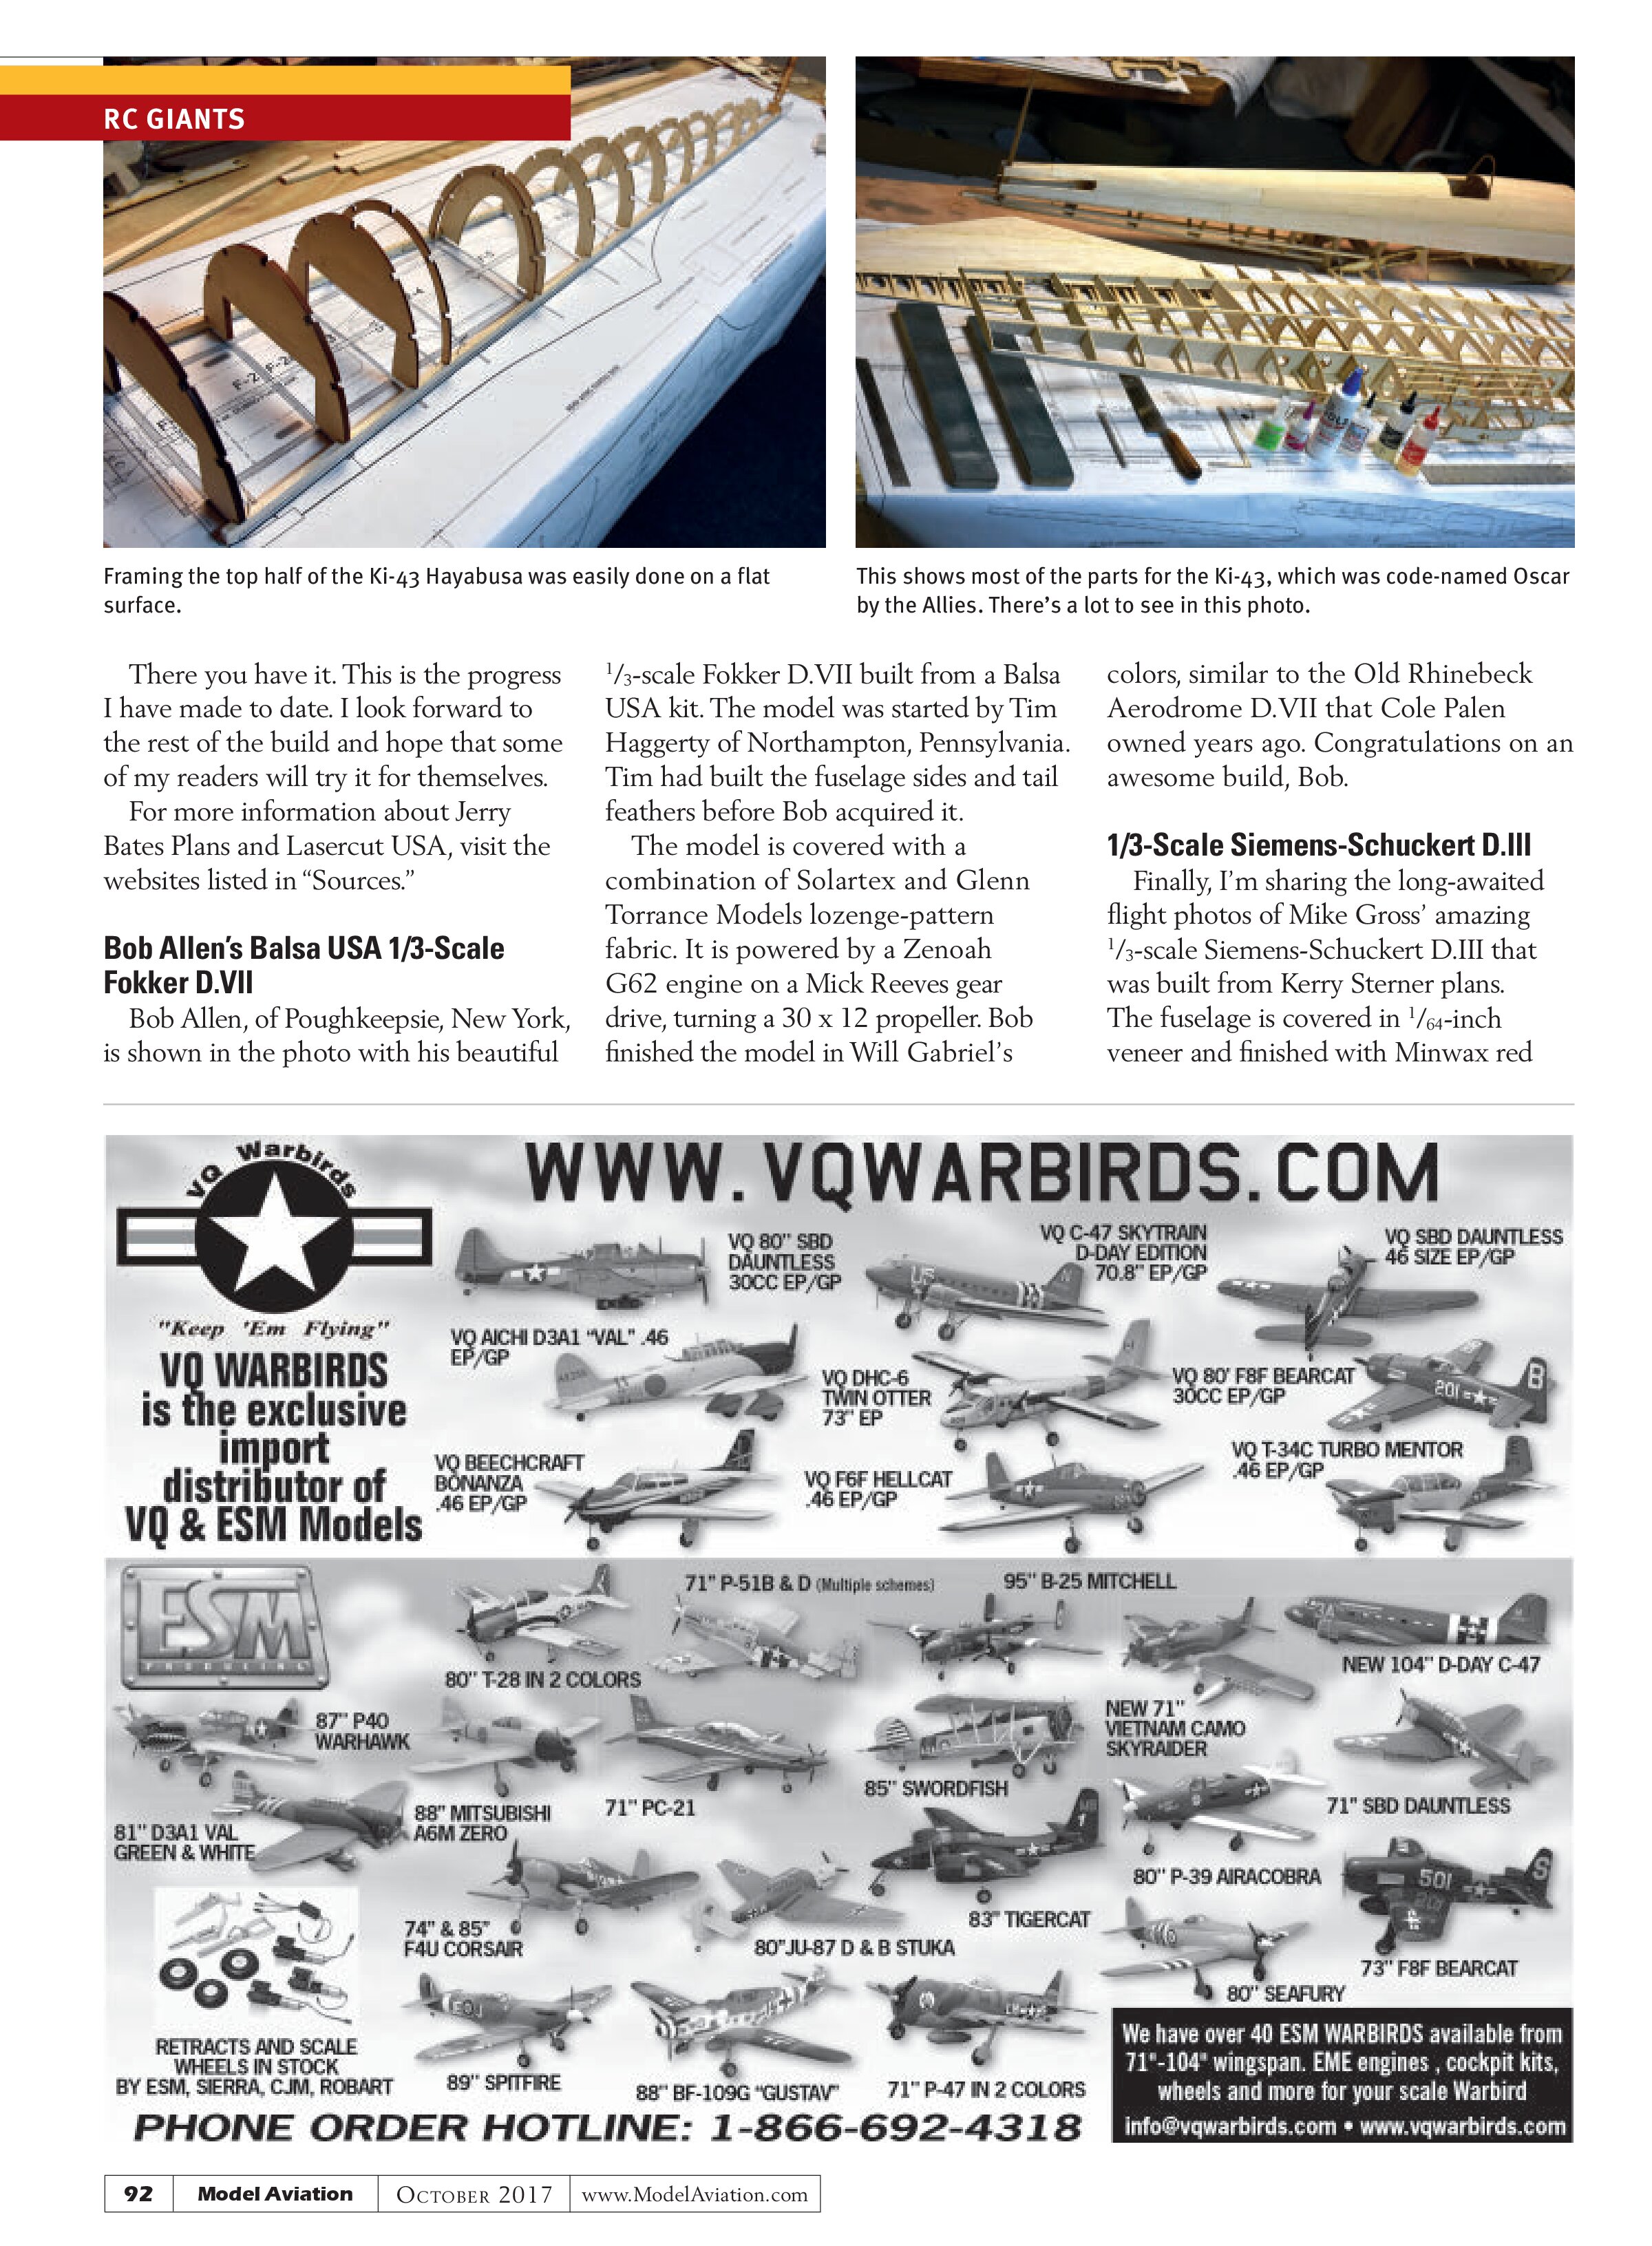
Bob Allen, of Poughkeepsie, New York, is shown in the photo with his beautiful 1/3-scale Fokker D.VII built from a Balsa USA kit. The model was started by Tim Haggerty of Northampton, Pennsylvania. Tim had built the fuselage sides and tail feathers before Bob acquired it.
The model is covered with a combination of Solartex and Glenn Torrance Models lozenge-pattern fabric. It is powered by a Zenoah G62 engine on a Mick Reeves gear drive, turning a 30 x 12 propeller. Bob finished the model in Will Gabriel’s colors, similar to the Old Rhinebeck Aerodrome D.VII that Cole Palen owned years ago. Congratulations on an awesome build, Bob.
1/3-Scale Siemens-Schuckert D.III
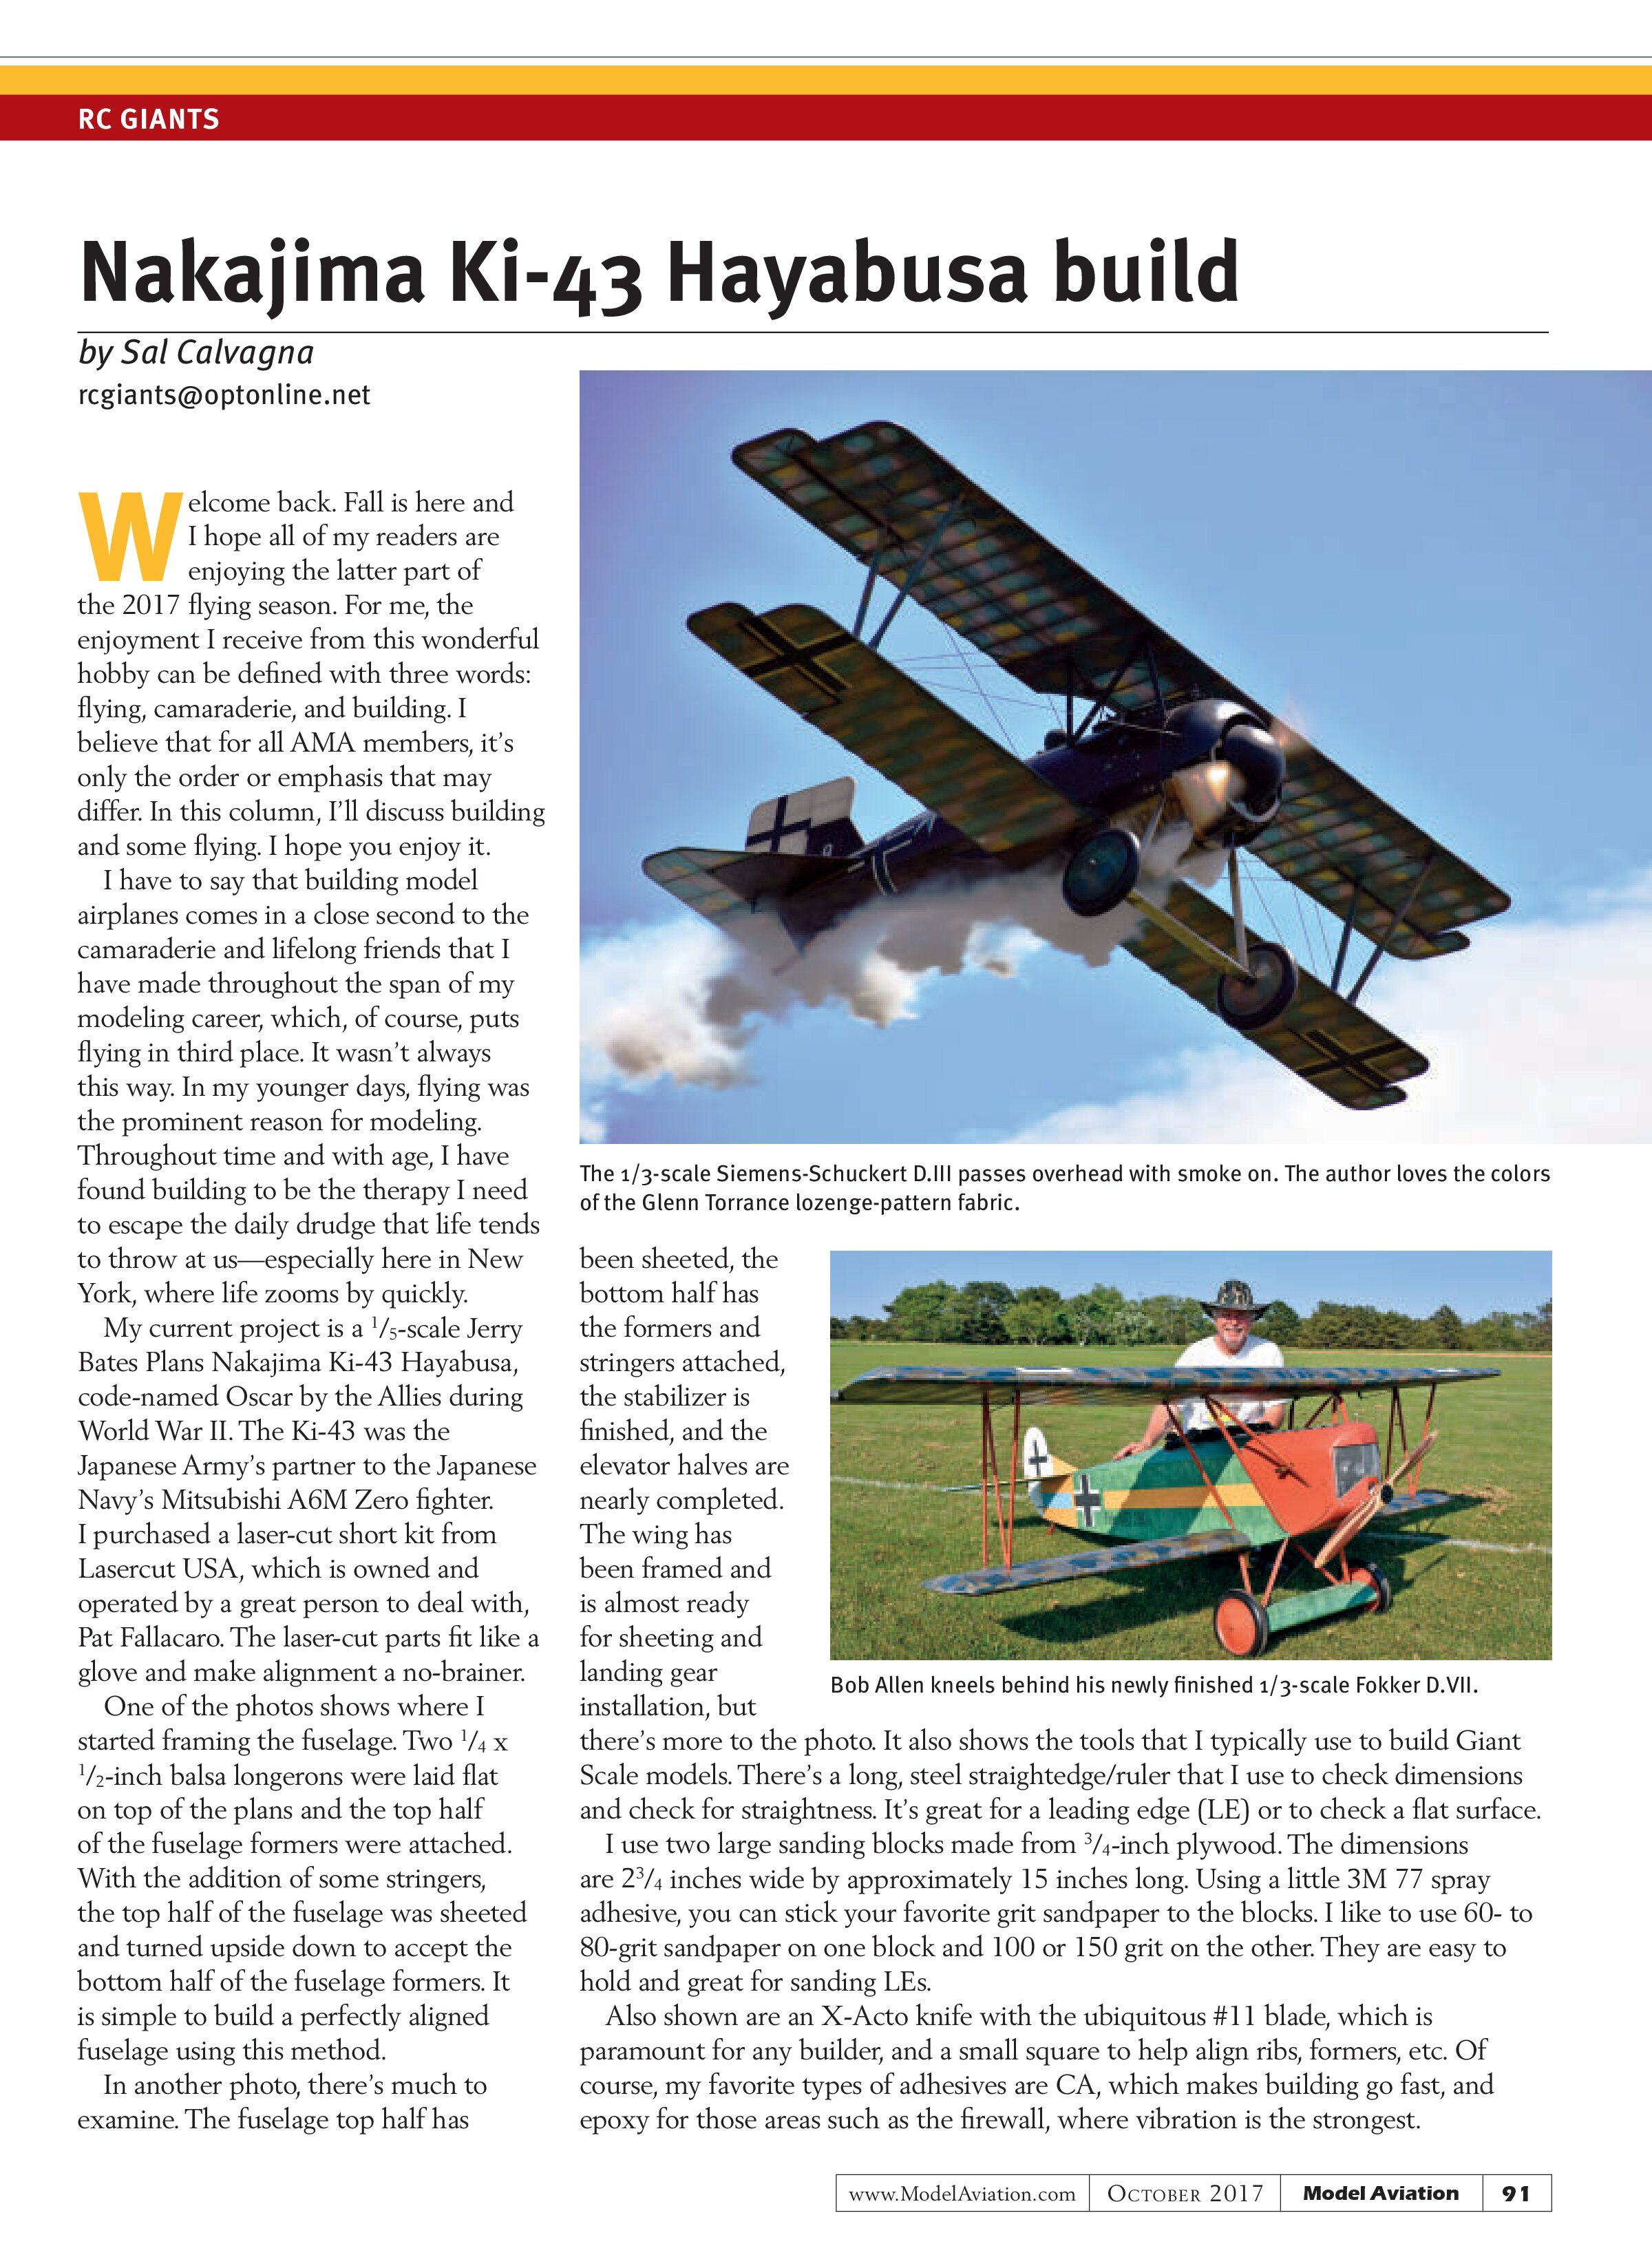
Finally, I’m sharing the long-awaited flight photos of Mike Gross’ amazing 1/3-scale Siemens-Schuckert D.III that was built from Kerry Sterner plans. The fuselage is covered in 1/64-inch veneer and finished with Minwax red mahogany stain. The D.III is powered by a DLE-111 gas engine, using a Sullivan smoke pump to create plumes of smoke as evident in the photo.
Mike is a world-class modeler with many award-winning models under his belt. The D.III was featured in the June 2016 “RC Giants” column. It was one of the winners of the static competition during the final Westchester Radio AeroModelers show. The D.III is a superb flier.
That’s all for now. Enjoy the rest of the flying season.
SOURCES:
Jerry Bates Plans
www.jbplans.com
Lasercut USA
(772) 528-4727
www.lasercutusa.com
Sullivan Products
(410) 732-3500
www.sullivanproducts.com
Minwax
(800) 523-9299
www.minwax.com