Reconstructing history
Bob Angel
Because this is the annual building issue, I’ll review some construction basics (and struggles) from the “good old days,” while tossing in a little history that might stray slightly off of the main topic. The era under discussion covers roughly the 1930s through the 1940s.
Most early modelers were young kids who began with simple rubber-powered model kits containing balsa sticks, parts printed or die stamped on sheet balsa, some colored tissue covering, and plans (usually one sheet) with a few instructions noted thereon.
Direct manufacturing costs for kit makers were probably 90% to 95% of the total cost, and the rest was overhead. It’s different today. Direct and overhead costs have almost reversed because of higher advertising requirements, government mandates, taxes, distributor costs, etc. Early manufacturers were extremely frugal about material and labor costs.
There were only enough sticks in a kit to complete the model if you planned carefully and cut the long pieces first, while laying out the rest of the pieces in descending order of size. Hobby shops, fortunately, stocked the often-needed spares.
Even the box sizes were carefully engineered to be able to barely fit the contents in one specific arrangement. Only people who could solve Chinese puzzles could repack a kit box after it was opened.
No kit could include the instruction courses needed to produce a proficient modeler, so everything had to be learned the hard way—through cut-and-try methods, plus whatever could be learned from fellow modelers.
If you were lucky, you lived in an area where a thriving model club existed and you could cut months—if not years—from the building/flying learning process. I wasn’t that lucky, so my learning process was long and sometimes painful.
Not wanting such education to go to waste could be why so many of us stuck with it for so long.
More than half of the boys in my grade school built models (usually World War II fighter airplanes) at some time, but few stayed with it for long.
The school was large, with a serious concentration of modeling ignorance spread evenly among us.
The local dime store stocked a few kits and tubes of glue. We hadn’t heard of dope, so the colored tissue was applied with model cement 
We finally learned that the covering process could be improved by simply dampening the tissue before applying it. If decent-quality rubber motor material was available, none of us was aware of it. Some genius among us discovered that by gluing a penny or two up front, a model could be made to actually glide.
Like today, a typical construction routine consisted of taping or pinning a piece of waxed paper over the plans, then assembling and gluing parts over them. The plans might have shown both wing halves or, in many cases, only one half, in which case you were instructed to oil the plans and reverse them to make the second wing. Many of us avoided that messy procedure by tracing the second wing onto the back while backlighting it against a windowpane.
Construction Errors
There’s one advantage to the single-panel wing drawing. You’re sure to get a second wing half that’s a mirror image of the first. Even today, many available Old-Timer (OT) plans are copied from the original plans, which aren’t as dimensionally accurate as modern CAD plans. It’s a good idea to at least measure each wing half when OT plans show both.
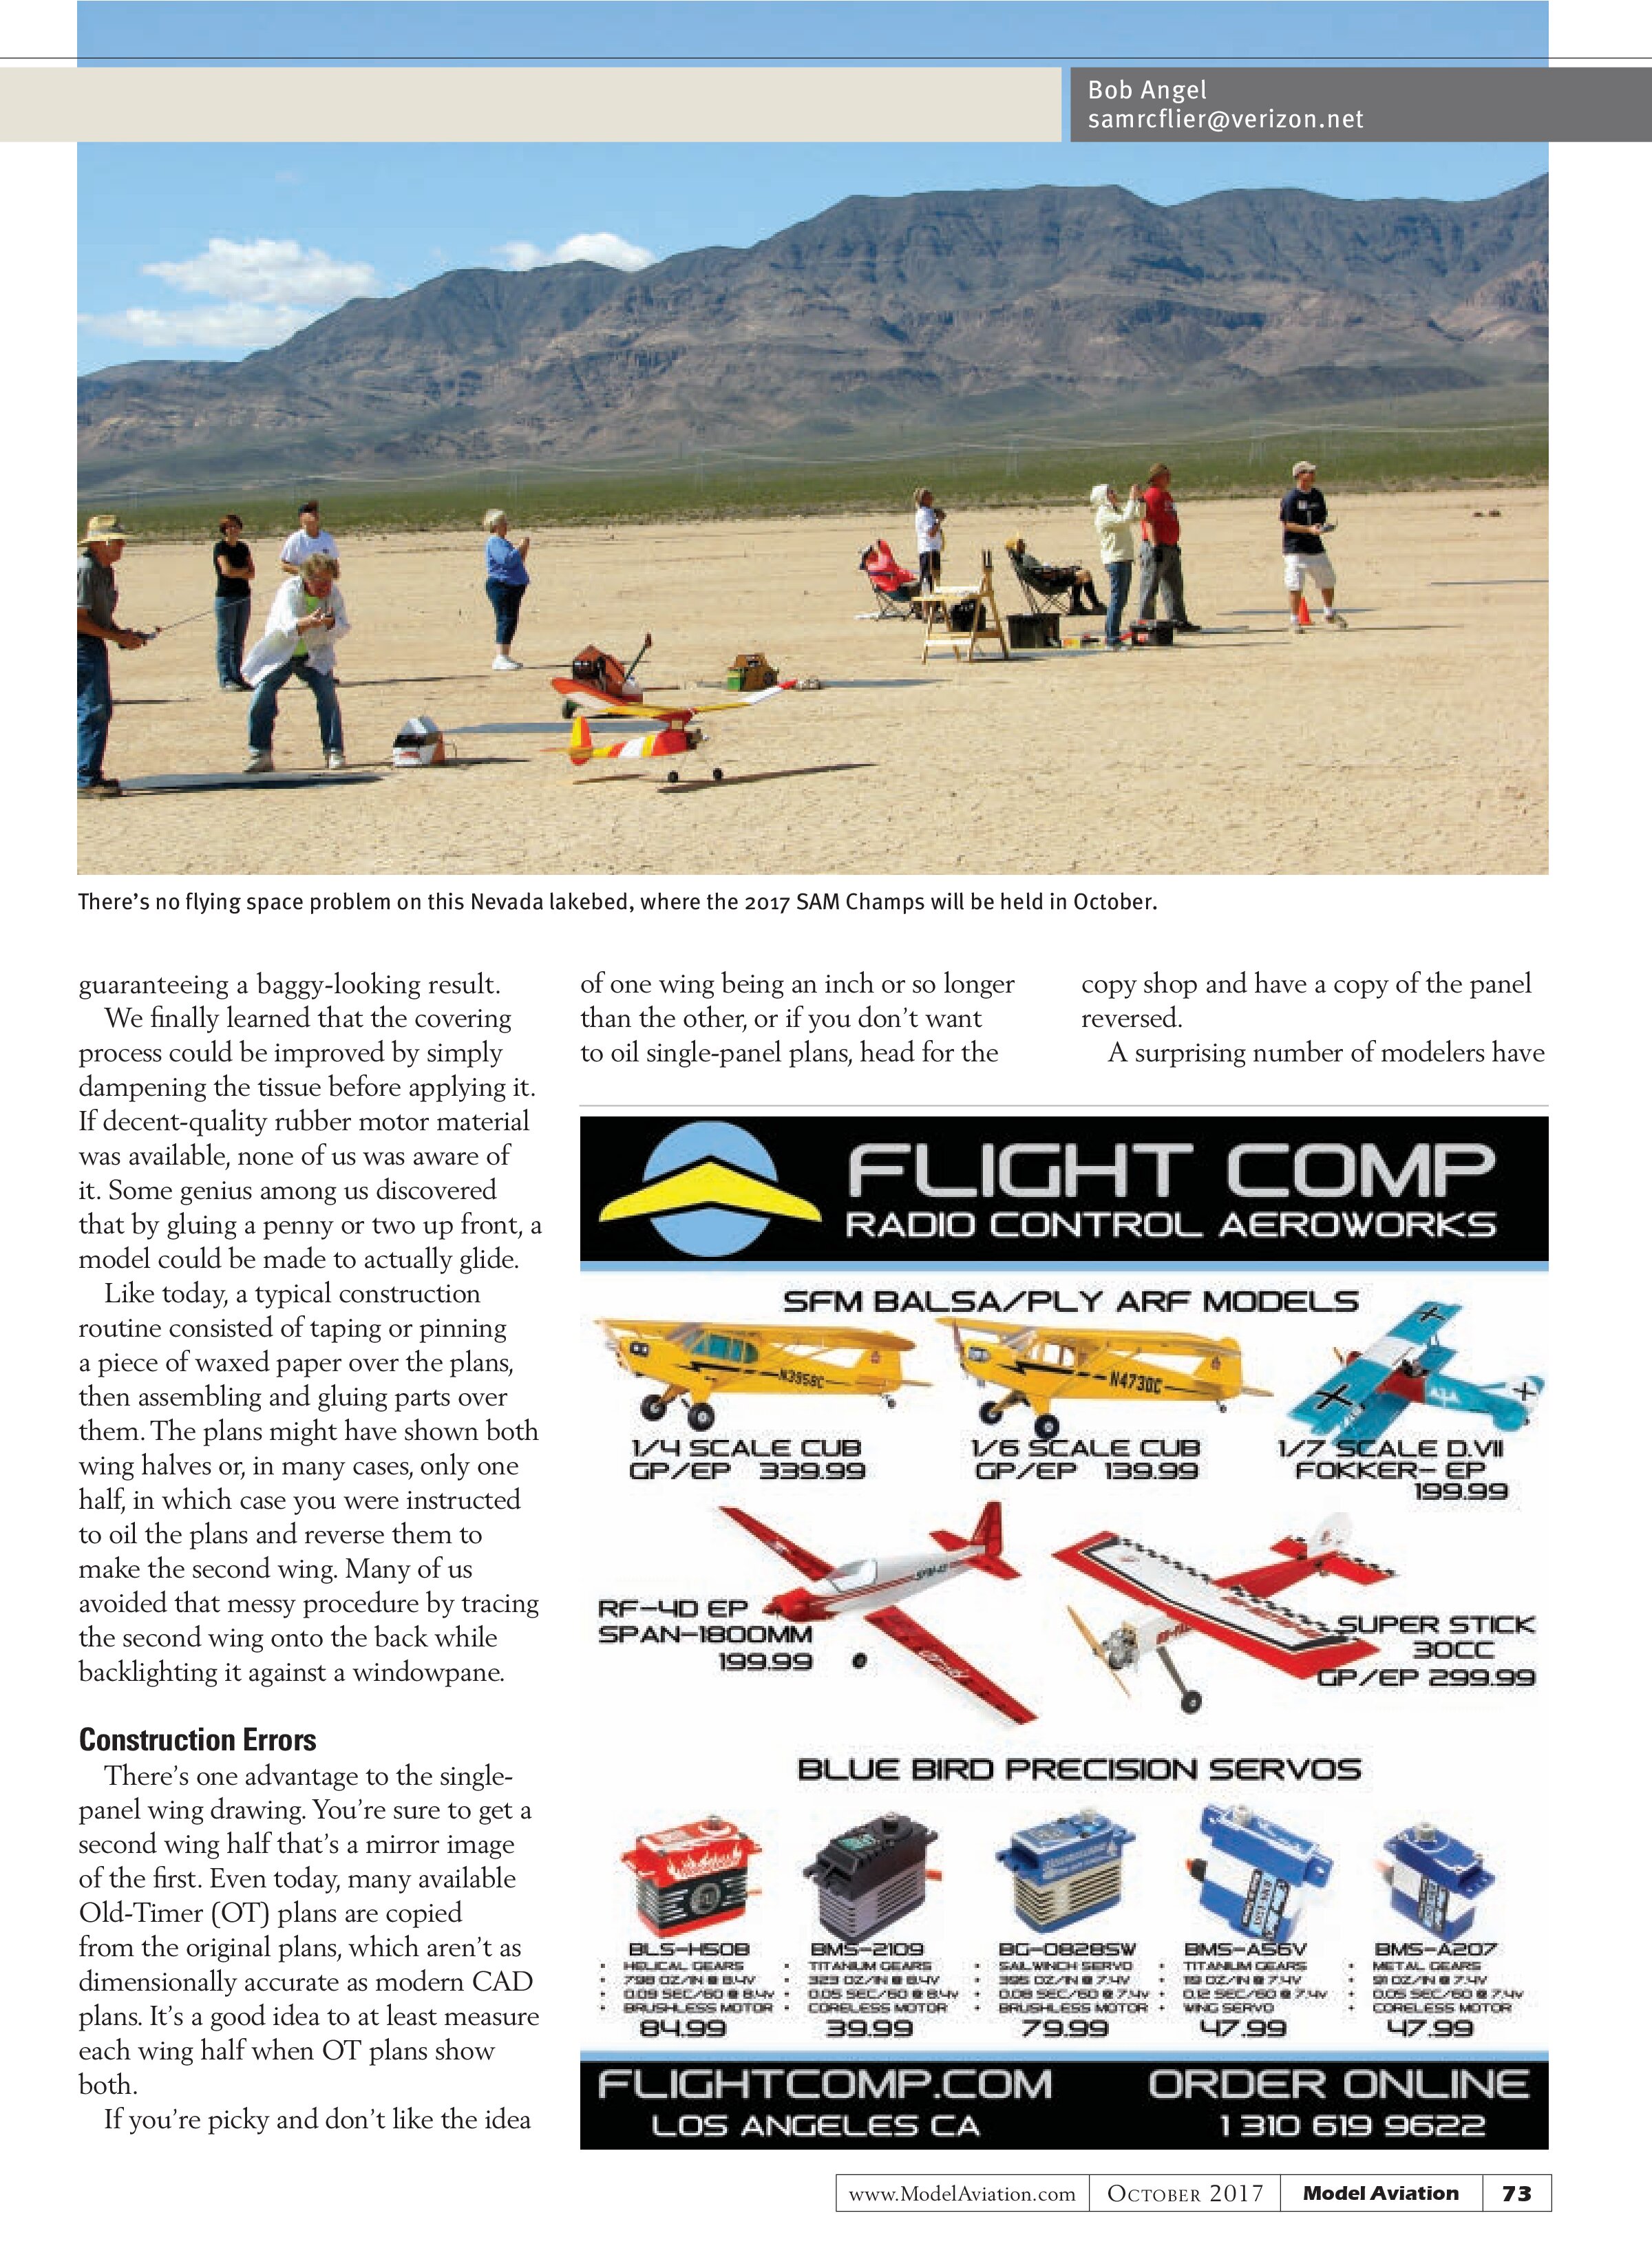
If you’re picky and don’t like the idea of one wing being an inch or so longer than the other, or if you don’t want to oil single-panel plans, head for the copy shop and have a copy of the panel reversed.
A surprising number of modelers have


at one time built two right or two left wing panels. It’s a real forehead slapper. I once posted a poll in our Society of Antique Modelers (SAM) chapter newsletter and received an unexpected number of confessions from modelers who had committed that boo-boo. Even Don Dewey, the founder, publisher, and editor of RC Modeler magazine, “fessed up” in a note.
Fred Lehmberg wrote an interesting and entertaining column in Model Builder magazine beginning in 1983. A mixture of technical aerodynamics and part comic strip, it was called “Plane Facts and Chickum Tracks.” It featured discussions by characters from the old Smilin’ Jack comics, such as a talking chicken, who frequently made a point. Fred was a member of our SAM chapter for several years before he passed away. He always had a story to tell.
Fred met an old flying friend long after they’d competed against each other as teenagers. The man had been a Free Flight (FF) winner whose aircraft persistently outclimbed the rest. While reminiscing, Fred mentioned the superior climb of those models. The modeler laughed and asked, “You guys never did catch on to what I was doing, did you?”
He further described to Fred, “You remember after processing and the weigh-in, how I always had engine starting problems and had to install fresh ignition D cells to get a start?” Fred replied, “Sure, I was often your helper and timer.”
The man continued, “Well, I really did need those fresh cells to start my engines because the batteries I used for the weigh-in were made of solid lead.” After reciting that story, Fred chuckled and said, “I wanted to kill that man right then and there.”
Pushrod System
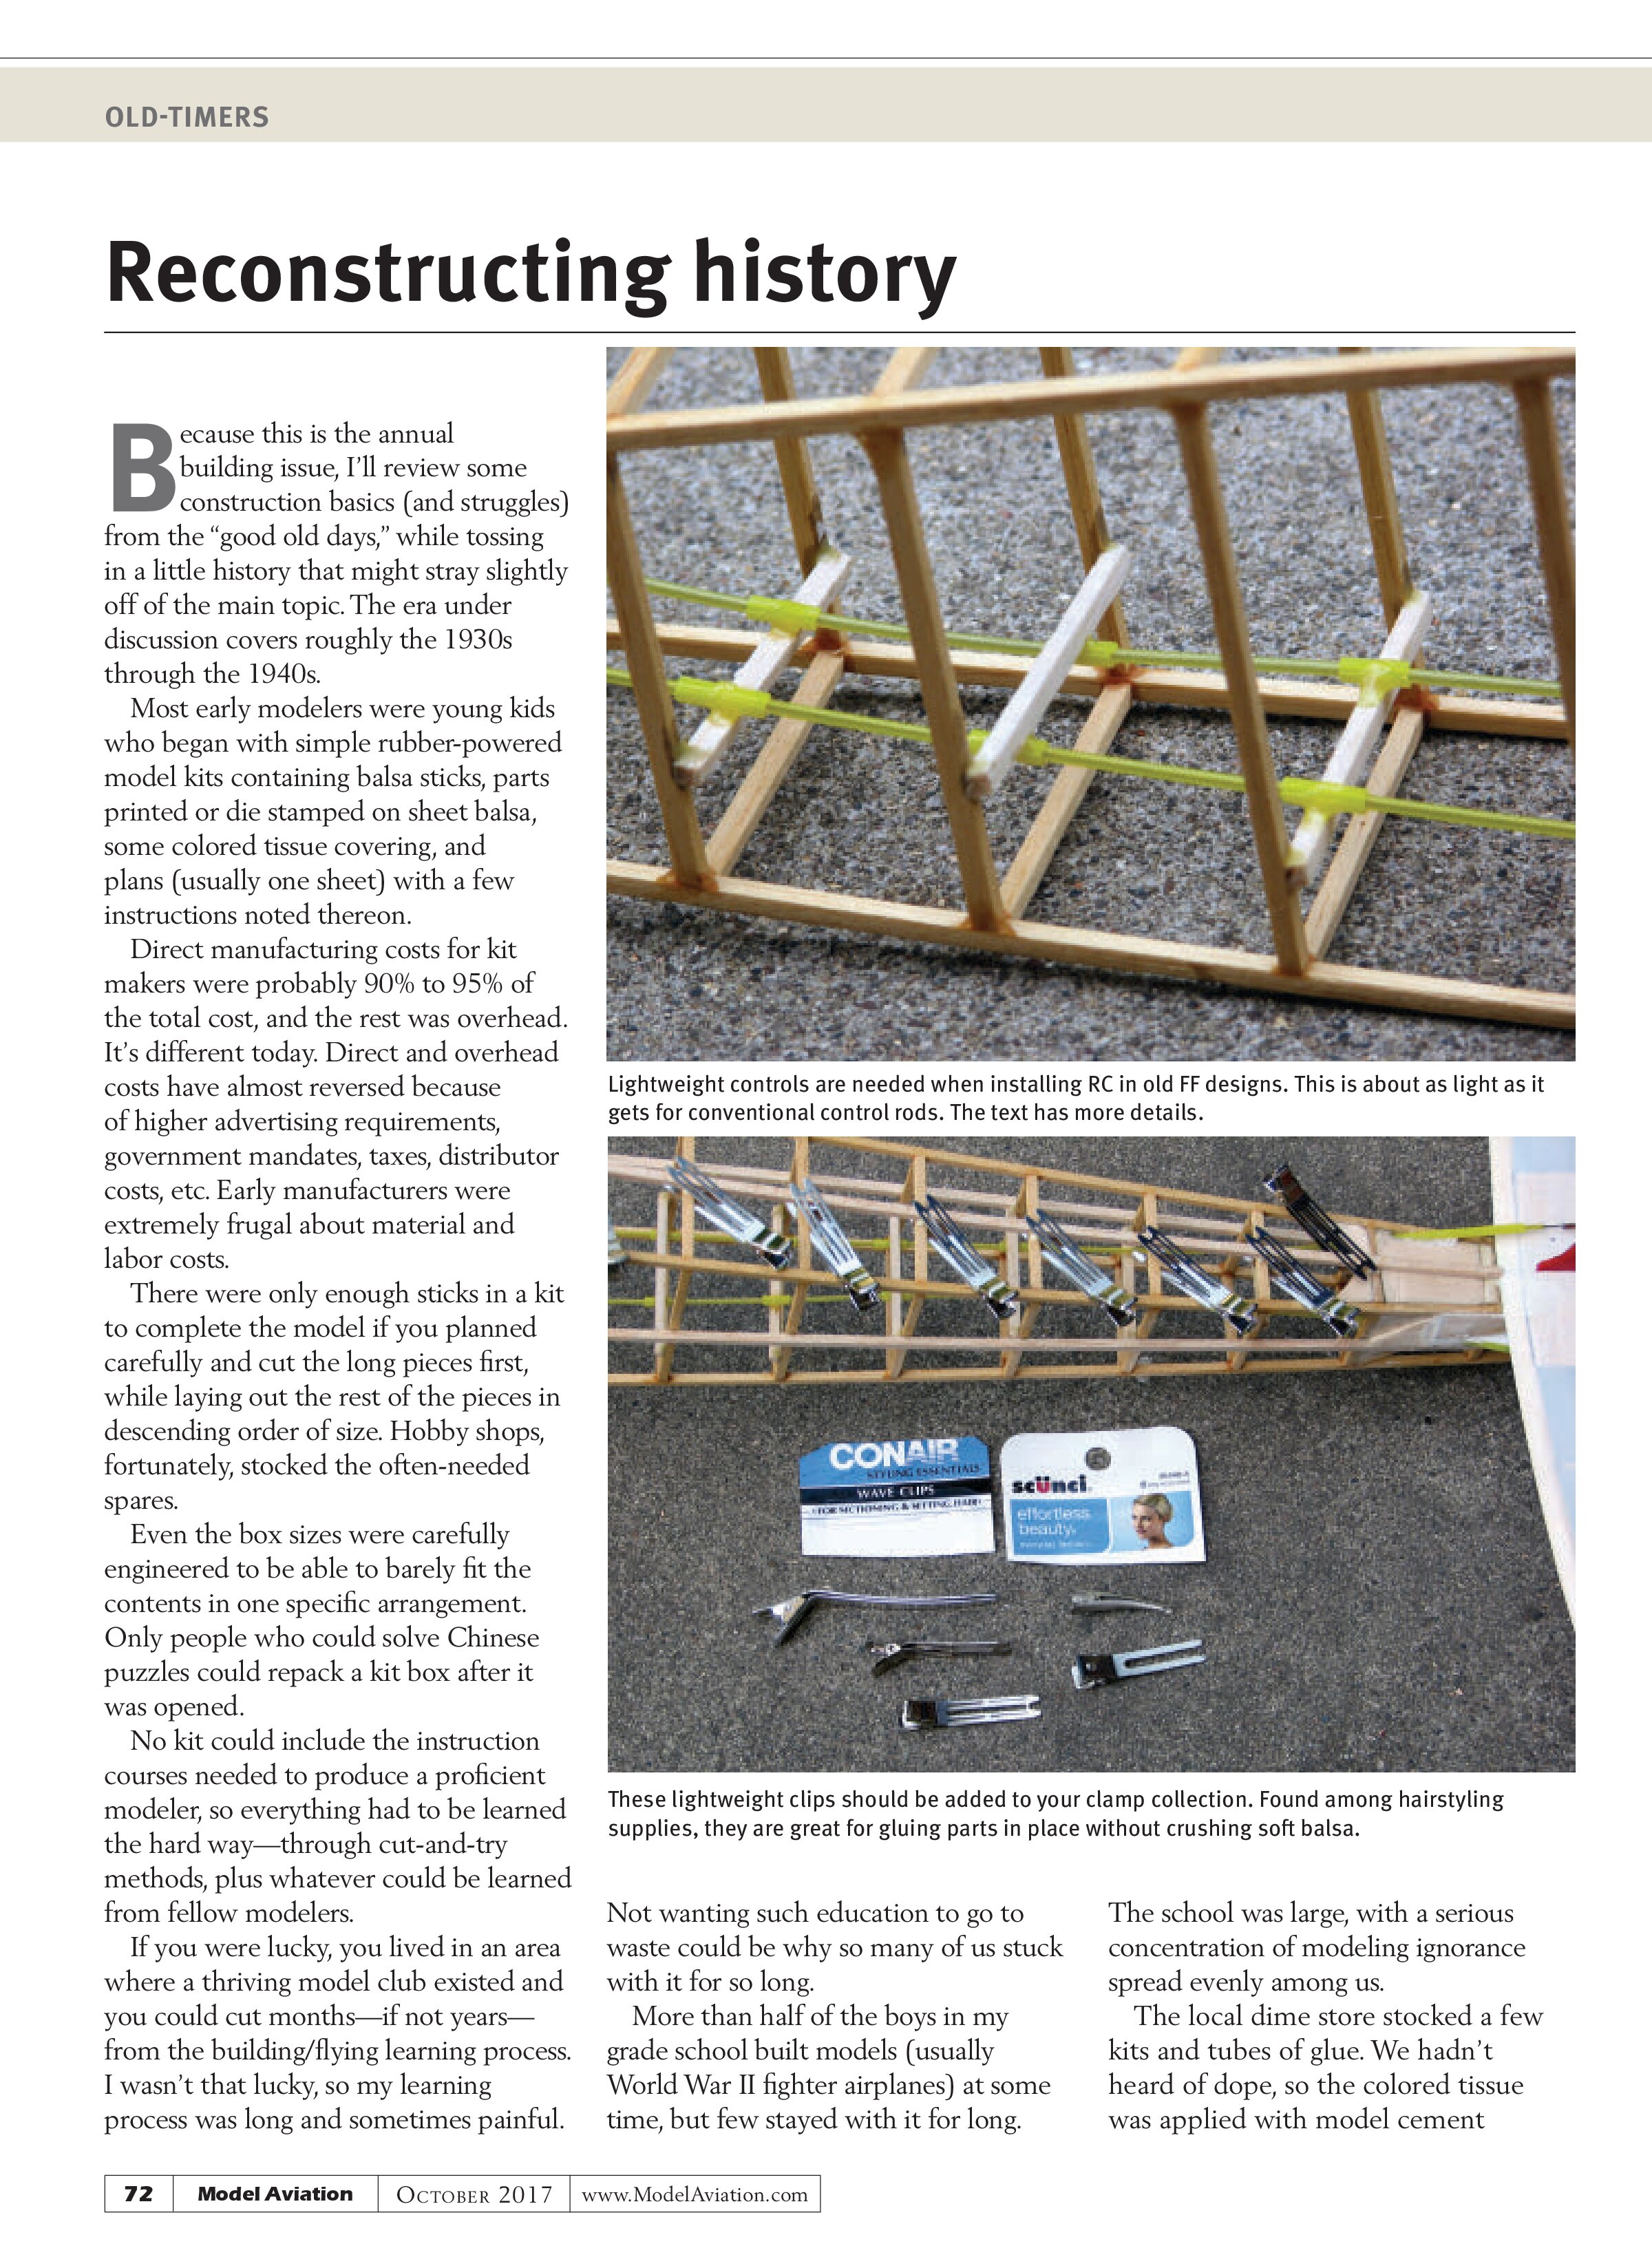
Adding RC gear to an OT design often results in a tail-heavy model, so plan well from the start. The Sullivan Products #507 Gold-N-Rod Pushrod System uses small stainless-steel wire in a yellow plastic sheath.
The wire changes little with temperature, but the plastic is less stable and needs to be installed properly to resist control drift. The assembly is extremely flexible and must be stabilized approximately every 3 inches.
The stabilization should allow the Sullivan outside tubing to slip freely back and forth with temperature change, while being anchored to the framework in only one place along its length. Otherwise, your control centering will be affected by temperature.
Those short pieces of slightly larger yellow tubing that are pictured are used as bushings to allow that fore and aft movement. They must be counted, cut, and slipped over the Sullivan tubing before the final installation then epoxied to the light balsa crossbraces after the pushrods are attached in the front and rear.
October Events
October is a busy contest month in my part of the west. SAM 26’s 43rd annual John Pond Commemorative OT RC contest will be held on October 7-8 at the Greenfield Flyers field, south of Bakersfield, California.
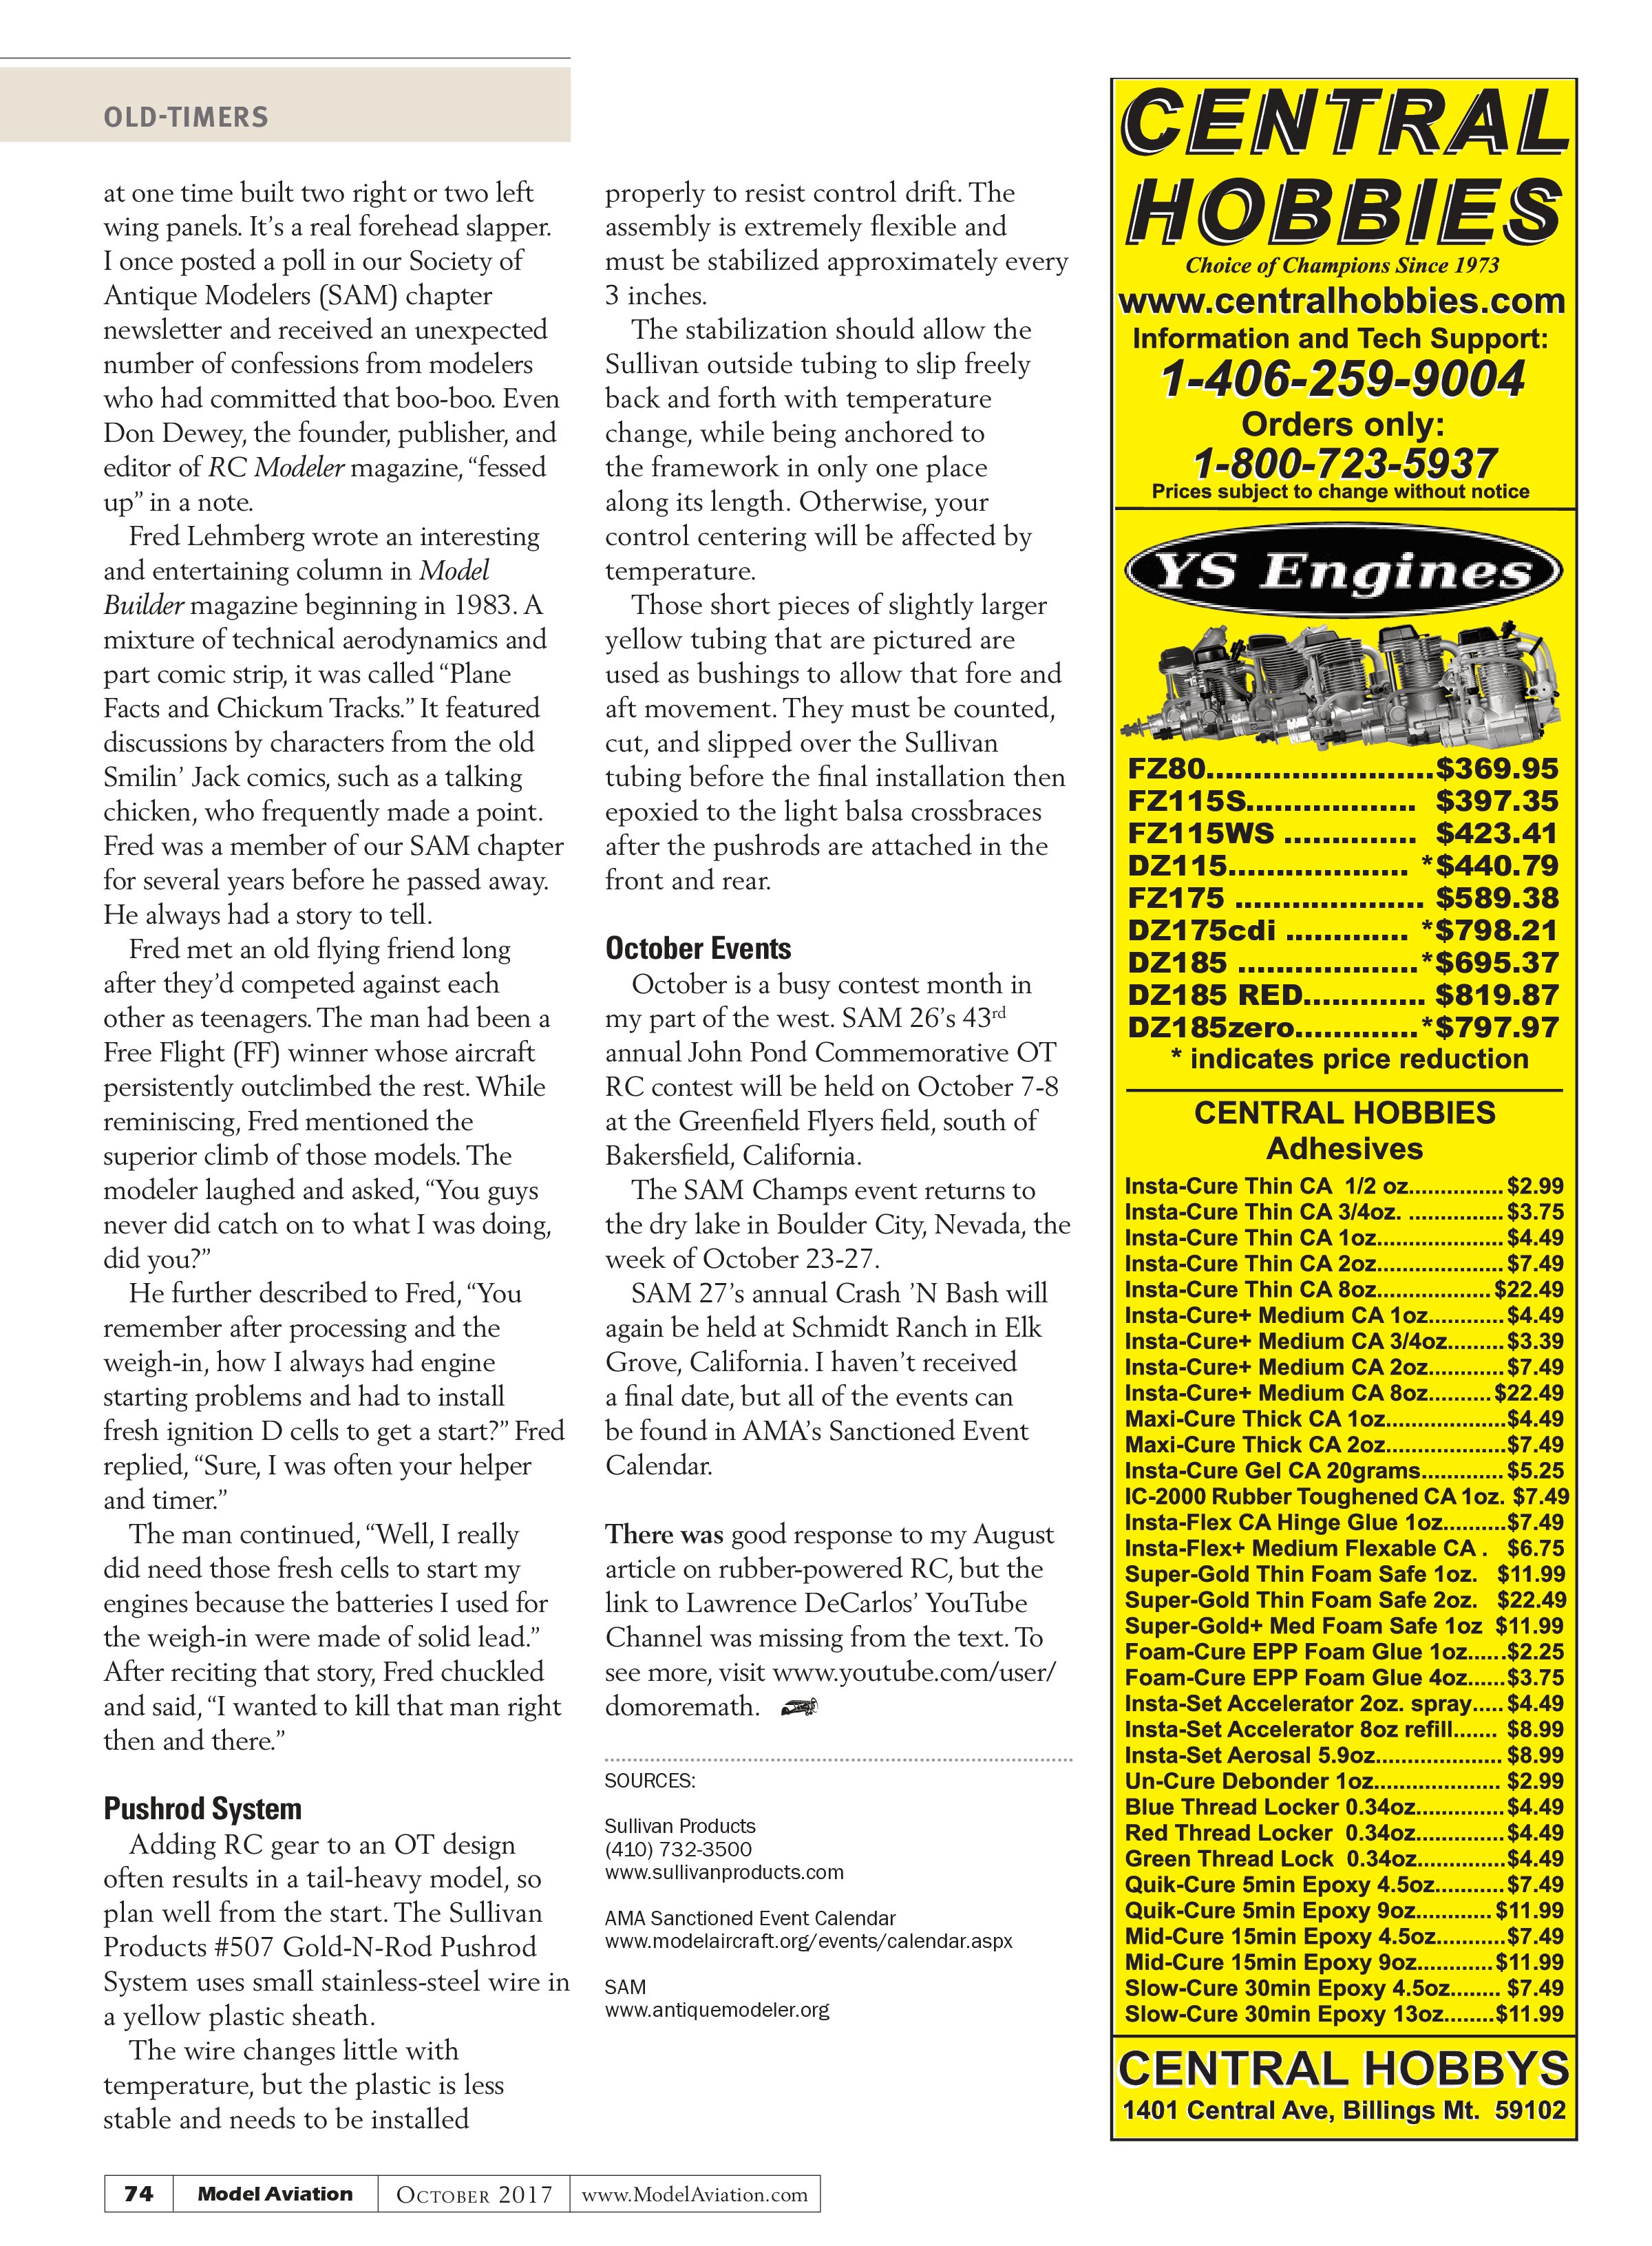
The SAM Champs event returns to the dry lake in Boulder City, Nevada, the week of October 23-27.
SAM 27’s annual Crash ’N Bash will again be held at Schmidt Ranch in Elk Grove, California. I haven’t received a final date, but all of the events can be found in AMA’s Sanctioned Event Calendar.
There was good response to my August article on rubber-powered RC, but the link to Lawrence DeCarlos’ YouTube Channel was missing from the text. To see more, visit www.youtube.com/user/domoremath.
SOURCES:
Sullivan Products
(410) 732-3500
www.sullivanproducts.com
AMA Sanctioned Event Calendar
www.modelaircraft.org/events/calendar.aspx
SAM
www.antiquemodeler.org