Potential structural modifications and covering the Diels P-36
by Dennis Norman
dennis@airacemodels.com
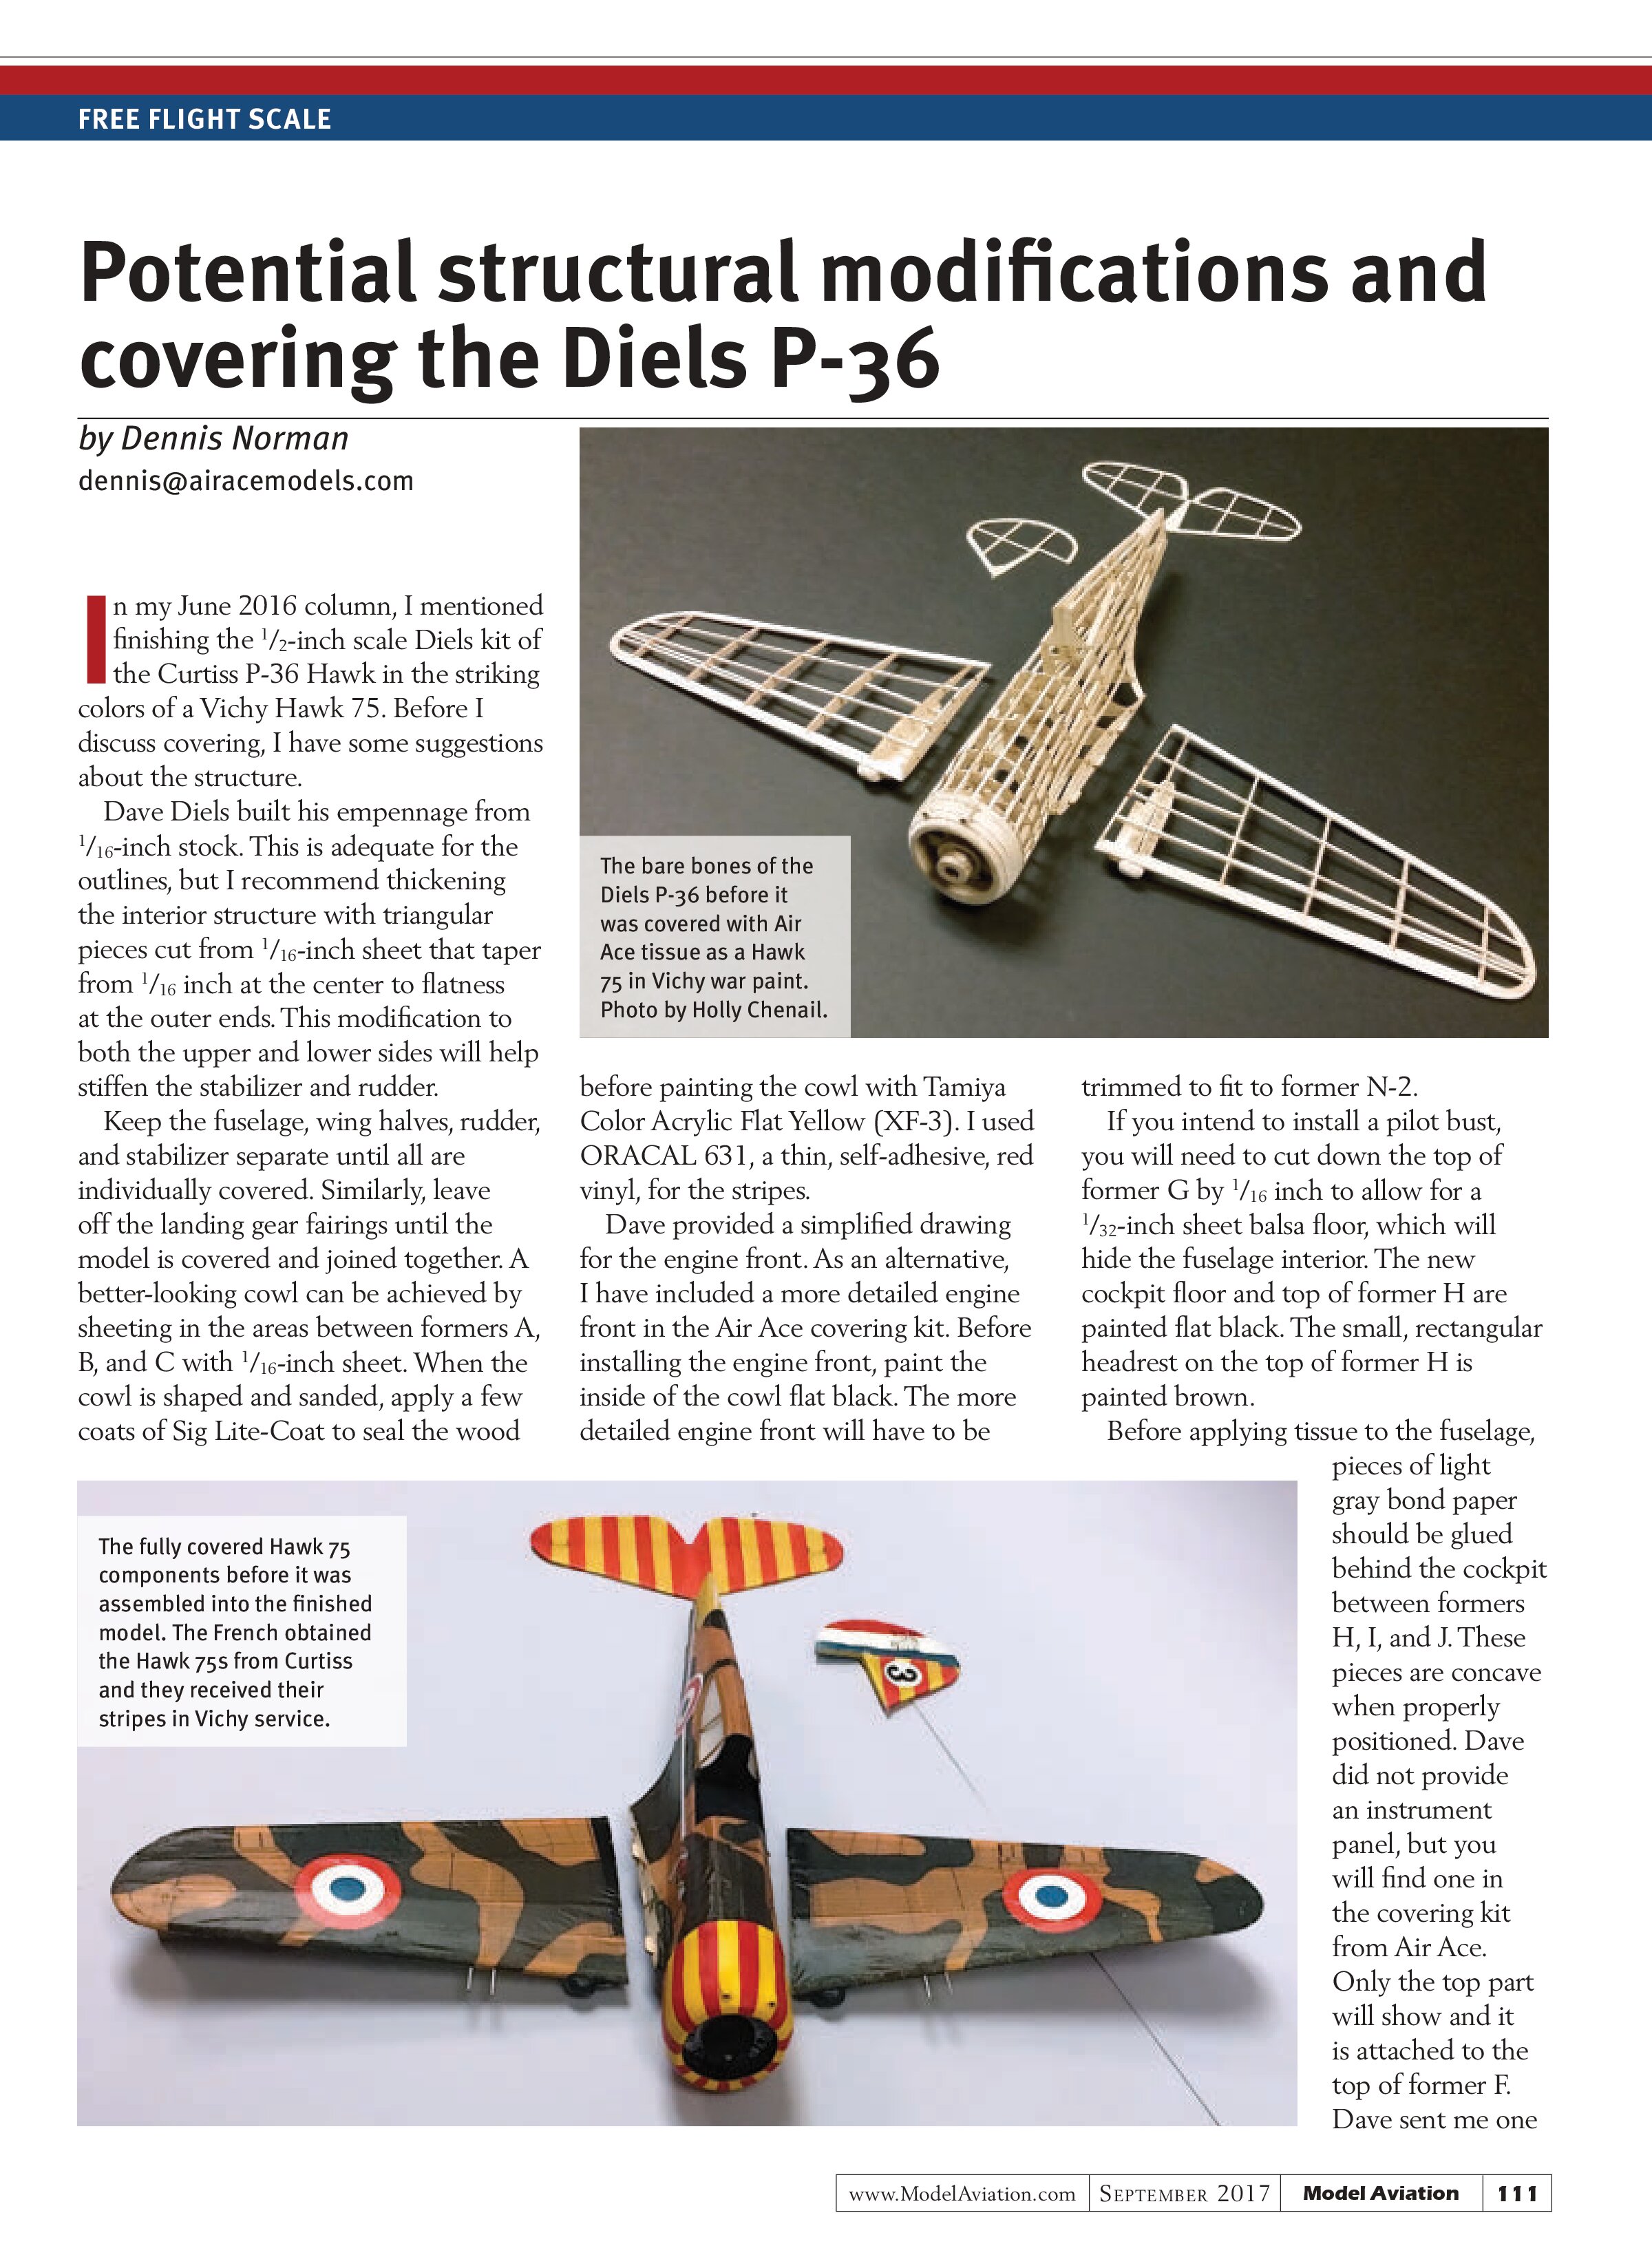
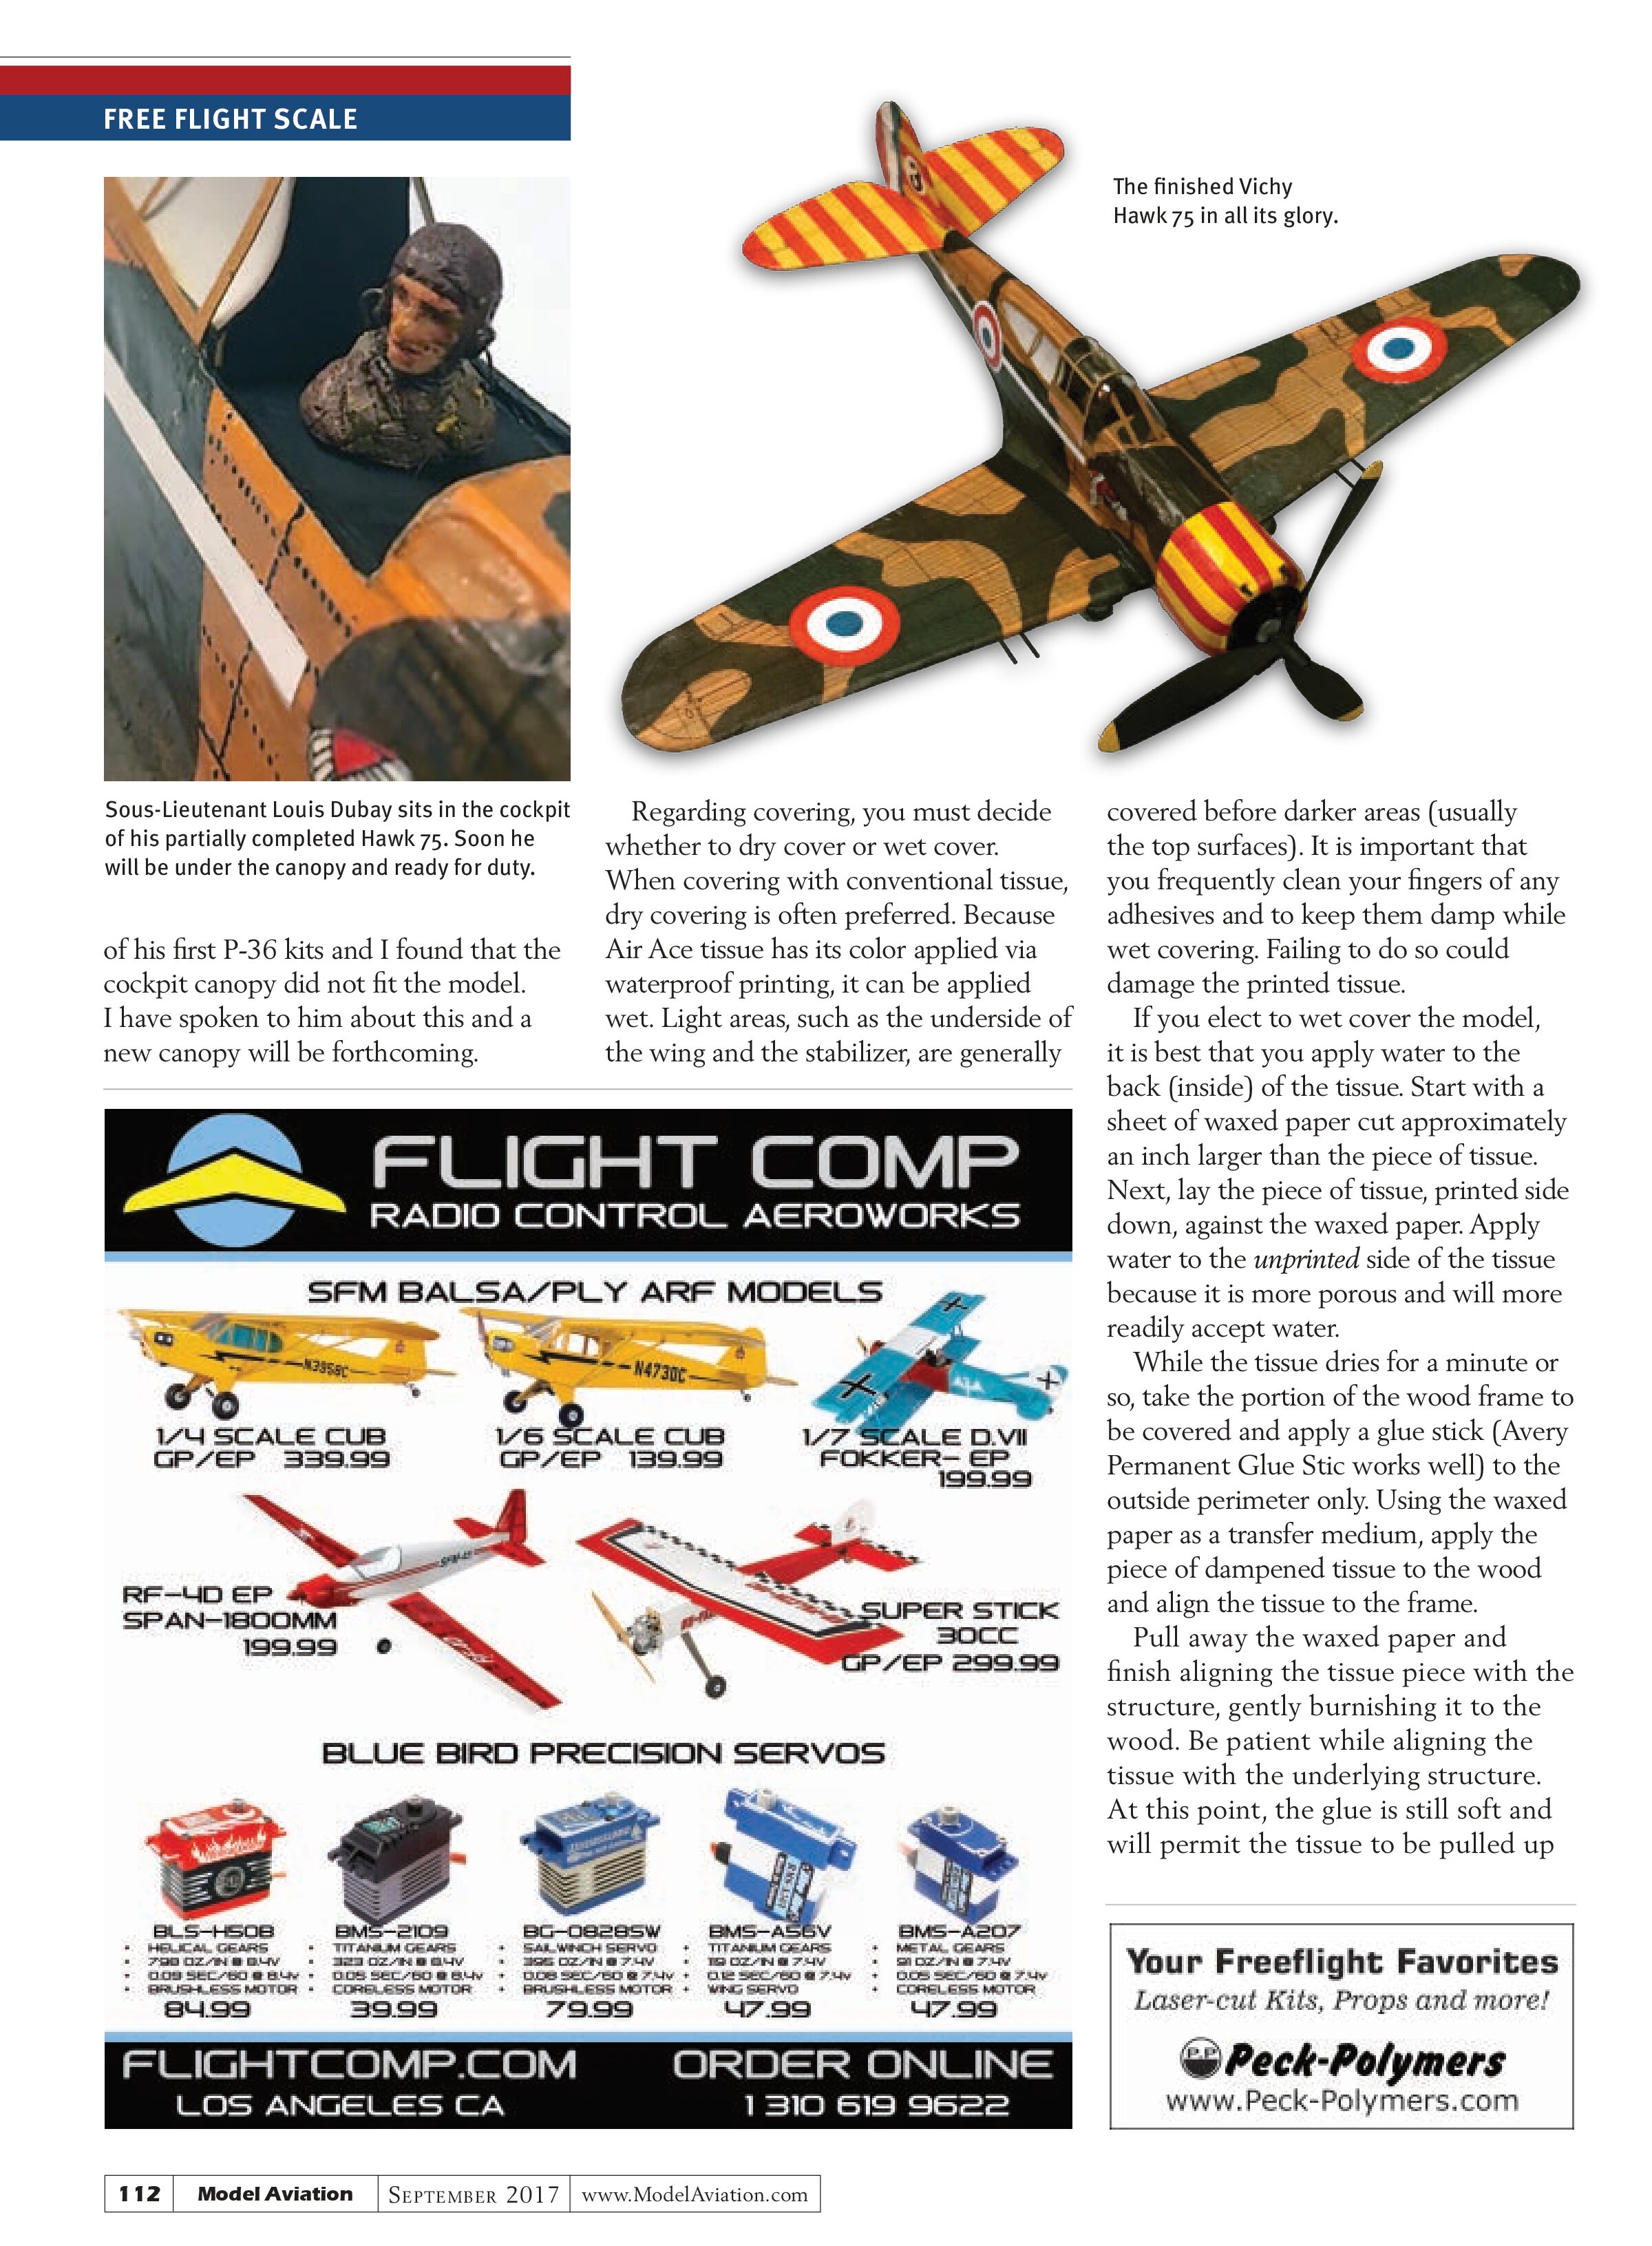
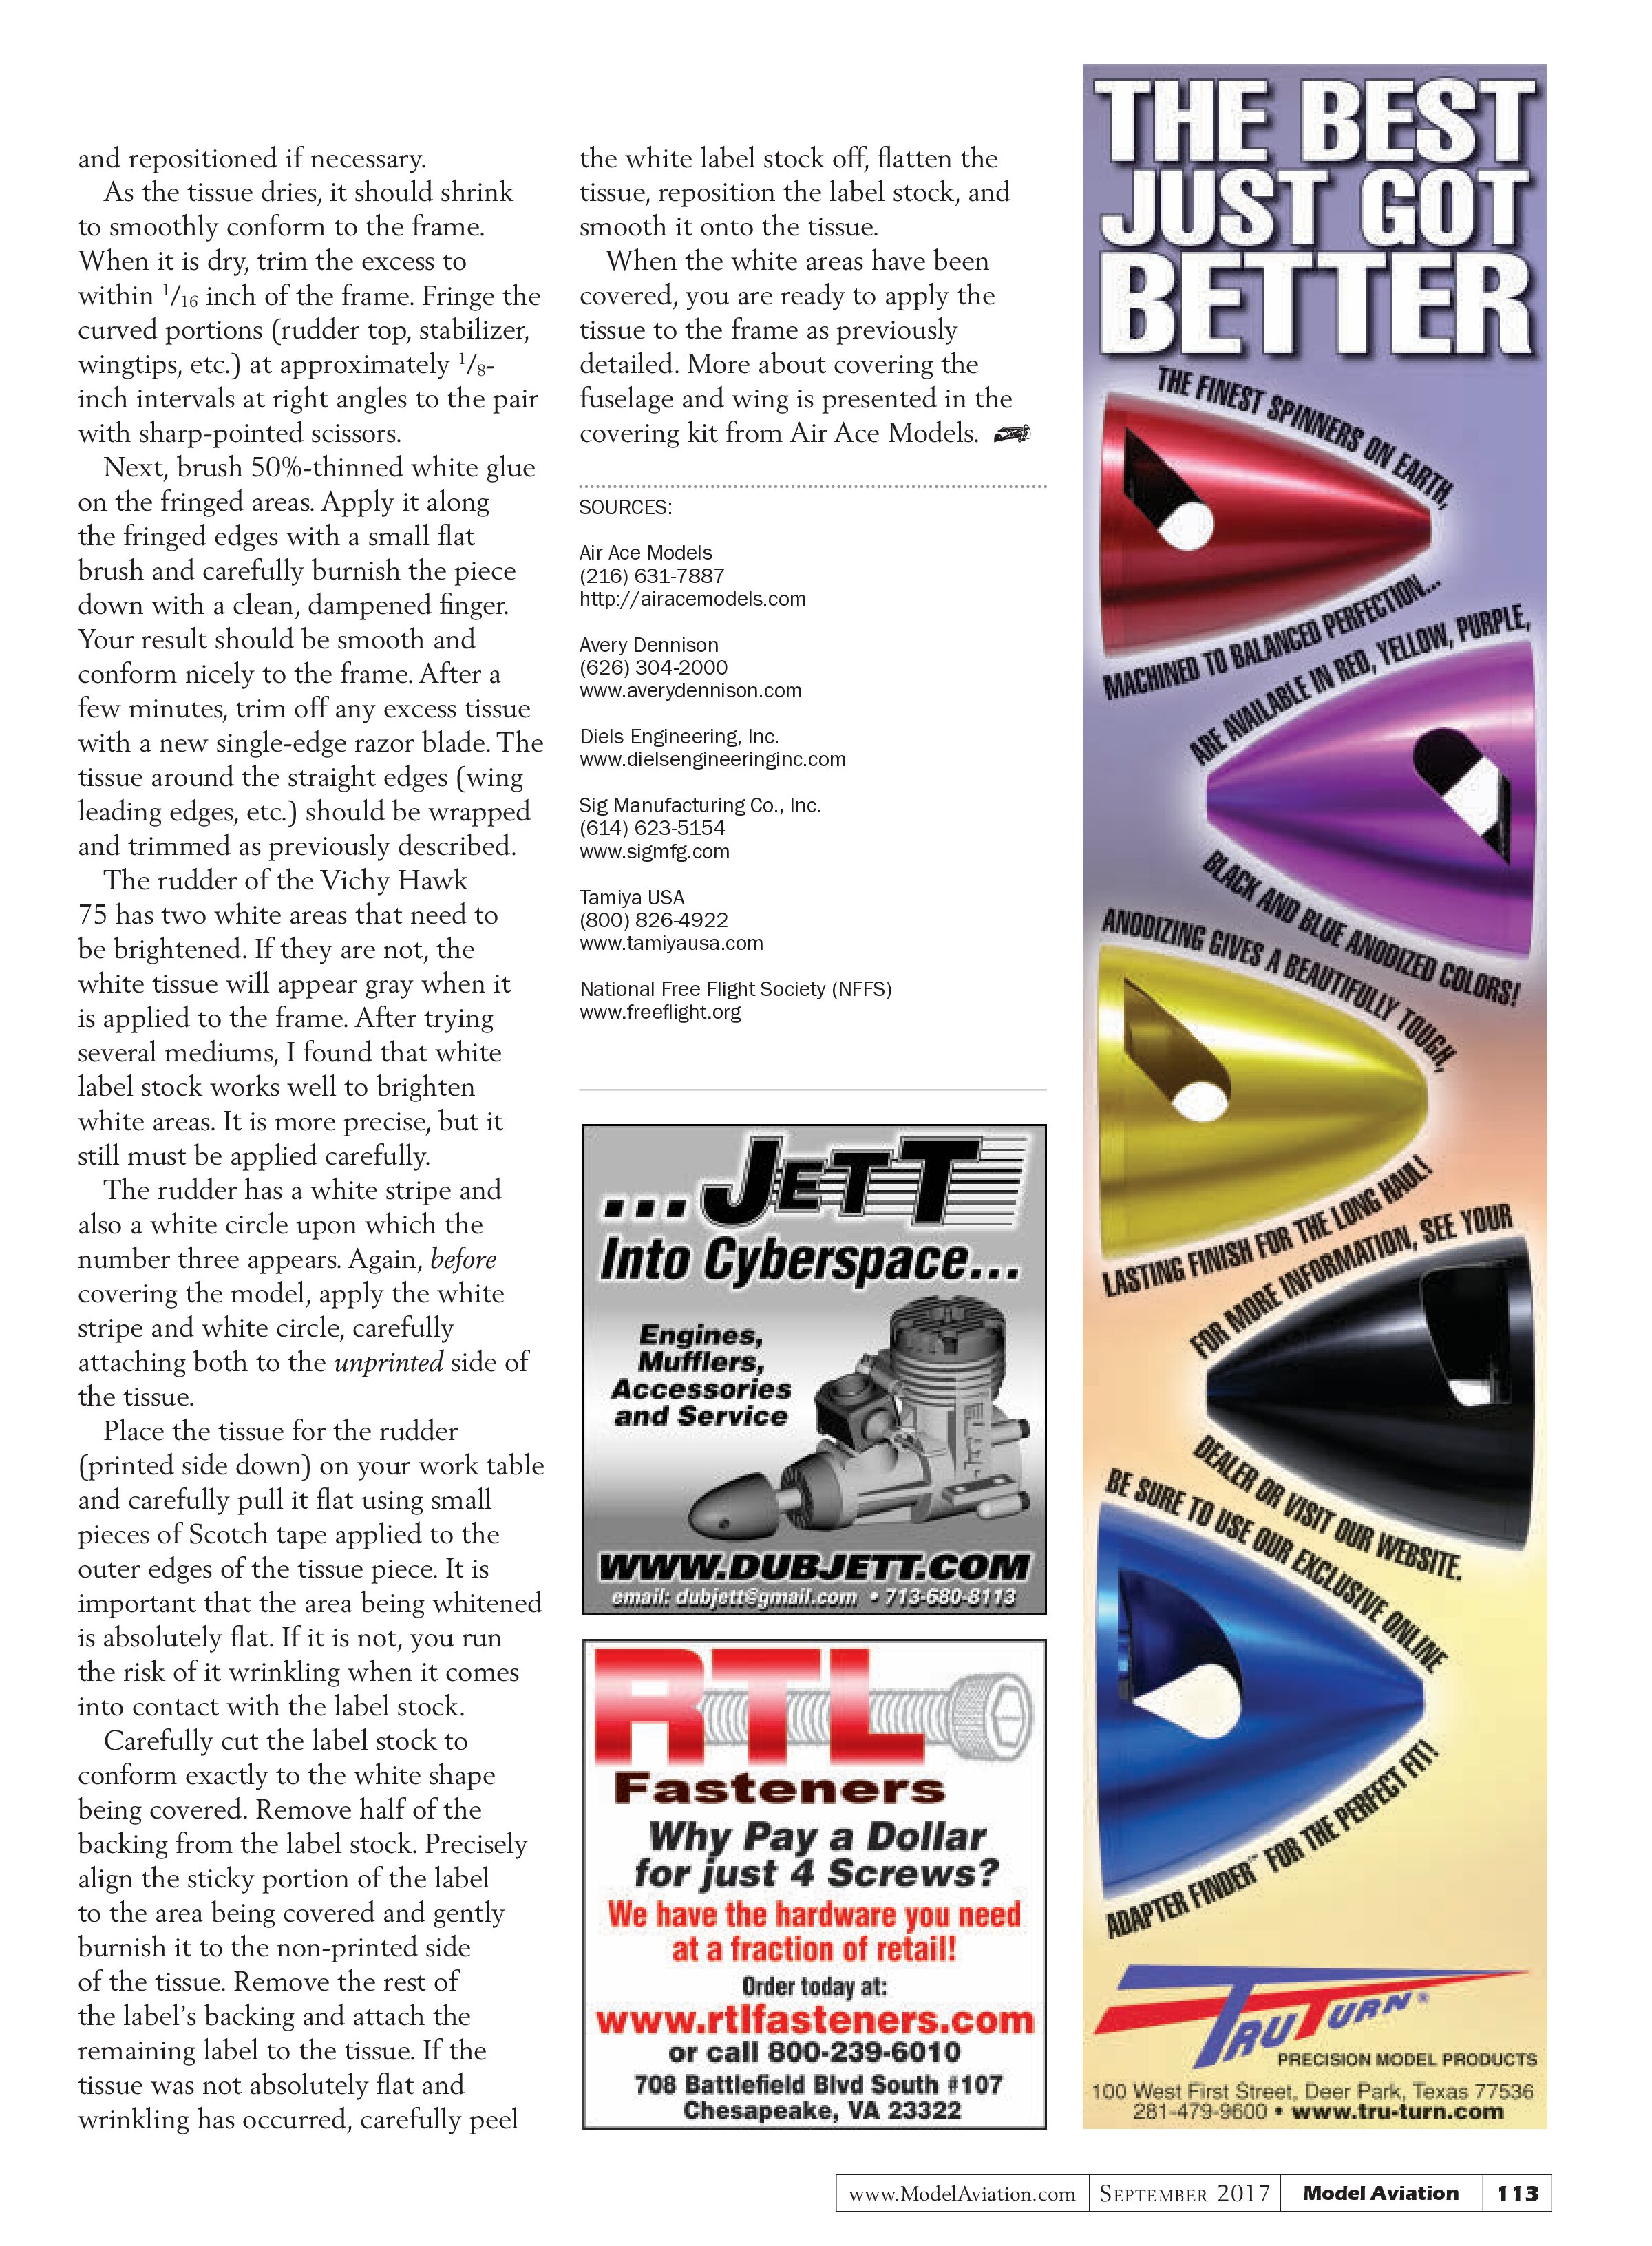
In my June 2016 column, I mentioned finishing the ½-inch scale Diels kit of the Curtiss P-36 Hawk in the striking colors of a Vichy Hawk 75. Before I discuss covering, I have some suggestions about the structure.
Dave Diels built his empennage from 1/16-inch stock. This is adequate for the outlines, but I recommend thickening the interior structure with triangular pieces cut from 1/16-inch sheet that taper from 1/16 inch at the center to flatness at the outer ends. This modification to both the upper and lower sides will help stiffen the stabilizer and rudder.
Keep the fuselage, wing halves, rudder, and stabilizer separate until all are individually covered. Similarly, leave off the landing gear fairings until the model is covered and joined together. A better-looking cowl can be achieved by sheeting in the areas between formers A, B, and C with 1/16-inch sheet. When the cowl is shaped and sanded, apply a few coats of Sig Lite-Coat to seal the wood

before painting the cowl with Tamiya Color Acrylic Flat Yellow (XF-3). I used ORACAL 631, a thin, self-adhesive, red vinyl, for the stripes.
Dave provided a simplified drawing for the engine front. As an alternative, I have included a more detailed engine front in the Air Ace covering kit. Before installing the engine front, paint the inside of the cowl flat black. The more detailed engine front will have to be trimmed to fit to former N-2.
If you intend to install a pilot bust, you will need to cut down the top of former G by 1/16 inch to allow for a 1/32-inch sheet balsa floor, which will hide the fuselage interior. The new cockpit floor and top of former H are painted flat black. The small, rectangular headrest on the top of former H is painted brown.
Before applying tissue to the fuselage, pieces of light gray bond paper should be glued behind the cockpit between formers H, I, and J. These pieces are concave when properly positioned. Dave did not provide an instrument panel, but you will find one in the covering kit from Air Ace. Only the top part will show and it is attached to the top of former F. Dave sent me one


of his first P-36 kits and I found that the cockpit canopy did not fit the model. I have spoken to him about this and a new canopy will be forthcoming.
Regarding covering, you must decide whether to dry cover or wet cover. When covering with conventional tissue, dry covering is often preferred. Because Air Ace tissue has its color applied via waterproof printing, it can be applied wet. Light areas, such as the underside of the wing and the stabilizer, are generally covered before darker areas (usually the top surfaces). It is important that you frequently clean your fingers of any adhesives and to keep them damp while wet covering. Failing to do so could damage the printed tissue.
If you elect to wet cover the model, it is best that you apply water to the back (inside) of the tissue. Start with a sheet of waxed paper cut approximately an inch larger than the piece of tissue. Next, lay the piece of tissue, printed side down, against the waxed paper. Apply water to the unprinted side of the tissue because it is more porous and will more readily accept water.
While the tissue dries for a minute or so, take the portion of the wood frame to be covered and apply a glue stick (Avery Permanent Glue Stick works well) to the outside perimeter only. Using the waxed paper as a transfer medium, apply the piece of dampened tissue to the wood and align the tissue to the frame.
Pull away the waxed paper and finish aligning the tissue piece with the structure, gently burnishing it to the wood. Be patient while aligning the tissue with the underlying structure. At this point, the glue is still soft and will permit the tissue to be pulled up and repositioned if necessary.

As the tissue dries, it should shrink to smoothly conform to the frame. When it is dry, trim the excess to within 1/16 inch of the frame. Fringe the curved portions (rudder top, stabilizer, wingtips, etc.) at approximately 1/8-inch intervals at right angles to the pair with sharp-pointed scissors.
Next, brush 50%-thinned white glue on the fringed areas. Apply it along the fringed edges with a small flat brush and carefully burnish the piece down with a clean, dampened finger. Your result should be smooth and conform nicely to the frame. After a few minutes, trim off any excess tissue with a new single-edge razor blade. The tissue around the straight edges (wing leading edges, etc.) should be wrapped and trimmed as previously described.
The rudder of the Vichy Hawk 75 has two white areas that need to be brightened. If they are not, the white tissue will appear gray when it is applied to the frame. After trying several mediums, I found that white label stock works well to brighten white areas. It is more precise, but it still must be applied carefully.
The rudder has a white stripe and also a white circle upon which the number three appears. Again, before covering the model, apply the white stripe and white circle, carefully attaching both to the unprinted side of the tissue.
Place the tissue for the rudder (printed side down) on your work table and carefully pull it flat using small pieces of Scotch tape applied to the outer edges of the tissue piece. It is important that the area being whitened is absolutely flat. If it is not, you run the risk of it wrinkling when it comes into contact with the label stock.
Carefully cut the label stock to conform exactly to the white shape being covered. Remove half of the backing from the label stock. Precisely align the sticky portion of the label to the area being covered and gently burnish it to the non-printed side of the tissue. Remove the rest of the label’s backing and attach the remaining label to the tissue. If the tissue was not absolutely flat and wrinkling has occurred, carefully peel the white label stock off, flatten the tissue, reposition the label stock, and smooth it onto the tissue.
When the white areas have been covered, you are ready to apply the tissue to the frame as previously detailed. More about covering the fuselage and wing is presented in the covering kit from Air Ace Models.
SOURCES:
Air Ace Models
(216) 631-7887
http://airacemodels.com
Avery Dennison
(626) 304-2000
www.averydennison.com
Diels Engineering, Inc.
www.dielsengineeringinc.com
Sig Manufacturing Co., Inc.
(614) 623-5154
www.sig mfg.com
Tamiya USA
(800) 826-4922
www.tamiyausa.com
National Free Flight Society (NFFS)
www.freeflight.org