BumpCharger box, part two
Greg Gimlick
maelectrics@gimlick.com
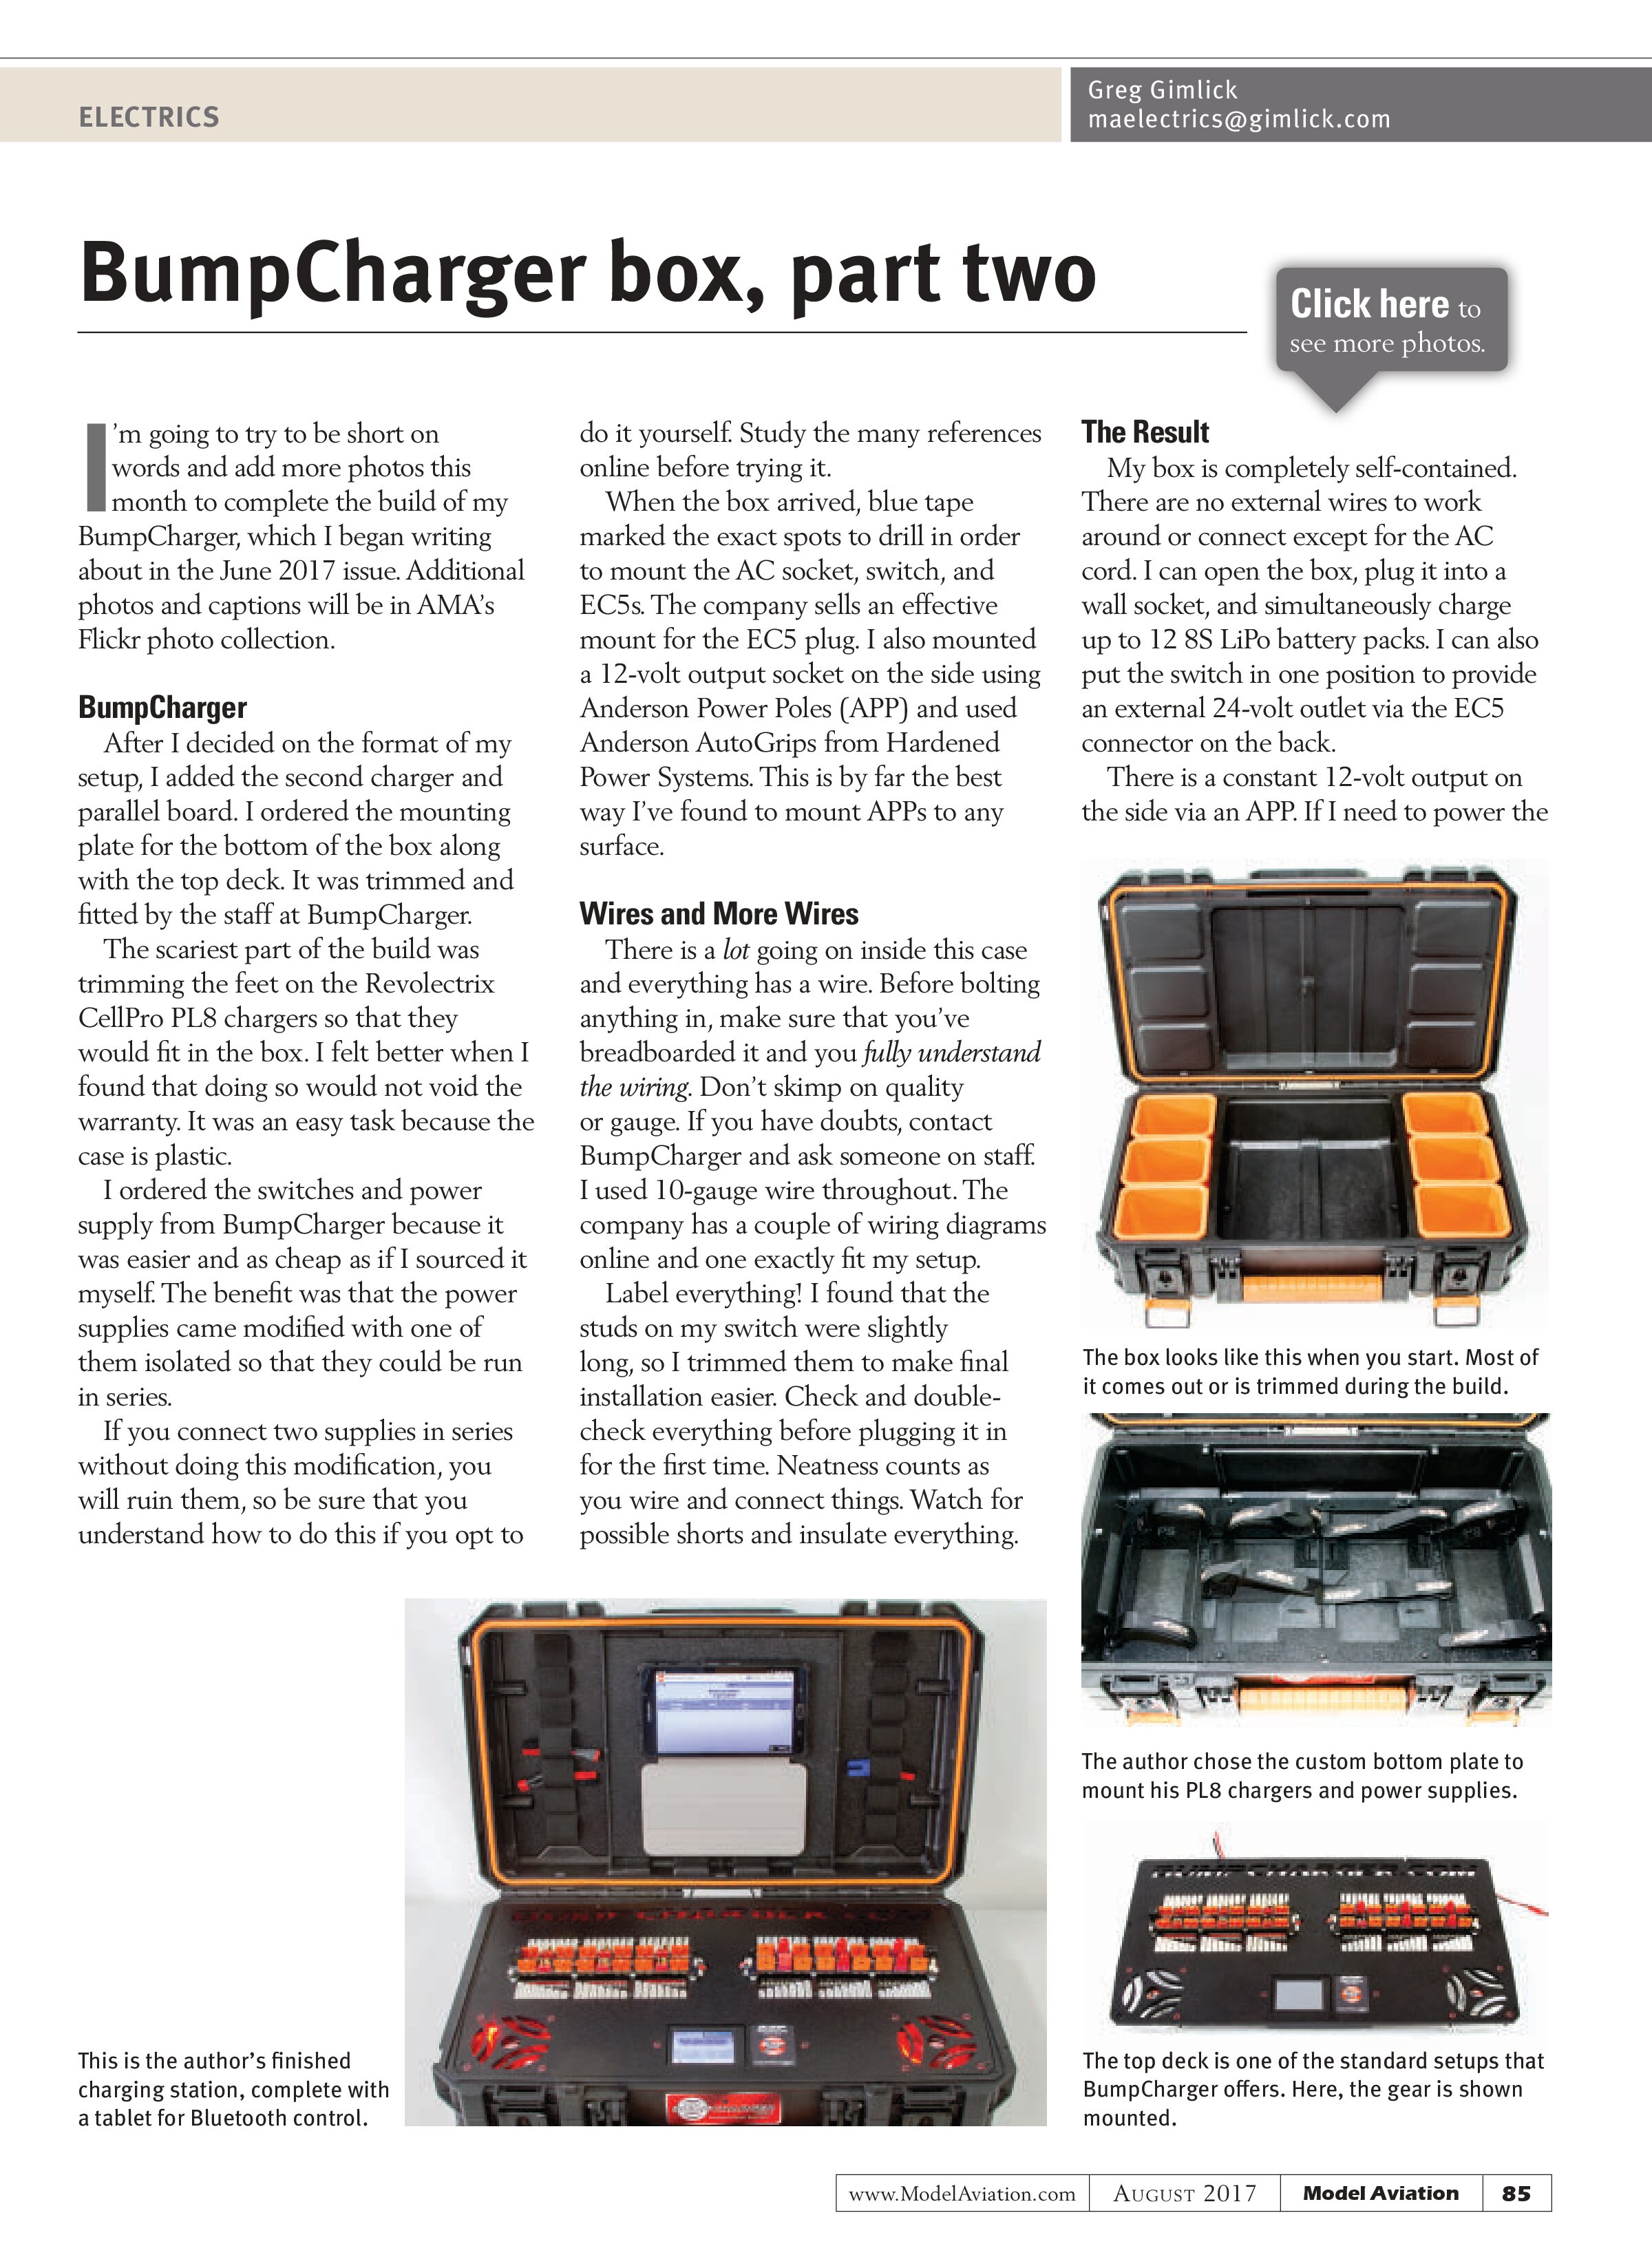
I’m going to try to be short on words and add more photos this month to complete the build of my BumpCharger, which I began writing about in the June 2017 issue. Additional photos and captions will be in AMA’s Flickr photo collection.
BumpCharger
After I decided on the format of my setup, I added the second charger and parallel board. I ordered the mounting plate for the bottom of the box along with the top deck. It was trimmed and fitted by the staff at BumpCharger.
The scariest part of the build was trimming the feet on the Revolectrix CellPro PL8 chargers so that they would fit in the box. I felt better when I found that doing so would not void the warranty. It was an easy task because the case is plastic.
I ordered the switches and power supply from BumpCharger because it was easier and as cheap as if I sourced it myself. The benefit was that the power supplies came modified with one of them isolated so that they could be run in series.
If you connect two supplies in series without doing this modification, you will ruin them, so be sure that you understand how to do this if you opt to do it yourself. Study the many references online before trying it.
When the box arrived, blue tape marked the exact spots to drill in order to mount the AC socket, switch, and EC5s. The company sells an effective mount for the EC5 plug. I also mounted a 12-volt output socket on the side using Anderson Power Poles (APP) and used Anderson AutoGrips from Hardened Power Systems. This is by far the best way I’ve found to mount APPs to any surface.
Wires and More Wires
There is a lot going on inside this case and everything has a wire. Before bolting anything in, make sure that you’ve breadboarded it and you fully understand the wiring. Don’t skimp on quality or gauge. If you have doubts, contact BumpCharger and ask someone on staff. I used 10-gauge wire throughout. The company has a couple of wiring diagrams online and one exactly fit my setup.
Label everything! I found that the studs on my switch were slightly long, so I trimmed them to make final installation easier. Check and double-check everything before plugging it in for the first time. Neatness counts as you wire and connect things. Watch for possible shorts and insulate everything.

The Result
My box is completely self-contained. There are no external wires to work around or connect except for the AC cord. I can open the box, plug it into a wall socket, and simultaneously charge up to 12 8S LiPo battery packs. I can also put the switch in one position to provide an external 24-volt outlet via the EC5 connector on the back.
There is a constant 12-volt output on the side via an APP. If I need to power the


setup without AC power, I can put the switch in the DC position and supply 12 to 24 volts from any DC source through the EC5. This bypasses the internal power supply and powers the chargers.
The reason I bought the stack of boxes was to install two 12-volt deep-cycle batteries in series in the bottom box to power the setup when I don’t have AC available. The box is on wheels, so it’s easy to move. There is still room to add a couple of USB ports, too!
Final Word
Figure out what your needs are and build a setup to last. Check out BumpCharger.com and look at how many choices there are. You can build as much or as little as your needs and budget allow.
I also downloaded the app for my Samsung Galaxy Tab tablet so that I can control it remotely via Bluetooth. I chose a proven setup, but the world is wide open for you to build your own holy grail of charger setups!
SOURCES:
BumpCharger
www.bumpcharger.com
Revolectrix USA
(301) 798-2770
www.revolectrix.com
Hardened Power Systems
(800) 328-9315
www.portableuniversalpower.com
AMA Flickr photos
www.flickr.com/photos/modelaircraft