VQ MODELS F6F HELLCAT .46 EP/GP
A nicely detailed ARF warbird
John Pomroy
pomroy.john@netzero.net

The Grumman F6F Hellcat was the U.S. Navy’s dominant World War II fighter in the second half of the Pacific War. The F6F was designed from the ground up to counter the Japanese Mitsubishi A6M Zero because its predecessor, the F4F Wildcat, was no match for the Zero. Using the same engine as the F4U Corsair—a Pratt & Whitney R-2800 Double Wasp—the Hellcat could fly faster and climb better than the Zero could above 14,000 feet.
By the end of WW II, the Hellcat-to-Zero kill ratio was 13:1. It was built to take damage and was reported to be well-behaved and enjoyable to fly. More than 12,000 were built in slightly more than two years. Although the aircraft was ultimately phased away from the frontlines, it served for another decade after WW II as a night fighter and was the first aircraft used by the U.S. Navy’s Blue Angels official flight demonstration team at its formation in 1946.
As of 2017, there are seven full-scale Hellcats in flying condition—one in England and six in the US—and four more currently undergoing restoration in the US.
Initial Impressions
VQ Warbirds offers the Hellcat in two sizes: 72-inch and 60-inch wingspan versions. This review is of the 60-inch version.
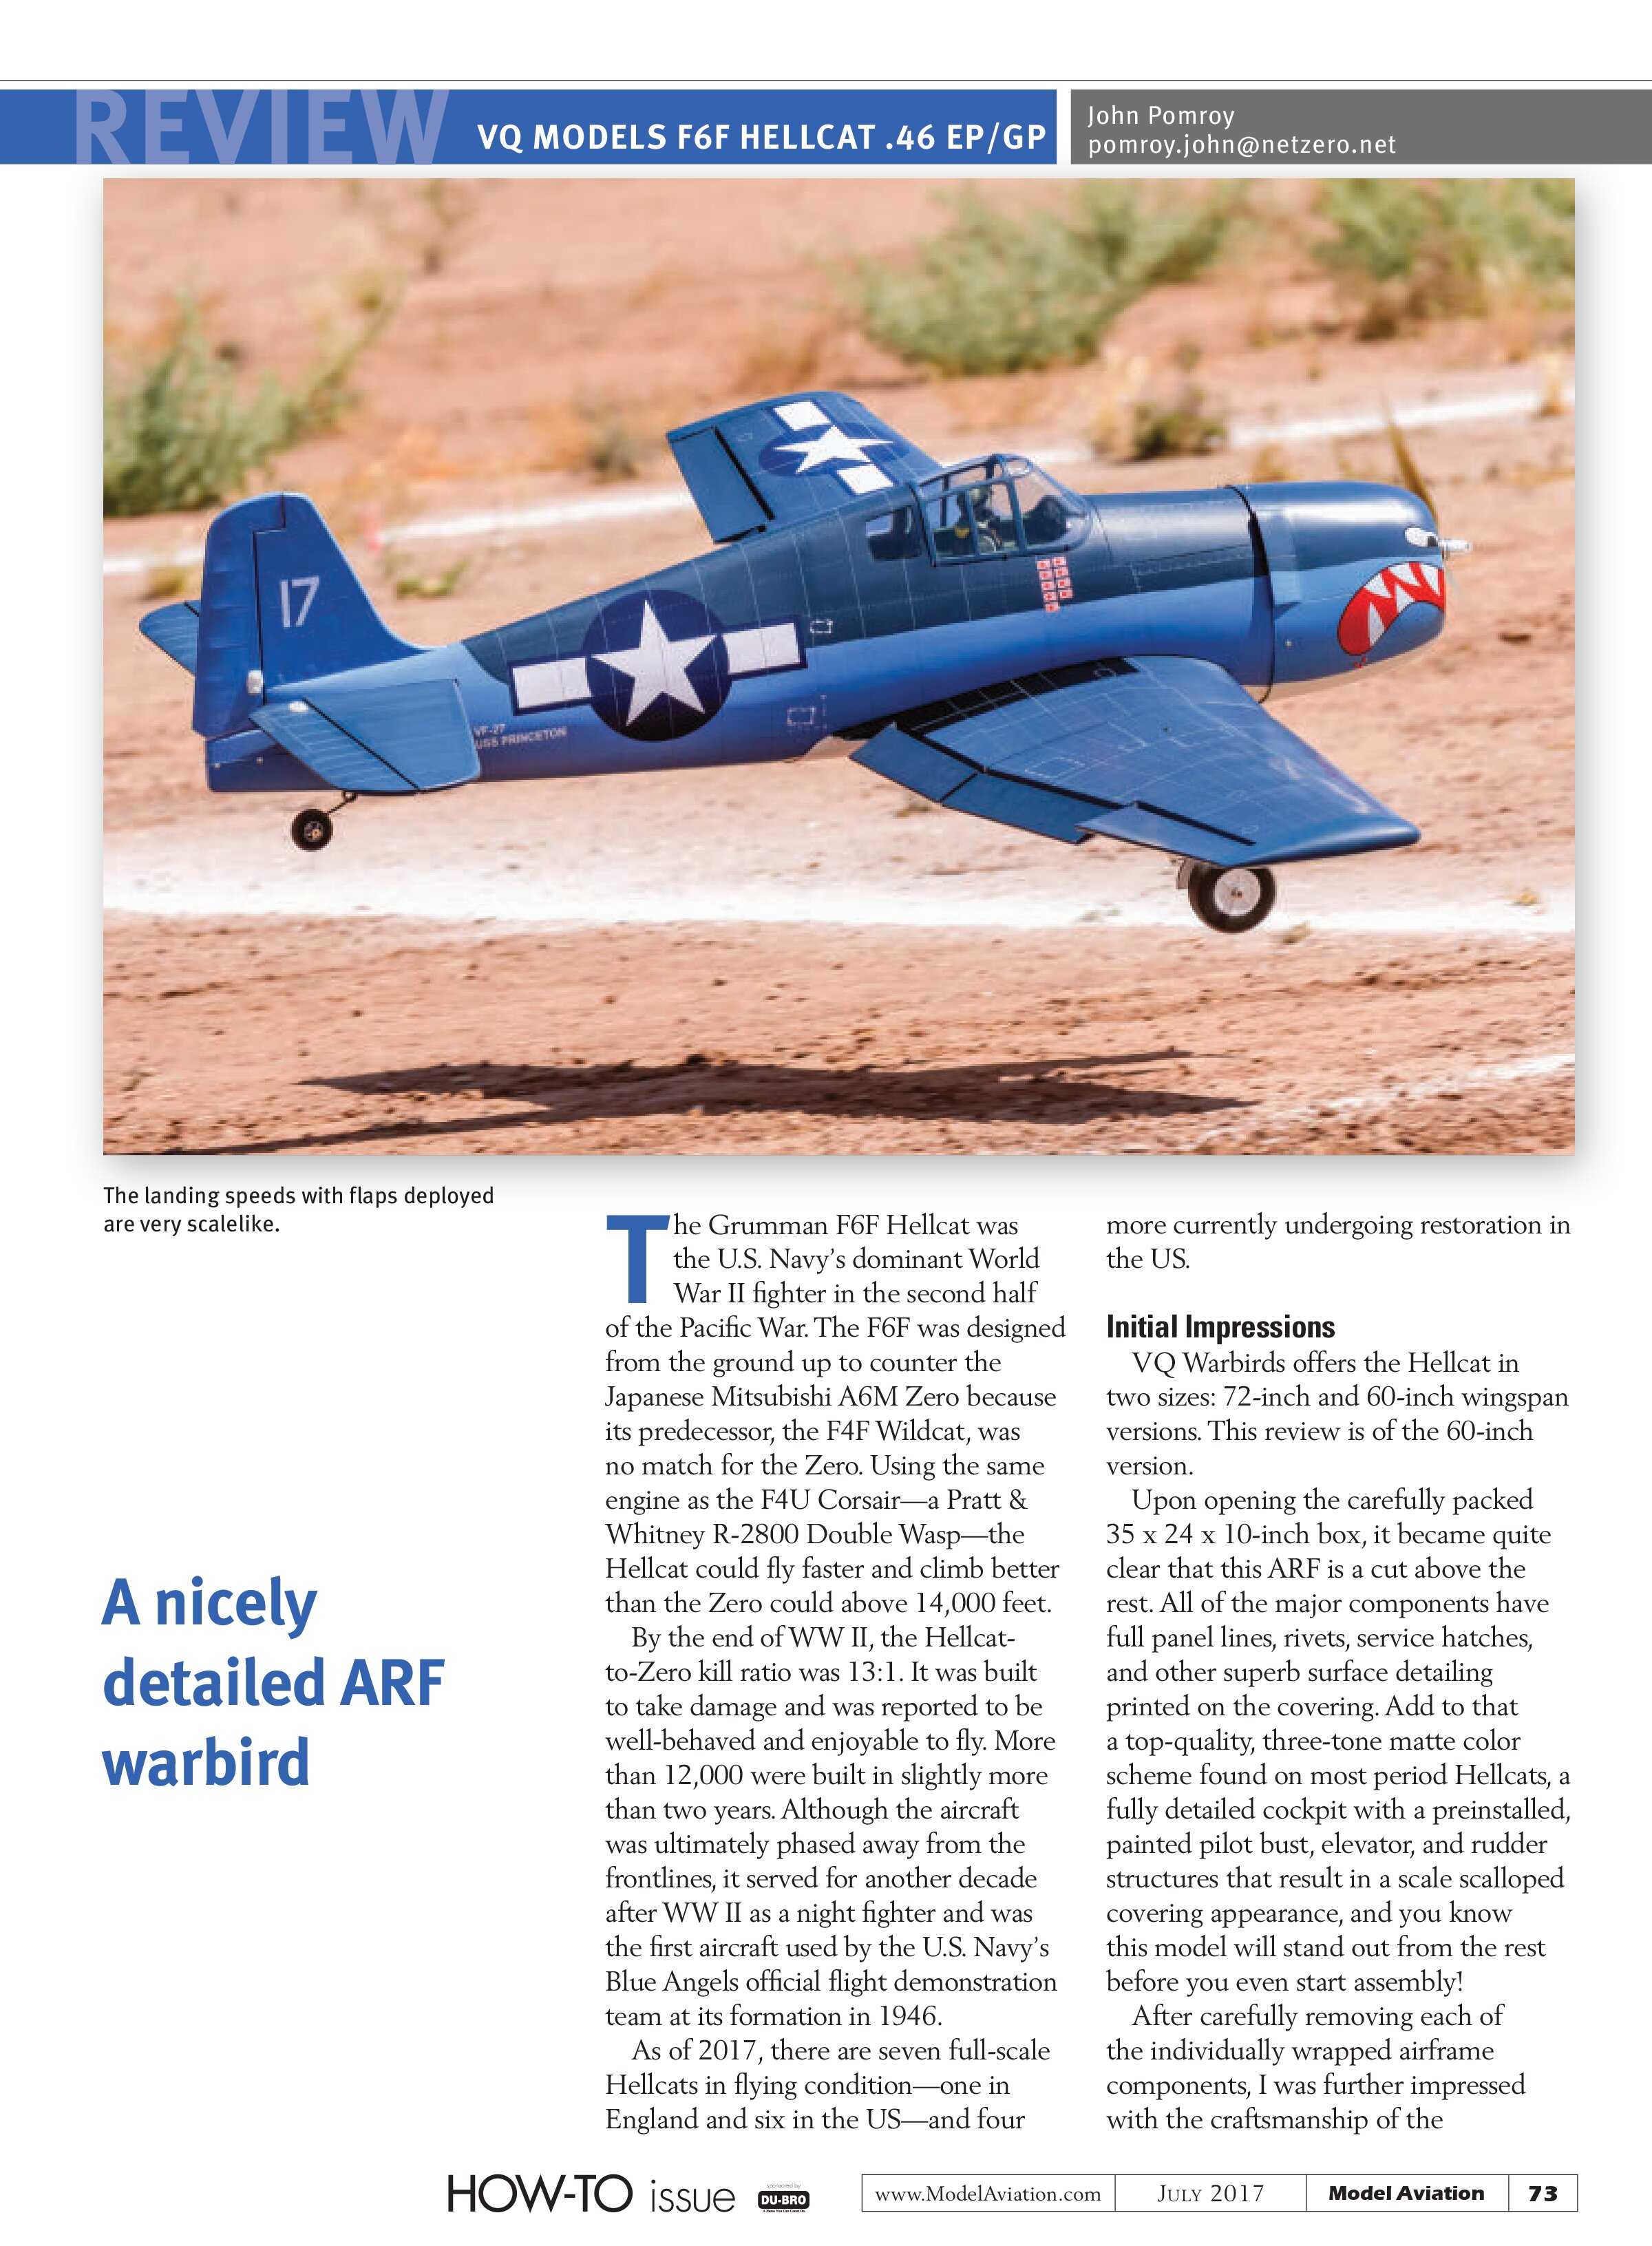
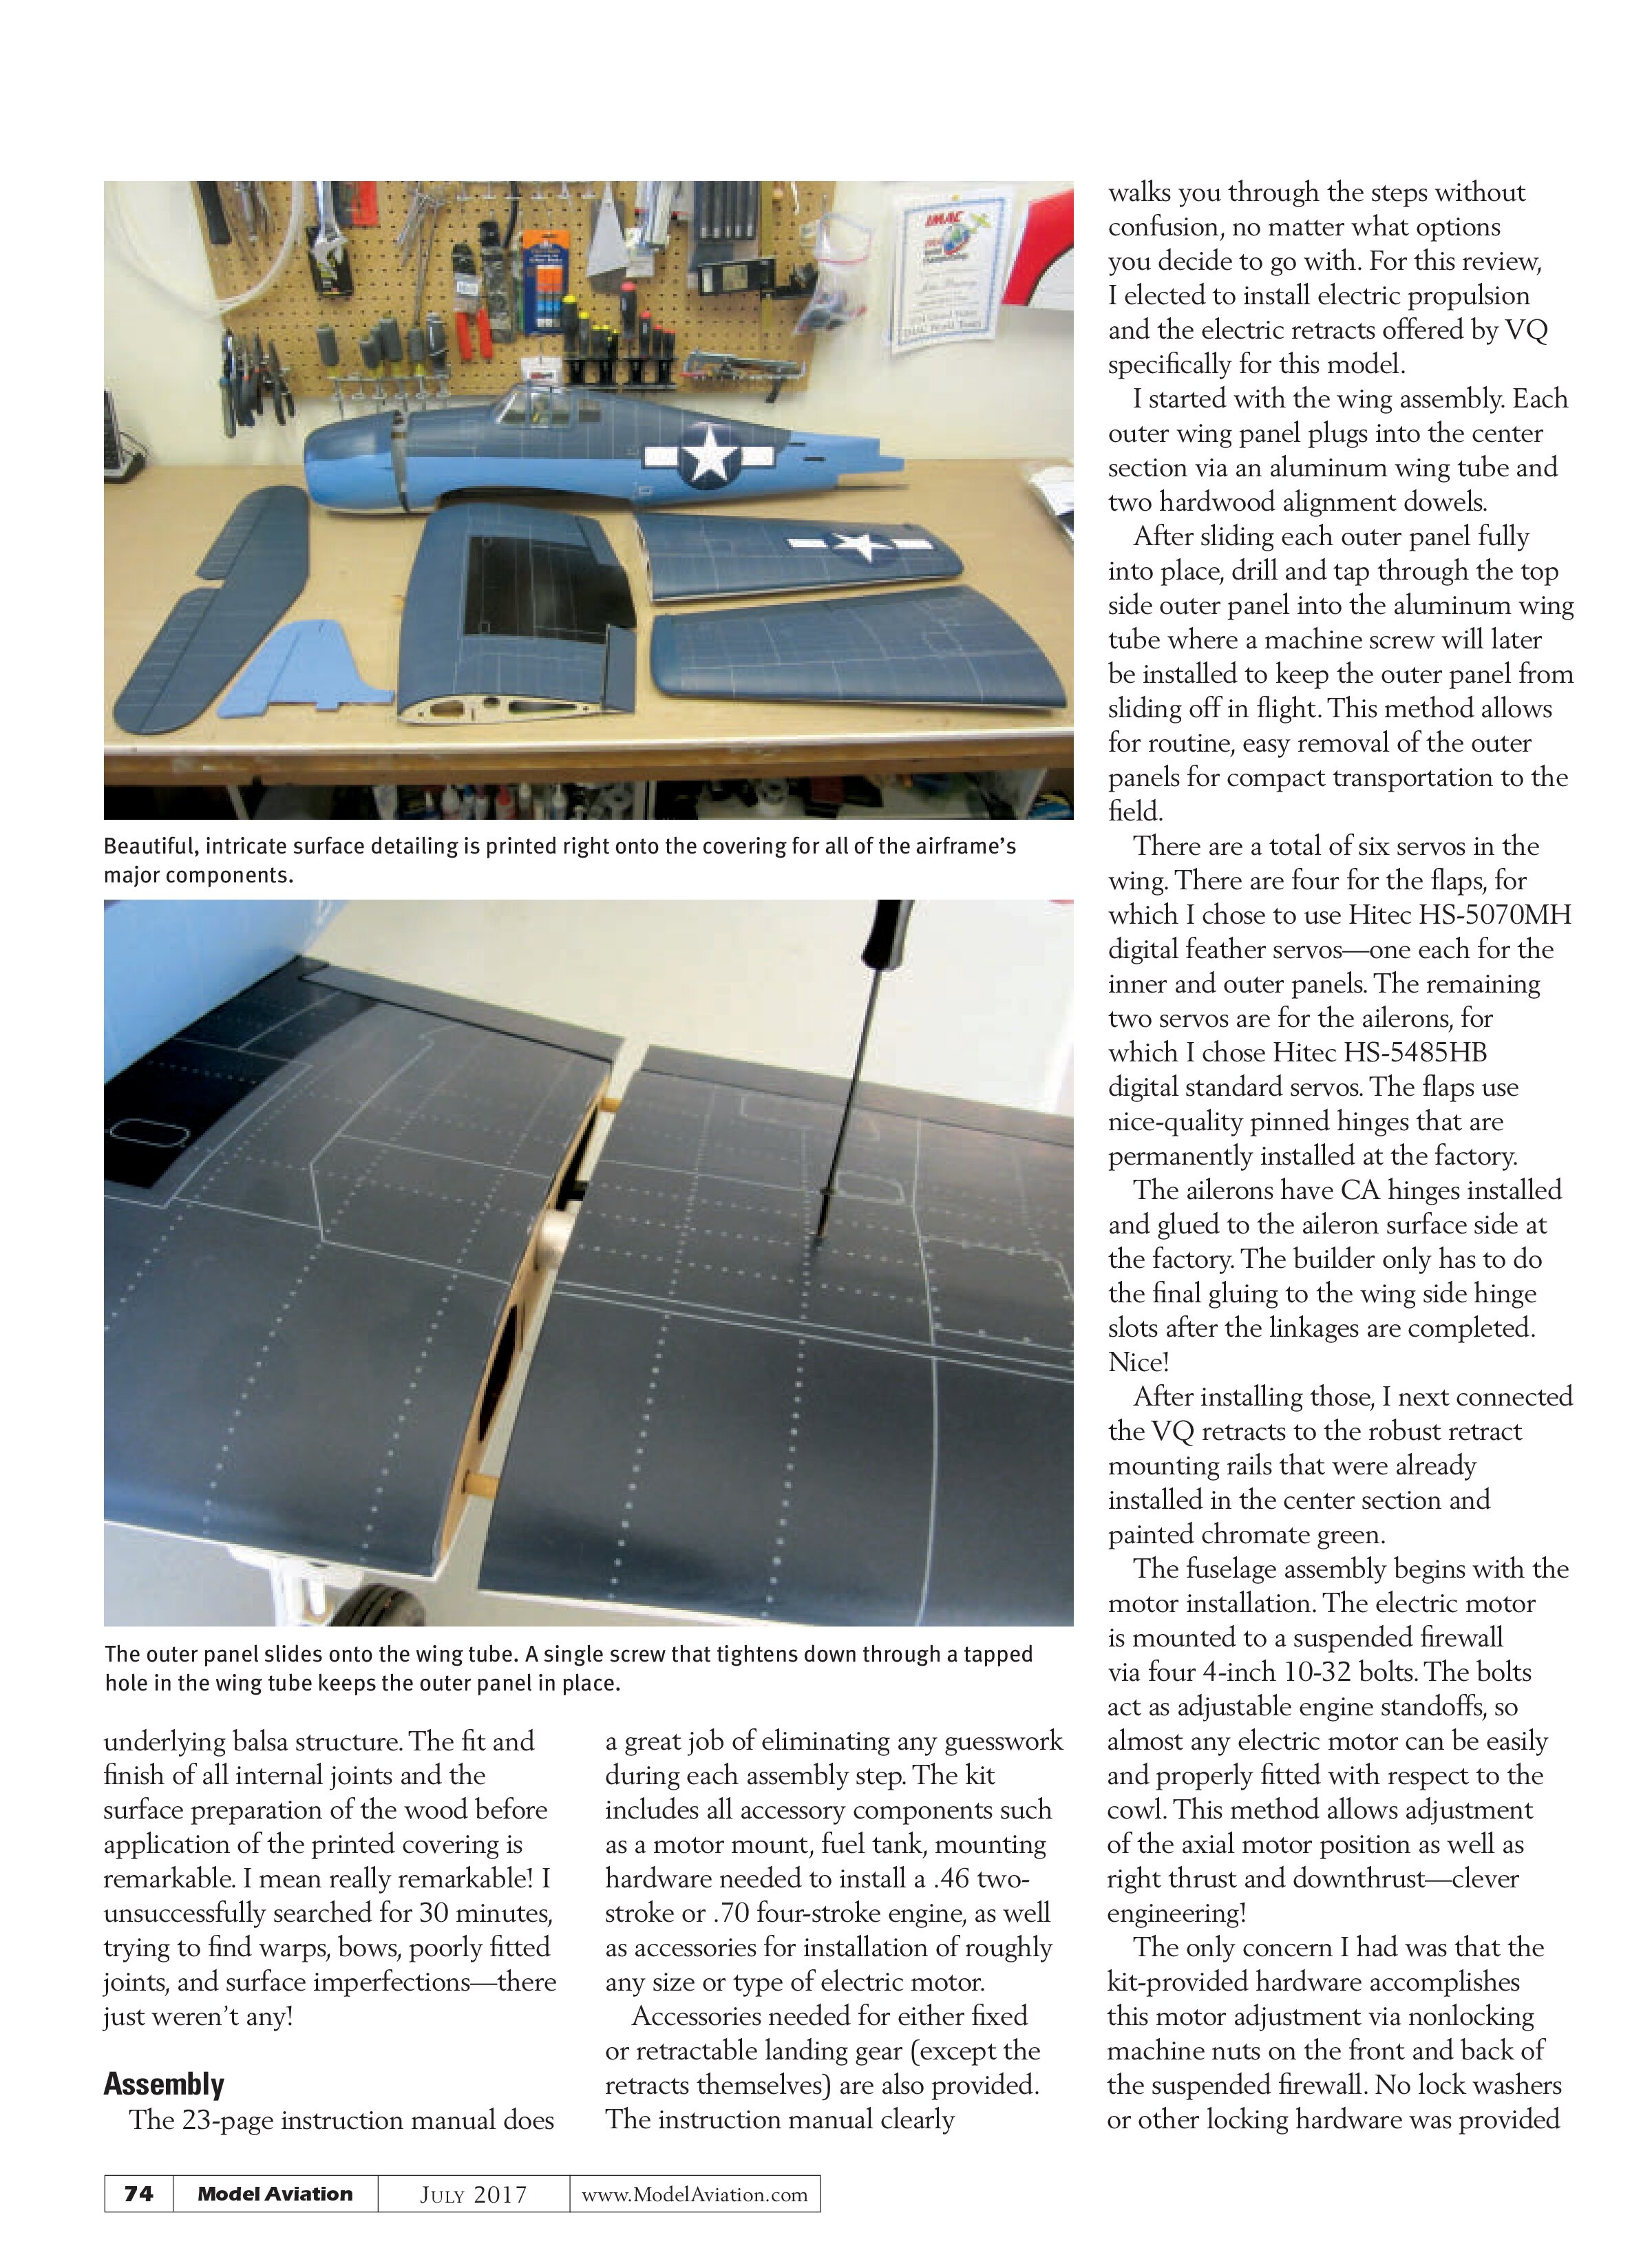
Upon opening the carefully packed 35 x 24 x 10-inch box, it became quite clear that this ARF is a cut above the rest. All of the major components have full panel lines, rivets, service hatches, and other superb surface detailing printed on the covering. Add to that a top-quality, three-tone matte color scheme found on most period Hellcats, a fully detailed cockpit with a preinstalled, painted pilot bust, elevator, and rudder structures that result in a scale scalloped covering appearance, and you know this model will stand out from the rest before you even start assembly!
After carefully removing each of the individually wrapped airframe components, I was further impressed with the craftsmanship of the

Beautiful, intricate surface detailing is printed right onto the covering for all of the airframe’s major components.

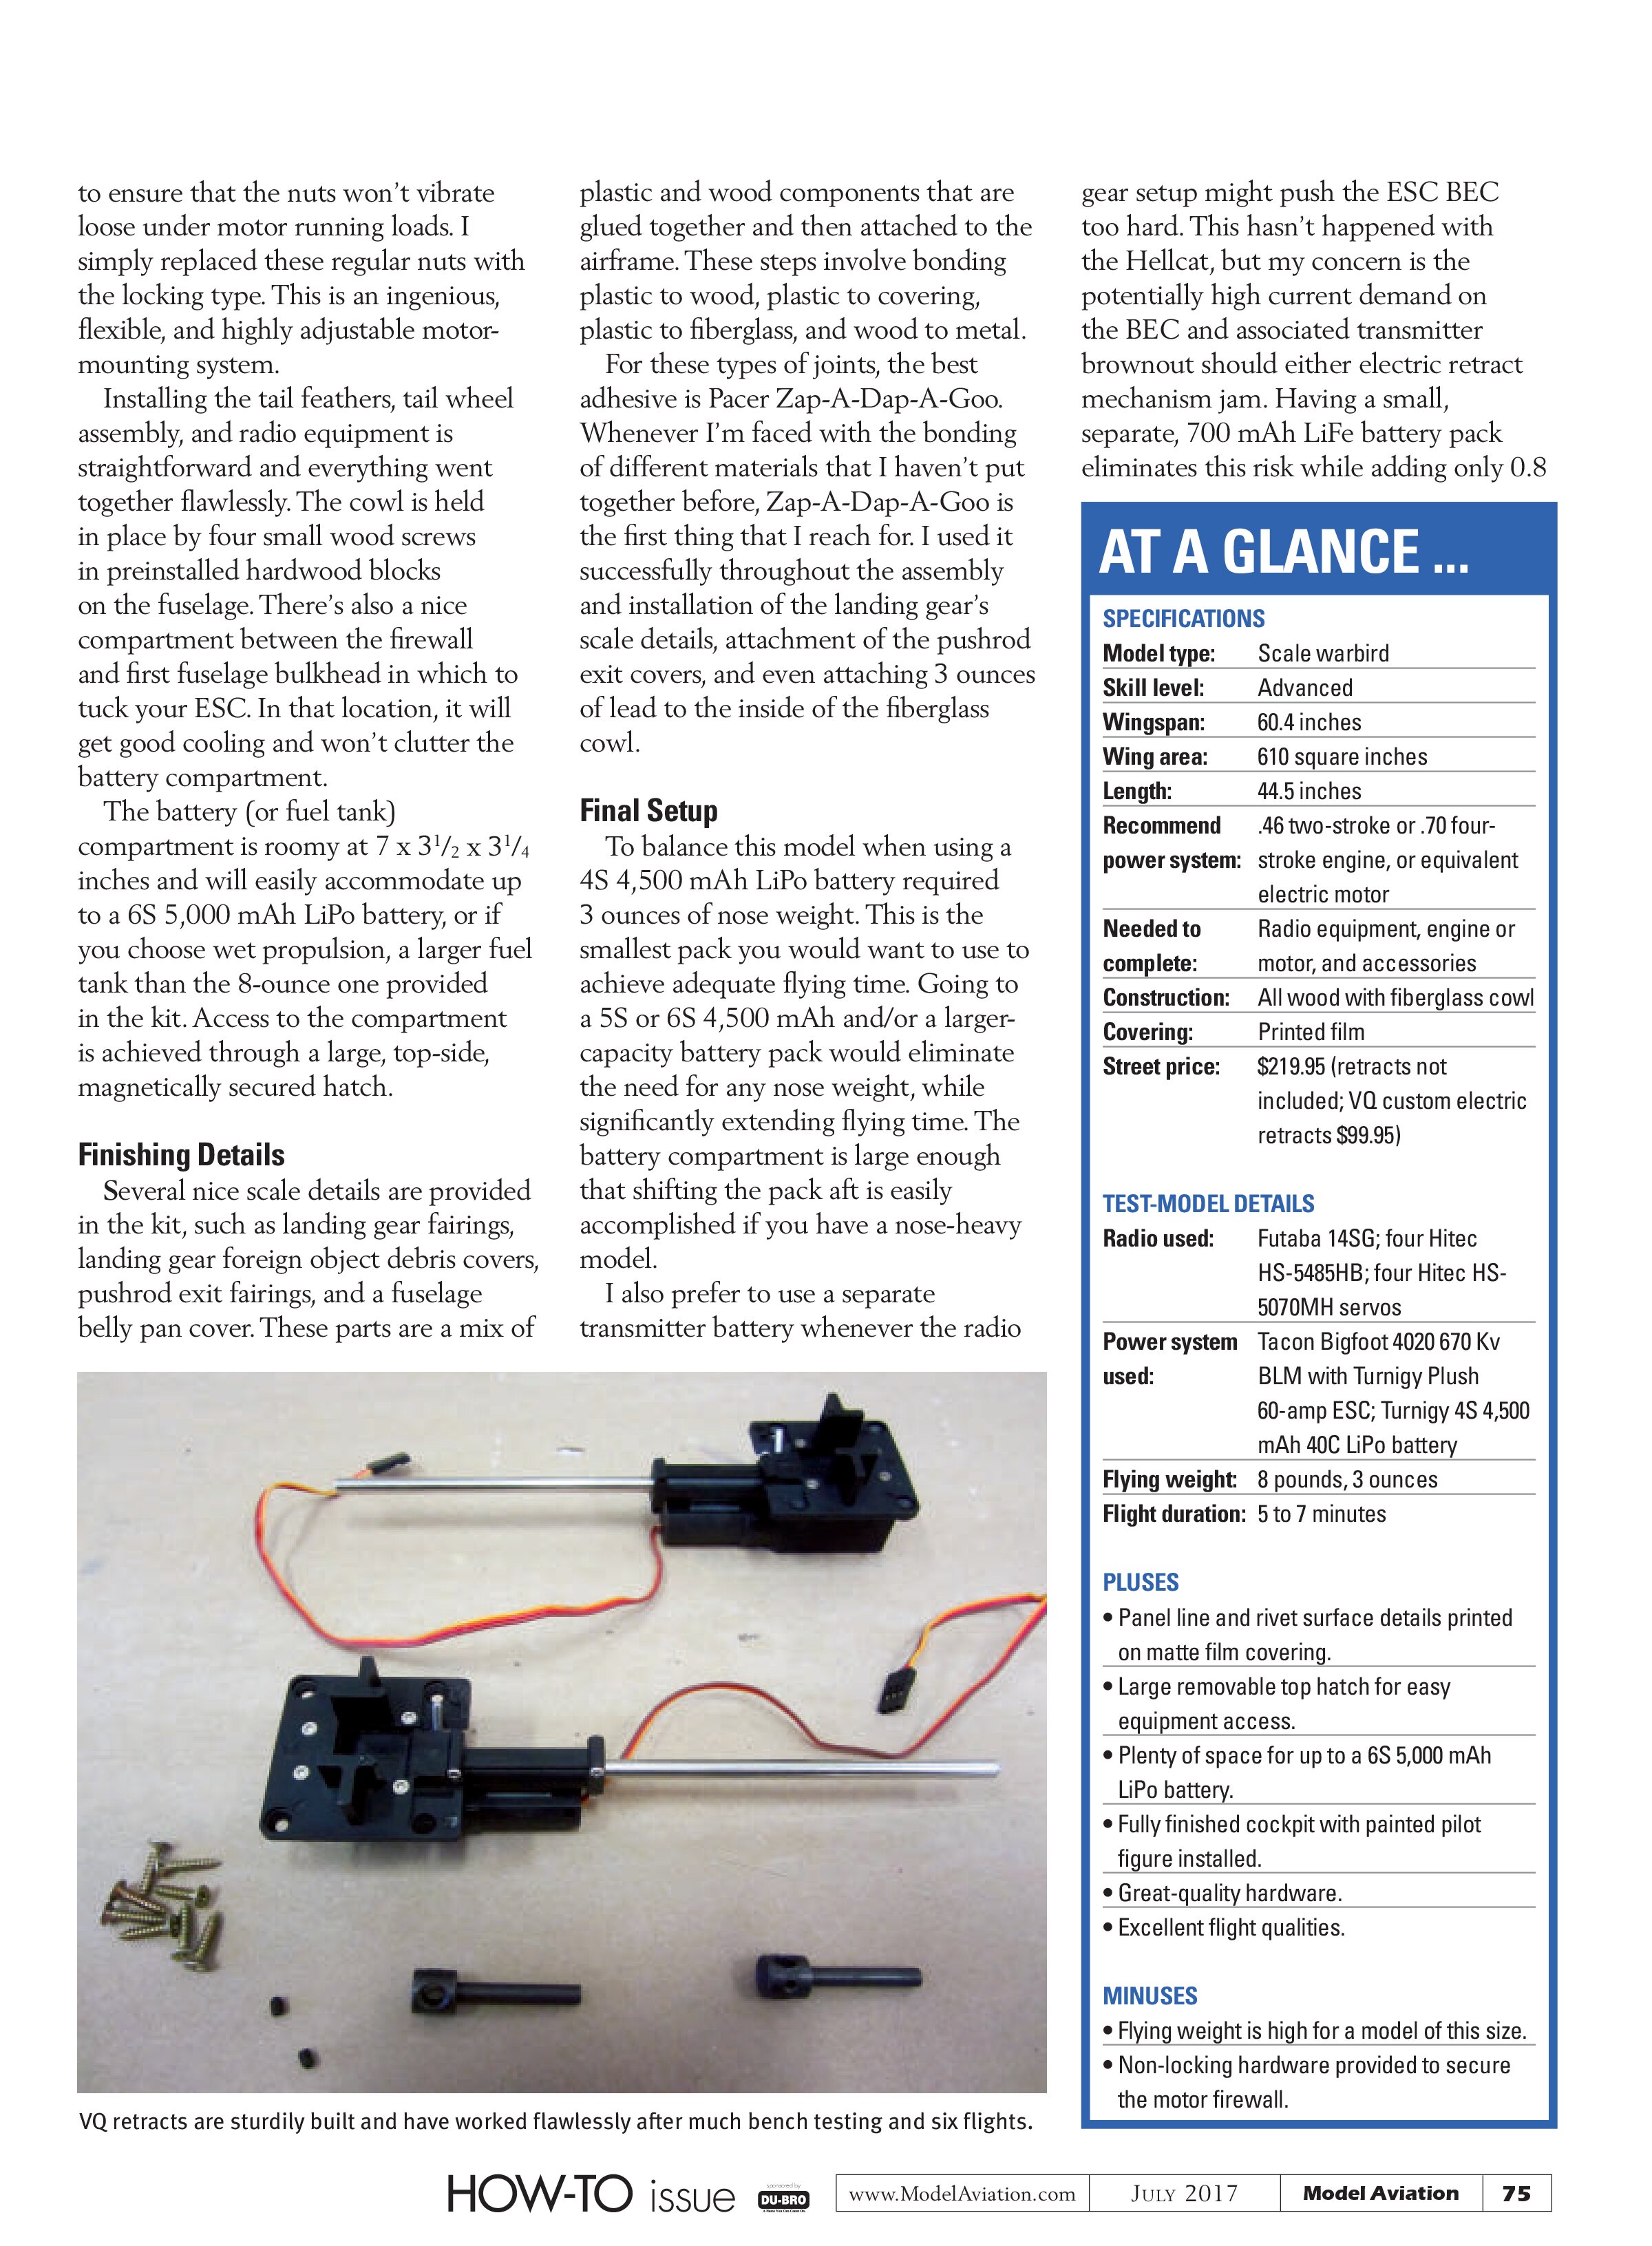
The outer panel slides onto the wing tube. A single screw that tightens down through a tapped hole in the wing tube keeps the outer panel in place.
underlying balsa structure. The fit and finish of all internal joints and the surface preparation of the wood before application of the printed covering is remarkable. I mean really remarkable! I unsuccessfully searched for 30 minutes, trying to find warps, bows, poorly fitted joints, and surface imperfections—there just weren’t any!
Assembly
The 23-page instruction manual does a great job of eliminating any guesswork during each assembly step. The kit includes all accessory components such as a motor mount, fuel tank, mounting hardware needed to install a .46 two-stroke or .70 four-stroke engine, as well as accessories for installation of roughly any size or type of electric motor. Accessories needed for either fixed or retractable landing gear (except the retracts themselves) are also provided. The instruction manual clearly walks you through the steps without confusion, no matter what options you decide to go with. For this review, I elected to install electric propulsion and the electric retracts offered by VQ specifically for this model.
I started with the wing assembly. Each outer wing panel plugs into the center section via an aluminum wing tube and two hardwood alignment dowels. After sliding each outer panel fully into place, drill and tap through the top side outer panel into the aluminum wing tube where a machine screw will later be installed to keep the outer panel from sliding off in flight. This method allows for routine, easy removal of the outer panels for compact transportation to the field.
There are a total of six servos in the wing. There are four for the flaps, for which I chose to use Hitec HS-5070MH digital feather servos—one each for the inner and outer panels. The remaining two servos are for the ailerons, for which I chose Hitec HS-5485HB digital standard servos. The flaps use nice-quality pinned hinges that are permanently installed at the factory.
The ailerons have CA hinges installed and glued to the aileron surface side at the factory. The builder only has to do the final gluing to the wing side hinge slots after the linkages are completed. Nice!
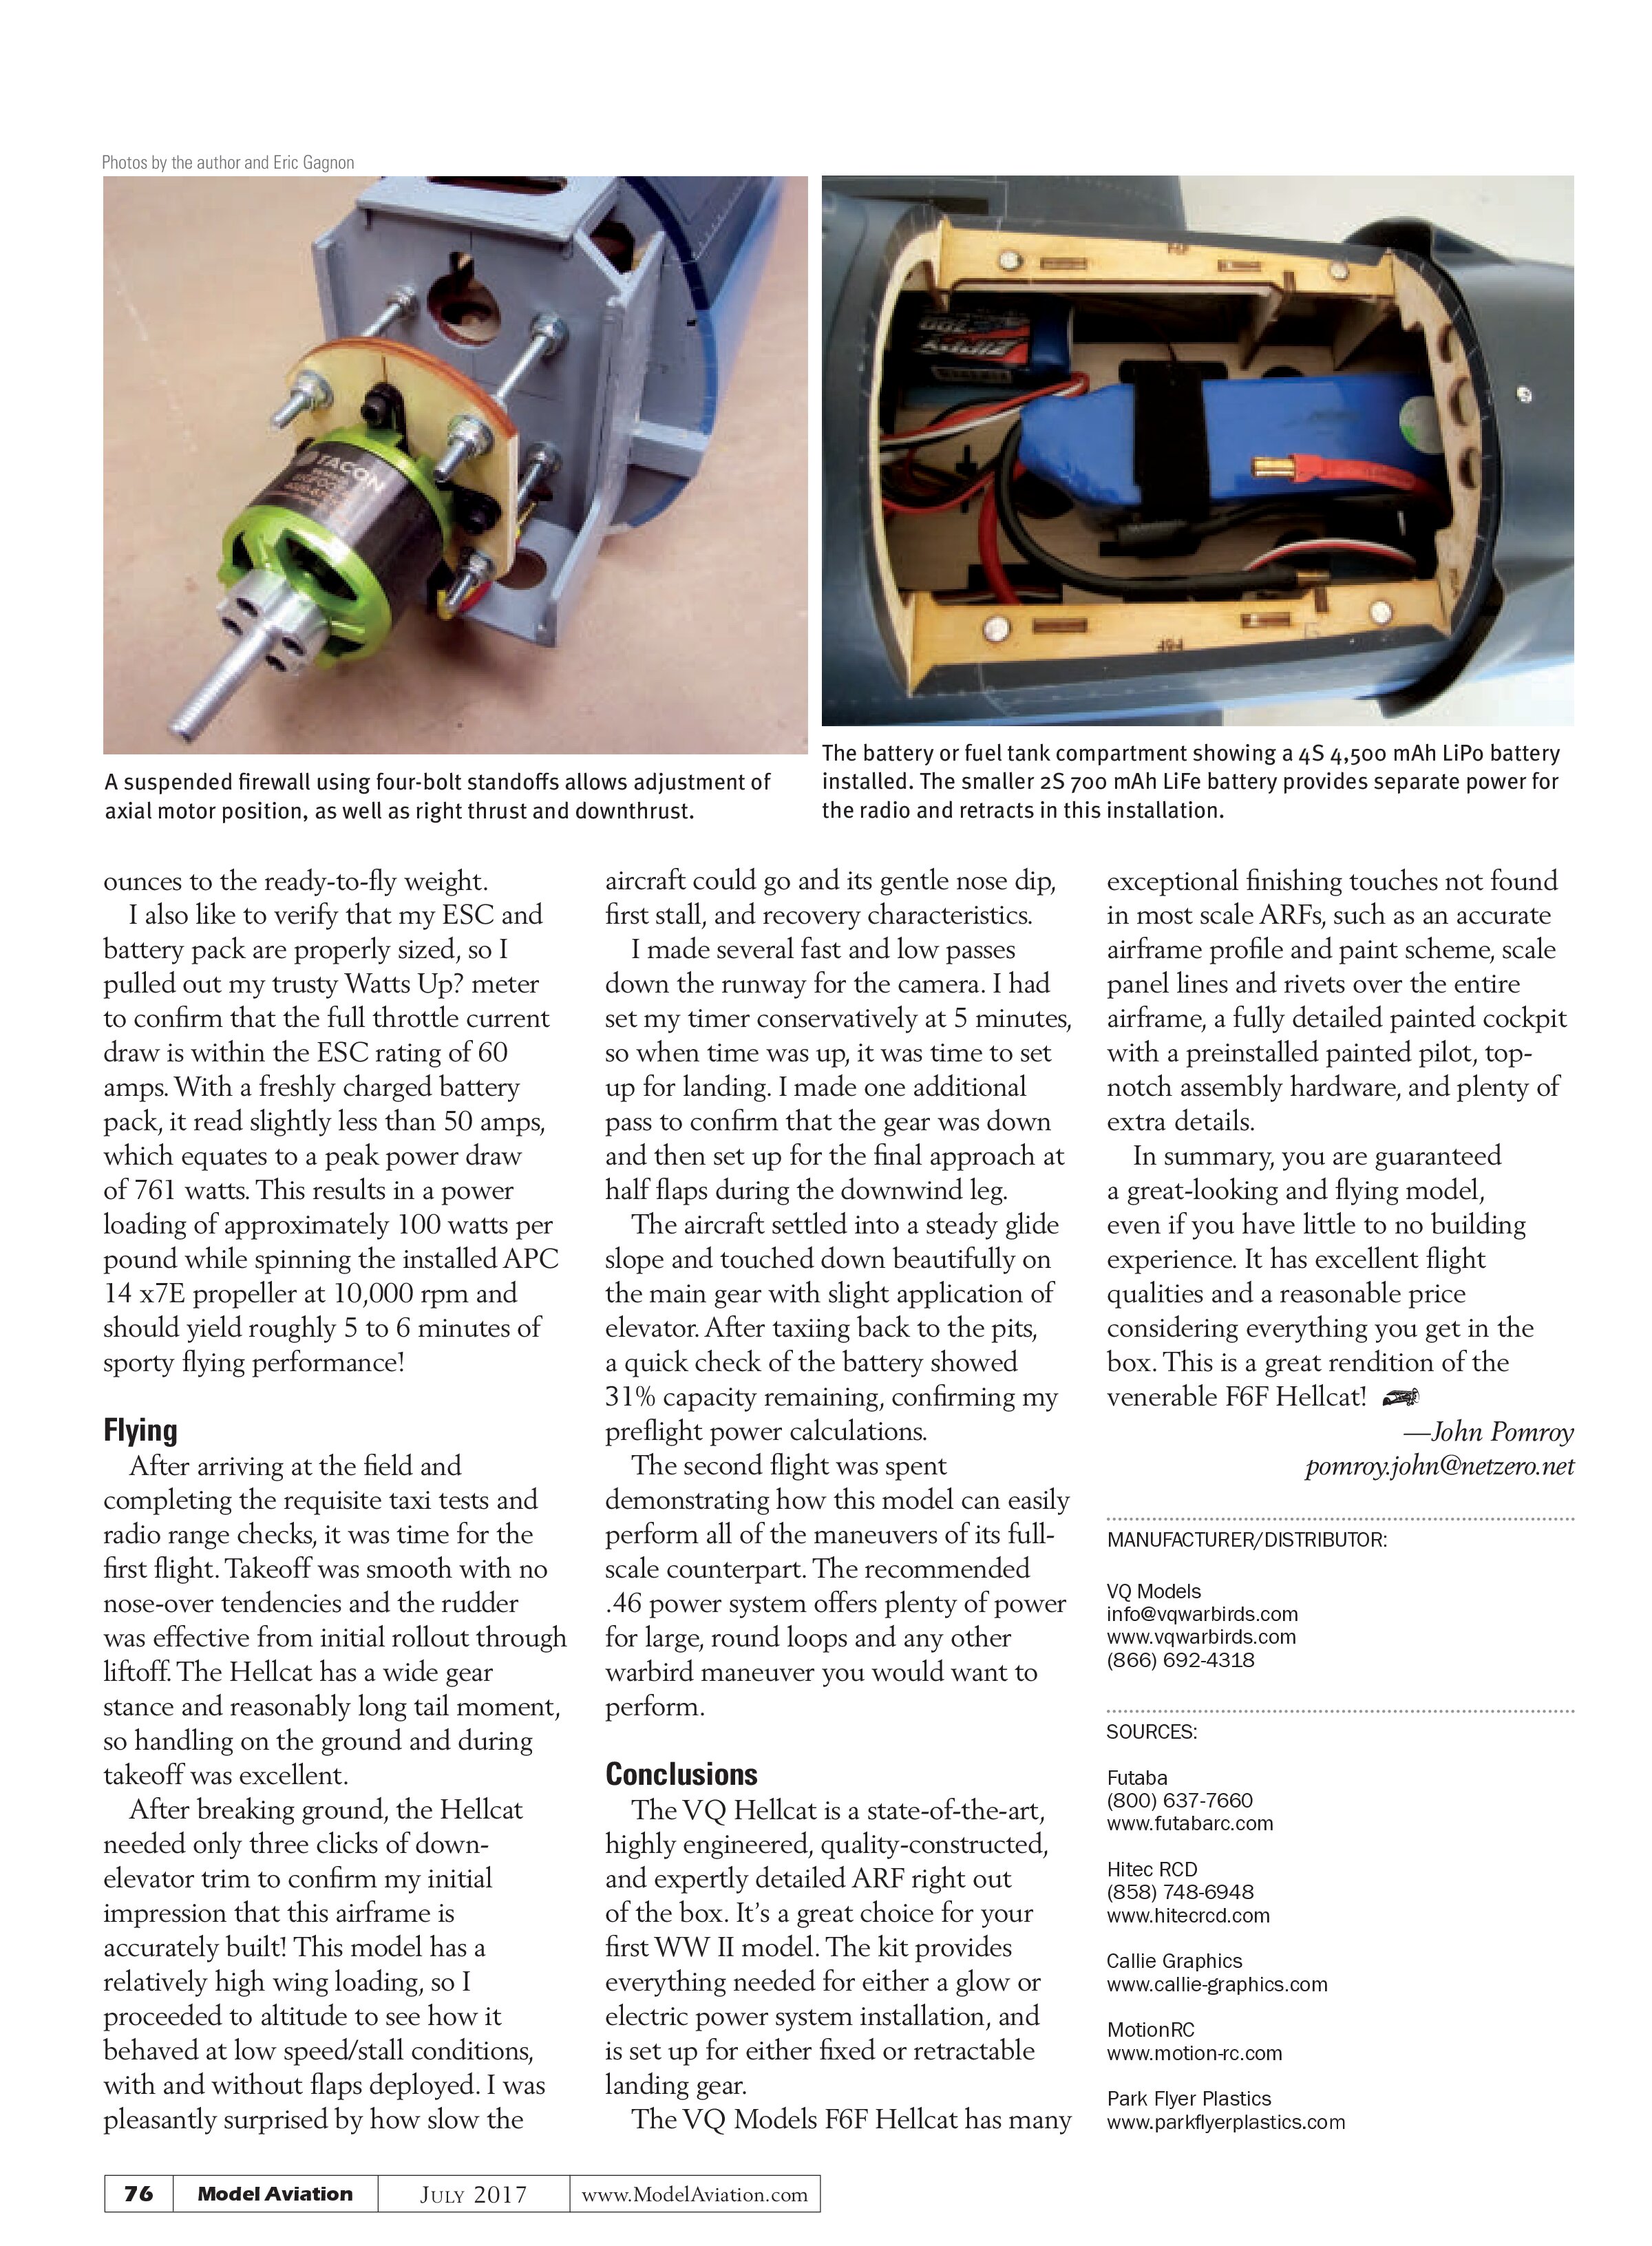
After installing those, I next connected the VQ retracts to the robust retract mounting rails that were already installed in the center section and painted chromate green.
The fuselage assembly begins with the motor installation. The electric motor is mounted to a suspended firewall via four 4-inch 10-32 bolts. The bolts act as adjustable engine standoffs, so almost any electric motor can be easily and properly fitted with respect to the cowl. This method allows adjustment of the axial motor position as well as right thrust and downthrust—clever engineering!
The only concern I had was that the kit-provided hardware accomplishes this motor adjustment via nonlocking machine nuts on the front and back of the suspended firewall. No lock washers or other locking hardware was provided to ensure that the nuts won’t vibrate loose under motor running loads. I simply replaced these regular nuts with the locking type. This is an ingenious, flexible, and highly adjustable motor-mounting system.
Installing the tail feathers, tail wheel assembly, and radio equipment is straightforward and everything went together flawlessly. The cowl is held in place by four small wood screws in preinstalled hardwood blocks on the fuselage. There’s also a nice compartment between the firewall and first fuselage bulkhead in which to tuck your ESC. In that location, it will get good cooling and won’t clutter the battery compartment.
The battery (or fuel tank) compartment is roomy at 7 x 3½ x 3¼ inches and will easily accommodate up to a 6S 5,000 mAh LiPo battery, or if you choose wet propulsion, a larger fuel tank than the 8-ounce one provided in the kit. Access to the compartment is achieved through a large, top-side, magnetically secured hatch.
Finishing Details
Several nice scale details are provided in the kit, such as landing gear fairings, landing gear foreign object debris covers, pushrod exit fairings, and a fuselage belly pan cover. These parts are a mix of plastic and wood components that are glued together and then attached to the airframe. These steps involve bonding plastic to wood, plastic to covering, plastic to fiberglass, and wood to metal.
For these types of joints, the best adhesive is Pacer Zap-A-Dap-A-Goo. Whenever I’m faced with the bonding of different materials that I haven’t put together before, Zap-A-Dap-A-Goo is the first thing that I reach for. I used it successfully throughout the assembly and installation of the landing gear’s scale details, attachment of the pushrod exit covers, and even attaching 3 ounces of lead to the inside of the fiberglass cowl.
Final Setup
To balance this model when using a 4S 4,500 mAh LiPo battery required 3 ounces of nose weight. This is the smallest pack you would want to use to achieve adequate flying time. Going to a 5S or 6S 4,500 mAh and/or a larger-capacity battery pack would eliminate the need for any nose weight, while significantly extending flying time. The battery compartment is large enough that shifting the pack aft is easily accomplished if you have a nose-heavy model.
I also prefer to use a separate transmitter battery whenever the radio gear setup might push the ESC BEC too hard. This hasn’t happened with the Hellcat, but my concern is the potentially high current demand on the BEC and associated transmitter brownout should either electric retract mechanism jam. Having a small, separate, 700 mAh LiFe battery pack eliminates this risk while adding only 0.8

VQ retracts are sturdily built and have worked flawlessly after much bench testing and six flights.
AT A GLANCE ...
SPECIFICATIONS
Model type: Scale warbird
Skill level: Advanced
Wingspan: 60.4 inches
Wing area: 610 square inches
Length: 44.5 inches
Recommend power system: .46 two-stroke or .70 four-stroke engine, or equivalent electric motor
Needed to complete: Radio equipment, engine or motor, and accessories
Construction: All wood with fiberglass cowl
Covering: Printed film
Street price: $219.95 (retracts not included; VQ custom electric retracts $99.95)
TEST-MODEL DETAILS
Radio used: Futaba 14SG; four Hitec HS-5485HB; four Hitec HS-5070MH servos
Power system used: Tacon Bigfoot 4020 670 Kv BLM with Turnigy Plush 60-amp ESC; Turnigy 4S 4,500 mAh 40C LiPo battery
Flying weight: 8 pounds, 3 ounces
Flight duration: 5 to 7 minutes
PLUSES
- Panel line and rivet surface details printed on matte film covering.
- Large removable top hatch for easy equipment access.
- Plenty of space for up to a 6S 5,000 mAh LiPo battery.
- Fully finished cockpit with painted pilot figure installed.
- Great-quality hardware.
- Excellent flight qualities.
MINUSES
- Flying weight is high for a model of this size.
- Non-locking hardware provided to secure the motor firewall.
ounces to the ready-to-fly weight.
I also like to verify that my ESC and battery pack are properly sized, so I pulled out my trusty Watts Up? meter to confirm that the full throttle current draw is within the ESC rating of 60 amps. With a freshly charged battery pack, it read slightly less than 50 amps, which equates to a peak power draw of 761 watts. This results in a power loading of approximately 100 watts per pound while spinning the installed APC 14 x 7E propeller at 10,000 rpm and should yield roughly 5 to 6 minutes of sporty flying performance!
Flying
After arriving at the field and completing the requisite taxi tests and radio range checks, it was time for the first flight. Takeoff was smooth with no nose-over tendencies and the rudder was effective from initial rollout through liftoff. The Hellcat has a wide gear stance and reasonably long tail moment, so handling on the ground and during takeoff was excellent.
After breaking ground, the Hellcat needed only three clicks of down-elevator trim to confirm my initial impression that this airframe is accurately built! This model has a relatively high wing loading, so I proceeded to altitude to see how it behaved at low speed/stall conditions, with and without flaps deployed. I was pleasantly surprised by how slow the aircraft could go and its gentle nose dip, first stall, and recovery characteristics.
I made several fast and low passes down the runway for the camera. I had set my timer conservatively at 5 minutes, so when time was up, it was time to set up for landing. I made one additional pass to confirm that the gear was down and then set up for the final approach at half flaps during the downwind leg.
The aircraft settled into a steady glide slope and touched down beautifully on the main gear with slight application of elevator. After taxiing back to the pits, a quick check of the battery showed 31% capacity remaining, confirming my preflight power calculations.
The second flight was spent demonstrating how this model can easily perform all of the maneuvers of its full-scale counterpart. The recommended .46 power system offers plenty of power for large, round loops and any other warbird maneuver you would want to perform.
Conclusions
The VQ Hellcat is a state-of-the-art, highly engineered, quality-constructed, and expertly detailed ARF right out of the box. It’s a great choice for your first WW II model. The kit provides everything needed for either a glow or electric power system installation, and is set up for either fixed or retractable landing gear.
The VQ Models F6F Hellcat has many exceptional finishing touches not found in most scale ARFs, such as an accurate airframe profile and paint scheme, scale panel lines and rivets over the entire airframe, a fully detailed painted cockpit with a preinstalled painted pilot, top-notch assembly hardware, and plenty of extra details.
In summary, you are guaranteed a great-looking and flying model, even if you have little to no building experience. It has excellent flight qualities and a reasonable price considering everything you get in the box. This is a great rendition of the venerable F6F Hellcat!
—John Pomroy
pomroy.john@netzero.net
MANUFACTURER/DISTRIBUTOR:
VQ Models
info@vqwarbirds.com
www.vqwarbirds.com
(866) 692-4318
SOURCES:
Futaba
(800) 637-7660
www.futabaRC.com
Hitec RCD
(858) 748-6948
www.hitecrcd.com
Callie Graphics
www.callie-graphics.com
MotionRC
www.motion-rc.com
Park Flyer Plastics
www.parkflyerplastics.com
DETAILING AN ARF
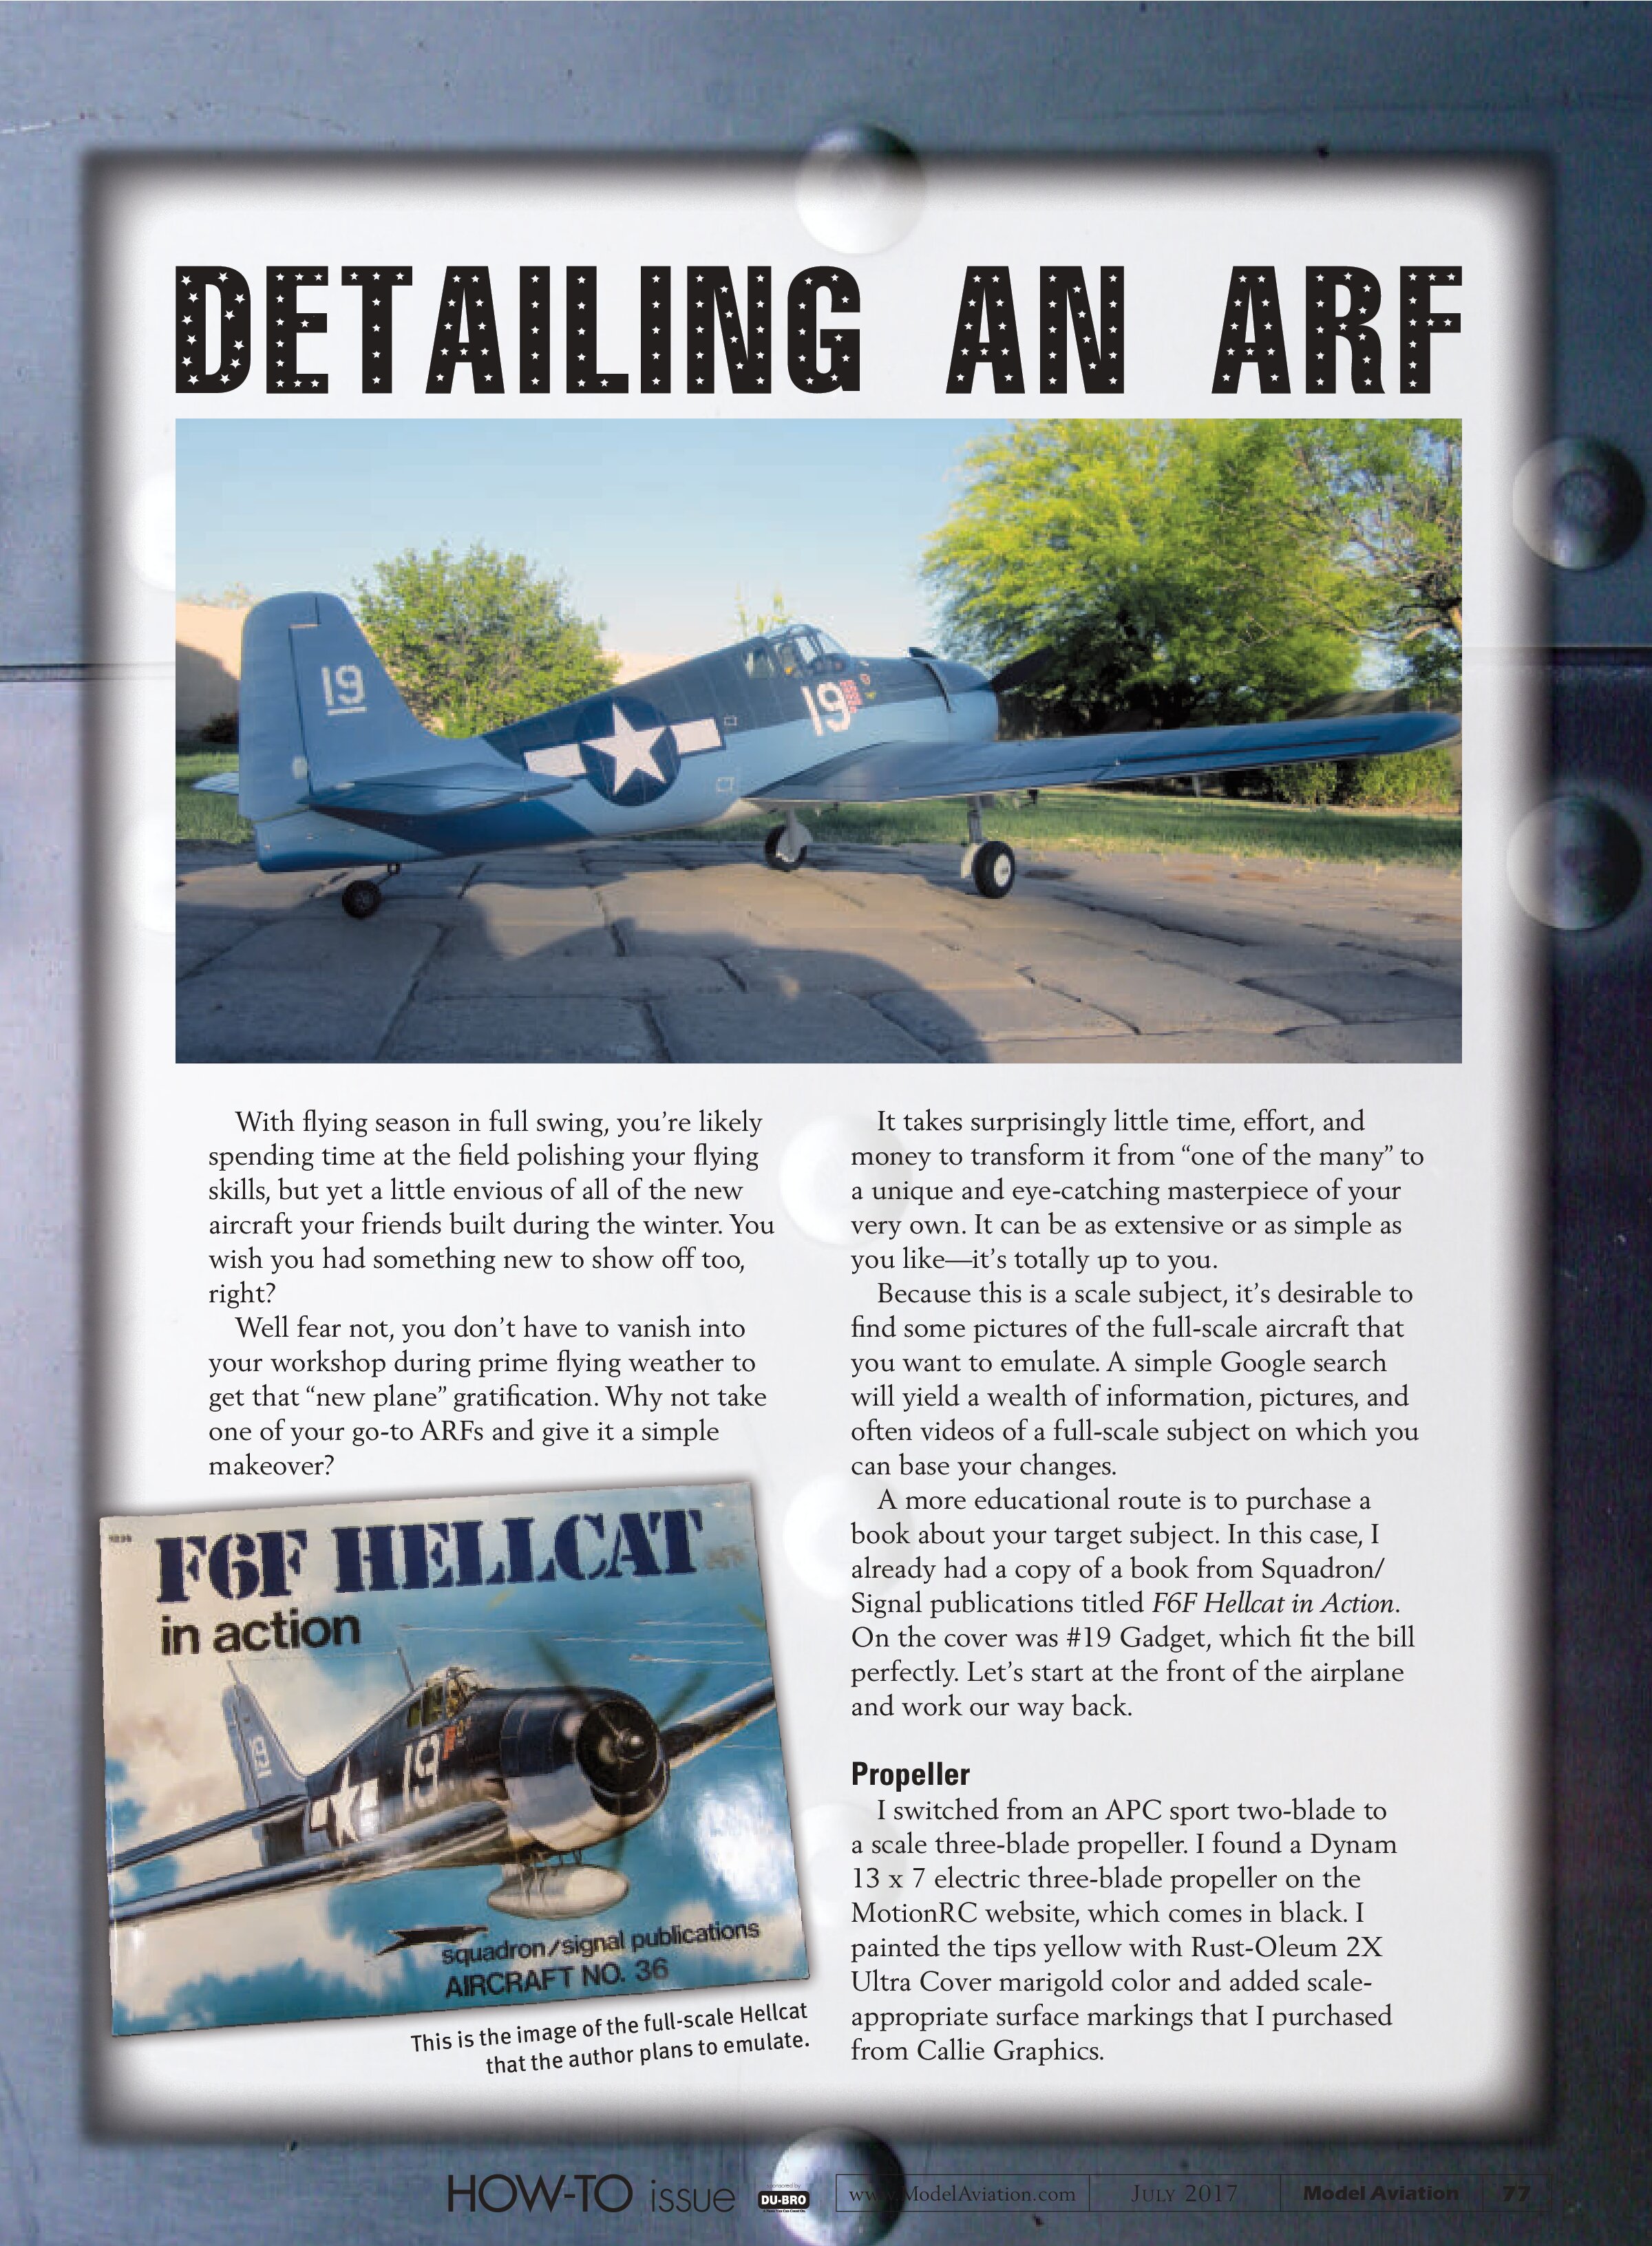
With flying season in full swing, you’re likely spending time at the field polishing your flying skills, but yet a little envious of all of the new aircraft your friends built during the winter. You wish you had something new to show off too, right?
Well fear not, you don’t have to vanish into your workshop during prime flying weather to get that “new plane” gratification. Why not take one of your go-to ARFs and give it a simple makeover?

It takes surprisingly little time, effort, and money to transform it from “one of the many” to a unique and eye-catching masterpiece of your very own. It can be as extensive or as simple as you like—it’s totally up to you.
Because this is a scale subject, it’s desirable to find some pictures of the full-scale aircraft that you want to emulate. A simple Google search will yield a wealth of information, pictures, and often videos of a full-scale subject on which you can base your changes.
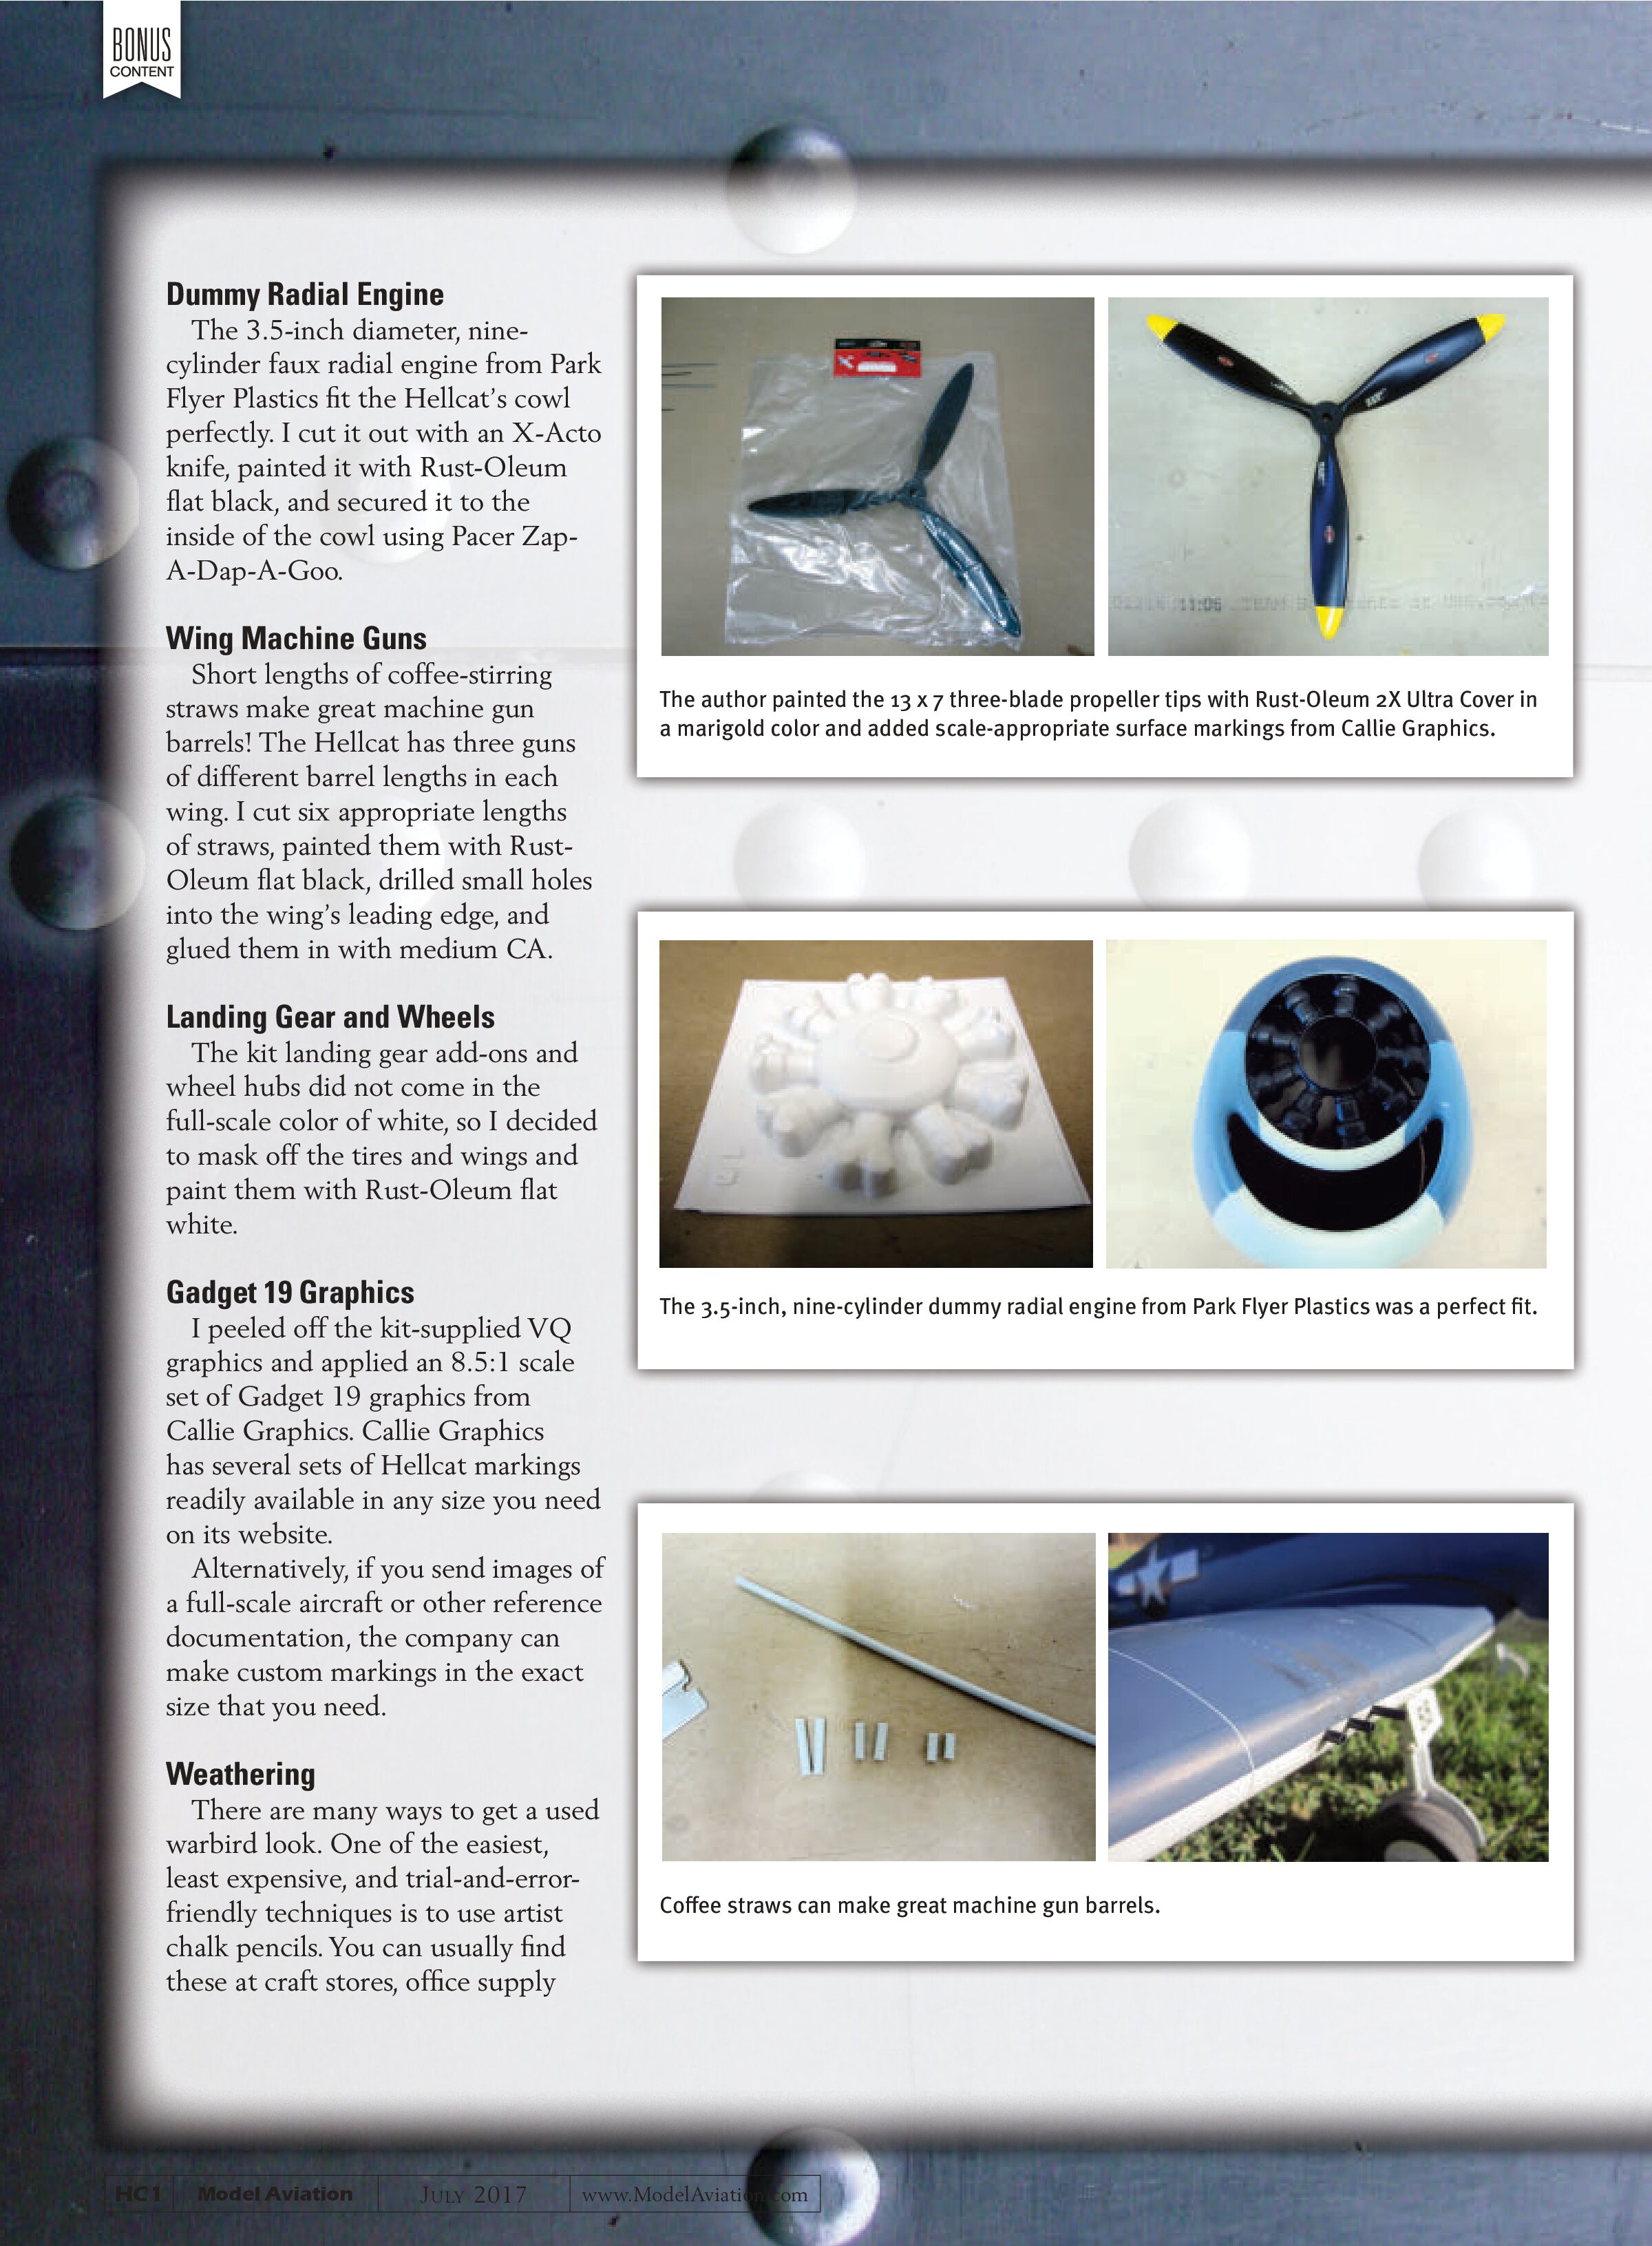
A more educational route is to purchase a book about your target subject. In this case, I already had a copy of a book from Squadron/Signal publications titled F6F Hellcat in Action. On the cover was #19 Gadget, which fit the bill perfectly. Let’s start at the front of the airplane and work our way back.

Propeller
I switched from an APC sport two-blade to a scale three-blade propeller. I found a Dynam 13 x 7 electric three-blade propeller on the MotionRC website, which comes in black. I painted the tips yellow with Rust-Oleum 2X Ultra Cover marigold color and added scale-appropriate surface markings that I purchased from Callie Graphics.


Dummy Radial Engine
The 3.5-inch diameter, nine-cylinder faux radial engine from Park Flyer Plastics fit the Hellcat’s cowl perfectly. I cut it out with an X-Acto knife, painted it with Rust-Oleum flat black, and secured it to the inside of the cowl using Pacer Zap-A-Dap-A-Goo.
Wing Machine Guns
Short lengths of coffee-stirring straws make great machine gun barrels! The Hellcat has three guns of different barrel lengths in each wing. I cut six appropriate lengths of straws, painted them with Rust-Oleum flat black, drilled small holes into the wing’s leading edge, and glued them in with medium CA.
Landing Gear and Wheels
The kit landing gear add-ons and wheel hubs did not come in the full-scale color of white, so I decided to mask off the tires and wings and paint them with Rust-Oleum flat white.
Gadget 19 Graphics
I peeled off the kit-supplied VQ graphics and applied an 8.5:1 scale set of Gadget 19 graphics from Callie Graphics. Callie Graphics has several sets of Hellcat markings readily available in any size you need on its website.
Alternatively, if you send images of a full-scale aircraft or other reference documentation, the company can make custom markings in the exact size that you need.
Weathering
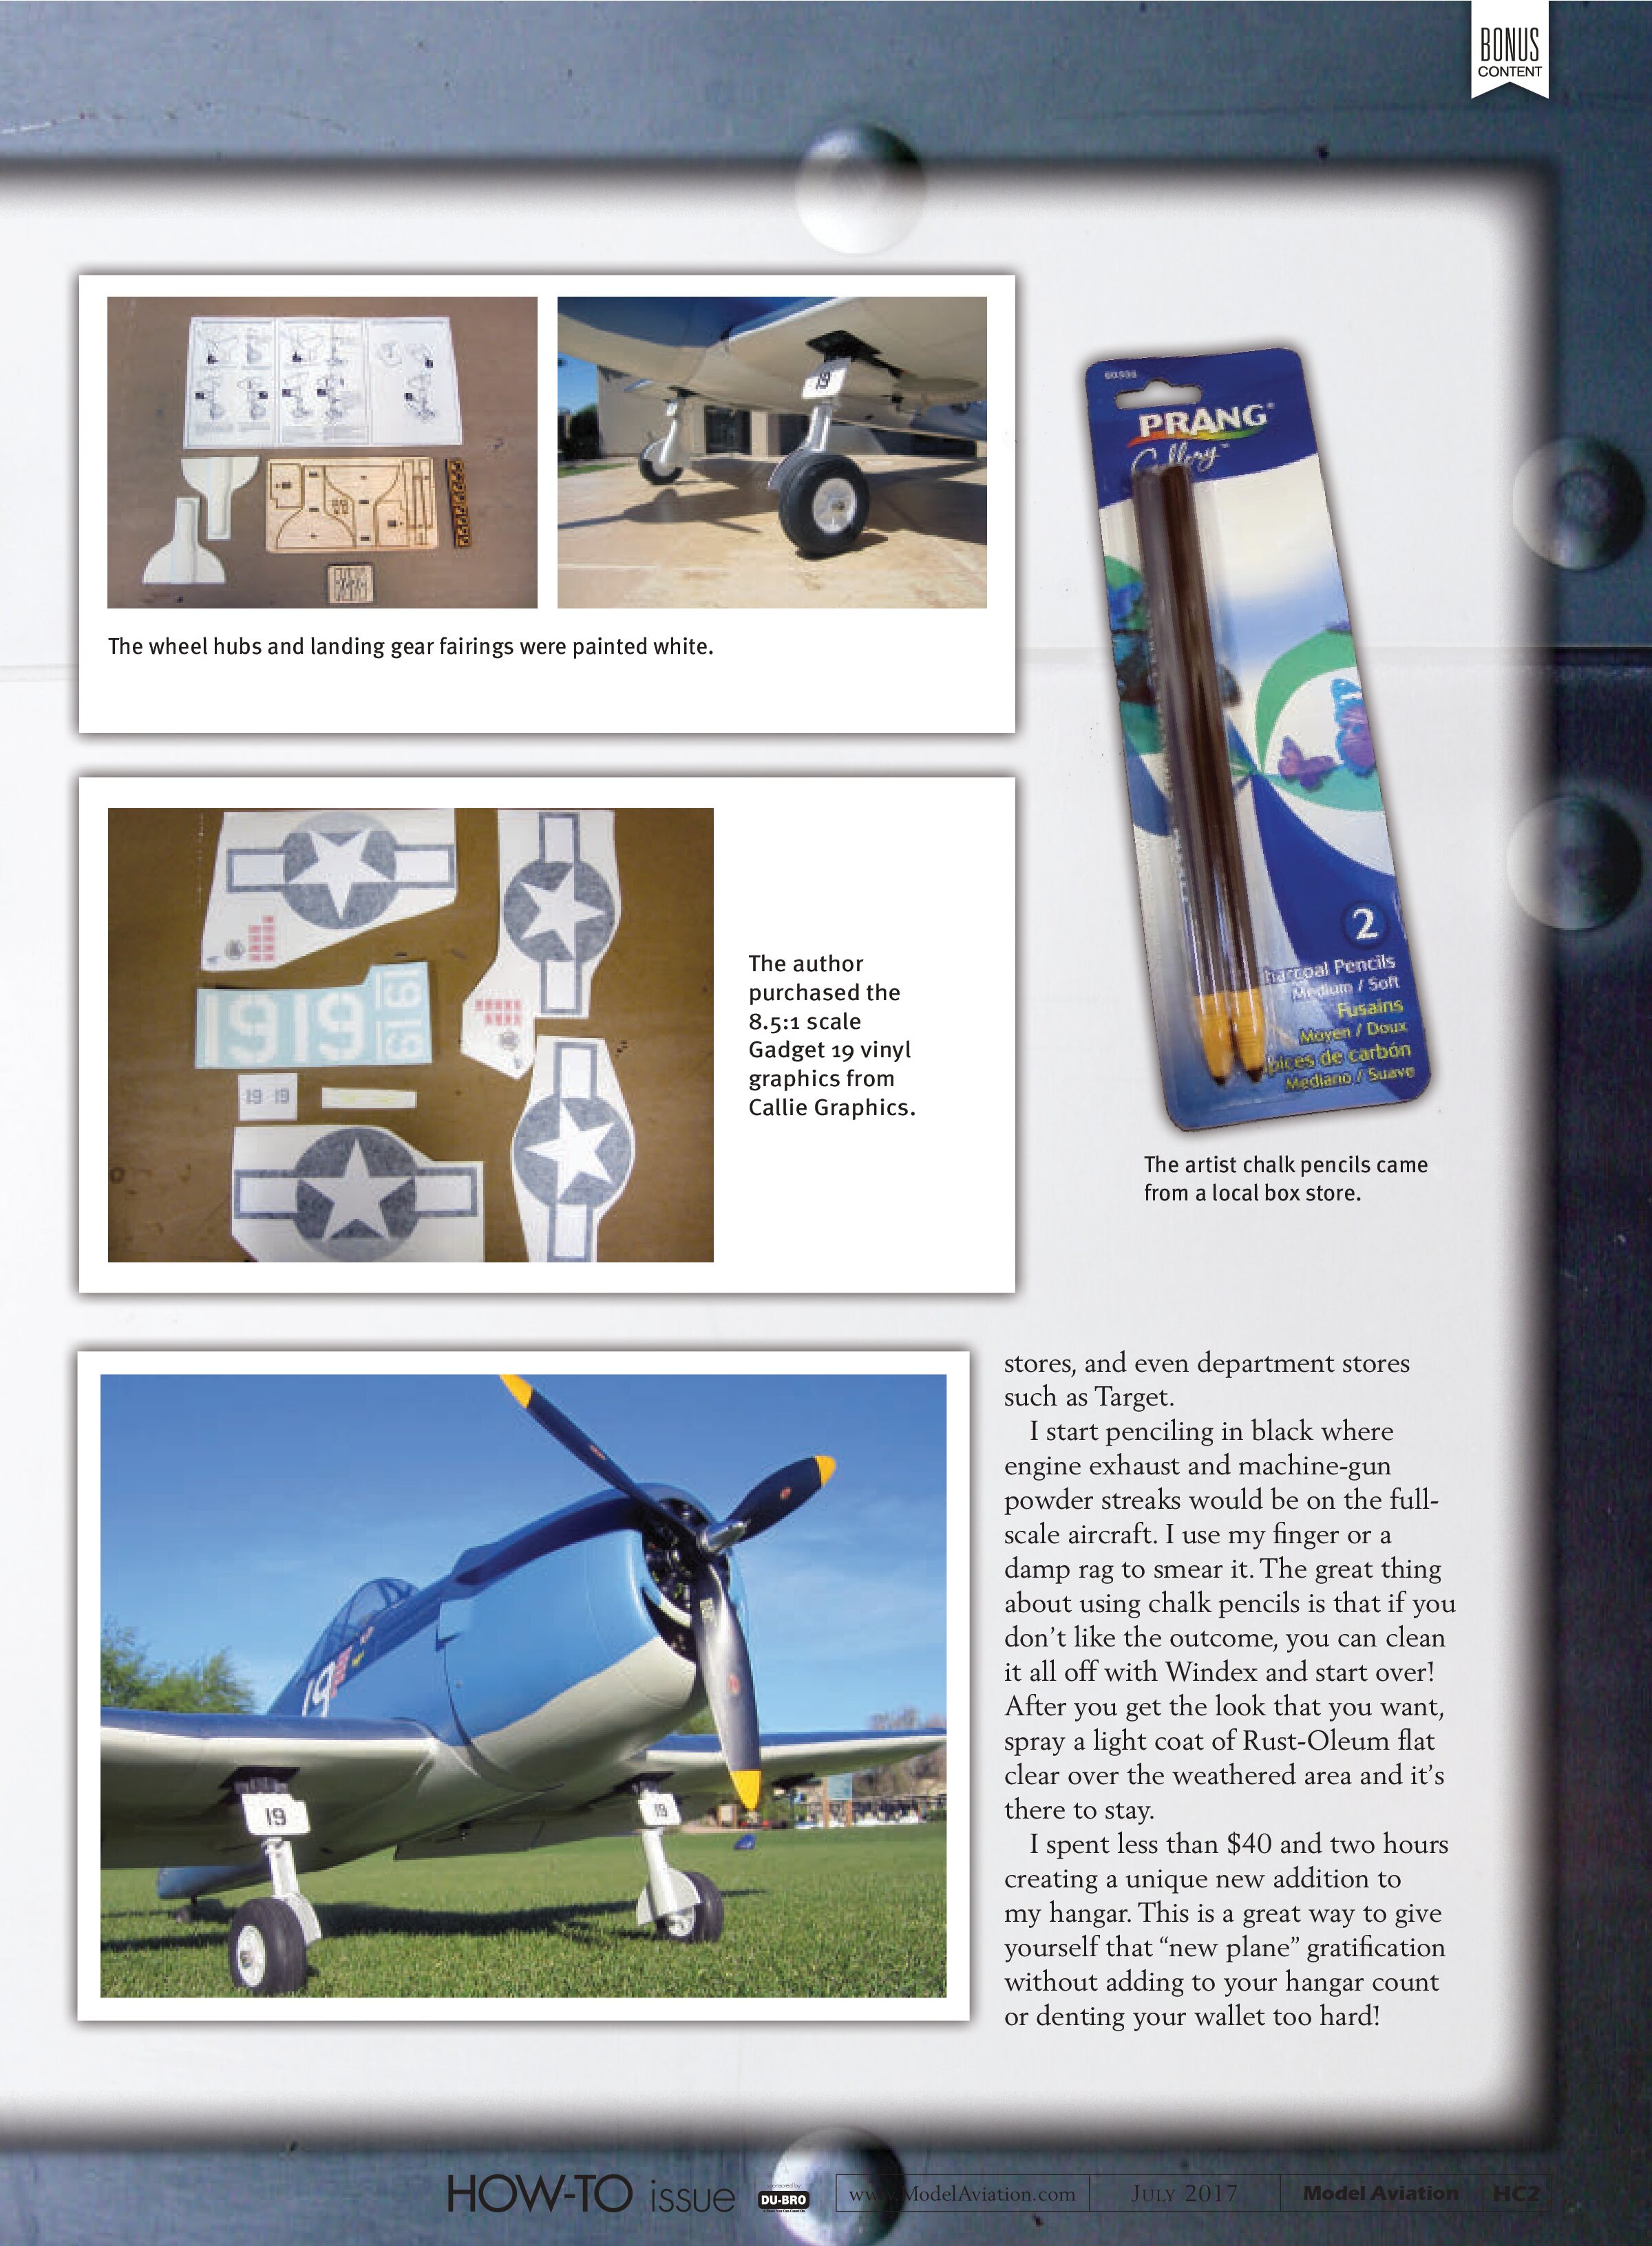
There are many ways to get a used warbird look. One of the easiest, least expensive, and trial-and-error-friendly techniques is to use artist chalk pencils. You can usually find these at craft stores, office supply


stores, and even department stores such as Target.
I start penciling in black where engine exhaust and machine-gun powder streaks would be on the full-scale aircraft. I use my finger or a damp rag to smear it. The great thing about using chalk pencils is that if you don’t like the outcome, you can clean it all off with Windex and start over! After you get the look that you want, spray a light coat of Rust-Oleum flat clear over the weathered area and it’s there to stay.
I spent less than $40 and two hours creating a unique new addition to my hangar. This is a great way to give yourself that “new plane” gratification without adding to your hangar count or denting your wallet too hard!