Building with Foam
by Keith Sparks

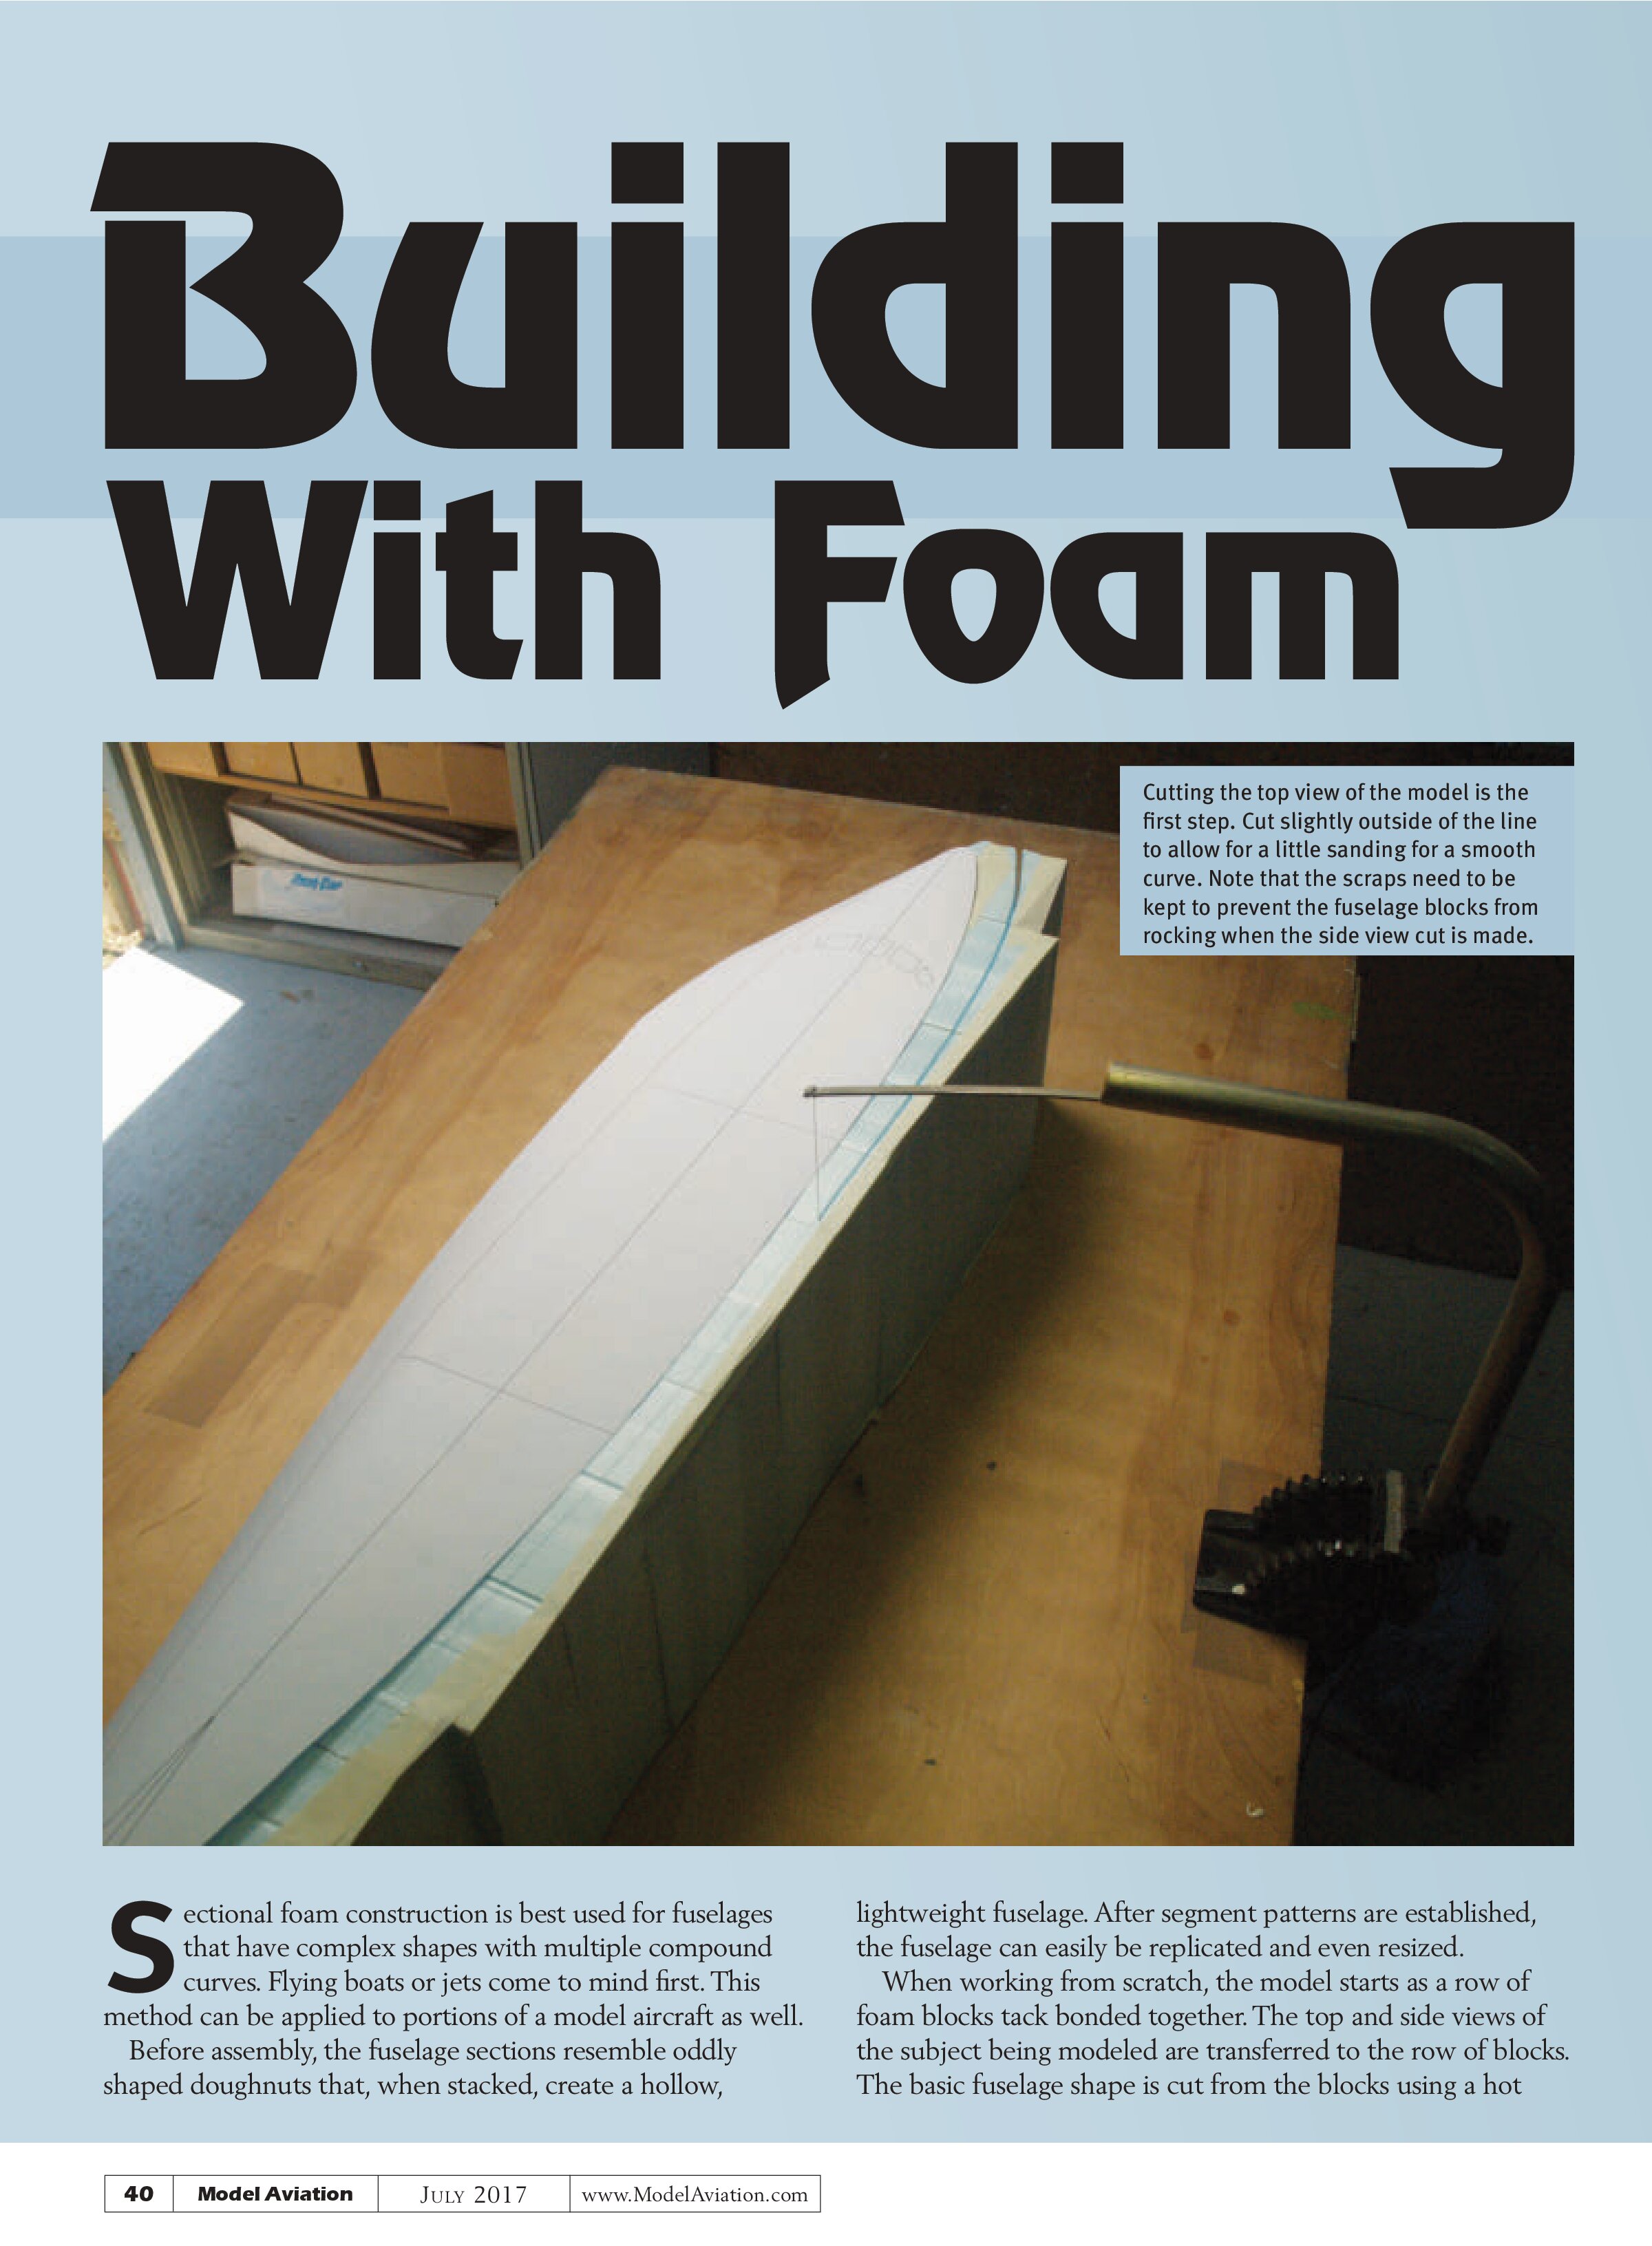
Sectional foam construction is best used for fuselages that have complex shapes with multiple compound curves. Flying boats or jets come to mind first. This method can be applied to portions of a model aircraft as well. Before assembly, the fuselage sections resemble oddly shaped doughnuts that, when stacked, create a hollow, lightweight fuselage. After segment patterns are established, the fuselage can easily be replicated and even resized. When working from scratch, the model starts as a row of foam blocks tack bonded together. The top and side views of the subject being modeled are transferred to the row of blocks. The basic fuselage shape is cut from the blocks using a hot
Sectional construction
by Keith Sparks | Photos by the author


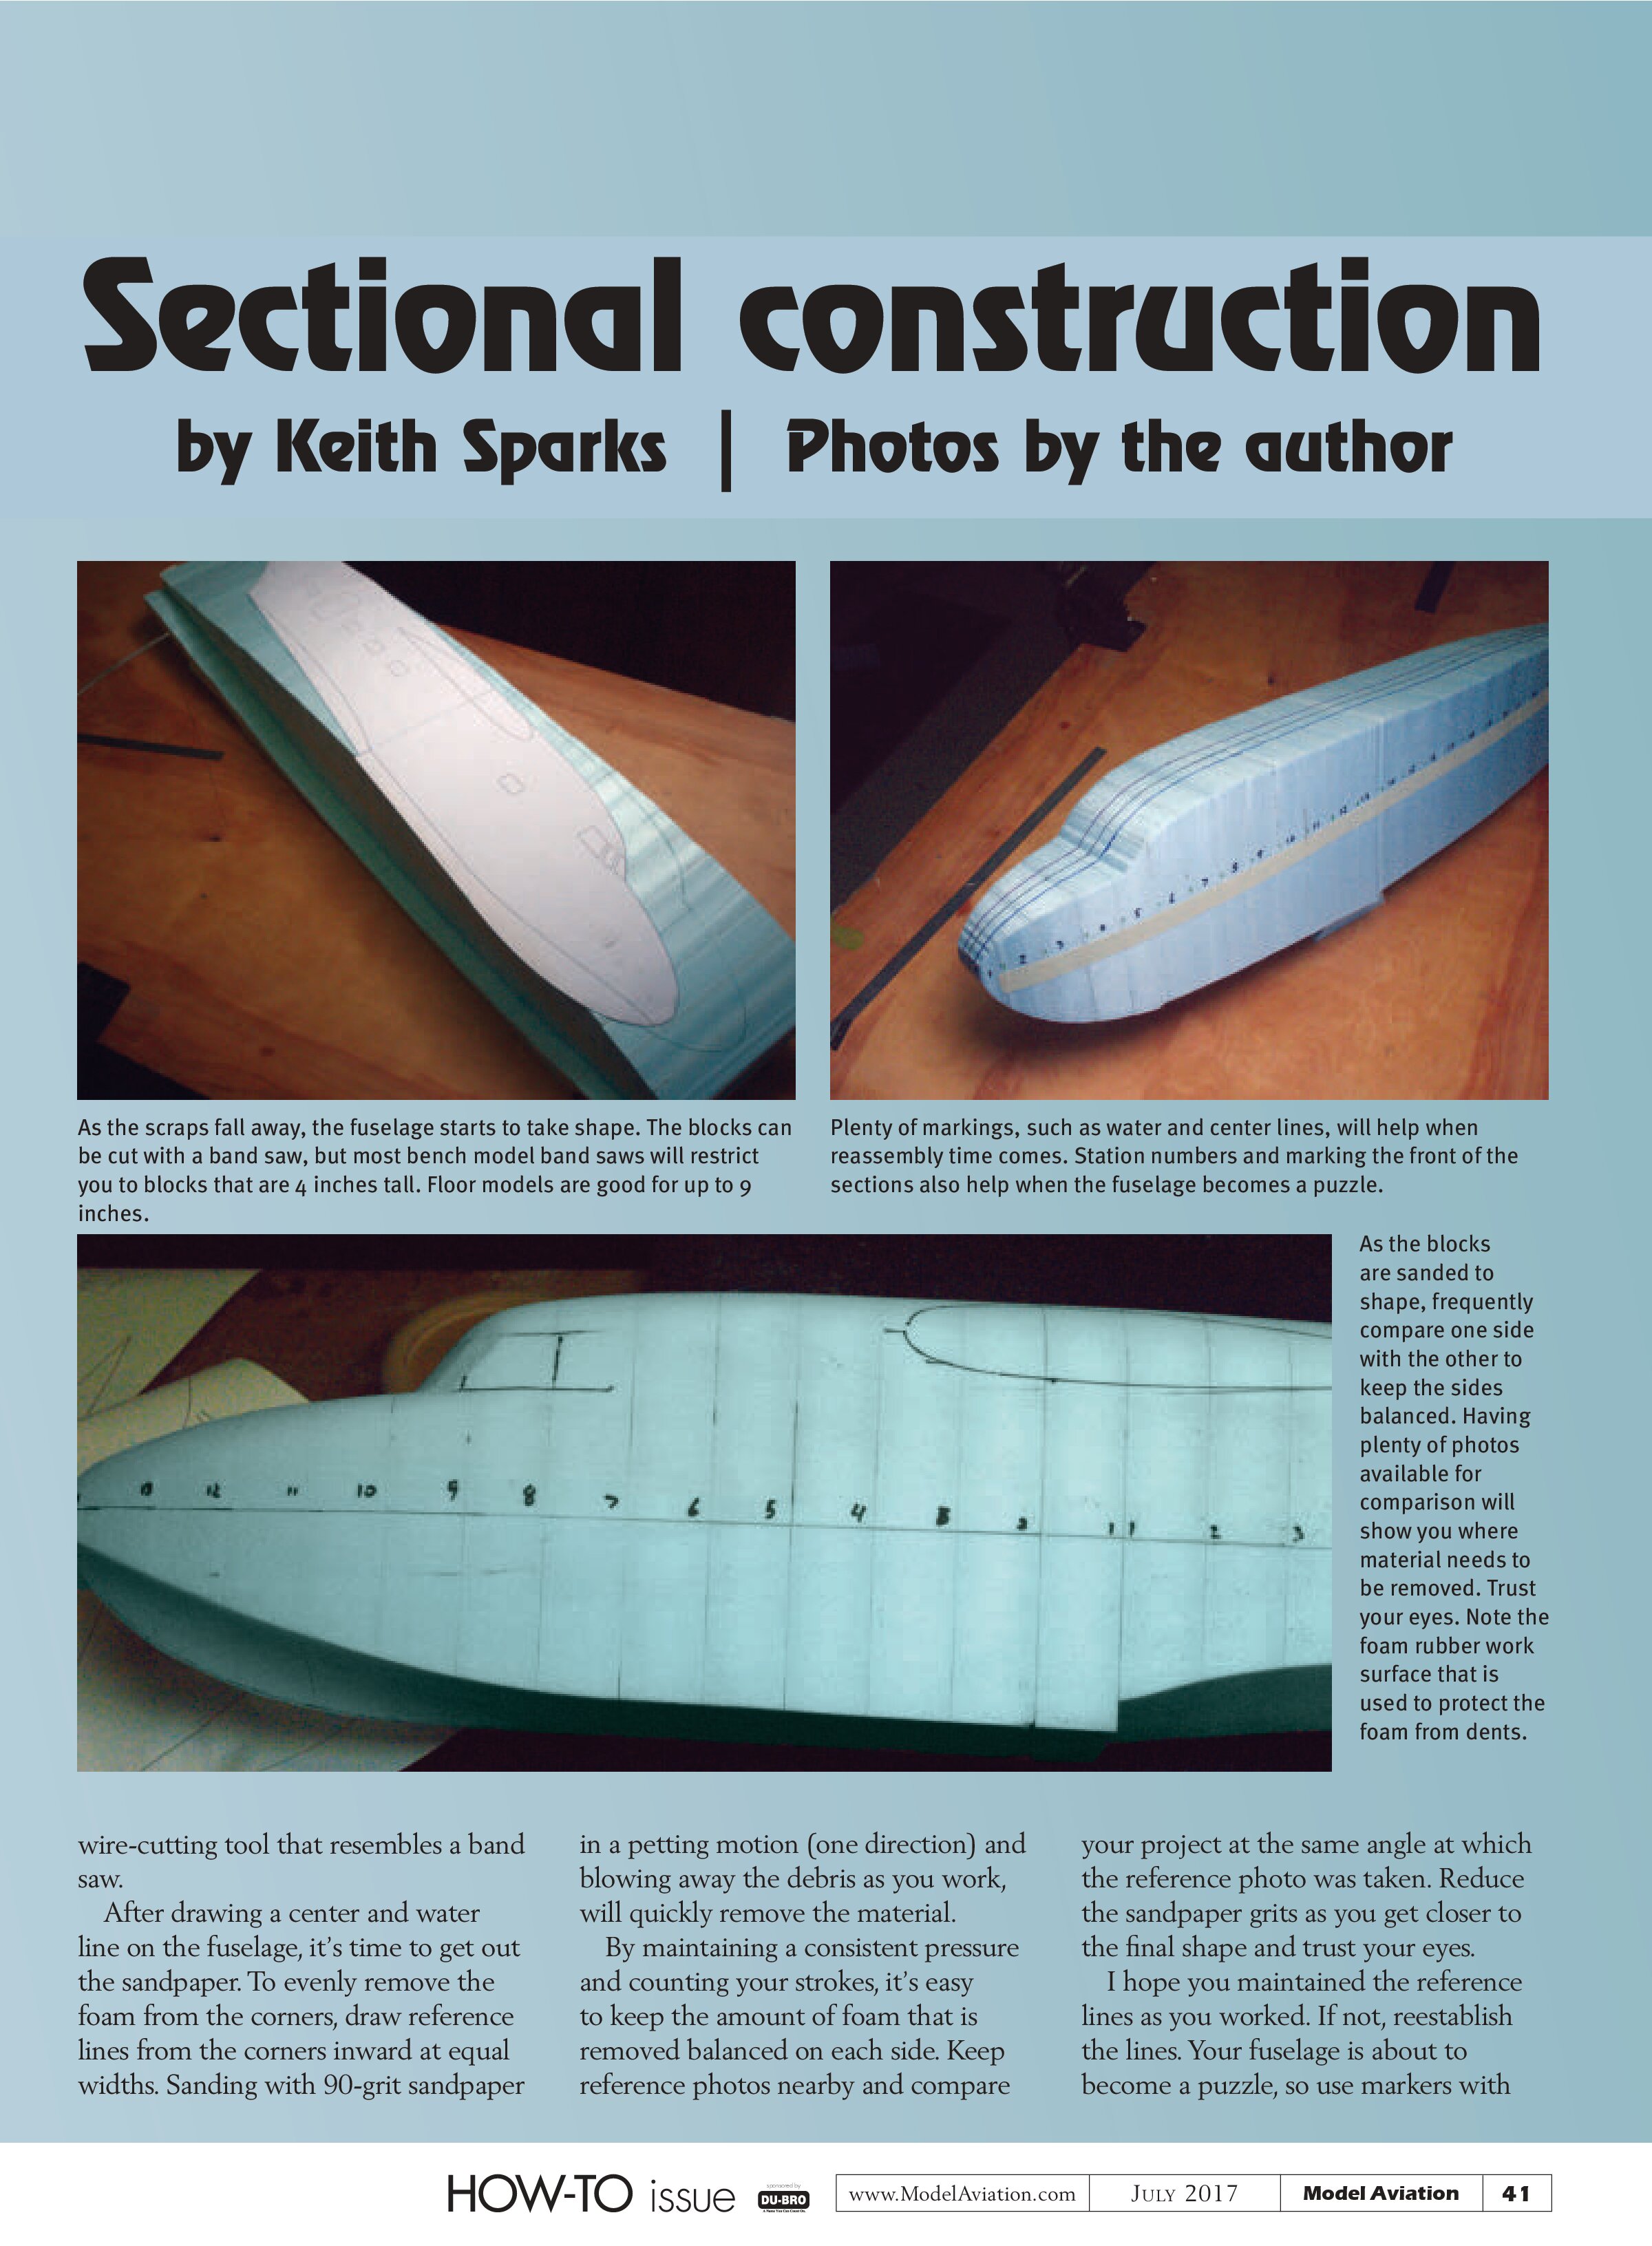
After the scraps fall away, the fuselage starts to take shape. The blocks can be cut with a band saw, but most bench model band saws will restrict you to blocks that are 4 inches tall. Floor models are good for up to 9 inches.
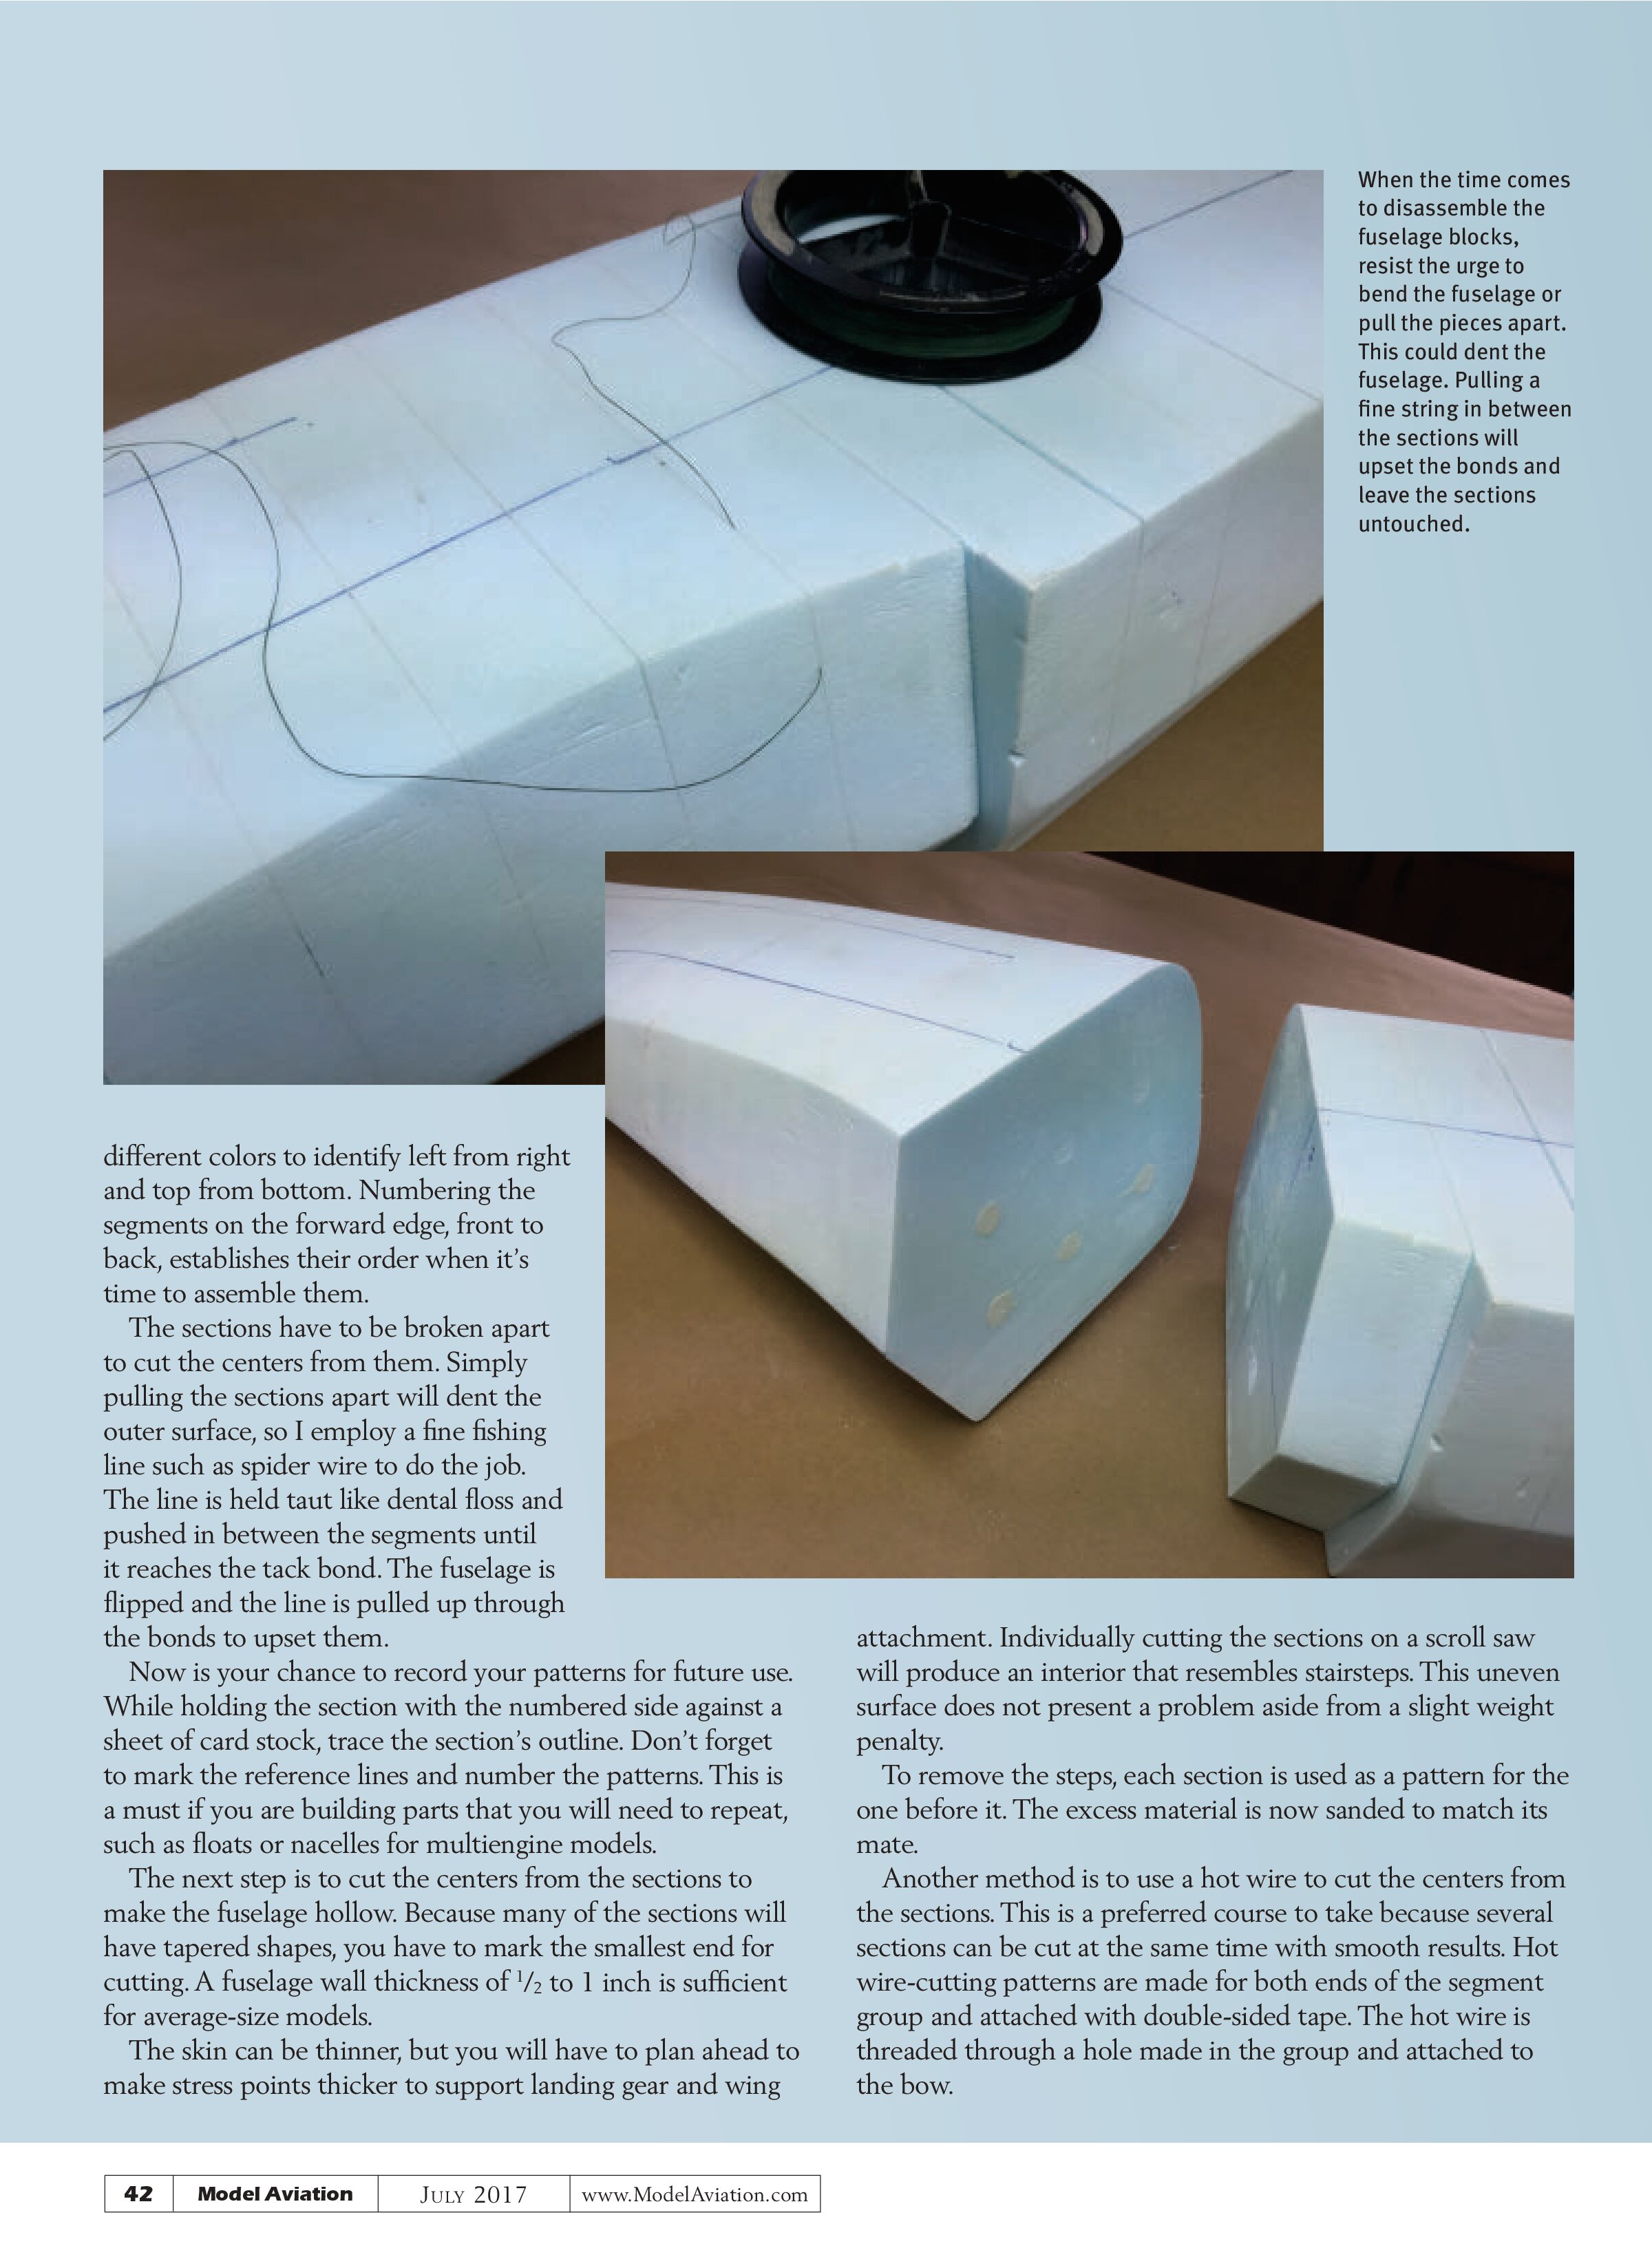
Plenty of markings, such as water and center lines, will help when reassembly time comes. Station numbers and marking the front of the sections also help when the fuselage becomes a puzzle.

wire-cutting tool that resembles a band saw. After drawing a center and water line on the fuselage, it’s time to get out the sandpaper. To evenly remove the foam from the corners, draw reference lines from the corners inward at equal widths. Sanding with 90-grit sandpaper in a petting motion (one direction) and blowing away the debris as you work, will quickly remove the material. By maintaining a consistent pressure and counting your strokes, it’s easy to keep the amount of foam that is removed balanced on each side. Keep reference photos nearby and compare your project at the same angle at which the reference photo was taken. Reduce the sandpaper grits as you get closer to the final shape and trust your eyes. I hope you maintained the reference lines as you worked. If not, reestablish the lines. Your fuselage is about to become a puzzle, so use markers with
different colors to identify left from right and top from bottom. Numbering the segments on the forward edge, front to back, establishes their order when it’s time to assemble them.
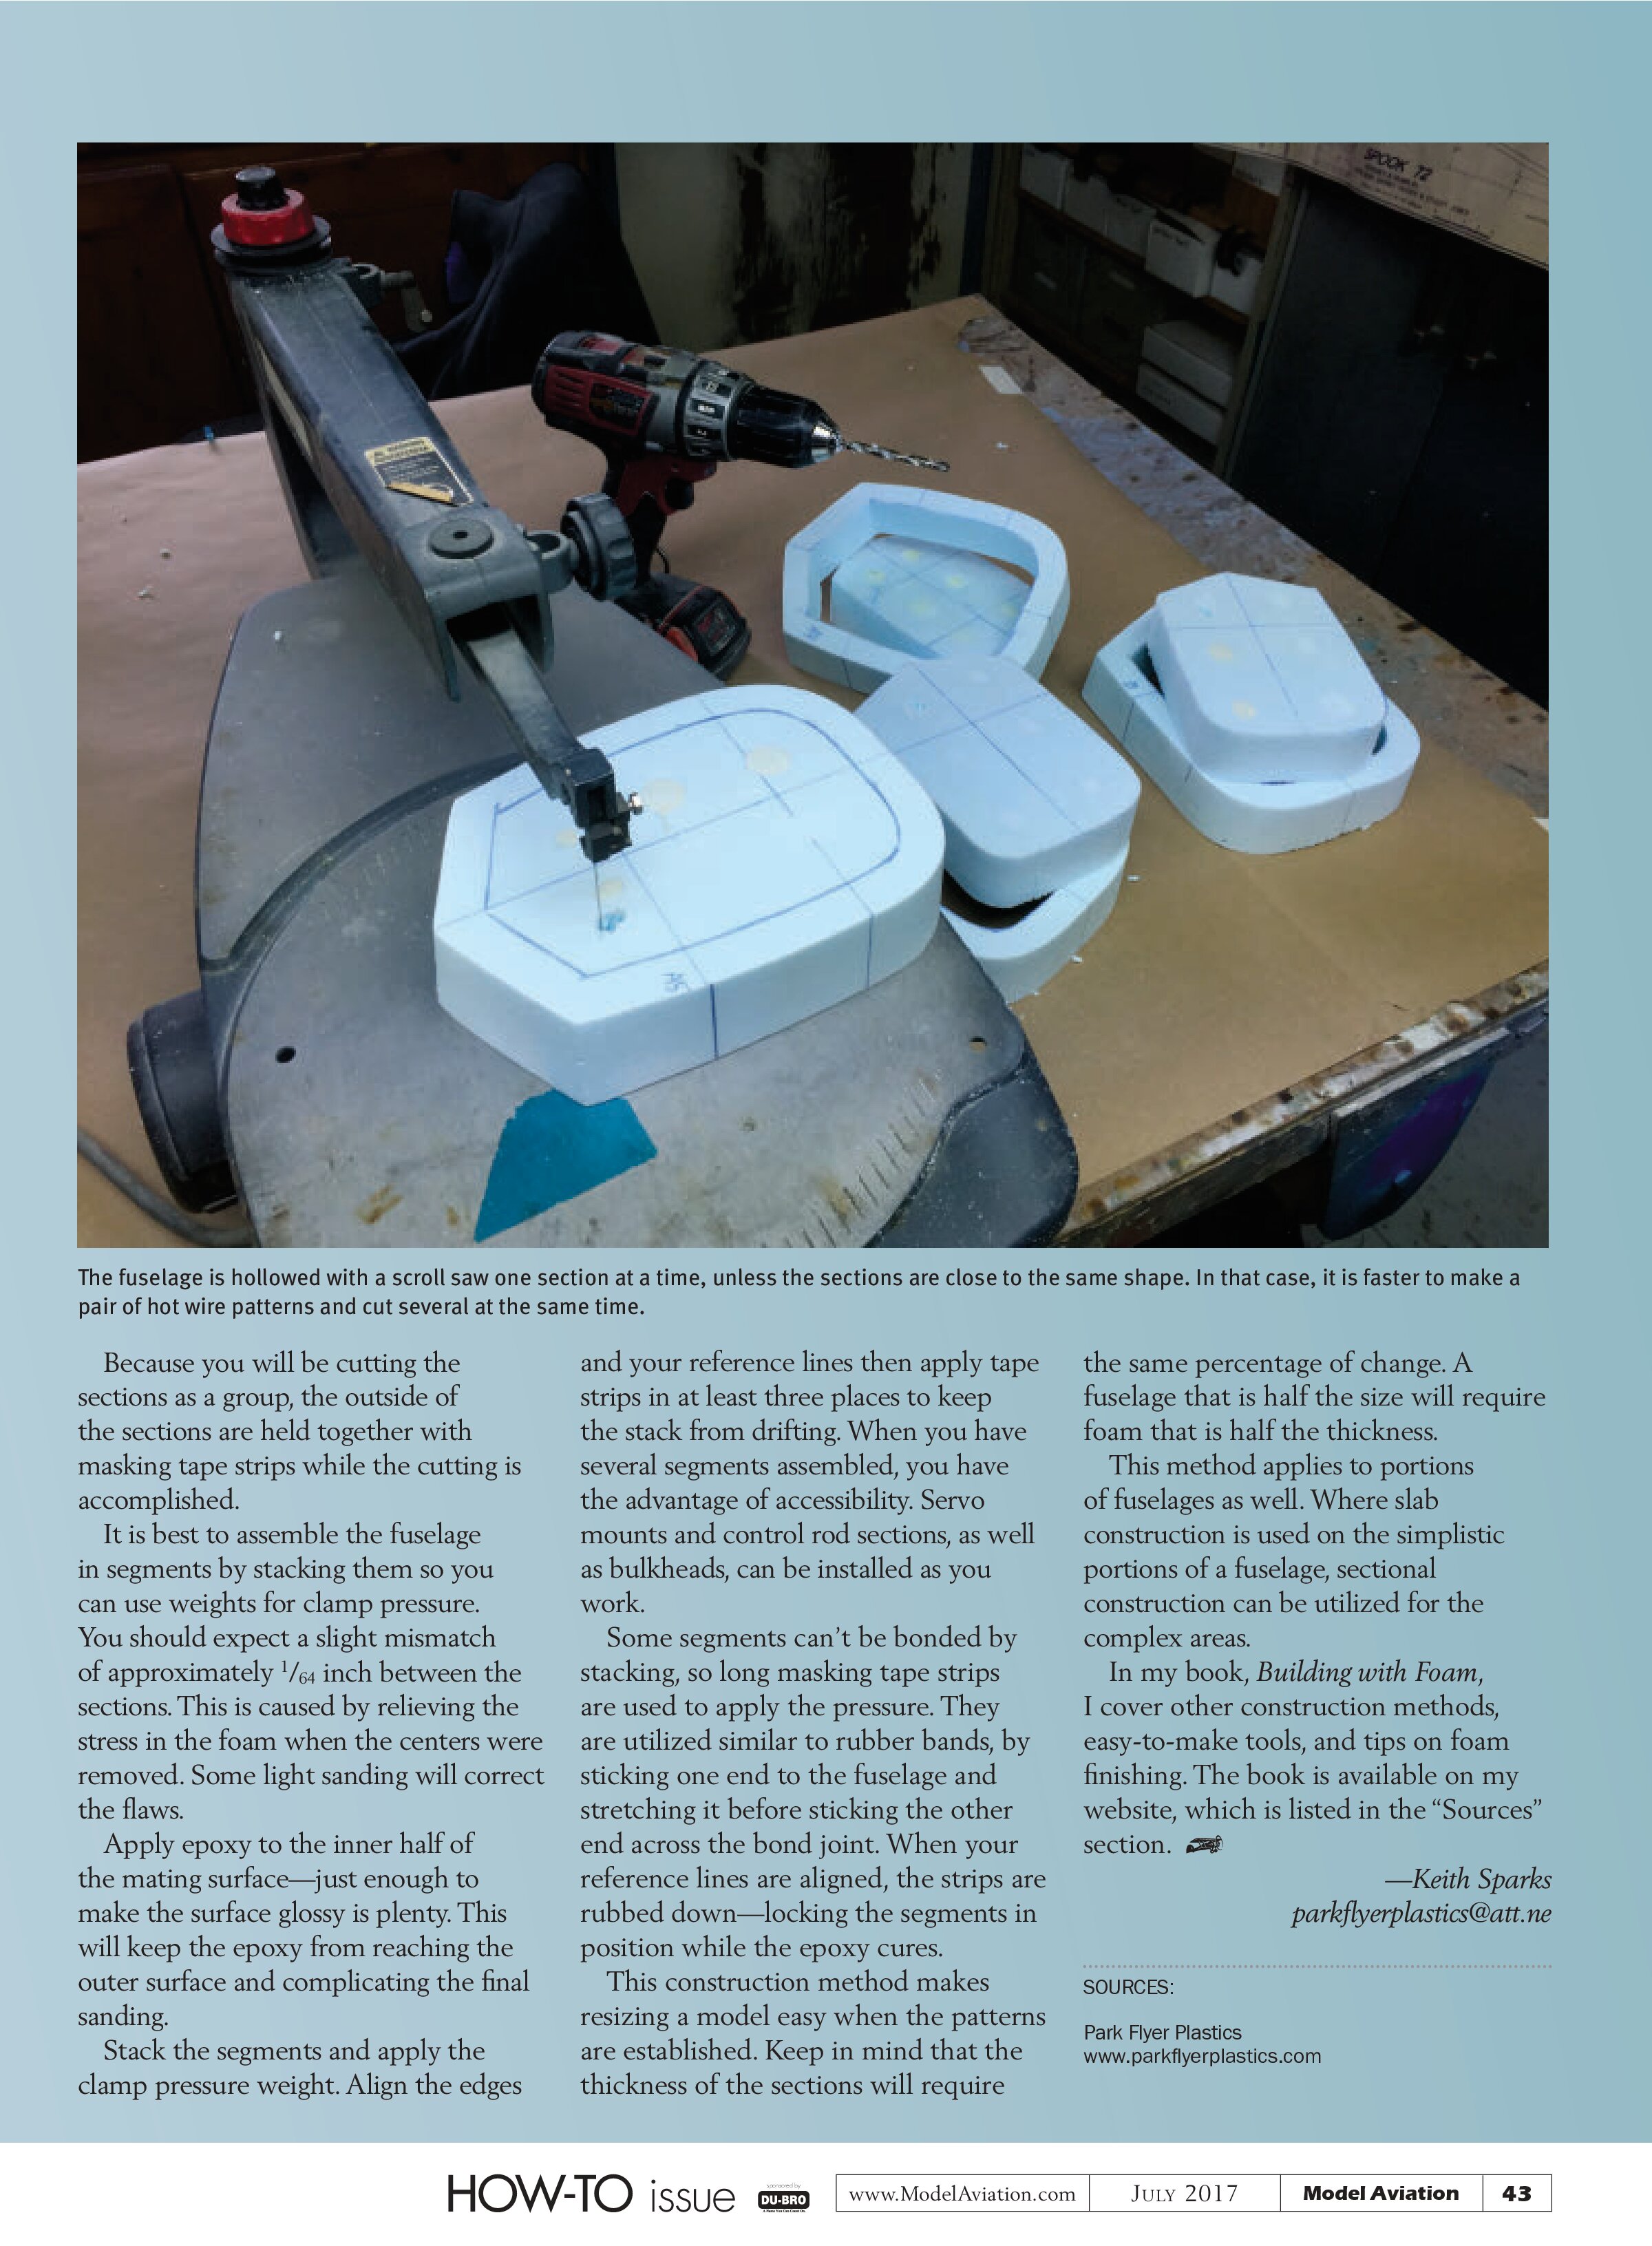
The sections have to be broken apart to cut the centers from them. Simply pulling the sections apart will dent the outer surface, so I employ a fine fishing line such as spider wire to do the job. The line is held taut like dental floss and pushed in between the segments until it reaches the tack bond. The fuselage is flipped and the line is pulled up through the bonds to upset them.
Now is your chance to record your patterns for future use. While holding the section with the numbered side against a sheet of card stock, trace the section’s outline. Don’t forget to mark the reference lines and number the patterns. This is a must if you are building parts that you will need to repeat, such as floats or nacelles for multiengine models.

The next step is to cut the centers from the sections to make the fuselage hollow. Because many of the sections will have tapered shapes, you have to mark the smallest end for cutting. A fuselage wall thickness of ½ to 1 inch is sufficient for average-size models.
The skin can be thinner, but you will have to plan ahead to make stress points thicker to support landing gear and wing attachment. Individually cutting the sections on a scroll saw will produce an interior that resembles stairsteps. This uneven surface does not present a problem aside from a slight weight penalty.
To remove the steps, each section is used as a pattern for the one before it. The excess material is now sanded to match its mate.
Another method is to use a hot wire to cut the centers from the sections. This is a preferred course to take because several sections can be cut at the same time with smooth results. Hot wire-cutting patterns are made for both ends of the segment group and attached with double-sided tape. The hot wire is threaded through a hole made in the group and attached to the bow.

When the time comes to disassemble the fuselage blocks, resist the urge to bend the fuselage or pull the pieces apart. This could dent the fuselage. Pulling a fine string in between the sections will upset the bonds and leave the sections untouched.
The fuselage is hollowed with a scroll saw one section at a time, unless the sections are close to the same shape. In that case, it is faster to make a pair of hot wire patterns and cut several at the same time.
Because you will be cutting the sections as a group, the outside of the sections are held together with masking tape strips while the cutting is accomplished.
It is best to assemble the fuselage in segments by stacking them so you can use weights for clamp pressure. You should expect a slight mismatch of approximately ¹/₆₄ inch between the sections. This is caused by relieving the stress in the foam when the centers were removed. Some light sanding will correct the flaws.
Apply epoxy to the inner half of the mating surface—just enough to make the surface glossy is plenty. This will keep the epoxy from reaching the outer surface and complicating the final sanding.
Stack the segments and apply the clamp pressure weight. Align the edges and your reference lines then apply tape strips in at least three places to keep the stack from drifting. When you have several segments assembled, you have the advantage of accessibility. Servo mounts and control rod sections, as well as bulkheads, can be installed as you work.
Some segments can’t be bonded by stacking, so long masking tape strips are used to apply the pressure. They are utilized similar to rubber bands, by sticking one end to the fuselage and stretching it before sticking the other end across the bond joint. When your reference lines are aligned, the strips are rubbed down—locking the segments in position while the epoxy cures.
This construction method makes resizing a model easy when the patterns are established. Keep in mind that the thickness of the sections will require the same percentage of change. A fuselage that is half the size will require foam that is half the thickness.
This method applies to portions of fuselages as well. Where slab construction is used on the simplistic portions of a fuselage, sectional construction can be utilized for the complex areas.
In my book, Building with Foam, I cover other construction methods, easy-to-make tools, and tips on foam finishing. The book is available on my website, which is listed in the “Sources” section.
—Keith Sparks
parkflyerplastics@att.net
Sources:
Park Flyer Plastics
www.parkflyerplastics.com