Practice makes perfect
by Mark Rudner
rudner@mit.edu
It’s a theme that regularly comes up, but because it’s still the off-season at the time of this writing, I would like to return to the subject of practice flying. It’s no secret that I’m a firm believer in the power of practice and that there is no substitute for quality “stick time.”
Practice flying is not always easy and, especially in the winter, it can take some effort to get going. In this month’s column, I’ll discuss a few tricks that can help facilitate practice.
One of the easiest traps to fall into in the winter is the “nobody else is going” excuse. If anything, this should give you more motivation to go—this is your chance to get a jump on the competition. However, there is one potential sticking point: you need someone to launch your airplane.
Not anymore! Although for safety purposes it isn’t recommended that you fly alone, where there’s a will, there’s a way. Control Line (CL) Combat pilots are a creative bunch. Throughout the years, I have seen a variety of solutions to this particular problem.
I had never used a self-launcher until approximately six years ago, when I borrowed a launcher from Alex Prokofiev in order to increase the amount of practice flying that I could do before the 2011 Team Trials. His foldable launcher was easily portable, quite stable, and reliable.
This past year, the well-worn launcher at my club in Denmark started to show signs of its age. I decided to build a new one for the club, with Alex’s launcher in my mind as a starting point.
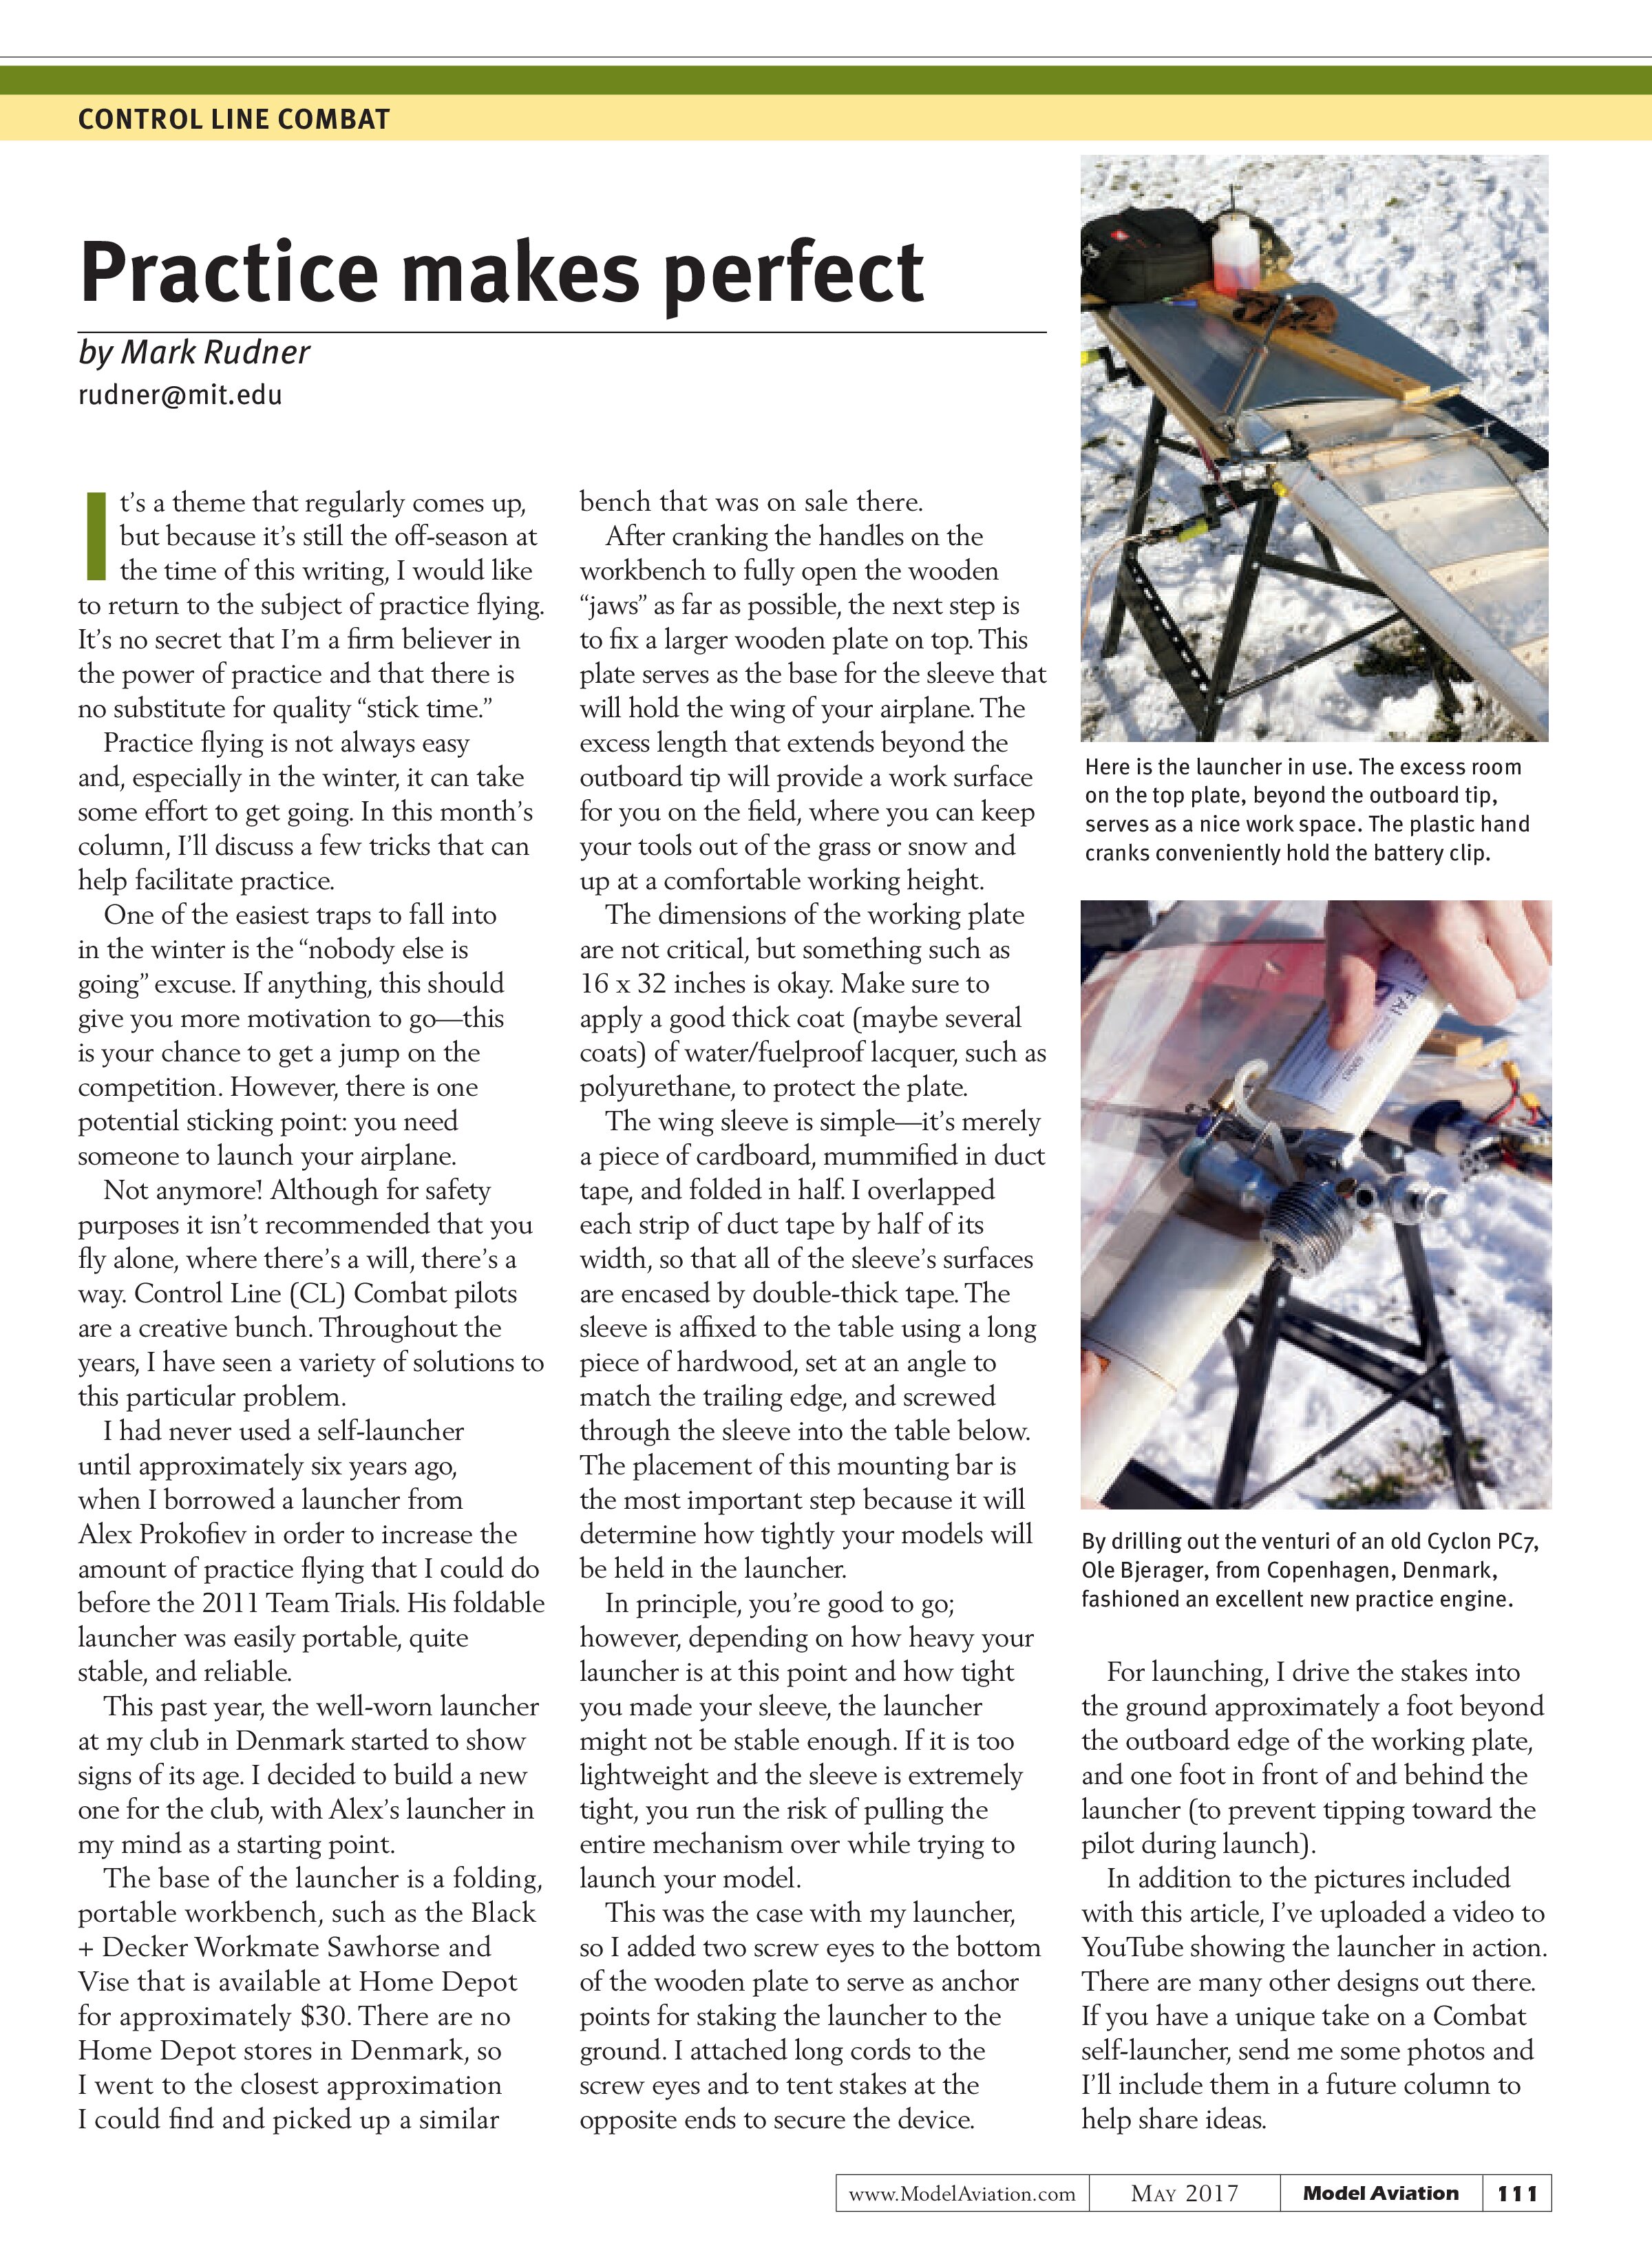
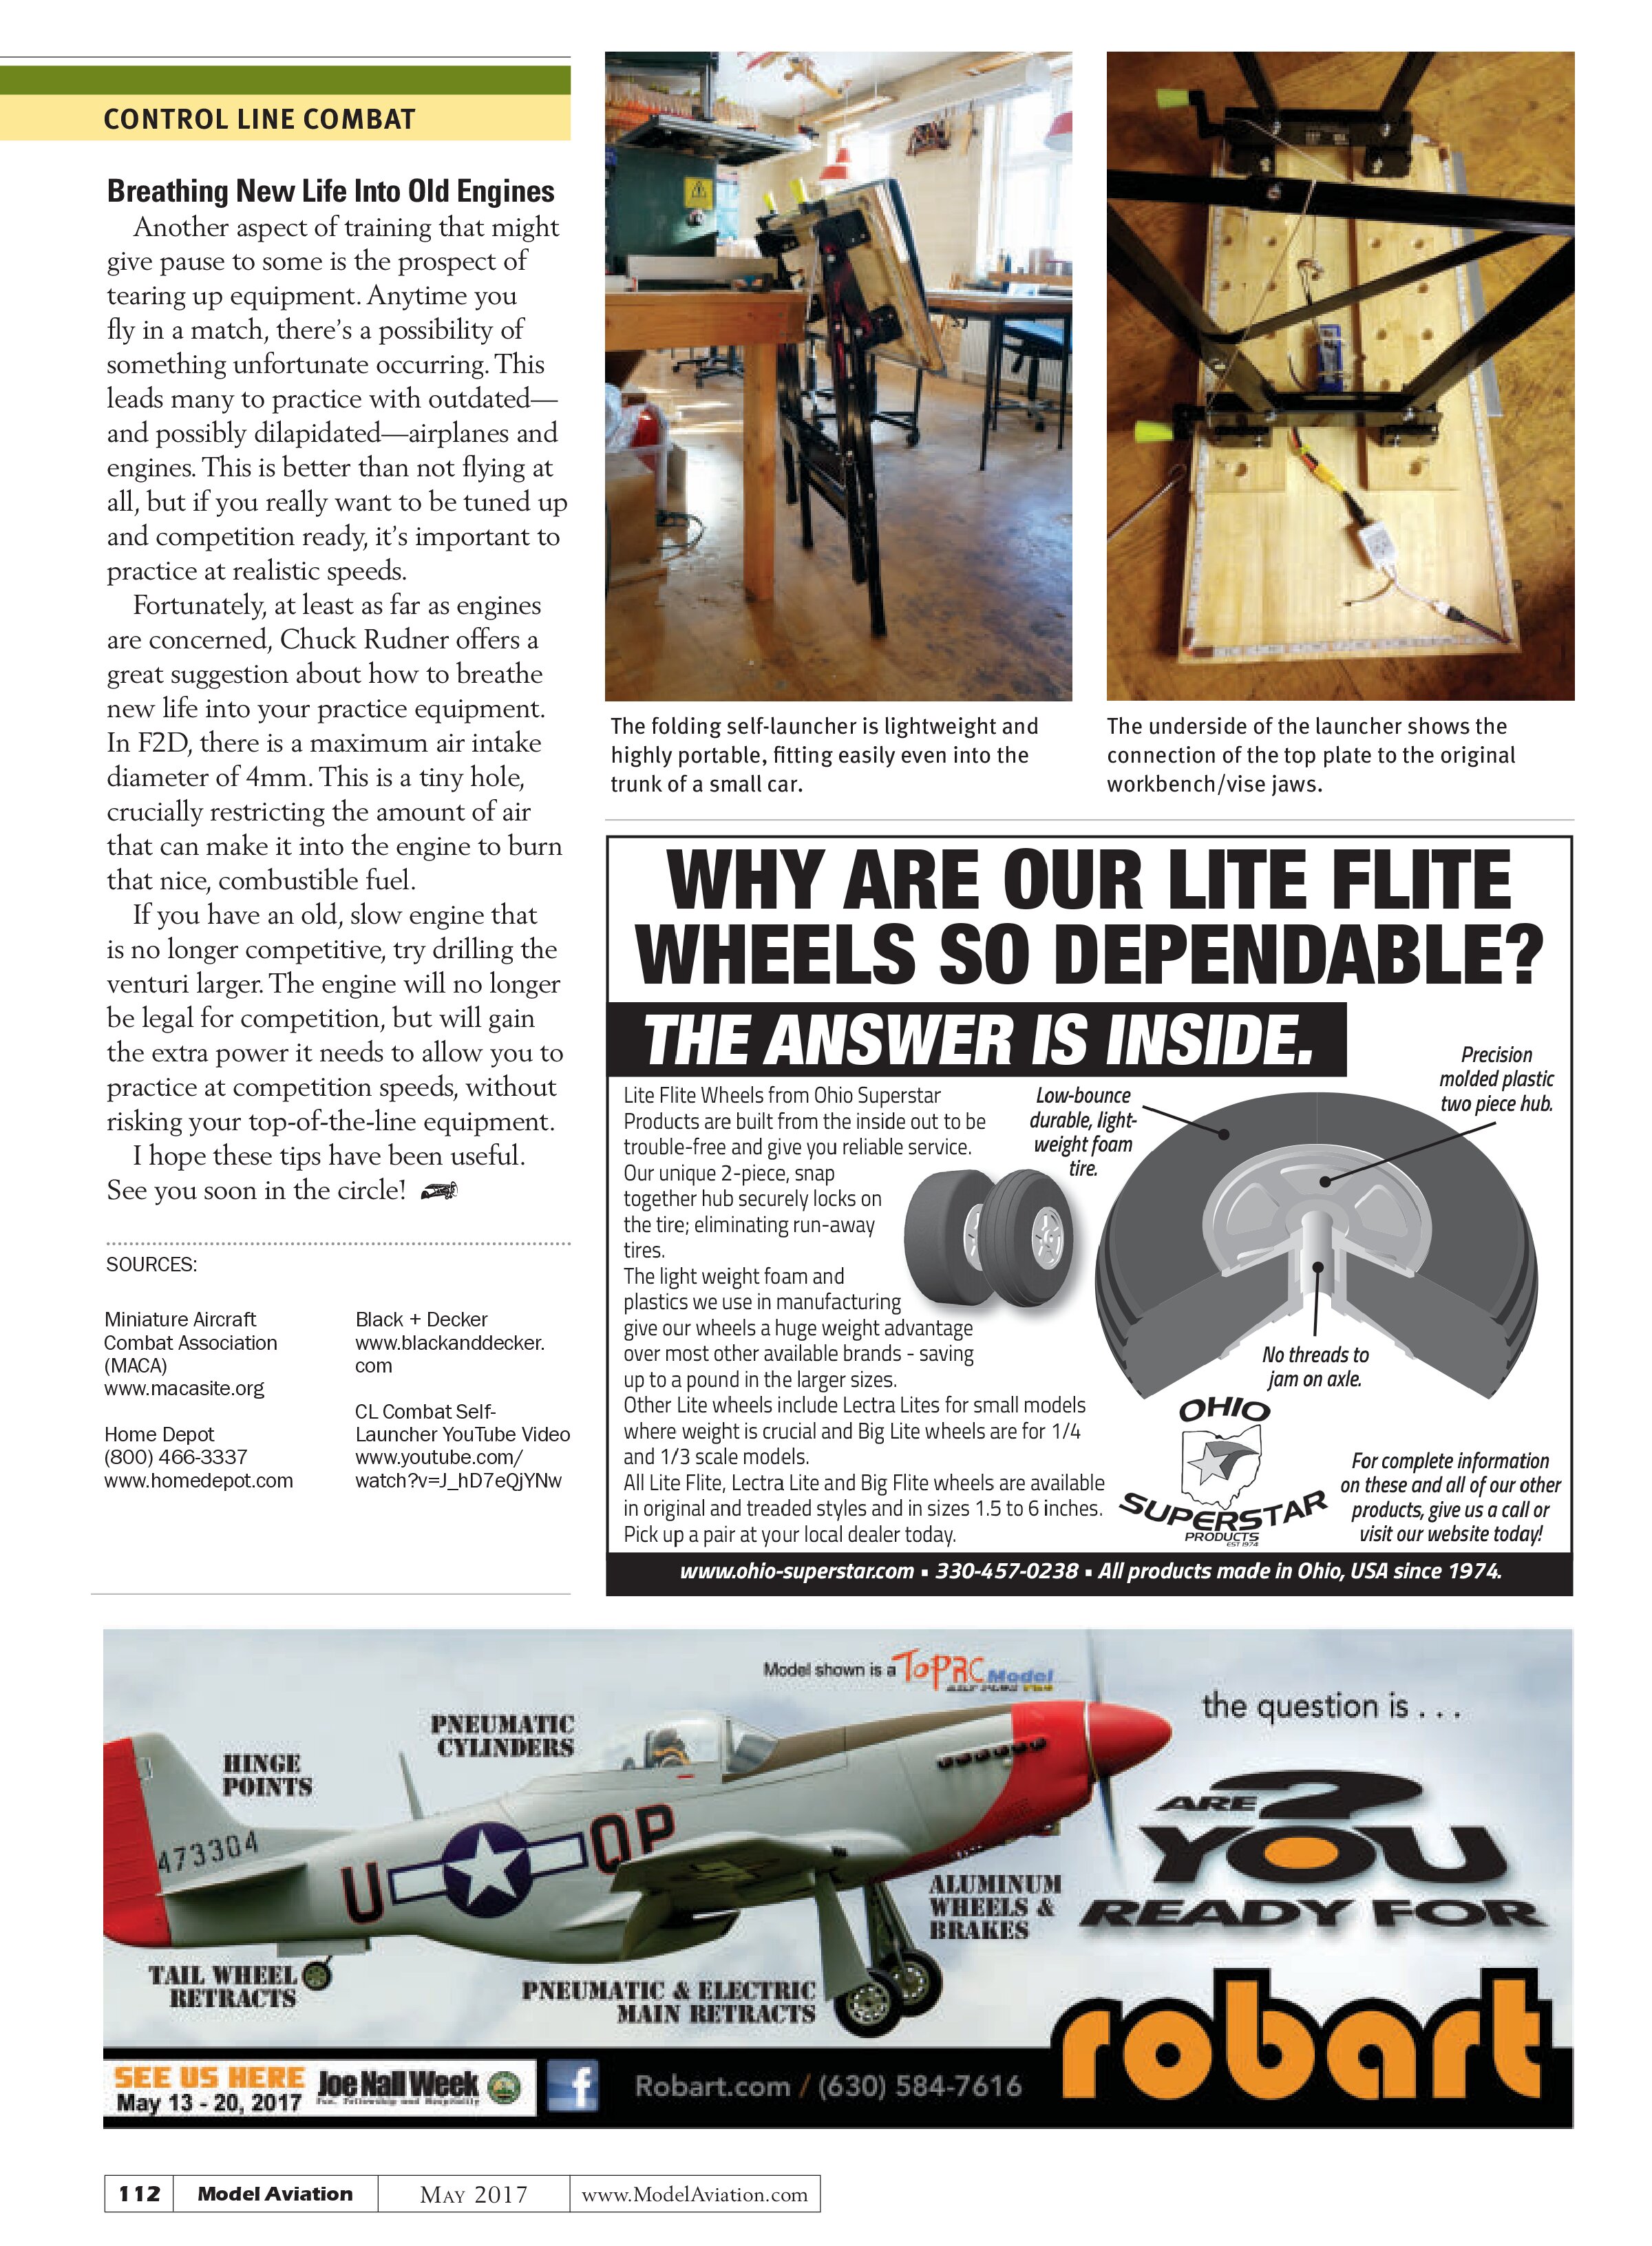
The base of the launcher is a folding, portable workbench, such as the Black + Decker Workmate Sawhorse and Vise that is available at Home Depot for approximately $30. There are no Home Depot stores in Denmark, so I went to the closest approximation I could find and picked up a similar bench that was on sale there.
After cranking the handles on the workbench to fully open the wooden “jaws” as far as possible, the next step is to fix a larger wooden plate on top. This plate serves as the base for the sleeve that will hold the wing of your airplane. The excess length that extends beyond the outboard tip will provide a work surface for you on the field, where you can keep your tools out of the grass or snow and up at a comfortable working height.
The dimensions of the working plate are not critical, but something such as 16 x 32 inches is okay. Make sure to apply a good thick coat (maybe several coats) of water/fuelproof lacquer, such as polyurethane, to protect the plate.
The wing sleeve is simple—it’s merely a piece of cardboard, mummified in duct tape, and folded in half. I overlapped each strip of duct tape by half of its width, so that all of the sleeve’s surfaces are encased by double-thick tape. The sleeve is affixed to the table using a long piece of hardwood, set at an angle to match the trailing edge, and screwed through the sleeve into the table below. The placement of this mounting bar is the most important step because it will determine how tightly your models will be held in the launcher.
In principle, you’re good to go; however, depending on how heavy your launcher is at this point and how tight you made your sleeve, the launcher might not be stable enough. If it is too lightweight and the sleeve is extremely tight, you run the risk of pulling the entire mechanism over while trying to launch your model.
This was the case with my launcher, so I added two screw eyes to the bottom of the wooden plate to serve as anchor points for staking the launcher to the ground. I attached long cords to the screw eyes and to tent stakes at the opposite ends to secure the device.

For launching, I drive the stakes into the ground approximately a foot beyond the outboard edge of the working plate, and one foot in front of and behind the launcher (to prevent tipping toward the pilot during launch).

In addition to the pictures included with this article, I’ve uploaded a video to YouTube showing the launcher in action. There are many other designs out there. If you have a unique take on a Combat self-launcher, send me some photos and I’ll include them in a future column to help share ideas.
Breathing New Life Into Old Engines
Another aspect of training that might give pause to some is the prospect of tearing up equipment. Anytime you fly in a match, there’s a possibility of something unfortunate occurring. This leads many to practice with outdated—and possibly dilapidated—airplanes and engines. This is better than not flying at all, but if you really want to be tuned up and competition ready, it’s important to practice at realistic speeds.
Fortunately, at least as far as engines are concerned, Chuck Rudner offers a great suggestion about how to breathe new life into your practice equipment. In F2D, there is a maximum air intake diameter of 4mm. This is a tiny hole, crucially restricting the amount of air that can make it into the engine to burn that nice, combustible fuel.
If you have an old, slow engine that is no longer competitive, try drilling the venturi larger. The engine will no longer be legal for competition, but will gain the extra power it needs to allow you to practice at competition speeds, without risking your top-of-the-line equipment.
I hope these tips have been useful. See you soon in the circle!
SOURCES:
Miniature Aircraft Combat Association (MACA)
www.macasite.org
Home Depot
(800) 466-3337
www.homedepot.com
Black + Decker
www.blackanddecker.com
CL Combat Self-Launcher YouTube Video
www.youtube.com/watch?v=J_hD7eQjYNw