Shaping LEs
by Louis Joyner
joynerduration@gmail.com
One of my favorite aeromodeling books is Edwin T. Hamilton’s Complete Model Aircraft Manual, which was first published in 1933. My copy is the updated, 569-page version. In it, the author states: “Whenever ribs are used requiring their leading edge spars to complete their form, the builder must take every precaution to see that his spars are so shaped as to continue the lines of the ribs in one perfect outline.”
Edwin details making a scraper out of brass to smooth the roughed-out balsa piece to the exact shape. He cautioned, “Do not be disappointed if you spoil a few spars in your first attempts. Shaping such pieces requires skill, which can only be gained through experience.”
Although I have had the book for more than 50 years, I must confess that I’ve never cut a template out of brass or scraped a leading edge (LE) to exact shape. The LE was usually carved and sanded by eye, hoping that the finished piece would be close enough.
I have come to realize that close enough isn’t good enough. I’ve tried several ways to improve accuracy. One that worked fairly well was to temporarily attach templates to the ends of each wing panel and use a long sanding block to shape the LE. Getting the templates precisely positioned was difficult and the process was slow.
I came across a brief mention of another way to machine balsa LEs with accuracy and repeatability. Dave Sechrist’s two-part article in the National Free Flight Society’s (NFFS) Free Flight Quarterly (Numbers 38 and 39, January 2011 and April 2011) details the construction of his Marie Super-Skinny-E P30. The article had many good ideas describing ways to build models more quickly and accurately.
One in particular read: “The leading edges are 0.125-inch balsa, but fashioned in a novel way. They are made by feeding the balsa stock through a stone-cutter in a Dremel router table. The stone is carefully contoured with a diamond tool.”
That was it—no photo and no detailed explanation, but it was the spark I needed.
I had a Dremel tool, several of the stones (Dremel ⅝ x ⅝-inch aluminum oxide grinding stone #8193), but no Dremel router table. I did, however, have many scrap pieces of ¾-inch plywood

and 1 x 2-inch and 1 x 3-inch pieces of pine.
Making a quick and crude router table was easy. The base was a 5 x 18-inch piece of ¾-inch plywood. A 4 x 18-inch piece of ¾-inch plywood was attached to the base at one end with a hinge to allow adjustment by shimming the piece up. Two ⅛-inch basswood guide strips were spaced ³⁄₁₆ inch apart and glued to the adjustable platform.
Because this was a test setup to make a batch of F1B stabilizer LEs, nonadjustable guides were used. Adjustable guides will be added to my next version. To allow clearance for the Dremel chuck, the center inch of the guides and adjustable table was sanded down approximately ⅛ inch into the plywood.
Mounting the Dremel tool was more involved than I had anticipated. Evidently this is a common problem. A quick internet search showed a variety of approaches, divided into two main categories. One was to clamp down the entire tool using machined metal hose clamps or plastic brackets around the body of the tool. The other was to simply unscrew the plastic piece behind

the chuck, exposing the spindle nose thread.
One or two online sources offer a machined mount threaded to fit the Dremel ³⁄₄-12 threads. Several Dremel accessories attach to the tool using the spindle threads. One I had on hand was the #565 multipurpose cutting kit.
It only took a few minutes to cut away most of the plastic skirt, leaving the threaded portion of the accessory. This was fitted into a 1-inch hole that was drilled in a 1 x 3-inch pine support block. The center of the hole was 1.25 inches up from the bottom. (The pine block only needs to be approximately 4 inches long. On my prototype, it is much longer and there is a second piece of 1 x 3-inch pine glued on the back. Some of this had to be cut away to allow the Dremel tool to screw in far enough.) I chucked a long piece of ¹⁄₈-inch rod in the tool to check the alignment with the adjustable table then glued the support block to the base.
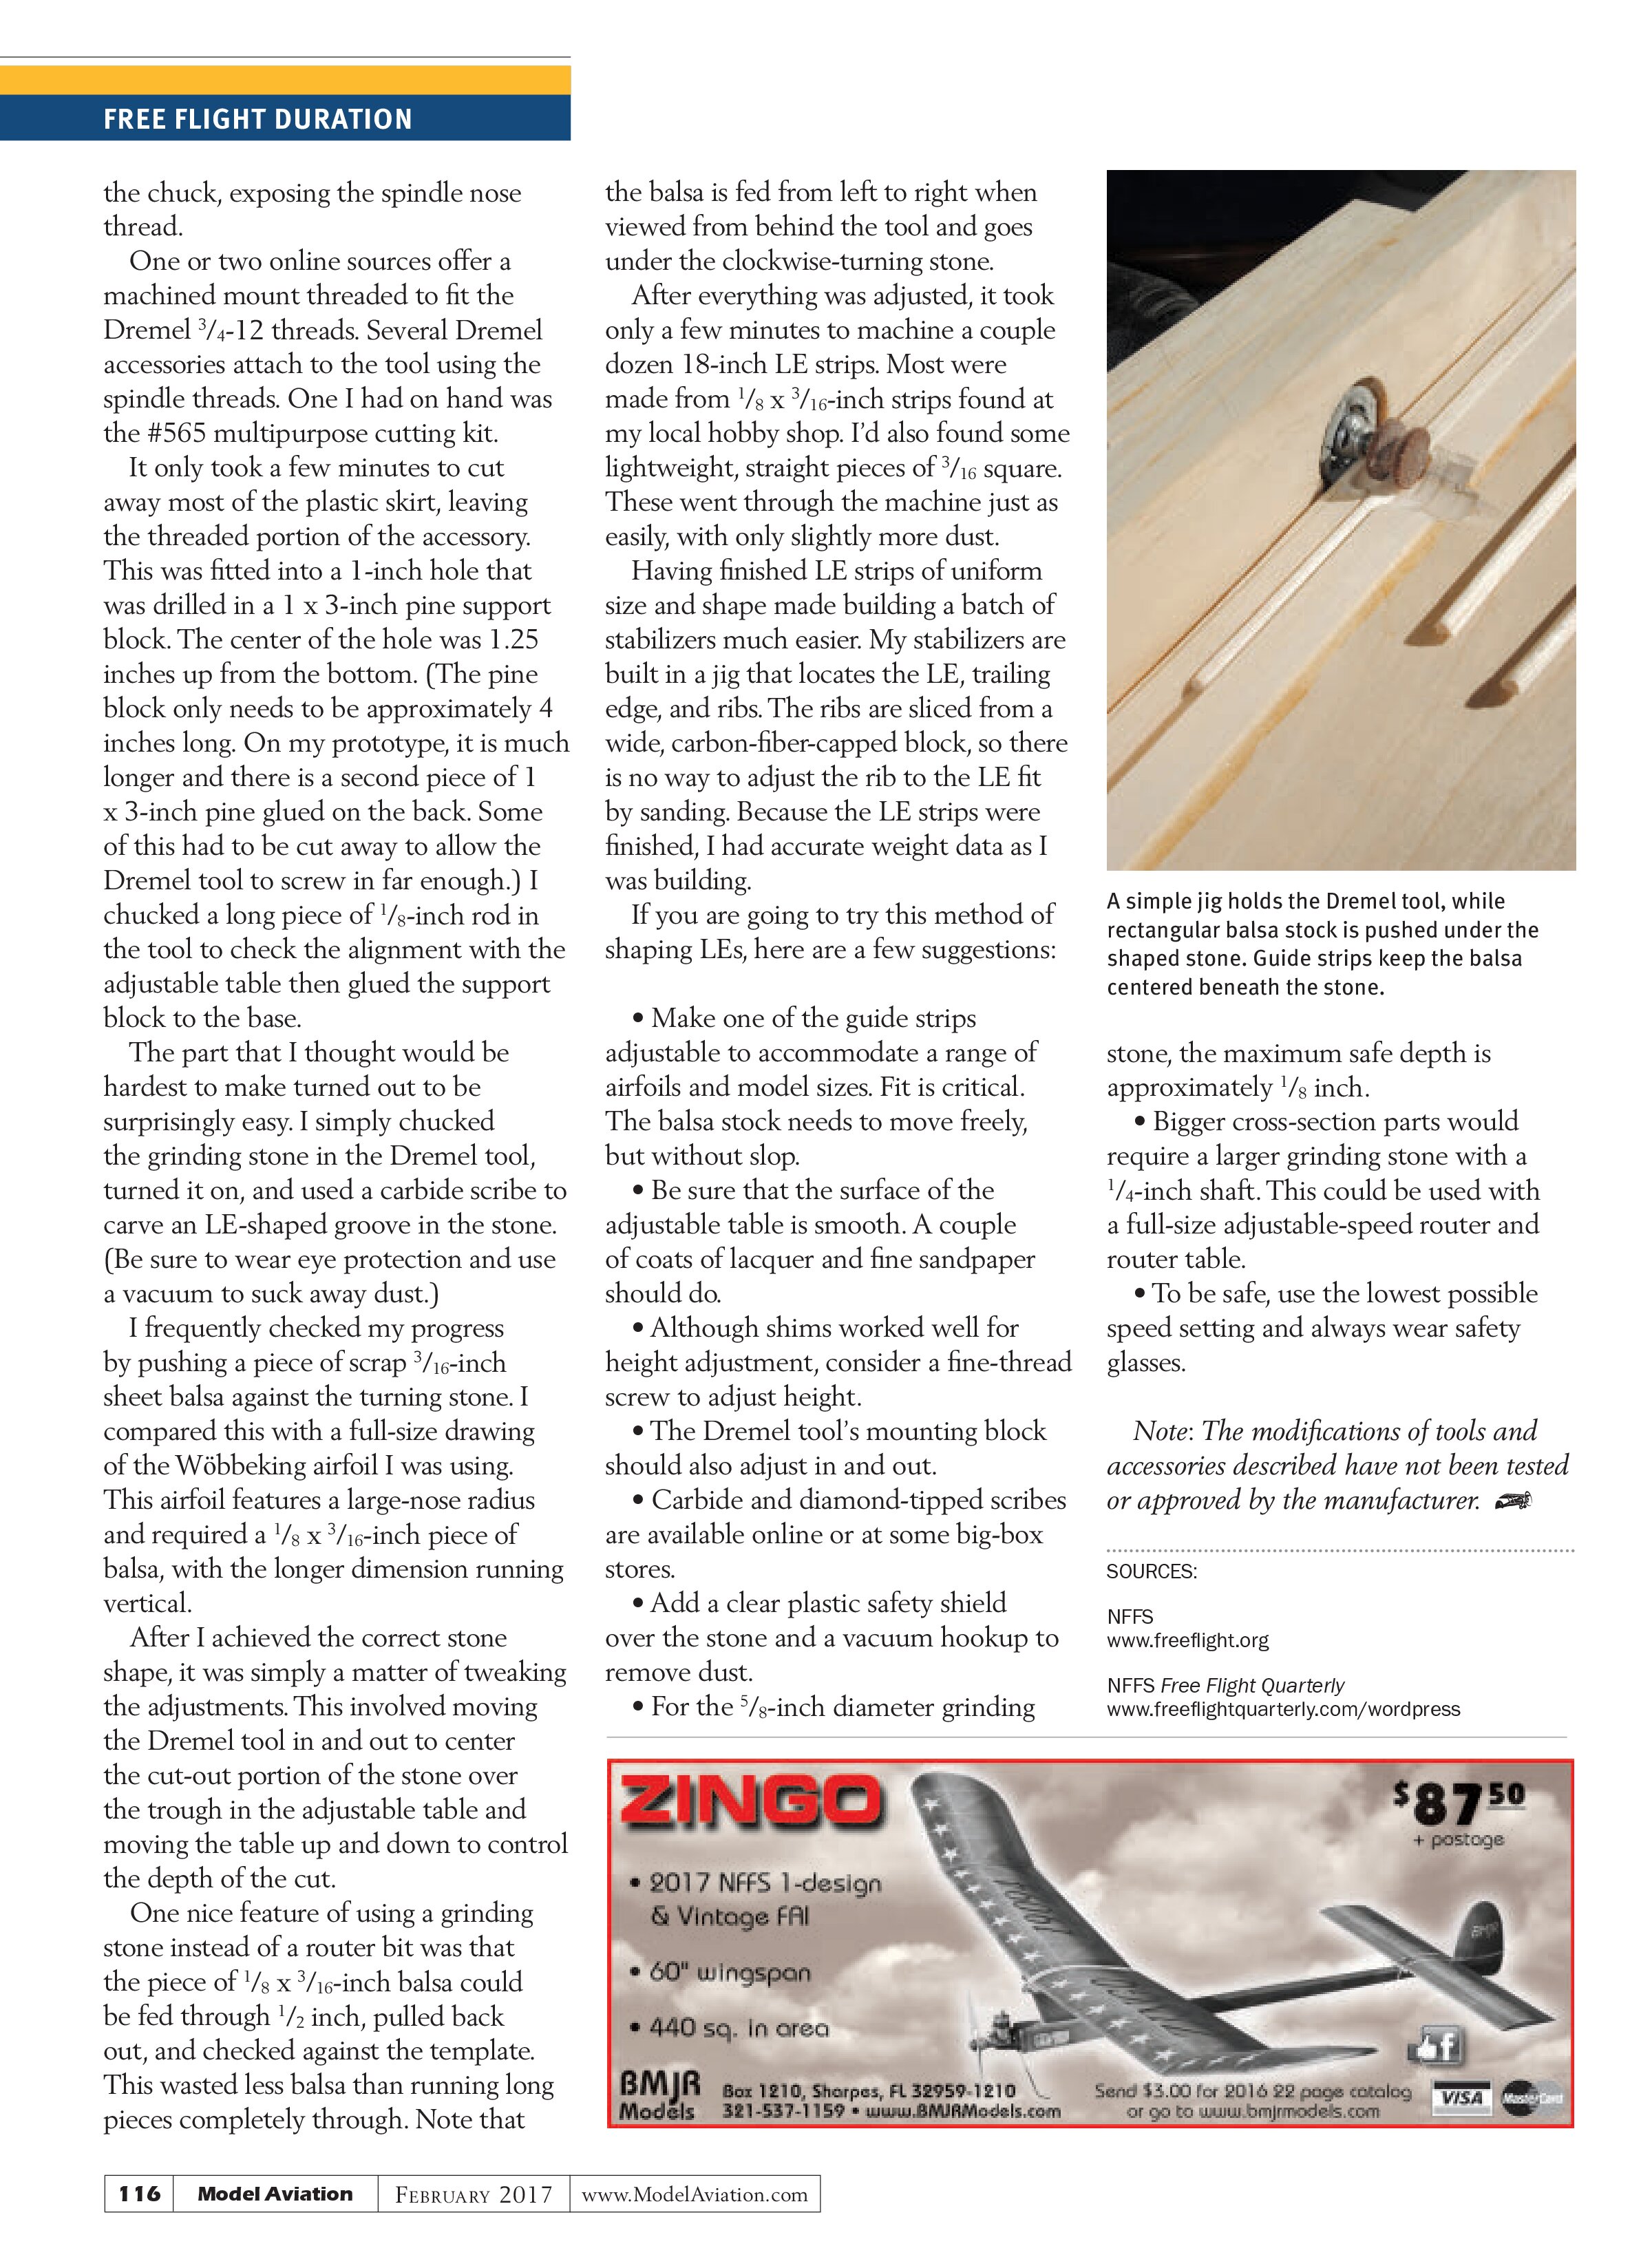
The part that I thought would be hardest to make turned out to be surprisingly easy. I simply chucked the grinding stone in the Dremel tool, turned it on, and used a carbide scribe to carve an LE-shaped groove in the stone. (Be sure to wear eye protection and use a vacuum to suck away dust.)
I frequently checked my progress by pushing a piece of scrap ³⁄₁₆-inch sheet balsa against the turning stone. I compared this with a full-size drawing of the Wöbbeking airfoil I was using. This airfoil features a large-nose radius and required a ¹⁄₈ x ³⁄₁₆-inch piece of balsa, with the longer dimension running vertical.
After I achieved the correct stone shape, it was simply a matter of tweaking the adjustments. This involved moving the Dremel tool in and out to center the cut-out portion of the stone over the trough in the adjustable table and moving the table up and down to control the depth of the cut.
One nice feature of using a grinding stone instead of a router bit was that the piece of ¹⁄₈ x ³⁄₁₆-inch balsa could be fed through ½ inch, pulled back out, and checked against the template. This wasted less balsa than running long pieces completely through. Note that the balsa is fed from left to right when viewed from behind the tool and goes under the clockwise-turning stone.
After everything was adjusted, it took only a few minutes to machine a couple dozen 18-inch LE strips. Most were made from ¹⁄₈ x ³⁄₁₆-inch strips found at my local hobby shop. I’d also found some lightweight, straight pieces of ³⁄₁₆ square. These went through the machine just as easily, with only slightly more dust.
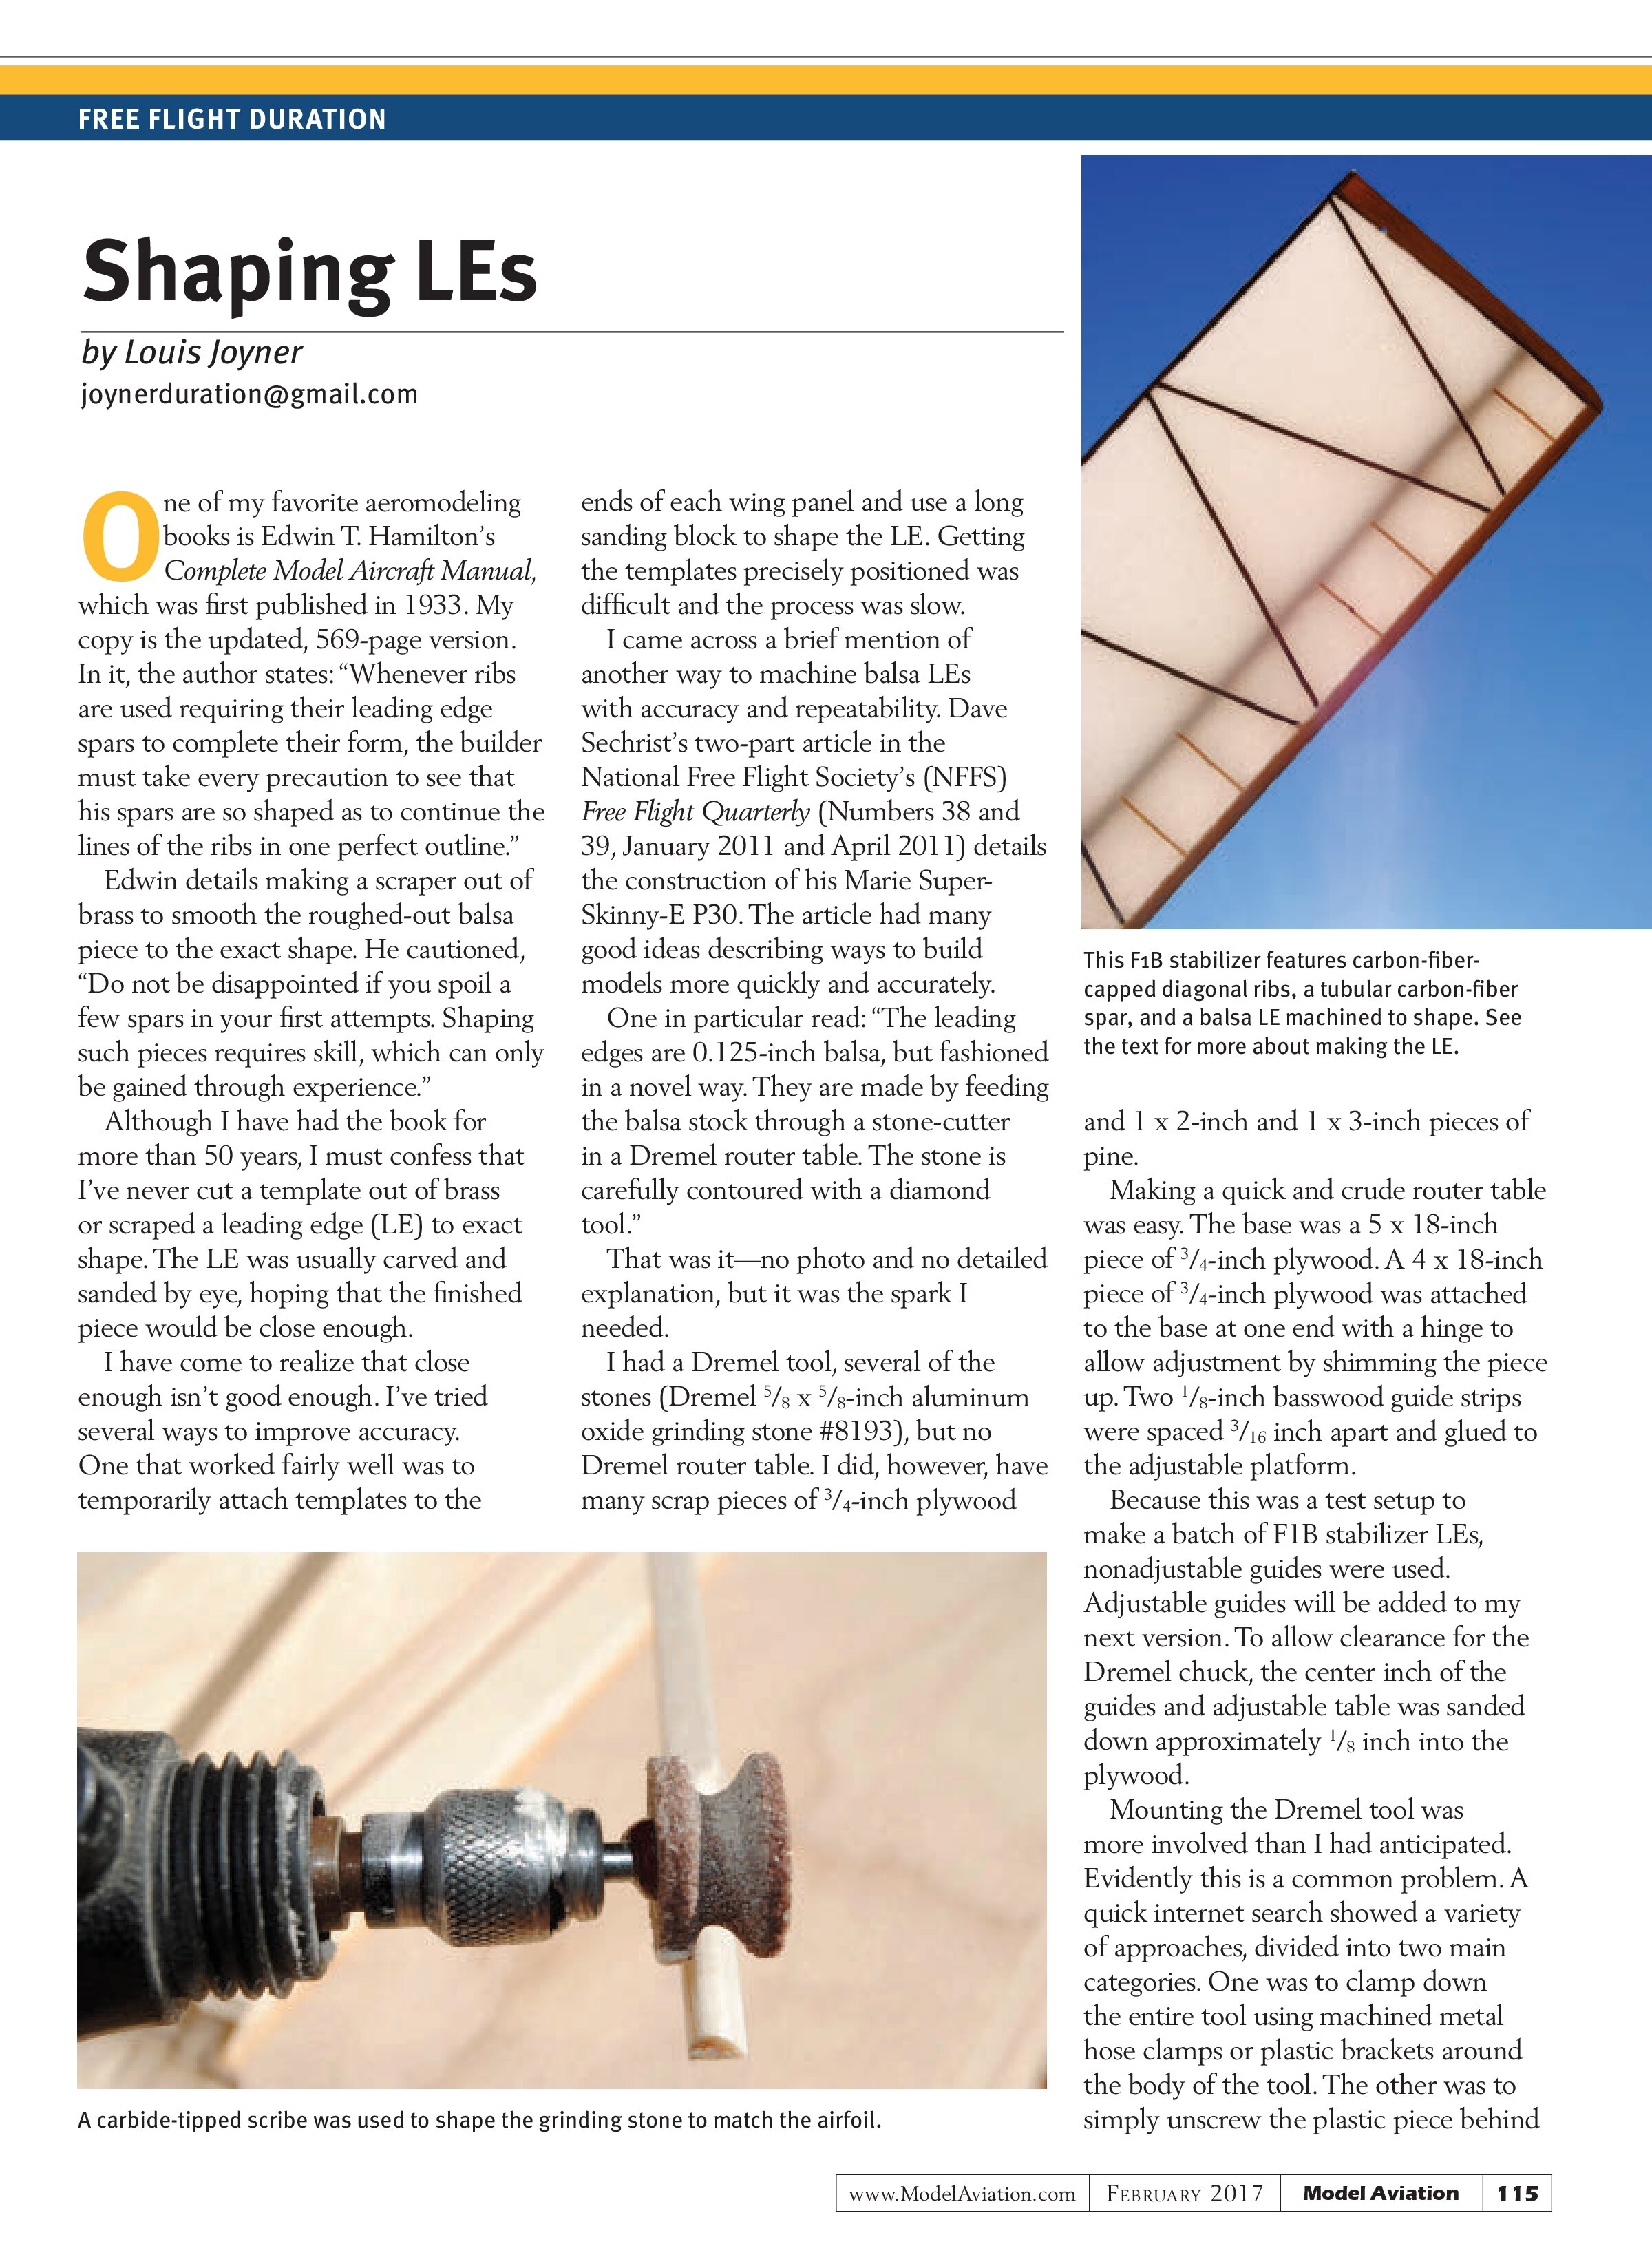
Having finished LE strips of uniform size and shape made building a batch of stabilizers much easier. My stabilizers are built in a jig that locates the LE, trailing edge, and ribs. The ribs are sliced from a wide, carbon-fiber-capped block, so there is no way to adjust the rib to the LE fit by sanding. Because the LE strips were finished, I had accurate weight data as I was building.
If you are going to try this method of shaping LEs, here are a few suggestions:
- Make one of the guide strips adjustable to accommodate a range of airfoils and model sizes. Fit is critical. The balsa stock needs to move freely, but without slop.
- Be sure that the surface of the adjustable table is smooth. A couple of coats of lacquer and fine sandpaper should do.
- Although shims worked well for height adjustment, consider a fine-thread screw to adjust height.
- The Dremel tool’s mounting block should also adjust in and out.
- Carbide and diamond-tipped scribes are available online or at some big-box stores.
- Add a clear plastic safety shield over the stone and a vacuum hookup to remove dust.
- For the ⁵⁄₈-inch diameter grinding

stone, the maximum safe depth is approximately ¹⁄₈ inch.
- Bigger cross-section parts would require a larger grinding stone with a ¹⁄₄-inch shaft. This could be used with a full-size adjustable-speed router and router table.
- To be safe, use the lowest possible speed setting and always wear safety glasses.
Note: The modifications of tools and accessories described have not been tested or approved by the manufacturer.
SOURCES:
NFFS
www.freeflight.org
NFFS Free Flight Quarterly
www.freeflightquarterly.com/wordpress