Refinement of the Sportsman sequence
by Peter Vogel
vogel.peter@gmail.com
In previous columns, I examined the finer points of the Sportsman sequence. The Sportsman sequence consists of 17 maneuvers (counting takeoff and landing), with two breaks dividing the pattern into three groups of five maneuvers each (center, turnaround, center, turnaround, center), so you have a chance to exit the aerobatic box, get your airplane back into a good position, and return to the box for the next five-maneuver sequence.
All maneuvers are ideally performed on the same “line,” running parallel to the runway approximately 150 meters out from where the pilot stands. Because previous articles have shown the full sequence, I’ll only list the maneuvers leading to the first break.
- Takeoff (upwind).
- Straight flight out (upwind, center).
- Half-Reverse Cuban 8 (turnaround).
- Straight flight back (downwind, center).
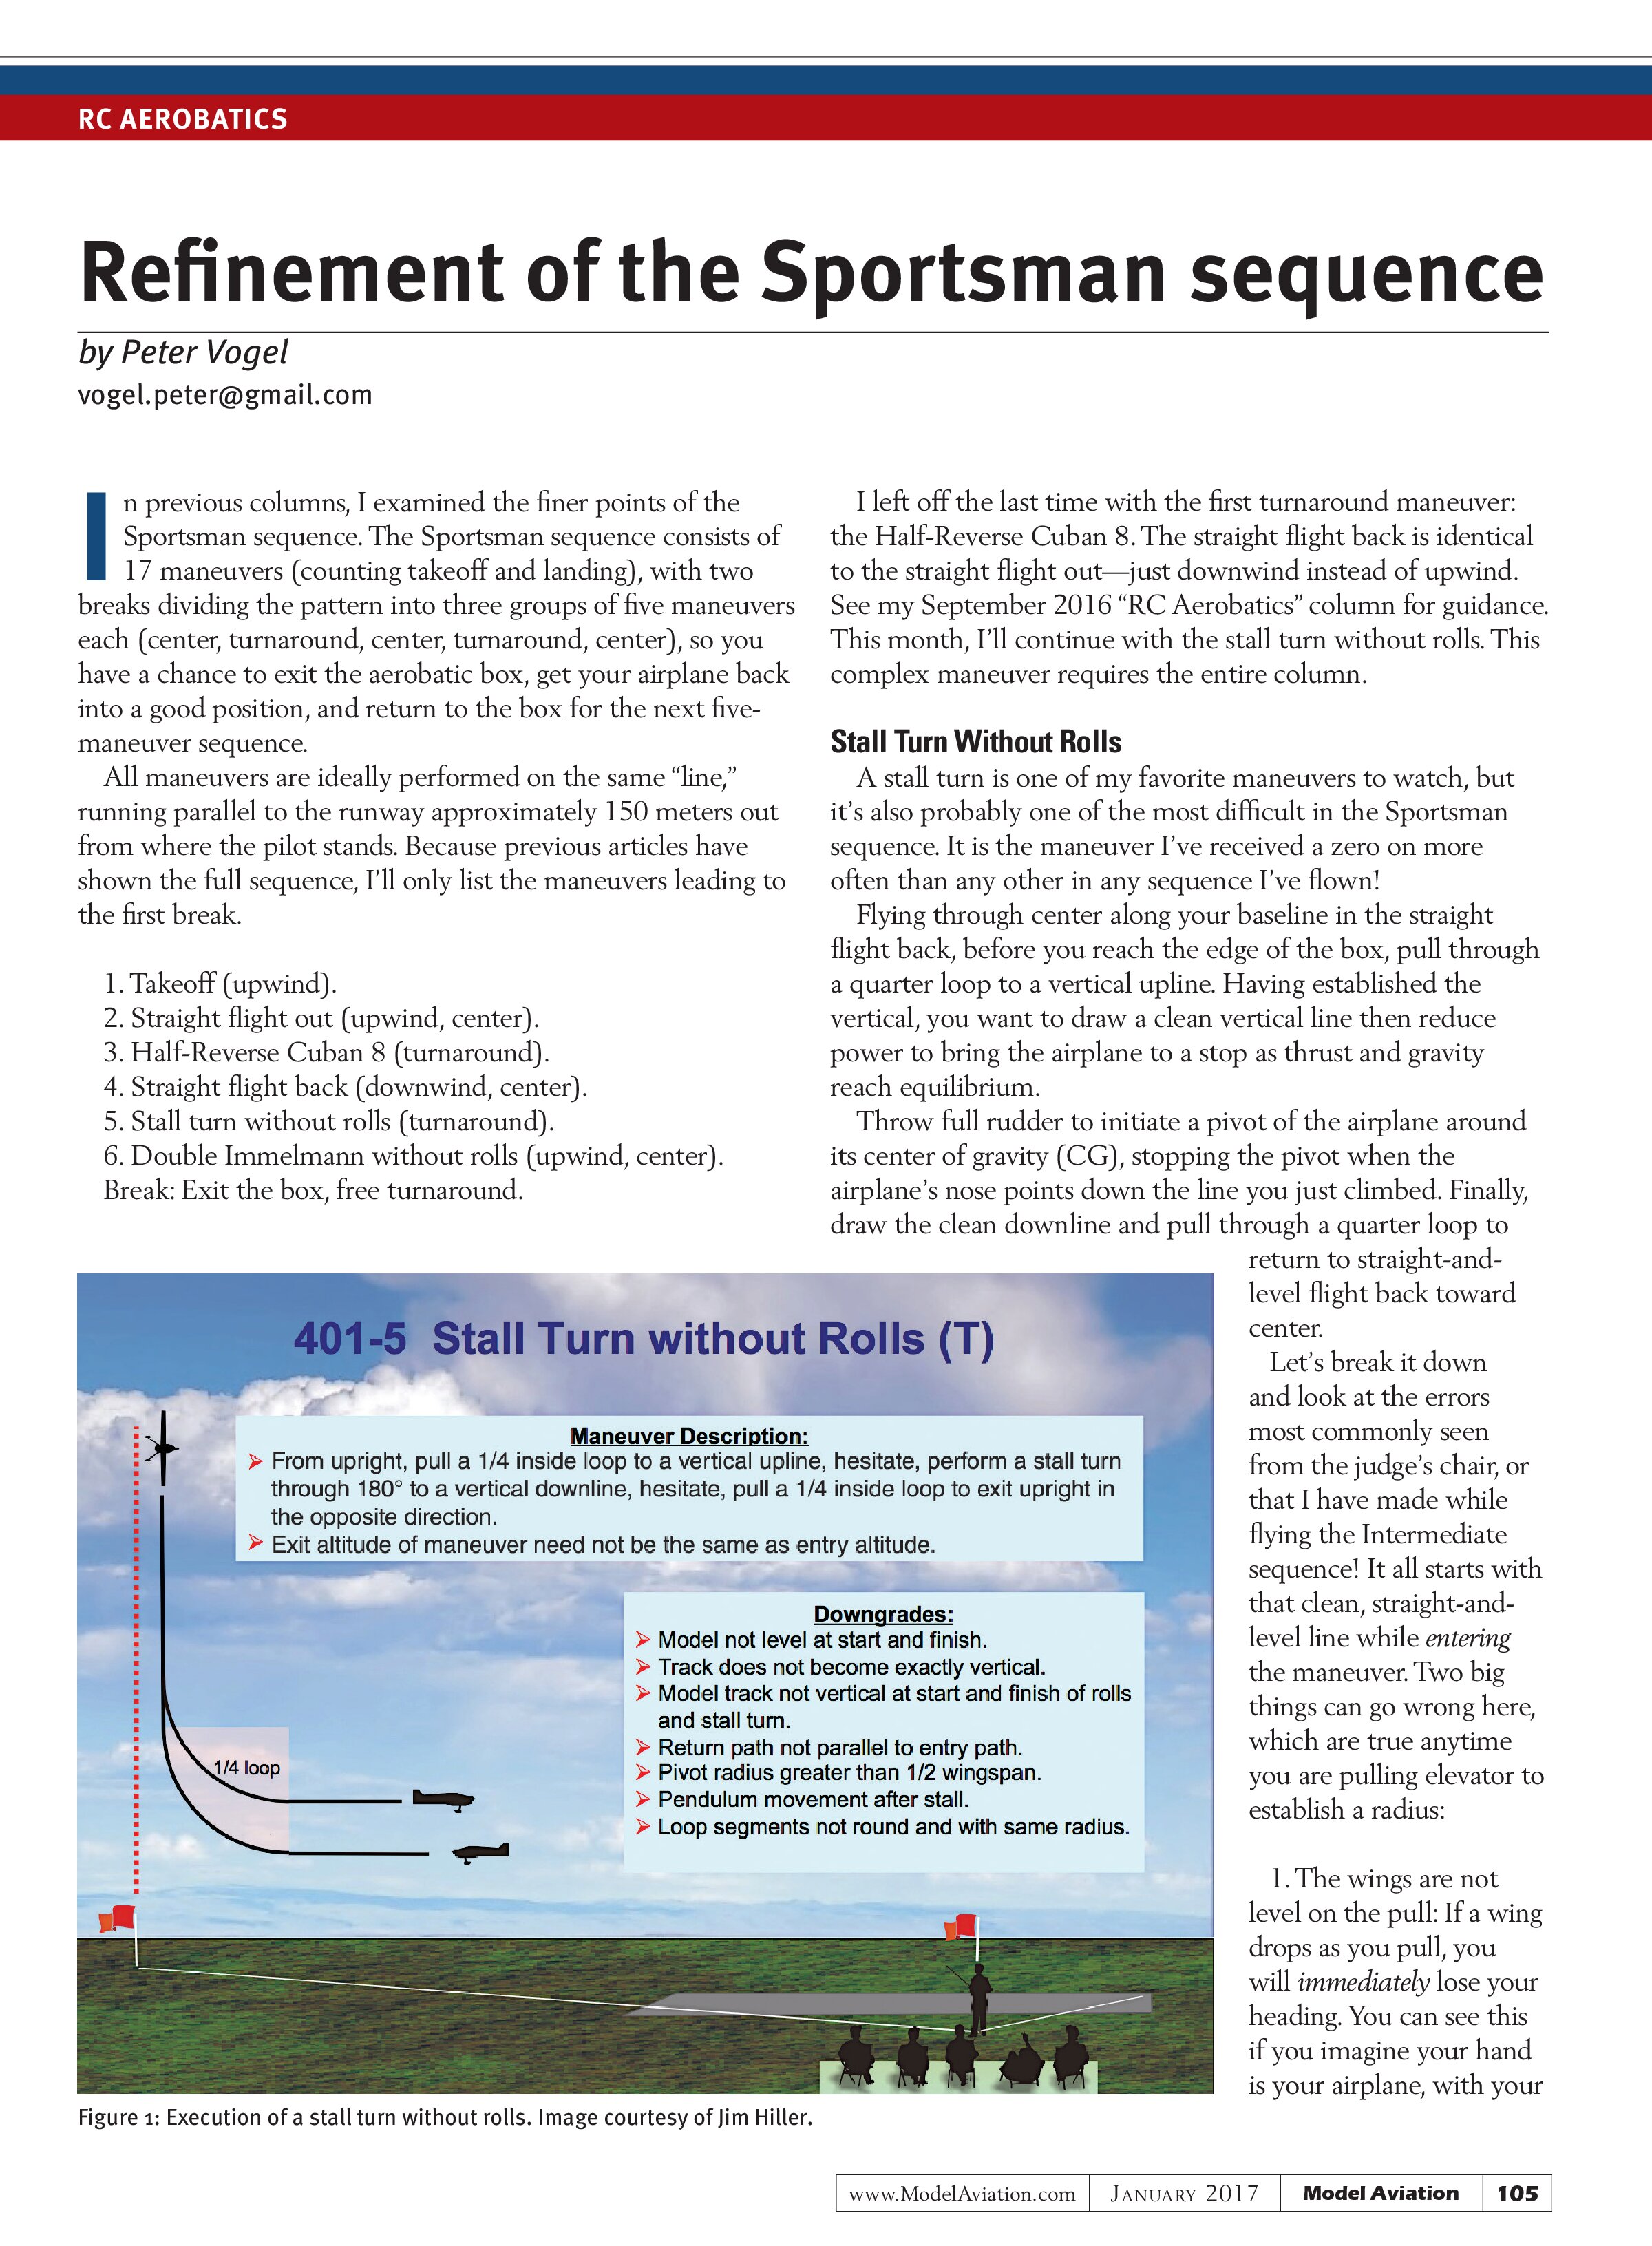
- Stall turn without rolls (turnaround).
- Double Immelmann without rolls (upwind, center).
Break: Exit the box, free turnaround.

I left off the last time with the first turnaround maneuver: the Half-Reverse Cuban 8. The straight flight back is identical to the straight flight out—just downwind instead of upwind. See my September 2016 “RC Aerobatics” column for guidance. This month, I’ll continue with the stall turn without rolls. This complex maneuver requires the entire column.
Stall Turn Without Rolls
A stall turn is one of my favorite maneuvers to watch, but it’s also probably one of the most difficult in the Sportsman sequence. It is the maneuver I’ve received a zero on more often than any other in any sequence I’ve flown!
Flying through center along your baseline in the straight flight back, before you reach the edge of the box, pull through a quarter loop to a vertical upline. Having established the vertical, you want to draw a clean vertical line then reduce power to bring the airplane to a stop as thrust and gravity reach equilibrium.
Throw full rudder to initiate a pivot of the airplane around its center of gravity (CG), stopping the pivot when the airplane’s nose points down the line you just climbed. Finally, draw the clean downline and pull through a quarter loop to return to straight-and-level flight back toward center.
Let’s break it down and look at the errors most commonly seen from the judge’s chair, or that I have made while flying the Intermediate sequence! It all starts with that clean, straight-and-level line while entering the maneuver. Two big things can go wrong here, which are true anytime you are pulling elevator to establish a radius:
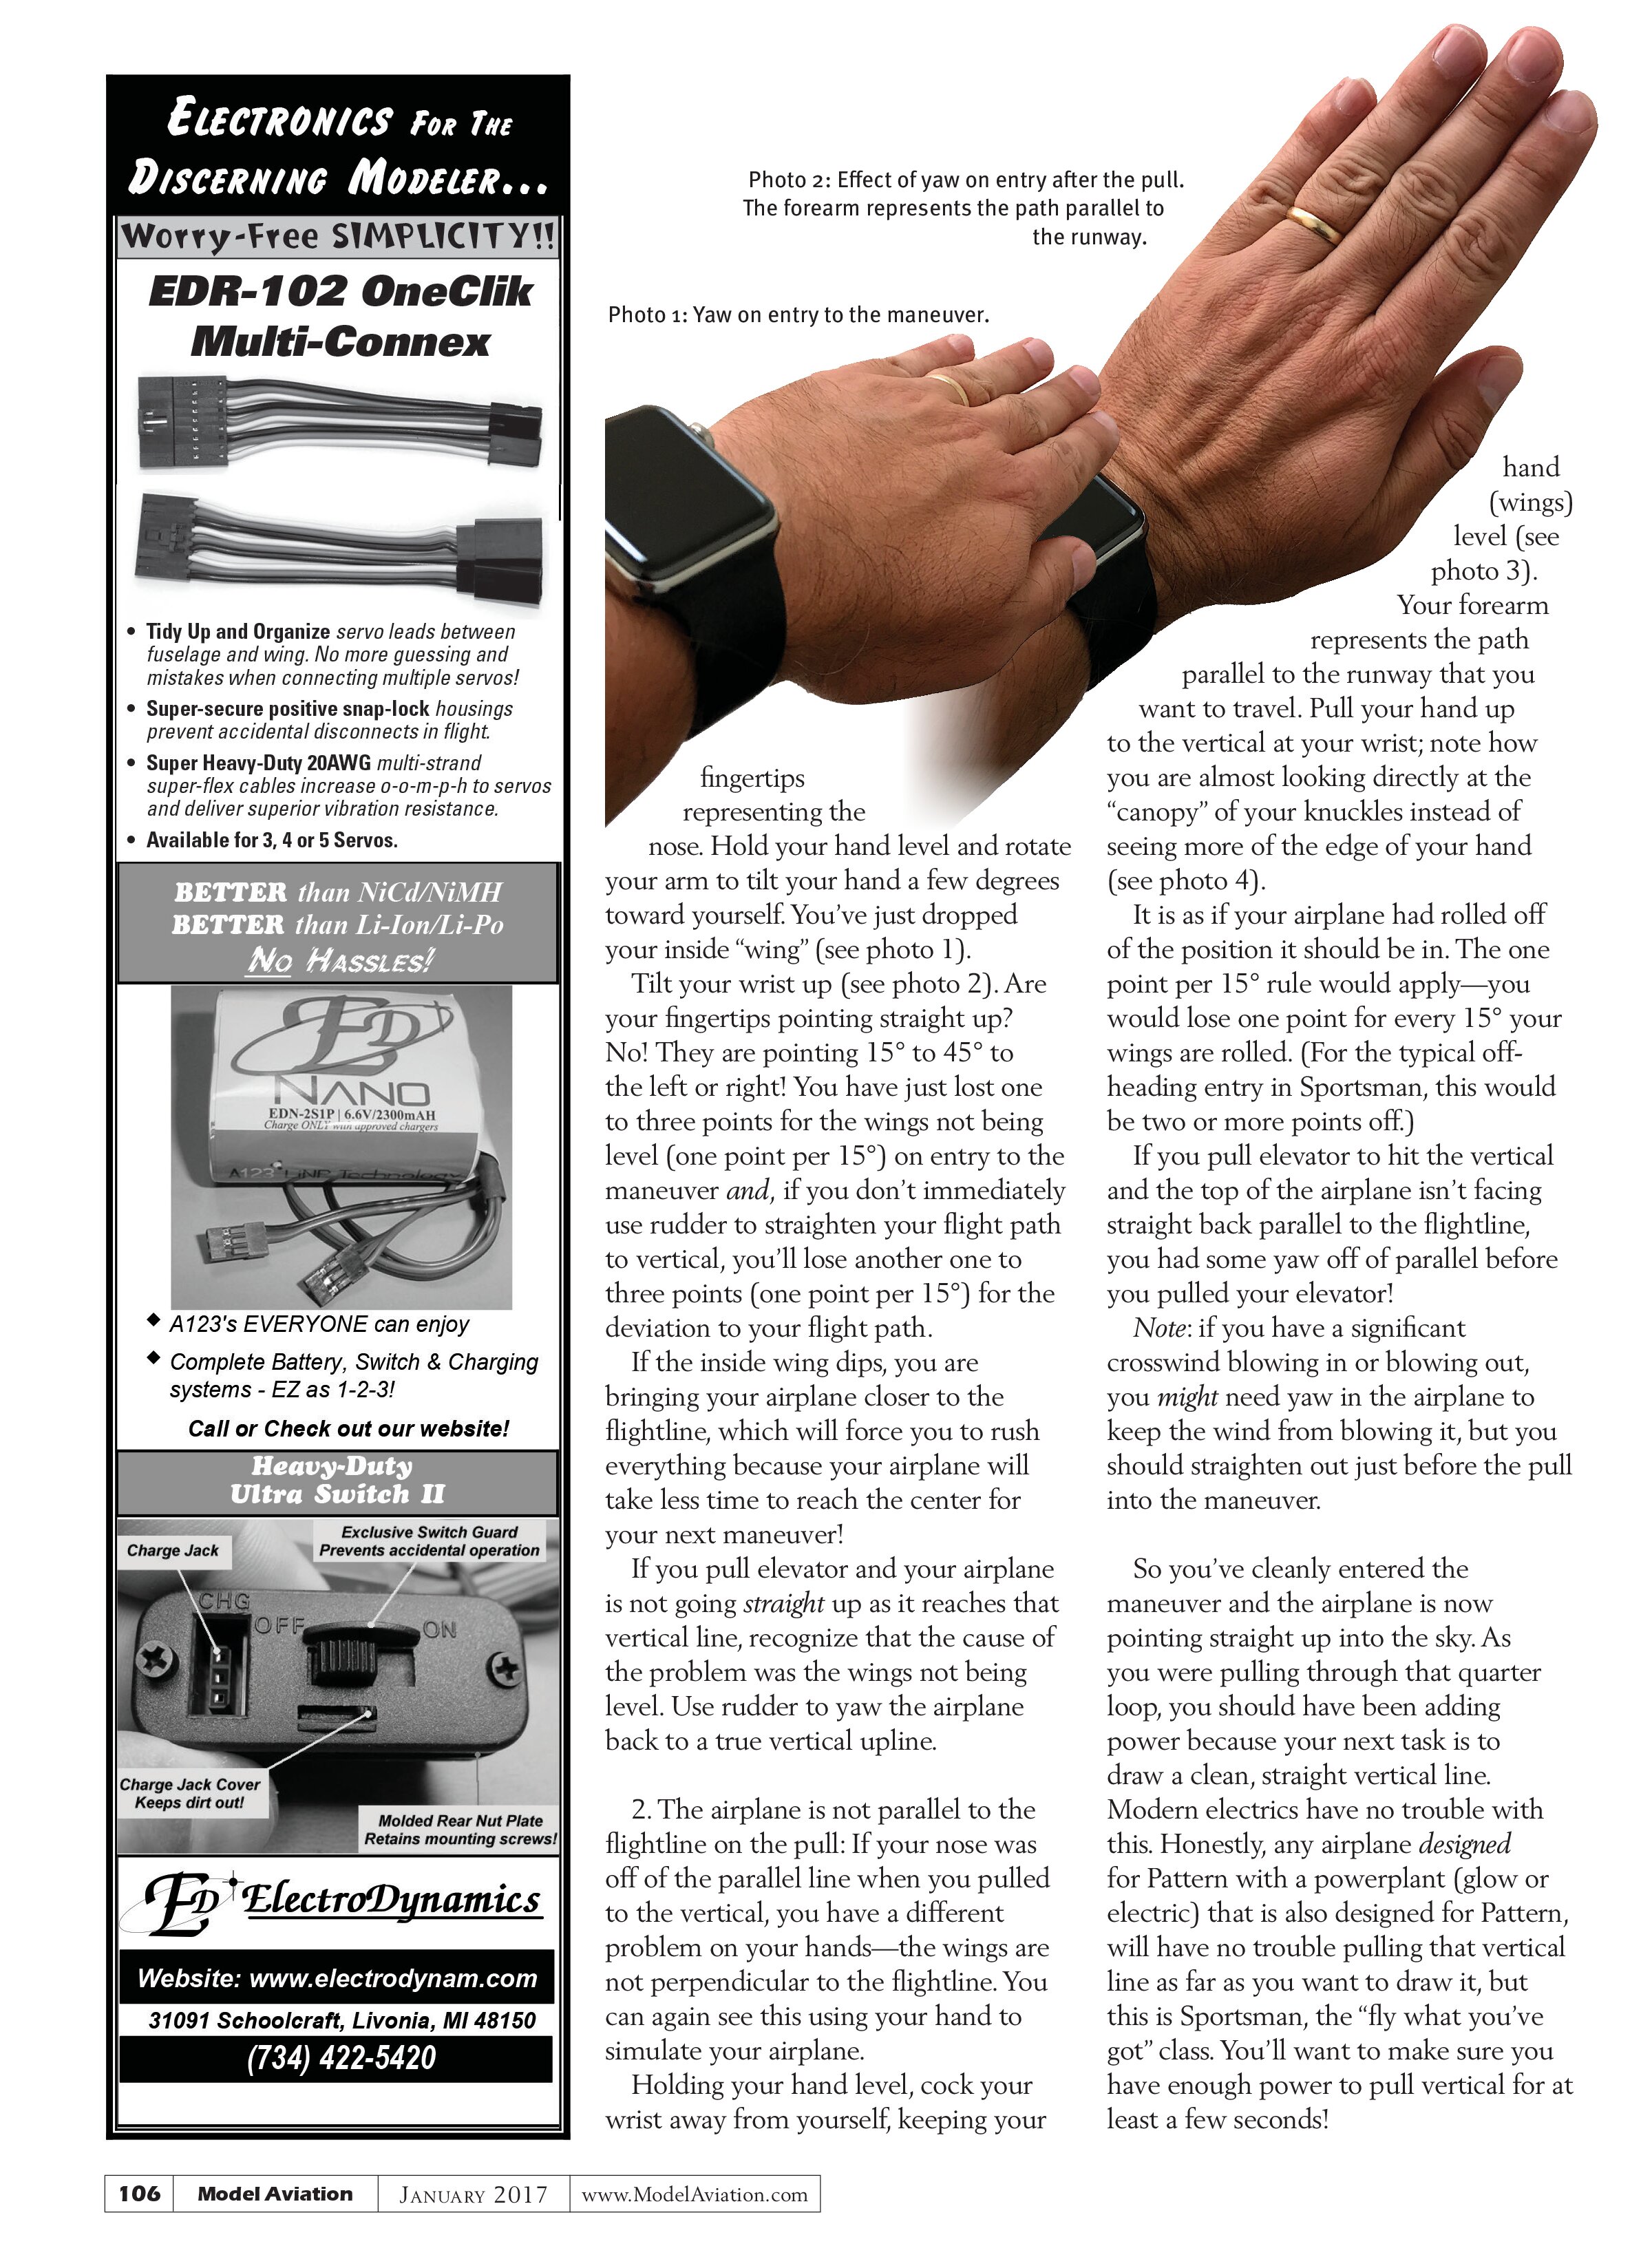
- The wings are not level on the pull: If a wing drops as you pull, you will immediately lose your heading. You can see this if you imagine your hand is your airplane, with your
fingertips representing the nose. Hold your hand level and rotate your arm to tilt your hand a few degrees toward yourself. You’ve just dropped your inside “wing” (see photo 1).
Tilt your wrist up (see photo 2). Are your fingertips pointing straight up? No! They are pointing 15° to 45° to the left or right! You have just lost one to three points for the wings not being level (one point per 15°) on entry to the maneuver and, if you don’t immediately use rudder to straighten your flight path to vertical, you’ll lose another one to three points (one point per 15°) for the deviation to your flight path.
If the inside wing dips, you are bringing your airplane closer to the flightline, which will force you to rush everything because your airplane will take less time to reach the center for your next maneuver!
If you pull elevator and your airplane is not going straight up as it reaches that vertical line, recognize that the cause of the problem was the wings not being level. Use rudder to yaw the airplane back to a true vertical upline.
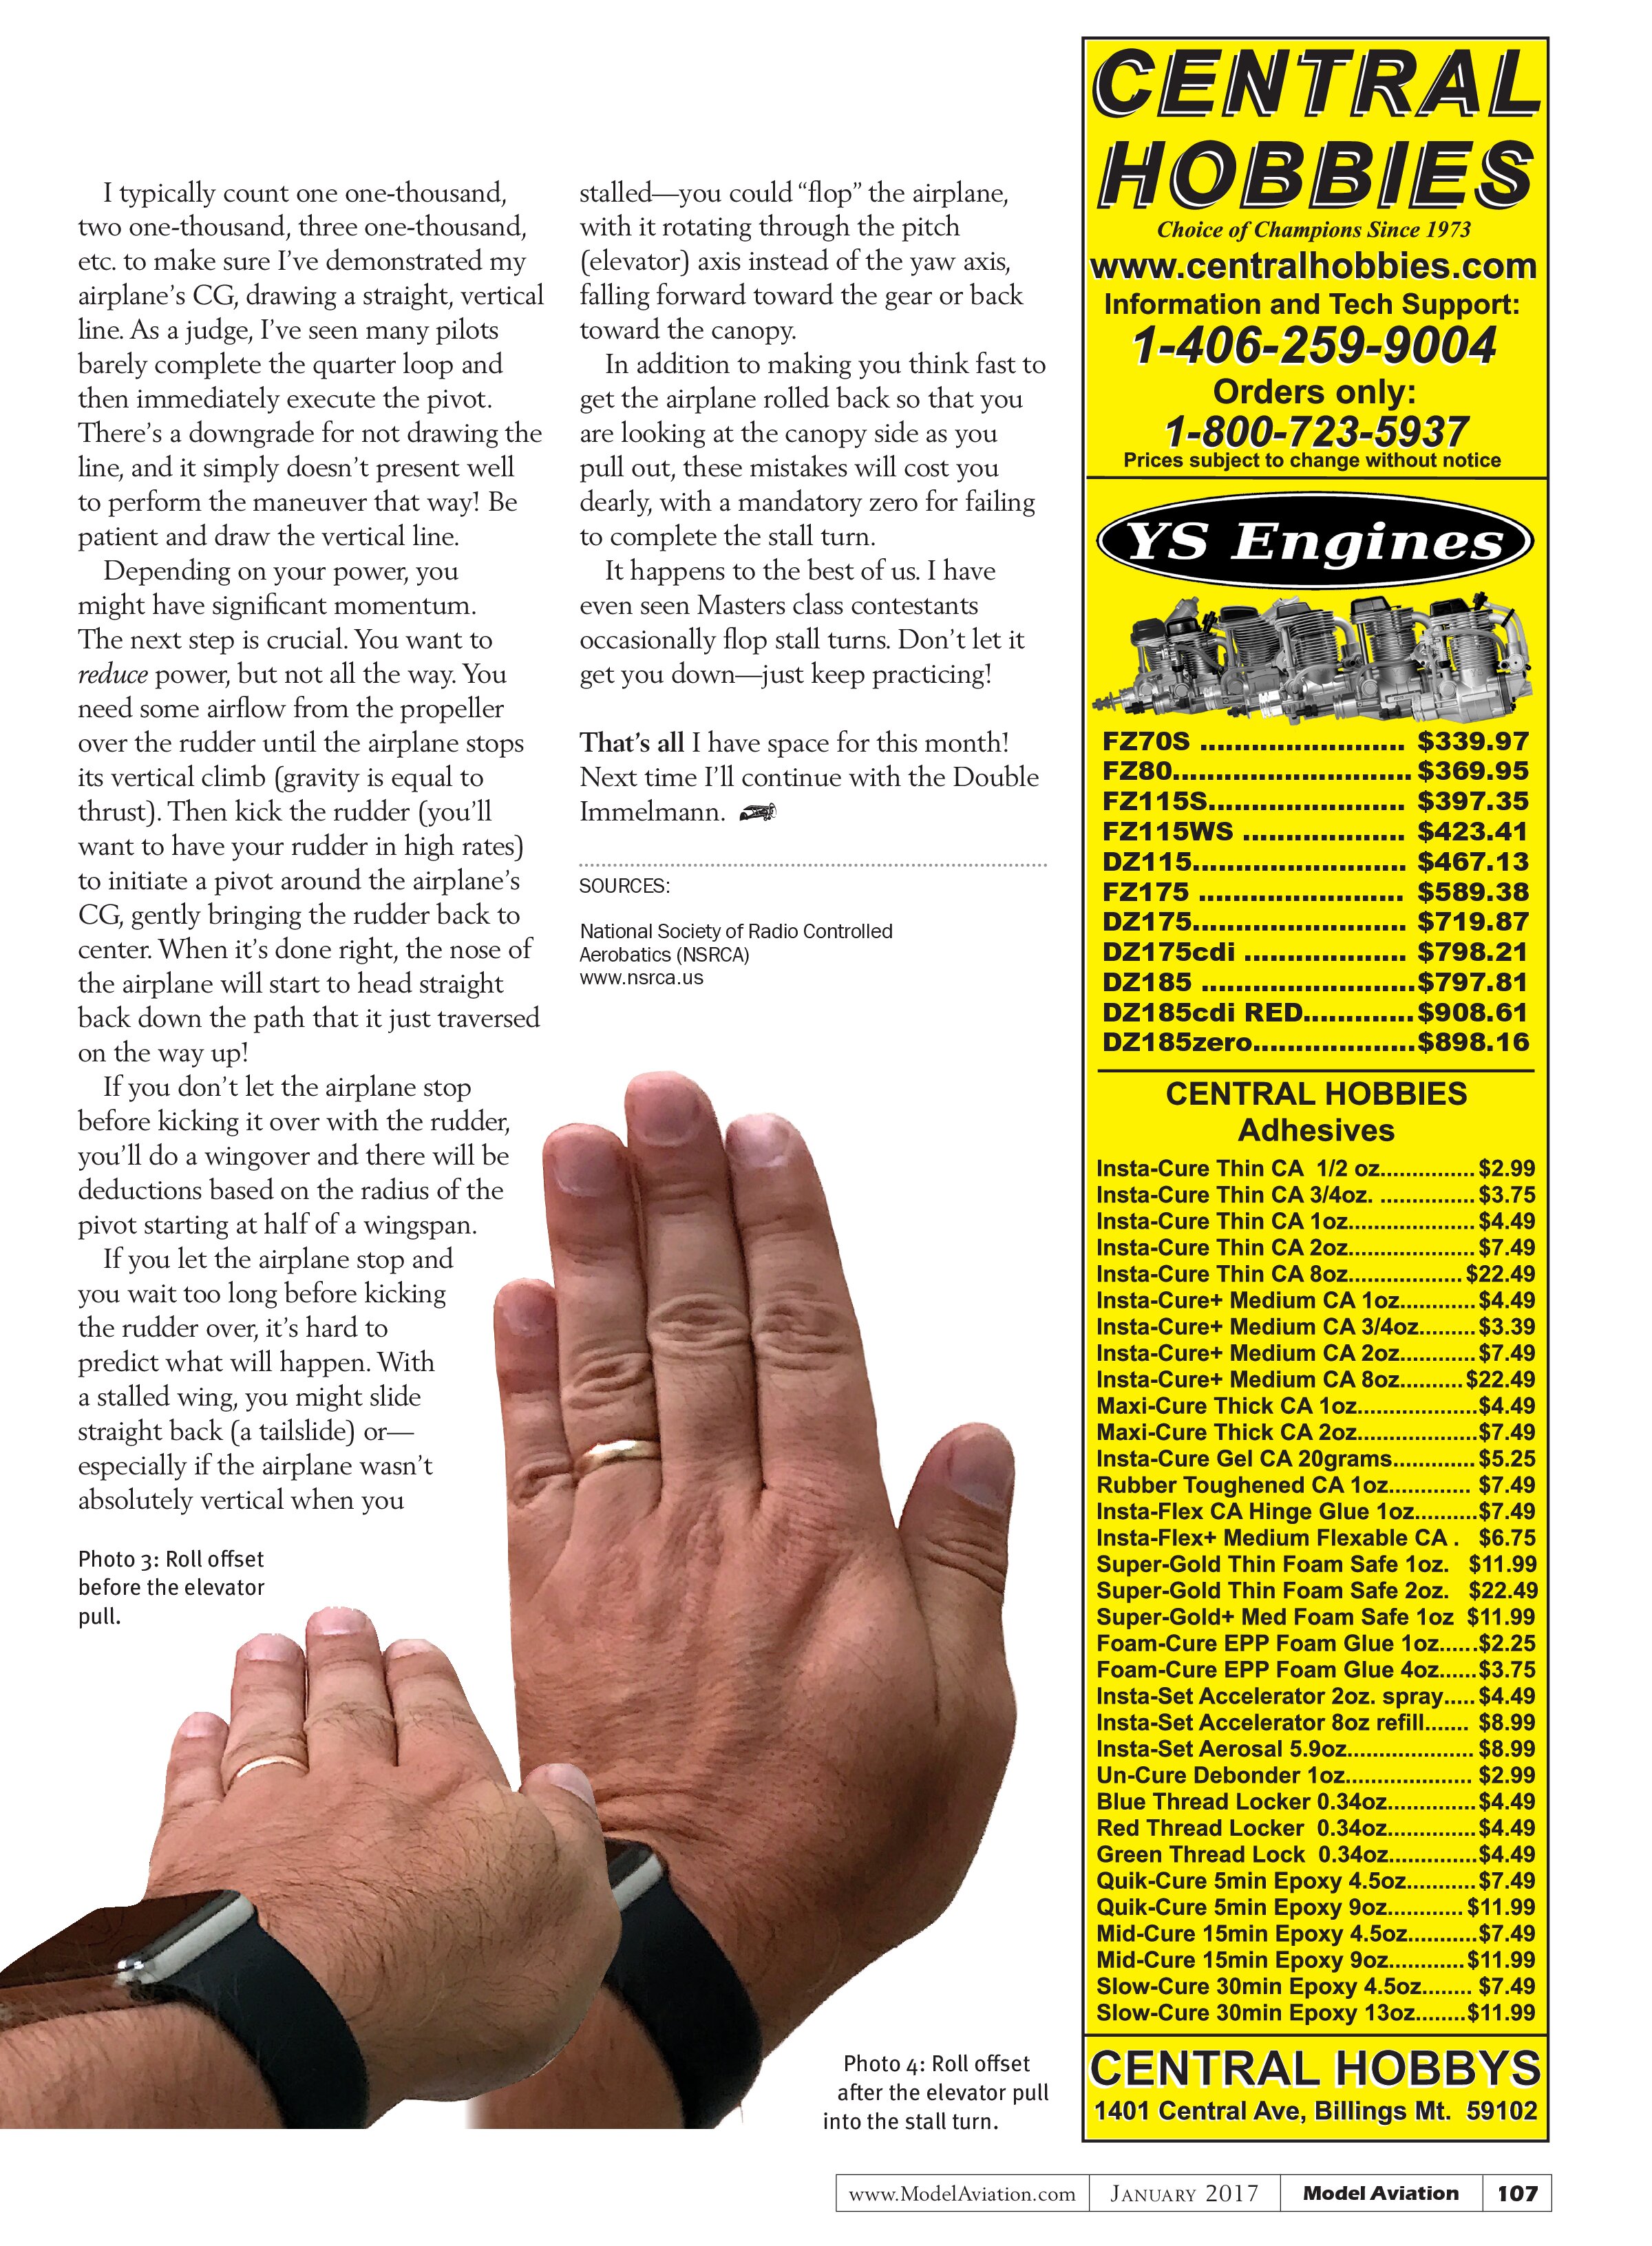
2. The airplane is not parallel to the flightline on the pull: If your nose was off of the parallel line when you pulled to the vertical, you have a different problem on your hands—the wings are not perpendicular to the flightline. You can again see this using your hand to simulate your airplane.
Holding your hand level, cock your wrist away from yourself, keeping your 
hand (wings) level (see photo 3). Your forearm represents the path parallel to the runway that you want to travel. Pull your hand up to the vertical at your wrist; note how you are almost looking directly at the “canopy” of your knuckles instead of seeing more of the edge of your hand (see photo 4).
It is as if your airplane had rolled off of the position it should be in. The one point per 15° rule would apply—you would lose one point for every 15° your wings are rolled. (For the typical off-heading entry in Sportsman, this would be two or more points off.)
If you pull elevator to hit the vertical and the top of the airplane isn’t facing straight back parallel to the flightline, you had some yaw off of parallel before you pulled your elevator!
Note: if you have a significant crosswind blowing in or blowing out, you might need yaw in the airplane to keep the wind from blowing it, but you should straighten out just before the pull into the maneuver.
So you’ve cleanly entered the maneuver and the airplane is now pointing straight up into the sky. As you were pulling through that quarter loop, you should have been adding power because your next task is to draw a clean, straight vertical line. Modern electrics have no trouble with this. Honestly, any airplane designed for Pattern with a powerplant (glow or electric) that is also designed for Pattern, will have no trouble pulling that vertical line as far as you want to draw it, but this is Sportsman, the “fly what you’ve got” class. You’ll want to make sure you have enough power to pull vertical for at least a few seconds!
I typically count one one-thousand, two one-thousand, three one-thousand, etc. to make sure I’ve demonstrated my airplane’s CG, drawing a straight, vertical line. As a judge, I’ve seen many pilots barely complete the quarter loop and then immediately execute the pivot. There’s a downgrade for not drawing the line, and it simply doesn’t present well to perform the maneuver that way! Be patient and draw the vertical line.
Depending on your power, you might have significant momentum. The next step is crucial. You want to reduce power, but not all the way. You need some airflow from the propeller over the rudder until the airplane stops its vertical climb (gravity is equal to thrust). Then kick the rudder (you’ll want to have your rudder in high rates) to initiate a pivot around the airplane’s CG, gently bringing the rudder back to center. When it’s done right, the nose of the airplane will start to head straight back down the path that it just traversed on the way up!
If you don’t let the airplane stop before kicking it over with the rudder, you’ll do a wingover and there will be deductions based on the radius of the pivot starting at half of a wingspan.
If you let the airplane stop and you wait too long before kicking the rudder over, it’s hard to predict what will happen. With a stalled wing, you might slide straight back (a tailslide) or—especially if the airplane wasn’t absolutely vertical when you stalled—you could “flop” the airplane, with it rotating through the pitch (elevator) axis instead of the yaw axis, falling forward toward the gear or back toward the canopy.
In addition to making you think fast to get the airplane rolled back so that you are looking at the canopy side as you pull out, these mistakes will cost you dearly, with a mandatory zero for failing to complete the stall turn.
It happens to the best of us. I have even seen Masters class contestants occasionally flop stall turns. Don’t let it get you down—just keep practicing!
That’s all I have space for this month! Next time I’ll continue with the Double Immelmann.
SOURCES:
National Society of Radio Controlled Aerobatics (NSRCA)
www.nsrca.us