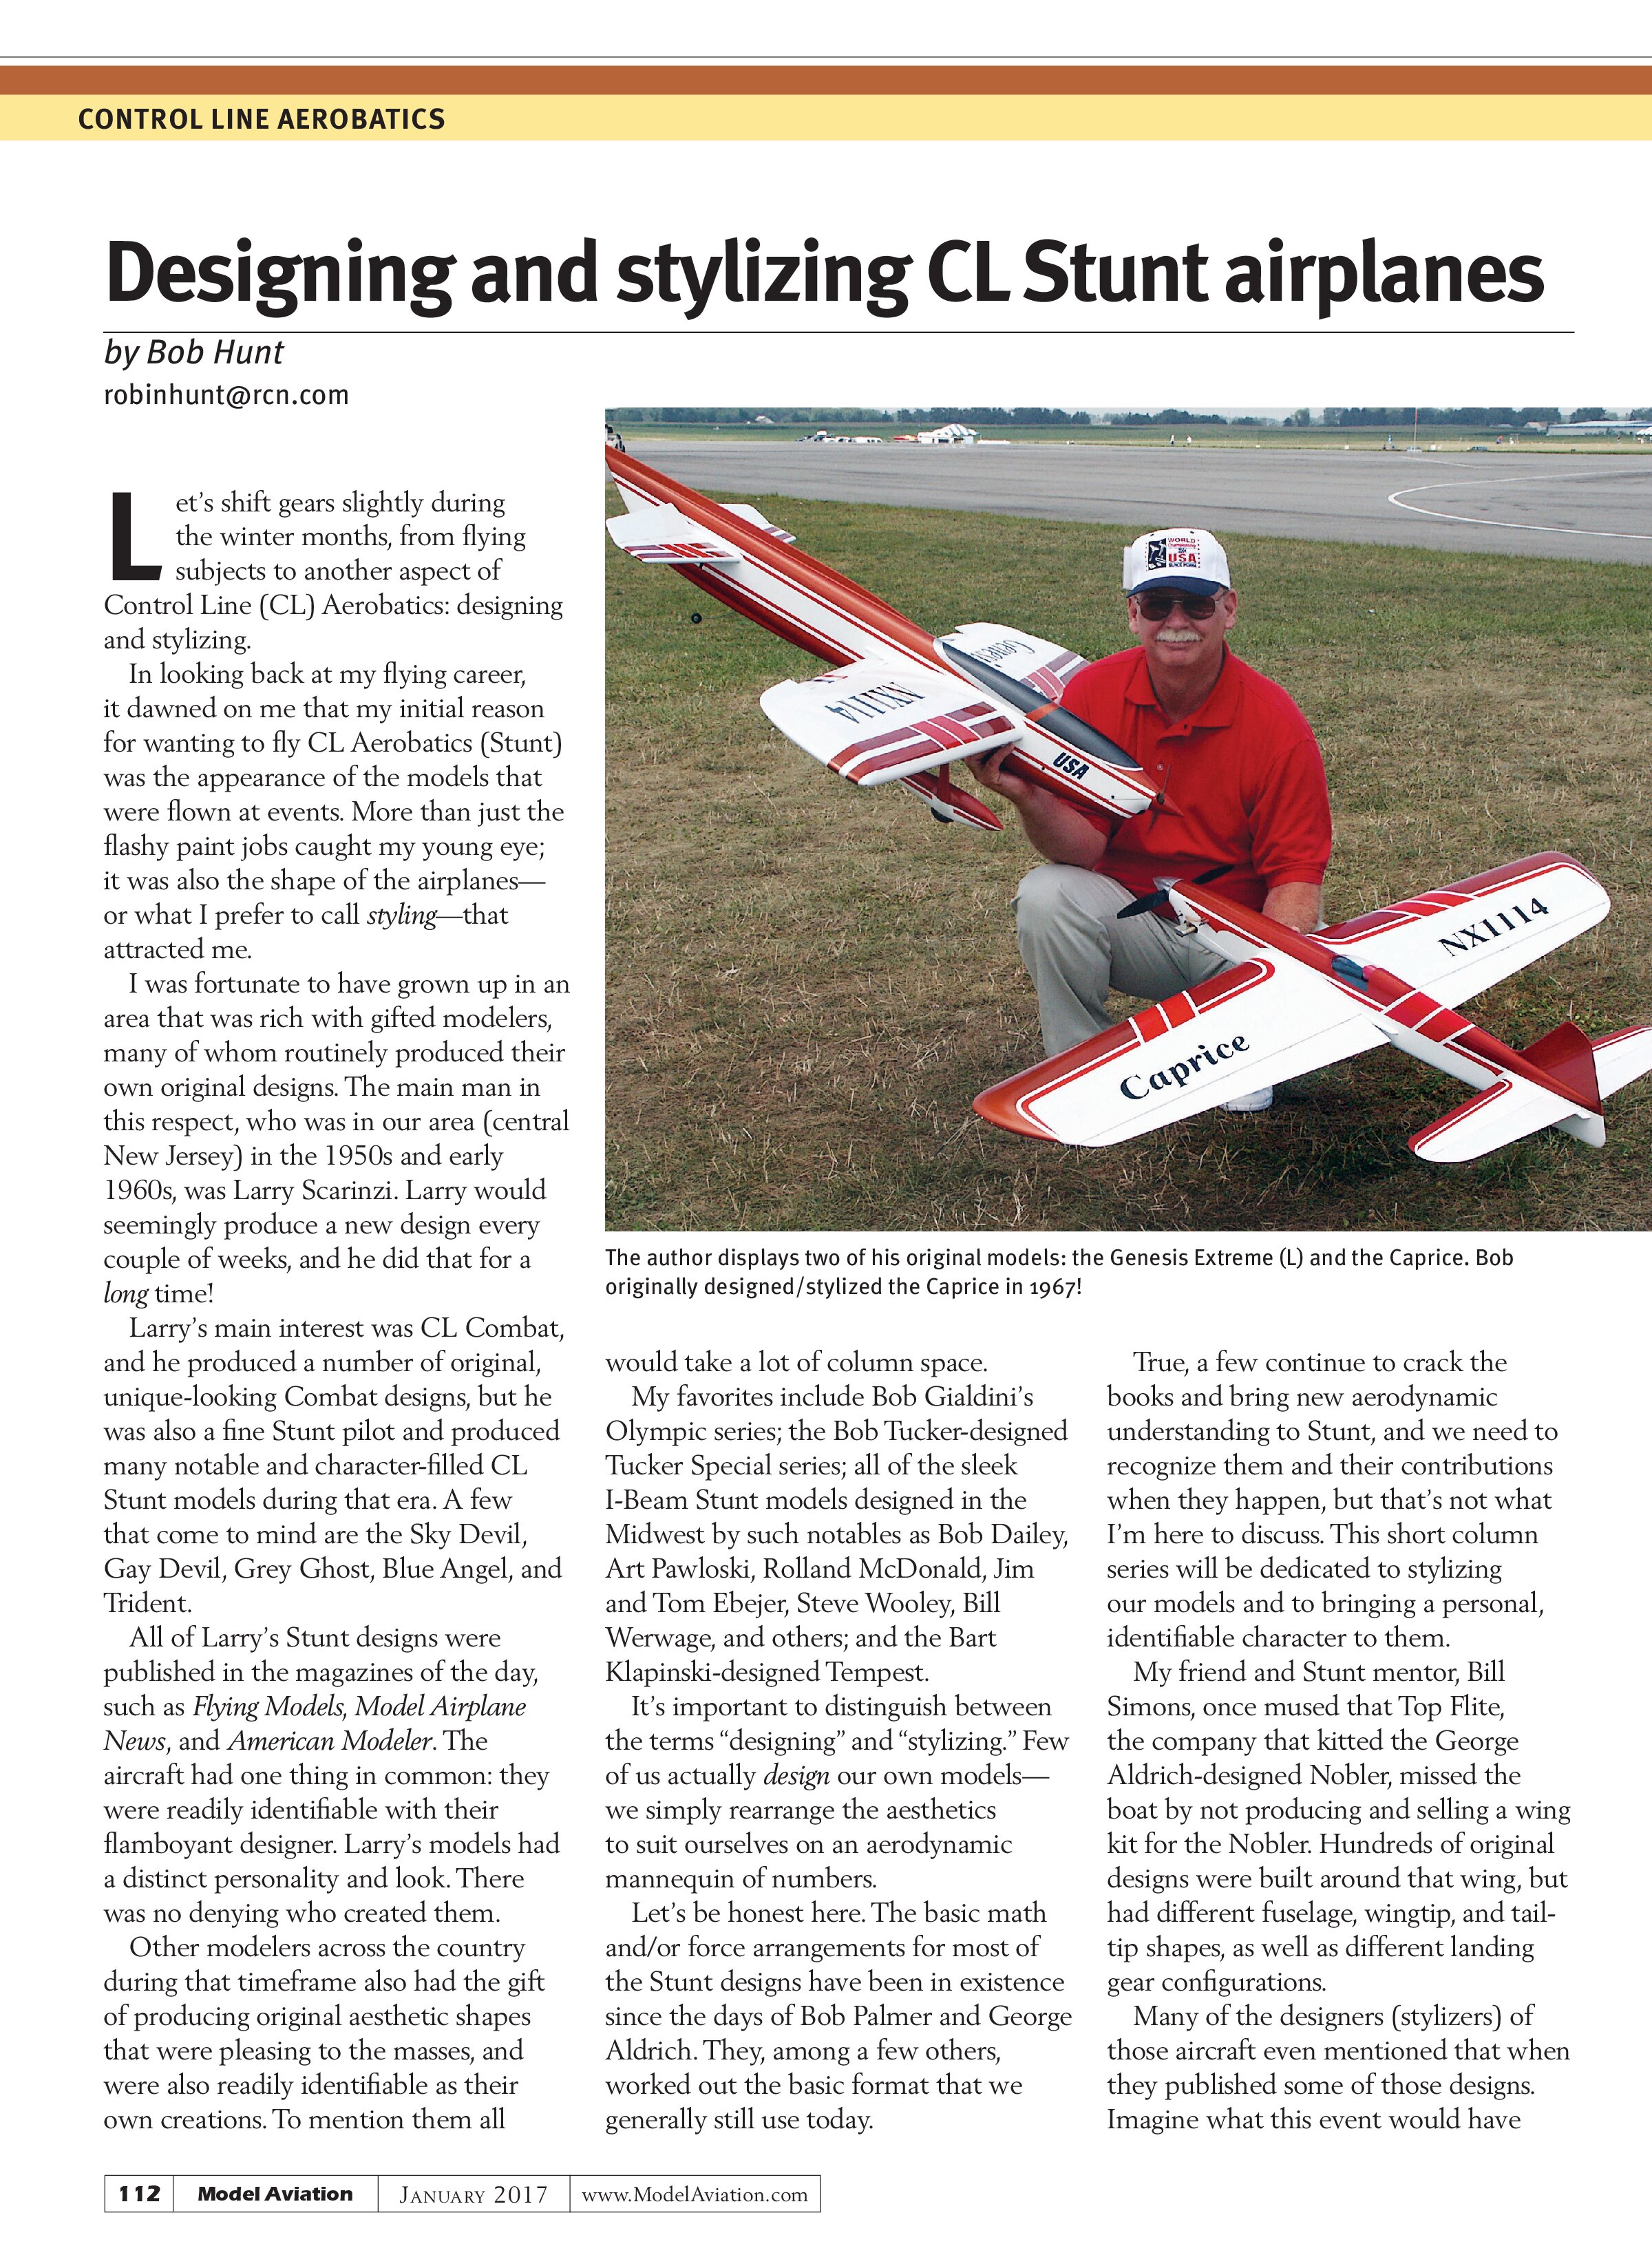
Designing and stylizing CL Stunt airplanes
by Bob Hunt
robinhunt@rcn.com
Let’s shift gears slightly during the winter months, from flying subjects to another aspect of Control Line (CL) Aerobatics: designing and stylizing.
In looking back at my flying career, it dawned on me that my initial reason for wanting to fly CL Aerobatics (Stunt) was the appearance of the models that were flown at events. More than just the flashy paint jobs caught my young eye; it was also the shape of the airplanes—or what I prefer to call styling—that attracted me.
I was fortunate to have grown up in an area that was rich with gifted modelers, many of whom routinely produced their own original designs. The main man in this respect, who was in our area (central New Jersey) in the 1950s and early 1960s, was Larry Scarinzi. Larry would seemingly produce a new design every couple of weeks, and he did that for a long time!
Larry’s main interest was CL Combat, and he produced a number of original, unique-looking Combat designs, but he was also a fine Stunt pilot and produced many notable and character-filled CL Stunt models during that era. A few that come to mind are the Sky Devil, Gay Devil, Grey Ghost, Blue Angel, and Trident.
All of Larry’s Stunt designs were published in the magazines of the day, such as Flying Models, Model Airplane News, and American Modeler. The aircraft had one thing in common: they were readily identifiable with their flamboyant designer. Larry’s models had a distinct personality and look. There was no denying who created them.
Other modelers across the country during that timeframe also had the gift of producing original aesthetic shapes that were pleasing to the masses, and were also readily identifiable as their own creations. To mention them all would take a lot of column space.
My favorites include Bob Gialdini’s Olympic series; the Bob Tucker-designed Tucker Special series; all of the sleek I-Beam Stunt models designed in the Midwest by such notables as Bob Dailey, Art Pawloski, Rolland McDonald, Jim and Tom Ebejer, Steve Wooley, Bill Werwage, and others; and the Bart Klapinski-designed Tempest.
It’s important to distinguish between the terms “designing” and “stylizing.” Few of us actually design our own models—we simply rearrange the aesthetics to suit ourselves on an aerodynamic mannequin of numbers.
Let’s be honest here. The basic math and/or force arrangements for most of the Stunt designs have been in existence since the days of Bob Palmer and George Aldrich. They, among a few others, worked out the basic format that we generally still use today.
True, a few continue to crack the books and bring new aerodynamic understanding to Stunt, and we need to recognize them and their contributions when they happen, but that’s not what I’m here to discuss. This short column series will be dedicated to stylizing our models and to bringing a personal, identifiable character to them.
My friend and Stunt mentor, Bill Simons, once mused that Top Flite, the company that kitted the George Aldrich-designed Nobler, missed the boat by not producing and selling a wing kit for the Nobler. Hundreds of original designs were built around that wing, but had different fuselage, wingtip, and tail-tip shapes, as well as different landing gear configurations.
Many of the designers (stylizers) of those aircraft even mentioned that when they published some of those designs. Imagine what this event would have

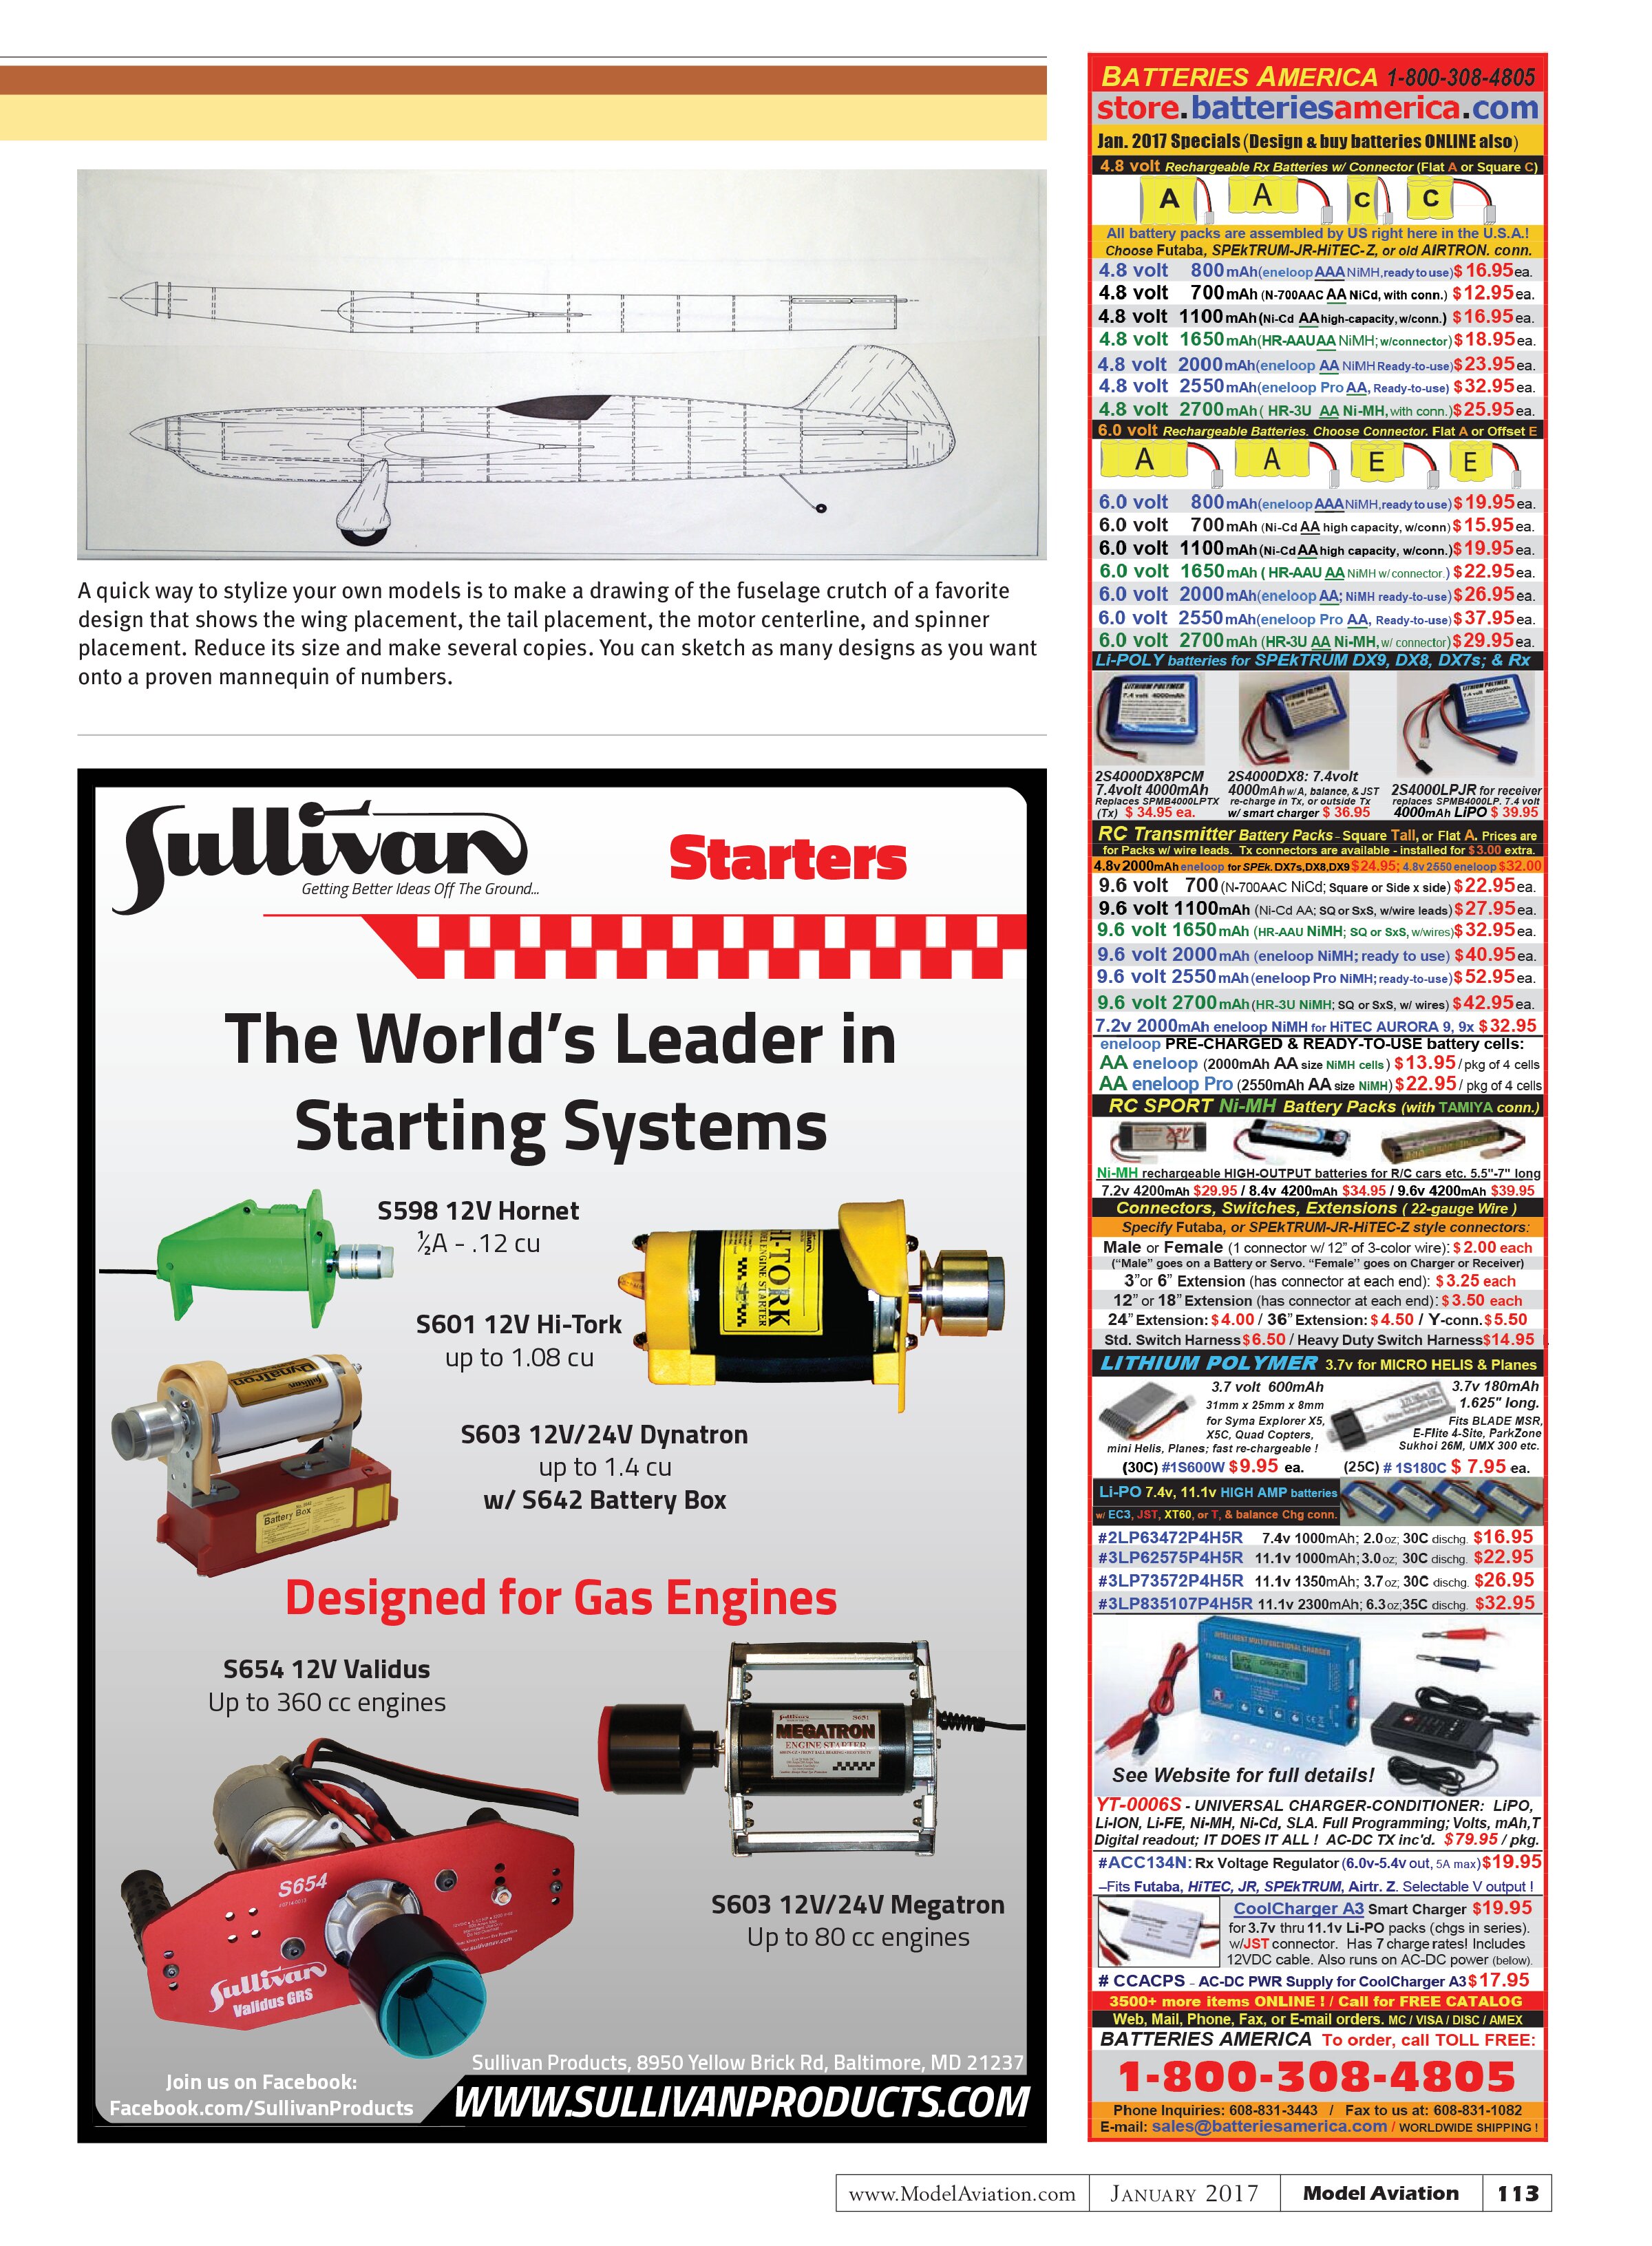
A quick way to stylize your own models is to make a drawing of the fuselage crutch of a favorite design that shows the wing placement, the tail placement, the motor centerline, and spinner placement. Reduce its size and make several copies. You can sketch as many designs as you want onto a proven mannequin of numbers.


been like without the Nobler.
We all have our own aesthetic likes and dislikes. If that were not the case, we’d be driving lookalike cars, have lookalike houses, etc. The urge to have something that is different, yet pleasing to the eye, is something common to nearly all human beings.
How does one set about creating his or her own stylized Stunt model? There are several time-tested methods that work.
Most of them begin with a simple sketch. The best way to let your creativity out is to put your mind into neutral and let it suggest shapes to you through a pencil on a pad. Sketch side-view shapes, top-view shapes, and, if you are capable, 3-D-perspective shapes.
One way to sketch shapes that you are certain can become a viable model to build is to first make a full-size drawing template of the fuselage crutch that has the root wing airfoil, the tail shape, and the spinner placement of the chosen aerodynamic mannequin where they belong.
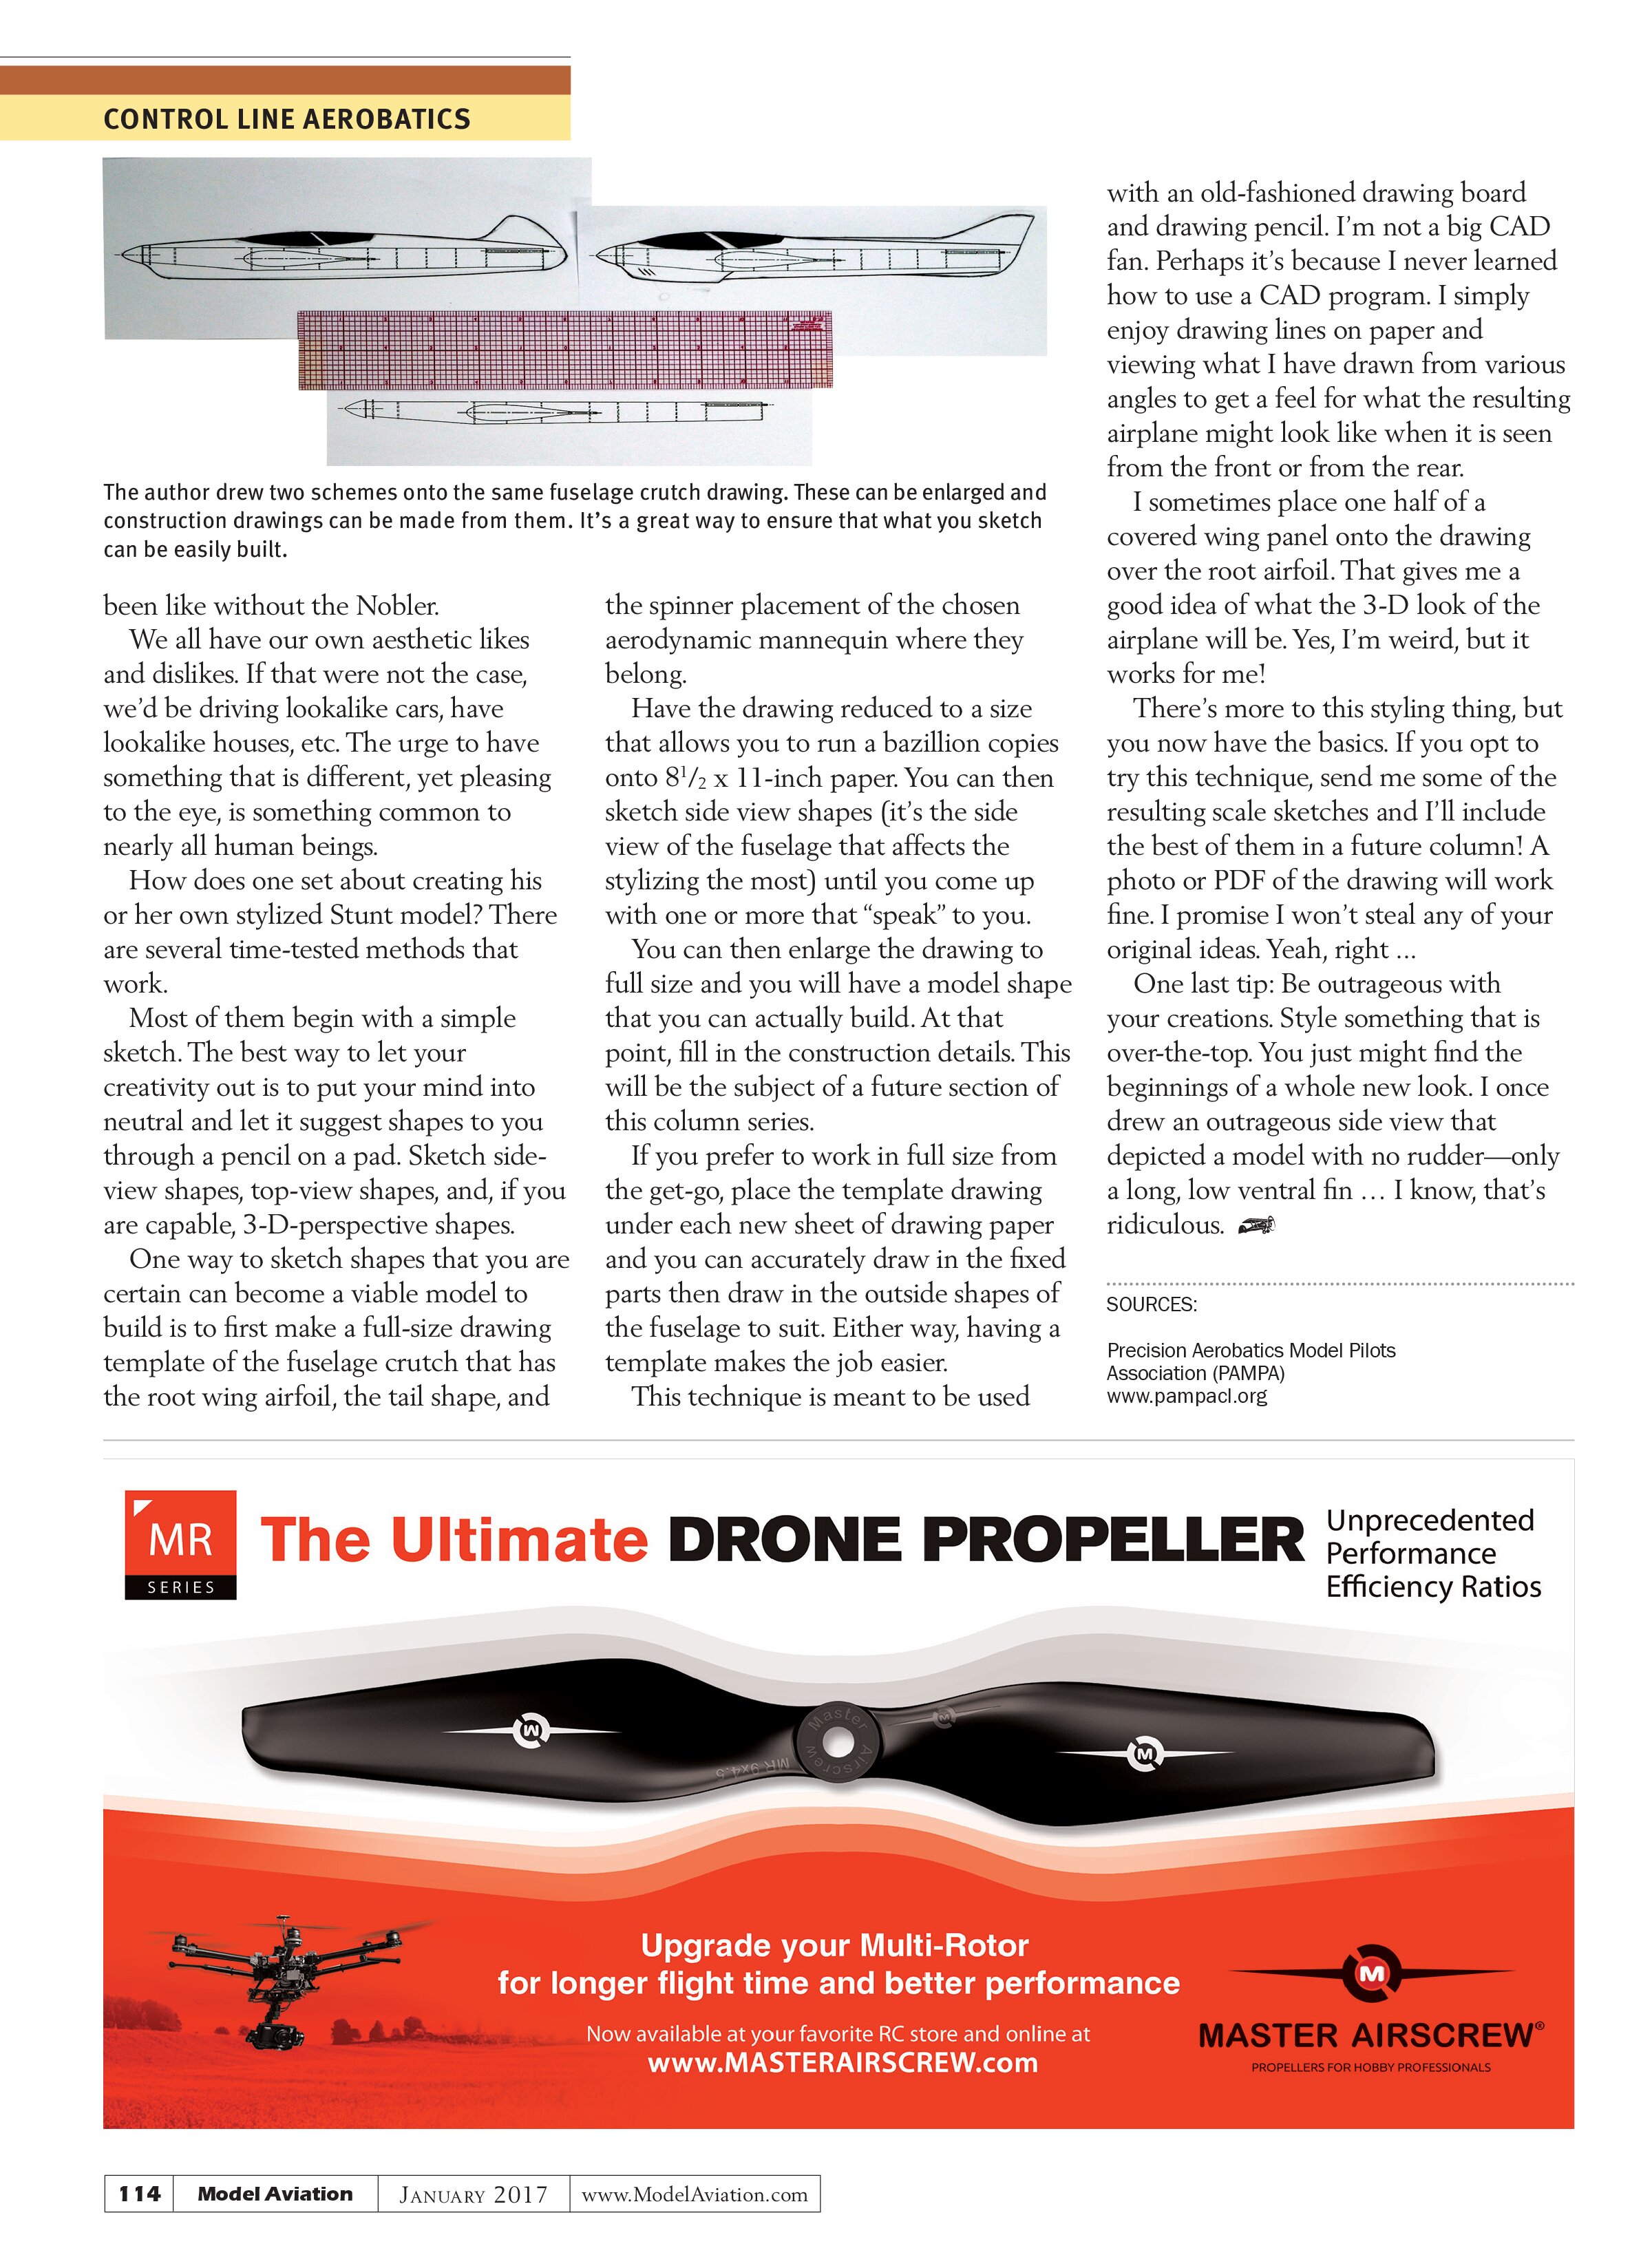
Have the drawing reduced to a size that allows you to run a bazillion copies onto 8½ x 11-inch paper. You can then sketch side view shapes (it’s the side view of the fuselage that affects the stylizing the most) until you come up with one or more that “speak” to you.
You can then enlarge the drawing to full size and you will have a model shape that you can actually build. At that point, fill in the construction details. This will be the subject of a future section of this column series.
If you prefer to work in full size from the get-go, place the template drawing under each new sheet of drawing paper and you can accurately draw in the fixed parts then draw in the outside shapes of the fuselage to suit. Either way, having a template makes the job easier.
This technique is meant to be used with an old-fashioned drawing board and drawing pencil. I’m not a big CAD fan. Perhaps it’s because I never learned how to use a CAD program. I simply enjoy drawing lines on paper and viewing what I have drawn from various angles to get a feel for what the resulting airplane might look like when it is seen from the front or from the rear.
I sometimes place one half of a covered wing panel onto the drawing over the root airfoil. That gives me a good idea of what the 3-D look of the airplane will be. Yes, I’m weird, but it works for me!
There’s more to this styling thing, but you now have the basics. If you opt to try this technique, send me some of the resulting scale sketches and I’ll include the best of them in a future column! A photo or PDF of the drawing will work fine. I promise I won’t steal any of your original ideas. Yeah, right …
One last tip: Be outrageous with your creations. Style something that is over-the-top. You just might find the beginnings of a whole new look. I once drew an outrageous side view that depicted a model with no rudder—only a long, low ventral fin … I know, that’s ridiculous.
Sources:
Precision Aerobatics Model Pilots Association (PAMPA)
www.pampacl.org