The joy of building model airplanes
by Dave Garwood
dave.garwood.518@gmail.com

There might come a time when no manufactured or prebuilt sailplane fulfills your requirements, and the sailplane you really want comes only in kit form. It could be that the sailplane needs to fit a specification, such as the One-Design Racing (ODR) rules. Maybe the landing conditions at your favorite flying locations dictate that you need to be flying EPP foam sailplanes.
These and other requirements will lead to a fascinating and truly cool part of the hobby: building your own sailplanes from scratch or from a kit.
I like building my own sailplanes because I can get exactly what I want. I can emphasize lightweight, “dance like a ballerina” performance, or damage-resistant toughness. I can also decorate the sailplanes to my preference. This column includes some how-to tips and tricks for building from an EPP foam kit.
Fellow Slope flier and avid builder, Ken Hawkins, of Boise, Idaho, wrote this about building:
“Being able to take a box of wood or chunk of foam and turn it into something beautiful that flies great is just wonderful. It feeds my soul.
“I like adding my own twist to the build. I rarely follow the directions exactly. I like to personalize the build. Building is my art.
“When I have a project on my table, I spend hours just thinking about the build and all [of] the different possibilities, potential problems, and solutions. This in itself gives me enjoyment.
“Before I start a kit, I can already visualize the finished product. This, I feel, is very, very important, so all [of] the systems fit and work well together.
“Over the years, I have helped friends set up ARFs that they bought, and I usually end up irritated trying to get the model to work to my satisfaction. I’m going through this now, trying to shoehorn an O.S. .95 four-stroke [engine] into a Sig Kadet Senior ARF for a friend. If I would have built the model myself, it would have been easier.
“It’s like the difference between buying a new cookie-cutter car or restoring your favorite classic. Which one are you going to be more proud of?”
Thank you for the inspiration, Ken. Now for some building tips.
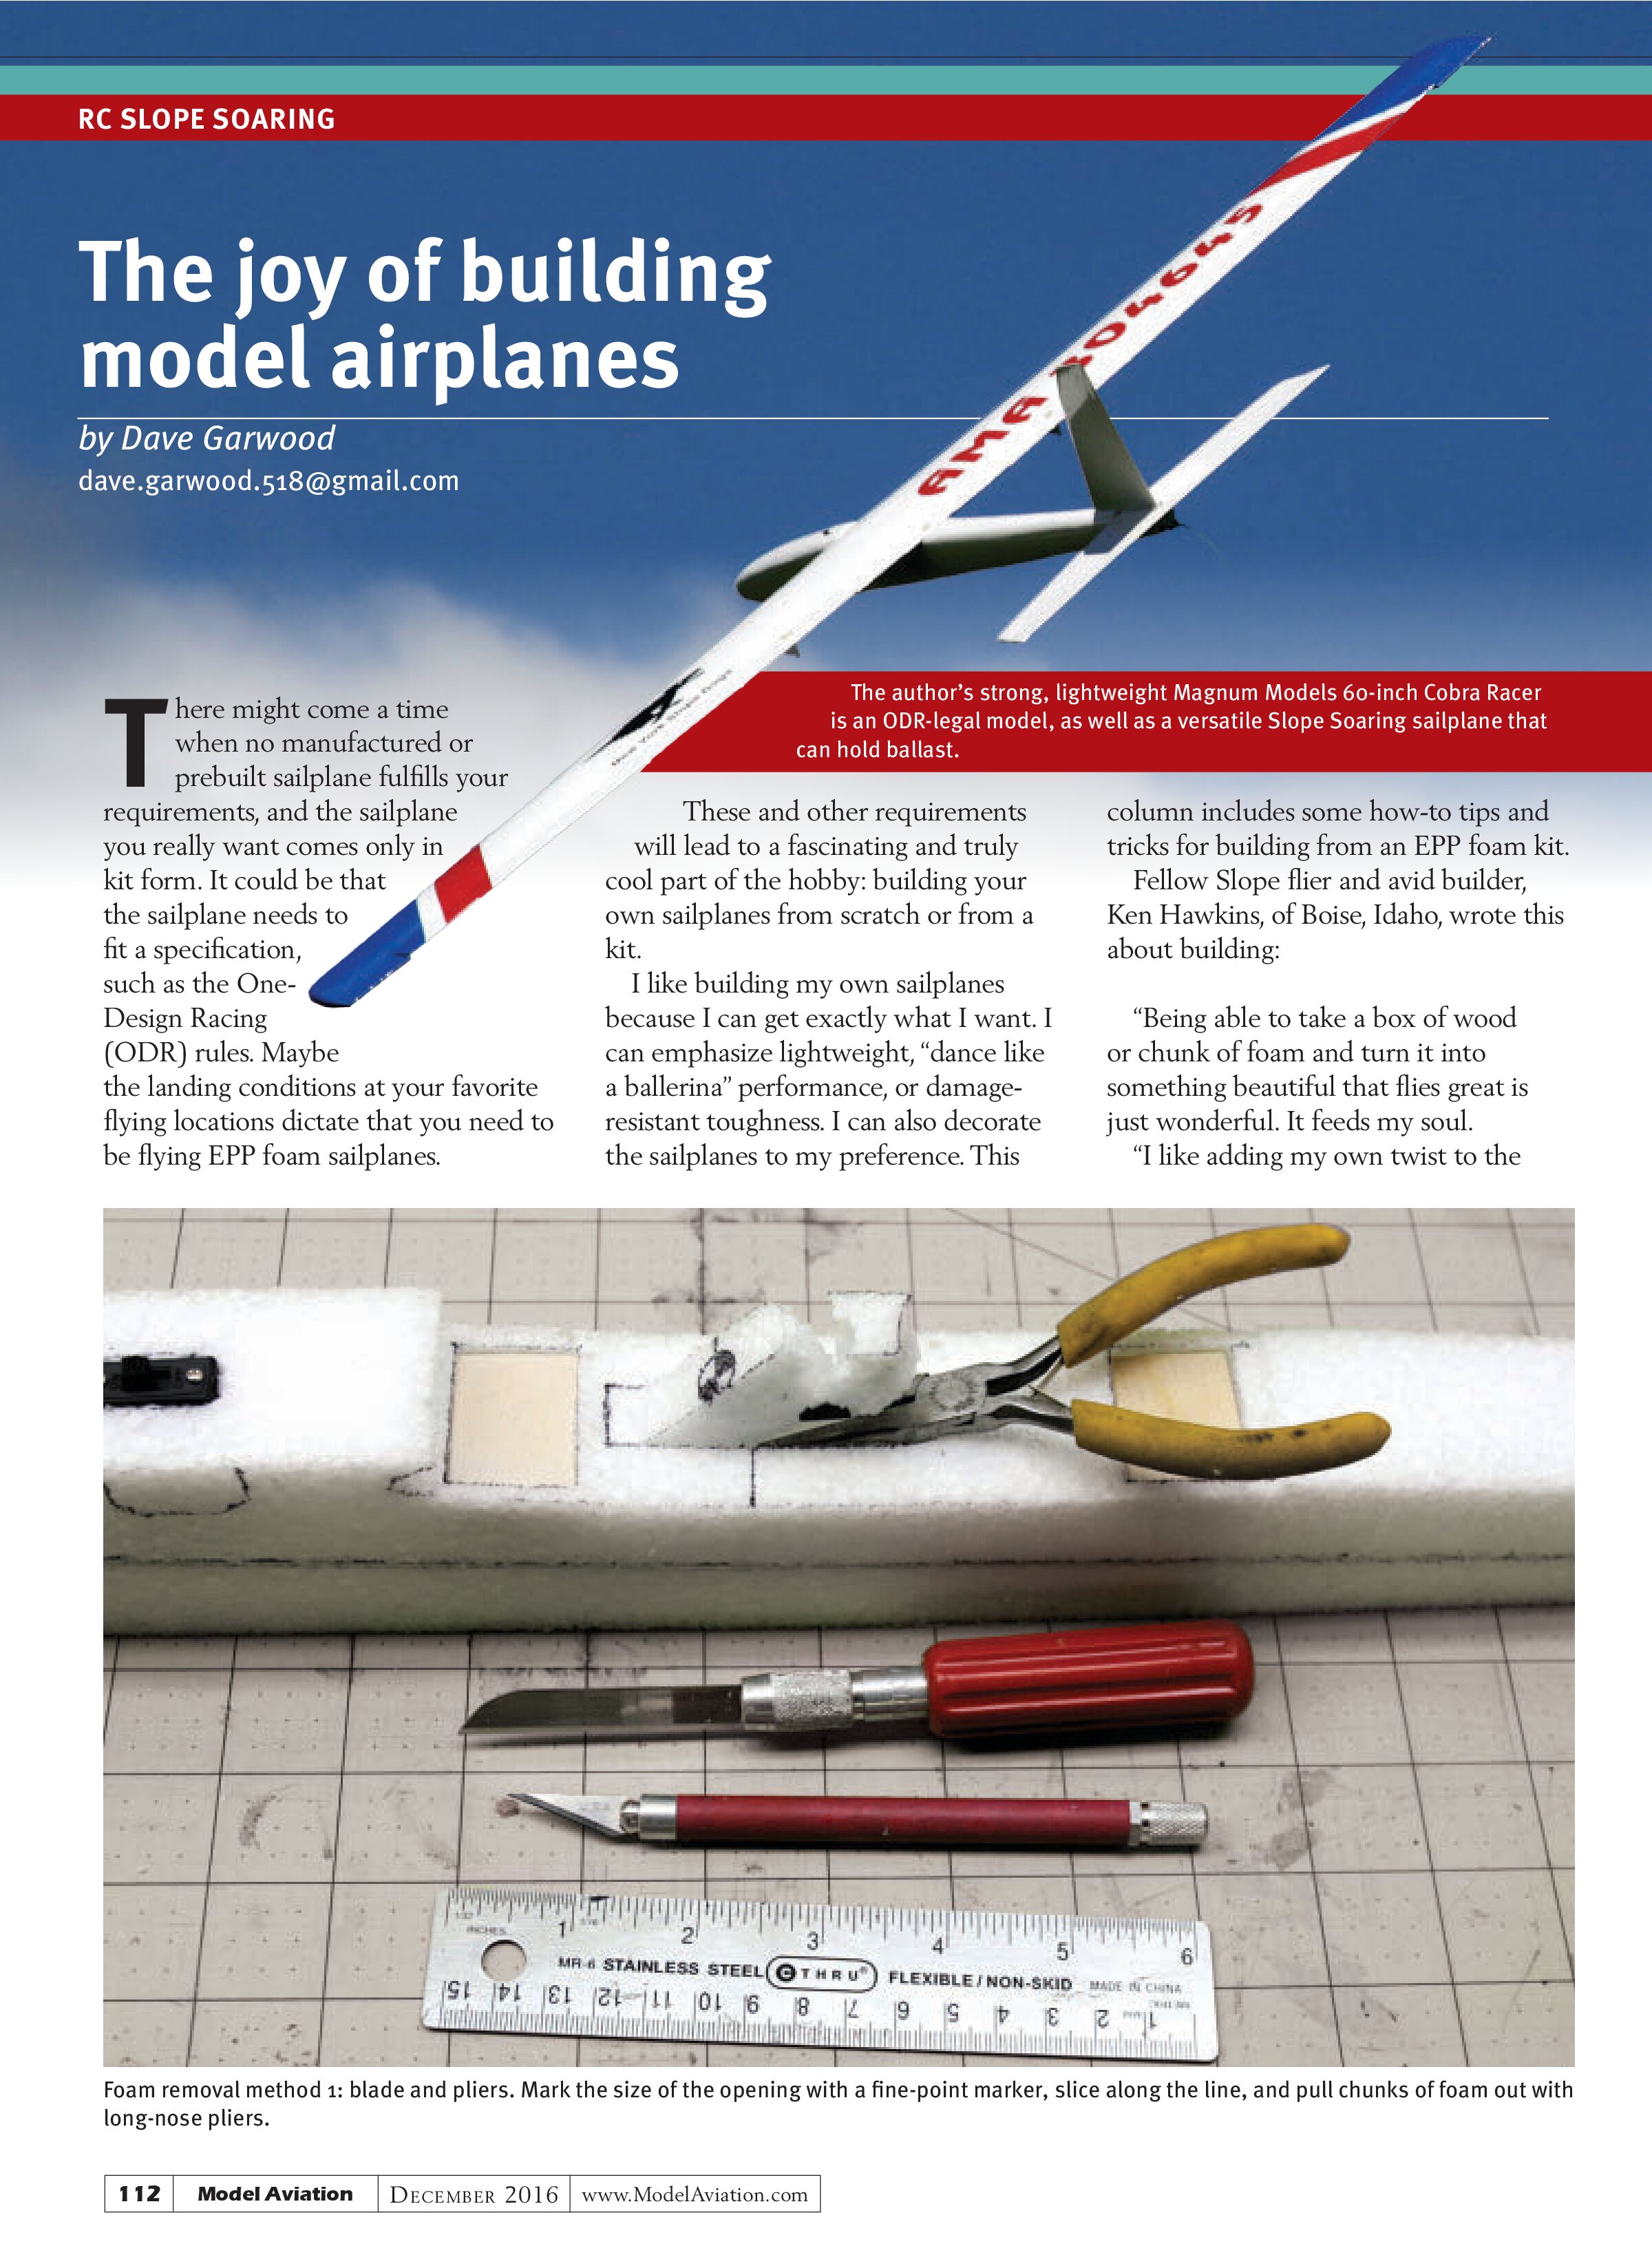
My most recent build was a Magnum Models Cobra Racer. I selected this aircraft anticipating competent or superior performance at some of our scrubby little high-wind, low-lift inland Slope Soaring sites. Almost any Slope sailplane will fly well in great lift. Great Slope sailplanes will even fly in crummy lift.
The Cobra Racer’s parts layout drawing shows an old-fashioned large receiver, but with new, smaller, lightweight receivers. I was able to not only get the weight down, but also move the elevator servo farther forward inside the fuselage so that only 1/8-ounce of nose weight was needed to balance the airframe.
The factory all-up weight specification is 23 ounces (9.2 ounces per square foot of wing loading), but mine came in at 21.3 ounces (8.5 ounces per square foot). My Cobra Racer will take two slugs of ballast at the center of gravity, raising the weight to 25.3 ounces and 29.3 ounces, and increasing the wing loading to 10.1 and 11.7 ounces per square foot. It will float like a butterfly and zip like a dart.
On its first slope day, my Cobra Racer exceeded expectations. Oh, the joy of building my own sailplanes from kits.
Foam Kit Building Tips
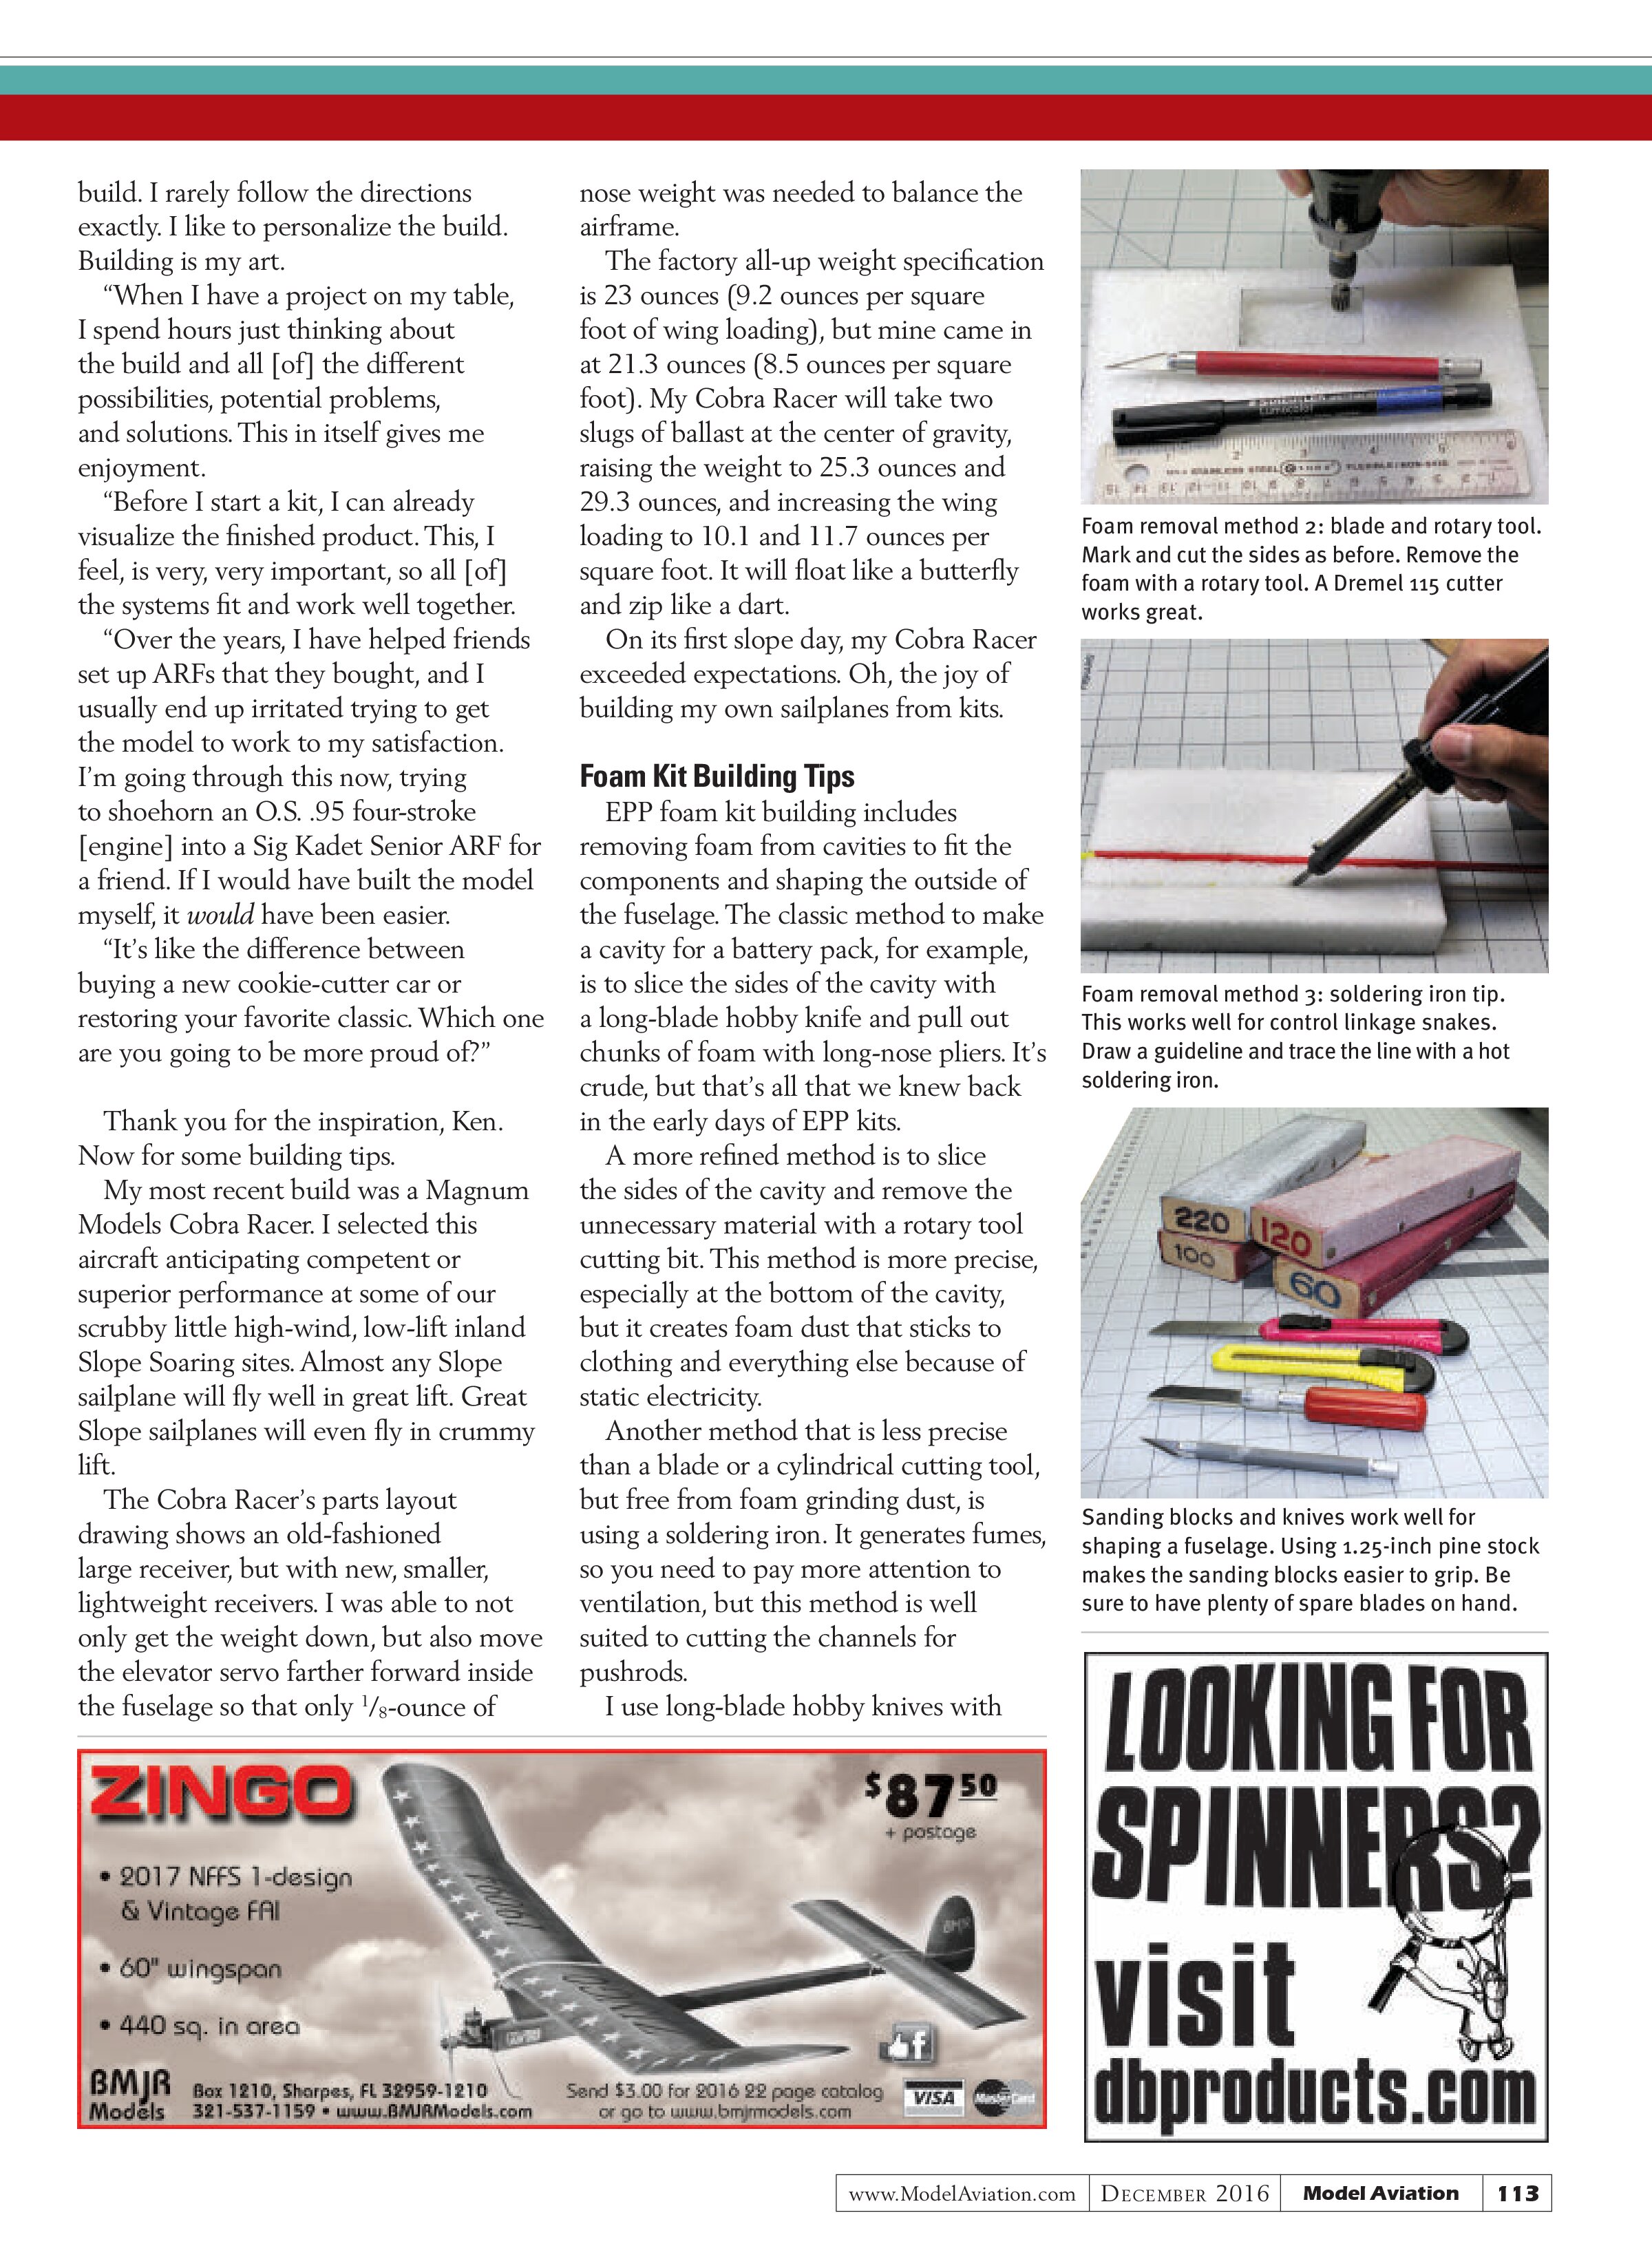
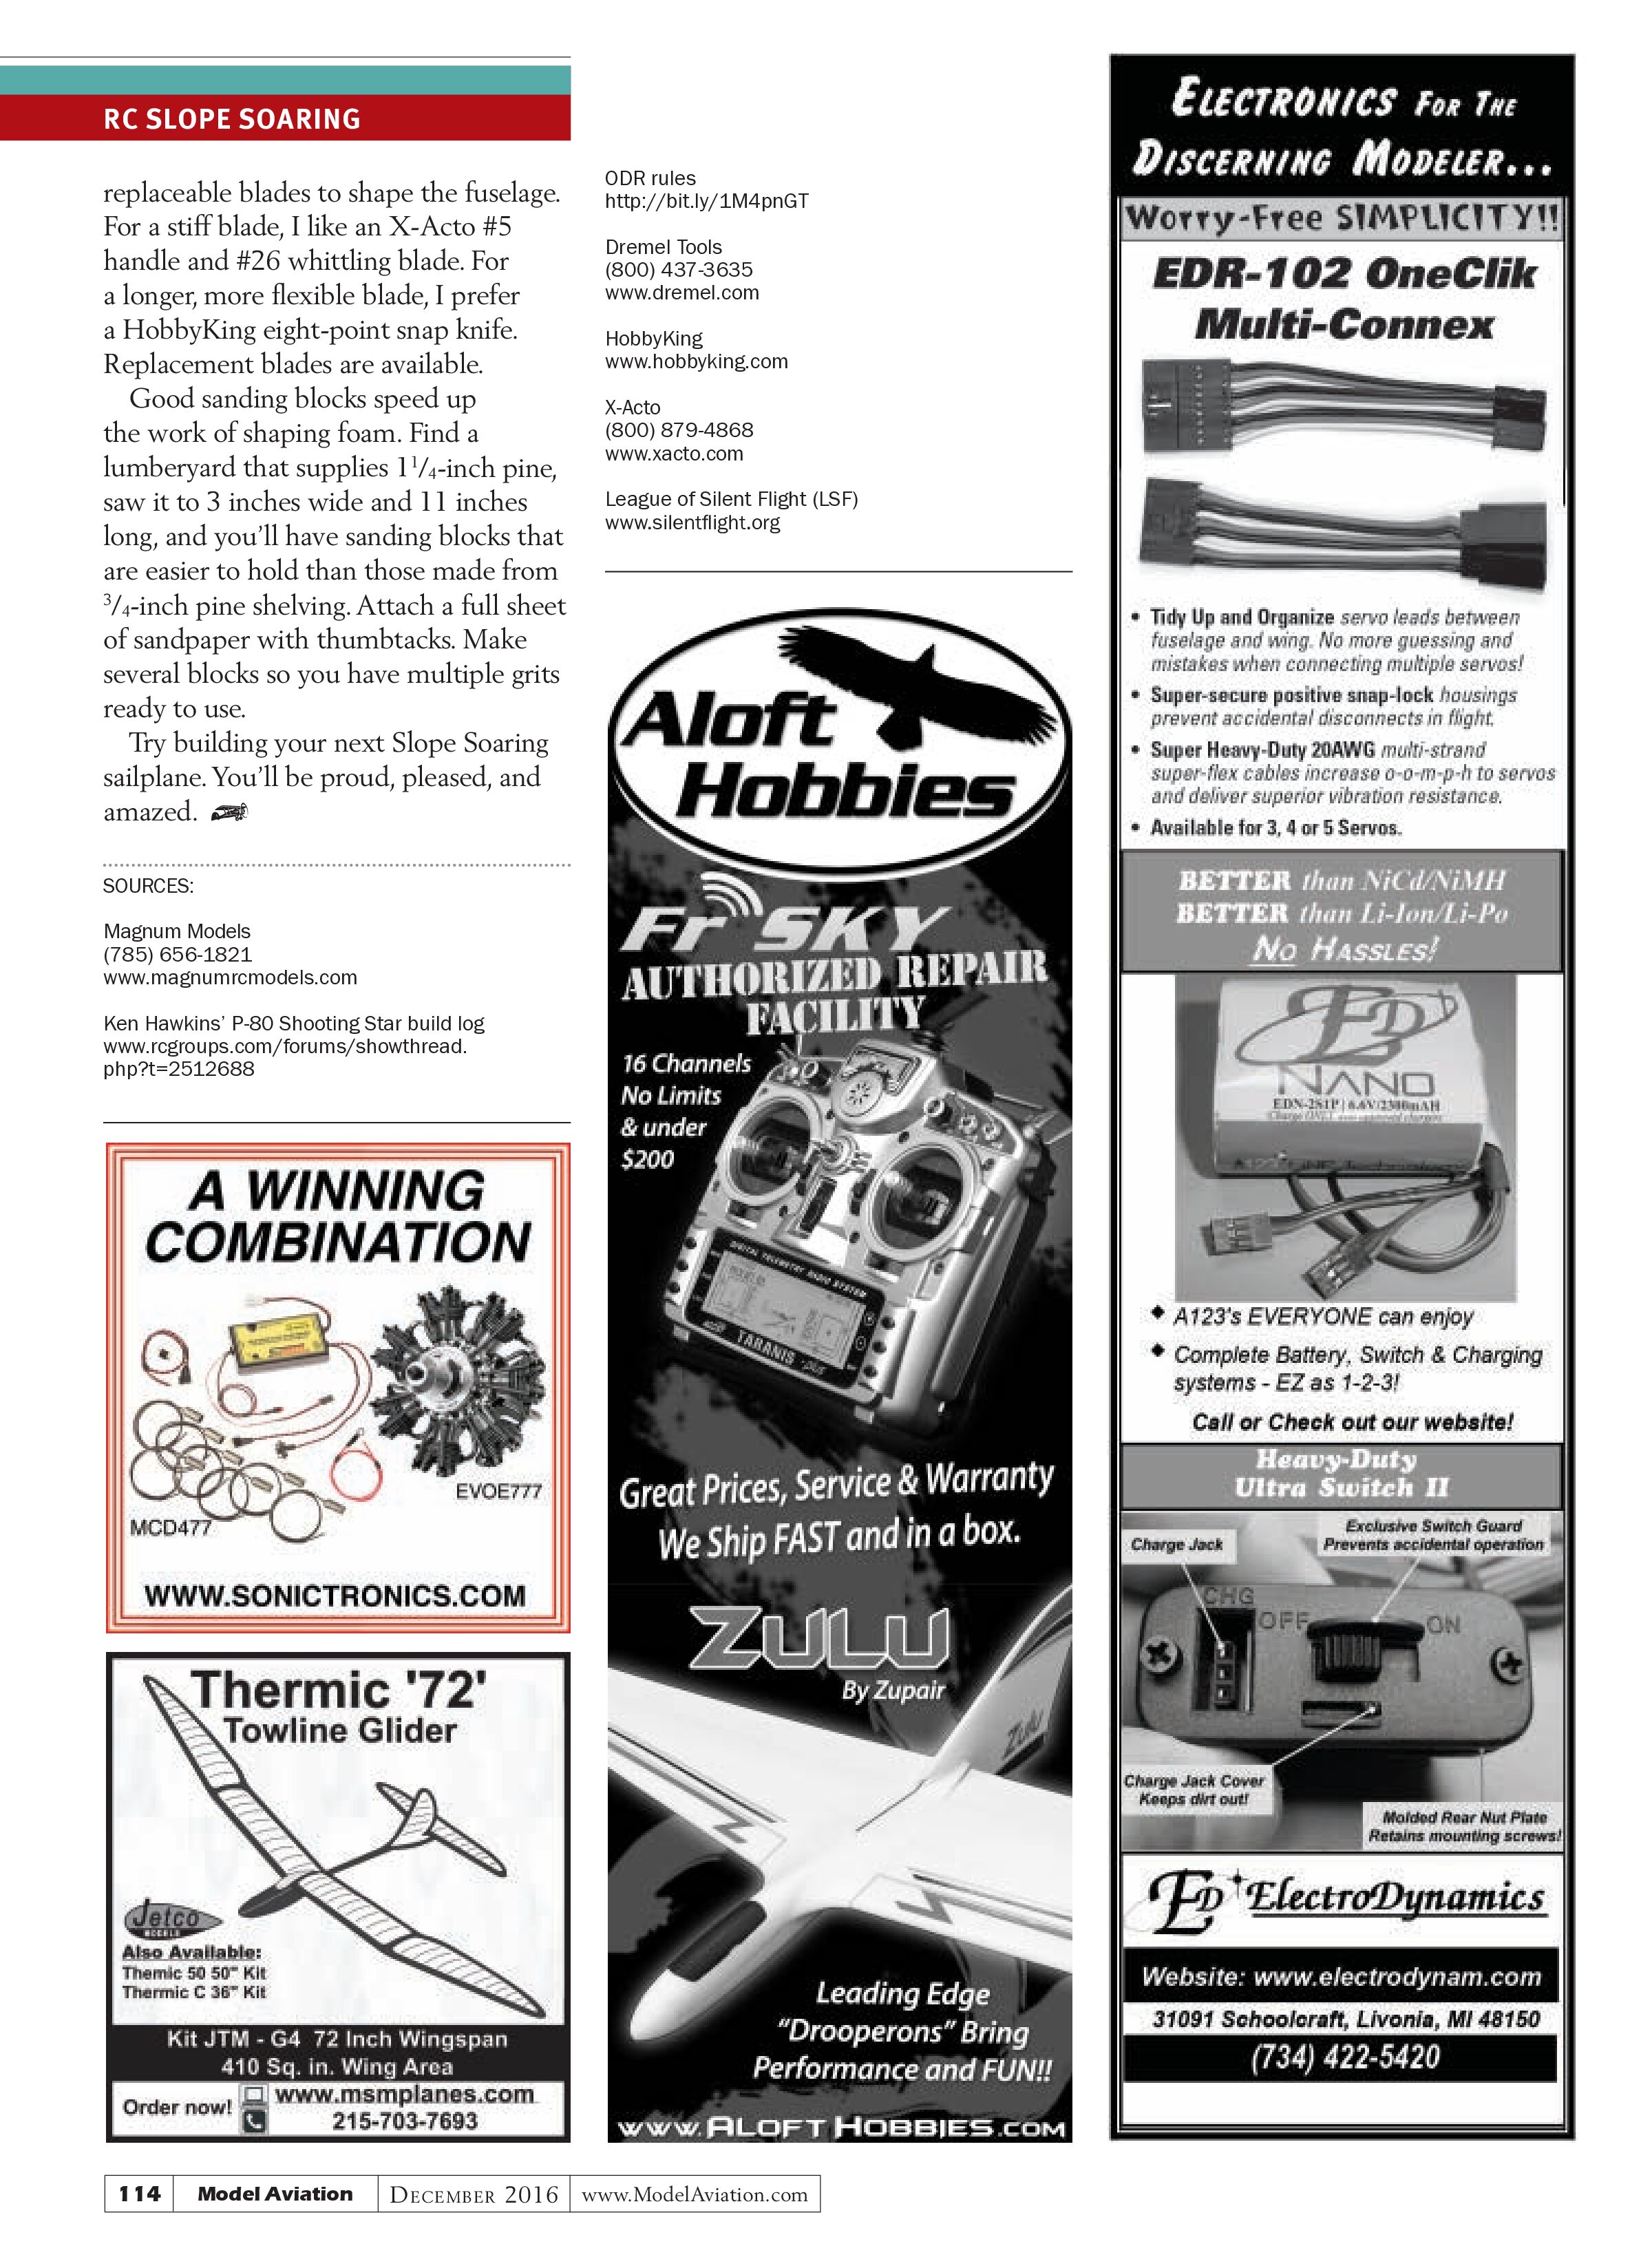
EPP foam kit building includes removing foam from cavities to fit the components and shaping the outside of the fuselage. The classic method to make a cavity for a battery pack, for example, is to slice the sides of the cavity with a long-blade hobby knife and pull out chunks of foam with long-nose pliers. It’s crude, but that’s all that we knew back in the early days of EPP kits.
A more refined method is to slice the sides of the cavity and remove the unnecessary material with a rotary tool cutting bit. This method is more precise, especially at the bottom of the cavity, but it creates foam dust that sticks to clothing and everything else because of static electricity.
Another method that is less precise than a blade or a cylindrical cutting tool, but free from foam grinding dust, is using a soldering iron. It generates fumes, so you need to pay more attention to ventilation, but this method is well suited to cutting the channels for pushrods.
I use long-blade hobby knives with

build. I rarely follow the directions exactly. I like to personalize the build. Building is my art.
“When I have a project on my table, I spend hours just thinking about the build and all [of] the different possibilities, potential problems, and solutions. This in itself gives me enjoyment.
“Before I start a kit, I can already visualize the finished product. This, I feel, is very, very important, so all [of] the systems fit and work well together.
“Over the years, I have helped friends set up ARFs that they bought, and I usually end up irritated trying to get the model to work to my satisfaction. I’m going through this now, trying to shoehorn an O.S. .95 four-stroke [engine] into a Sig Kadet Senior ARF for a friend. If I would have built the model myself, it would have been easier.
“It’s like the difference between buying a new cookie-cutter car or restoring your favorite classic. Which one are you going to be more proud of?”
Thank you for the inspiration, Ken. Now for some building tips.
My most recent build was a Magnum Models Cobra Racer. I selected this aircraft anticipating competent or superior performance at some of our scrubby little high-wind, low-lift inland Slope Soaring sites. Almost any Slope sailplane will fly well in great lift. Great Slope sailplanes will even fly in crummy lift.
The Cobra Racer’s parts layout drawing shows an old-fashioned large receiver, but with new, smaller, lightweight receivers. I was able to not only get the weight down, but also move the elevator servo farther forward inside the fuselage so that only 1/8-ounce of nose weight was needed to balance the airframe.
The factory all-up weight specification is 23 ounces (9.2 ounces per square foot of wing loading), but mine came in at 21.3 ounces (8.5 ounces per square foot). My Cobra Racer will take two slugs of ballast at the center of gravity, raising the weight to 25.3 ounces and 29.3 ounces, and increasing the wing loading to 10.1 and 11.7 ounces per square foot. It will float like a butterfly and zip like a dart.
On its first slope day, my Cobra Racer exceeded expectations. Oh, the joy of building my own sailplanes from kits.
Foam Kit Building Tips
EPP foam kit building includes removing foam from cavities to fit the components and shaping the outside of the fuselage. The classic method to make a cavity for a battery pack, for example, is to slice the sides of the cavity with a long-blade hobby knife and pull out chunks of foam with long-nose pliers. It’s crude, but that’s all that we knew back in the early days of EPP kits.
A more refined method is to slice the sides of the cavity and remove the unnecessary material with a rotary tool cutting bit. This method is more precise, especially at the bottom of the cavity, but it creates foam dust that sticks to clothing and everything else because of static electricity.
Another method that is less precise than a blade or a cylindrical cutting tool, but free from foam grinding dust, is using a soldering iron. It generates fumes, so you need to pay more attention to ventilation, but this method is well suited to cutting the channels for pushrods.
I use long-blade hobby knives with


replaceable blades to shape the fuselage. For a stiff blade, I like an X-Acto #5 handle and #26 whittling blade. For a longer, more flexible blade, I prefer a HobbyKing eight-point snap knife. Replacement blades are available.
Good sanding blocks speed up the work of shaping foam. Find a lumberyard that supplies 1¼-inch pine, saw it to 3 inches wide and 11 inches long, and you’ll have sanding blocks that are easier to hold than those made from ¾-inch pine shelving. Attach a full sheet of sandpaper with thumbtacks. Make several blocks so you have multiple grits ready to use.
Try building your next Slope Soaring sailplane. You’ll be proud, pleased, and amazed.
SOURCES:
Magnum Models
(785) 656-1821
www.magnumr cmodels.com
Ken Hawkins’ P-80 Shooting Star build log
www.rcgroups.com/forums/showthread.php?t=2512688
ODR rules
http://bit.ly/1M4pnGT
Dremel Tools
(800) 437-3635
www.dremel.com
HobbyKing
www.hobbyking.com
X-Acto
(800) 879-4868
www.xacto.com
League of Silent Flight (LSF)
www.silentflight.org