Micro-size electric FF models


Q636: I noted with interest the piece in your June 2016 “Frequently Asked Questions” column about the new E-20 electric-powered Free Flight (FF) model contests. I’m not a contest-type person, but I began wondering if the E-20 power system could be used on micro-size sport or scale FF aircraft, just for the fun of it. Do you have any thoughts?
A636: I hadn’t given that any thought until this reader wrote to me. Since publishing my little FF E-20 Civy Boy, I’ve logged many flights on it. They have been basically short flights, because at age 78, I’m not too keen about chasing models across the field.
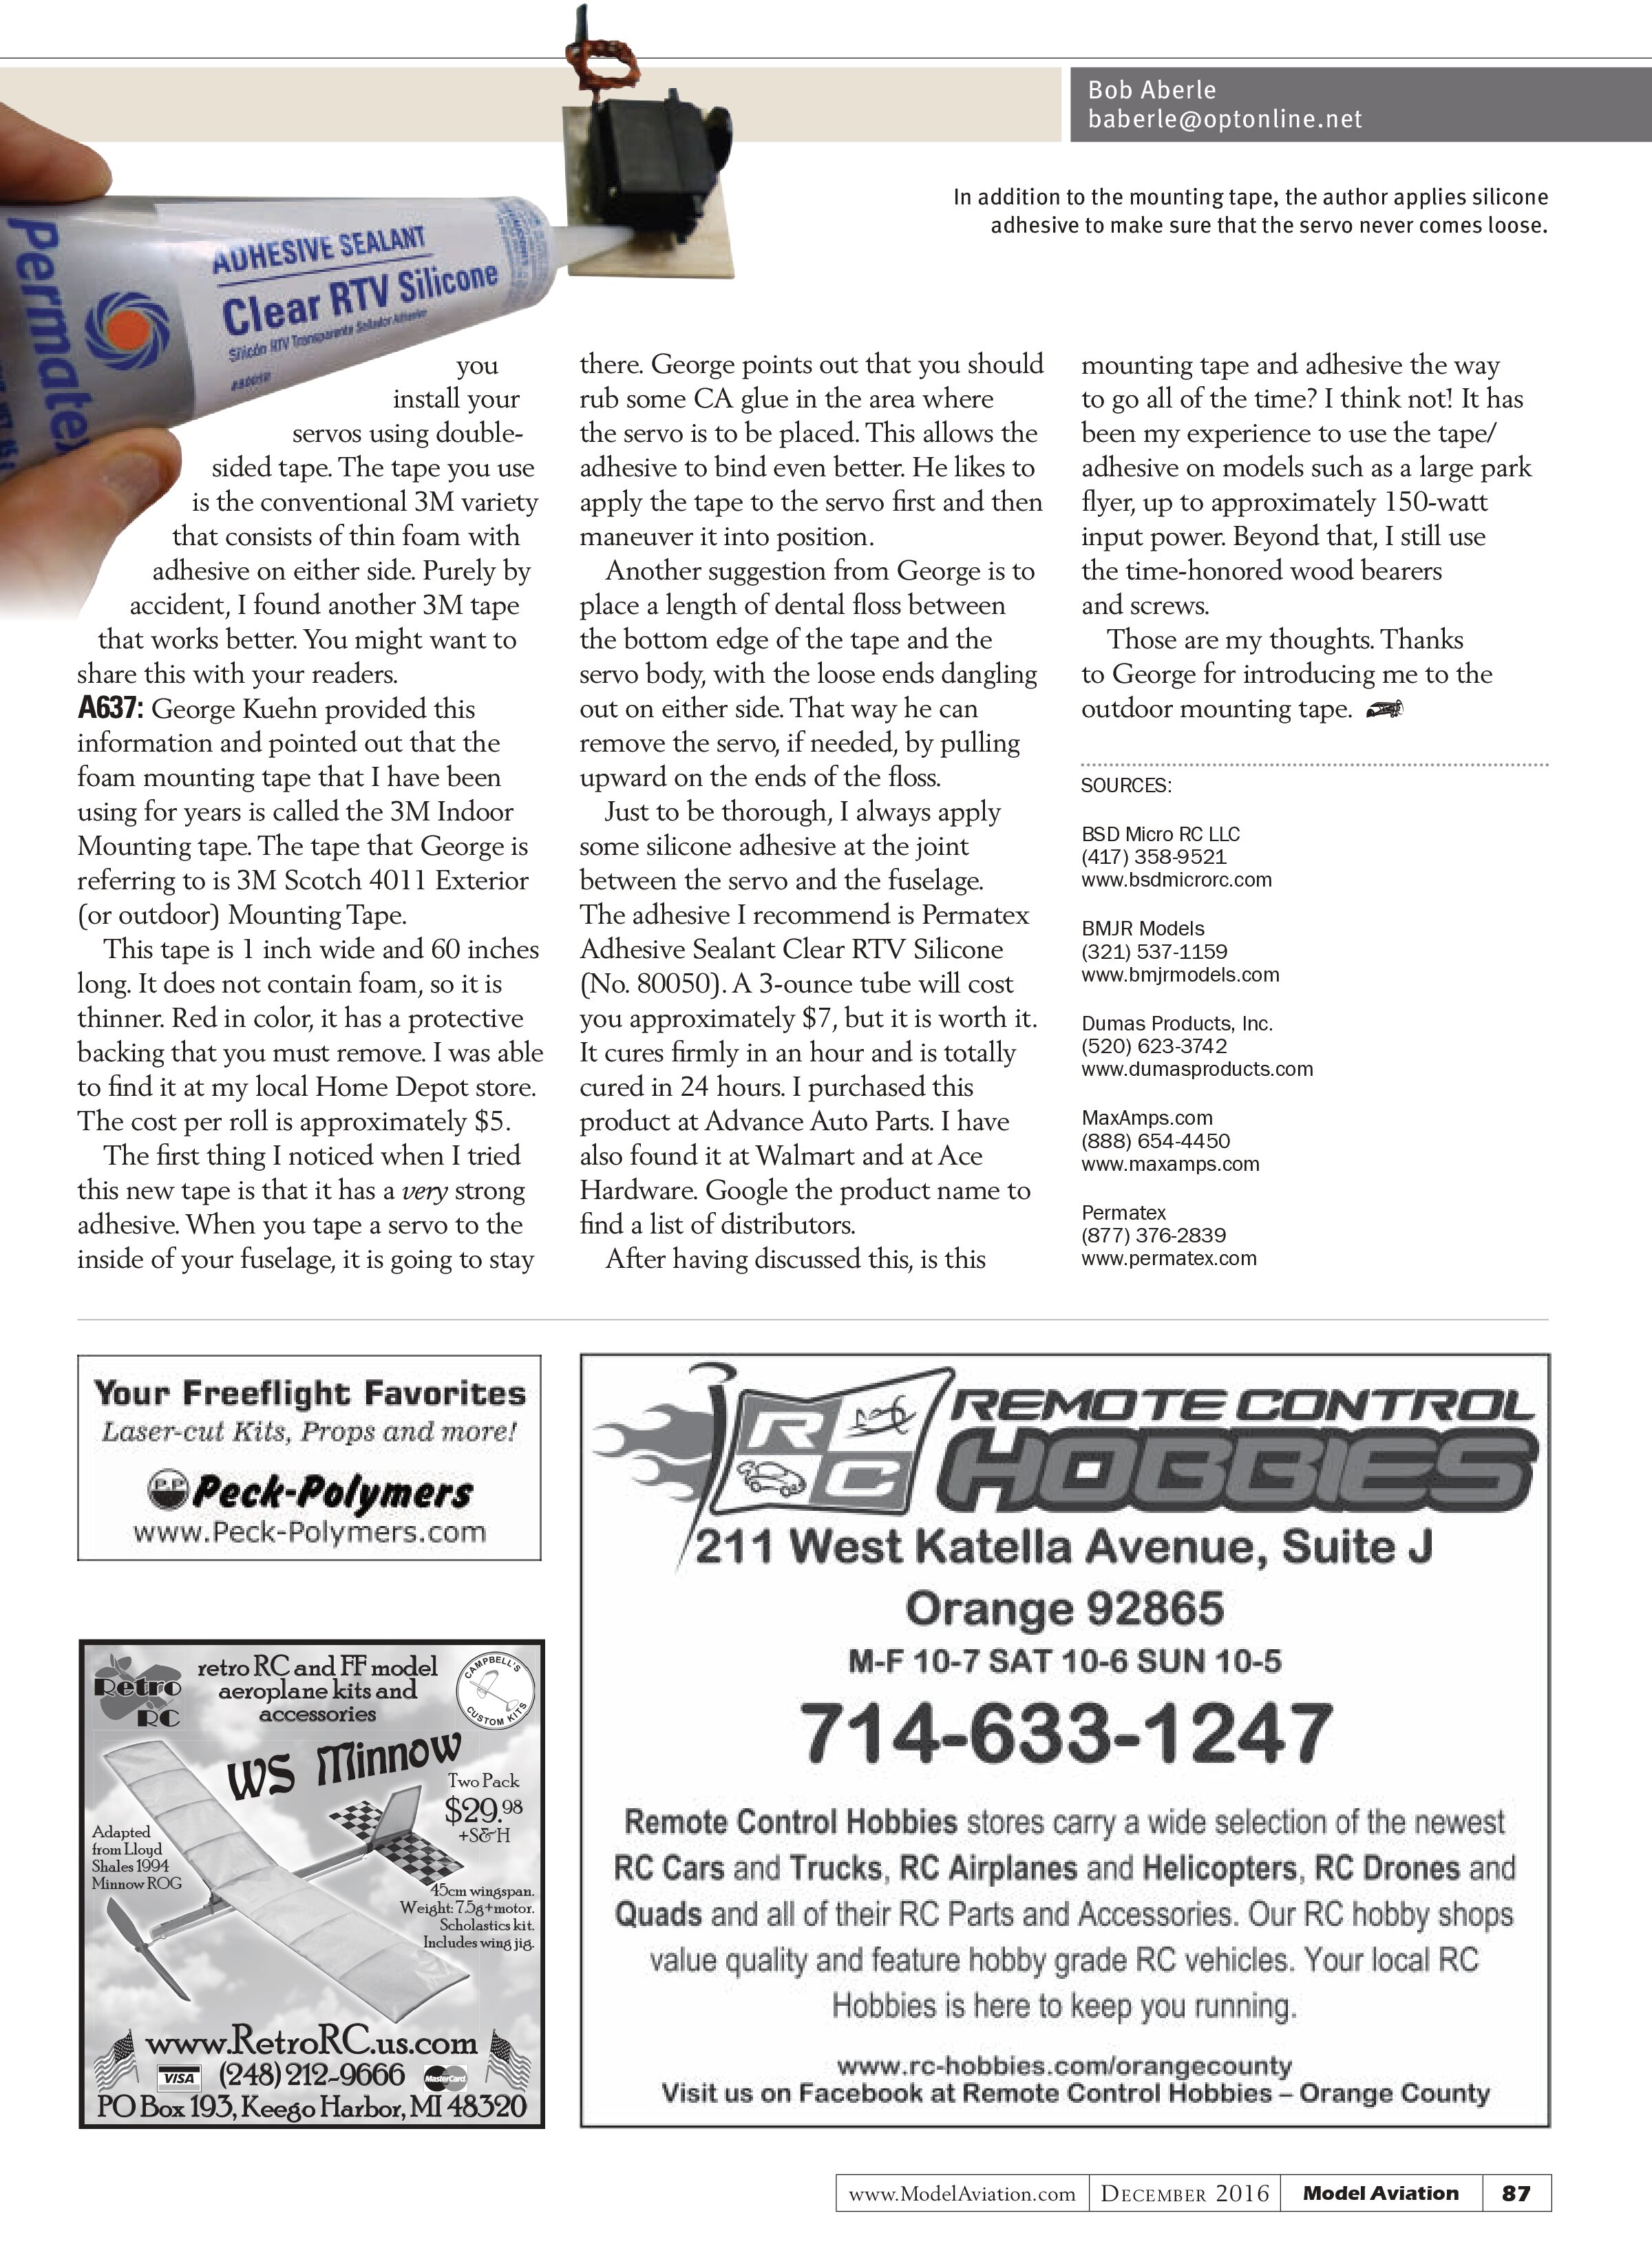
I’ve learned that the E-20 power system, consisting of an E-flite P-51 brushed motor, a special timer developed by Bob Selman of BSD Micro RC, and a single 150 mAh LiPo battery cell, is capable of flying models weighing up to 2 ounces. E-20 airplanes must weigh at least 1 ounce. To win, you want to be at that mark. Believe me—that motor system has considerable power potential.
Keeping all of this in mind, I decided to install my E-20 power system into a
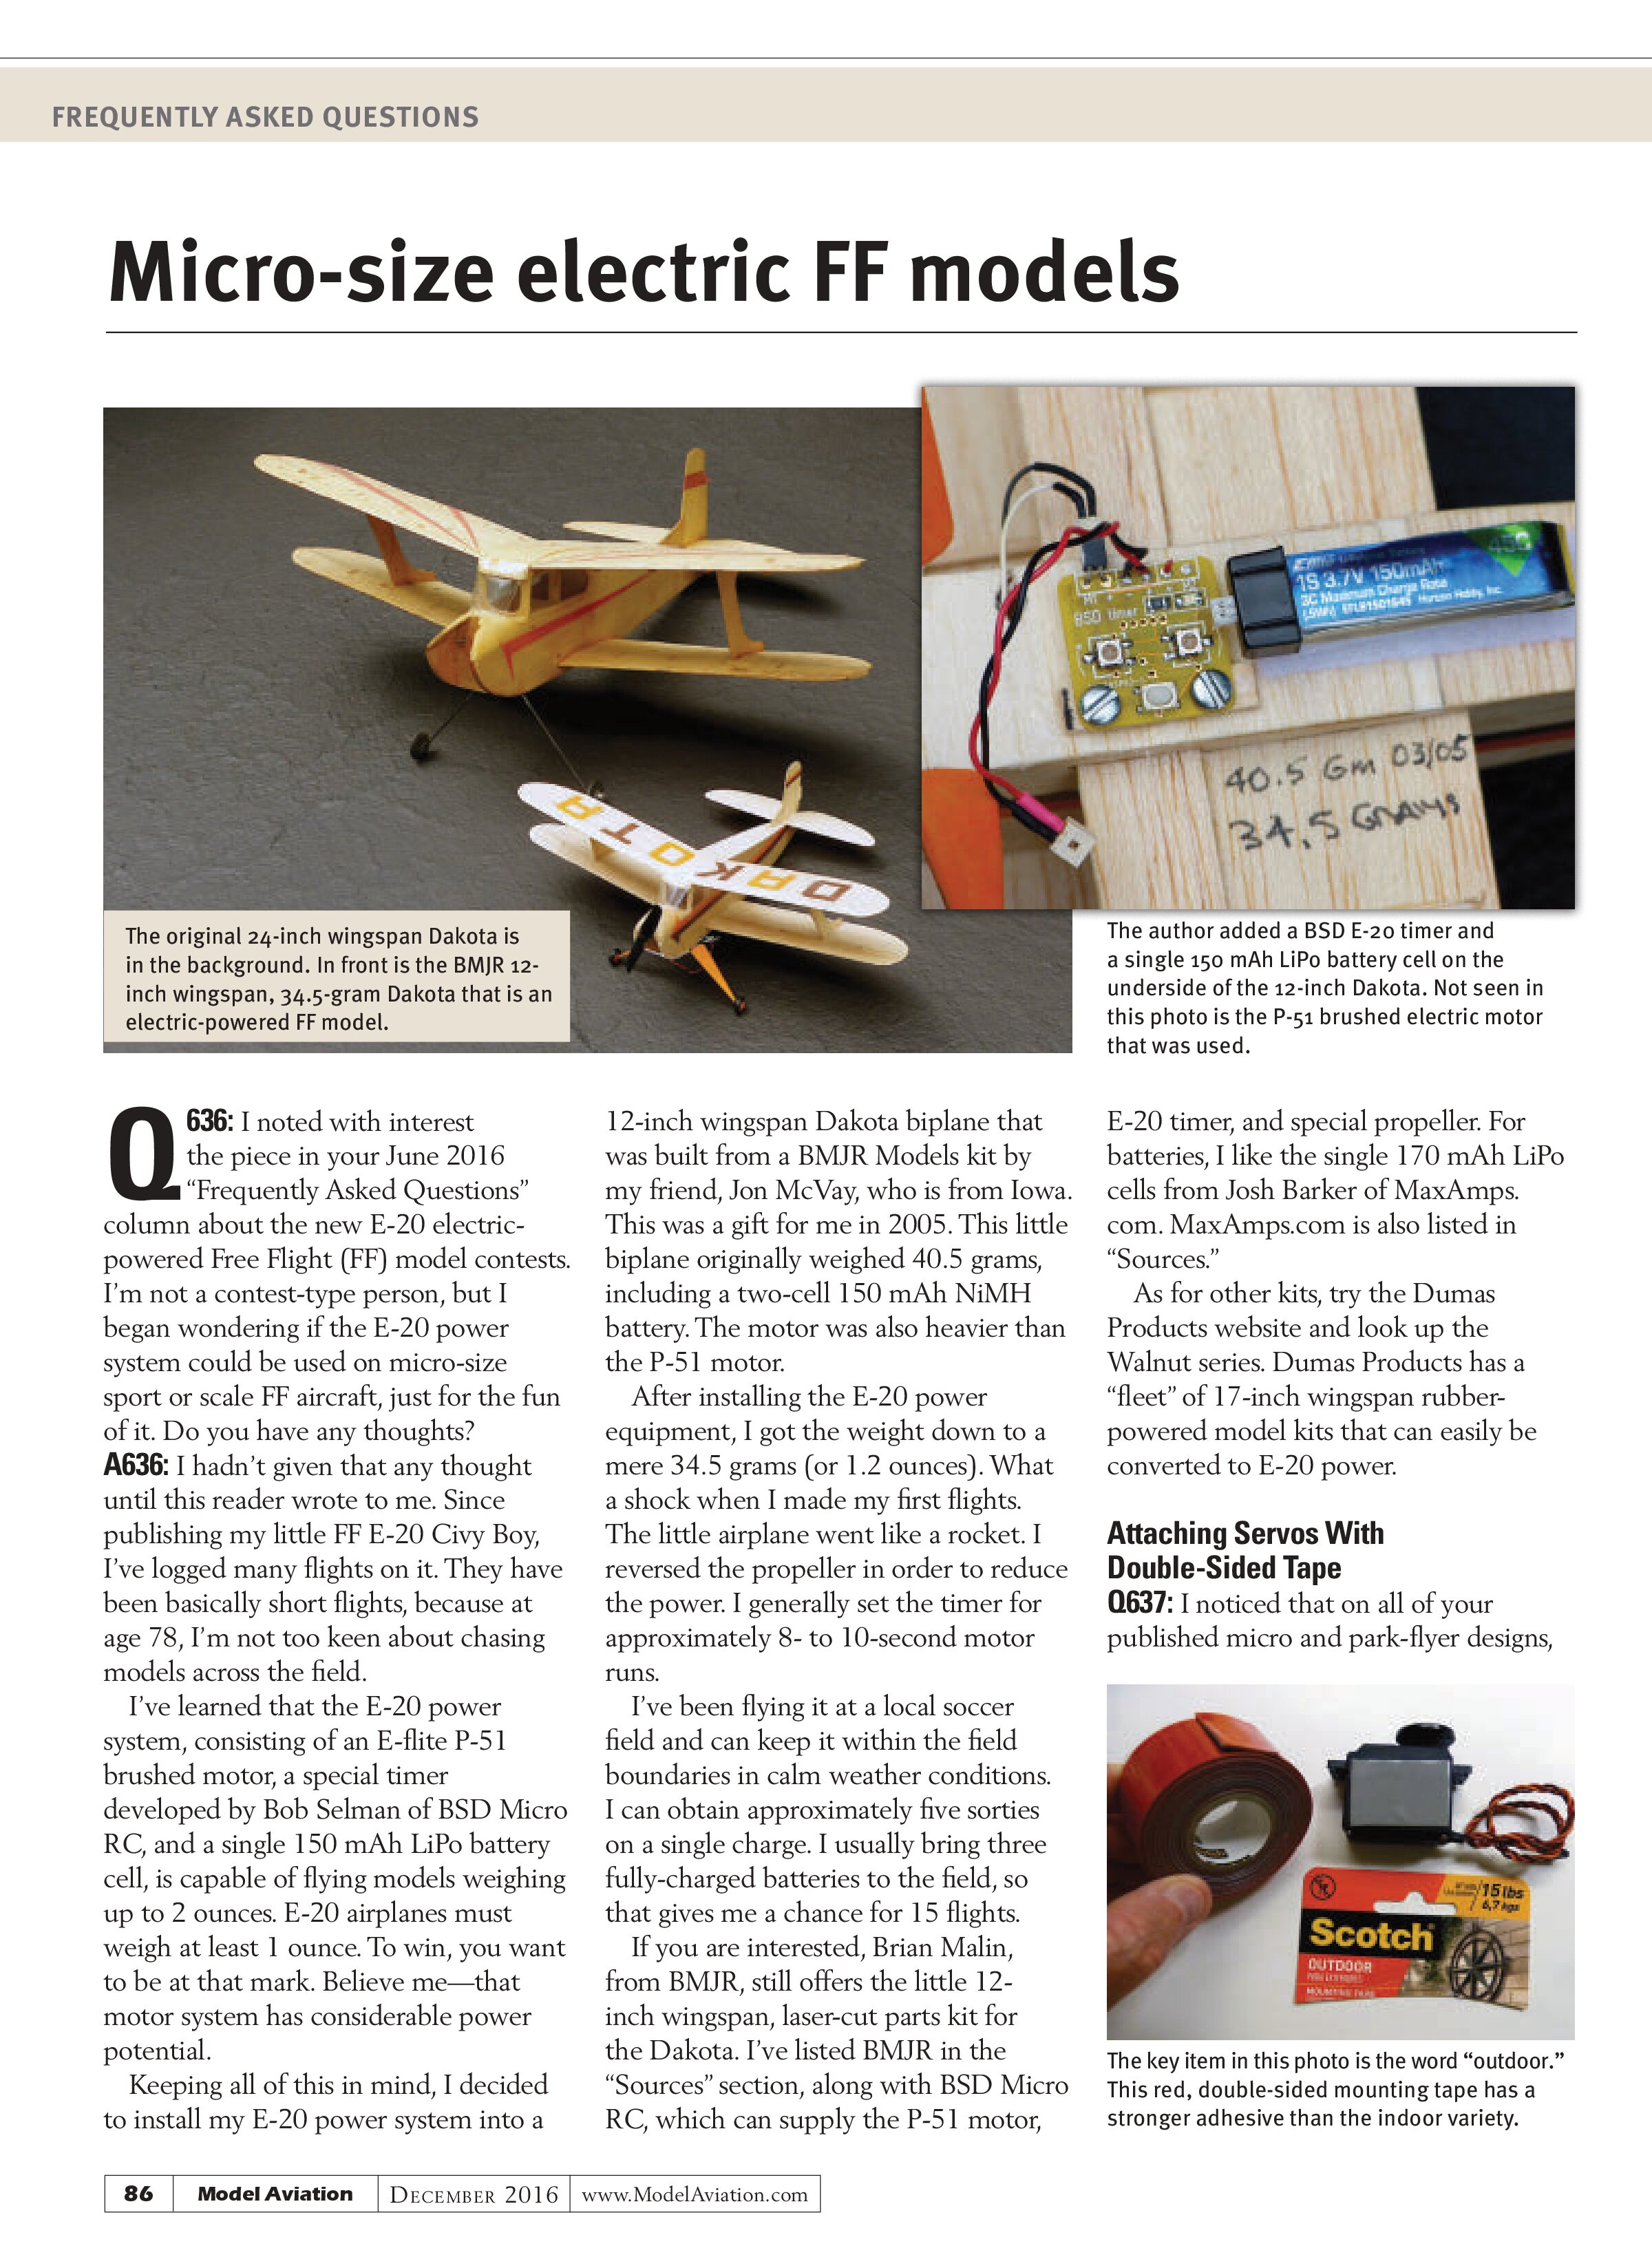
12-inch wingspan Dakota biplane that was built from a BMJR Models kit by my friend, Jon McVay, who is from Iowa. This was a gift for me in 2005. This little biplane originally weighed 40.5 grams, including a two-cell 150 mAh NiMH battery. The motor was also heavier than the P-51 motor.
After installing the E-20 power equipment, I got the weight down to a mere 34.5 grams (or 1.2 ounces). What a shock when I made my first flights. The little airplane went like a rocket. I reversed the propeller in order to reduce the power. I generally set the timer for approximately 8- to 10-second motor runs.
I’ve been flying it at a local soccer field and can keep it within the field boundaries in calm weather conditions. I can obtain approximately five sorties on a single charge. I usually bring three fully-charged batteries to the field, so that gives me a chance for 15 flights.
If you are interested, Brian Malin, from BMJR, still offers the little 12-inch wingspan, laser-cut parts kit for the Dakota. I’ve listed BMJR in the “Sources” section, along with BSD Micro RC, which can supply the P-51 motor,
E-20 timer, and special propeller. For batteries, I like the single 170 mAh LiPo cells from Josh Barker of MaxAmps.com. MaxAmps.com is also listed in “Sources.”
As for other kits, try the Dumas Products website and look up the Walnut series. Dumas Products has a “fleet” of 17-inch wingspan rubber-powered model kits that can easily be converted to E-20 power.
Attaching Servos With Double-Sided Tape
Q637: I noticed that on all of your published micro and park-flyer designs,

A637: George Kuehn provided this information and pointed out that the foam mounting tape that I have been using for years is called the 3M Indoor Mounting tape. The tape that George is referring to is 3M Scotch 4011 Exterior (or outdoor) Mounting Tape.
This tape is 1 inch wide and 60 inches long. It does not contain foam, so it is thinner. Red in color, it has a protective backing that you must remove. I was able to find it at my local Home Depot store. The cost per roll is approximately $5.
The first thing I noticed when I tried this new tape is that it has a very strong adhesive. When you tape a servo to the inside of your fuselage, it is going to stay
there. George points out that you should rub some CA glue in the area where the servo is to be placed. This allows the adhesive to bind even better. He likes to apply the tape to the servo first and then maneuver it into position.
Another suggestion from George is to place a length of dental floss between the bottom edge of the tape and the servo body, with the loose ends dangling out on either side. That way he can remove the servo, if needed, by pulling upward on the ends of the floss.
Just to be thorough, I always apply some silicone adhesive at the joint between the servo and the fuselage. The adhesive I recommend is Permatex Adhesive Sealant Clear RTV Silicone (No. 80050). A 3-ounce tube will cost you approximately $7, but it is worth it. It cures firmly in an hour and is totally cured in 24 hours. I purchased this product at Advance Auto Parts. I have also found it at Walmart and at Ace Hardware. Google the product name to find a list of distributors.
After having discussed this, is this mounting tape and adhesive the way to go all of the time? I think not! It has been my experience to use the tape/adhesive on models such as a large park flyer, up to approximately 150-watt input power. Beyond that, I still use the time-honored wood bearers and screws.
Those are my thoughts. Thanks to George for introducing me to the outdoor mounting tape.
SOURCES:
BSD Micro RC LLC
(417) 358-9521
www.bsdmicrorc.com
BMJR Models
(321) 537-1159
www.bjmrmodels.com
Dumas Products, Inc.
(520) 623-3742
www.dumasproducts.com
MaxAmps.com
(888) 654-4450
www.maxamps.com
Permatex
(877) 376-2839
www.permatex.com