Product Spotlight
New products that are Worth a Closer Look
PROGRESSIVERC EC5 CONNECTOR ASSEMBLY PUNCH
Greg Gimlick reviewed the ProgressiveRC EC5 Connector Assembly Punch. Here is what he had to say:
Now and then, a tool comes along that makes you slap your forehead and wonder why it hadn’t come along sooner, or why you didn’t think of it yourself. ProgressiveRC’s EC5 Connector Assembly Punch is one of those tools. For the meager sum of $7.99, you can put an end to the cussing and fussing when trying to assemble an EC5 connector.
The EC5 is a great connector that handles substantial current and offers excellent protection against shorts, etc. It has a nice grip to pull the connector apart, too.
There are some tips to assembling a connector, and one of the complaints I hear has to do with using a small screwdriver or something to help insert the connector fully into the plastic housing. Here are three tips to make your life easy:
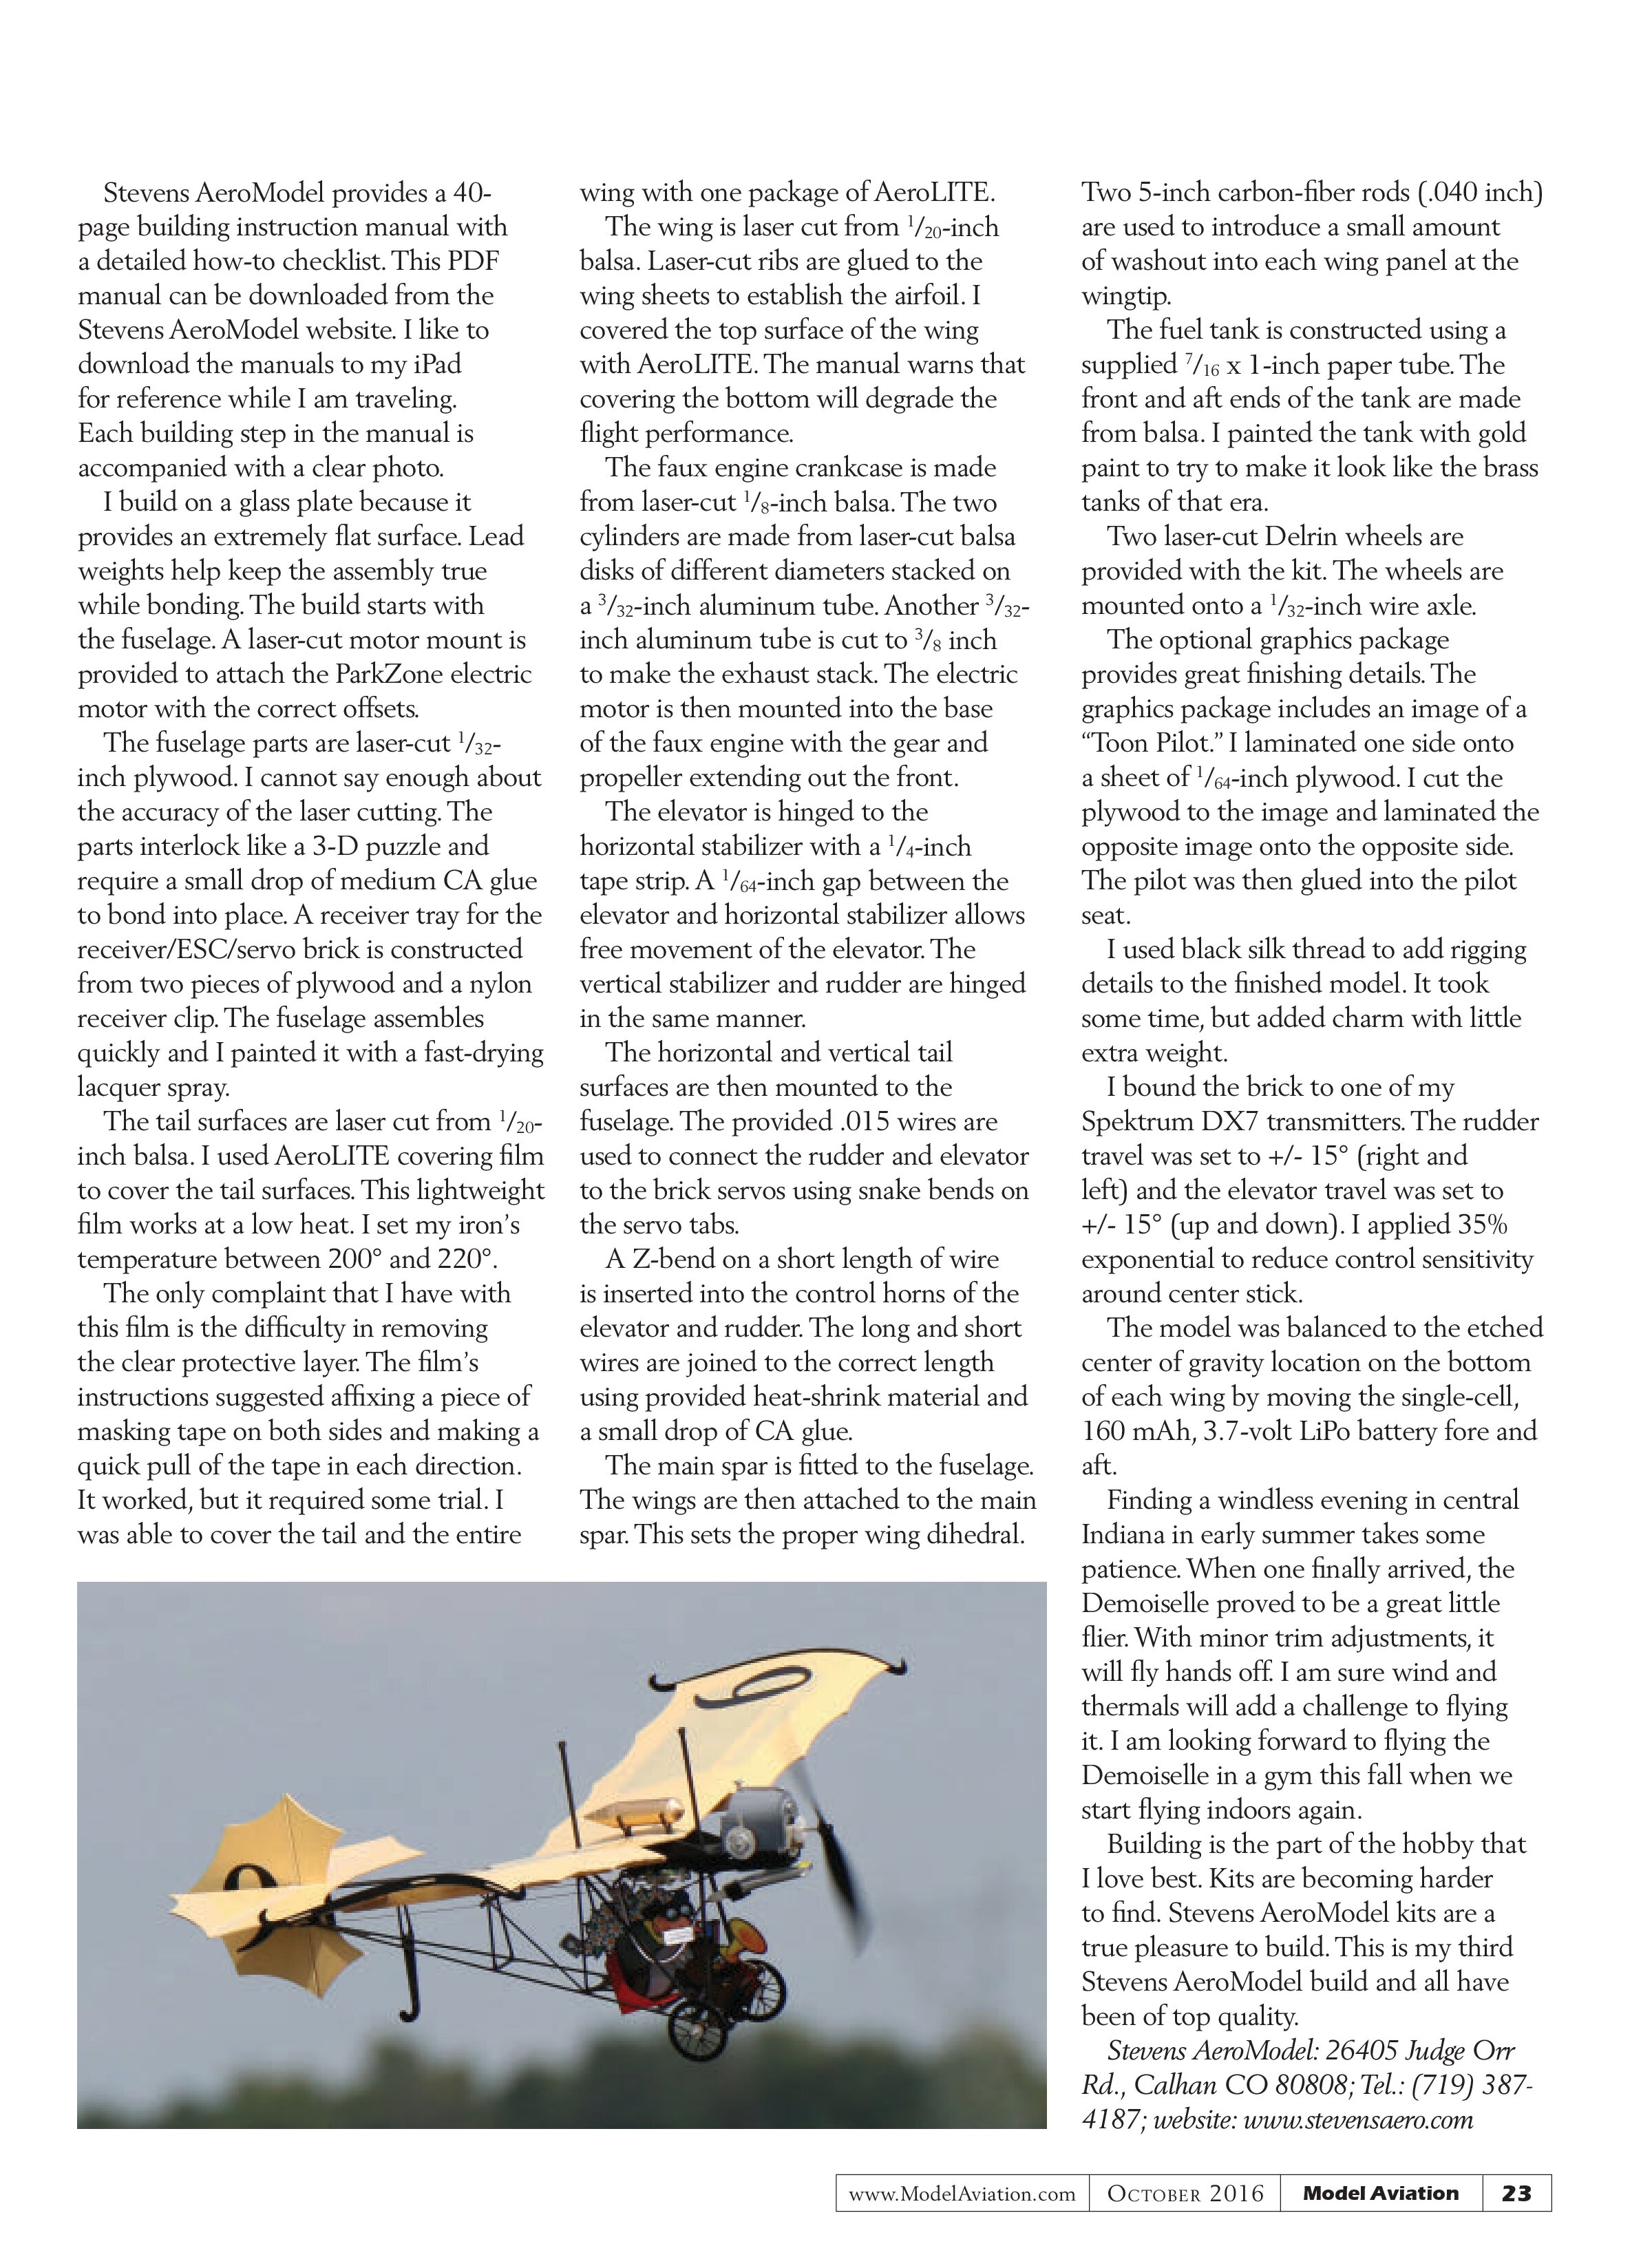
- Do not get excess solder on the connector barrel.
- Insert the connector into the housing while it’s still warm from soldering.
- Use the EC5 Connector Assembly Punch!
Following these three steps will make your life much easier.
The main problem many people have is getting the connector fully seated into the plastic housing until they hear that telltale snap. Seating the connector


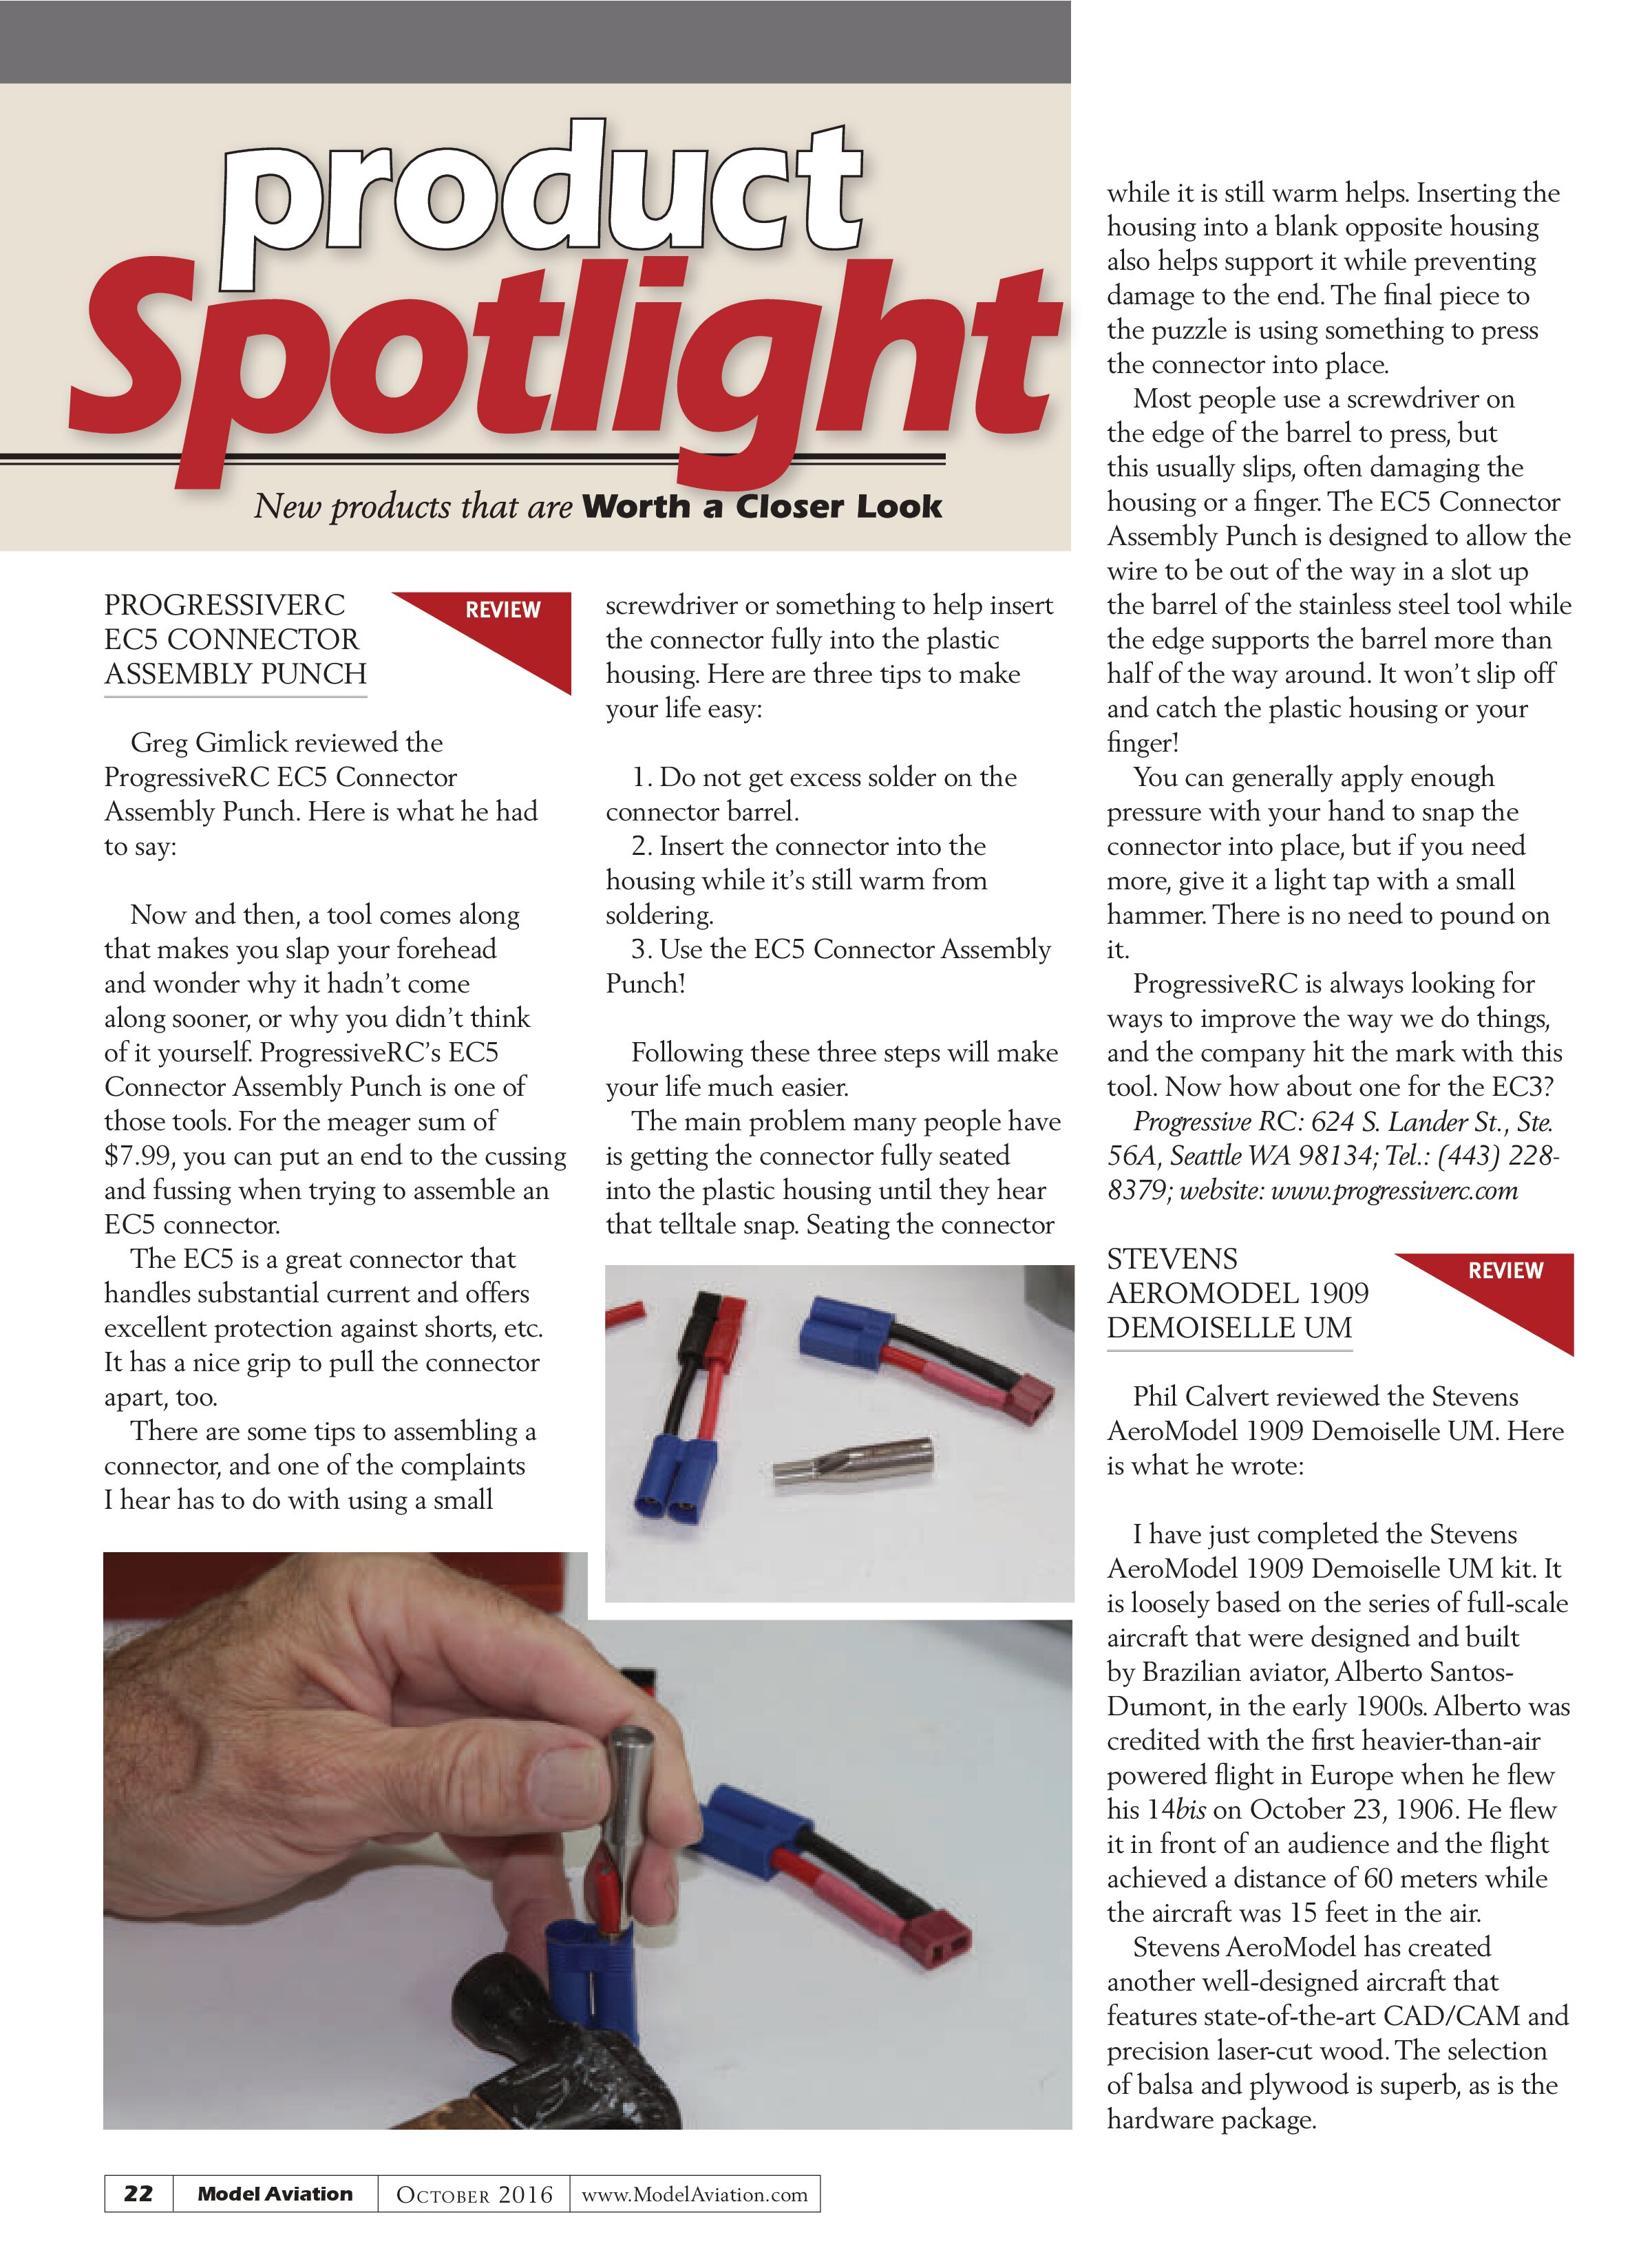
Most people use a screwdriver on the edge of the barrel to press, but this usually slips, often damaging the housing or a finger. The EC5 Connector Assembly Punch is designed to allow the wire to be out of the way in a slot up the barrel of the stainless steel tool while the edge supports the barrel more than half of the way around. It won’t slip off and catch the plastic housing or your finger!
You can generally apply enough pressure with your hand to snap the connector into place, but if you need more, give it a light tap with a small hammer. There is no need to pound on it.
ProgressiveRC is always looking for ways to improve the way we do things, and the company hit the mark with this tool. Now how about one for the EC3?
Progressive RC: 624 S. Lander St., Ste. 56A, Seattle WA 98134; Tel.: (443) 228-8379; website: www.progressiverc.com
STEVENS AEROMODEL 1909 DEMOISELLE UM
Phil Calvert reviewed the Stevens AeroModel 1909 Demoiselle UM. Here is what he wrote:
I have just completed the Stevens AeroModel 1909 Demoiselle UM kit. It is loosely based on the series of full-scale aircraft that were designed and built by Brazilian aviator, Alberto Santos-Dumont, in the early 1900s. Alberto was credited with the first heavier-than-air powered flight in Europe when he flew his 14bis on October 23, 1906. He flew it in front of an audience and the flight achieved a distance of 60 meters while the aircraft was 15 feet in the air.
Stevens AeroModel has created another well-designed aircraft that features state-of-the-art CAD/CAM and precision laser-cut wood. The selection of balsa and plywood is superb, as is the hardware package.
Stevens AeroModel provides a 40-page building instruction manual with a detailed how-to checklist. This PDF manual can be downloaded from the Stevens AeroModel website. I like to download the manuals to my iPad for reference while I am traveling. Each building step in the manual is accompanied with a clear photo.
I build on a glass plate because it provides an extremely flat surface. Lead weights help keep the assembly true while bonding. The build starts with the fuselage. A laser-cut motor mount is provided to attach the ParkZone electric motor with the correct offsets.
The fuselage parts are laser-cut 1/32-inch plywood. I cannot say enough about the accuracy of the laser cutting. The parts interlock like a 3-D puzzle and require a small drop of medium CA glue to bond into place. A receiver tray for the receiver/ESC/servo brick is constructed from two pieces of plywood and a nylon receiver clip. The fuselage assembles quickly and I painted it with a fast-drying lacquer spray.
The tail surfaces are laser cut from 1/20-inch balsa. I used AeroLITE covering film to cover the tail surfaces. This lightweight film works at a low heat. I set my iron’s temperature between 200° and 220°.
The only complaint that I have with this film is the difficulty in removing the clear protective layer. The film’s instructions suggested affixing a piece of masking tape on both sides and making a quick pull of the tape in each direction. It worked, but it required some trial. I was able to cover the tail and the entire wing with one package of AeroLITE.
The wing is laser cut from 1/20-inch balsa. Laser-cut ribs are glued to the wing sheets to establish the airfoil. I covered the top surface of the wing with AeroLITE. The manual warns that covering the bottom will degrade the flight performance.
The faux engine crankcase is made from laser-cut 1/8-inch balsa. The two cylinders are made from laser-cut balsa disks of different diameters stacked on a 3/32-inch aluminum tube. Another 3/32-inch aluminum tube is cut to 3/8 inch to make the exhaust stack. The electric motor is then mounted into the base of the faux engine with the gear and propeller extending out the front.
The elevator is hinged to the horizontal stabilizer with a 1/4-inch tape strip. A 1/64-inch gap between the elevator and horizontal stabilizer allows free movement of the elevator. The vertical stabilizer and rudder are hinged in the same manner.
The horizontal and vertical tail surfaces are then mounted to the fuselage. The provided .015 wires are used to connect the rudder and elevator to the brick servos using snake bends on the servo tabs.
A Z-bend on a short length of wire is inserted into the control horns of the elevator and rudder. The long and short wires are joined to the correct length using provided heat-shrink material and a small drop of CA glue.
The main spar is fitted to the fuselage. The wings are then attached to the main spar. This sets the proper wing dihedral.
Two 5-inch carbon-fiber rods (.040 inch) are used to introduce a small amount of washout into each wing panel at the wingtip.
The fuel tank is constructed using a supplied 7/16 x 1-inch paper tube. The front and aft ends of the tank are made from balsa. I painted the tank with gold paint to try to make it look like the brass tanks of that era.
Two laser-cut Delrin wheels are provided with the kit. The wheels are mounted onto a 1/32-inch wire axle.
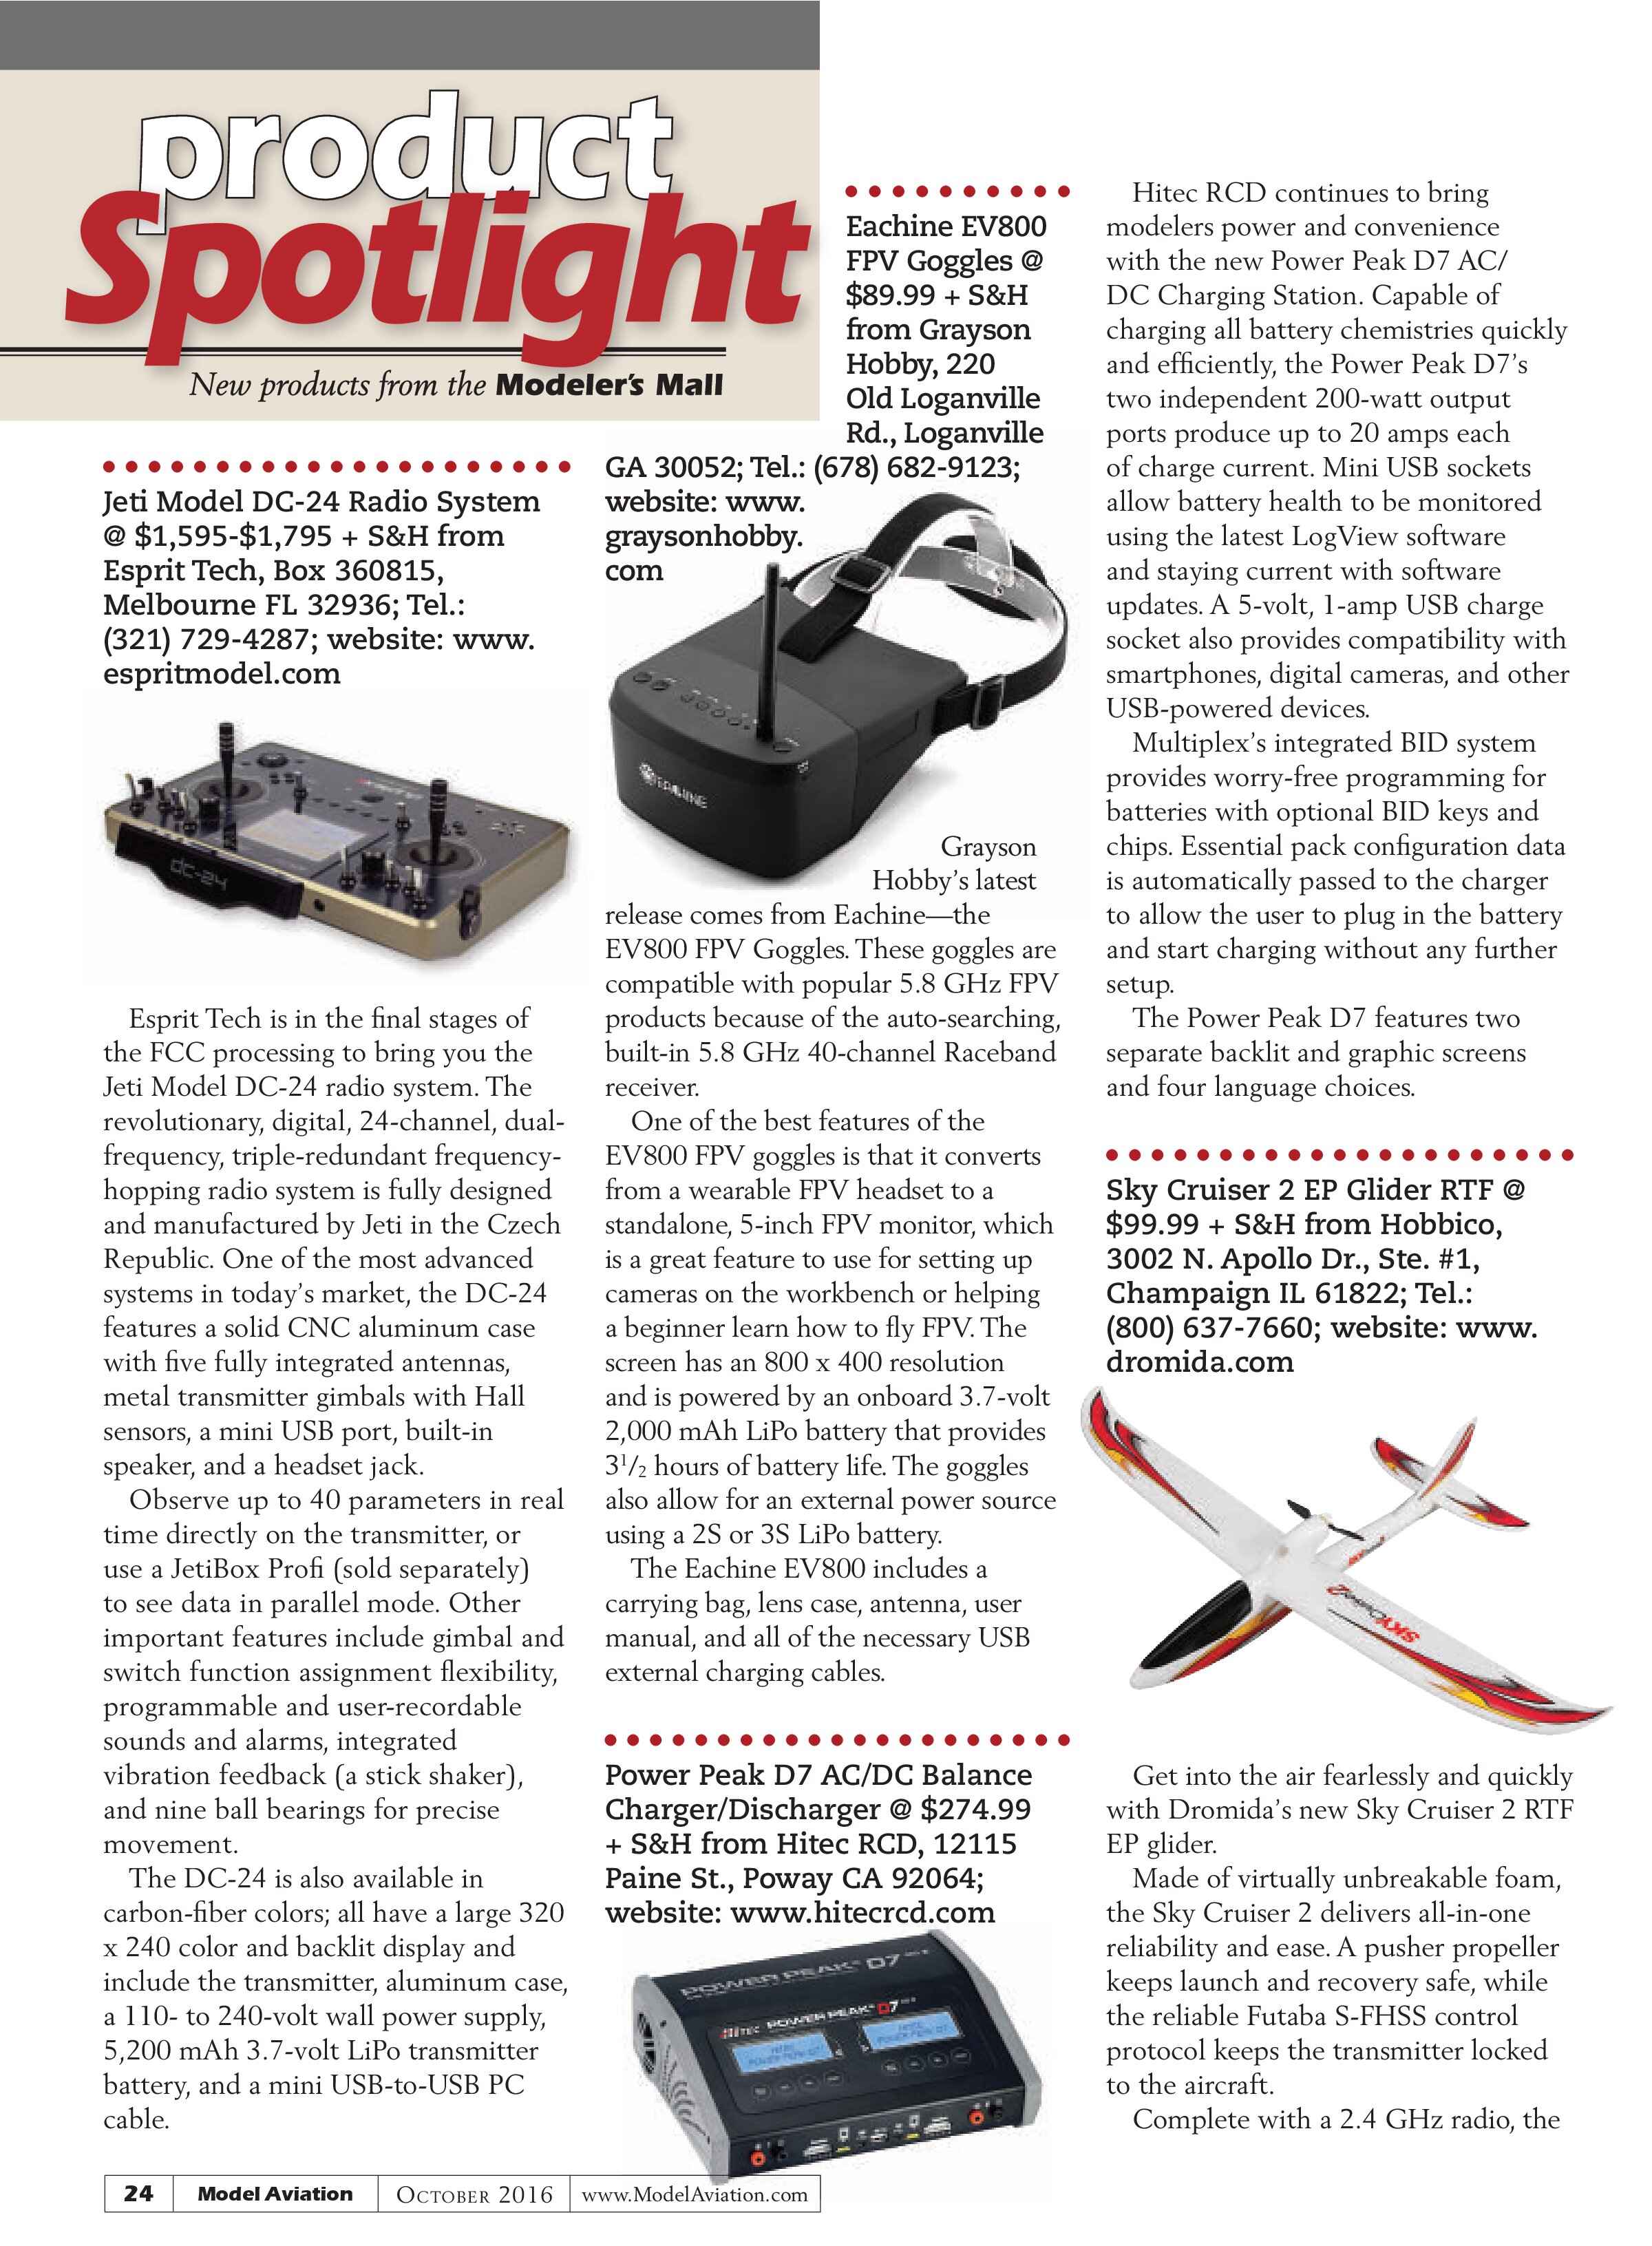
The optional graphics package provides great finishing details. The graphics package includes an image of a “Toon Pilot.” I laminated one side onto a sheet of 1/64-inch plywood. I cut the plywood to the image and laminated the opposite image onto the opposite side. The pilot was then glued into the pilot seat.
I used black silk thread to add rigging details to the finished model. It took some time, but added charm with little extra weight.
I bound the brick to one of my Spektrum DX7 transmitters. The rudder travel was set to +/- 15° (right and left) and the elevator travel was set to +/- 15° (up and down). I applied 35% exponential to reduce control sensitivity around center stick.
The model was balanced to the etched center of gravity location on the bottom of each wing by moving the single-cell, 160 mAh, 3.7-volt LiPo battery fore and aft.
Finding a windless evening in central Indiana in early summer takes some patience. When one finally arrived, the Demoiselle proved to be a great little flier. With minor trim adjustments, it will fly hands off. I am sure wind and thermals will add a challenge to flying it. I am looking forward to flying the Demoiselle in a gym this fall when we start flying indoors again.
Building is the part of the hobby that I love best. Kits are becoming harder to find. Stevens AeroModel kits are a true pleasure to build. This is my third Stevens AeroModel build and all have been of top quality.
Stevens AeroModel: 26405 Judge Orr Rd., Calhan CO 80808; Tel.: (719) 387-4187; website: www.stevensaero.com

Jeti Model DC-24 Radio System @ $1,595-$1,795 + S&H from Esprit Tech, Box 360815, Melbourne FL 32936; Tel.: (321) 729-4287; website: www.espritmodel.com
Esprit Tech is in the final stages of the FCC processing to bring you the Jeti Model DC-24 radio system. The revolutionary, digital, 24-channel, dual-frequency, triple-redundant frequency-hopping radio system is fully designed and manufactured by Jeti in the Czech Republic. One of the most advanced systems in today’s market, the DC-24 features a solid CNC aluminum case with five fully integrated antennas, metal transmitter gimbals with Hall sensors, a mini USB port, built-in speaker, and a headset jack.
Observe up to 40 parameters in real time directly on the transmitter, or use a JetiBox Profi (sold separately) to see data in parallel mode. Other important features include gimbal and switch function assignment flexibility, programmable and user-recordable sounds and alarms, integrated vibration feedback (a stick shaker), and nine ball bearings for precise movement.
The DC-24 is also available in carbon-fiber colors; all have a large 320 x 240 color and backlit display and include the transmitter, aluminum case, a 110- to 240-volt wall power supply, 5,200 mAh 3.7-volt LiPo transmitter battery, and a mini USB-to-USB PC cable.

Eachine EV800 FPV Goggles @ $89.99 + S&H from Grayson Hobby, 220 Old Loganville Rd., Loganville GA 30052; Tel.: (678) 682-9123; website: www.graysonhobby.com

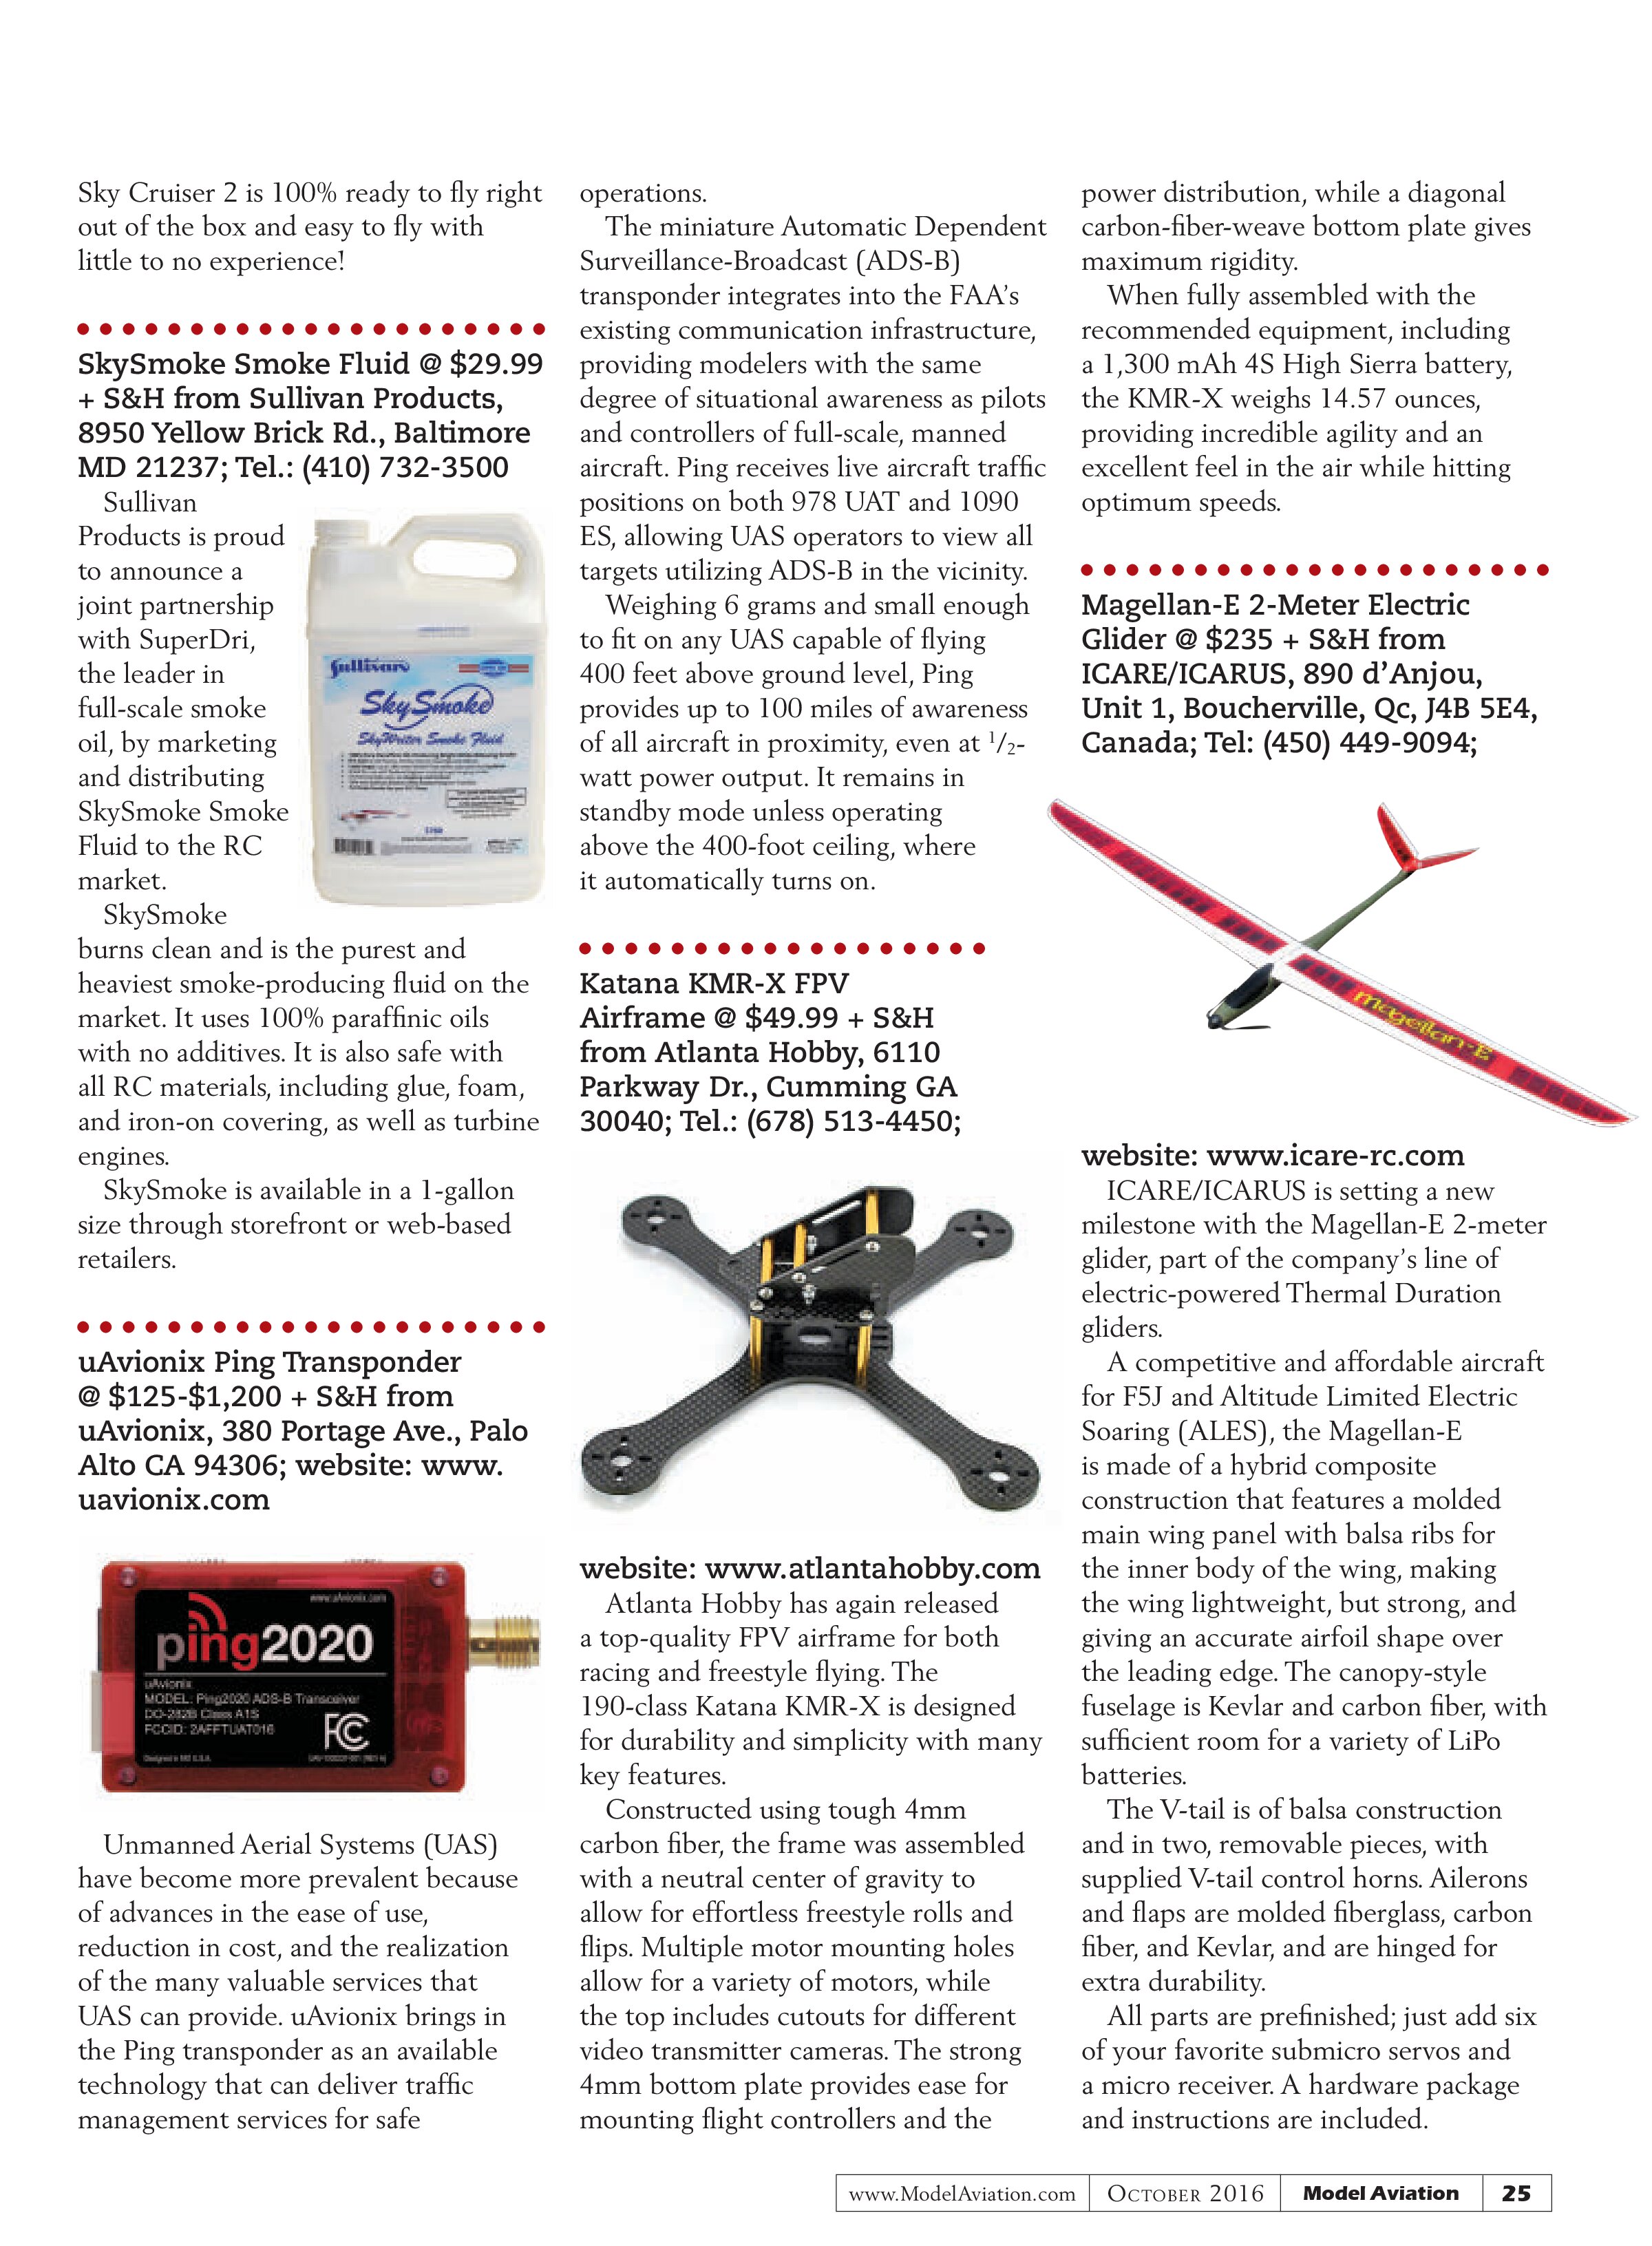
Grayson Hobby’s latest release comes from Eachine—the EV800 FPV Goggles. These goggles are compatible with popular 5.8 GHz FPV products because of the auto-searching, built-in 5.8 GHz 40-channel Raceband receiver.
One of the best features of the EV800 FPV goggles is that it converts from a wearable FPV headset to a standalone, 5-inch FPV monitor, which is a great feature to use for setting up cameras on the workbench or helping a beginner learn how to fly FPV. The screen has an 800 x 400 resolution and is powered by an onboard 3.7-volt 2,000 mAh LiPo battery that provides 3½ hours of battery life. The goggles also allow for an external power source using a 2S or 3S LiPo battery.
The Eachine EV800 includes a carrying bag, lens case, antenna, user manual, and all of the necessary USB external charging cables.
Power Peak D7 AC/DC Balance Charger/Discharger @ $274.99 + S&H from Hitec RCD, 12115 Paine St., Poway CA 92064; website: www.hitecrcd.com

Hitec RCD continues to bring modelers power and convenience with the new Power Peak D7 AC/DC Charging Station. Capable of charging all battery chemistries quickly and efficiently, the Power Peak D7’s two independent 200-watt output ports produce up to 20 amps each of charge current. Mini USB sockets allow battery health to be monitored using the latest LogView software and staying current with software updates. A 5-volt, 1-amp USB charge socket also provides compatibility with smartphones, digital cameras, and other USB-powered devices.
Multiplex’s integrated BID system provides worry-free programming for batteries with optional BID keys and chips. Essential pack configuration data is automatically passed to the charger to allow the user to plug in the battery and start charging without any further setup.
The Power Peak D7 features two separate backlit and graphic screens and four language choices.
Sky Cruiser 2 EP Glider RTF @ $99.99 + S&H from Hobbico, 3002 N. Apollo Dr., Ste. #1, Champaign IL 61822; Tel.: (800) 637-7660; website: www.dromida.com

Get into the air fearlessly and quickly with Dromida’s new Sky Cruiser 2 RTF EP glider.
Made of virtually unbreakable foam, the Sky Cruiser 2 delivers all-in-one reliability and ease. A pusher propeller keeps launch and recovery safe, while the reliable Futaba S-FHSS control protocol keeps the transmitter locked to the aircraft.
Complete with a 2.4 GHz radio, the Sky Cruiser 2 is 100% ready to fly right out of the box and easy to fly with little to no experience!
SkySmoke Smoke Fluid @ $29.99 + S&H from Sullivan Products, 8950 Yellow Brick Rd., Baltimore MD 21237; Tel.: (410) 732-3500
Sullivan Products is proud to announce a joint partnership with SuperDri, the leader in full-scale smoke oil, by marketing and distributing SkySmoke Smoke Fluid to the RC market.

SkySmoke burns clean and is the purest and heaviest smoke-producing fluid on the market. It uses 100% paraffinic oils with no additives. It is also safe with all RC materials, including glue, foam, and iron-on covering, as well as turbine engines.
SkySmoke is available in a 1-gallon size through storefront or web-based retailers.
uAvionix Ping Transponder @ $125-$1,200 + S&H from uAvionix, 380 Portage Ave., Palo Alto CA 94306; website: www.uavionix.com

Unmanned Aerial Systems (UAS) have become more prevalent because of advances in the ease of use, reduction in cost, and the realization of the many valuable services that UAS can provide. uAvionix brings in the Ping transponder as an available technology that can deliver traffic management services for safe operations.
The miniature Automatic Dependent Surveillance-Broadcast (ADS-B) transponder integrates into the FAA’s existing communication infrastructure, providing modelers with the same degree of situational awareness as pilots and controllers of full-scale, manned aircraft. Ping receives live aircraft traffic positions on both 978 UAT and 1090 ES, allowing UAS operators to view all targets utilizing ADS-B in the vicinity.
Weighing 6 grams and small enough to fit on any UAS capable of flying 400 feet above ground level, Ping provides up to 100 miles of awareness of all aircraft in proximity, even at ½-watt power output. It remains in standby mode unless operating above the 400-foot ceiling, where it automatically turns on.
Katana KMR-X FPV Airframe @ $49.99 + S&H from Atlanta Hobby, 6110 Parkway Dr., Cumming GA 30040; Tel.: (678) 513-4450;

website: www.atlantahobby.com
Atlanta Hobby has again released a top-quality FPV airframe for both racing and freestyle flying. The 190-class Katana KMR-X is designed for durability and simplicity with many key features.
Constructed using tough 4mm carbon fiber, the frame was assembled with a neutral center of gravity to allow for effortless freestyle rolls and flips. Multiple motor mounting holes allow for a variety of motors, while the top includes cutouts for different video transmitter cameras. The strong 4mm bottom plate provides ease for mounting flight controllers and the power distribution, while a diagonal carbon-fiber-weave bottom plate gives maximum rigidity.
When fully assembled with the recommended equipment, including a 1,300 mAh 4S High Sierra battery, the KMR-X weighs 14.57 ounces, providing incredible agility and an excellent feel in the air while hitting optimum speeds.
Magellan-E 2-Meter Electric Glider @ $235 + S&H from ICARE/ICARUS, 890 d’Anjou, Unit 1, Boucherville, Qc, J4B 5E4, Canada; Tel: (450) 449-9094; website: www.icare-rc.com

ICARE/ICARUS is setting a new milestone with the Magellan-E 2-meter glider, part of the company’s line of electric-powered Thermal Duration gliders.
A competitive and affordable aircraft for F5J and Altitude Limited Electric Soaring (ALES), the Magellan-E is made of a hybrid composite construction that features a molded main wing panel with balsa ribs for the inner body of the wing, making the wing lightweight, but strong, and giving an accurate airfoil shape over the leading edge. The canopy-style fuselage is Kevlar and carbon fiber, with sufficient room for a variety of LiPo batteries.
The V-tail is of balsa construction and in two, removable pieces, with supplied V-tail control horns. Ailerons and flaps are molded fiberglass, carbon fiber, and Kevlar, and are hinged for extra durability.
All parts are prefinished; just add six of your favorite submicro servos and a micro receiver. A hardware package and instructions are included.