UMX Radian on floats
Bob Aberle
baberle@optonline.net

Q633: I heard that someone came up with an interesting scheme for adding floats to a Horizon Hobby E-flite UMX Radian sailplane. I know you fly one of these airplanes and have mentioned your success with it in several of your columns. Do you happen to know the name of the person who engineered the float attachment?
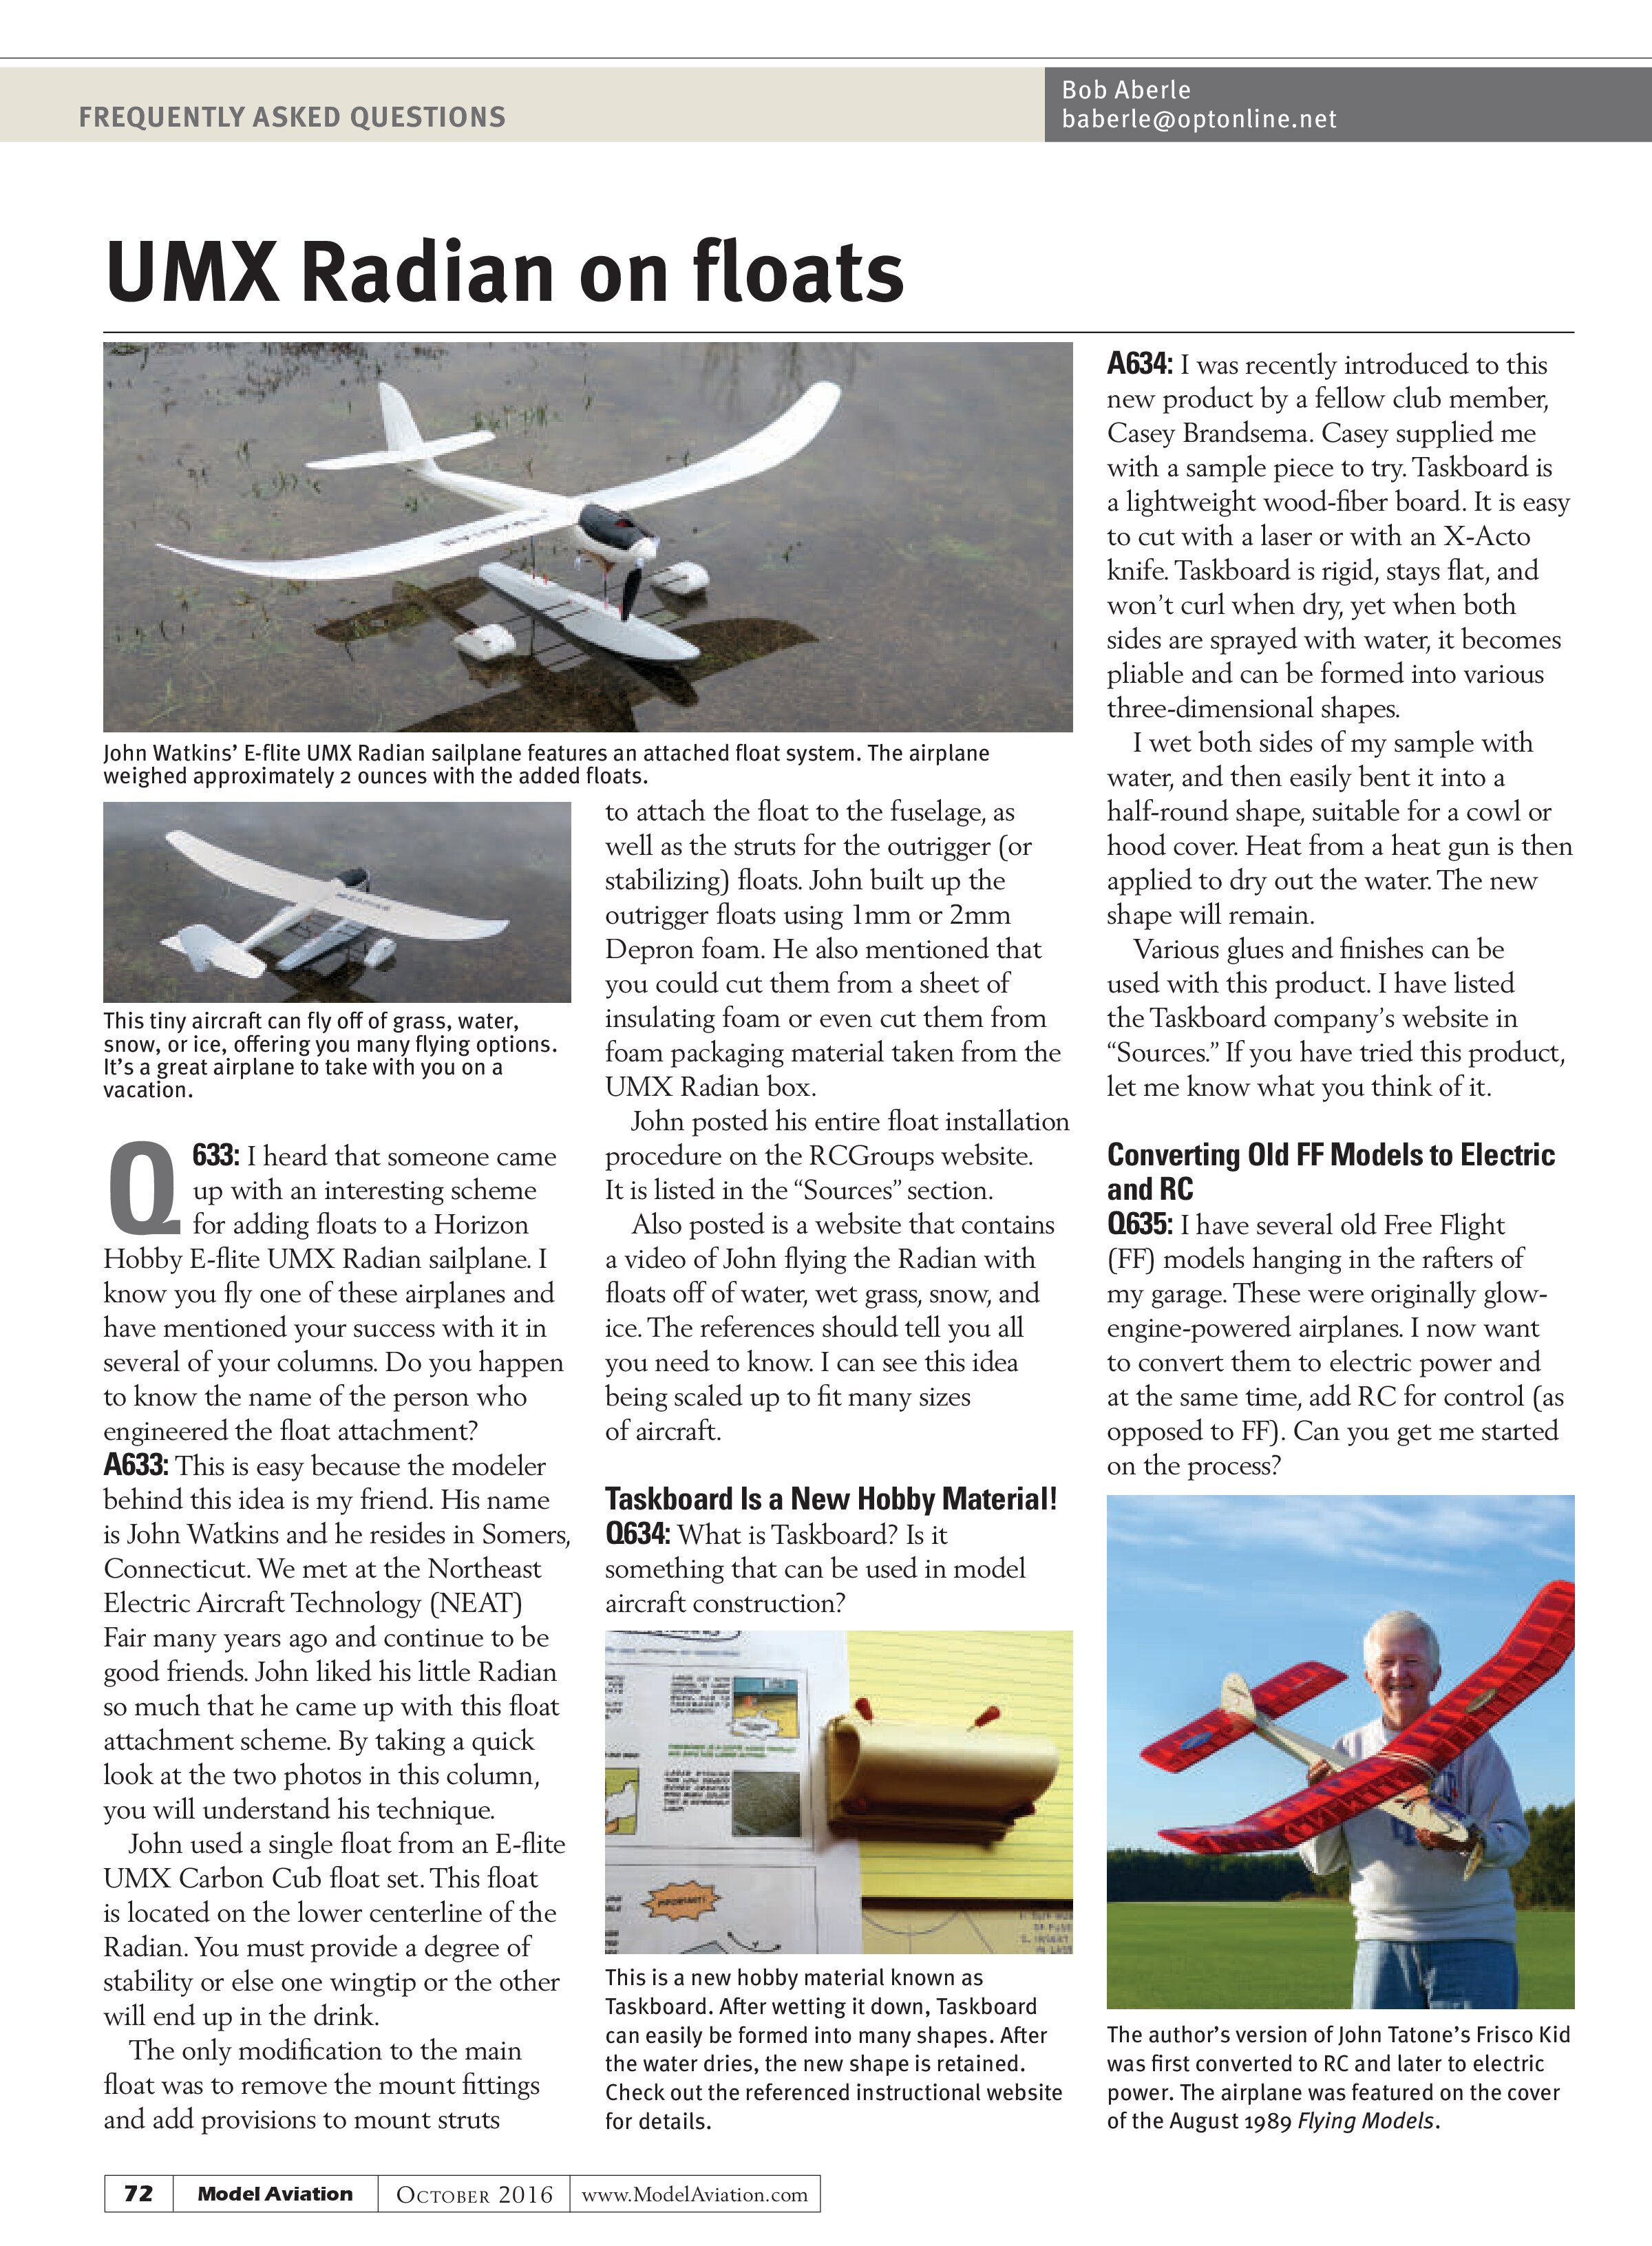
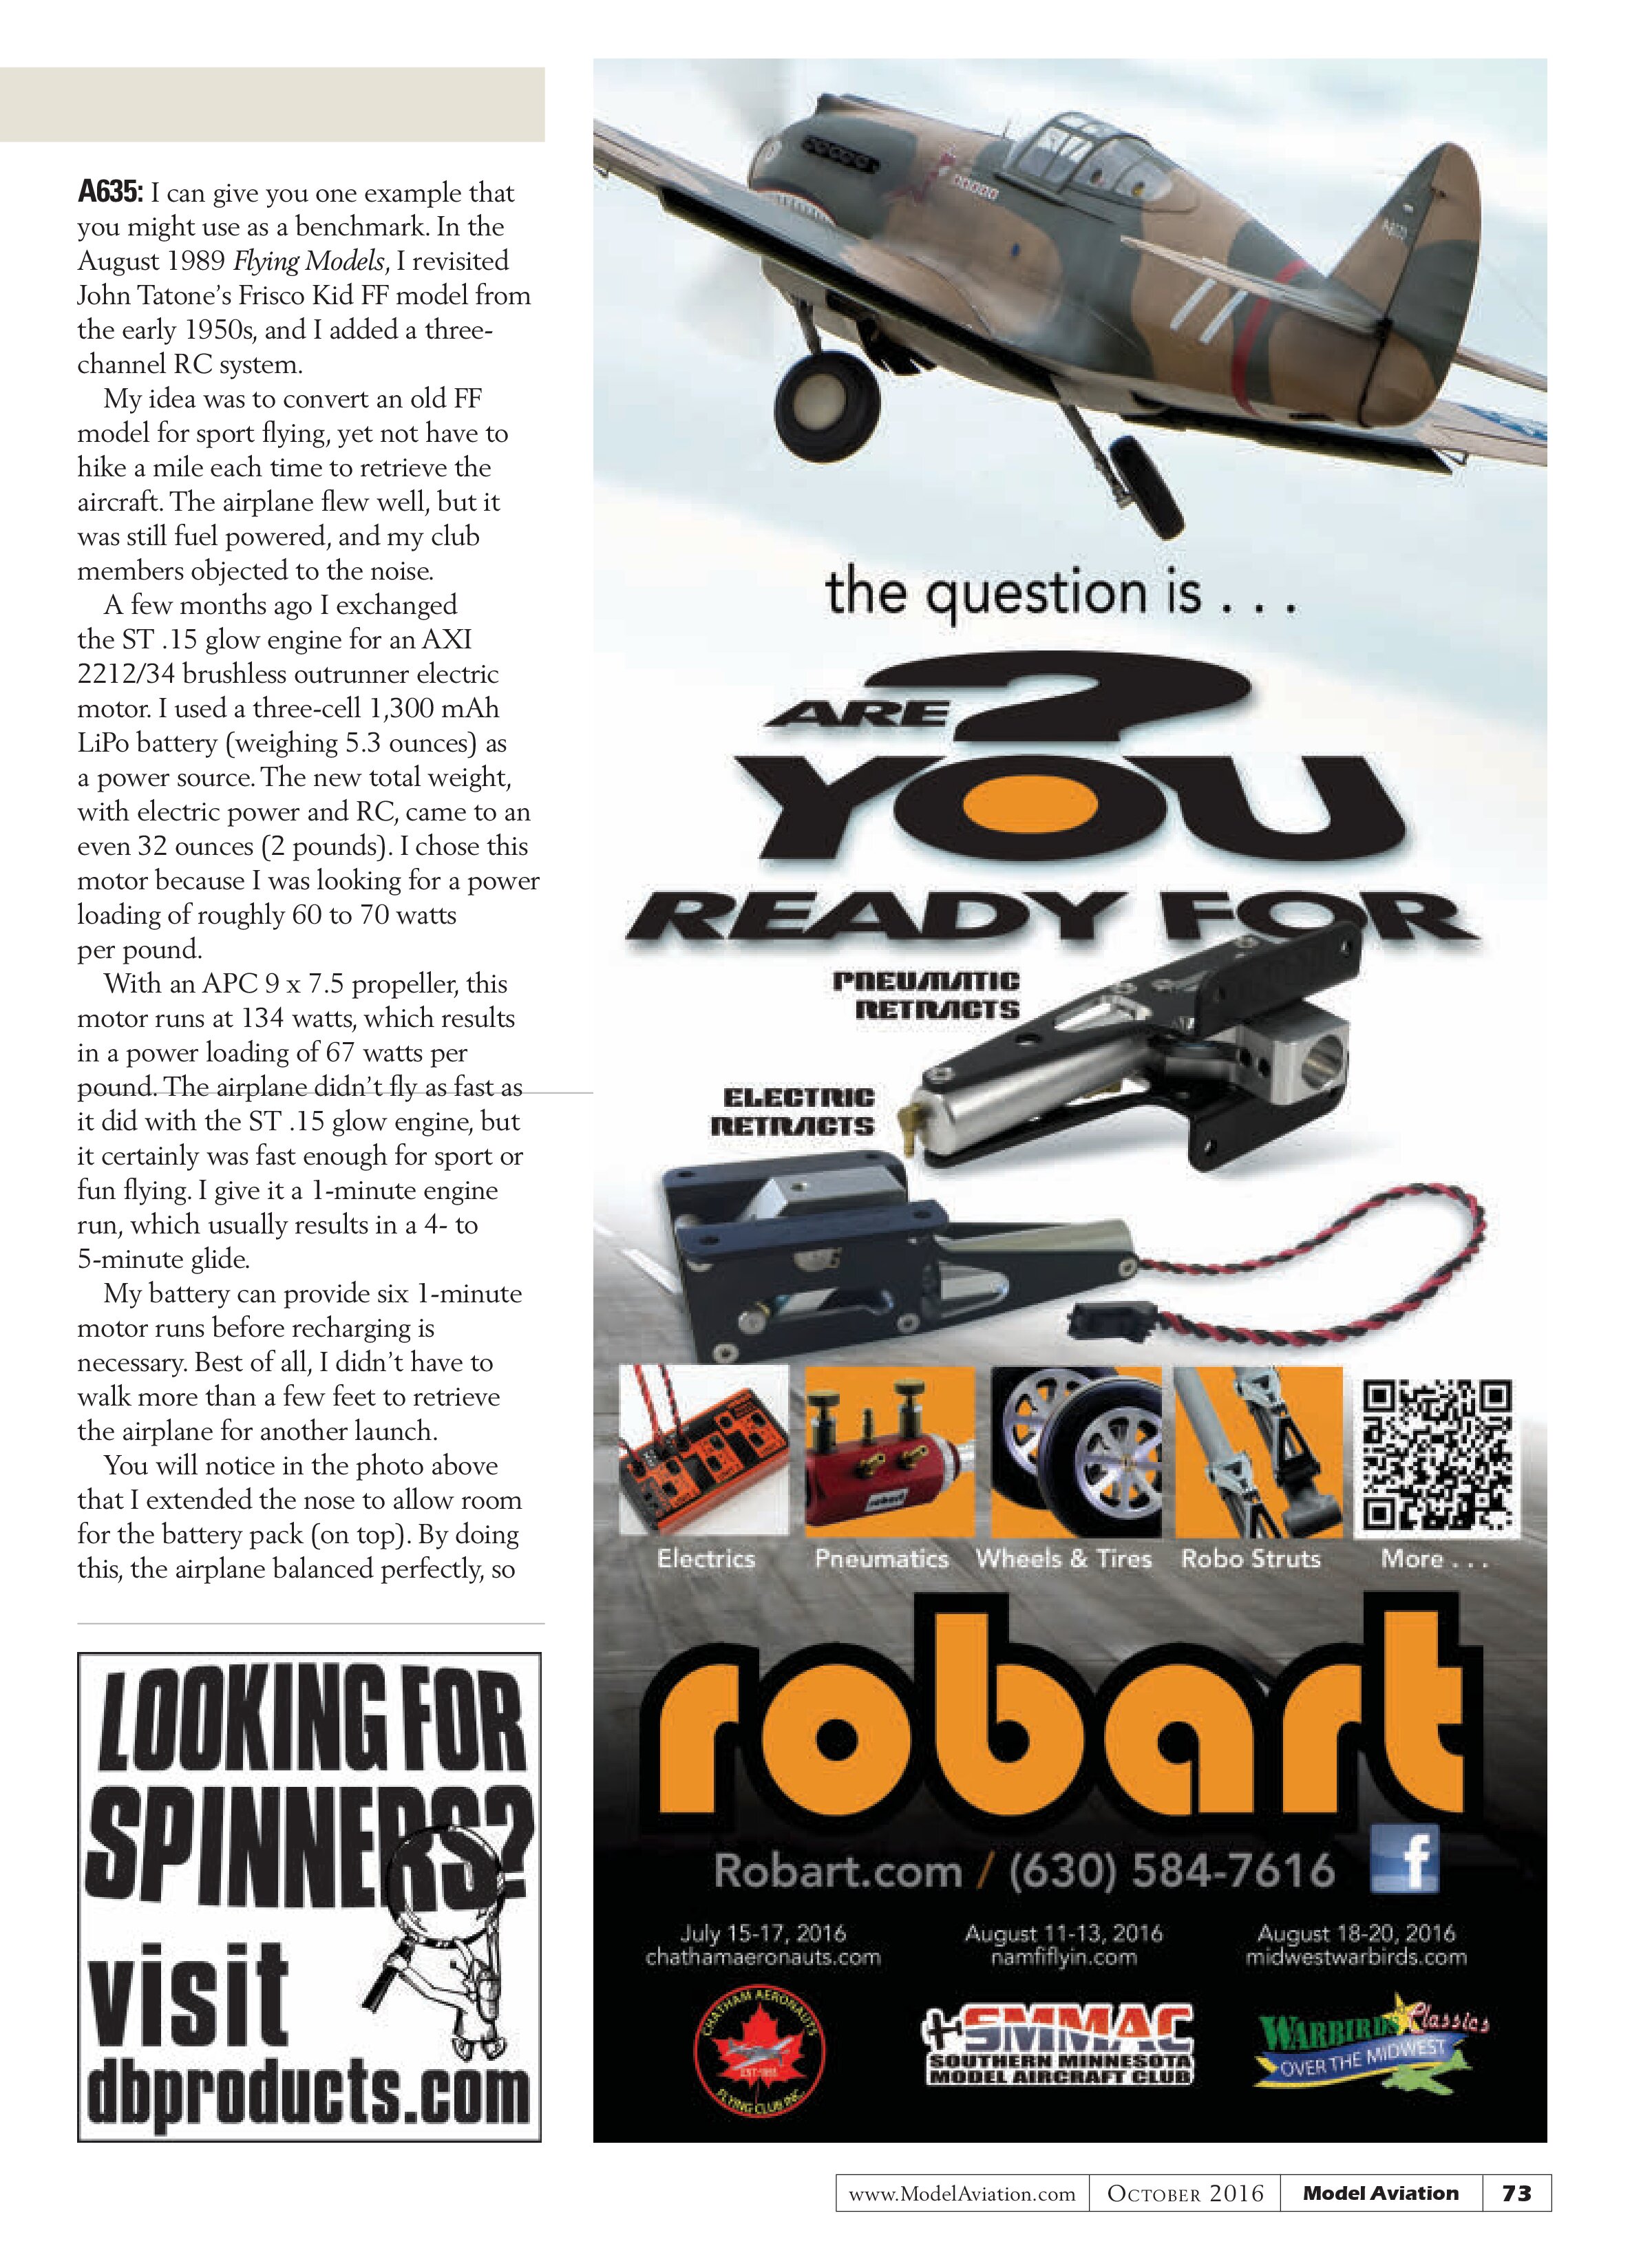
A633: This is easy because the modeler behind this idea is my friend. His name is John Watkins and he resides in Somers, Connecticut. We met at the Northeast Electric Aircraft Technology (NEAT) Fair many years ago and continue to be good friends. John liked his little Radian so much that he came up with this float attachment scheme. By taking a quick look at the two photos in this column, you will understand his technique.

John used a single float from an E-flite UMX Carbon Cub float set. This float is located on the lower centerline of the Radian. You must provide a degree of stability or else one wingtip or the other will end up in the drink.
The only modification to the main float was to remove the mount fittings and add provisions to mount struts to attach the float to the fuselage, as well as the struts for the outrigger (or stabilizing) floats. John built up the outrigger floats using 1mm or 2mm Depron foam. He also mentioned that you could cut them from a sheet of insulating foam or even cut them from foam packaging material taken from the UMX Radian box.
John posted his entire float installation procedure on the RCGroups website. It is listed in the “Sources” section.
Also posted is a website that contains a video of John flying the Radian with floats off of water, wet grass, snow, and ice. The references should tell you all you need to know. I can see this idea being scaled up to fit many sizes of aircraft.
Taskboard Is a New Hobby Material!
Q634: What is Taskboard? Is it something that can be used in model aircraft construction?

A634: I was recently introduced to this new product by a fellow club member, Casey Brandsema. Casey supplied me with a sample piece to try. Taskboard is a lightweight wood-fiber board. It is easy to cut with a laser or with an X-Acto knife. Taskboard is rigid, stays flat, and won’t curl when dry, yet when both sides are sprayed with water, it becomes pliable and can be formed into various three-dimensional shapes.
I wet both sides of my sample with water, and then easily bent it into a half-round shape, suitable for a cowl or hood cover. Heat from a heat gun is then applied to dry out the water. The new shape will remain.
Various glues and finishes can be used with this product. I have listed the Taskboard company’s website in “Sources.” If you have tried this product, let me know what you think of it.
Converting Old FF Models to Electric and RC
Q635: I have several old Free Flight (FF) models hanging in the rafters of my garage. These were originally glow-engine-powered airplanes. I now want to convert them to electric power and, at the same time, add RC for control (as opposed to FF). Can you get me started on the process?

A635: I can give you one example that you might use as a benchmark. In the August 1989 Flying Models, I revisited John Tatone’s Frisco Kid FF model from the early 1950s, and I added a three-channel RC system.
My idea was to convert an old FF model for sport flying, yet not have to hike a mile each time to retrieve the aircraft. The airplane flew well, but it was still fuel powered, and my club members objected to the noise.
A few months ago I exchanged the ST .15 glow engine for an AXI 2212/34 brushless outrunner electric motor. I used a three-cell 1,300 mAh LiPo battery (weighing 5.3 ounces) as a power source. The new total weight, with electric power and RC, came to an even 32 ounces (2 pounds). I chose this motor because I was looking for a power loading of roughly 60 to 70 watts per pound.
With an APC 9 x 7.5 propeller, this motor runs at 134 watts, which results in a power loading of 67 watts per pound. The airplane didn’t fly as fast as it did with the ST .15 glow engine, but it certainly was fast enough for sport or fun flying. I give it a 1-minute engine run, which usually results in a 4- to 5-minute glide.
My battery can provide six 1-minute motor runs before recharging is necessary. Best of all, I didn’t have to walk more than a few feet to retrieve the airplane for another launch.
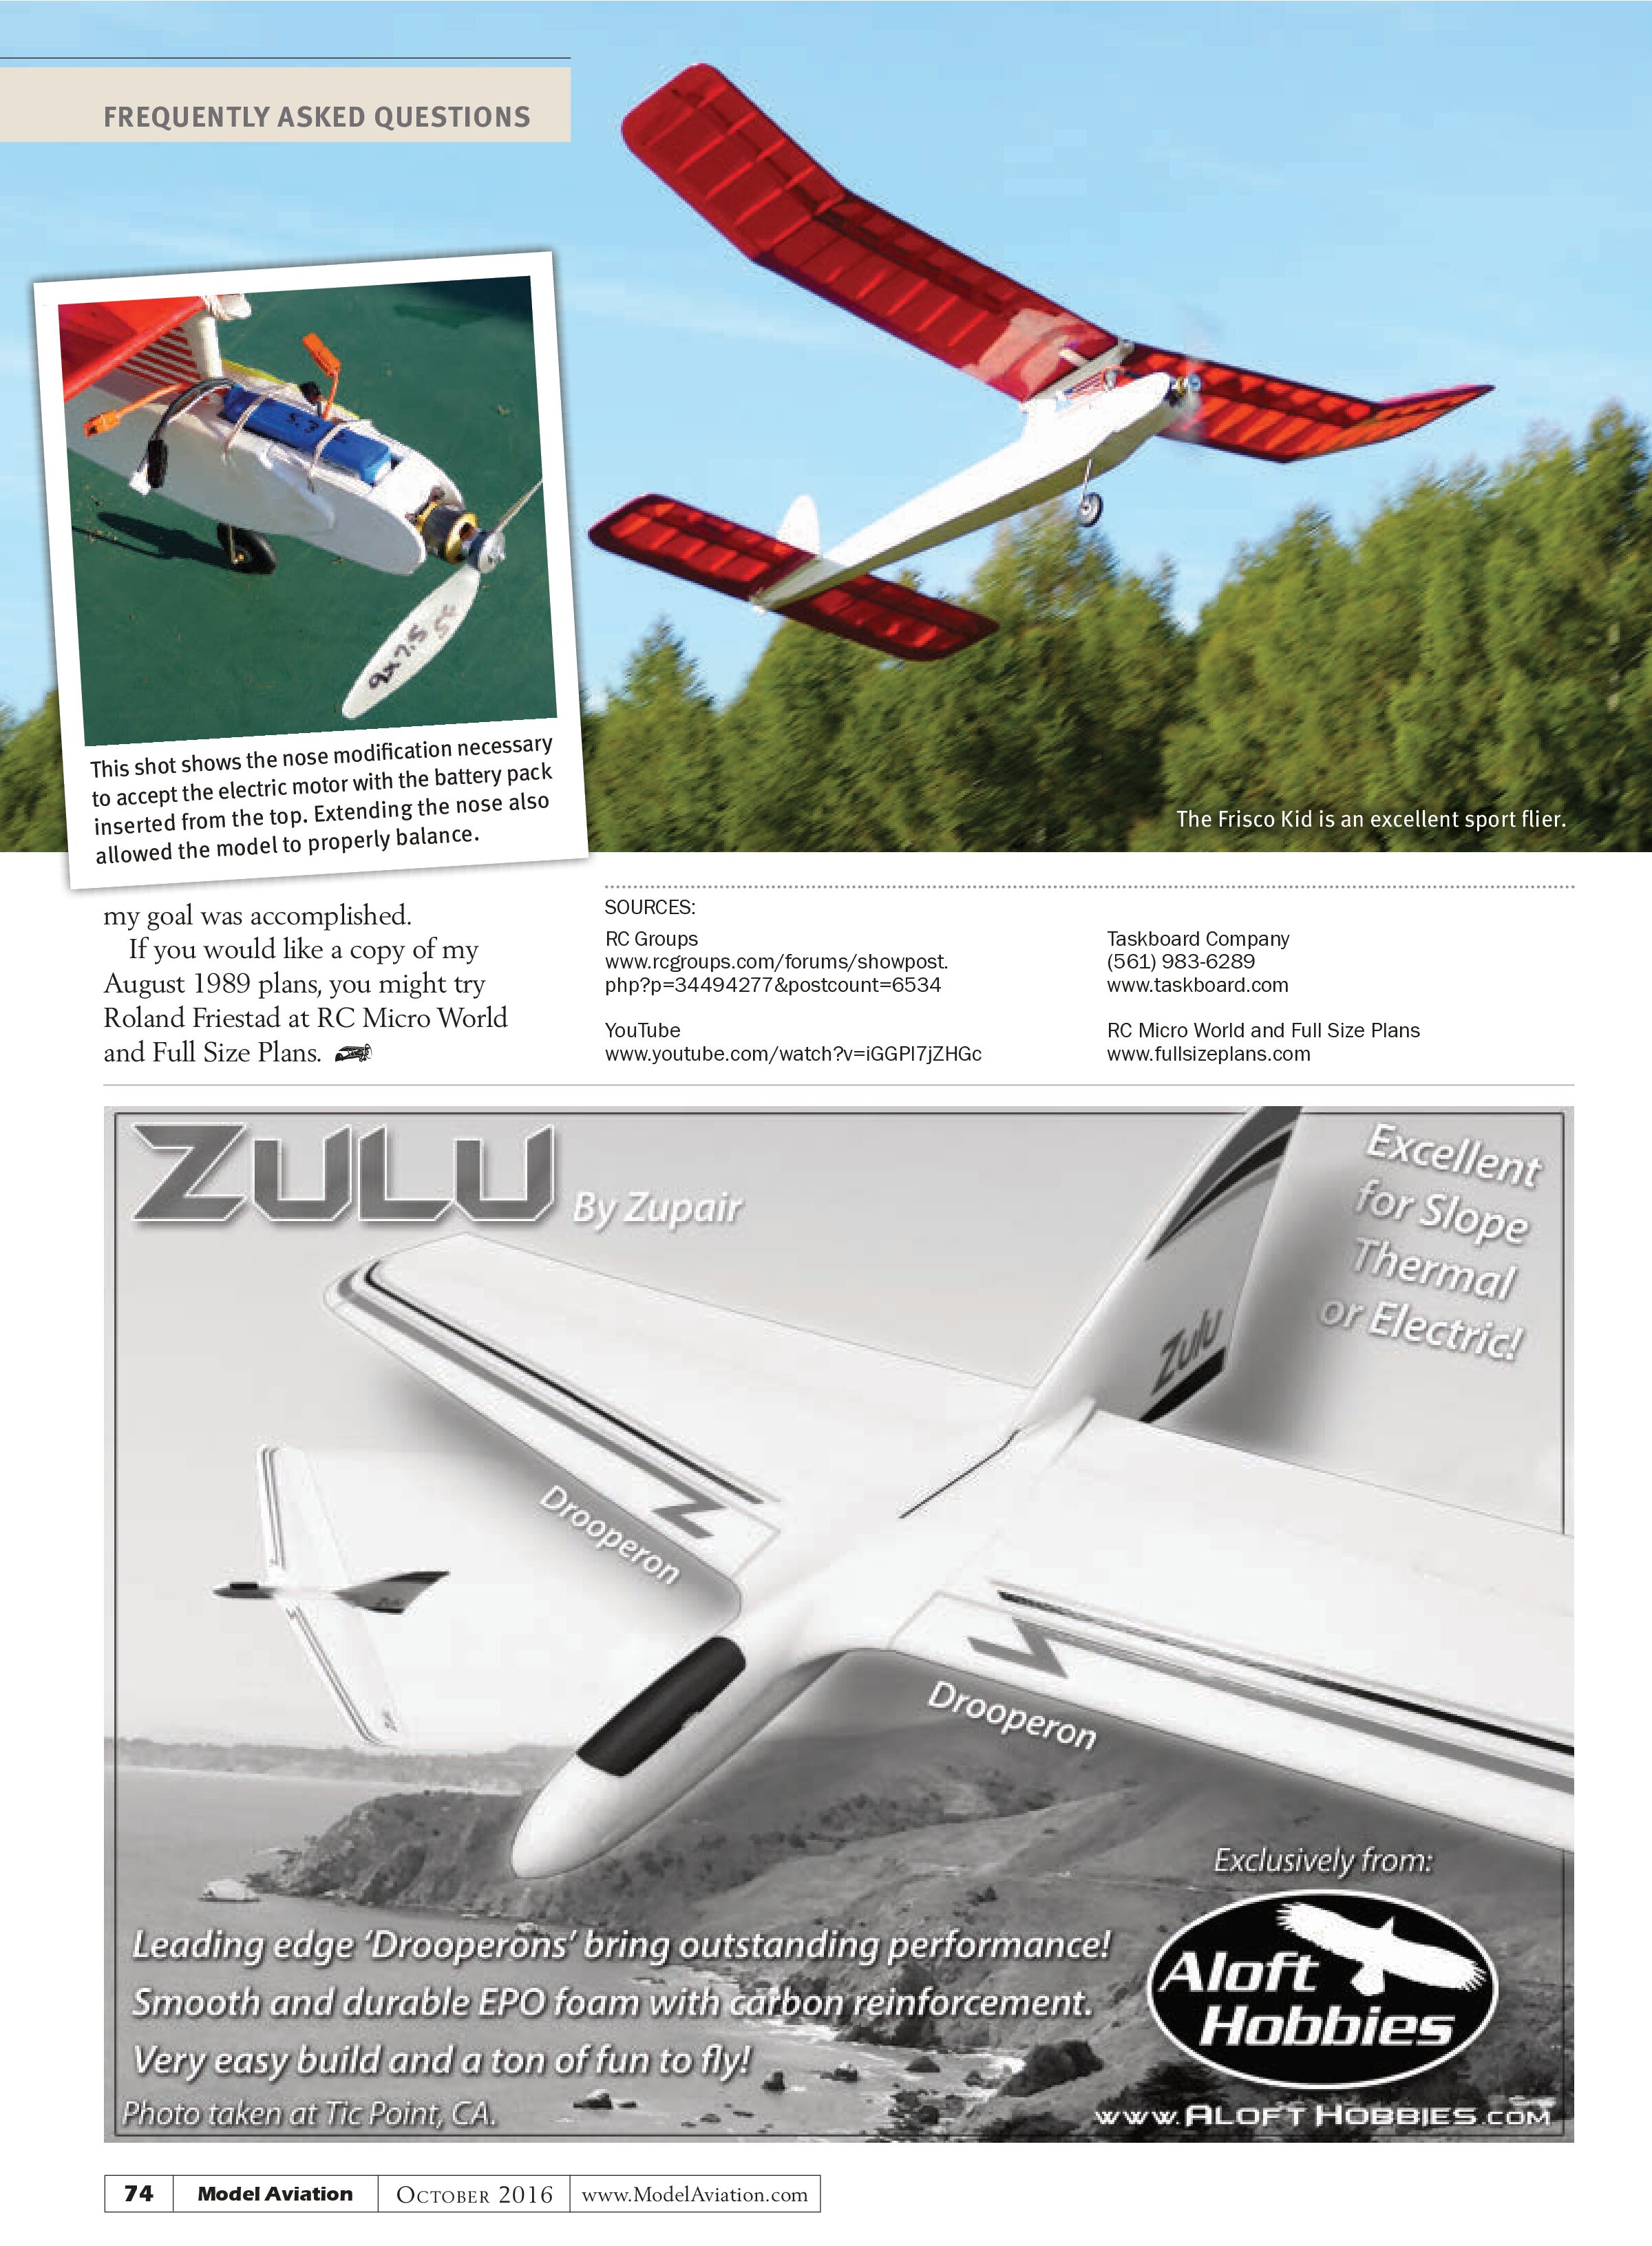
You will notice in the photo above that I extended the nose to allow room for the battery pack (on top). By doing this, the airplane balanced perfectly, so


my goal was accomplished.
If you would like a copy of my August 1989 plans, you might try Roland Friestad at RC Micro World and Full Size Plans.
SOURCES:
RC Groups
www.rcgroups.com/forums/showpost.php?p=34494277&postcount=6534
YouTube
www.youtube.com/watch?v=iGGPI7jZHGc
Taskboard Company
(561) 983-6289
www.taskboard.com
RC Micro World and Full Size Plans
www.fullsizeplans.com