Xtreme ARF Vixen features
by Jim Hiller
jetmodeler@earthlink.net

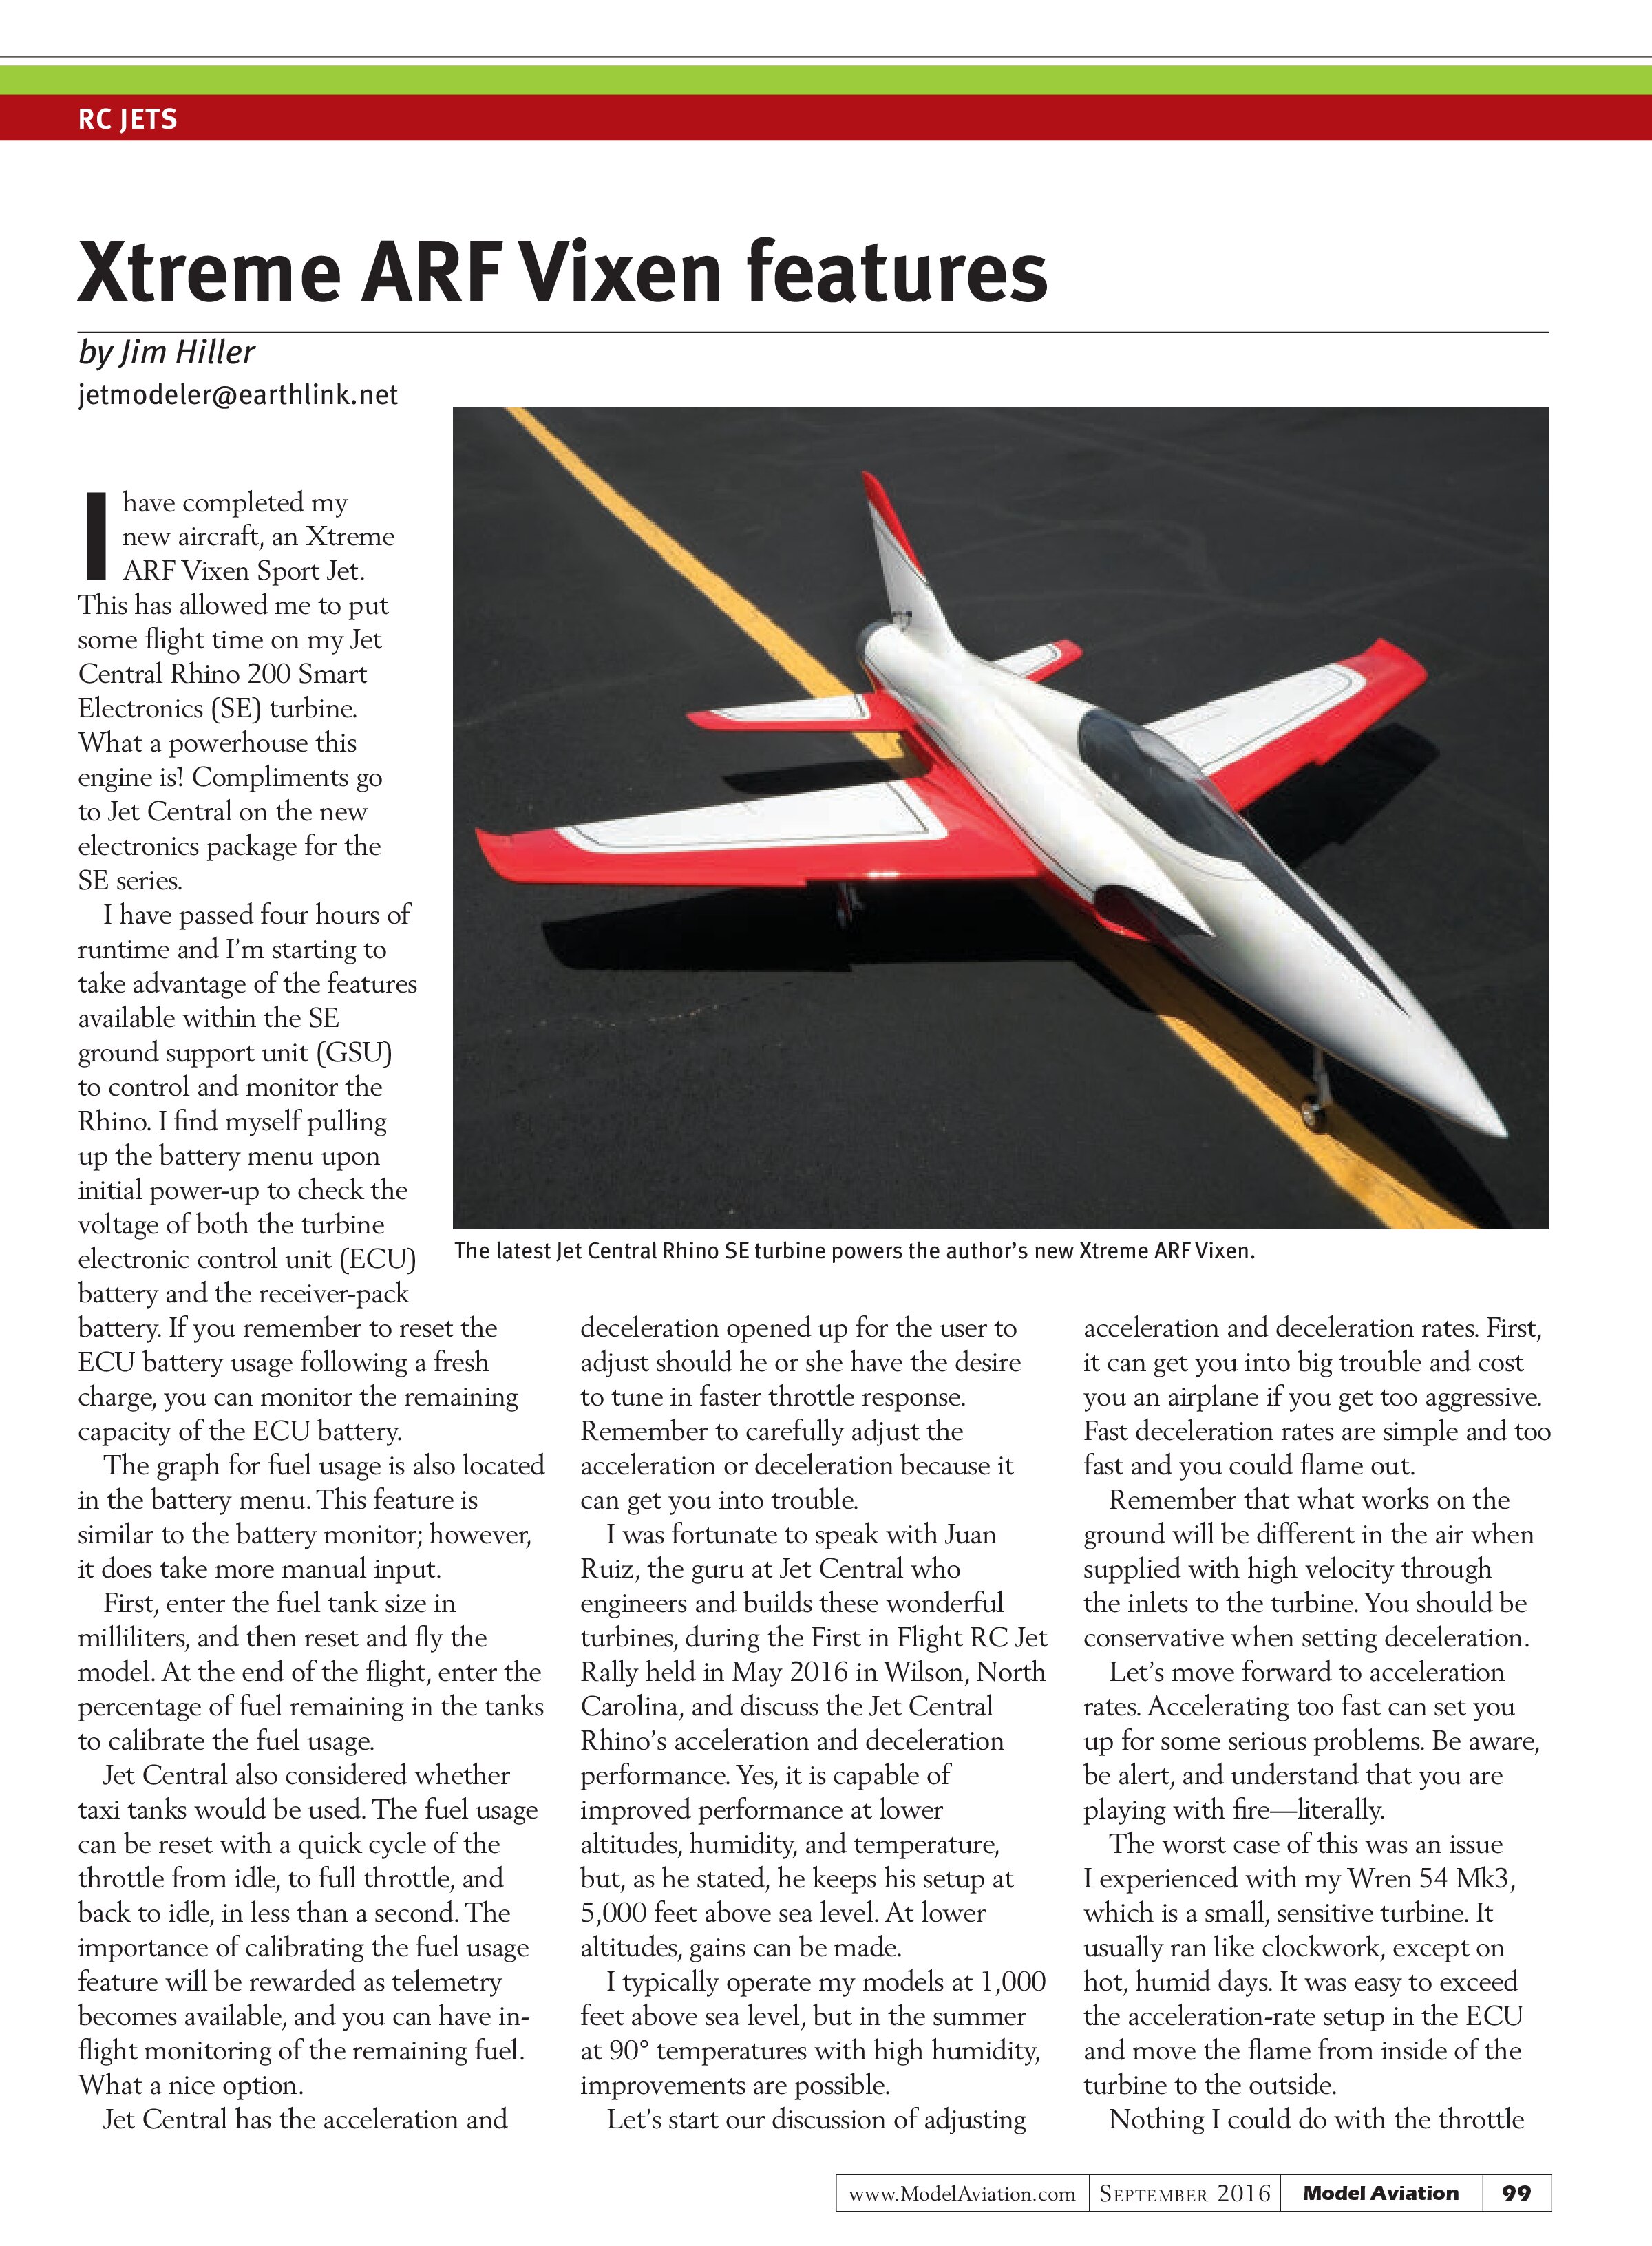
I have completed my new aircraft, an Xtreme ARF Vixen Sport Jet. This has allowed me to put some flight time on my Jet Central Rhino 200 Smart Electronics (SE) turbine. What a powerhouse this engine is! Compliments go to Jet Central on the new electronics package for the SE series.
I have passed four hours of runtime and I’m starting to take advantage of the features available within the SE ground support unit (GSU) to control and monitor the Rhino. I find myself pulling up the battery menu upon initial power-up to check the voltage of both the turbine electronic control unit (ECU) battery and the receiver-pack battery. If you remember to reset the ECU battery usage following a fresh charge, you can monitor the remaining capacity of the ECU battery.
The graph for fuel usage is also located in the battery menu. This feature is similar to the battery monitor; however, it does take more manual input.
First, enter the fuel tank size in milliliters, and then reset and fly the model. At the end of the flight, enter the percentage of fuel remaining in the tanks to calibrate the fuel usage.
Jet Central also considered whether taxi tanks would be used. The fuel usage can be reset with a quick cycle of the throttle from idle, to full throttle, and back to idle, in less than a second. The importance of calibrating the fuel usage feature will be rewarded as telemetry becomes available, and you can have in-flight monitoring of the remaining fuel. What a nice option.
Jet Central has the acceleration and deceleration opened up for the user to adjust should he or she have the desire to tune in faster throttle response. Remember to carefully adjust the acceleration or deceleration because it can get you into trouble.
I was fortunate to speak with Juan Ruiz, the guru at Jet Central who engineers and builds these wonderful turbines, during the First in Flight RC Jet Rally held in May 2016 in Wilson, North Carolina, and discuss the Jet Central Rhino’s acceleration and deceleration performance. Yes, it is capable of improved performance at lower altitudes, humidity, and temperature, but, as he stated, he keeps his setup at 5,000 feet above sea level. At lower altitudes, gains can be made.
I typically operate my models at 1,000 feet above sea level, but in the summer at 90° temperatures with high humidity, improvements are possible.
Let’s start our discussion of adjusting acceleration and deceleration rates. First, it can get you into big trouble and cost you an airplane if you get too aggressive. Fast deceleration rates are simple and too fast and you could flame out.
Remember that what works on the ground will be different in the air when supplied with high velocity through the inlets to the turbine. You should be conservative when setting deceleration.
Let’s move forward to acceleration rates. Accelerating too fast can set you up for some serious problems. Be aware, be alert, and understand that you are playing with fire—literally.
The worst case of this was an issue I experienced with my Wren 54 Mk3, which is a small, sensitive turbine. It usually ran like clockwork, except on hot, humid days. It was easy to exceed the acceleration-rate setup in the ECU and move the flame from inside of the turbine to the outside.
Nothing I could do with the throttle
would move the flame back inside of the turbine. The only option was to shut the turbine down.
It sounds simple—shut it down when you accelerate too fast. But remember, you have to recognize what it is happening and react. Flames behind the turbine are visible on an open installation, but on airplanes such as the Reaction 54, it can burn the tail off of the airplane.
This situation can be even worse on a tailpipe-equipped airplane. You can’t see the flames, but the heat builds up in the tailpipe until the tailpipe fails and you burn up the model.
Why this discussion? Acceleration and deceleration rates have been set up by the factory—admittedly on the conservative side—for a reason. Change them at your own risk. Turbine pilots do not typically change these rates.
This issue is seldom discussed, so there is not much of a knowledge base about how to recognize and respond to issues when you have exceeded the turbine’s capabilities. Tread lightly here.
I have been adjusting my Rhino SE’s acceleration and deceleration to optimize performance, and I am impressed by this turbine’s potential. I have not yet reached its limits, and to be honest, I do not want to after my bad experiences throughout the years.
In my case, I started in the Running Menu by moving the acceleration and deceleration curves to the fast setting, and then flying the model in hot and humid conditions. You have to do this when you are the only pilot flying because you need to hear your turbine to know it is still correctly operating. Improved acceleration through the low rpm range helps throttle response when you are landing, particularly if a go-around is required.
When you are confident in these curve settings, move on to the acceleration and deceleration times. This is when I can make real aerobatic flying-style improvements because I do not fully throttle back to idle. Instead, I keep some throttle on to avoid the turbine’s poor throttle response at low rpm.
This is where Jet Central uses acceleration and deceleration times. Start by moving them one increment at a time; be conservative in your approach to this tuning. Bad things can happen when you exceed the turbine’s capabilities. Don’t forget to set the times for the hottest, most humid, day and the highest altitude you will be flying.
Most turbine manufacturers offer some way for a pilot to fine-tune the acceleration and deceleration rates. Before you adjust these settings, you must understand what the results could be if you adjust too much. Be ready to shut down the turbine.
I can’t tell you how many times in my early days of turbine flying that I

lined up for takeoff and had to shut down the turbine when the model failed to accelerate when throttle was applied. I have also seen pilots neglect to shut down the turbine in time, and the tailpipe failed from the excess heat, destroying the beautiful jet model.
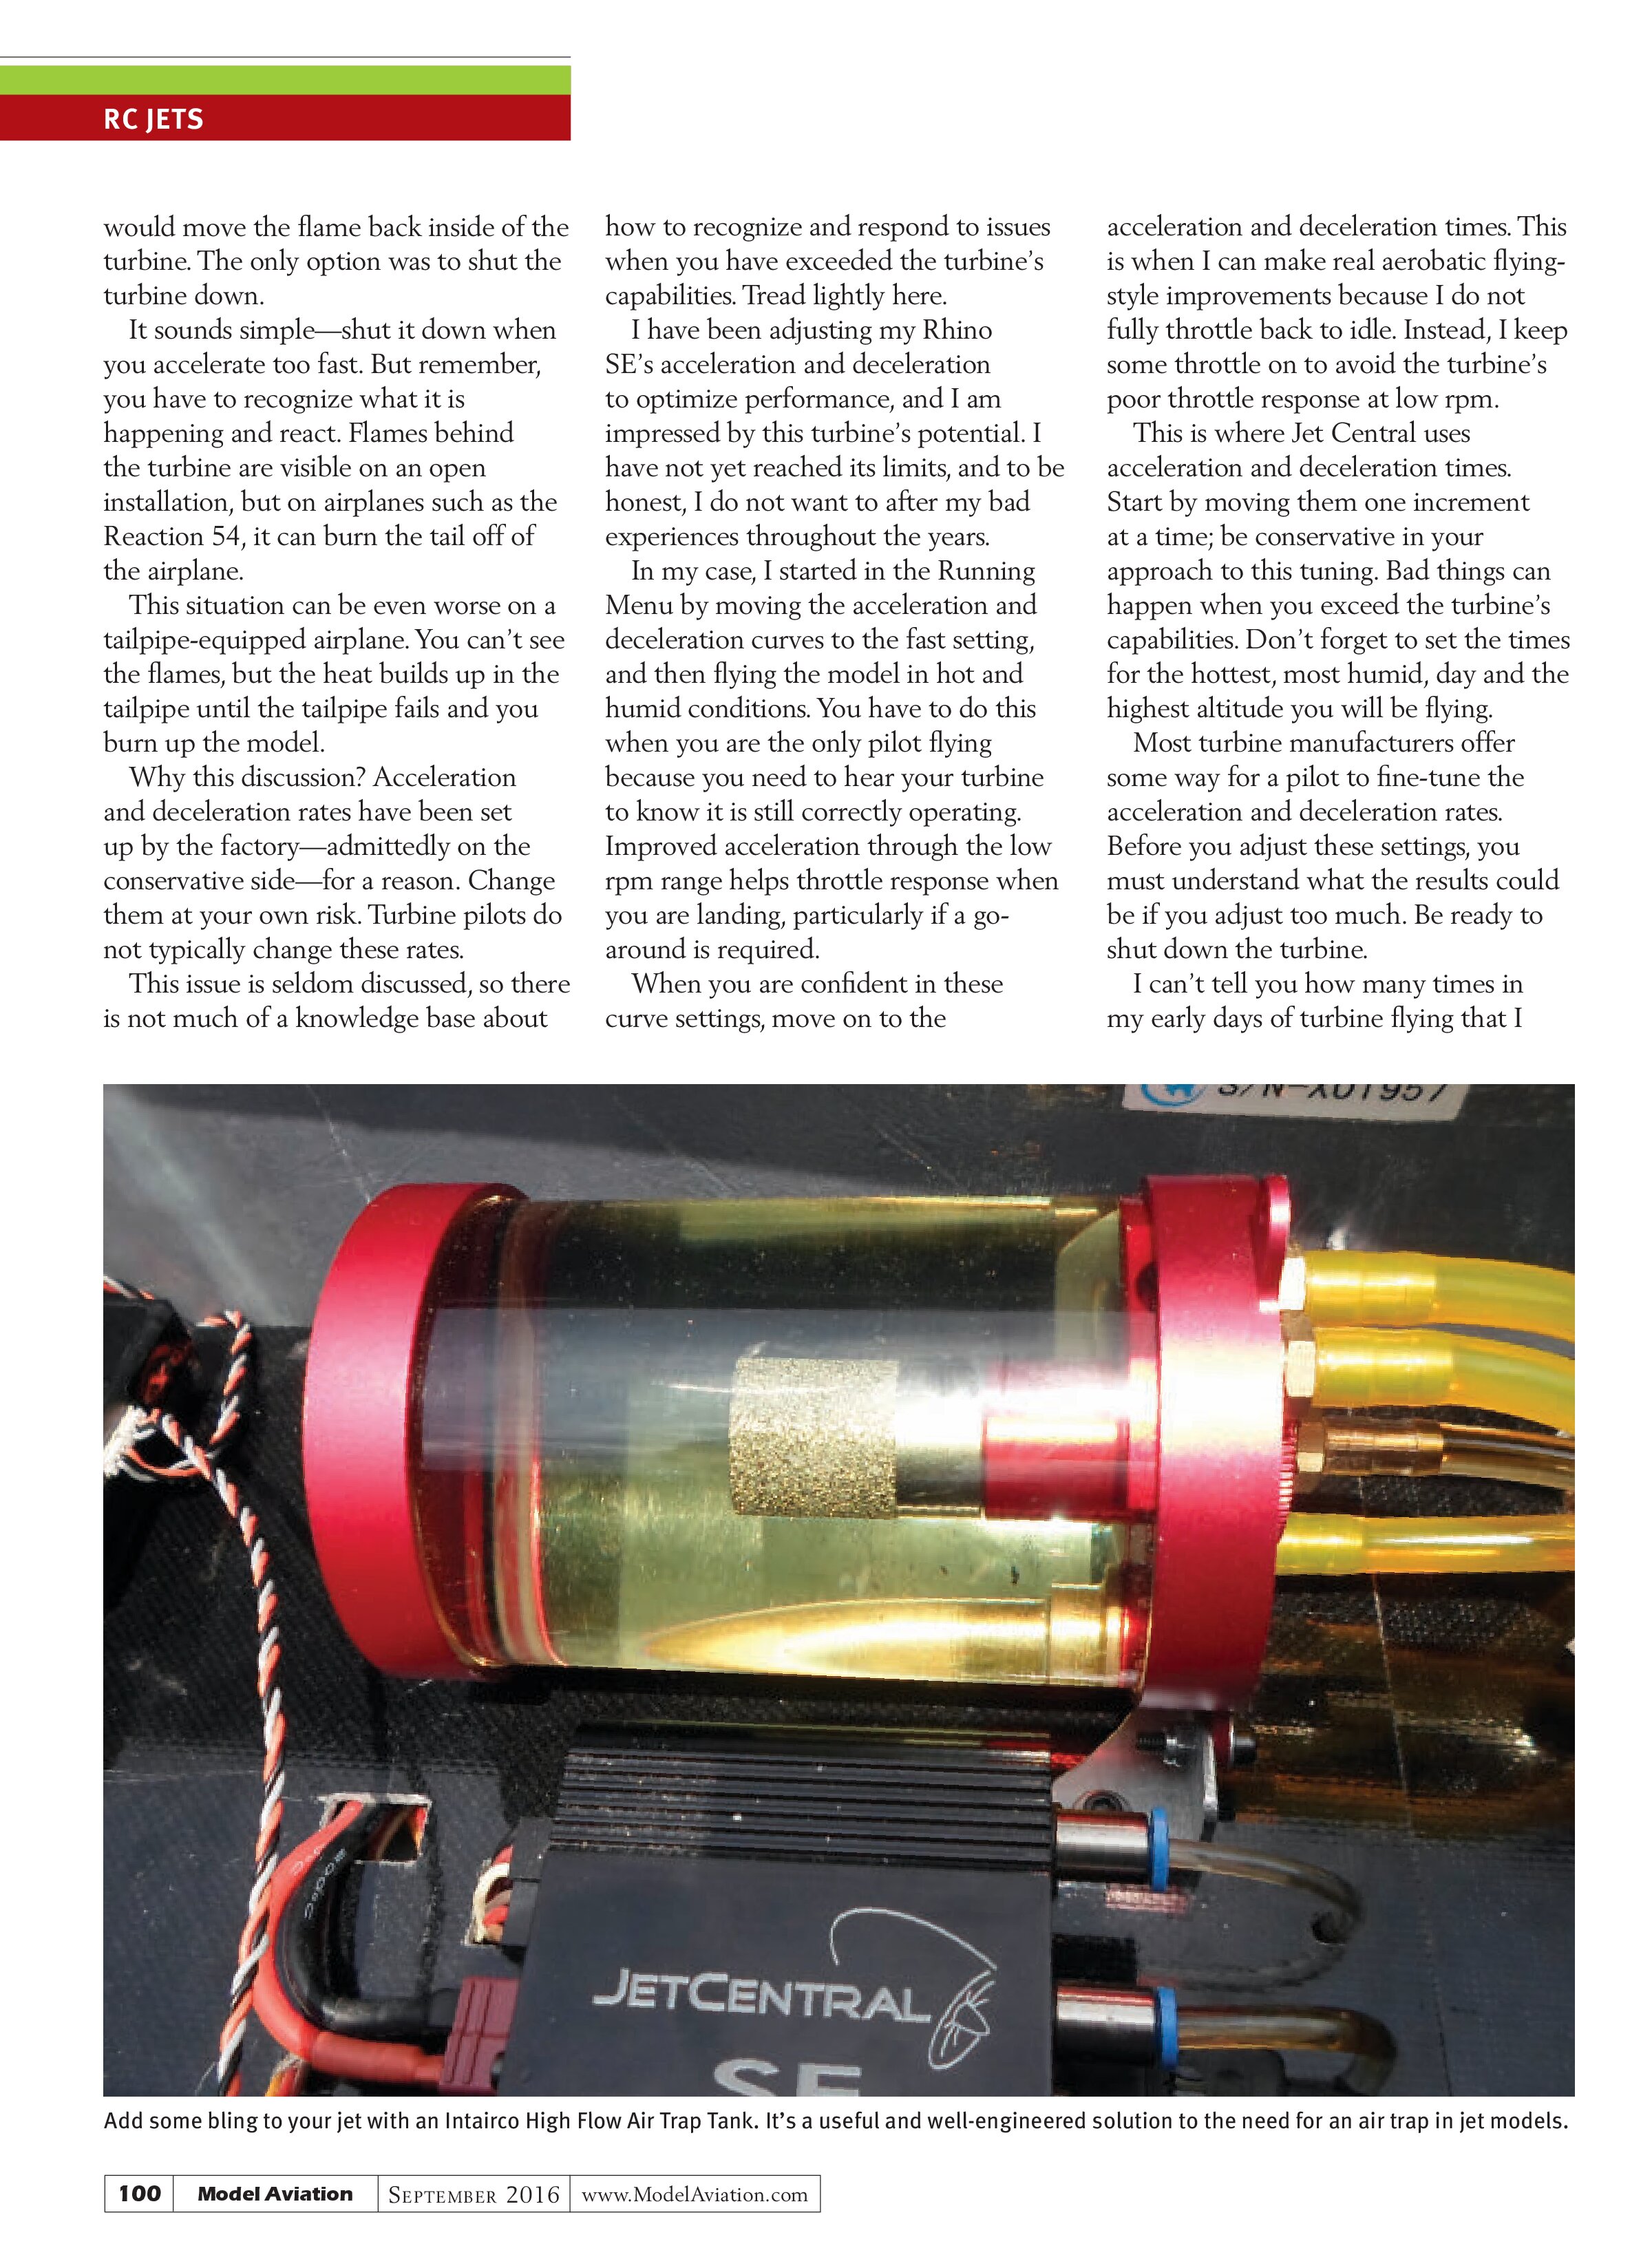
My Xtreme ARF Vixen Sport Jet has an Intairco High Flow Air Trap Tank. It is an attractive piece, with the red anodized aluminum end caps surrounding a clear tube to form the tank. The clear tank makes it easy to see the fuel and air should you have problems with the tank that is feeding this air trap.
The tank has four fittings—two are on the top for feeding from up to two tanks. In the air trap tank installation in my Vixen, both feed directly from each of the left and right saddle tanks, and then the fuel pump is fed from the middle with a metallic filter inside of the air trap. The fill/drain line is at the bottom of this air trap, allowing it to be drained when the tanks are emptied at the end of a day of flying.
One impressive part of the Intairco High Flow Air Trap Tank is where the ports are located on the fuel inlet lines. They are at the top of the tank. When filling the tanks, visible air remains in the air trap, which is nice.
At the end of the flight, any air in the air trap will be from the tanks that are feeding the air trap. Look for problems in those tanks when you see an excessive air bubble lodged in the air trap.
The Intairco High Flow Air Trap Tank has large fittings, allowing the use of the larger-diameter fuel tubing that supplies kerosene to our turbines. Overall, it’s a nice package, and a well thought out and executed product that can also add some bling to your next installation. ✈
SOURCES:
Xtreme ARF
support@xtremearf.com
www.xtremearf.com
Jet Central
www.jetcentralusa.com
Intairco
info@intairco.net
www.intairco.net
Jet Pilots Organization
www.jetpilots.org