Tom Hallman’s jigging technique
by Gene Smith
grwhiskey@brightok.net
One of the secrets of building is the use of jigs. A jig is basically a fixture that holds parts in alignment while the glue is setting. This can be something as simple as using a stick to prop up a wingtip to set the dihedral, or it can be a fuselage building box such as what is sold by RockyTop Models. The fuselage building box is used to secure a half-shell fuselage while attaching the stringers.
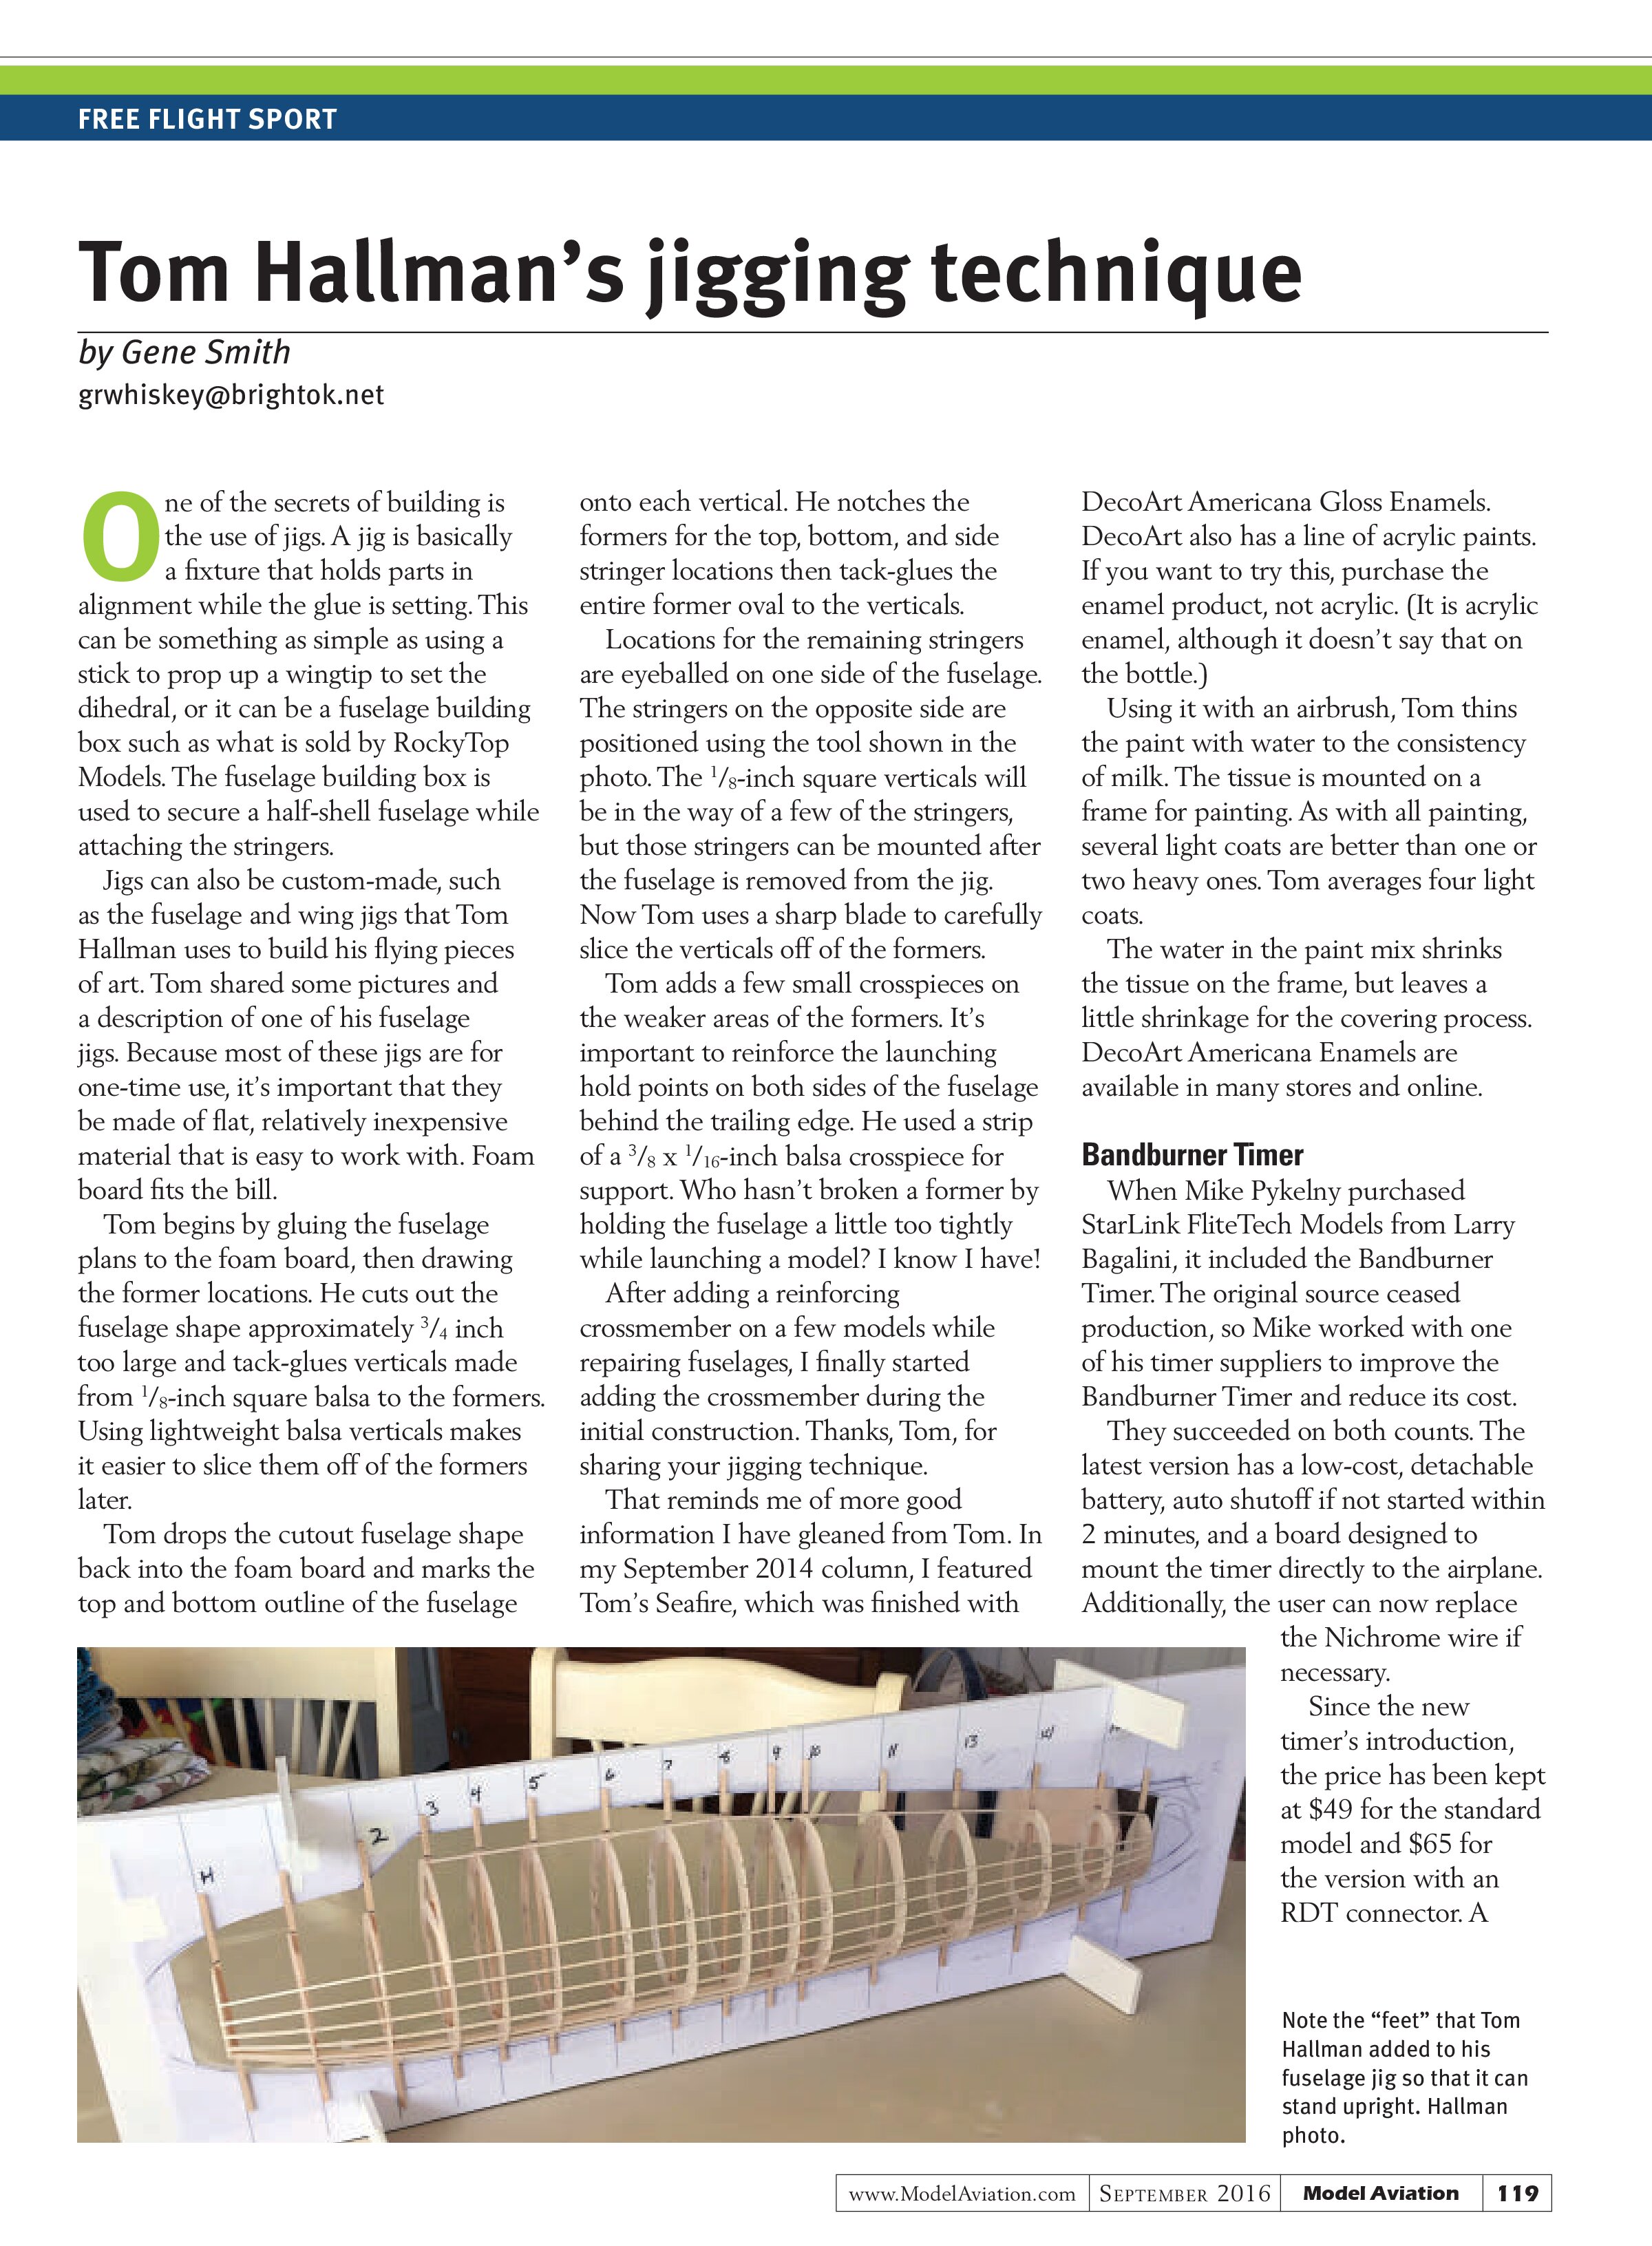
Jigs can also be custom-made, such as the fuselage and wing jigs that Tom Hallman uses to build his flying pieces of art. Tom shared some pictures and a description of one of his fuselage jigs. Because most of these jigs are for one-time use, it’s important that they be made of flat, relatively inexpensive material that is easy to work with. Foam board fits the bill.
Tom begins by gluing the fuselage plans to the foam board, then drawing the former locations. He cuts out the fuselage shape approximately ¾ inch too large and tack-glues verticals made from ⅛-inch square balsa to the formers. Using lightweight balsa verticals makes it easier to slice them off of the formers later.
Tom drops the cutout fuselage shape back into the foam board and marks the top and bottom outline of the fuselage onto each vertical. He notches the formers for the top, bottom, and side stringer locations then tack-glues the entire former oval to the verticals.
Locations for the remaining stringers are eyeballed on one side of the fuselage. The stringers on the opposite side are positioned using the tool shown in the photo. The ⅛-inch square verticals will be in the way of a few of the stringers, but those stringers can be mounted after the fuselage is removed from the jig. Now Tom uses a sharp blade to carefully slice the verticals off of the formers.
Tom adds a few small crosspieces on the weaker areas of the formers. It’s important to reinforce the launching hold points on both sides of the fuselage behind the trailing edge. He used a strip of a ⅜ x ¹⁄₁₆-inch balsa crosspiece for support. Who hasn’t broken a former by holding the fuselage a little too tightly while launching a model? I know I have!
After adding a reinforcing crossmember on a few models while repairing fuselages, I finally started adding the crossmember during the initial construction. Thanks, Tom, for sharing your jigging technique.
That reminds me of more good information I have gleaned from Tom. In my September 2014 column, I featured Tom’s SeaFire, which was finished with
DecoArt Americana Gloss Enamels. DecoArt also has a line of acrylic paints. If you want to try this, purchase the enamel product, not acrylic. (It is acrylic enamel, although it doesn’t say that on the bottle.)
Using it with an airbrush, Tom thins the paint with water to the consistency of milk. The tissue is mounted on a frame for painting. As with all painting, several light coats are better than one or two heavy ones. Tom averages four light coats.
The water in the paint mix shrinks the tissue on the frame, but leaves a little shrinkage for the covering process. DecoArt Americana Enamels are available in many stores and online.
Bandburner Timer
When Mike Pyelny purchased StarLink FliteTech Models from Larry Bagalini, it included the Bandburner Timer. The original source ceased production, so Mike worked with one of his timer suppliers to improve the Bandburner Timer and reduce its cost.
They succeeded on both counts. The latest version has a low-cost, detachable battery, auto shutoff if not started within 2 minutes, and a board designed to mount the timer directly to the airplane. Additionally, the user can now replace the Nichrome wire if necessary.
Since the new timer’s introduction, the price has been kept at $49 for the standard model and $65 for the version with an RDT connector. A


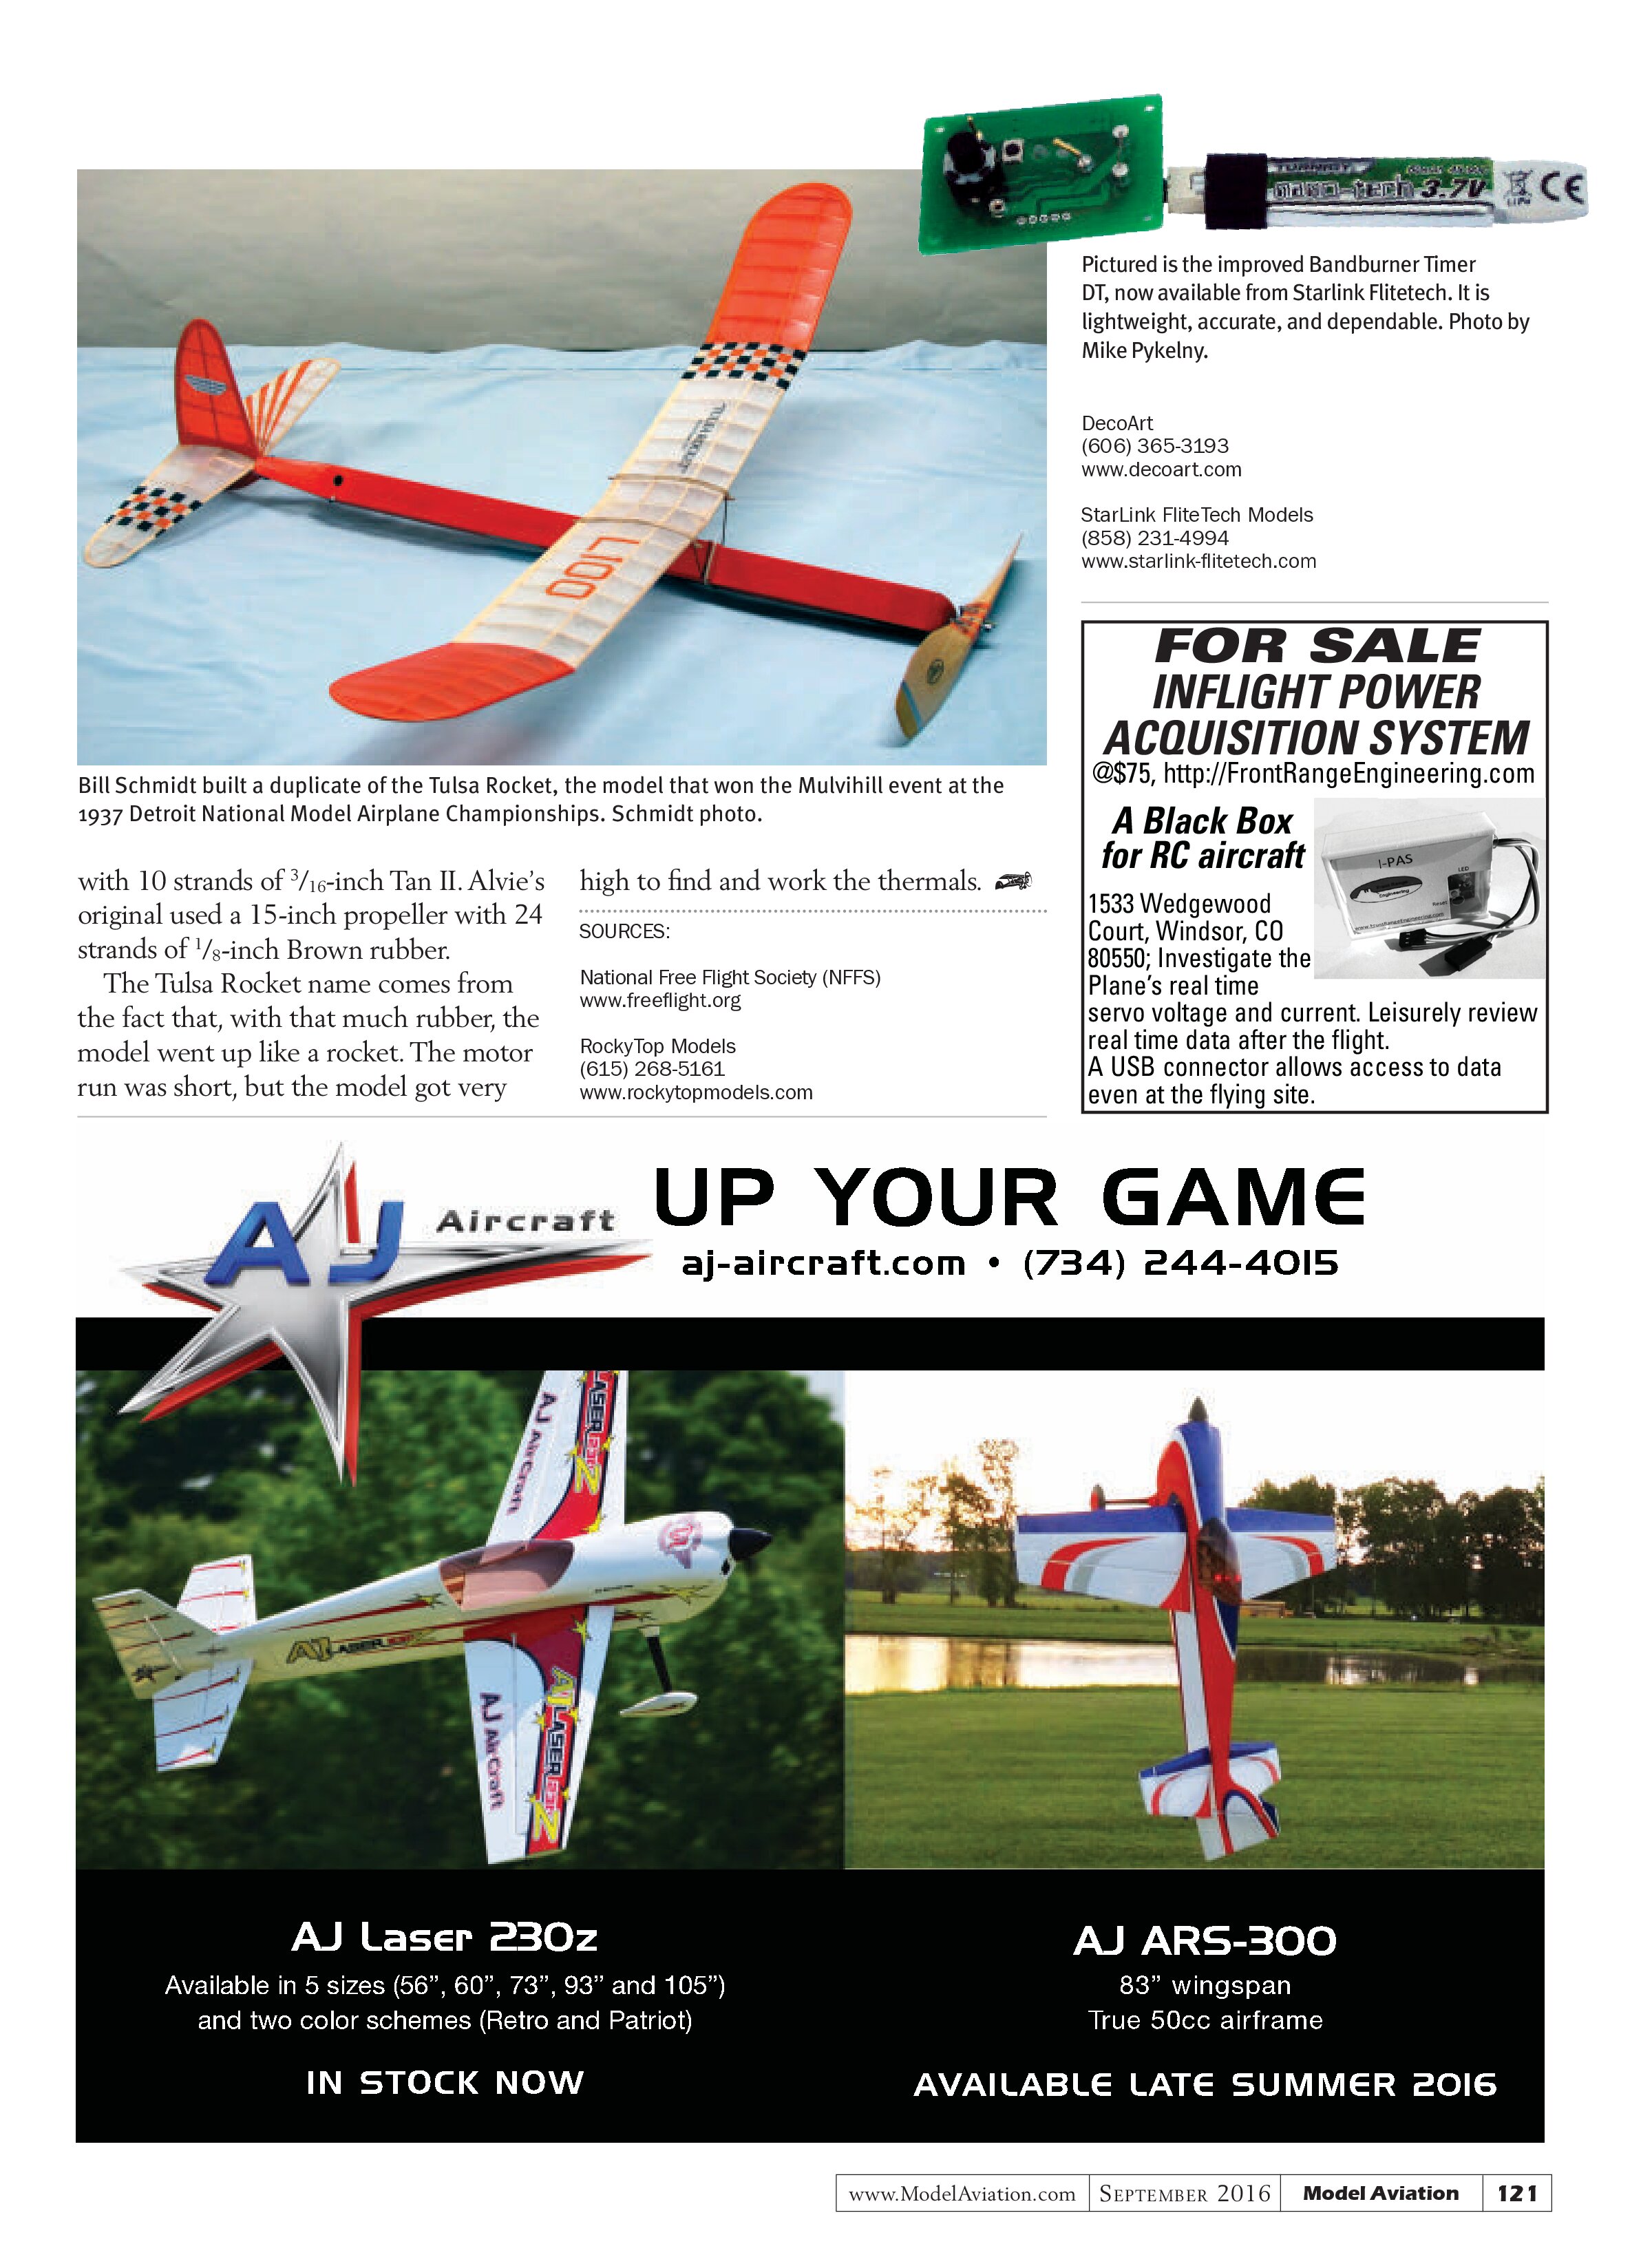
with 10 strands of 3/16-inch Tan II. Alvie’s original used a 15-inch propeller with 24 strands of 1/8-inch Brown rubber.
The Tulsa Rocket name comes from the fact that, with that much rubber, the model went up like a rocket. The motor run was short, but the model got very high to find and work the thermals.
Sources:
National Free Flight Society (NFFS)
www.freeflight.org
RockyTop Models
(615) 268-5161
www.rockytopmodels.com