Slicing consistent ribs
Thayer Syme
thayer@flying-models.com
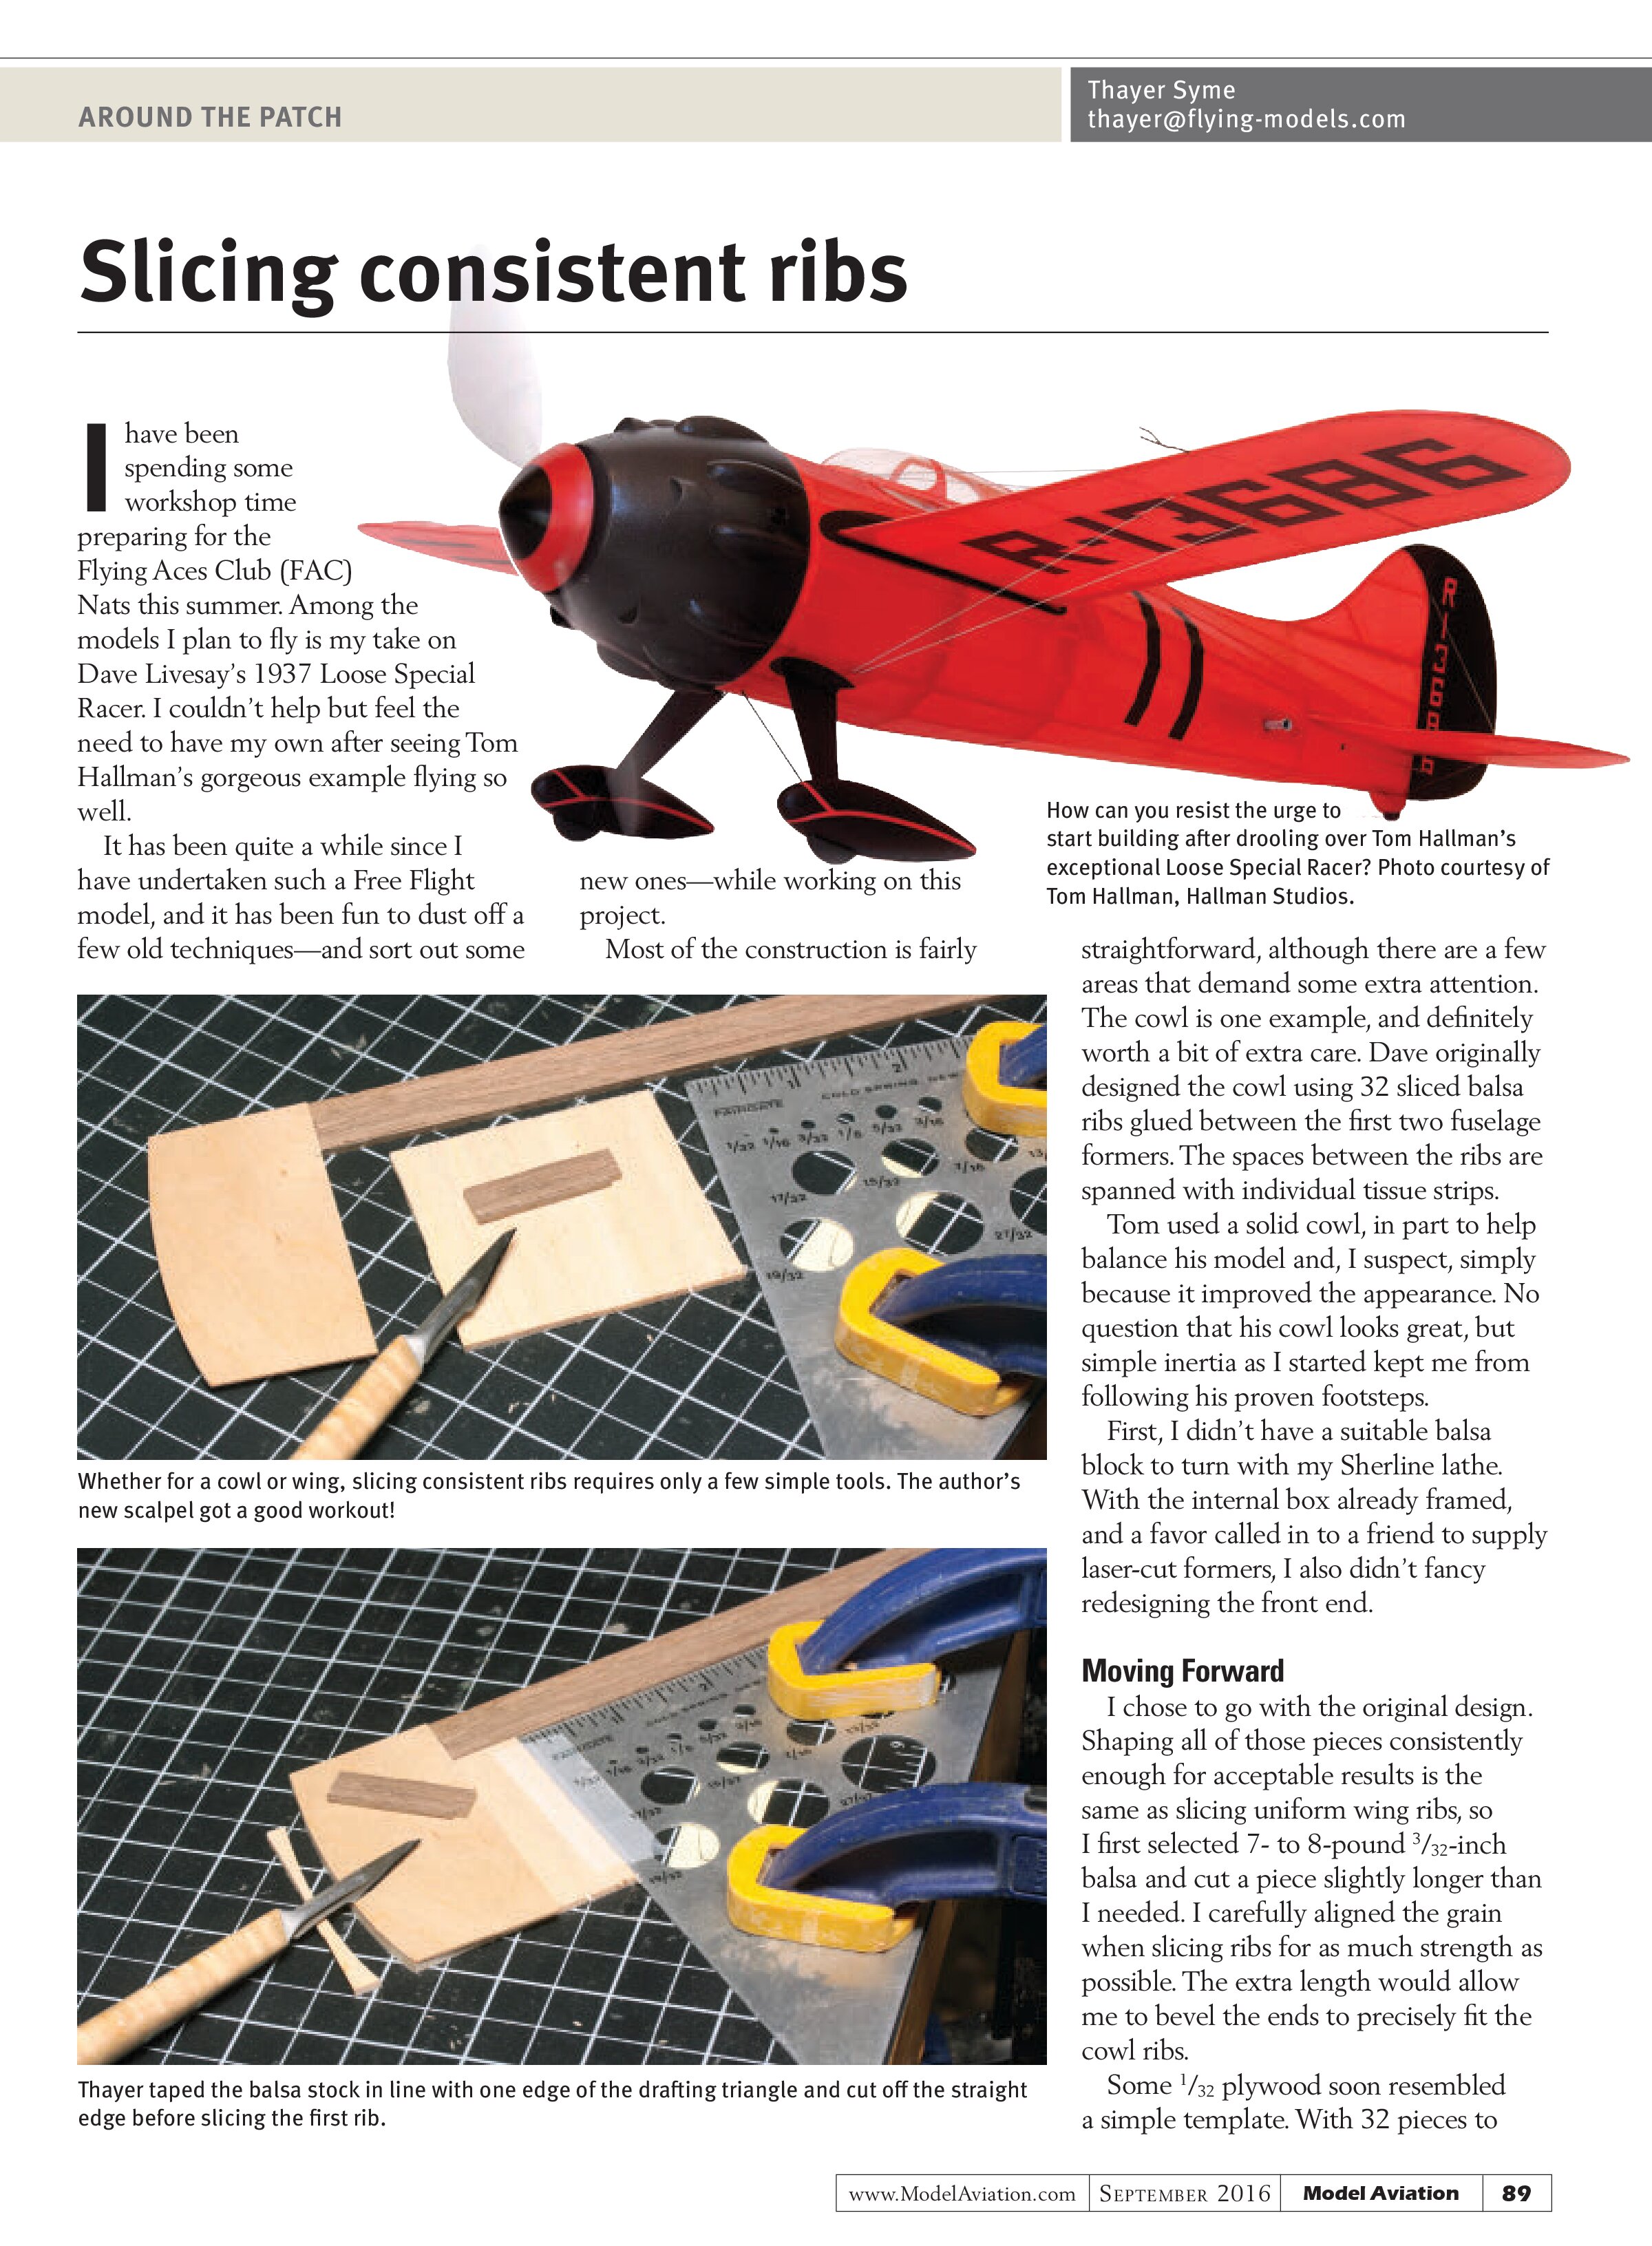
I have been spending some workshop time preparing for the Flying Aces Club (FAC) Nats this summer. Among the models I plan to fly is my take on Dave Livesay’s 1937 Loose Special Racer. I couldn’t help but feel the need to have my own after seeing Tom Hallman’s gorgeous example flying so well.

It has been quite a while since I have undertaken such a Free Flight model, and it has been fun to dust off a few old techniques—and sort out some new ones—while working on this project.
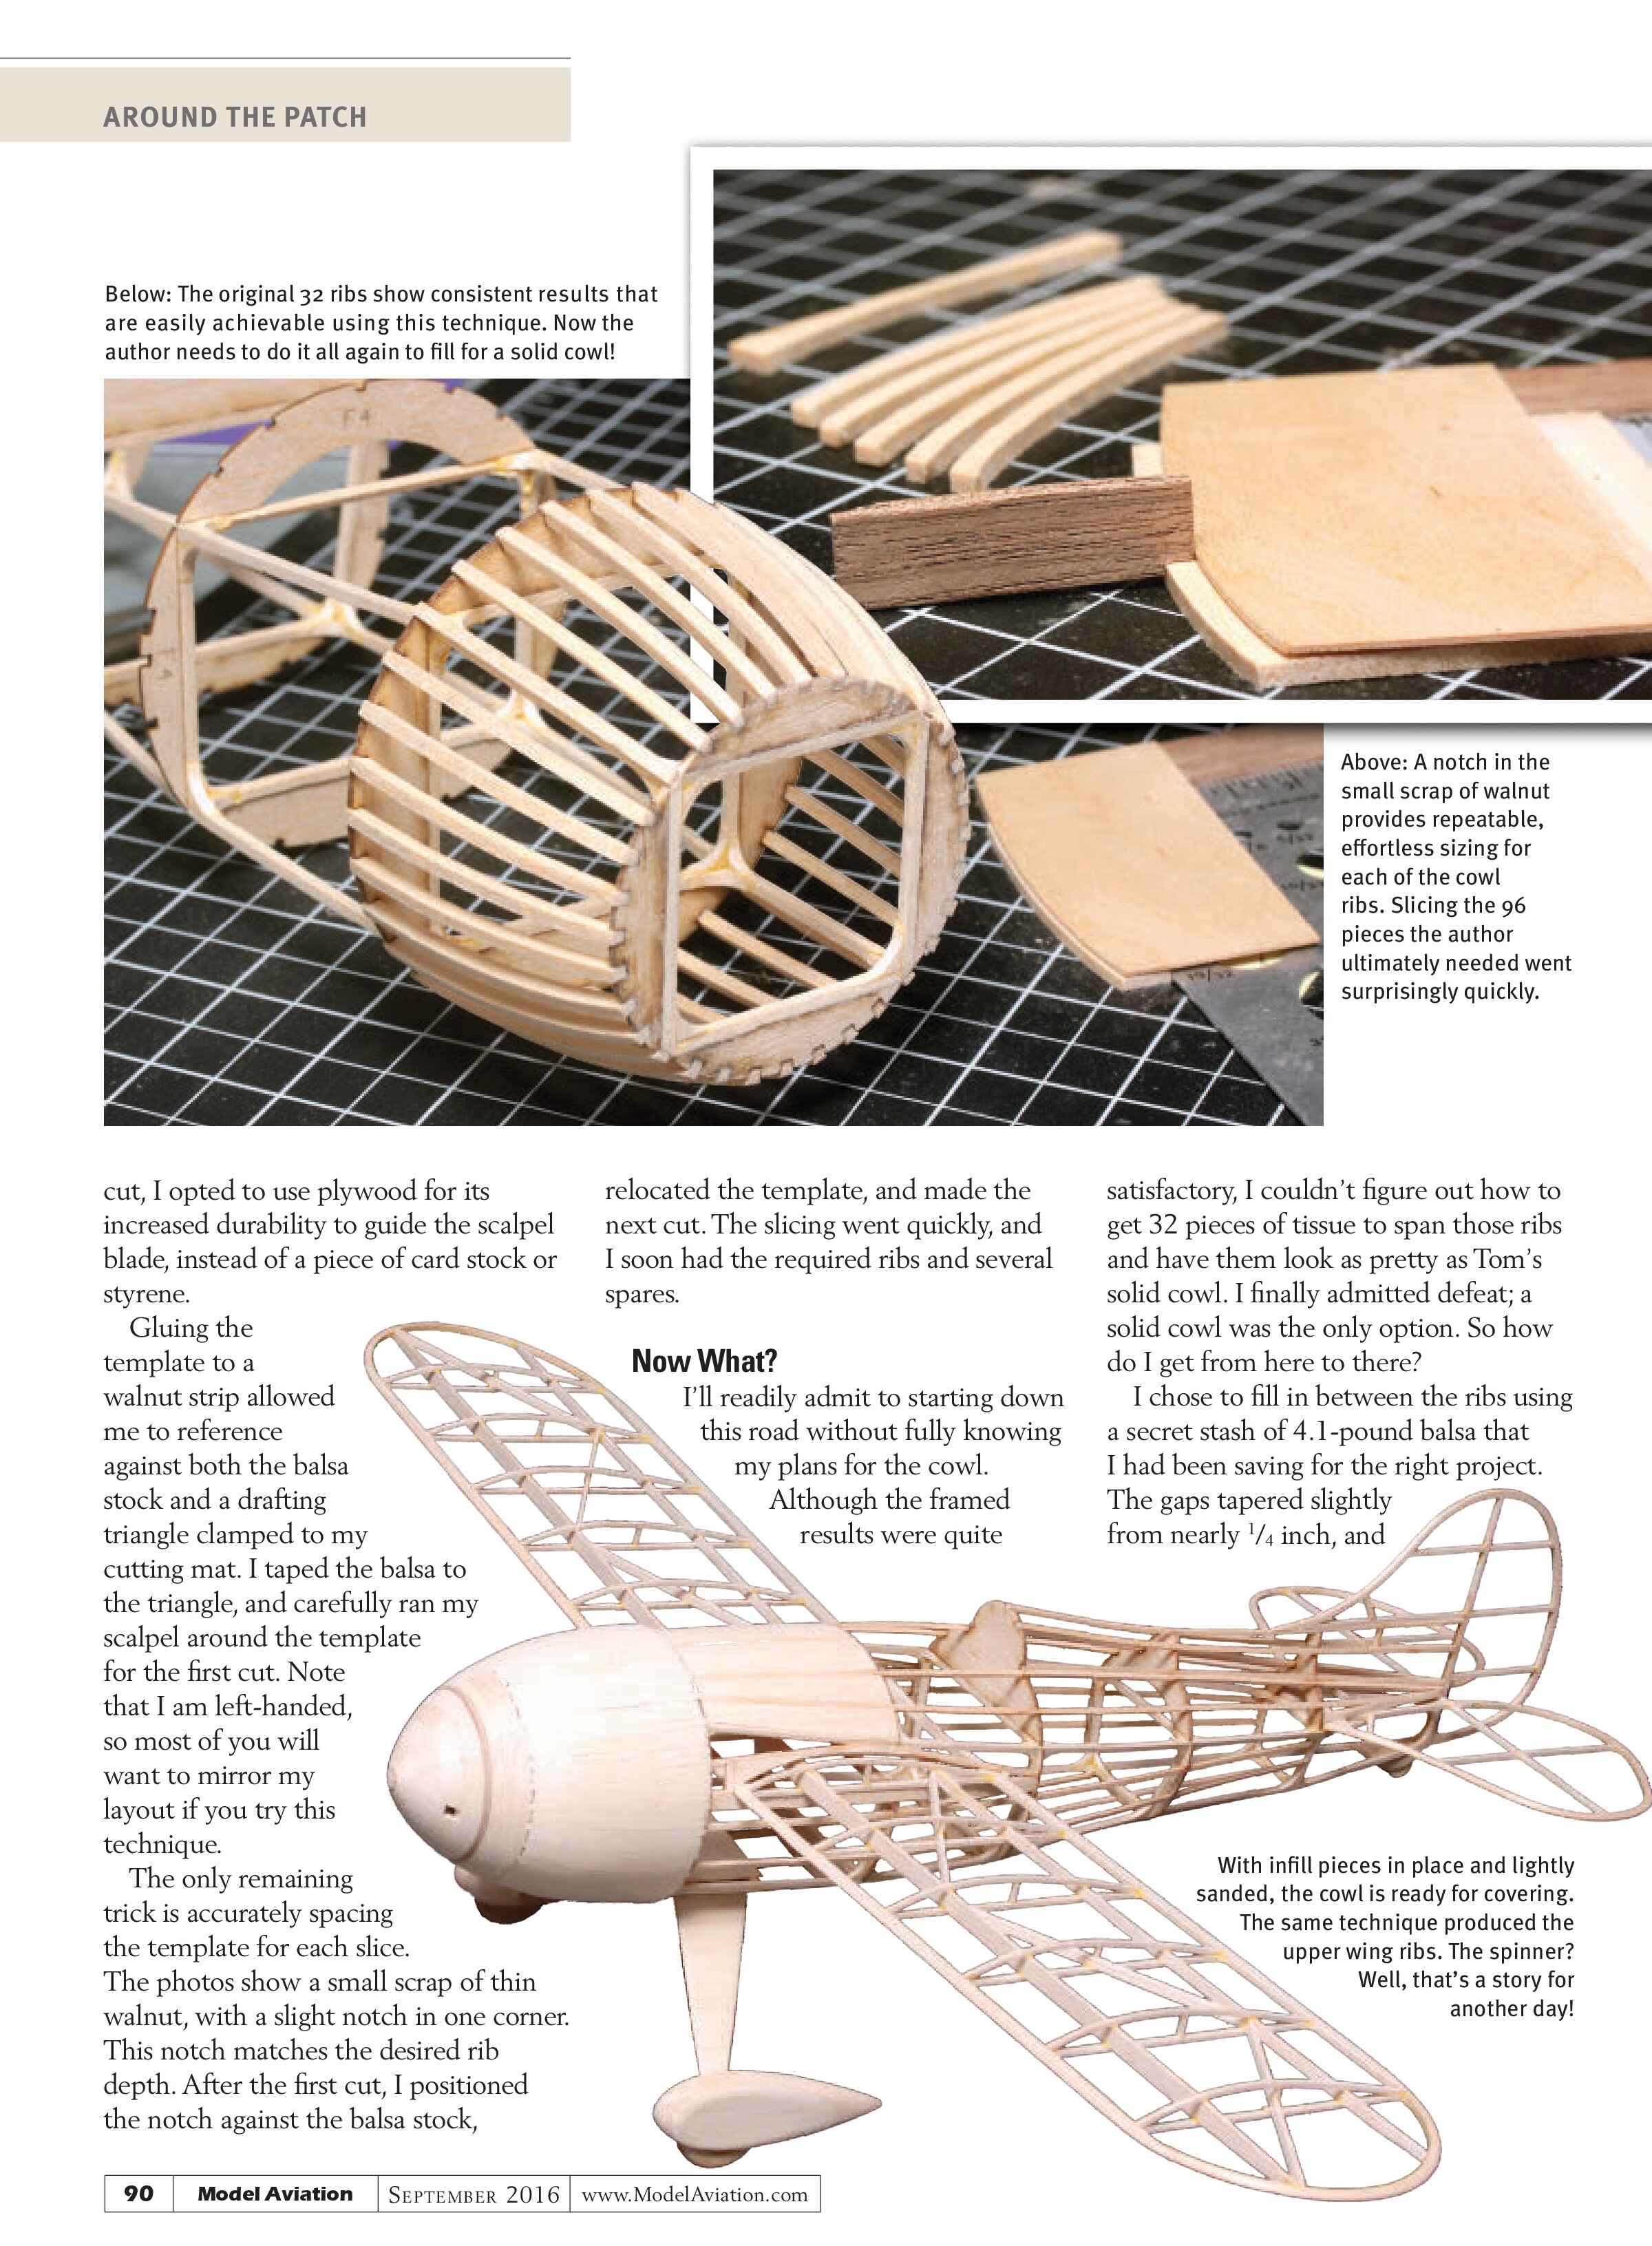
Most of the construction is fairly straightforward, although there are a few areas that demand some extra attention. The cowl is one example, and definitely worth a bit of extra care. Dave originally designed the cowl using 32 sliced balsa ribs glued between the first two fuselage formers. The spaces between the ribs are spanned with individual tissue strips.
Tom used a solid cowl, in part to help balance his model and, I suspect, simply because it improved the appearance. No question that his cowl looks great, but simple inertia as I started kept me from following his proven footsteps.
First, I didn’t have a suitable balsa block to turn with my Sherline lathe. With the internal box already framed, and a favor called in to a friend to supply laser-cut formers, I also didn’t fancy redesigning the front end.
Moving Forward
I chose to go with the original design. Shaping all of those pieces consistently enough for acceptable results is the same as slicing uniform wing ribs, so I first selected 7- to 8-pound 3/32-inch balsa and cut a piece slightly longer than I needed. I carefully aligned the grain when slicing ribs for as much strength as possible. The extra length would allow me to bevel the ends to precisely fit the cowl ribs.

Some 1/32 plywood soon resembled a simple template. With 32 pieces to

Below: The original 32 ribs show consistent results that are easily achievable using this technique. Now the author needs to do it all again to fill for a solid cowl!

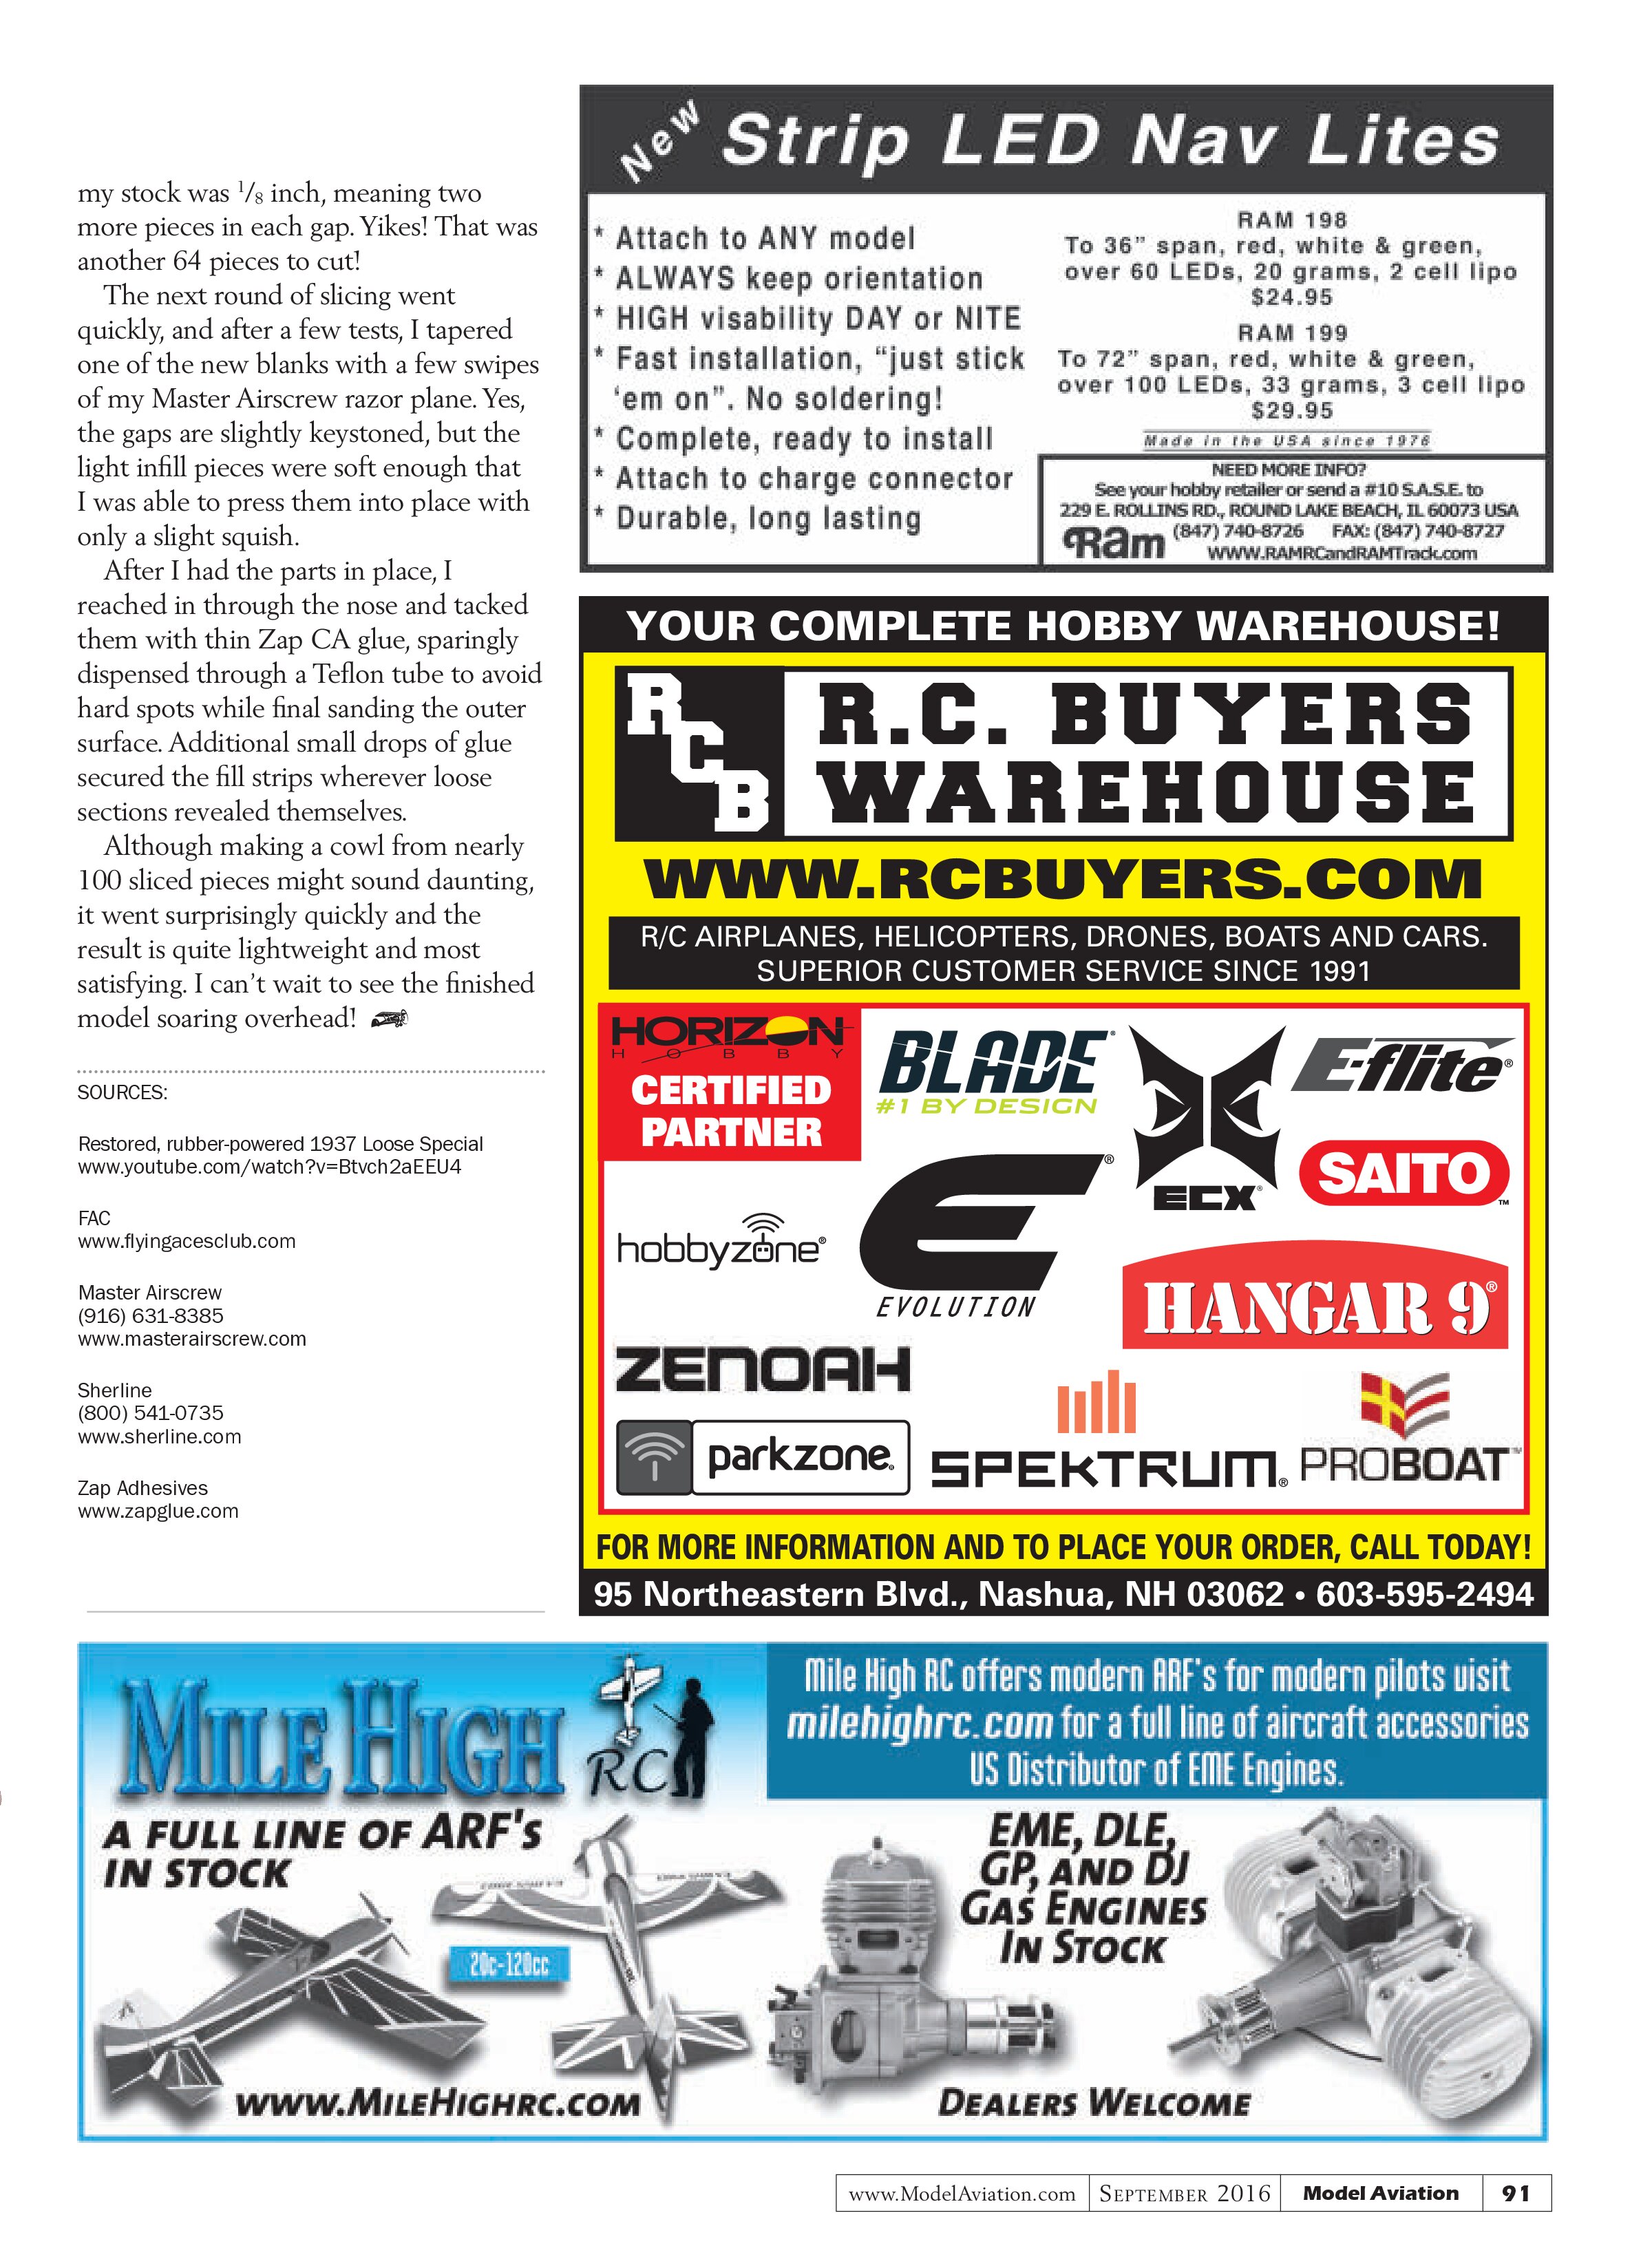
Above: A notch in the small scrap of walnut provides repeatable, effortless sizing for each of the cowl ribs. Slicing the 96 pieces the author ultimately needed went surprisingly quickly.

cut, I opted to use plywood for its increased durability to guide the scalpel blade, instead of a piece of card stock or styrene.
Gluing the template to a walnut strip allowed me to reference against both the balsa stock and a drafting triangle clamped to my cutting mat. I taped the balsa to the triangle, and carefully ran my scalpel around the template for the first cut. Note that I am left-handed, so most of you will want to mirror my layout if you try this technique.
The only remaining trick is accurately spacing the template for each slice. The photos show a small scrap of thin walnut, with a slight notch in one corner. This notch matches the desired rib depth. After the first cut, I positioned the notch against the balsa stock, relocated the template, and made the next cut. The slicing went quickly, and I soon had the required ribs and several spares.
Now What?
I’ll readily admit to starting down this road without fully knowing my plans for the cowl. Although the framed results were quite satisfactory, I couldn’t figure out how to get 32 pieces of tissue to span those ribs and have them look as pretty as Tom’s solid cowl. I finally admitted defeat; a solid cowl was the only option. So how do I get from here to there?
I chose to fill in between the ribs using a secret stash of 4-pound balsa that I had been saving for the right project. The gaps tapered slightly from nearly ¼ inch, and my stock was ⅛ inch, meaning two more pieces in each gap. Yikes! That was another 64 pieces to cut!
The next round of slicing went quickly, and after a few tests, I tapered one of the new blanks with a few swipes of my Master Airscrew razor plane. Yes, the gaps are slightly keystoned, but the light infill pieces were soft enough that I was able to press them into place with only a slight squish.
After I had the parts in place, I reached in through the nose and tacked them with thin Zap CA glue, sparingly dispensed through a Teflon tube to avoid hard spots while final sanding the outer surface. Additional small drops of glue secured the fill strips wherever loose sections revealed themselves.
Although making a cowl from nearly 100 sliced pieces might sound daunting, it went surprisingly quickly and the result is quite lightweight and most satisfying. I can’t wait to see the finished model soaring overhead!

With infill pieces in place and lightly sanded, the cowl is ready for covering. The same technique produced the upper wing ribs. The spinner? Well, that’s a story for another day!
SOURCES:
Restored, rubber-powered 1937 Loose Special
www.youtube.com/watch?v=Btvch2aEEU4
Master Airscrew
(916) 631-8385
www.masterairscrew.com
Sherline
(800) 541-0735
www.sherline.com
Zap Adhesives
www.zapglue.com